Internet of Dirt: a Texting Plant
by bonniee in Circuits > Arduino
21066 Views, 128 Favorites, 0 Comments
Internet of Dirt: a Texting Plant
.JPG)
Do you struggle to keep your plants alive? Looking to get started with an IoT project? Why not have your plants text you when they need watering?
This simple project combines a capacitive soil sensor, the WiFi-enabled Adafruit Feather HUZZAH ESP8266 board, Adafruit IO, and IFTTT to set up a system that will text you when your plant's soil gets too dry. It makes a great intermediate-level Arduino project, or a good introduction to Internet of Things-style projects.
Materials list
- Adafruit Feather HUZZAH ESP8266
- USB cable
- Breadboard
- Male-to-male jumper wires
- 330Ohm resistors
- DF Robot corrosion-resistant soil sensor
- A plant
- A cup of water
Skills required
- Soldering
- Breadboarding
- Basic Arduino programming
This first appeared as a class co-taught by Bonnie Eisenman and Maya Kutz at NYC Resistor. For future iterations of the class, keep an eye on our Eventbrite listings.
Install Arduino IDE, USB Drivers, and ESP8266 Board Package


There's a bunch of software you'll want to install for this to work. Let's get started!
Install the Arduino IDE.
Install the required USB drivers.
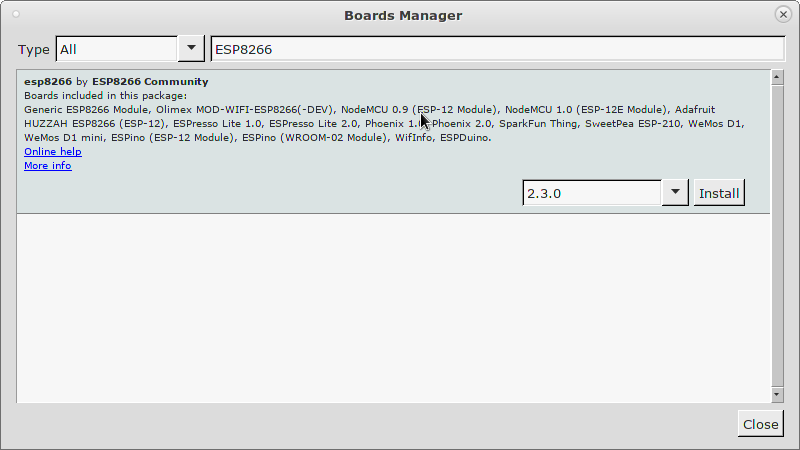
Install the ESP8266 board package for Arduino. You can do this by opening the Arduino IDE's preferences menu (in version 1.6.4 or above - update the IDE if necessary), then adding the URL:
http://arduino.esp8266.com/stable/package_esp8266com_index.json
into the field Additional Board Manager URLs. (See photo above.)
Then go to Tools -> Board -> Board Manager, and search for "esp8266". Install the ESP8266 package.
Restart the Arduino IDE.
Install the MQTT Library


In the Arduino IDE, go to Sketch -> Include Library -> Manage Libraries.
Search for the Adafruit MQTT Library and install it.
Restart the Arduino IDE.
Test Your Feather With the Blink Program

OK, now that we've installed a bunch of software, let's ensure that your Feather is working properly.
The Adafruit Feather HUZZAH is an Arduino-compatible microcontroller with a built-in WiFi chip. It's therefore pretty useful for WiFi-enabled electronics projects.
Plug your Feather into your computer, and run the following program. The onboard LED should blink. Try changing the timing of the blinking, too, to ensure that your program is being run correctly.
void setup() {
  pinMode(0, OUTPUT);
}

void loop() {
  Serial.println("Hey! I'm in a loop!");
  digitalWrite(0, HIGH);
  delay(500);
  digitalWrite(0, LOW);
  delay(500);
}
Why does this work? On the Feather HUZZAH, there's an LED connected to pin 0. By writing HIGH and then LOW signals to that pin, we also cause the LED to blink.
Solder Up Your Feather

Time to solder up your Feather so we can use it with the soil sensor. You have two options here.
Option 1 (for intermediate students):
Solder the included headers to your Feather. This way it'll be easier to use your Feather in future projects.
Option 2 (for beginners):
- Solder a black wire to GND
- Solder a red wire to 3V
- Solder a blue wire to ADC
Take a Look at Your Soil Sensor

Before we wire everything up, let's take a look at the soil sensor.
Your soil sensor has three pins: one for power, one for ground, and one for signal.
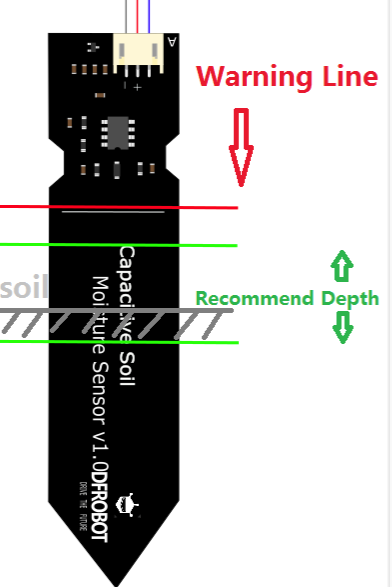
The electronics on top of your sensor are not waterproof! Be careful not to short your sensor while testing it. The line at the top marks where you can submerge it.
Wire Up Your Soil Sensor

Wire up your soil sensor according to the Fritzing diagram above.
For beginners, here's the text version:
- Connect the black wire on your Feather to the ground rail of your breadboard
- Connect the GND pin of your soil sensor the ground rail of your breadboard
- Connect the red wire on your Feather to the power rail of your breadboard
- Connect the VCC pin of your soil sensor to the power rail of your breadboard
- Connect the blue wire on your Feather to row 5 of your breadboard
- Place a resistor between row 5 of your breadboard and the ground rail
- Place a resistor between rows 5 and 10 of your breadboard
- Connect the SIG pin of your soil sensor to row 10 of your breadboard
Test Your Soil Sensor
Upload the following code using the Arduino IDE:
int inputPin = A0;
/* The default dry and wet values for the sensor are 520 and 260 (no voltage divider).
 *  To calibrate your sensor, run this code and open the Serial Monitor.
 *  Record the value being measured as your new "dry" value.
 *  Insert the sensor to the white line in a cup of water. Record the new reading as the "wet" value.
 */
const int dryVal = 567;
const int wetVal = 367;
int sensorVal = 0; //initialize value for sensor readings

void setup() {
  Serial.begin(115200);
}

void loop() {
  sensorVal = analogRead(inputPin);

  Serial.print("Sensor Value: ");
  Serial.println(sensorVal);

  Serial.print("Relative humidity: ");
  // calculate RH assuming linear relationship between sensor readings and soil moisture level.
  Serial.print(100* (dryVal - sensorVal) / (dryVal - wetVal));
  Serial.println("%");
  Serial.println();

  delay(1000);
}
Record the sensor value while your sensor is dry. Then, insert the sensor into a cup of water, and record the value when the sensor is wet. Replace the default values for dryVal and wetVal in the code accordingly, and then re-upload the Arduino sketch.
Grab a Plant and Find Your Humidity Threshold

Now, grab a plant. It should be in need of watering. Insert the soil sensor into the soil.
Measure the sensor reading of the plant when it needs watering; then, water your plant. Measure the sensor value post-watering.
Because different plants have different needs, there's no universal humidity value we can use to alert on. You might want to take measurements over a series of days to determine which humidity values indicate that your plant needs watering.
Make a note of where you want to set the alert threshold for your plant - we'll need it later.
Make an Account on Adafruit IO and Note Your Credentials


We'll be using Adafruit.io to record our plant's humidity data. Make an account on https://io.adafruit.com/.
You'll then need to find the following information:
- your adafruit.io username: you can find this from the URL, which should look like https://io.adafruit.com/yourusername
- your adafruit.io key: from your dashboard, click on the key icon
Connect to Adafruit IO
Now we need to modify our code to send data to Adafruit.
This is largely taken from Adafruit's tutorial. It's almost entirely boilerplate, but what this code does is:
- connect to your WiFi network
- connect to Adafruit via WiFi
- read data from your soil sensor
- upload sensor data to Adafruit
You will need to change the following variables in the code:
- WLAN_SSID - this is the name of your WiFi network
- WLAN_PASS - this is the password to your WiFi network
- AIO_USERNAME - this is your adafruit.io username
- AIO_KEY - this is your adafruit.io key
- dryVal - from your previous code
- wetVal - from your previous code
// Libraries
#include #include "Adafruit_MQTT.h" #include "Adafruit_MQTT_Client.h"// WiFi parameters #define WLAN_SSID "YOUR WIFI HERE" #define WLAN_PASS "YOUR WIFI PASSWORD"
// Adafruit IO #define AIO_SERVER "io.adafruit.com" #define AIO_SERVERPORT 1883 #define AIO_USERNAME "YOUR USERNAME" #define AIO_KEY "YOUR KEY"
int inputPin = A0;
// CHANGE THESE BASED ON YOUR SENSOR READINGS const int dryVal = 567; const int wetVal = 367;
// Functions void connect(); int readHumidity();
WiFiClient client; Adafruit_MQTT_Client mqtt(&client, AIO_SERVER, AIO_SERVERPORT, AIO_USERNAME, AIO_KEY);
/****************************** Feeds ***************************************
/ Setup feeds for temperature & humidity Adafruit_MQTT_Publish humidity = Adafruit_MQTT_Publish(&mqtt, AIO_USERNAME "/feeds/humidity");
/*************************** Sketch Code ************************************/
void setup() { Serial.begin(115200); Serial.println(F("Adafruit IO Example"));
// Connect to WiFi access point. Serial.println(); Serial.println(); delay(10); Serial.print(F("Connecting to ")); Serial.println(WLAN_SSID);
WiFi.begin(WLAN_SSID, WLAN_PASS); while (WiFi.status() != WL_CONNECTED) { delay(500); Serial.print(F(".")); } Serial.println();
Serial.println(F("WiFi connected")); Serial.println(F("IP address: ")); Serial.println(WiFi.localIP());
// connect to adafruit io connect(); }
void loop() { // ping adafruit io a few times to make sure we remain connected if(! mqtt.ping(3)) { // reconnect to adafruit io if(! mqtt.connected()) connect(); }
// Grab the current state of the sensor int humidity_data = readHumidity();
// Publish data if (!humidity.publish(humidity_data)) { Serial.println(F("Failed to publish humidity")); } else { Serial.print(F("Humidity published: ")); Serial.println(humidity_data); }
// Repeat every minute delay(60000);
}
int readHumidity() { int sensorVal = analogRead(inputPin); return (int)(100*(dryVal-sensorVal)/(dryVal-wetVal)); }
// connect to adafruit io via MQTT void connect() {
Serial.print(F("Connecting to Adafruit IO... "));
int8_t ret;
while ((ret = mqtt.connect()) != 0) {
switch (ret) { case 1: Serial.println(F("Wrong protocol")); break; case 2: Serial.println(F("ID rejected")); break; case 3: Serial.println(F("Server unavail")); break; case 4: Serial.println(F("Bad user/pass")); break; case 5: Serial.println(F("Not authed")); break; case 6: Serial.println(F("Failed to subscribe")); break; default: Serial.println(F("Connection failed")); break; }
if(ret >= 0) mqtt.disconnect();
Serial.println(F("Retrying connection...")); delay(5000);
}
Serial.println(F("Adafruit IO Connected!"));
}
Check That the Data Upload Is Working

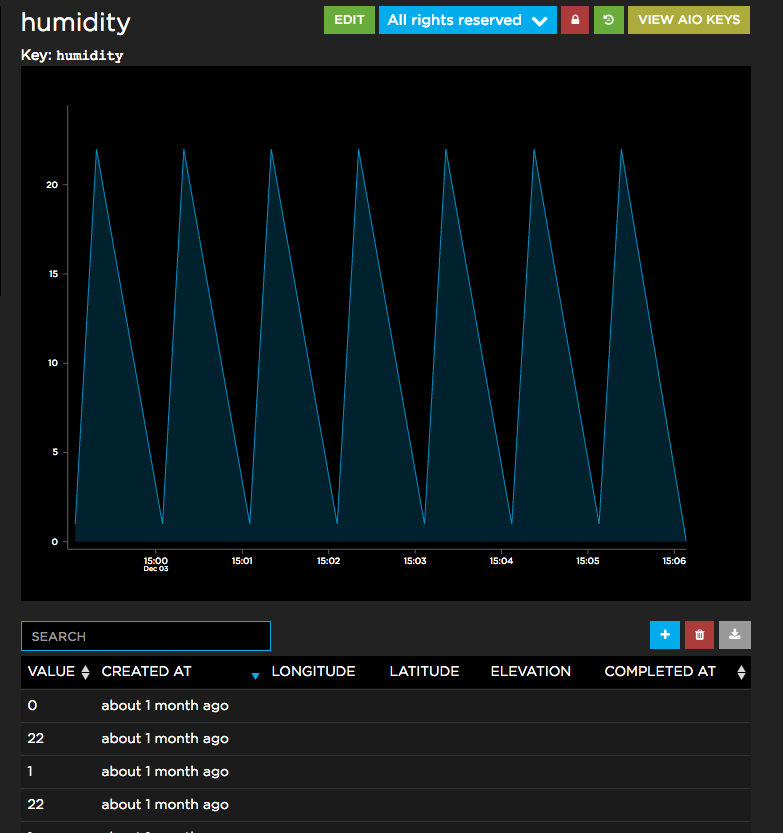
After you run the sketch from the previous step, if you check your humidity feed from the adafruit.io interface, you should see data appear!
By default, the code from the previous step uploads new data every five seconds, which is probably overkill. Feel free to adjust this to something more sensible once you've confirmed that your code is working.
Connect Adafruit IO to IFTTT

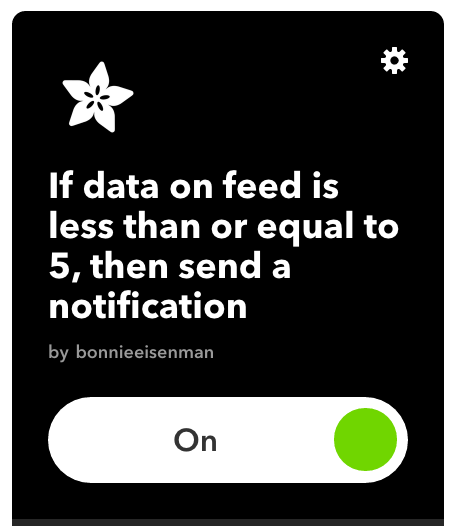
IFTTT (If This, Then That) is a wonderful, free service that lets you connect things together. And Adafruit.io has IFTTT integration! We're going to create an IFTTT applet: if our humidity feed on Adafruit.io is <5, then send a text message.
If you don't already have an IFTTT account, create one: https://ifttt.com/
Then, create a new "applet." Click on the "this", search for Adafruit, and then select "Monitor a feed on Adafruit IO".
For the "that" portion, you can either set up notifications via the IFTTT application, or text messages, or email, or...you get the idea. Give it a try!
Keep Your Plant Alive

Now you should receive push notifications when your plant is in need of watering.
This is just a prototype, of course. If you want to set up a robust system that will run with minimal intervention for months or years at a time, you'll want to think about power supplies, transferring your circuit from a breadboard to something more permanent, waterproof enclosures, etc. But this should get you started.
Good luck keeping your plants alive!