Iron Man Arc Reactor

Hello Friends, welcome back in my new Instructables. Today I'm going to show you that how I build this Iron Man Arc Reactor. I specifically build this for Instructables Colours Of the Rainbow Contest. Before going further let me know you about me;)
My Self Kishan Pratap Singh, Currently I'm a student of Intermediate College. I started to make a videos on YouTube from Class 9th & I gained upto 67k Subscription after 2 Years of Hard Work by making short videos. But channel is still not monetized, so I decided to take a help of any other's tech Creator. I found a person who said that he will be monetize my YouTube channel. I trust on him & he hacked my YouTube channel via Fraud.
But I didn't Give UP and started a New Channel NEXT BUILDER on YouTube. And Thankyou very much to PCBWAY Who supported me after hacking my channel. I request you guys to keep supporting me on Instructables & YouTube also, for more upcoming awesome projects in future.
Now let's talk about the project, I'll guide you through the process of building a stunning, customizable Arc Reactor that you can control with the WLED app. Whether you're a fan of the Marvel Universe or simply love DIY electronics. Since I build this for Instructables Contest so I need to show all the rainbow colours, for that I used WS2812B Programmable RGB Led Strip.
Rainbow Colours Means;)
- Red
- Orange
- Yellow
- Green
- Blue
- Indigo
- Violet
Now let's build it step by step, Don't Forget to support guys, your little bit support may be courage me to do some more works for You.
Supplies
Required Components;)
- Wemos D1 Mini
- RGB Led Strip
Required Tools;)
- Solder Wire
- Power Adaptor
- USB Cable
- 24 AWG Silicon Wire
- Miniware Soldering Iron
- Helping Hand For Soldering
- 3D Printing Service
Design & Print

First I Designed it's Case In Iron Man ARC Reactor Shape Using Autodesk Fusion 360. Because it's too easy to design using this software for beginners. Then I downloaded it's STL File to print it using 3d Printer. But Unfortunately I haven't a 3d printer so I visited on PCBWAY To use there 3d Printing service, because it's affordable and excellent quality Printing Service. I Uploaded the STL File & ordered it. After one week I received the Package & the quality is really amazing. You can find the STL File on this step;)
Connection


In this step I'll do the connection of RGB led strip with Wemos D1 Mini. The Connection is too easy. You can also see image for your reference. First I solder three wires on RGB led strip after doing this I have done the connection with Wemos D1 Mini. For best soldering I'll recommend Everyone The Powerful Soldering Iron know as Miniware TS80P. It's Mine Favourite Soldering Iron.
Assembly


Now After Connection, it's time to do assembling. You can follow these simple steps to complete it.
- First attach the Wemos D1 Mini with the lower base of 3d Printed ARC Reactor. For Reference See image 1.
- Now Place the RGB Led Strip arround the lower base. For Reference See image 2 & 3.
- Now Place the defuser at the middle of the Case. For Reference See image 4.
- Now Place the upper Part of 3d Printed Enclosure. For Reference See image 5 & 6.
Now it's ready, check the further step for uploading Firmware Process.
Uploading Firmware

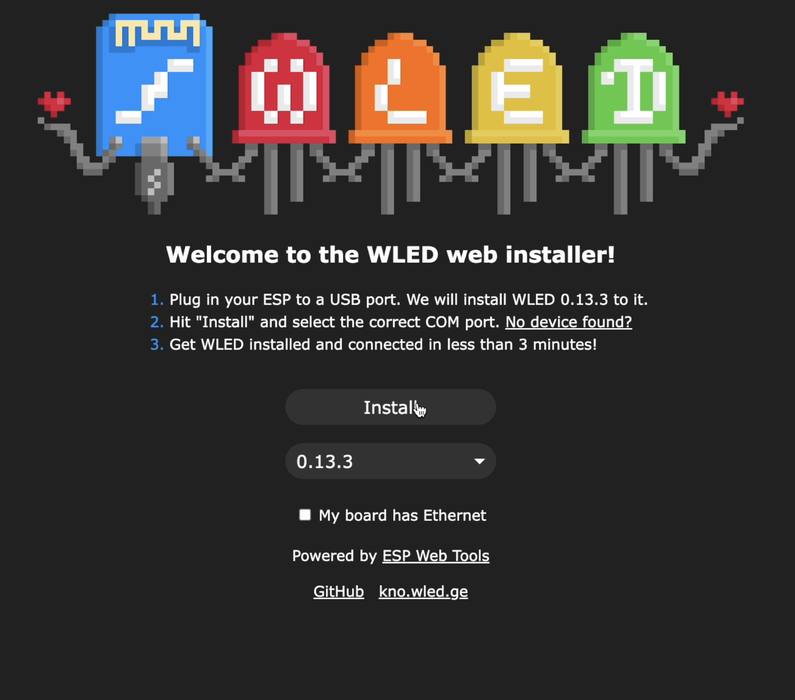
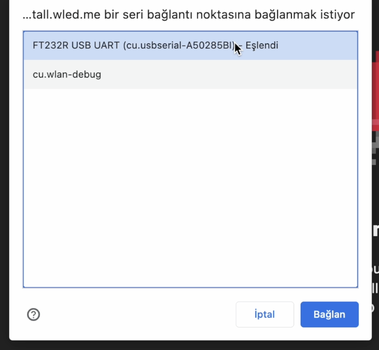


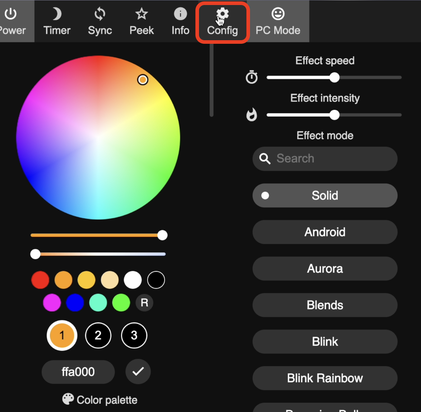
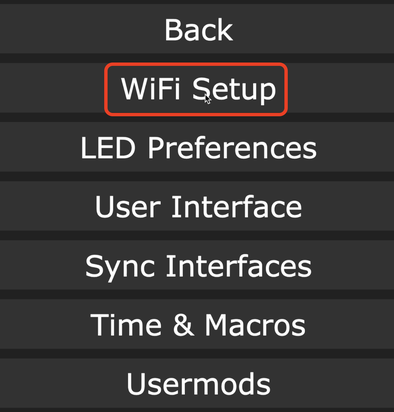



In this step, I'll guide you through the process of uploading code. we will use a tool called WLED to control the light project. You can use different ESP Web tools besides this app. The best part about WLED is that it requires no code, only plug and play! For That Connect the board to the PC/Laptop.
- Go to the WLED page (see image 2) & Press the Install Button.
- Select the port the board is connected to and wait for the installation to complete (see image 3 and 4)
- After the installation is complete, enter your Wi-Fi network information (see image 5 and 6)
- Installation is that simple, now you can control your device. Click on "visit device" and start using your LED lighting by making the first settings mentioned below. (see image 7)
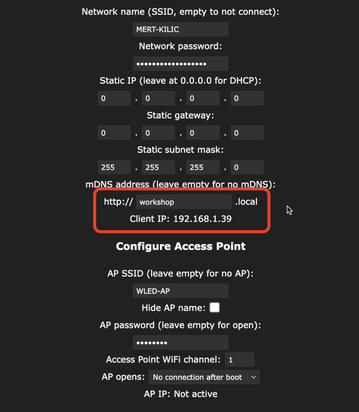
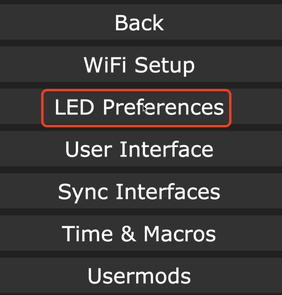
- Go to Settings, and set an address for easier access to the LED control panel, or use the specified IP address. (see image 8,9 and 10)
- Then you can access the LED control panel by entering the address in the web browser, or the application. (see image 11)
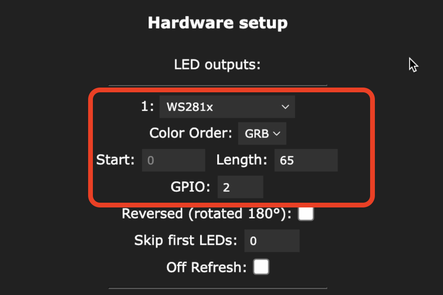
- Finally, enter the number of LEDs used and the GPIO pin number to which the LED is connected, and save. Also here, you can see the estimated current consumption according to the number of LEDs. (see image 12,13 and 14)
Now you can control the LED lighting in different scenarios with the WLED web browser, smartphone and tablet app.
Testing


Now it's ready to use. To use it just provide the 5v Power Supply Through the Micro USB Port. You can control it's brightness, effect speed, effect intensity & a lot of Modes, through your smartphone. Using WLED Application. You can also use it as a stunning decorative piece in various ways. Here are some creative ideas to showcase your hard work;)
- Desk Ornaments
- Wall Art
- Night Light
- Cosplay Prop
- Gaming Studio
- Themed Room Decoration
- Immersive environment
- Centerpiece for Parties
You can enjoy it's aesthetic and functional benefits while showcasing your craftsmanship. I hope you like this project. Don't forget to support me for upcoming awesome projects in future. Stay tuned for next project unit make it your self & Enjoy.