JOT Holder
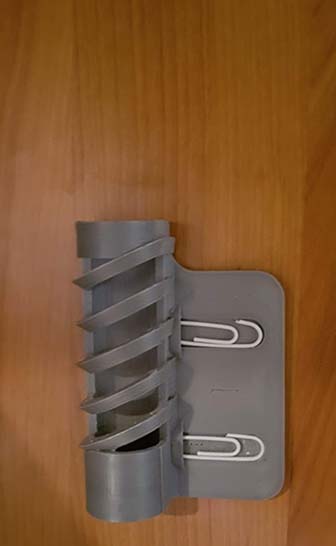


This is a project for people that absolutely need to write whatever kinds of things in whatever time of the day.
It's just a universal holder for Just Ordinary Things:
Pens (also pencils, markers...) and sheets of Paper (A4, paper rolls...)
also see the definition of JOT
It's pretty much size independent and you should get creative with what you can do with it.
As of right now I just stuck with writing Grocery Lists and for that it is AMAZING, far superior to any digital app I believe. I believe this is one of my most useful 3D prints and also one of the prettiest. I really dug-down to create a never seen before design and I think I nailed it for the most part.
Enough of this. Enjoy this instructables, try the JOT holder and let me know your thoughts!
Supplies
3D printer
PLA filament
Paper Clips
Double sided tape
Laying Out the Basics


Let us start off! First things first we need to measure up some things.
20 mm for the pen holder side should be fine for most things, though a few millimeters more could be better if planning to use markers (I'll revise the model soon). Also, don't mind if your pens are way smaller than this hole diameter, I'll give you an insight on a cool feature of the JOT holder made exactly to solve this!
Next, we measure paper clips! Make sure to include some slight play tolerance ( +0.2 ) to keep into account the imprecision of a general 3D printer, this is mostly due to the shrinking of hot extruded plastic more than a mechanical imperfection.
I am including the final version STEP file in case you need to customize the model to fit it to your equipment.
*******************************************************************************************************
ACHTUNG: make sure to have a proper metal caliper from your local hardware store rather than a cheap plastic one off of Amzn. Well, this is actually just a tip.
Nailing Snug-fit Tolerances

Remember the seemingly random 0.2 mm play tolerance?
That's just a good starting point to usually works out very well, but as you like your stuff to be spot-on now we're going to test things out!
You could actually skip this step, making the tolerance higher to something like 0.5 mm and fix the paper clip in place by using glue.
Easy route, I don't judge.
Otherwise, let's have some fun printing out small test samples of the paper clip holder. For that I just used the previous dimensions and incrementally added something like 0.1 mm, until I found something that felt right.
*******************************************************************************************************
SIDENOTE: the reasons why we are craving for a good tolerance is to have a "hole" inside which the paper clip just stays there tightly.
If the hole is too big then the paper clip will eventually fall out and we'd have to use glue to fix inside the hole.
If the hole is too small then the paper clip won't actually go inside it and we'd have to enlarge the hole by filing, drilling or melting some of the plastic.
*******************************************************************************************************
SECOND SIDENOTE:
I found out that cutting a bit the leg of the paper clip, helps it holding on to the seater. In the video I try to show the different behavior between shortened paper clip and original. The model you see there is my first attempt at the JOT holder. Clearly the print had failed.
Downloads
Design in CAD
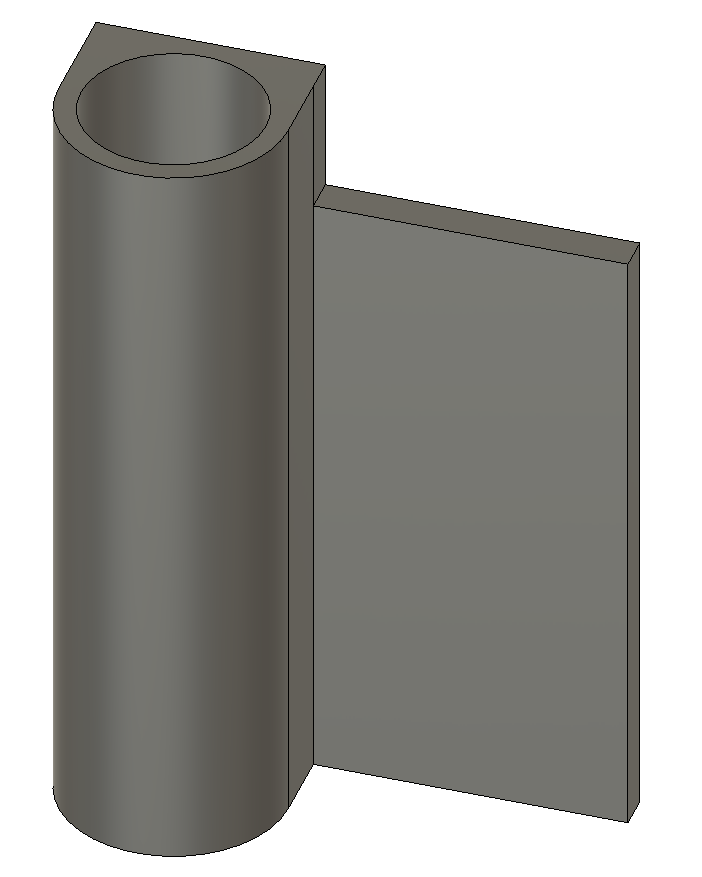
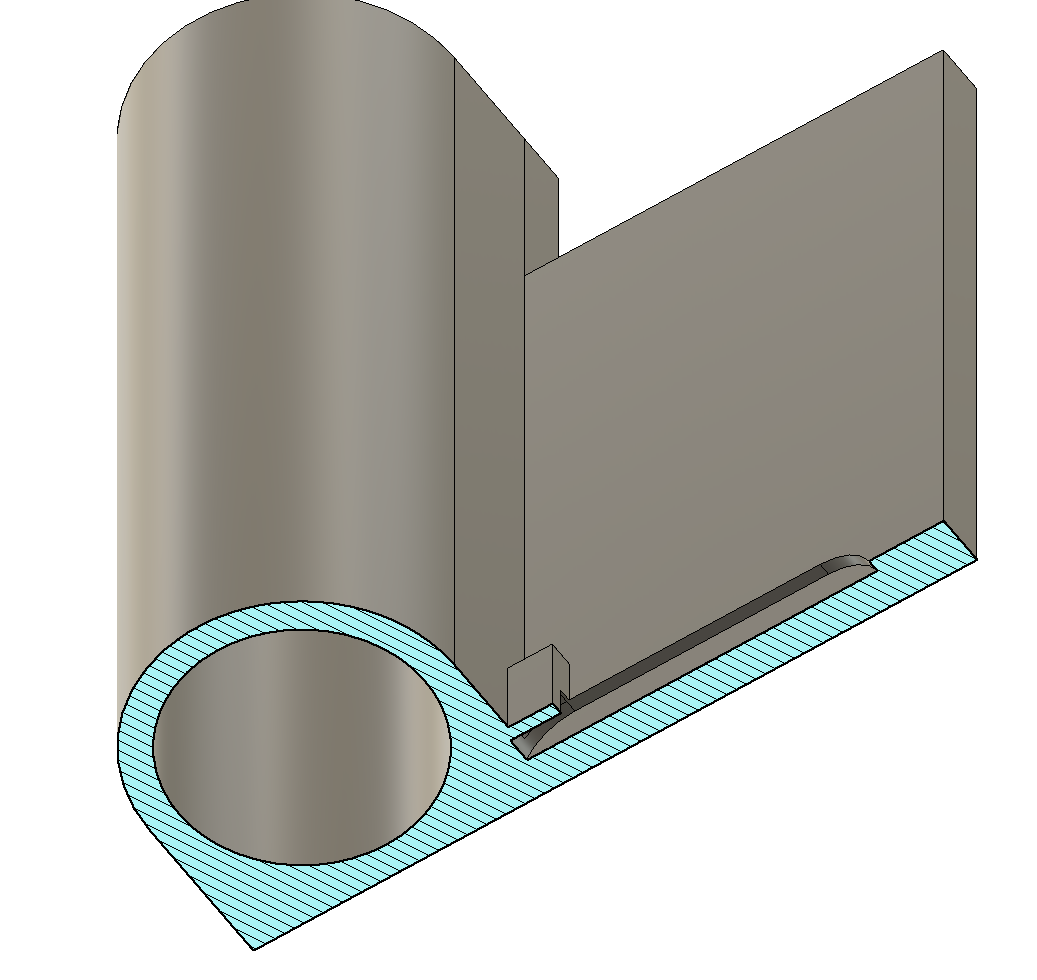

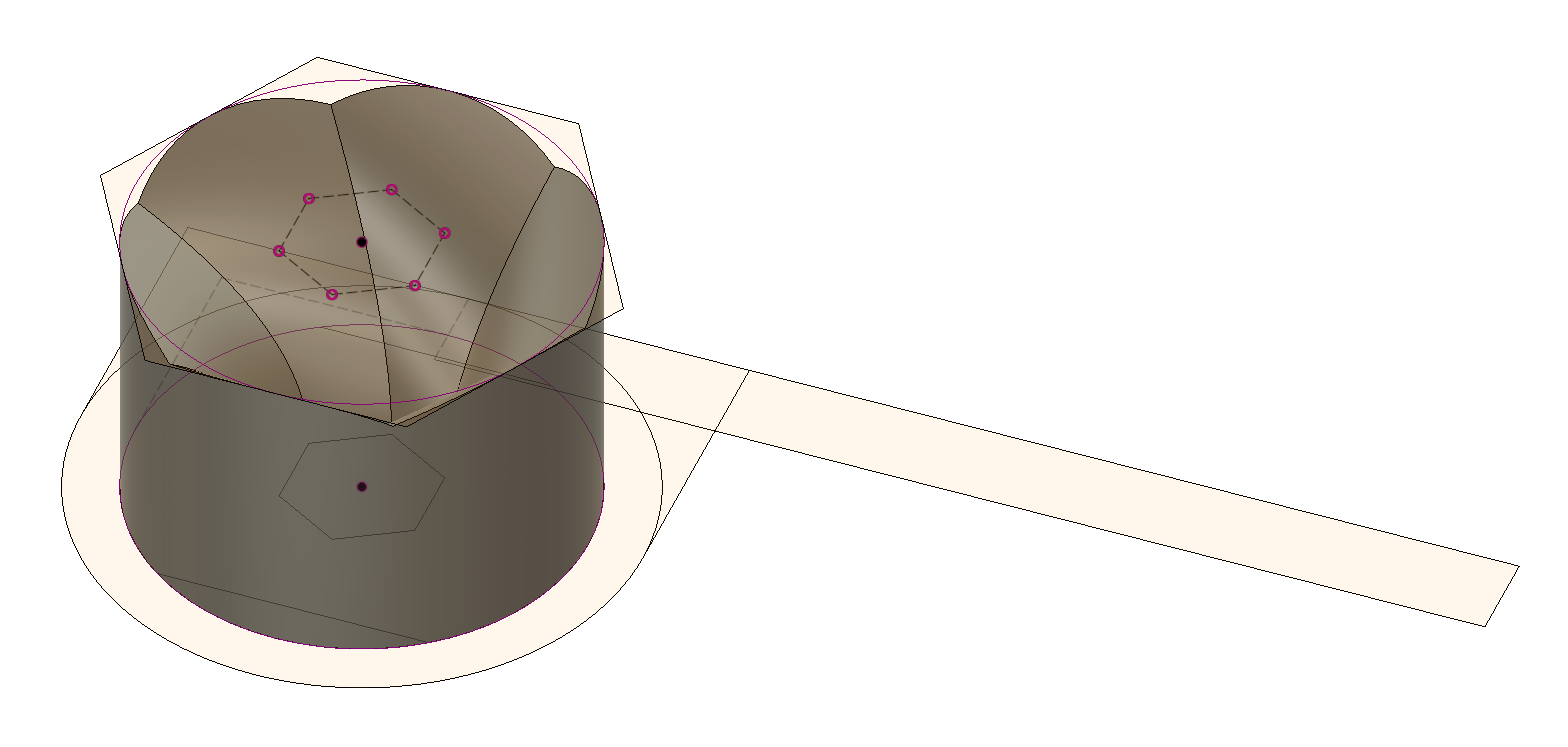


Now the real fun part, fire up your CAD modeler of choice and let's think about the design!
I almost entirely use the free version of Fusion 360, up until now it has rarely let me down and works like a charm. We start off by using the main information we have, that is the dimensions we took earlier (tolerances included). I included my dimensions in the pictures.
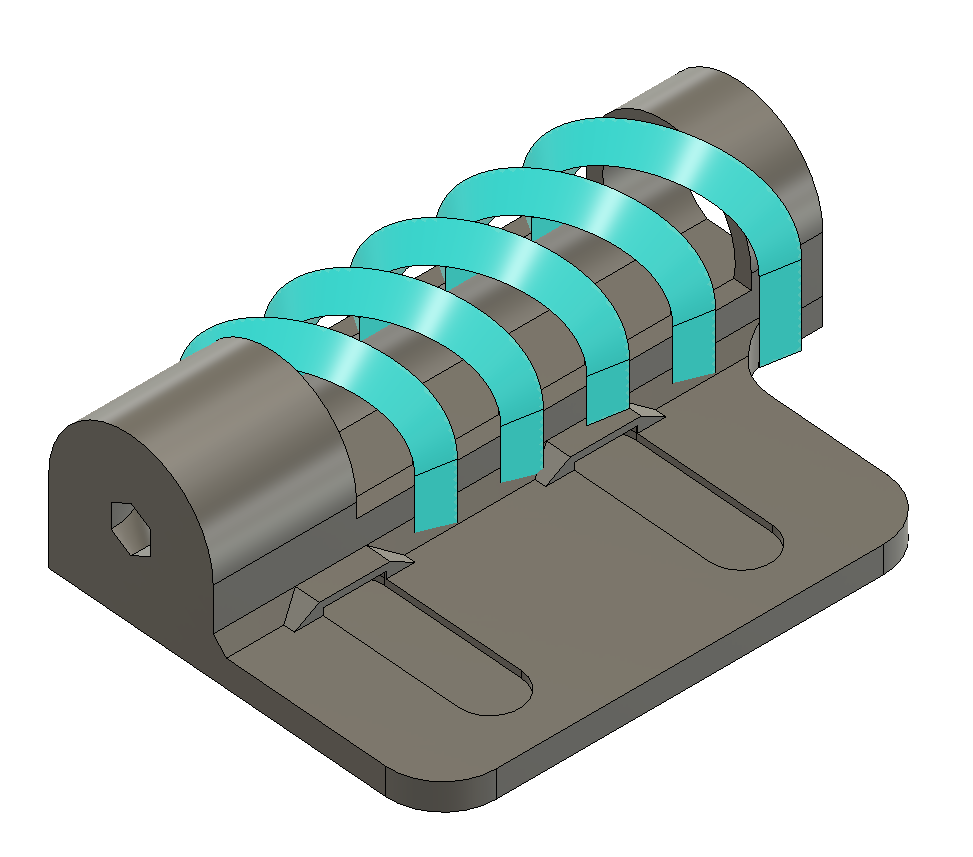
The back side of the piece is designed to be flat to be able to use double sided tape and fix it to a smooth surface (in my case the fridge). To design the paper clips slot I simply used the feature "slot" and then extruded some pieces to cover up a side of it, this will help to keep the paper clips in place. For aesthetics I then chamfered this top piece.
Still for aesthetics, I decided to cut out a portion of the cylinder and instead use a cage-like something.
I wanted the pen to be visibile and the JOT to have a nice vibe, so I came up with what you see in picture 11.
I had initially come up with something else, but more on that at the end of the guide.
The cool feature I anticipated in "Laying out the basics" is hidden one.
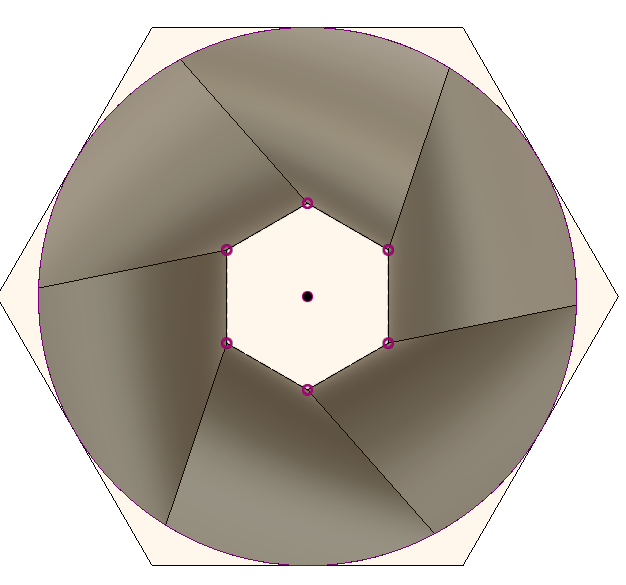
That is a "camera lens iris" shaped guide for the pen tip to slide into. My thought was because of a hurry, or even careless distraction, it would happen to just drop the pen into the JOT. If the cylinder were to be fully closed on the bottom, then the tip of the pen (like the one in Bic pens) will get damaged over time. So the iris is there to gently guide the tip into the open bottom. To design it, I used a simple loft between two 90 degrees rotated hexagons. Simple and effective [pic 4,5]
The model is not particularly complex, but has some finicky stuff every now and then. When satisfied with the overall design, just export the model in STL or OBJ format, or whichever format your Slicer supports. A slicer is a general name for a program that turns 3D model information into machine-readable commands (GCODE).
The entire model will be printed as a single piece.
*******************************************************************************************************
SIDENOTE: about the cage...
This was one of the parts where I experimeted A LOT and tried many different things, most didn't work and in the end I'm happy with the final look, though I'm planning on adding a bit of "modularity".
Anyway, these are the major versions:
Pic 6 was made using Voronoi plugin inside of Fusion
Pic 7 was made using Meshmixer (details in pic 4,5)
Pic 10 was made using tubes inside of Fusion
Pic 11 was made using Custom Coils inside of Fusion
Print Orientation

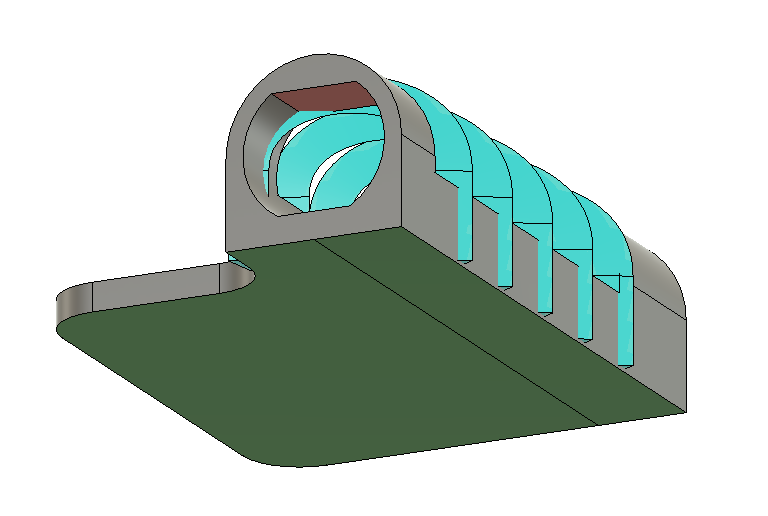

I wanted to write a short sidenote for this, but this topic derves it's own place.
As 3D printing is orientation-dependent, we must take great care in the design phase about print orientation.
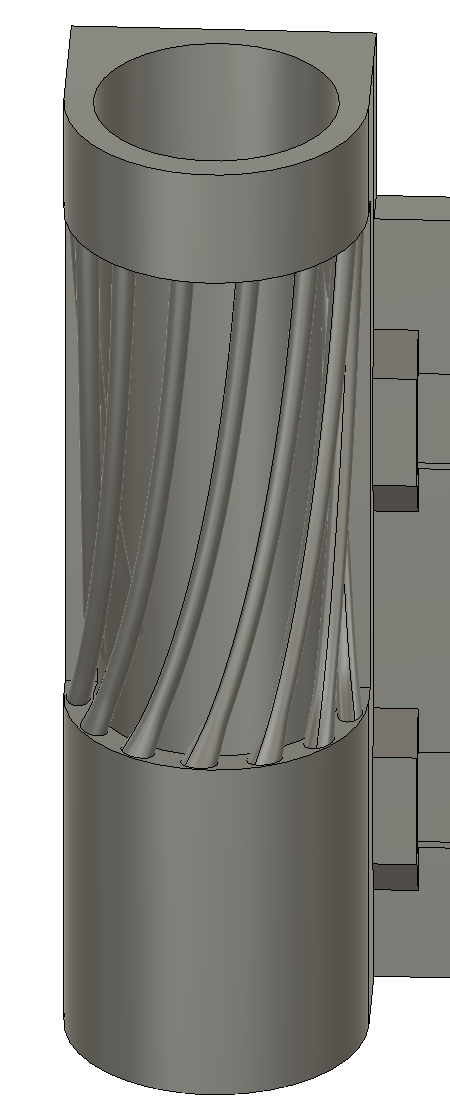
My original idea was to print it straight-up, so in the initial design phase I took that into account [pic 1].
More on "Design iteration" at the end of the guide.
Then, with subsequent designs, I opted for a laid-down print orientation [pic 2].
The major consideration when designing are overhangs and orphan parts, every feature that stands out of the main body must have some sort of draft angle (the angle value depends on printer capabilities).
I developed a simple trick to aid myself in designing well-thought-of 3D printed parts, and it is a color based trick.
I mark GREEN the areas that will be laid down on the print bed, while I mark RED dangerous overhangs. Doing this is very easy inside Fusion 360, just use the appearance dialog. [pic 4]
Overhangs must be addressed using draft angles or bridges. If you are not sure that your printer can handle such geometry you should look after these areas even during the print process. Better safe than sorry.
More about failures in "Failure section"
In pic 3 you can clearly see a simple example using the final JOT holder model.
Also notice how the "Camera lens iris" (previous section) assumed different nuances from Initial Version to Final Version in order to be fully printable (due to a change in print orientation).
Printing / Prototyping / Failures


The (probably) last part.
After all of the measuring, thinking and designing, it is finally time to print your object! If successful, well this could be the last step, but when prototyping, more often than not, your design will have some issues at the first go.
I did, more than one time.
For instance, when printing the final version (the one that right now is solidly attached to my fridge) some supports in the model broke up and when I came back to the printer I found that thing [pic 4, video 1].
I had to stop the print, but found a way to fix the problem. I measured the height of the failed object, went back to Fusion, sliced up the model and printed the missing pieces.
Then I thoroughly cleaned the failed print and glued everything together. I think the result was quite amazing. Having printed the missing pieces in a totally different orientation made them look I had hoped they would.
Finally I had the object I wanted. I taped it to the fridge, inserted and glued a bit the paperclips, found some spare pens and voilà! The JOT holder in all its glory and functionality! Hope you found this instructable useful and interesting, and for those of us that are eager to learn more I have one last section for you. Check it out!
Downloads
Iterating a Design



- Coming up with ideas is simple, executing on them is the challenge.
Mostly because creating something new requires lots of trial and error, it is pretty much mandatory that you will have to revise and improve your design over time.
In my case,the initial idea was to print the JOT straight-up, so I designed it accordingly. The paper clip seaters, the iris, the cage, the overall shape… everything starts from bottom to top and doesn’t require ANY sort of support.
When going from design to print I faced some issues though:
- The cage pillows actually were too thin and started breaking off during printing
- The top of the cage wasn’t as easy to print as I had hoped, so it failed.
I also noticed some other issues after printing:
- The surface quality wasn’t as good as I expected (layer lines, stringing, presence of defects..)
- The iris didn’t fill the whole cylinder so there were some small flat spots were the pen would bump into when dropped into the cylinder.
After all of this inspections I made a couple notes about trying a different print orientation, redesigning the iris, changing the cage and so on ... and that meant that the whole design had to be adjusted, actually I pretty much started from scratch back again.
All in all, I felt that redesigning the whole thing greatly improved my CAD and thought skills. Well worth the time and effort.
This the real end. Hope you enjoyed reading!
*******************************************************************************************************
SIDENOTE: some tips about improving your already 3D printed design.
Grab a pen or marker and make notes directly on the plastics about moving features around, increasing tolerances or whatever you think might work.
Masking tape, cardboard and glue are your friends when it comes to making prototypes. You already have most of the geometry in plastic, from there just add or remove features. It will help when redesigning in CAD