Nomad: Mini WIFI Media Server
by Jstudner10 in Circuits > Gadgets
24643 Views, 143 Favorites, 0 Comments
Nomad: Mini WIFI Media Server


Hello Makers!
I’m Jackson Studner, a mechanical engineering student and hardware enthusiast who dove into coding, embedded systems, and web UI design through this project. Nomad is my first major software project, so do keep that in mind while setting it up. The devce serves as a portable offline media server powered by the ESP32-S3 microcontroller, designed to be compact, reliable, and fully open-source.
What is Jcorp Nomad?
Nomad is a self-contained, battery-friendly media server that fits in your pocket. It creates a local Wi-Fi hotspot with no internet connection needed, allowing you to stream your own movies, shows, music, books, and more directly from a microSD card. As of the Mk4 update it can also carry a full offline copy of Wikipedia (and other ZIM archives like Project Gutenberg, TED, and Ifixit), searchable right on the device, so it's not just movies and music anymore, it's a whole offline backup. It’s perfect for camping, road trips, classrooms, or any scenario where connectivity is limited or unavailable.
This device functions similarly to popular media servers like Jellyfin but is fully offline, ultra-portable, and simple to use. It supports multiple simultaneous streams (tested with up to 8 videos at once), offers a customizable Screen UI via SquareLine Studio and LVGL, and works with most browser compatible devices, phones, laptops, tablets, etc. You can also easily edit the frontend on the go from the admin panel. My priorities where multi user support, simple and easy to understand frontend, and customizability. I wanted to design a blanket solution to fit the needs of many.
Why I Built This
As someone who loves camping and road trips, I frequently ran into problems with entertainment options. Streaming apps depend on cell signal and pre-downloading content can be restrictive or difficult to manage. Nomad solves this by letting you carry your own personal media server that anyone nearby can connect to, no cellular data, no cables, no fuss. It doesnt use accounts or an app, making the setup as quick as possible on any device (literaly just connect and use).
Key Features
- Local captive‑portal Wi‑Fi hotspot.
- No user accounts, browser based tracking.
- Browser-based UI: menu, movies, shows, music, books, comics, gallery, files, and archives.
- Offline Wikipedia / ZIM archive support with fast on-device search (browse full Wikipedia, Gutenberg, TED, etc. with zero internet).
- Admin panel: file browser (upload/rename/delete), shutdown, restart, flash mode, USB mass-storage, indexing controls, RGB and brightness controls, console logs + more.
- Background, non-blocking library indexing.
- Resume playback for movies & shows stored in browser cache.
- Theme customizer with 28 built-in themes, plus dark mode.
- Improved show/book/music folder support (nested seasons, artist/album structure).
- Music playlists, shuffle/loop, downloads.
- PDF, EPUB and MP3 audiobook support, plus a dedicated comic/webtoon (CBZ).
Who Should Use Nomad?
- Whether you’re a traveler, educator, parent, or hobbyist, Nomad offers a lightweight, offline media solution designed for maximum flexibility. It’s open source, so you can customize it or build your own version, no specialized skills required beyond basic hardware flashing and SD card management.
Supplies
What You'll Need
Below is a general list of the hardware, software, and accessories you’ll need to complete the Jcorp Nomad project. I’ve included notes on options for customizing your build depending on your goals, whether you want to save money, maximize portability, or make it uniquely your own.
Note: The links below are Amazon affiliate links. If you click and buy something, I might earn a few cents—just enough to fund more SD cards and maybe one day a coffee that isn’t instant. Thanks for supporting the project (and keeping me caffeinated)!
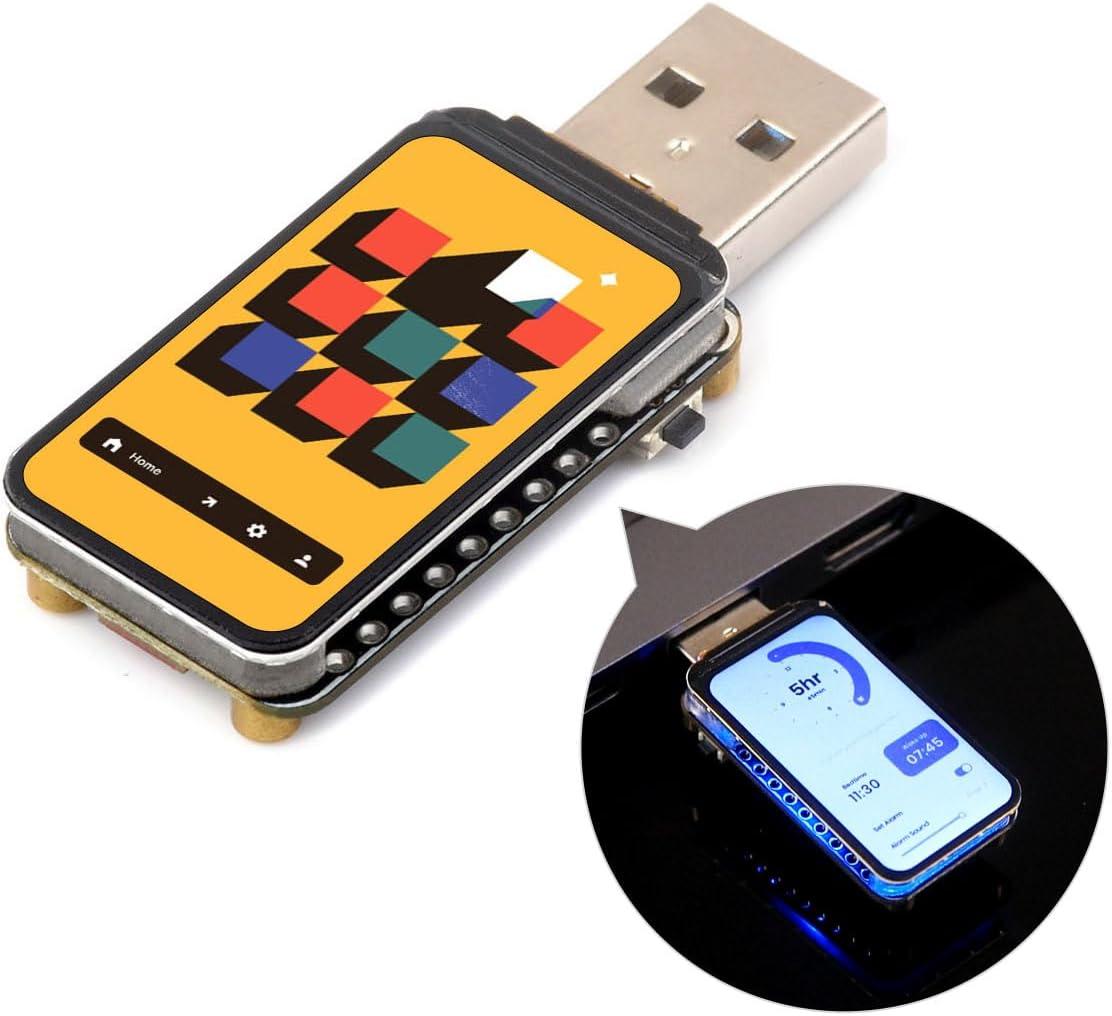
Waveshare ESP32-S3 with 1.47" Display
Alternate link with better shipping times: Amazon Link (affiliate)
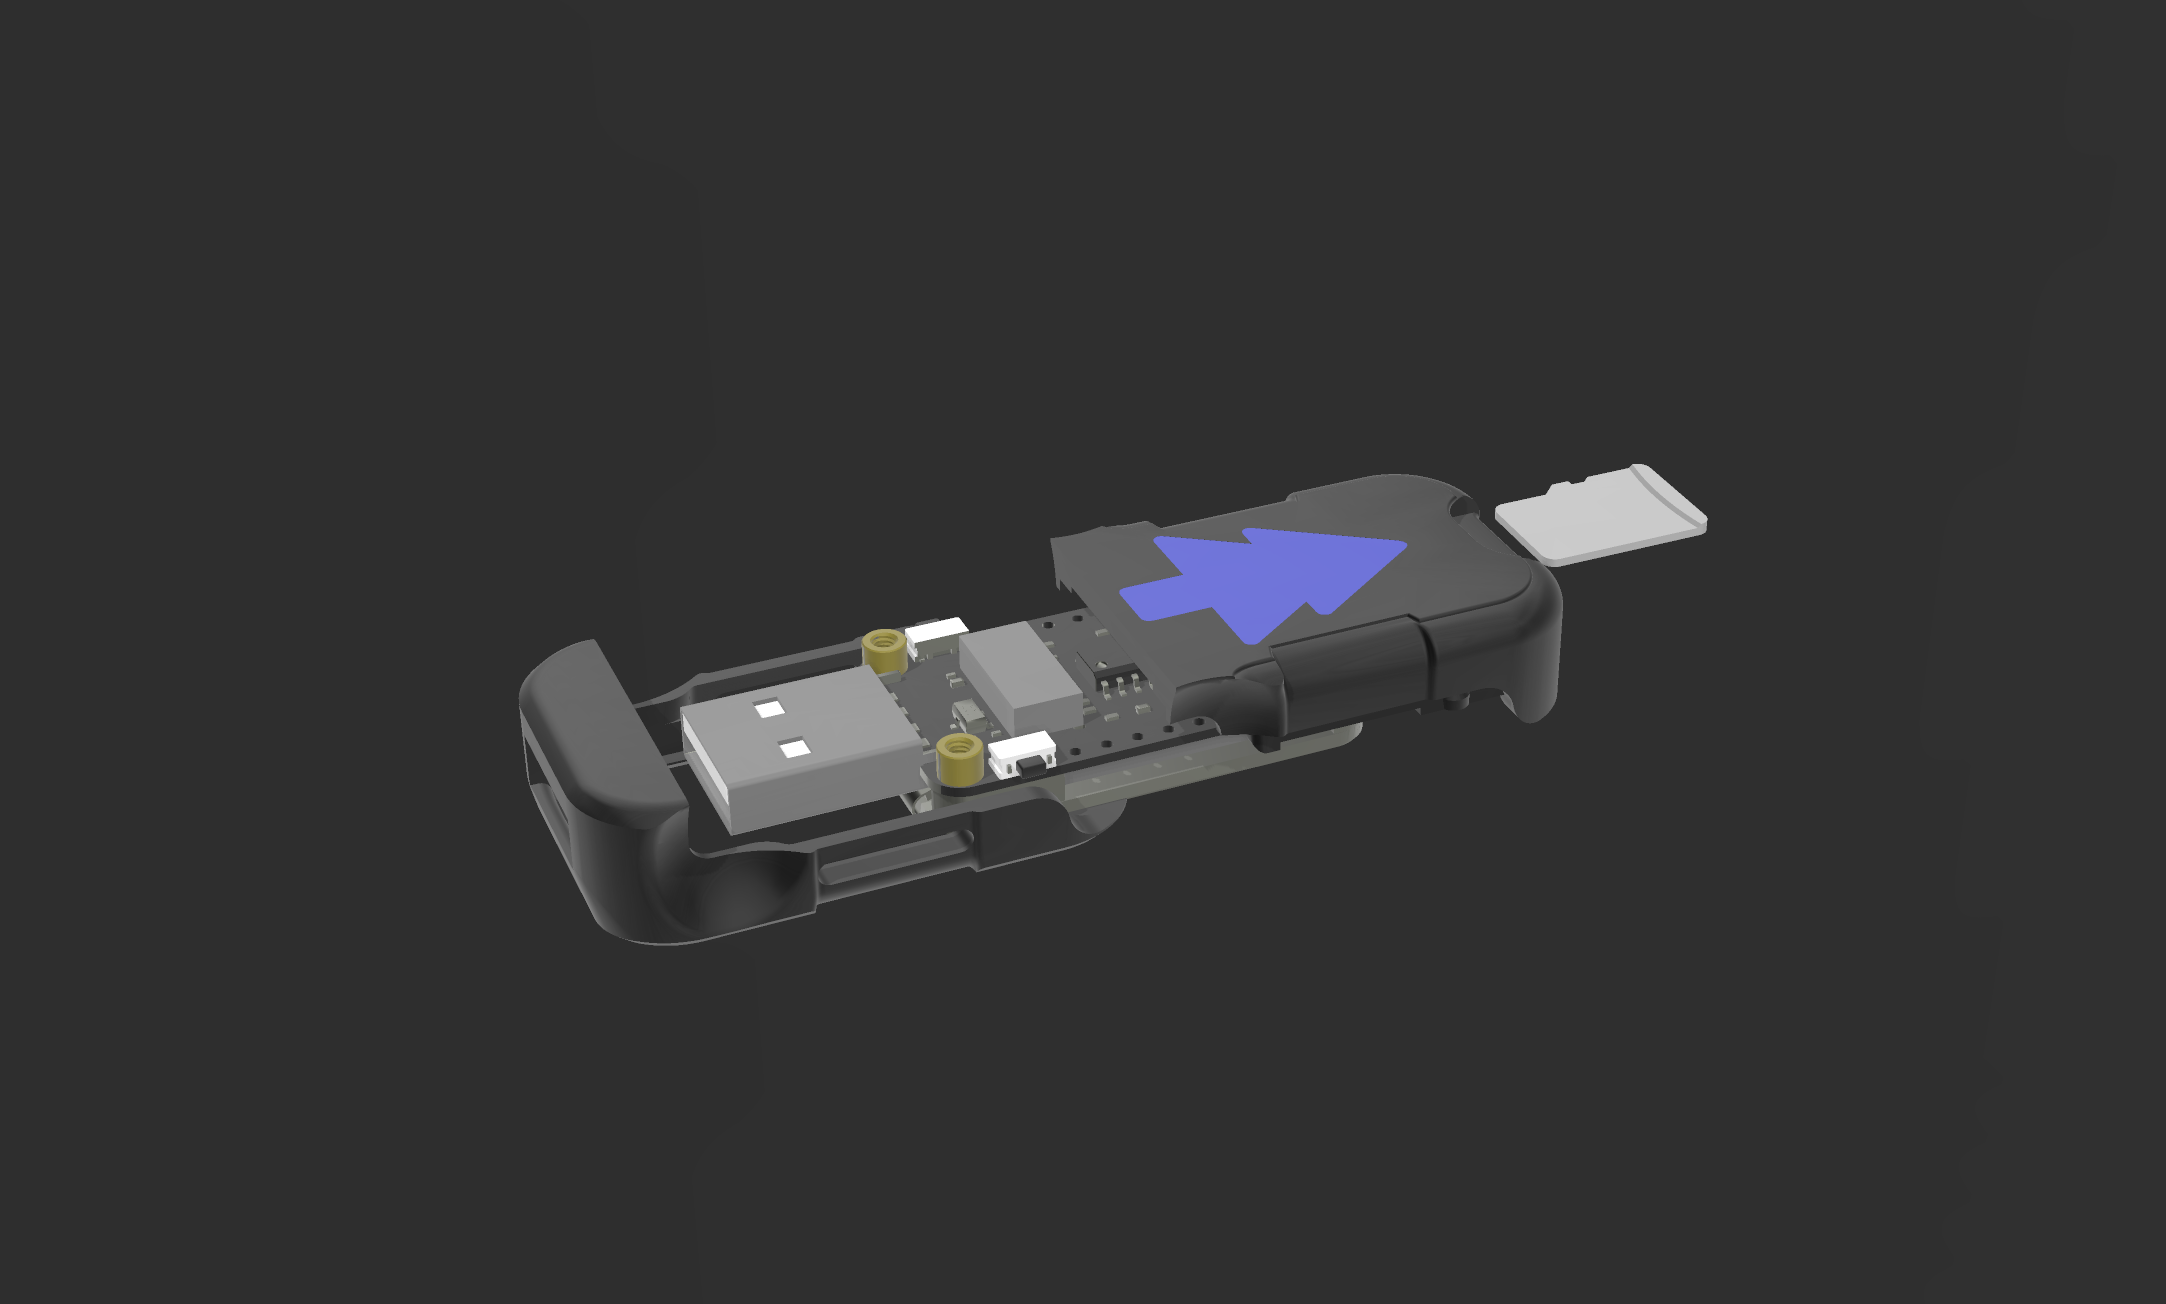
This all-in-one development board powers the entire project: Wi-Fi, display, and SD card support all on a single compact PCB. While it’s possible to build a Nomad using separate components, this board is by far the easiest, cleanest, and most space-efficient method.
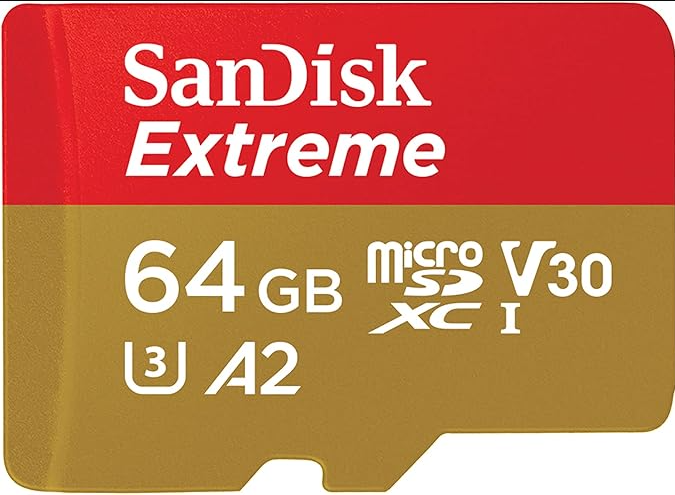
MicroSD Card (16 GB or larger, Must be Grade 10)
I recommend at least 64 GB if you want to store a decent media library, but the system will work with as little as 16 GB if you only need a few files. Make sure to format the card as FAT32, ESP32 has compatibility issues with exFAT and NTFS.
The system is very read/write heavy so I highly recomend a Grade 10 micro SD card, as they are designed for the abuse, and you will see a notable performance increase using one.
If you’re feeling adventurous (or just absurdly wealthy), the project should support 1.5–2 TB SD cards. I haven’t tested those sizes yet, but if you do, please get in touch, I’d love to hear how that goes.
SD Card Extenders
These are not required, and sadly you can only bulk buy ones that are the right length (if I can find a different version I will update) The appeal of these is that you can access the SD card from the back of the case without removing it, making it a fair bit more clean. If you don't need to access the card often you can skip this part.
These will make it easier to access the SD card without disassembling the entire unit and improve durability.
3D Printed Case (Optional but Recommended)
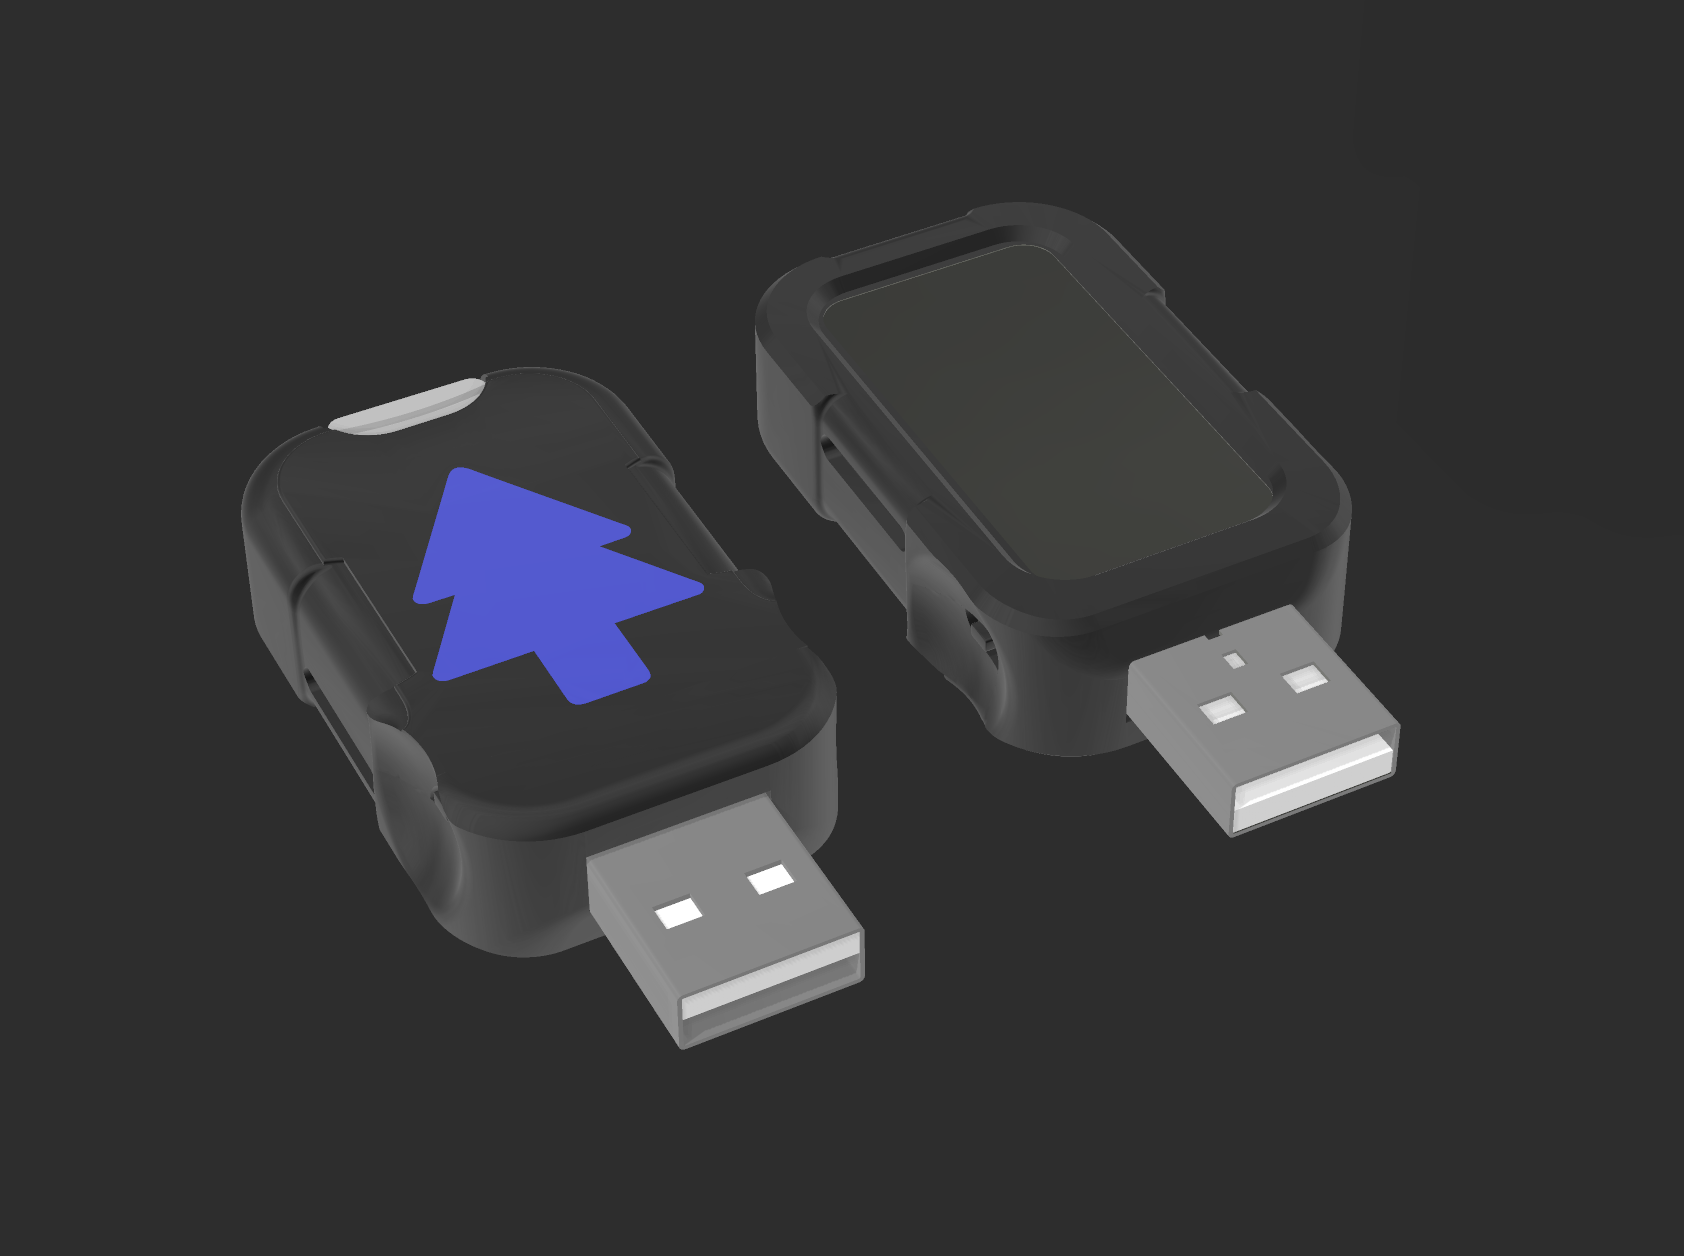
Included in the project files is a 3D printable case for the project. This mainly serves to protect the screen as its not very durable and the sides / wiring can get damaged easily. You can glue the screen cover on, but in general it should be fine as a snap fit.
I highly recomend printing in PETG, the device can get hot and the plastic may warp if it's not heat tolerant.
Want to customize it? Add your name to the backplate, decals, ventilation holes, or accessory mounts. As a mechanical engineering student, I recommend trying TinkerCAD for easy 3D modeling. (not even a joke, love that software)
Software (All Free and Open Source)
- SquareLine Studio – For editing the touchscreen UI using LVGL (this is advanced, but doable)
- Arduino IDE – To compile and upload the firmware to the ESP32-S3
- FAT32Format – For flashing the SD card into fat32 regardless of storage capacity
- Nomad PC Tools – A small set of Python scripts bundled on the SD template (PC_Tools.zip). Not neccisarily needed, but can handle image optimization, quickly indexing media (Nomad can handle this just slower), and prepping zim files to be read by nomad (combines, splits into under 4gb chunks, then indexs).
- Web Browser – For testing the media portal and UI after flashing
All software tools used are free, cross-platform, and beginner-friendly. No professional coding experience is needed, if you can copy-paste, follow a few instructions, and tolerate some compile errors, you’ll do great.
My code isn’t perfect (it’s held together with duct tape and good vibes), but if you get stuck, feel free to drop a comment and I’ll try to help however I can! Also check out the discussions page on github, lots of documentation of past issues and ideas.
Get the Code and SD Card Layout
All source code, firmware, UI files, and a downloadable SD card template with the required folder structure and sample media are available here:
GitHub Repository: https://github.com/Jstudner/jcorp-nomad
Clone or download the repository to get started.
Prepare the SD Card
Before powering up Nomad, you’ll need to prepare the SD card with the correct folder structure, media files, and interface content. This is how your ESP32-S3 knows what to serve and how to present it to connected devices.
- Important: The SD card must be formatted as FAT32, or the ESP32-S3 won’t be able to read it properly.
Formatting SD Cards
Windows won’t let you format cards larger than 32GB as FAT32 by default, but don't worry, there's a free and easy workaround.
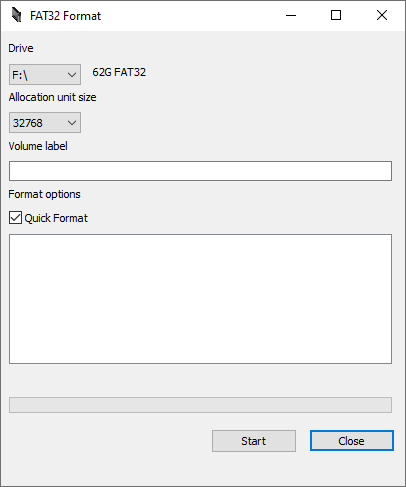
Use the GUIFormat Tool:
- Download the tool from https://fat32format-gui.en.lo4d.com/windows.
- Insert your SD card into your computer and take note of what letter mount it used (such as /E)
- Launch the guiformat.exe program.
- Select your SD card’s drive letter.
- Set:
- Allocation size: 32K
- Volume label: whatever you want!
- Quick Format: ✅ Checked
- Click Start. It’ll format the entire card as FAT32, even if it’s 64GB or 256GB.
- Remember the key limitation of fat32 is that no single file can be bigger than 4GB
⚠️ Double-check that you selected the correct drive letter, this will erase everything on that card! ⚠️
Required Folder Structure
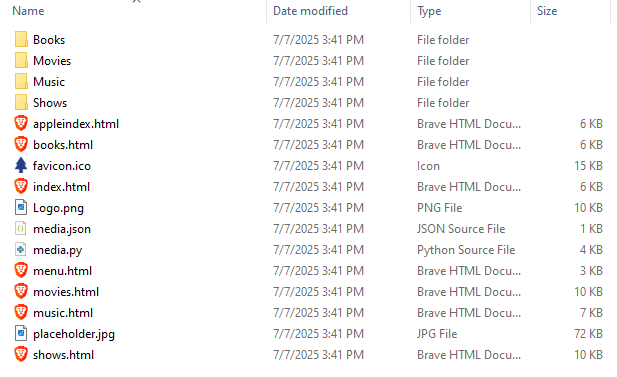
Here’s some examples of how you can layout your SD card:
A downloadable SD card template is included in the GitHub repository. You can download that directly to your SD card to get started. It includes sample media you can use to test before gathering all of your real content.
The template now also ships a bunch of extra support files (the readers, theme files, admin panel, etc.). You don't need to touch those, just don't rename or delete them or the corresponding pages will break.
Requirements:
- The Shows folder must contain subfolders for each show:
- Inside each show folder, place the individual episode video files.
- You can rename the media files to whatever you want, but it’s strongly recommended to use a consistent format like:
- This helps keep the episodes in order (it sorts alphabetically).
- You can also have season folders inside of the show folder with episodes in them. any video files placed outside of the seasons folder will be treated as a special or movie, and is also sorted alphabeticaly, allowing for it to be placed in watching order.
File Descriptions
Here’s what each of the key files does:
- appleindex.html
- This page is shown only on Apple devices (iPhones, iPads, etc.) due to how iOS handles captive portals. It includes special instructions for connecting and using the system.
- index.html
- This is the default homepage for all non-Apple devices. It automatically redirects based on device type. Handles all android based devices.
- menu.html
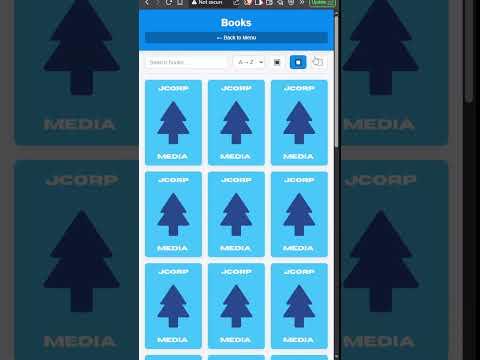
- The first screen users see after connecting. It displays links to Movies, Shows, Books, Music, Comics, Gallery, Files, and Archives. You can remove a section by editing this file and deleting its link (e.g., remove the “Books” link if you're not including books).
- Has a search bar that can see all media files and will redirect to them.
- At the bottom there is a section for resuming content from movies and shows. These items display on their pages as well.
- archive.html The Wikipedia / archive browser. This is where ZIM archives (offline Wikipedia, Gutenberg, TED, etc.) show up. Archives can't just be dropped on the card raw, they need to be prepped first with the PC Tools (covered in Step 4). If you have no archives on the card, this section just stays empty and will not load or display to users.
- books.html, movies.html, music.html, shows.html, gallery.html, and files.html
- These are the individual section pages. They list the content available for each category. a search bar is included that uses in text search.
- For Movies each video file should also get a matching jpg image with the exact same name. I recommend getting your Show and Movie Images from https://www.themoviedb.org/?language=en-US
- For Shows each show gets one image, it should be in the /Shows directory and named the same as the directory that your episode files are in. Episodes and Seasons don't have images, it will just display the filename.
- For Books I recomend using PDF, as it is the most stable. The system does support epub and mp3 audiobooks aswell though. Include a jpg cover image of the same name regardless of filetype.
- For Music use mp3, wav, or flac files. You can also have subdirectories like with shows, items in the subdirectories will show on the main page, but also in sorted lists in the playlist page. Folders can be two levels deep, named however you want. /Music/Artist/Album/song.mp3 for example.
- favicon.ico
- The site’s tab icon. Replace it with your own if you like, but keep the same size and format.
- Logo.png
- Displayed on the site’s header. Feel free to swap it out with a logo of your own just use the same aspect ratio.
Admin Panel
Provides many useful tools for managing the system and customizing the experiance.
- System controls: restart, shutdown, USB mode, and flash mode
- Real-time monitoring: CPU temperature, connected users, and system status
- RGB LED control: off/solid/rainbow modes with color picker
- LCD brightness adjustment
- Wi-Fi credentials management (SSID and password)
- Admin password configuration with enable/disable options
- Library indexing: manual full scan and auto-index on boot toggle
- SD card storage usage tracking with visual progress bar
- System console with real-time status monitoring
- File browser with upload, rename, delete, and folder creation capabilities
- Basic authentication system with password protection
What You Can Customize
You can edit any of the HTML or image files from the admin panel. Feel free to:
- Change colors and layout in menu.html and section pages
- Replace the logo, favicon, or placeholder image
- Remove content categories (like Books or Music) by deleting the links in menu.html
Just remember: the system is expecting specific file and folder names, so don’t rename core files unless you know how to update the code to match.
Flashing the Firmware
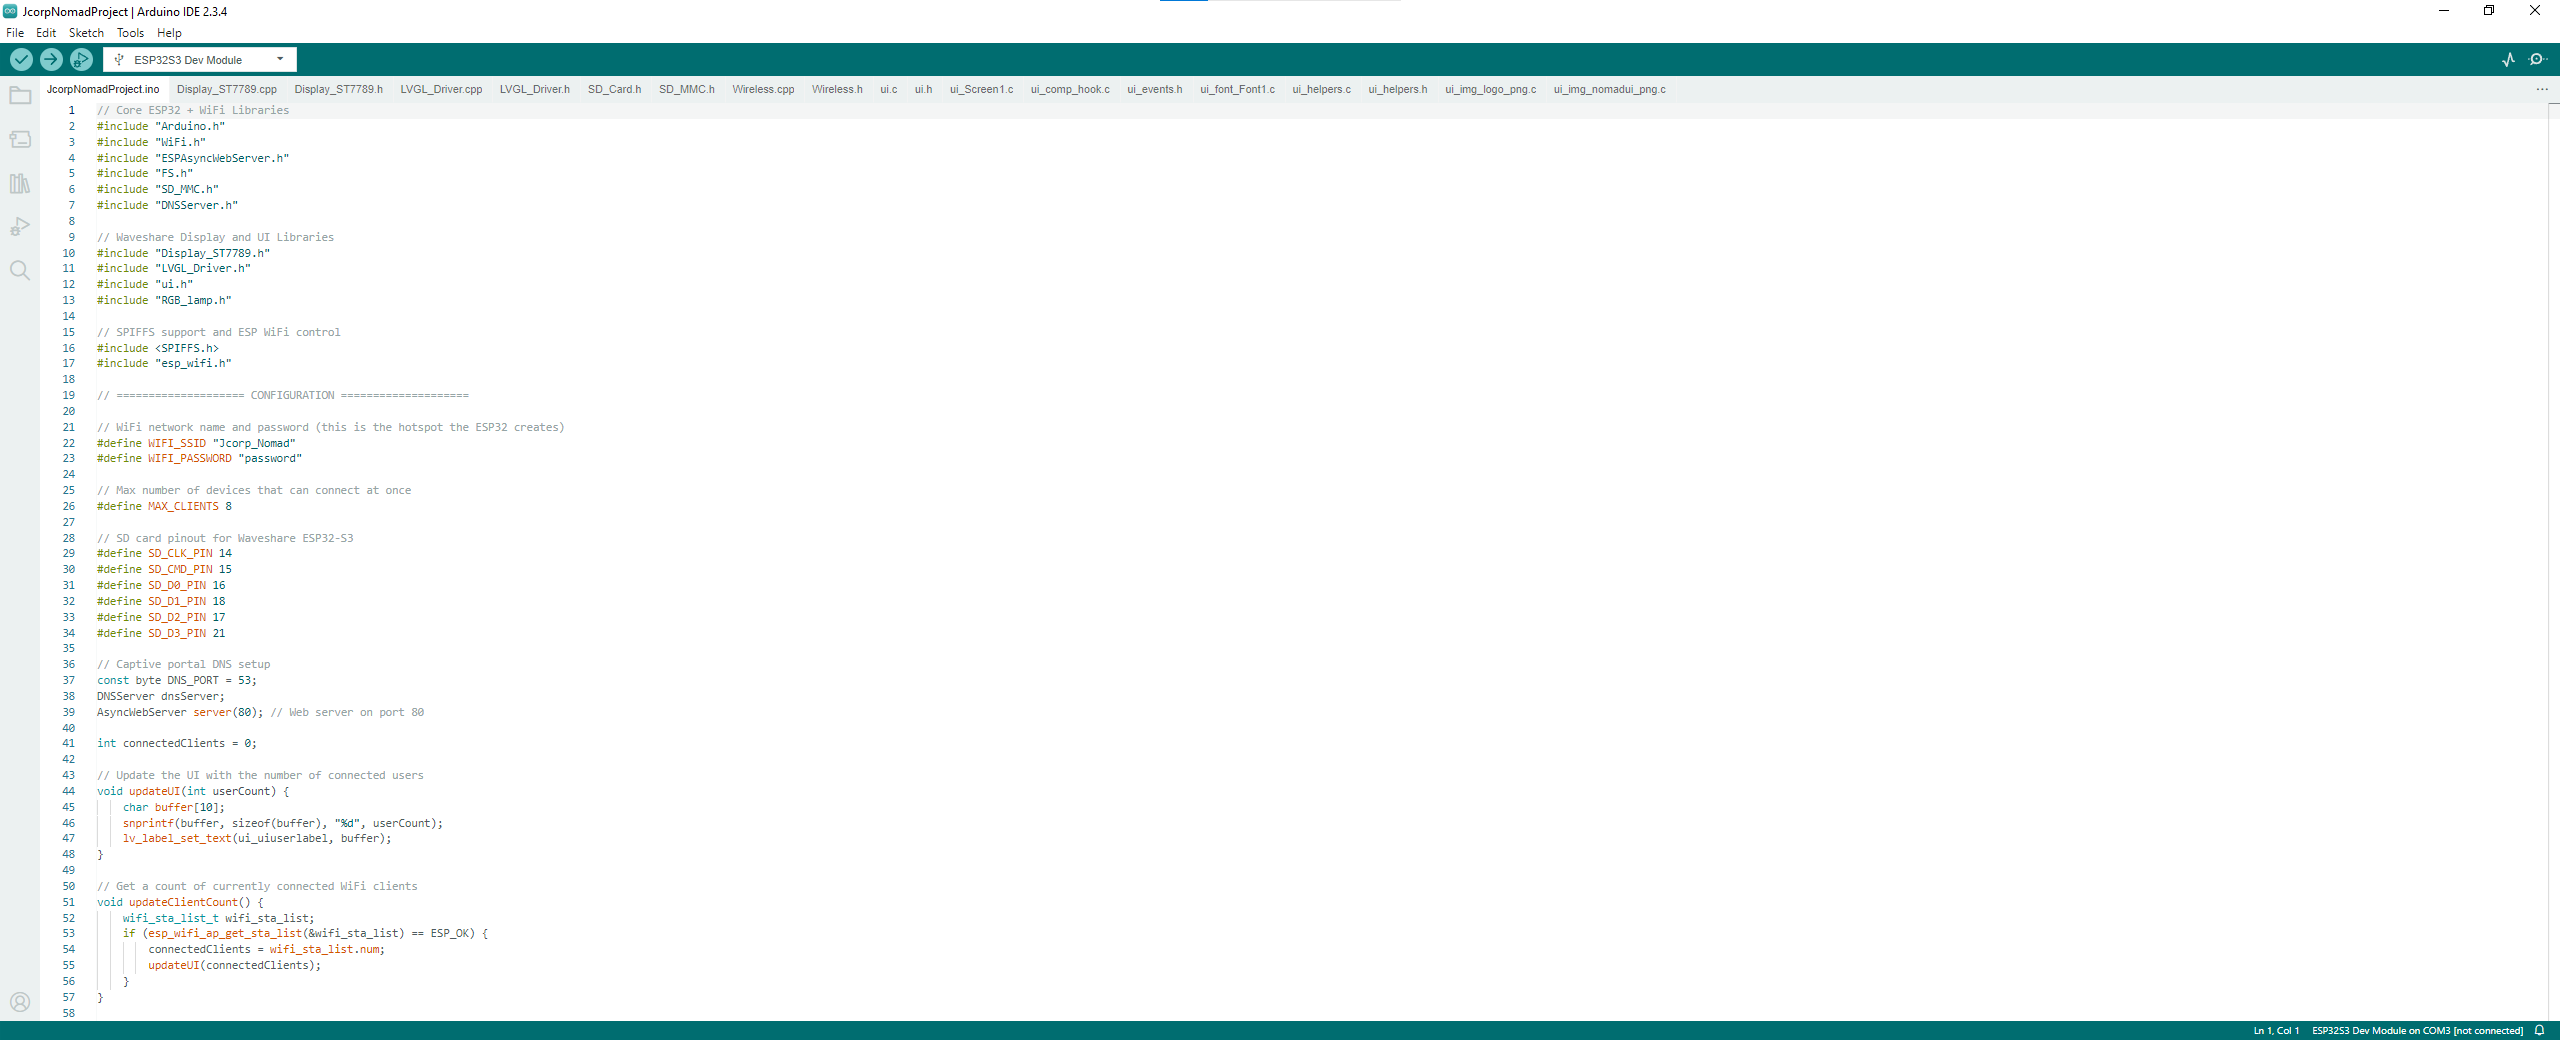
Now that your SD card is ready, it’s time to upload the firmware to the ESP32-S3 board.
The Waveshare board used in this project makes things easy, it has a USB Type-A male connector, just like a flash drive. You can plug it directly into any available USB port on your laptop or PC, no adapters or extra cables required.
Installing Arduino IDE
If you haven’t already, download and install the Arduino IDE from:
https://www.arduino.cc/en/software
Once installed, open it up, you’ll use this to flash the Nomad firmware to the board.
Opening the Project
- Download the firmware files from the GitHub page.
- Open the .ino file in Arduino IDE.
- Ensure you download all of the files in the "firmware/JcorpNomadProject" directory, when you run the ino those files need to be preset for it to function.
- The project should load all necessary tabs and files automatically. (if they don't load check its in the right spot as above)
Board Setup in Arduino IDE
You’ll need to tell Arduino IDE how to talk to the ESP32 board. Follow these steps:
- Go to File > Preferences
- Under "Additional Board Manager URLs", paste this:
- Then go to Tools > Board > Board Manager
- Search for and install “esp32 by Espressif Systems” Make sure to use version 3.3.3 and not the latest version
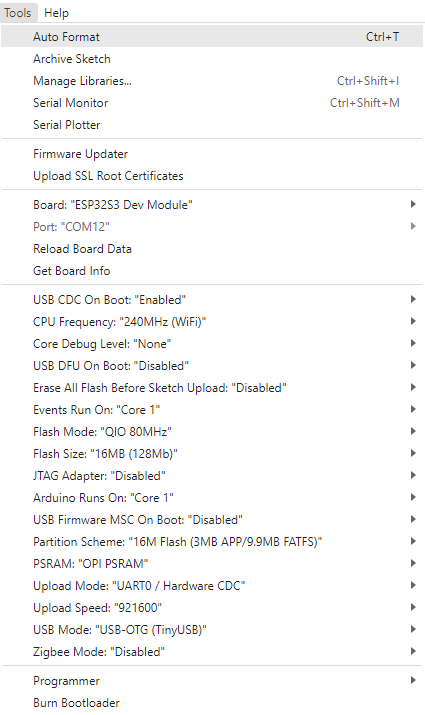
Now configure the board under the "Tools" Tab, look for the following settings towards the bottom and set them as follows:
- Board: ESP32S3 Dev Module
- Port: Select the correct COM port once the device is plugged in
- USB CDC on Boot > Enabled
- Flash Size: 16MB (128Mb)
- Partition Scheme: 16MB Flash (3MB APP/9.9MB FATFS)
- PSRAM: OPI PSRAM
- Upload Speed: 921600
- USB Mode: USB-OTG (tinyUSB)
These settings are based on the Waveshare 1.47" display model, other boards may need adjustments. Also check the picture of the settings above.
Required Libraries
Go to "tools" > "Manage Libraries"
You will need to install the following Libraries/Versions through the library manager:
- "ArduinoJson" by Benoit Blanchon v7.3.0
- "Async TCP" by ESP32Async v3.4.7
- "ESP Async Webserver" by ESP32Async v3.7.1
- "LVGL" by kisvegabor v8.3.10
- "SDFat" by Bill Greiman v2.3.0 (only needed in the most recent version on github now)
Make sure you use the correct versions as they are required!
Flashing the Code
Once everything is set:
- Click the Upload (right arrow) button in Arduino IDE.
- Wait for the compile and upload process to finish.
- If successful, you’ll see a “Done uploading” message.
- Check the serial output to see if everything launched correctly. There will be debugging logs for your convenience.
If you get errors, make sure the correct COM port is selected and the board is seated properly. Try pressing the boot/reset button on the ESP32 if needed during upload. For missing library errors
A guide for this ESP32 board can be found at This Link, it may help troubleshooting.
You can also check to see if anyone has had similar problems, or open a new issue on the github here.
If you need to get the ESP32S3 back into Flash Mode:
You can manually put the device in flashing mode if Arduino IDE stops picking it up on serial. This can happen if you need to re-flash the code at any point, as once Nomad is loaded, the device will no longer accept flash writes unless put into Flash mode. If you can access the web server, you can simply click "Flash Mode" in the admin panel. If you can't access the web server, you can do it with the two onboard buttons by holding the BOOT button, pressing the RESET button, then release the RESET button and then finally release the BOOT button. The screen should go dark, or say "Flash mode".
Editing the screen UI
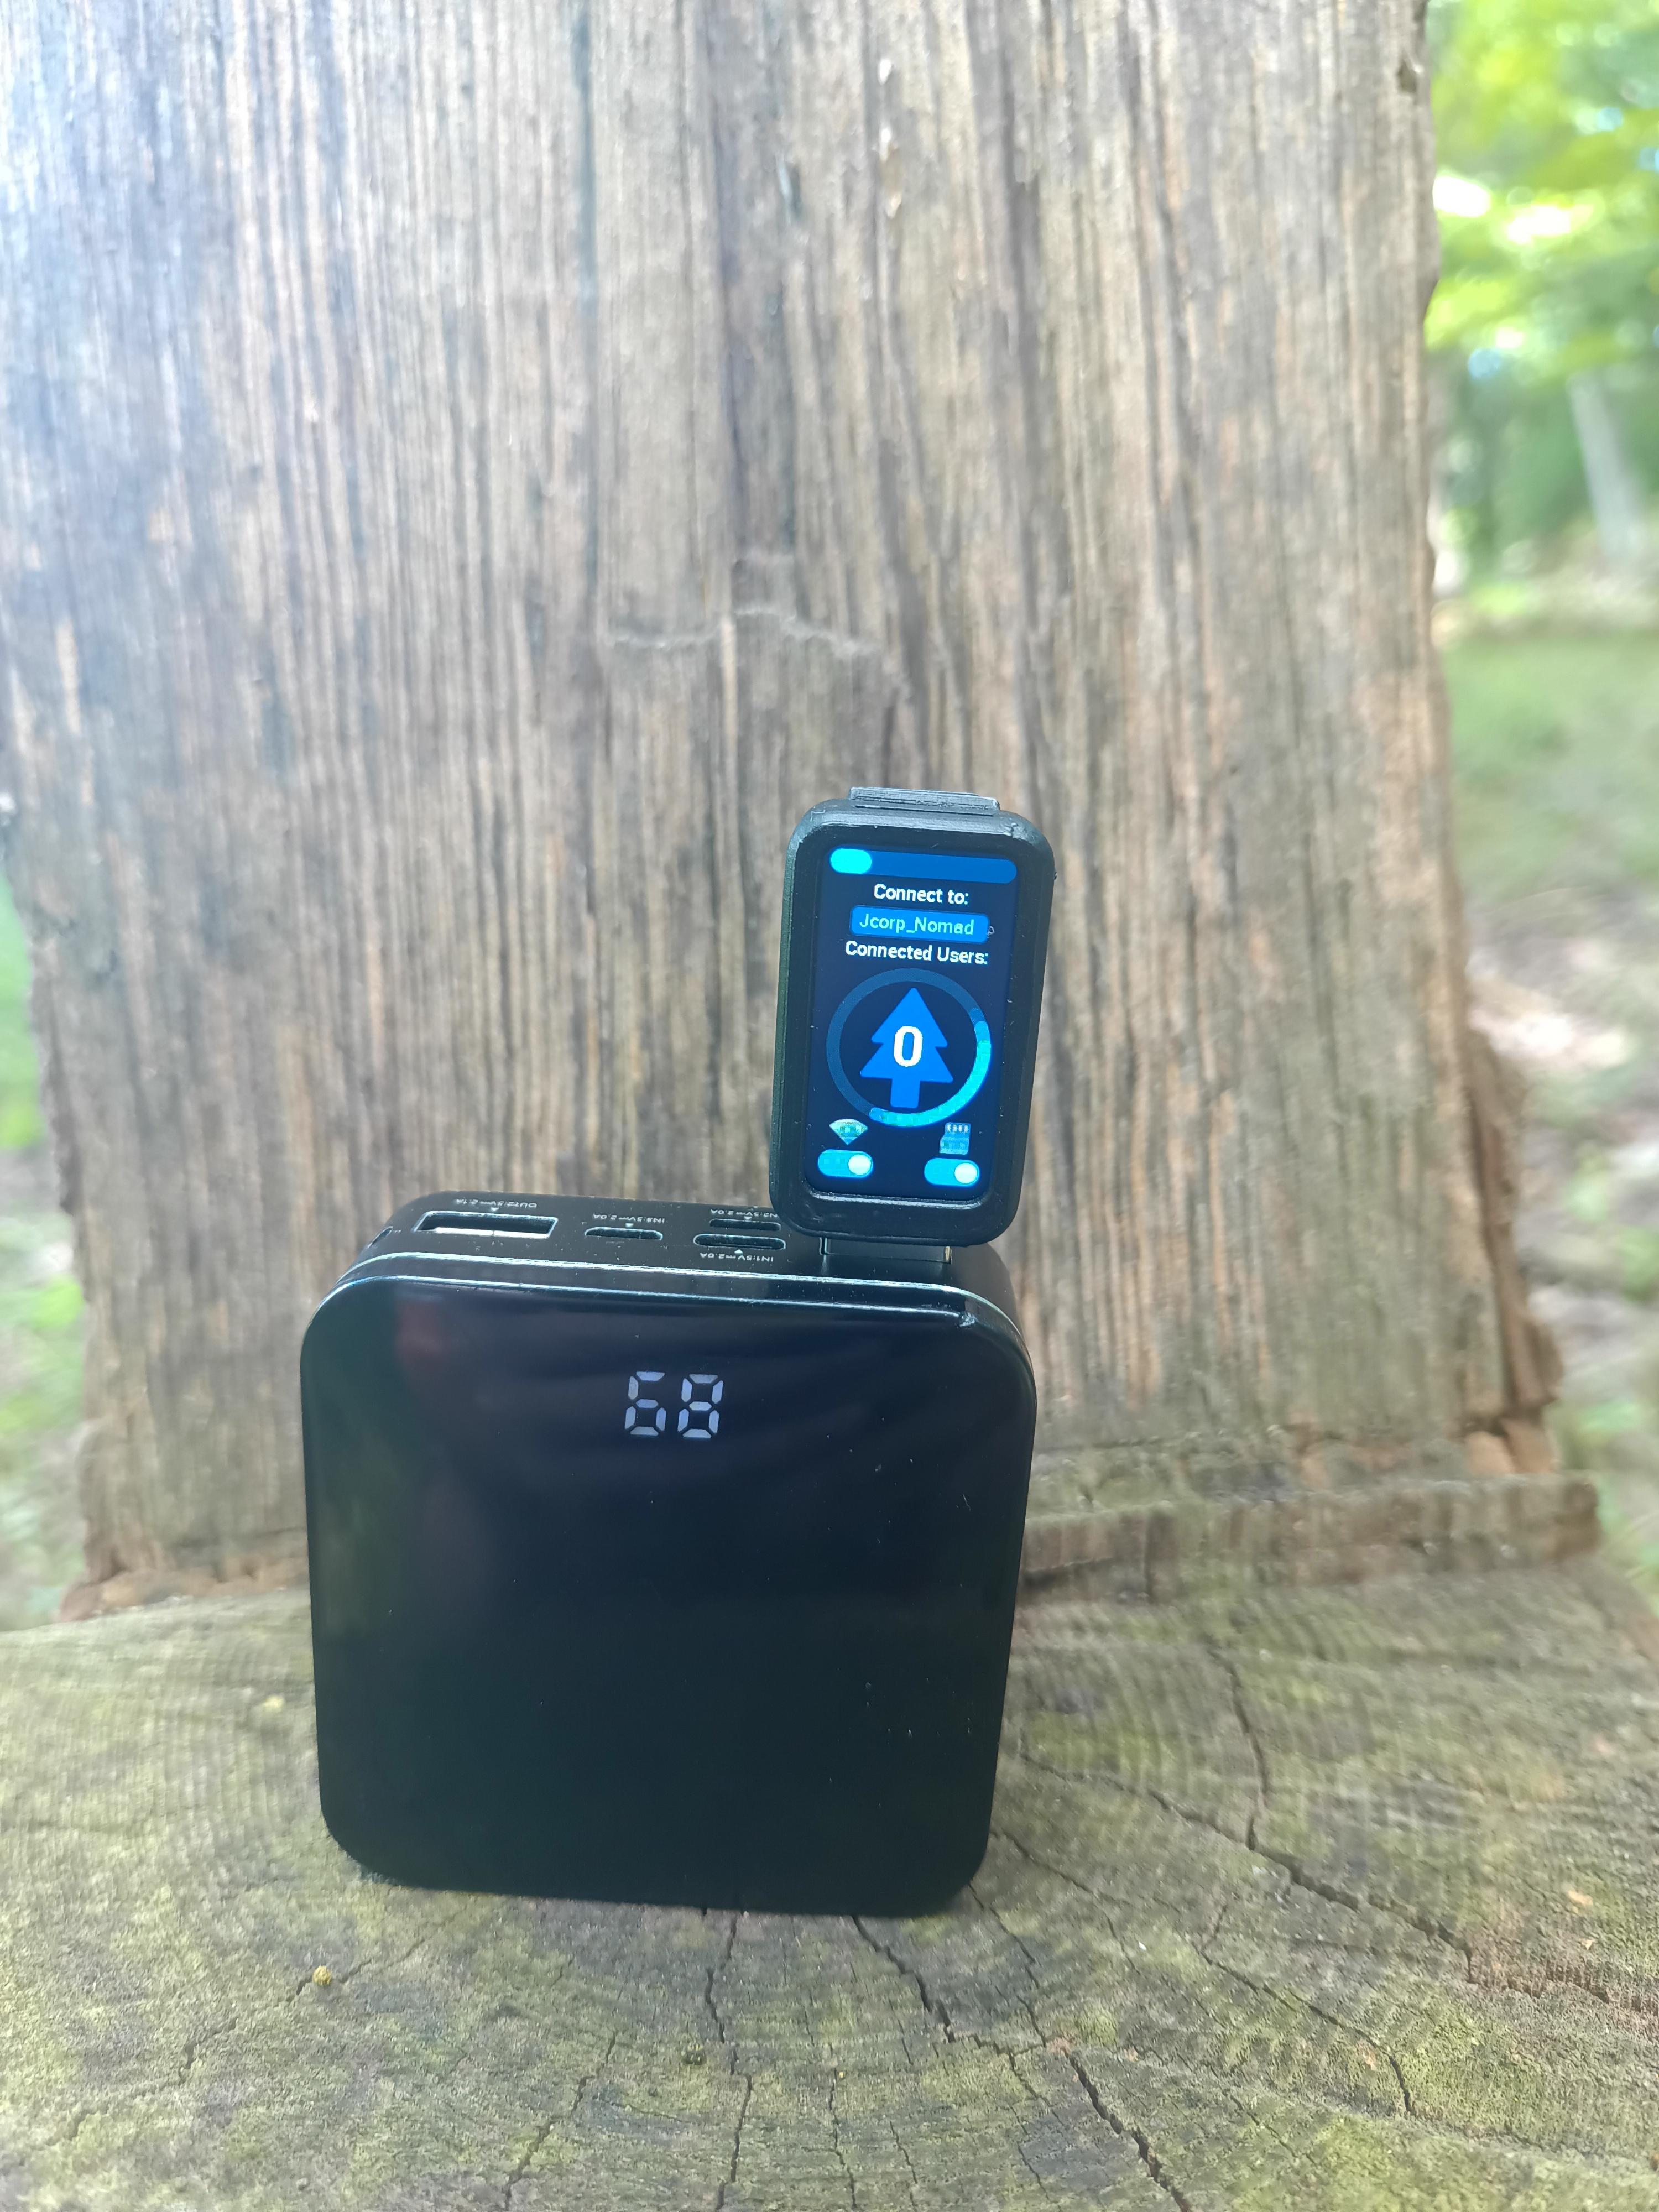
- You can change what displays on the screen, currently it displays a SD usage bar, the current SSID, # of connected users, and WIFI/SD card status.
- Editing the screen will involve downloading Squareline studios and using the free version to edit the files in the github.
- This isnt super beginer friendly, but you can find docs for squareline online and the project files are avaiable on the github under /docs.
Library issues:
- If you encounter an error while flashing along the lines of: fatal error: <libraryname>.h: No such file or directory
- It usually means your libraries are the wrong version. I recommend cleaning out everything in your library folder (usually C:\Users\<yourusername>\Documents\Arduino\libraries on windows) and updating with just the required ones.
- Then try to re-flash, it should work.
Case
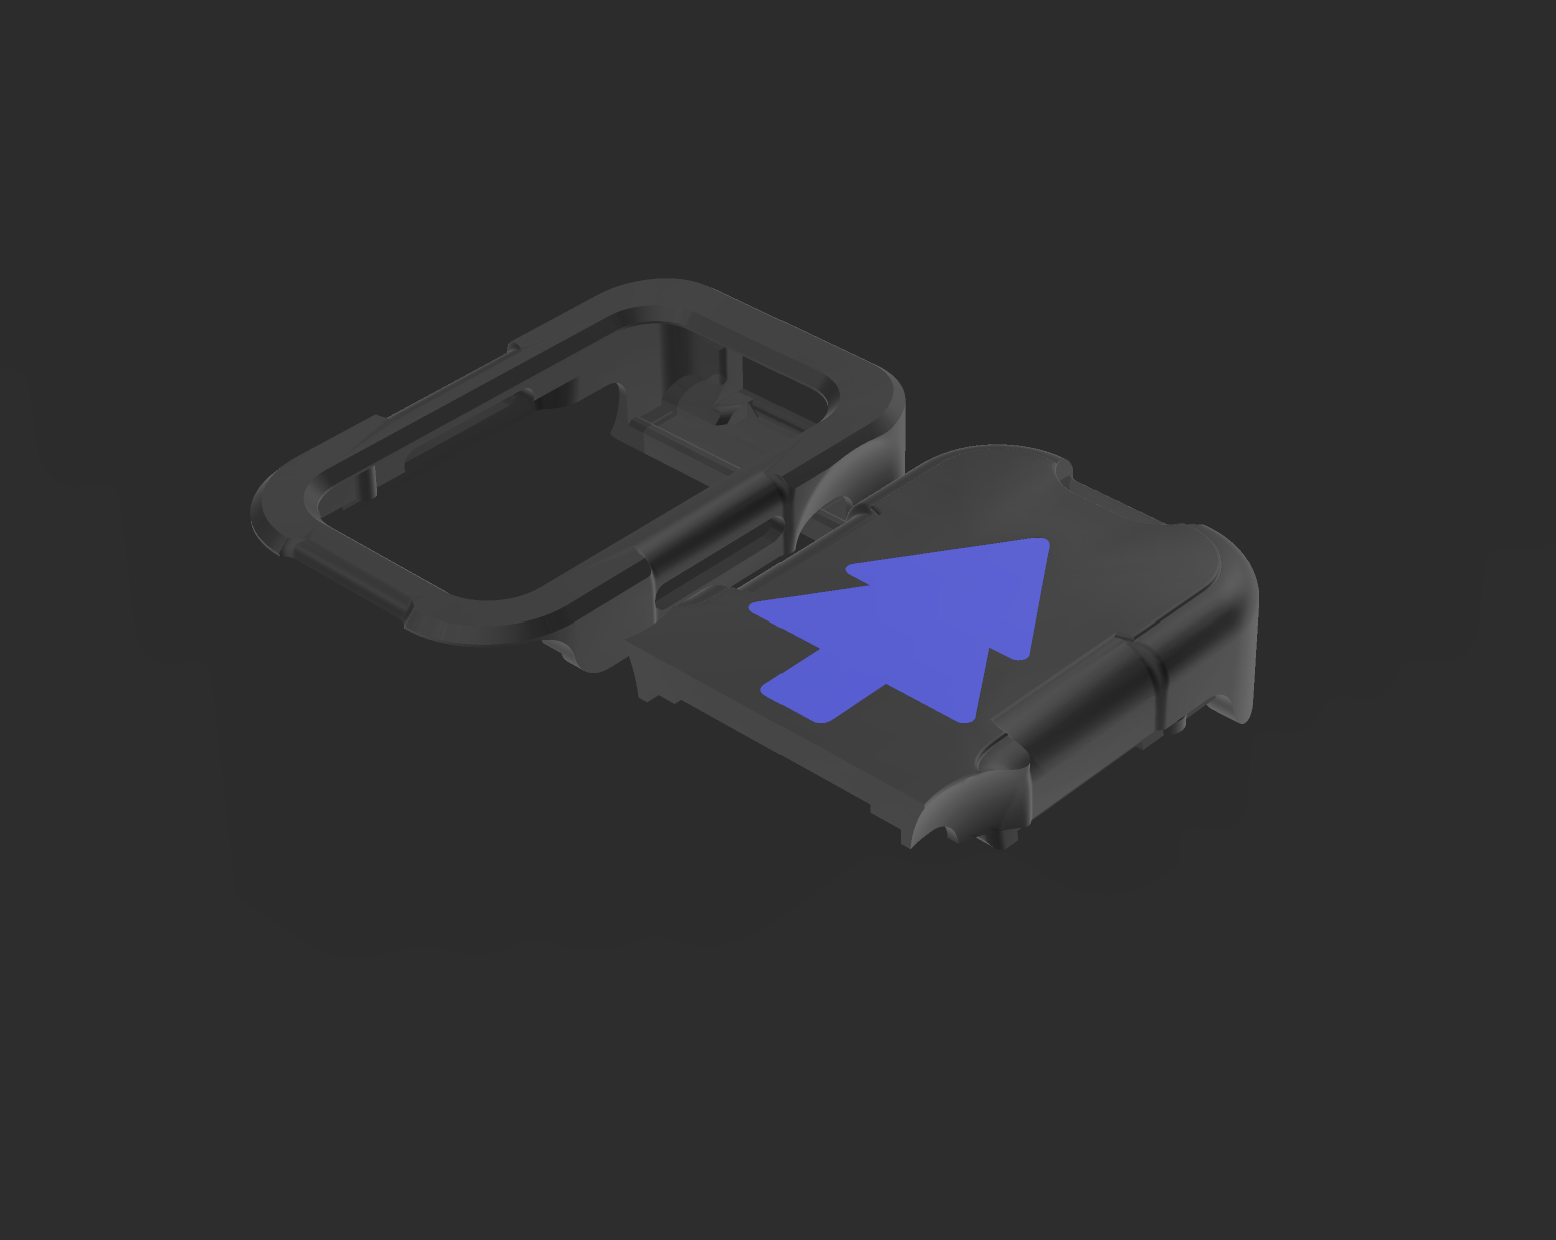
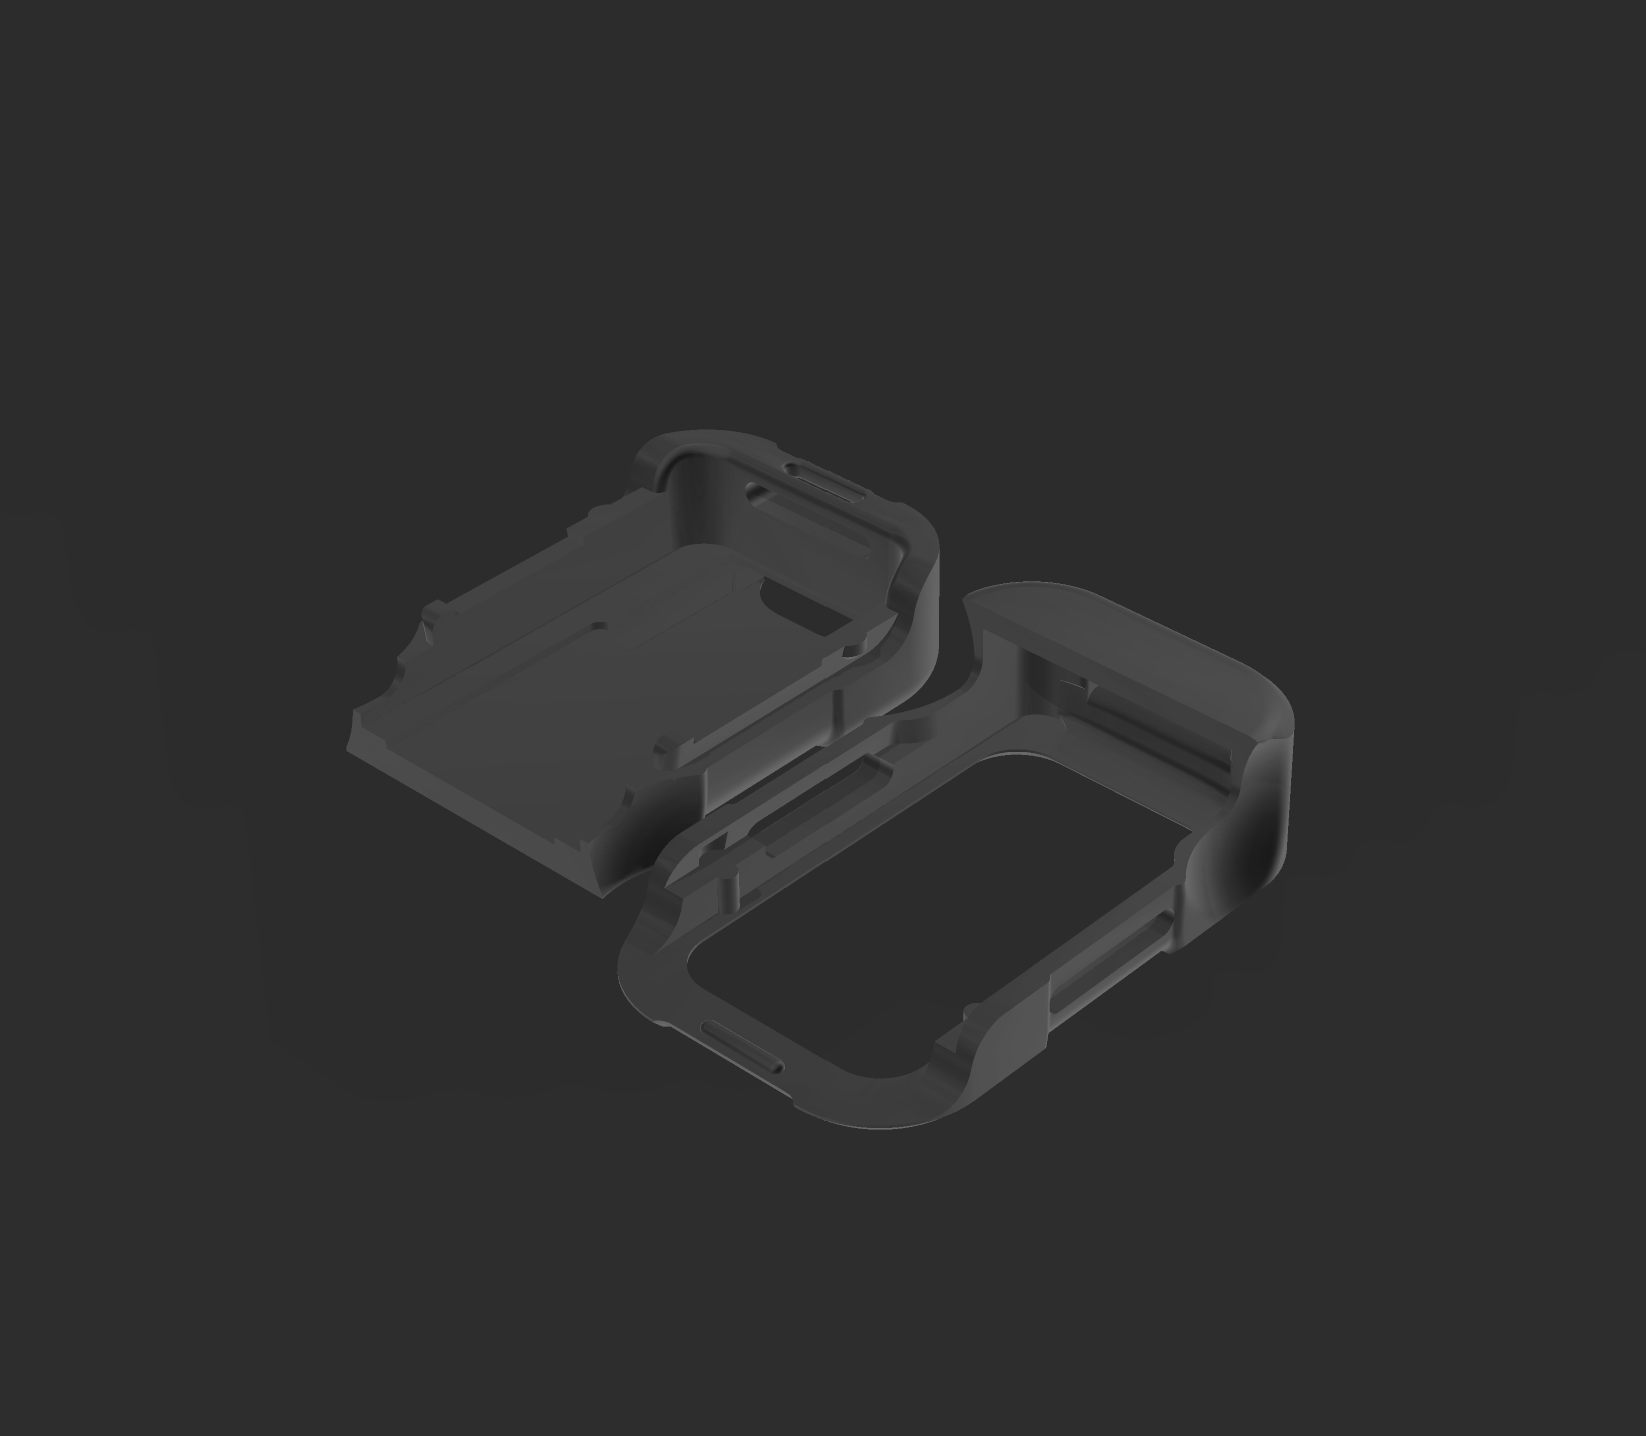
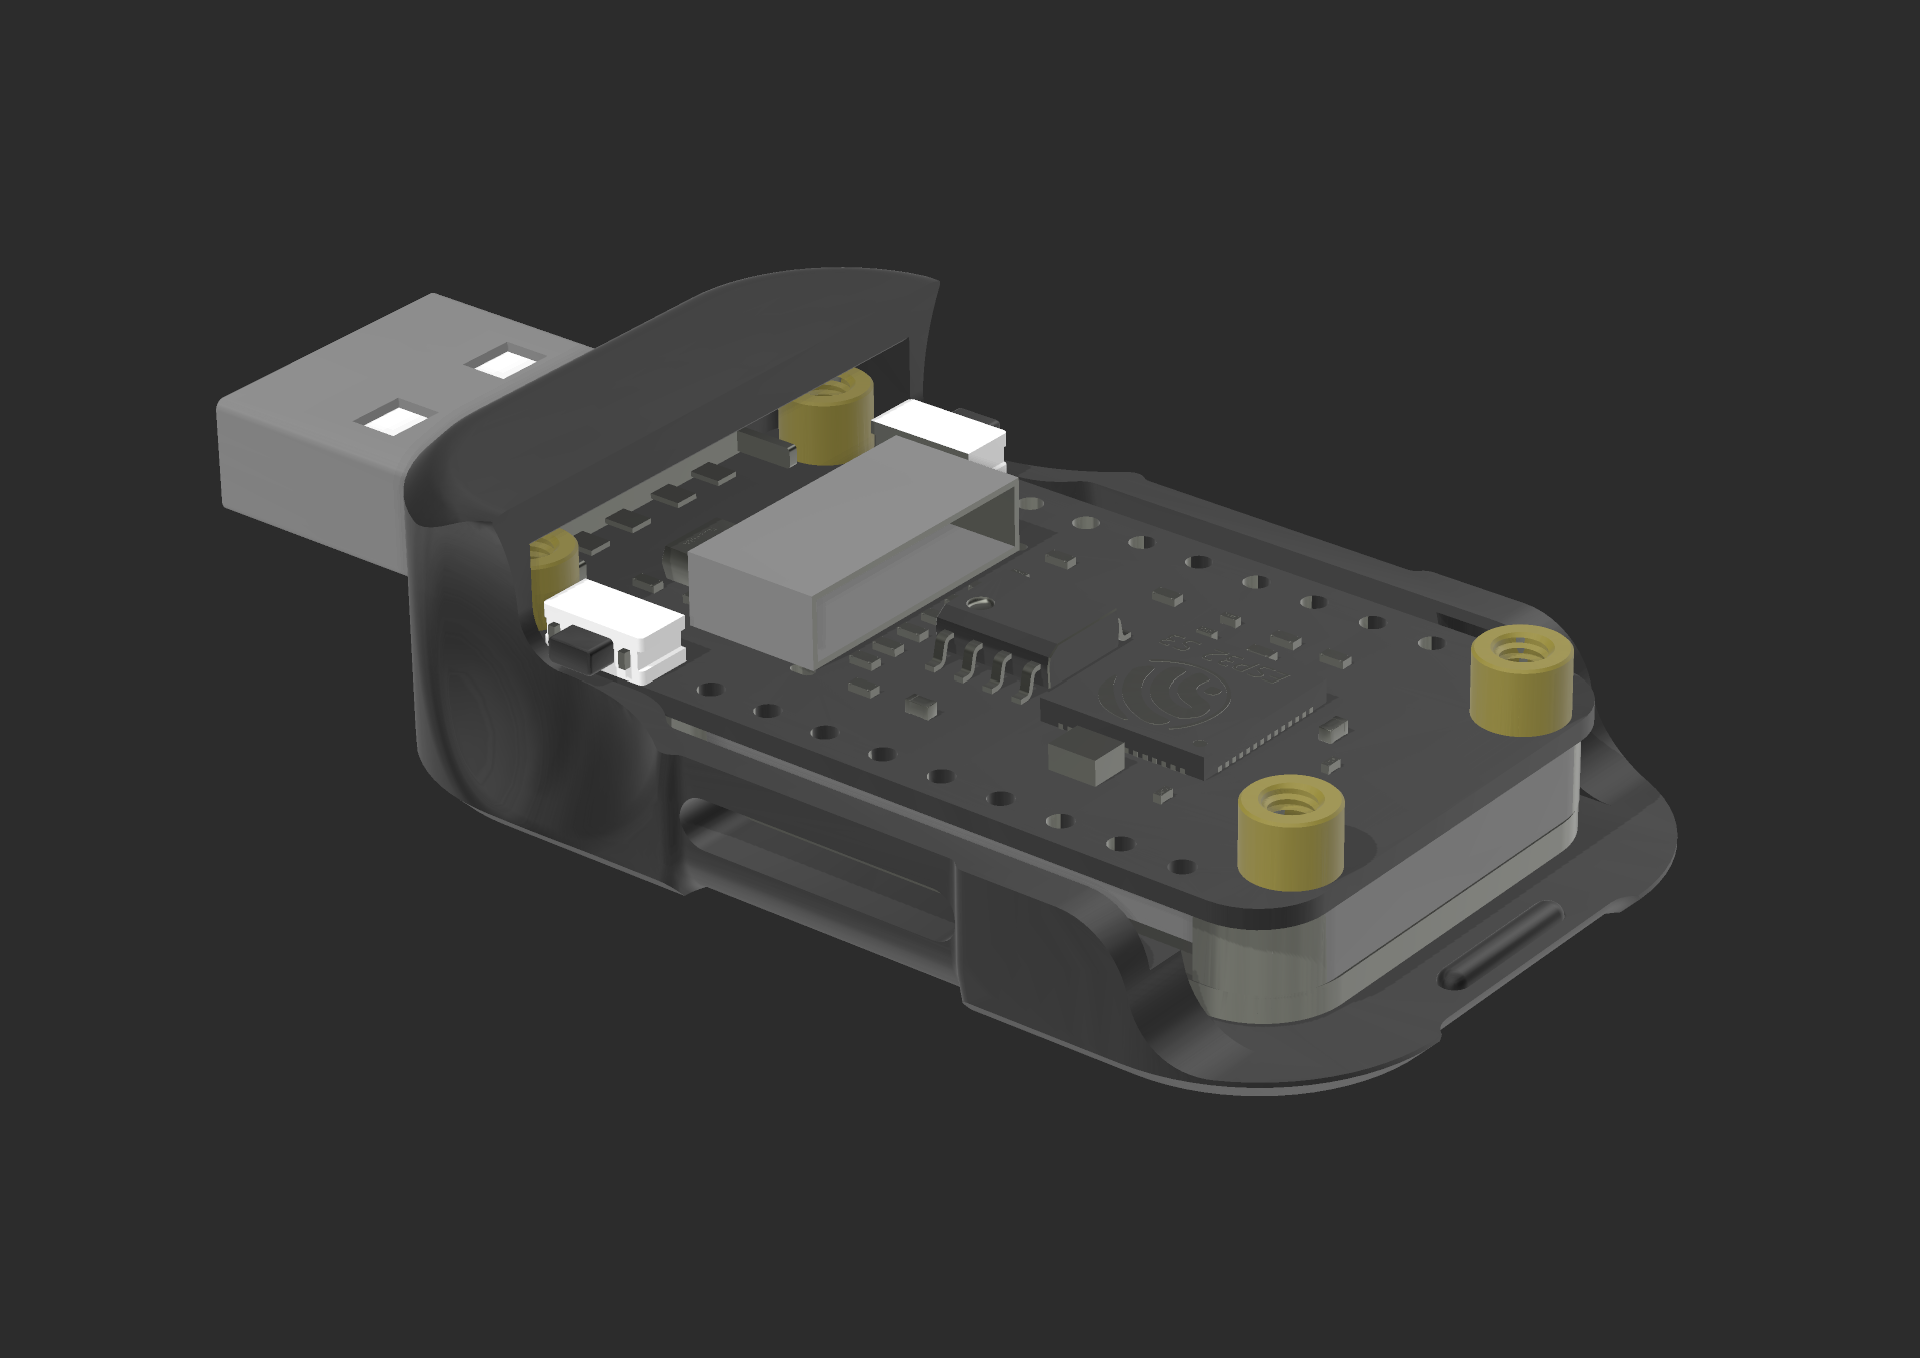
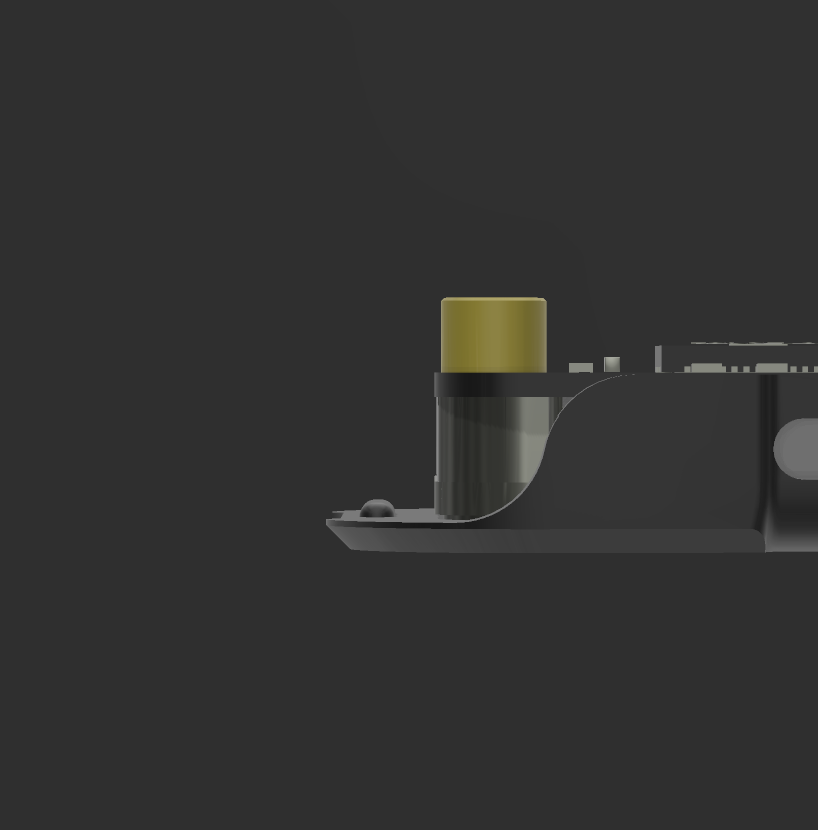
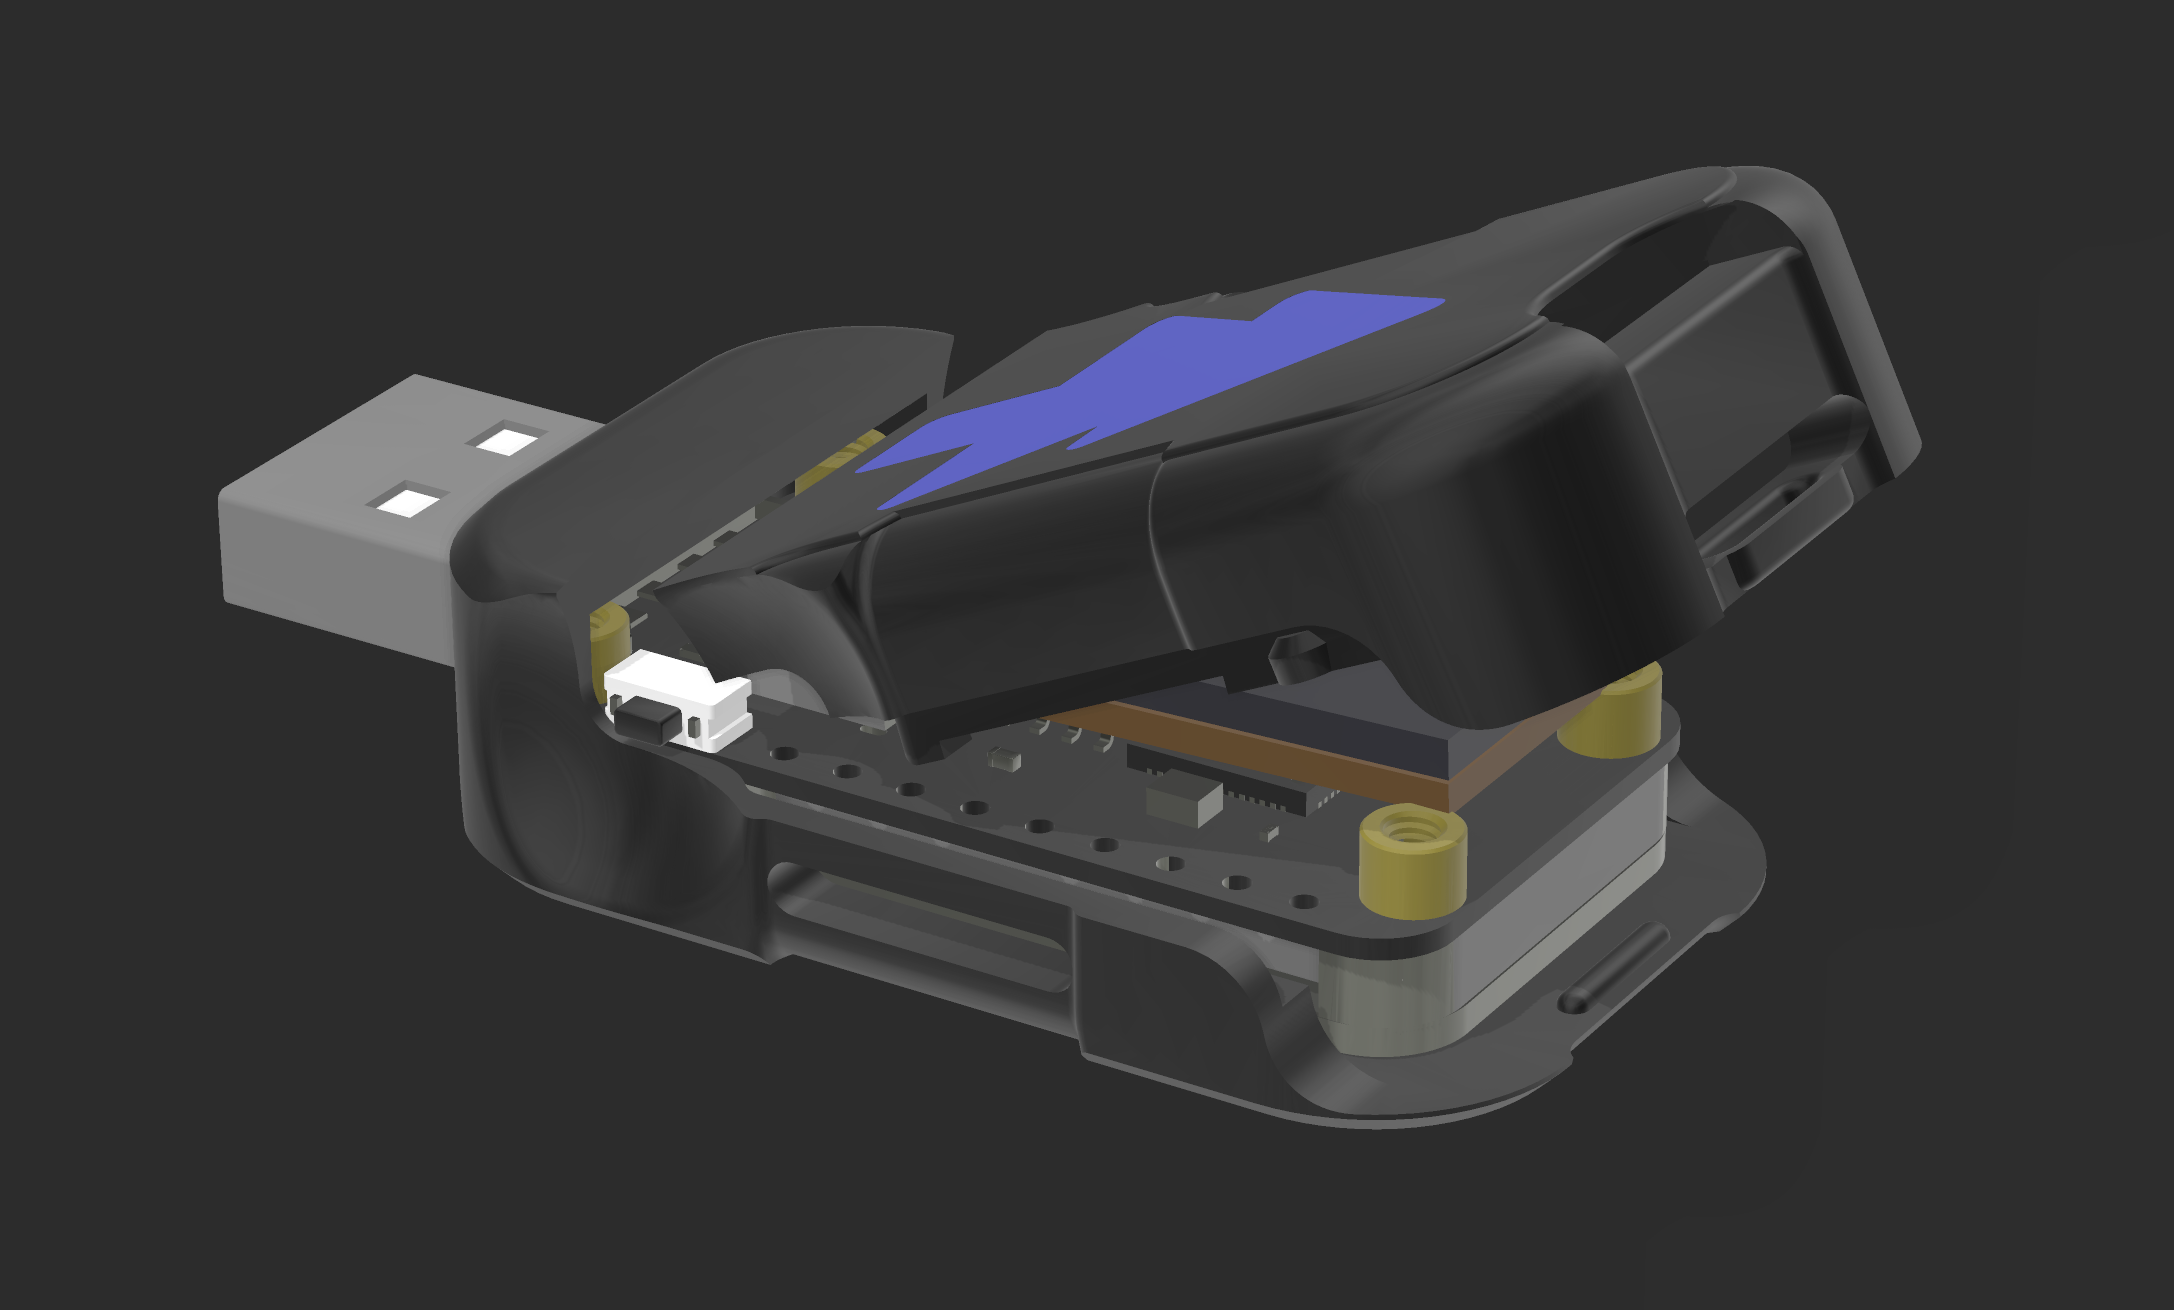
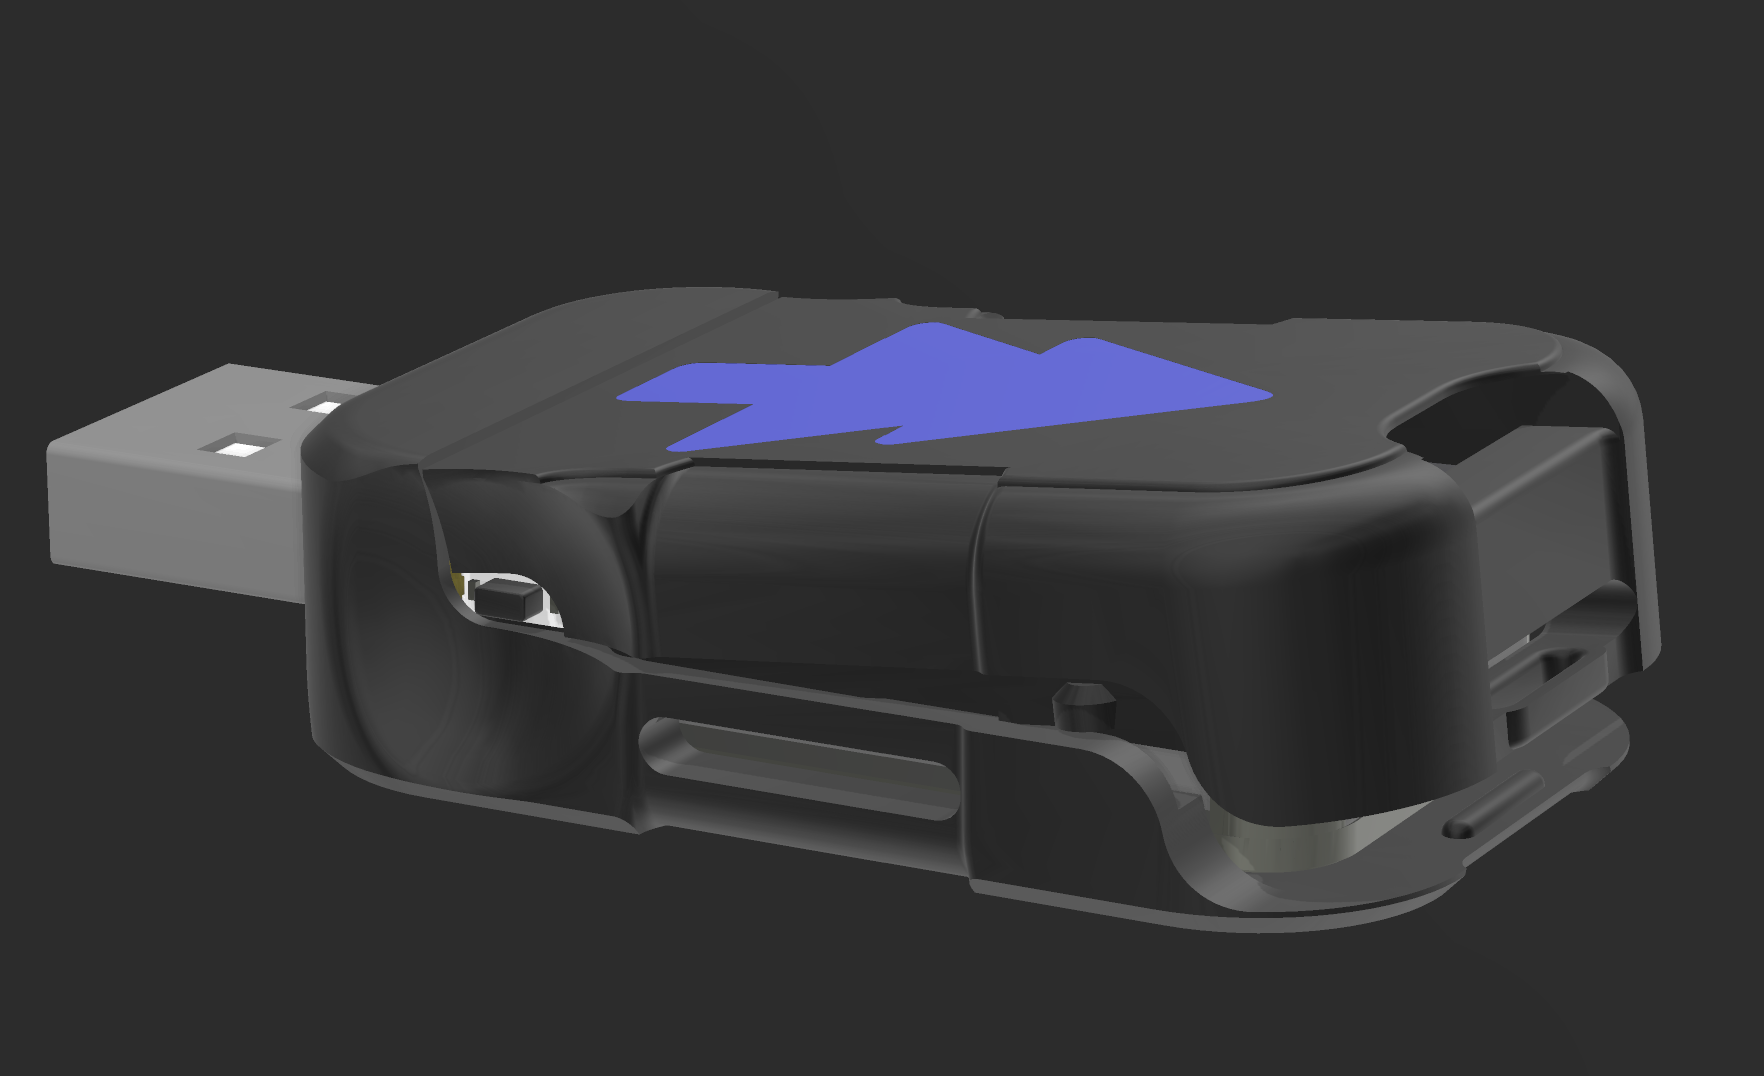
Once your ESP32-S3 board has been flashed and tested, you can enclose it in the 3D-printed case. I strongly recommend waiting until you've verified the device is fully working before putting it together. It comes apart fine, but the more often you do it, the weaker the tabs get, so you don't want to be reassembling it over and over chasing a bug you could've caught first. The new MK4 design exposes the buttons so its less risk, but still check everything first!
Heads-Up Before You Start:
- The front screen is very fragile, I broke several during development. The whole point of the case is to protect it, so go slow and be gentle whenever you're adding or removing it. You should never need to remove the top section of the case when done.
- Test everything before assembling. Seriously. Connect to the Wi-Fi, open the menu, stream a file, then move on to the case.
- If you're not confident in your printer's accuracy, print 1% larger (scale to 101%). If it ends up loose you can always scale back down.
The New Case (Two Parts)
The Mk4 case is two pieces: a top section that frames the screen, and a bottom section that snaps on and holds the SD card extender.
1. Fit the top section (screen) first. Start by cleaning out the USB port opening so nothing obstructs the fit. It should be a tight fit, but not blocked, if there's leftover print material in the way you won't get the board in. This assumes a good quality print, or at least a cleanup job.
Slide the board into the top section until the screen is properly framed. A couple things to watch:
- Be very careful of the ribbon cable at the front, just above the USB port. That's the part that tends to break.
- Make sure the screen doesn't slide off the little acrylic shell it's glued to. Sometimes the boards just aren't assembled well from the factory, so keep an eye on it as it seats.
When it's in right, there should be a small gap at the tab on the back of the top section (the end furthest from the USB plug).
2. Test-fit the SD card extender in the bottom section. Before final assembly, make sure the SD card extender drops into the bottom section, and that your SD card slides into the extender. If it's fighting you, you can trim down the side of the SD adapter a little to help it slide. Get this right up front, you'll be pulling the card in and out a fair bit when loading media, so you want it smooth.
3. Snap the bottom on. Once the extender fits, plug it into the ESP32. Then take the bottom case at about a 45° angle and snap the two front connectors (the ones closer to the USB) in first. Lower the back and gently snap it into place so the SD card extender slots into its cutout.
- This shouldn't take much force, be delicate. Too much pressure here can crack the Waveshare board's screen. If that does happen, it's not the end of the world: the screen only shows basic status info, and Nomad works completely fine without it. (you just lose style points)
About Heat!
This device runs hot. Like, really hot. The ESP32-S3 chip and SD card area can get toasty under load, especially when multiple people are streaming content. Quality PLA shouldnt warp, but if you can get PETG use it!
Here’s how to keep it cool:
- Add a tiny thermal pad or dab of thermal paste between the ESP32-S3 chip and the case shell
- Keep an eye on SD card health, high temps can shorten their lifespan, using a quality card will help greatly, the SD extender also helps to reduce heat exposure.
- Cutting down a few office staples makes a good heatsink
- Keep in mind I just aircool mine without issues, no thermal paste or anything, its not going to explode, but depends on your goals / prefomance. all of the testing has been done air cooled.
So far I haven’t burned out a board, but I wouldn’t rule it out either. Just plan for heat, and you’ll be fine.
*update more than a year into development, still havent burnt out a board, and optimizations have reduced the temps a bit, but its still a pretty hot little guy.
Downloads
Media Prep & Best Practices
Let’s be real, how you get your media is up to you. Personally, I rip my own DVDs and Blu-rays, which gives me full control over the format and quality. But however you source your movies, shows, music, and ebooks, there are some important formatting rules and optimization tips you’ll want to follow to make everything work smoothly on Nomad.
Supported Formats (Very Important)
The ESP32-S3 isn’t exactly a media powerhouse, so we have to keep things lightweight and consistent.
- Movies & Shows: .mp4, .webm, .m4v, .mov, .mkv, .ts, .m2ts
- Music: .mp3, .flac, .wav, .ogg, .aac, .m4a
- Books: .pdf, .epub, plus comics as .cbz
- Archives: .zim (offline Wikipedia and other ZIM wikis, needs prep, see below)
- Images: .jpg, .jpeg, .png
- Each Movie, Show folder, and Book should have a matching image file for the poster/cover.
Tip: The Nomad Card Tools bundle (Nomad-Card-Tools.zip on the card) can bulk-compress all the cover images in your Movies, Shows, and Books folders. This one's optional, everything works without it, but smaller covers load noticeably faster in the web UI, so it's worth doing if you've got a big library. It overwrites the originals (no backup), so it'll ask you to confirm first.
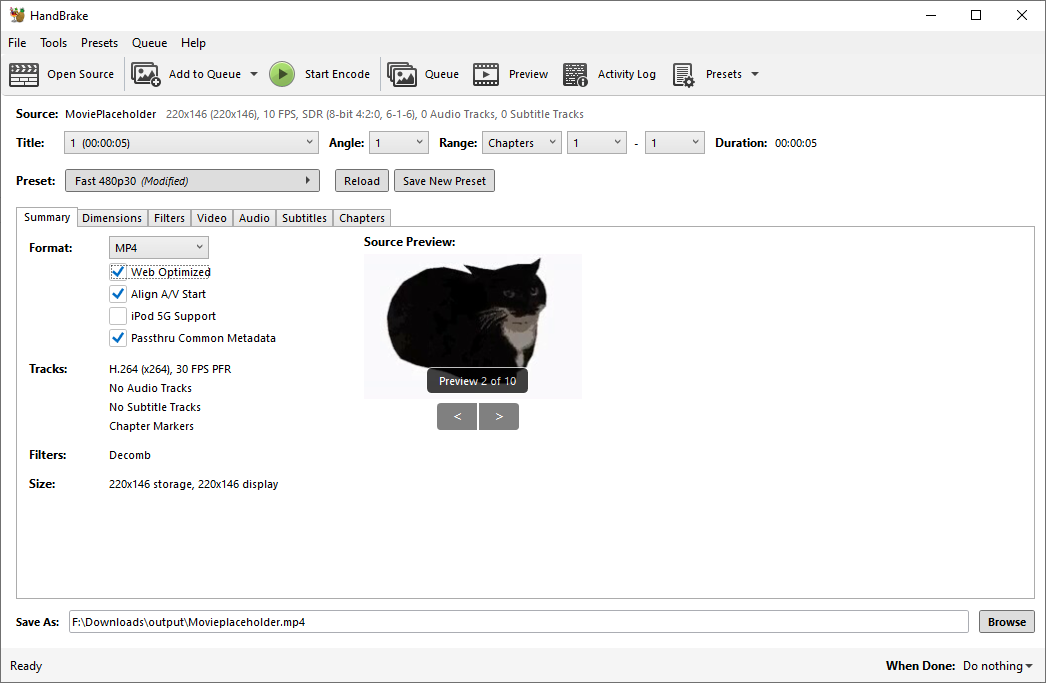
Optimize Videos with HandBrake
HandBrake is an awesome free tool for converting and compressing videos. I use it to prep almost all of my media for Nomad.
Why compress?
- Lower file size = faster load & more streams at once!
- Avoids crashes during playback
- Saves SD card space = more media
- ensure files are under the 4GB file limit
Recommended HandBrake Settings
- Open HandBrake and drag your video file in, or select a folder with multiple and queue them.
- Under Format, choose: MP4 (or any of the compatible types)
- Under Video tab:
- Preset: Fast 480p (check web optimized on)
- Video Codec: H.264 (x264)
- Framerate (FPS): Same as source, Constant Framerate
- Quality: Use the RF slider, set it to around 22–24 for a good size/quality balance
- Under Audio tab:
- Keep a single stereo track, AAC codec
- Under Subtitles:
- Burn In any you need.
- If you don't burn them in (say for anime) they will not show up. so be sure to do this if you need it.
- File naming:
- For episodes, I recommend naming like:
- S01E01 - The Pilot.mp4
- Keeping things alphabetized will prevent playback order issues, the index sorts alphabetically so plan for that.
Once you're happy with your settings, click "Start Encode" and you’re good to go. For more detailed steps check online, handbrake is widely used and well documented. If you are in a rush or have tons of files (or just willing to use more space just doing the fast 480p preset and web optimizing is usually fine for most uses.
It is also worth noting nomad will suport higher quality video files, just at the cost of performance. It very much depends on the encoding, but under (very) ideal conditions I have gotten Big Buck Bunny (common 10min demo vid) to play at 4k 60FPS, with minimal buffering) though of course this limits the device to one stream at a time and isnt recomended.
Rebuilding the Index
Nomad reads a prebuilt index instead of scanning the whole card every time, that's what keeps browsing and search fast even on big libraries. You need to rebuild it whenever you add or remove media.
Most of the time you can just do this on Nomad itself from the Admin panel (Library Index → Full Scan), no PC required. That's the normal way to do it day to day.
The Card Tools bundle also has a Rebuild Media Index option that does the exact same job from your computer. It's more stable and faster for really big libraries, or handy if the on-device scan ever chokes on something. Either way it builds a index on the card in a couple seconds. Use whichever is convenient, they produce the same result.
Adding Offline Wikipedia / ZIM Archives
This is the big Mk4 feature, and it's the one job you have to do from the PC. Unlike everything else on the card, you can't just copy a .zim file over, the device needs it prepped and indexed first. So the Card Tools' Add ZIM Archives option is the only way to get ZIM content onto Nomad, even a tiny one. Dragging a raw .zim onto the card won't work.
Grab any ZIM you want from the Kiwix library, Wikipedia comes in everything from a tiny ~0.8 GB set up to the full ~140 GB with images, plus Gutenberg, TED, and more. In the tool, point it at a single .zim or a whole folder of them:
- Drop several .zim files in one folder and it'll bring them all in at once in a single pass.
- Adding more later is safe. Whatever's already on the card stays put, the tool just integrates the new archives in alongside your existing ones and rebuilds the search so everything works together.
- Huge files get split automatically to fit the card, so the 140 GB Wikipedia is no problem.
One thing to be deliberate about: you can't pull out a single ZIM once it's on there. There's no "remove just this one" option, so if you ever want to drop one archive you'll have to wipe the ZIM data and re-add the ones you're keeping. Not a huge deal, but think a little about what you're loading before you commit a giant set.
Once it's done, the archives show up under the Archives page on Nomad. Embedded videos and EPUB books inside them open right in the browser too.
Clean Folder Structure
Nomad depends on a specific folder and file layout to function properly. Here’s what it should look like:
Naming Tips
- Keep file names simple and clean (avoid emojis, long symbols, or extra punctuation)
- For shows, using SxxExx - Title helps avoid weird sorting issues
- Covers must match the name of the main media file/folder (e.g., Interstellar.mp4 + Interstellar.jpg)
Conclusion & What’s Next
Thanks for Checking Out the Jcorp Nomad Project!
What started as a quick side project has turned into months of tinkering, debugging, and learning new skills I never expected to pick up. I didn’t originally plan to publish this, so it’s been amazing to see how much interest it’s gotten.
Nomad works well today, but there’s still plenty I want to add, and plenty of room for others to take it further. Some ideas in the pipeline:
- Offline Maps – Inspired by the Backcountry Beacon project, store map tiles on the SD card so you can see your position without cell service. I’ve tested a few approaches, but it’s not quite nailed down yet.
- Retro Game Emulation – Using emulatorJS to support ROMs and other games that can be run fully in a web browser.
Custom CSS- Control styles similar to jellyfin.DONE! Custom themes and css have been added to the admin panel!- Chat Page - Similar to pirate box's chat feature, works as a message board for connected users
- Whiteboard page - lets you draw, but also has a shared board that all connected users can see / work on.
If you decide to build your own version of Nomad, I’d love to see it. Share photos, fork the repo, or drop a comment if you get stuck or come up with a cool feature idea. This project is open source so others can help it grow in ways I can’t on my own.
Happy hacking ✌️
— Jackson Studner
Links:
Buy a Prebuilt (please just build one)