LCD(16x2) Interfacing With Arduino Using 3 Pins
by Rajkumar2506 in Circuits > Arduino
5764 Views, 13 Favorites, 0 Comments
LCD(16x2) Interfacing With Arduino Using 3 Pins


To interface 16x2 LCD six pins are needed.To save your arduino pins and easy interface of LCD 3 pin LCD interface board is needed.The board is available in cheap price at market.This board uses ic 74HC595N. Which is Shift Register that receive data serially and out the received data parallel at the output pins.So this logic is used to interface LCD using 3 Pins
Material Needed
- Arduino Uno
- 3 pin LCD Board
If you don't have 3 Pin LCD Board click on below link to know how to make it
Interfacing LCD Using IC 74HC595N
- 16 x 2 LCD Display
Software Installation
In order to program ARDUINO. You need to have Arduino IDE installed in your computer.This Software is available in internet.Which is an open Source.
Updating Libraries
To use your 3 PIN interface Board .You need to Update the ARDUINO LiquidCrystal libraries.Which is located at the following location
Local Disk(C)-->Program Files-->Arduino-->libraries-->LiquidCrystal.
Open the LiquidCrystal folder and there are some files inside that folder.Cut and paste these files Some where on your pc. Because you need to use these files when you interface LCD using BreadBoard Method.
Now Download and Extract the following libraries.Which is an updated Liquid Crystal libraries to use 3 Pin LCD Board.Copy the extracted files and paste it in the following Location
Local Disk(C)-->Program Files-->Arduino-->libraries-->LiquidCrystal.
Note: open the folder of Liquid Crystal and paste it.
Now you have updated your Arduino Liquid Crystal libraries
Downloads
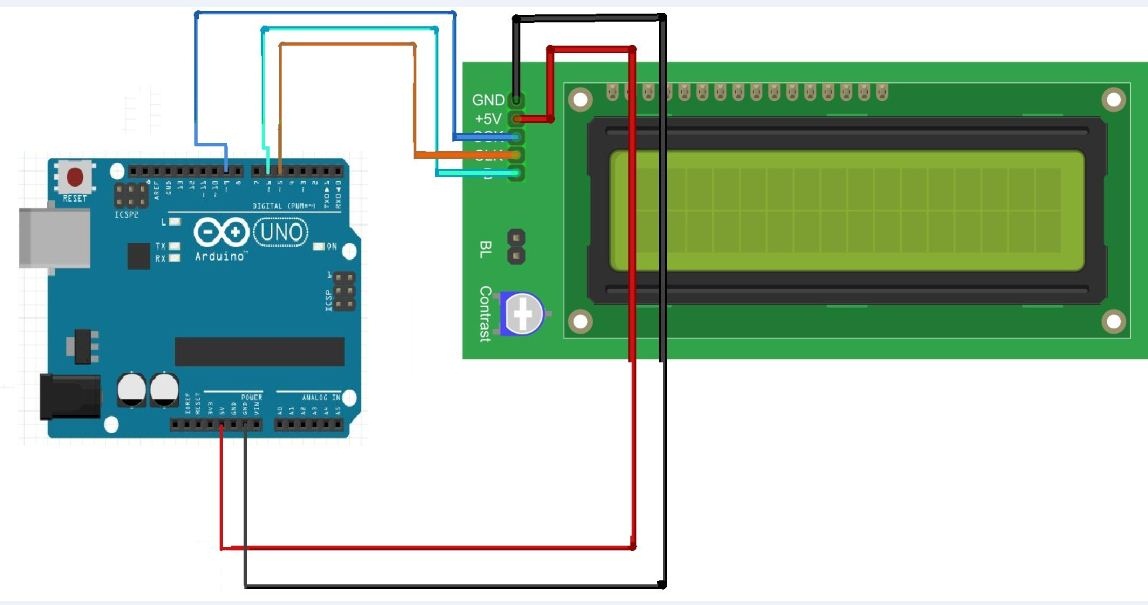
Schematic Diagram
Program Code(Upload the Following Code to Your Arduino)

#include <wire.h>
#include <LiquidCrystal_SR.h>
// Defining LCD and Pins for interfacing.
LiquidCrystal_SR lcd(6, 5, 9);
// Pin 6 - Data Enable/ SER, Pin 5 - Clock/SCL,Pin 9 -SCK
void setup(){
lcd.begin(16,2); // Initializing LCD
lcd.home (); // Setting Cursor at Home i.e. 0,0
}
void loop(){
lcd.print("3 Pin LCD"); // Print Something on LCD
delay(2000); // Waiting for a while
lcd.clear(); // Clearing LCD
lcd.print("INSTRUCTABLES");
lcd.setCursor(0, 1); // Setting cursor to column first and second row.
lcd.print("");
delay(2000);
lcd.clear();
}
Video
 interfacing with Arduino Using 3 Pins)