Laser Cut Gameboy

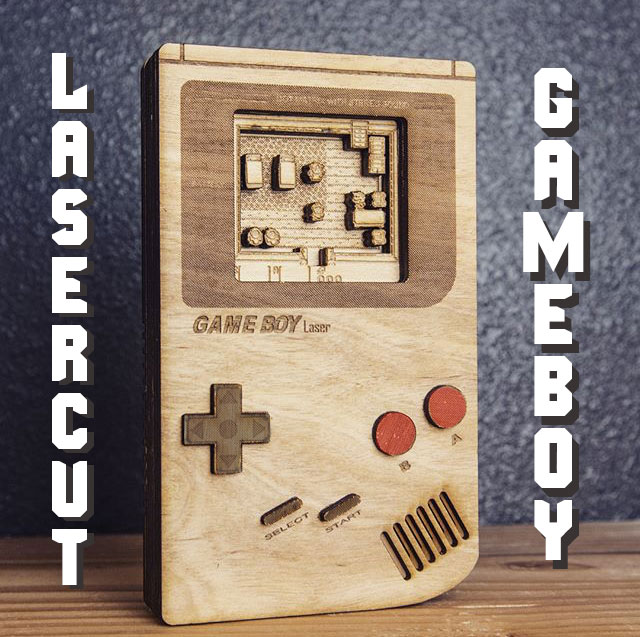
When I began learning how to use a Laser-cutter, my first project was an attempt to pay homage to one of my favorite consoles as a kid - The Nintendo Gameboy.
I created a scale replica of the original DMG Gameboy, with interchangeable diorama cartridges. My first choice in games was one of my all-time favorites - The Legend of Zelda: Link's Awakening. It's a blast putting this project together.
Here's how:
Materials


For materials, I used:
Laser cutter (I used a Epilog 40W laser cutter)
Inkscape (or similar software)
12x24 sheet 3mm plywood (fits 1 Gameboy and 1 game)
Wood glue
Red and Black paint
12x24 sheet 6mm acrylic (for the jig)
1/4 20 nuts and bolts (for the jig)
Clamps
Measuring for Reference


Since I was making this laser cut Gameboy to scale, I first measured my Gameboy and cartridge to get the dimensions I would need to create the cutouts for the Gameboy and cartridge in Inkscape.
The measurements for the cartridge were:
55mm x 60mm (or 2.165" x 2.362")
Using 3mm plywood, I figured I would need 8 layers for the cartridge and diorama
The measurements for the Gameboy were:
90mm x 148mm (or 3.543" x 5.827")
Using 3mm plywood, I figured I would need 11 layers to match the 32mm thickness of the Gameboy
Drawing the Cartridge


Using the dimensions I got from measuring the cartridge, I went into Inkscape and created a square, then sized it to shape. I duplicated the shape 8 times
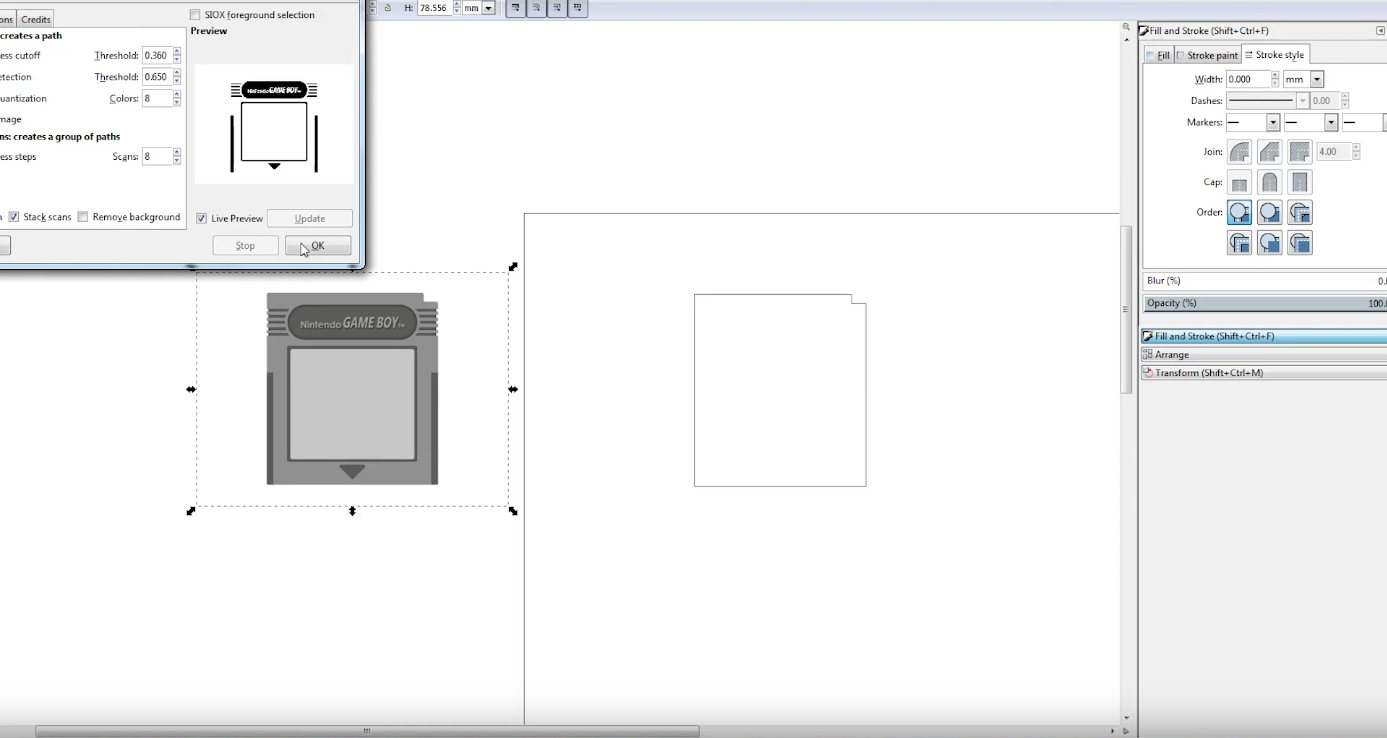
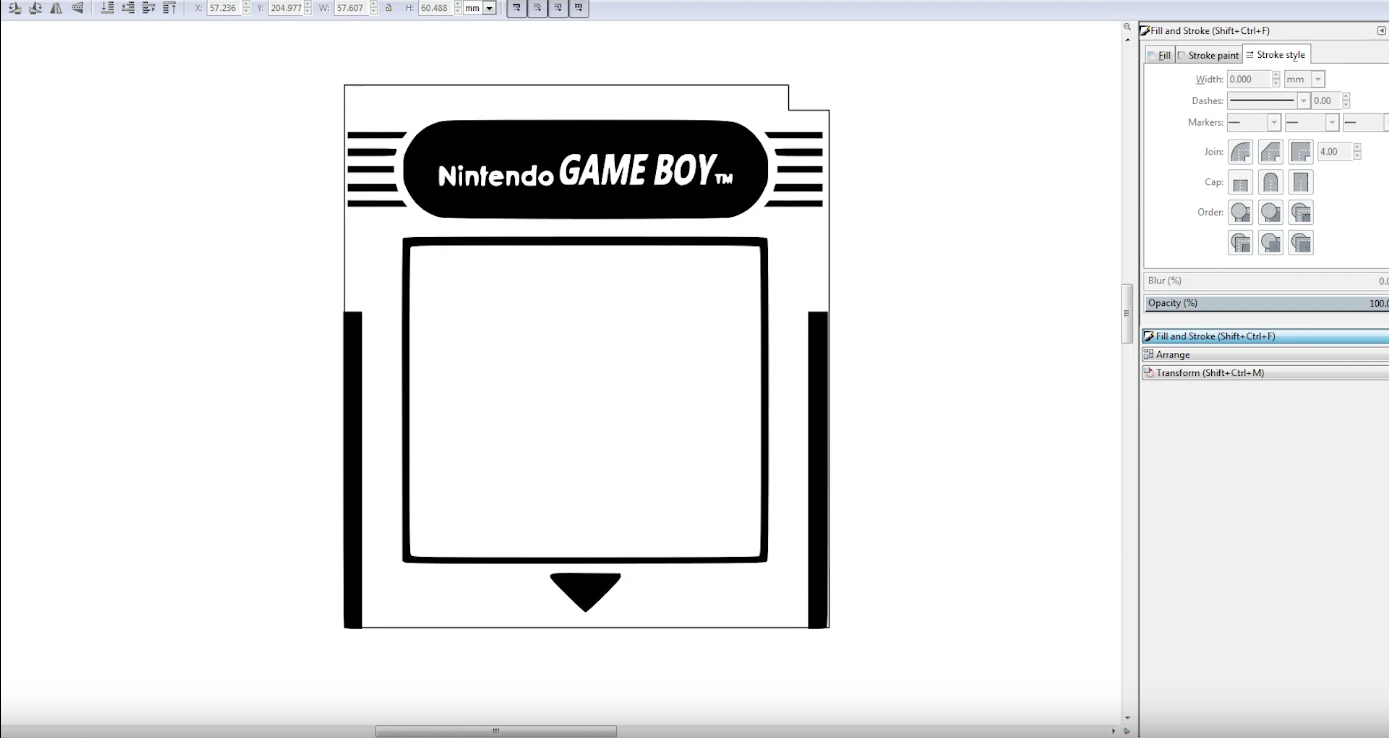
I found a picture of the face of a cartridge, and used Trace Bitmap to create a vector layer for the outline I created. I shaped the top layer to have the indents on the side (to match the angled portion on the sides of the actual cartridge).
I found a graphic for Link's Awakening, used Trace Bitmap, and created a vector for the Logo that I then put on the top layer for the cartridge.
I found a scene from the game that I wanted to use for the inset diorama, and... you guess it!... used trace bitmap to create vectors for each of the characters and shapes from the scene.
I made the diorama 3 layers deep, with the background as the 3rd layer. I created 2 copies of each character and element that I wanted to stand out in the diorama.
Drawing the Gameboy


Following this same process as the cartridge, I drew the shape of the Gameboy and used a graphic to create vectors for each of the buttons on the front of the Gameboy.
I scaled down the last few layers to match the rounded back of the Gameboy, and created elements for the design of the battery cover and indents on the back. I also added a personal logo (bit of self promotion)
Combining the Two

After a few attempts, and a little trial and error, I figured out a way to get each of the elements for the Gameboy, and the catridge, to fit on one 12x24 sheet.
After figuring out the arrangement, I saved the file as a PDF.
Cutting Out on a Laser Cutter


Considering the tedium of the previous steps, this step is very easy. I just put the 12x24 sheet in the laser cutter, loaded the PDF, print to the laser printer, and set the material to 3mm wood vector and raster.
Press a button, and it's off!
Creating the Jigs


Before putting all the pieces together, it was crucial to have all the pieces line up exactly to allow for the cartridge to slide in and out of the Gameboy easily. To help with the glue-up process, I took the outline of the Gameboy and the cartridge, and cut several layers of each out of 6mm acrylic. I had a solid piece as the base, and cut a 1/4" hole in the corner of each piece to allow me to run a nut and bolt through each piece to keep them together.
Putting It All Together


Whether by hand or with the help tweezers, it is now time to glue all the small character and element pieces together for the diorama. I used tweezers. I glued the 2 layers for each element together, and then glued the elements to the background, trying my best to make everything line up. I layered the cartridge in the jig starting with the logo and stacking through to the top of the diorama.
Minus the front piece and back piece, the Gameboy pieces all stacked on top of each other in the jig, with the last scaled down pieces on top.
Then it was just adding the top piece of acrylic and clamping the jig together (making sure to put even pressure with the clamps to ensure a straight glue-up
Unpacking the Jigs


Because glue is... well, glue, some runoff will happen when gluing the layers together - this is why I used a bolt and nut to hold the acrylic pieces together rather than gluing them together - to allow me to take the layers apart later if I needed to.
Depending on how much glue you used, this is an easy process. Or if you went a little heavy on the glue, you may need to pry the cartridge and Gameboy pieces from the jig.
But after you do, they should look straight, and even, and fantastic!
Paint


To give the Gameboy some subtle touches, I watered down some black and red paint, and then brushed a few coats on the buttons. It was subtle, but added enough color to make the face of the Gameboy really stand out.
Create More Games!

Now that there is a template for the Gameboy and the games, you can go in and create different cartridges for different games, or make cosmetic alterations to the Gameboy to customize it however you want.
Metroid II cartridge? Sure!
Tetris? That goes without saying!
Baseball? Of course!
Put your cousin's name on one? You can do that too
Enjoy!

Now that everything is done, you can compare the wood variant of the Gameboy to its inspiration. Both look amazing, although you will, admittedly, get more play-ability out of one over the other.
It'll still look amazing though
Try Different Materials


The great thing about the template I made is that you can experiment with different materials for the Gameboy and/or for the cartridges. Acrylic Gameboy with a wood game cartridge? Looks amazing! Maple Gameboy with a Walnut cartridge?! Why not?!?
The possibilities are endless really.
Watch the Video!

Now you know how to do it, watch it being made!
I have more geeky projects you can check out here on Instructables, so be sure to follow me for when I put out new Instructables
AND you can watch more of my project videos HERE
AND you can also follow me on Instagram @onceuponaworkbench