Layered Hilda Christmas Scene
by GeekDadDIY in Workshop > Woodworking
1803 Views, 6 Favorites, 0 Comments
Layered Hilda Christmas Scene

On the tenth day of Christmas my true love gave to me - a layered Christmas scene inspired by Netflix's Hilda!
After spotting a Woodland Scene kit on clearance, I got the idea to turn it into a scene out of the Netflix show Hilda! The kit ended up being a great template for putting together this Hilda project.
Here's how I made it:
Supplies
Supplies I used: (with affiliate links)
Woodland Scene Kit
1/4" pine board
Acrylic paint pens - https://amzn.to/2rct0fO
Tools I used:
K40 laser cutter - https://amzn.to/2sKq0aB
Scroll saw - https://amzn.to/2Vi84lf
Pull saw -
Picking the Pieces


I opened up the woodland scene kit and decided on which pieces I wanted to keep. Not wanting the scene to be too crowded, I decided to take out the tree, as well as the animals (that would be replaced by Hilda characters)
Painting the Backdrop


I took the paint pens and started painting the backdrop scene. I started with the trees, then added ornaments to the trees (this is a Christmas scene after all). Using blue and white paint and a brush, I painted the mountains.
I used a hairdryer to help speed up the drying process, then put the background piece into the base.
Adding the Hills


Using green paint I painted the hills, used the hair dryer to dry the piece, then added it to the base.
Changing the Tree


The tree that came with the kit was a generic one, so I used a reference picture from Hilda to redraw the tree in the style of the show.
I took the tree to the scroll saw, then cut out the outline I had drawn.
I used the paint and paint pens to color the tree, and add some ornaments, then added the tree to the base.
Designing the Characters


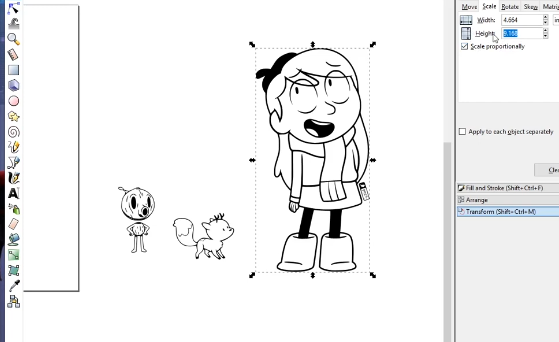
Finding reference pictures for Hilda, The Wood Man, and Twig, I brought each of the pictures into Inkscape.
Using the 'trace bitmap' function I created a vector for each of the characters, and then drew an outline around each.
I scaled each of the characters to what I thought would be a good size for the scene, and then exported them to my laser cutter software.
Prepping a Board


I grabbed a piece of 1/4" pine, and started to measure out what I needed. Based on the size of the characters I only needed a 6"x8" piece, so measured and cut accordingly.
Etching the Characters


I put the piece of pine into my laser cutter, and loaded the character file into the software (K40 whisper is what I use).
I first raster engraved to get the darker areas, then vector engraved to outline all the features of each of the characters.
Cut and Paint


I took my character board to the scroll saw and cut out the outline of each character. I made sure to leave a section at the bottom of each character to fit into the slot at the base
With the characters cut out, I used the paint pens to paint each of the characters. After each character was painted and dried, I added them to the base.
Show It Off!


Now that it's done, it was just a matter of finding a good spot to put the scene, and show off this cool looking layered scene with characters from one of my favorite new shows!