Layered Sculpture Lamps


Besides being my advanced version of procrastination, this project should tell you two things about me:
- I work off stress with my hands.
- I really like lamps (click here to see my IoT networked ones).
Anyway, this was the byproduct of a need to work off stress from the summer internship search (the sting of rejections...). Inspiration came from a raindrop lamp I saw a while ago, in addition to layered veneer sculptures that I've made before.
What's included in this tutorial: I made three total "sculptures:"
- The first design is taken and slightly altered from my previous veneer sculptures; go to that tutorial for instructions on how I created the floral design.
- The second design demonstrates how to do an "offset path" function on an image traced from the internet.
- The third design features fiddling around in Adobe Illustrator (any graphics software would suffice) to create designs, similar to the first design.
Side note: If you like this project, votes in the Papercraft Contest would be appreciated!
Materials
- paper (anything ranging from light-weight cardstock to printer paper would be fine. Even thinner is great too in terms of allowing light to shine through, but then there's less structural integrity. The thicker your paper, the less light will shine through -- keep that in mind!)
- X-acto knife or box cutter -- something that can cut through paper with precision (I know, not my description of a box cutter but it worked for me...)
- glue
- light source (I used LED string lights that I had lying around, but plan to move to wall scone suitable lighting later. Be careful with what you chose: remember that paper can burn and start fires if you use light sources with high heat dissipation. LED is usually quite safe, but incandescent bulbs, etc not so much. [Thanks to KeifD for pointing this out!])
- For making your own designs: any vector graphics software (Adobe Illustrator is always my weapon of choice, but Inkscape is a free alternative.)
Flower Design: Illustrator


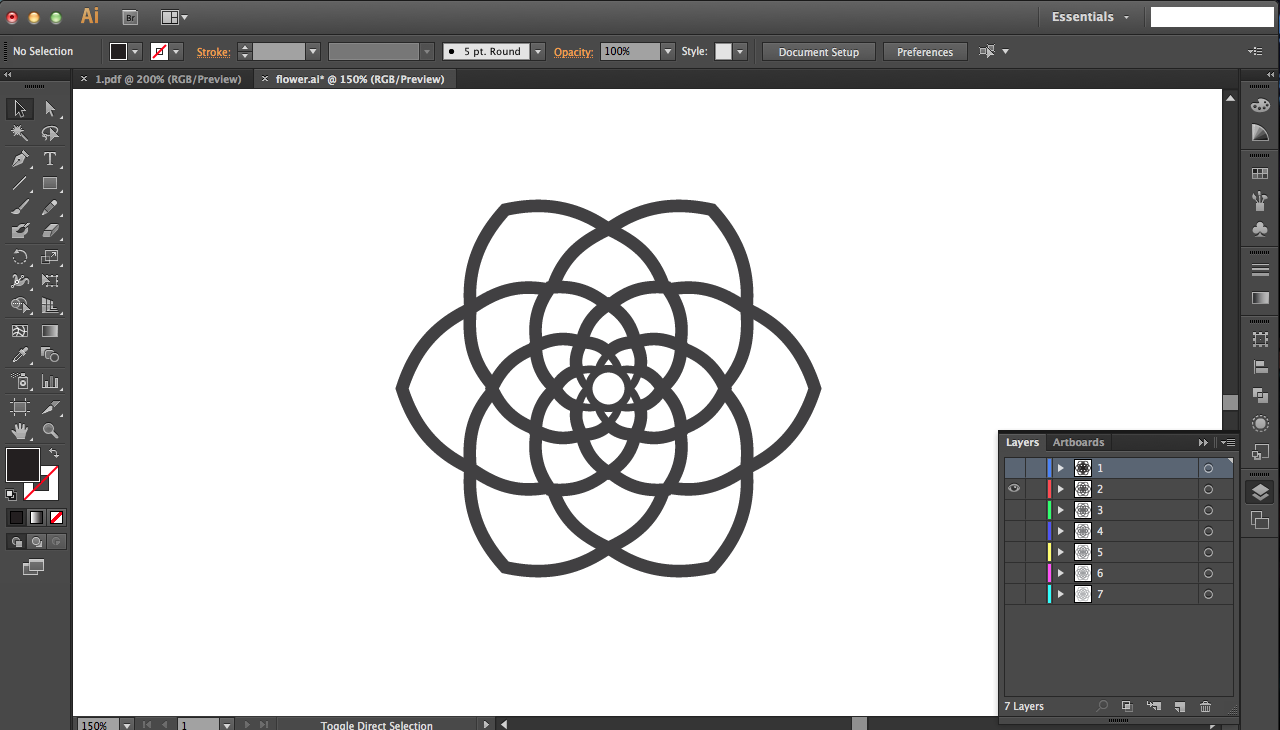
This flower design is taken and altered slightly from my other instructable on layered designs. You can check that instructable out to see instructions on how I created this design, but files are also attached in a zip folder to this step.
Once you have all these designs, the idea is that you open each pdf (or you can use the Illustrator file if you have it) and enlarge it on your computer screen. Then you can put your paper (patterned side down) on the screen and trace the design onto the paper before using your knife to carefully cut it out. Painstaking, but unless you have a laser cutter or other CNC cutter, that's the best option.
To size the layers correctly, listed below are the length x height dimensions (for overall size of 5"):
- 3.7615" x 3.3349"
- 3.9436" x 3.4959"
- 4.1348" x 3.665"
- 4.3355" x 3.8425"
- 4.5463" x 4.0289"
- 4.7676" x 4.2246"
- 5" x 4.4302"
You can use the transform tool in Illustrator in the .ai file of the zip folder to resize all the dimensions to scale if you want something bigger or smaller than 5".
Downloads
Assembly


After you've cut out all the flowers, you'll need to attach them with small spacers. I did this but cutting out 1/8" x 1/4" rectangles (yes, these are tiny..) and folding the long edges to meet at the middle (see second image above).
Then I just glued the tabs (apply glue on one of the folded sides) onto one face of each cutout: I put them at intersection points of the cutout for stability. Once the tabs were dried on each cutout, I applied more glue on the other side of the tab and stacked the cutouts.
Now the sculpture's done! To light it up, I just balanced it on top of string lights for now (the bulbs fit surprisingly well in the hollow areas). Notice that both the top and bottom make for interesting lamps...
NOTE: Be careful with what you chose for a light source: remember that paper can burn and start fires if you use light sources with high heat dissipation. LED is usually quite safe, but incandescent bulbs, etc not so much. (Thanks to KeifD for pointing this out!)
RWBY Rose: Design Part 1

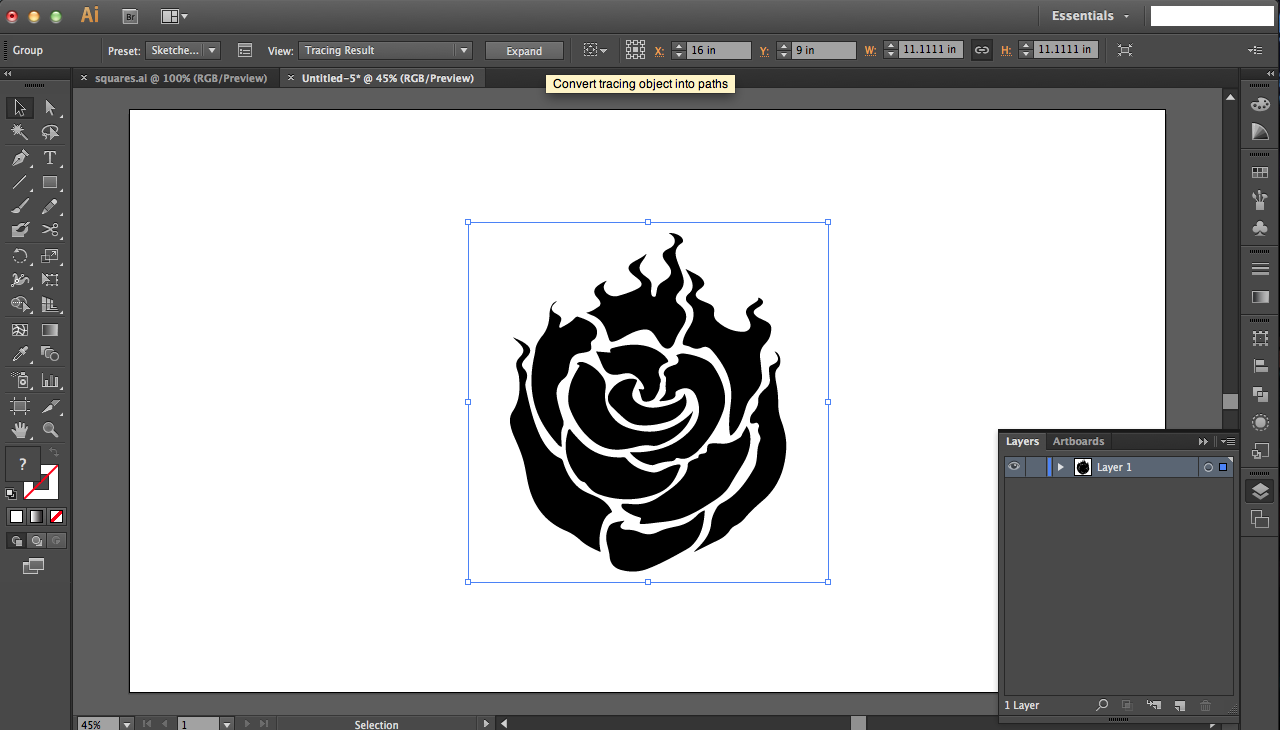
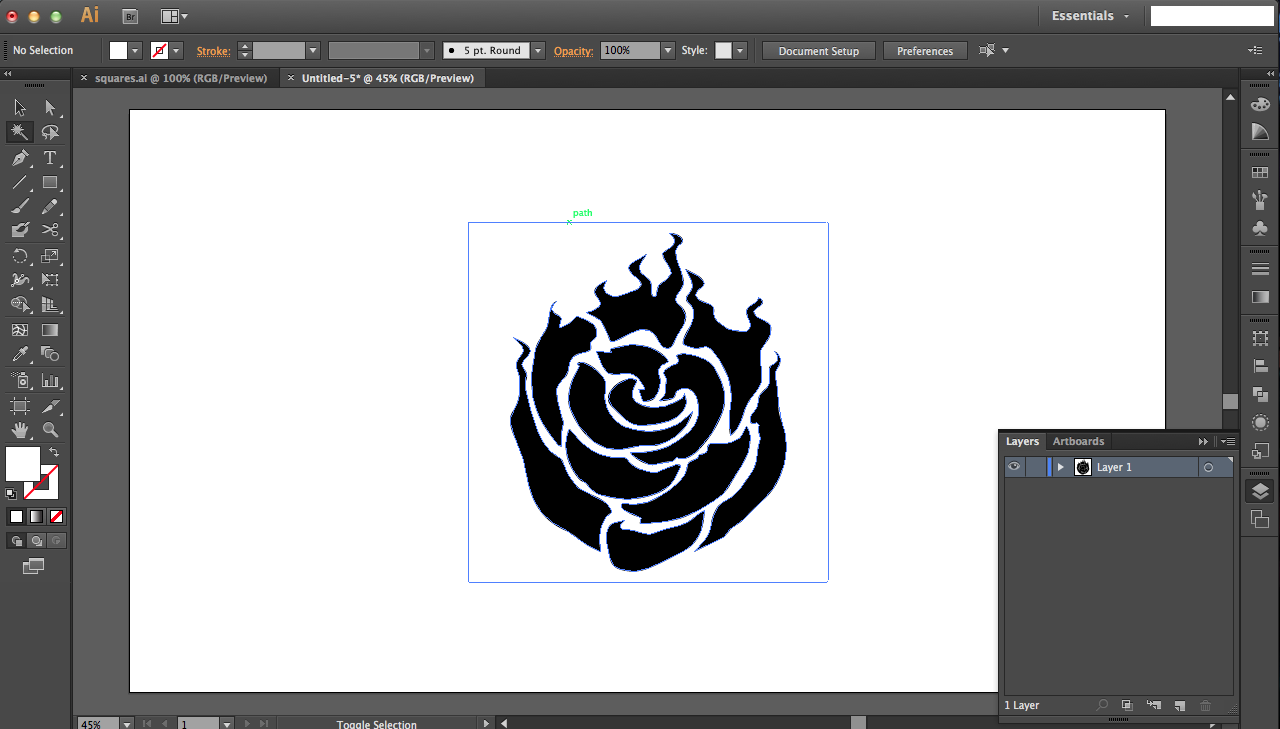

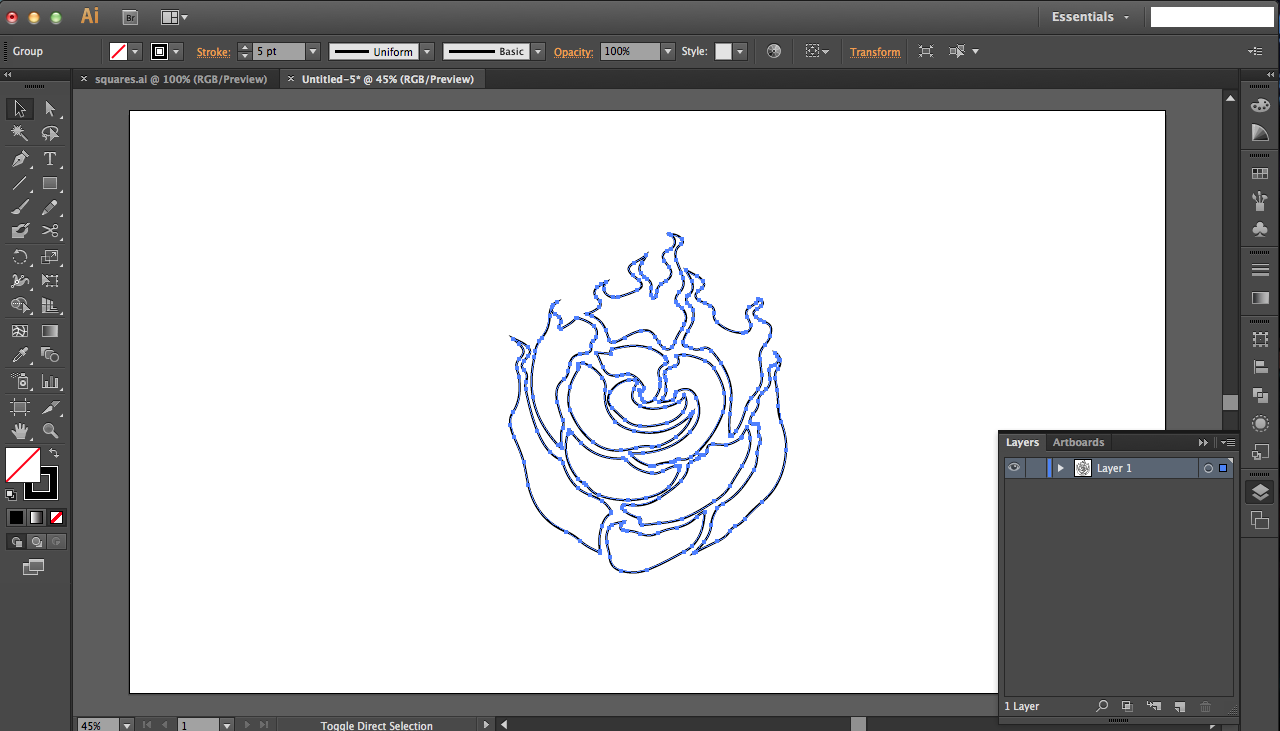
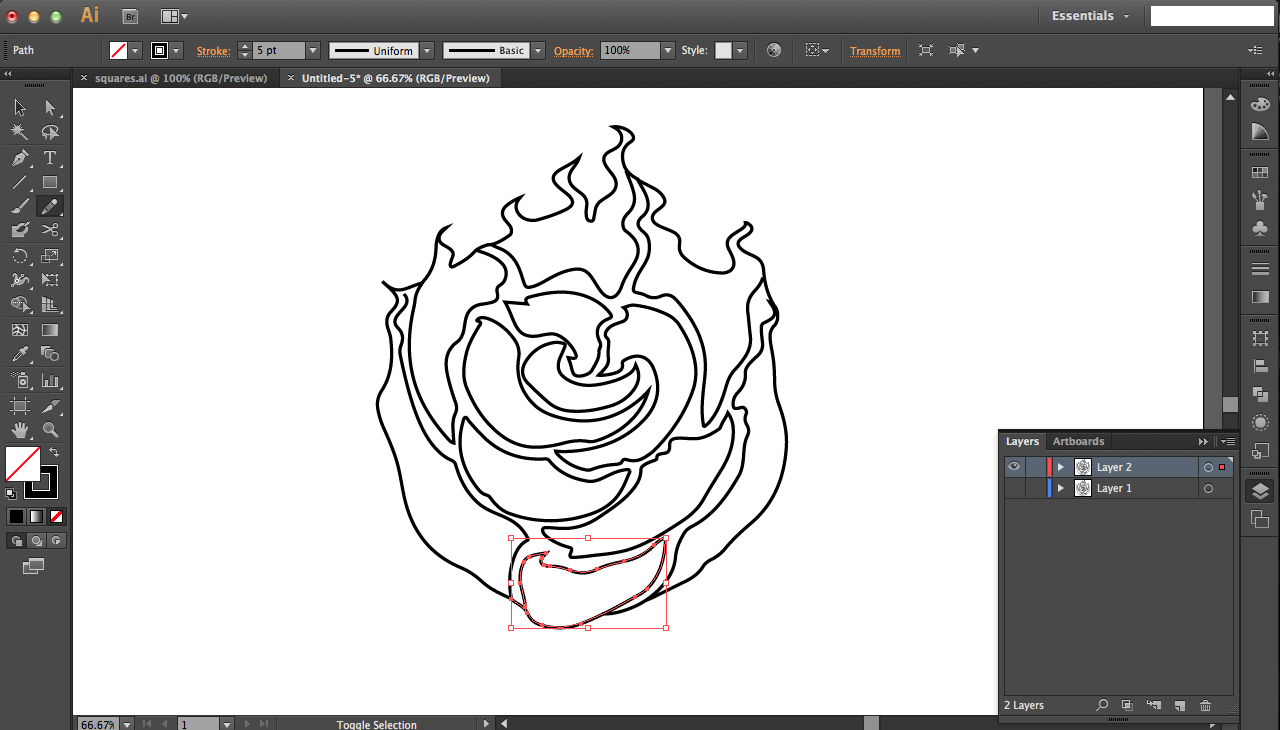


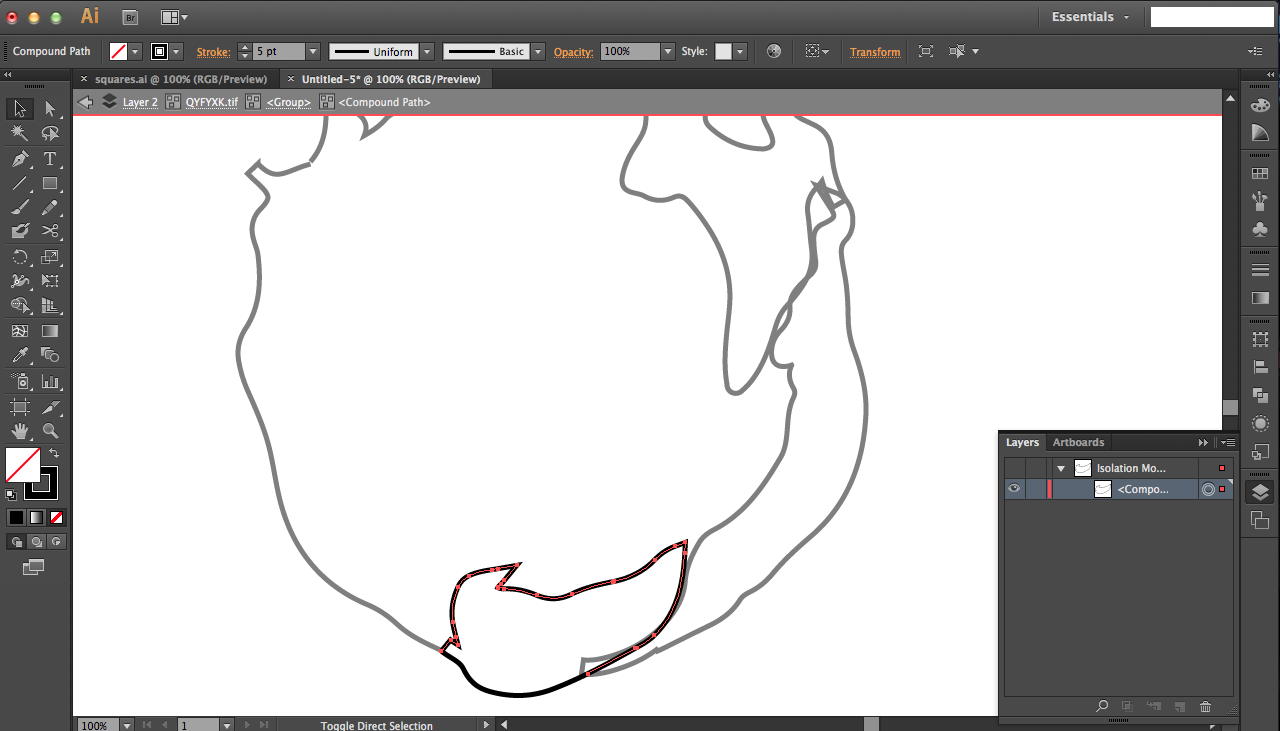


For the RWBY rose design, the cutouts are the inverted design that I wanted so I had to trace and draw in the outline. Follow the notes in the pictures above for step-by-step instructions on how I did that. (final zip file attached to next step)
RWBY Rose: Design Part 2


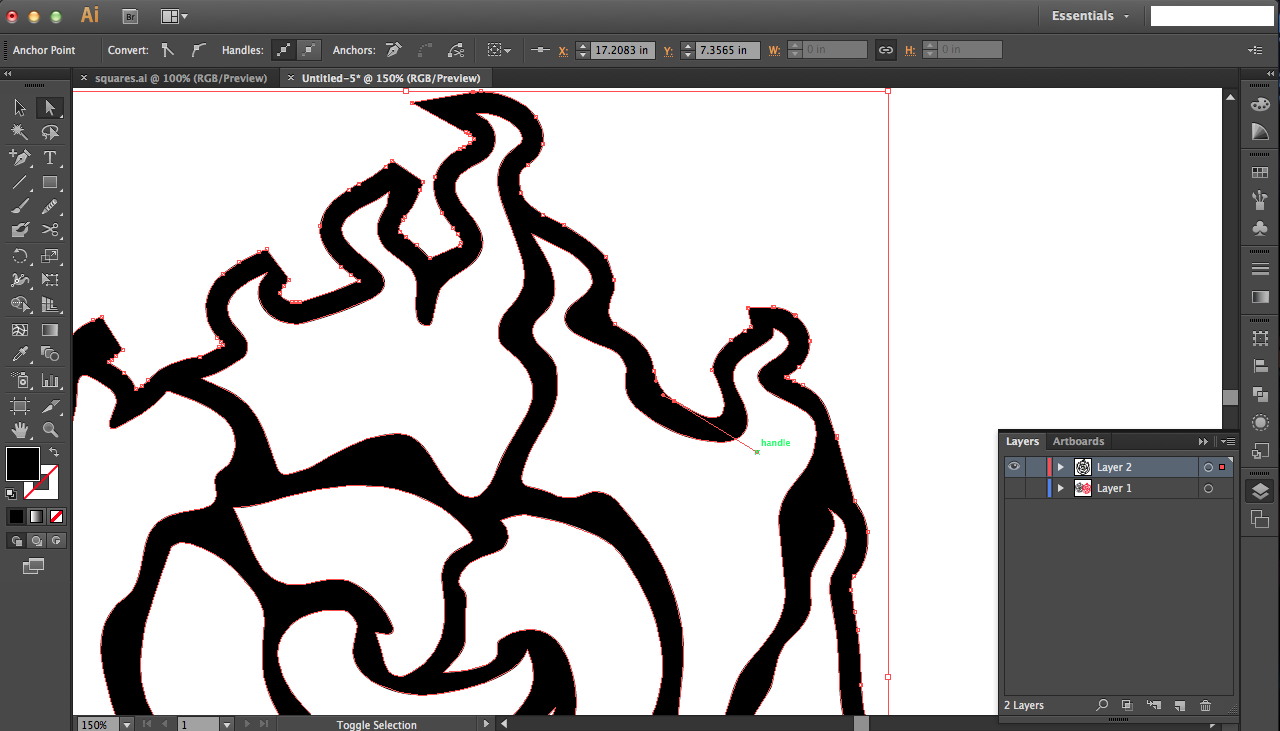
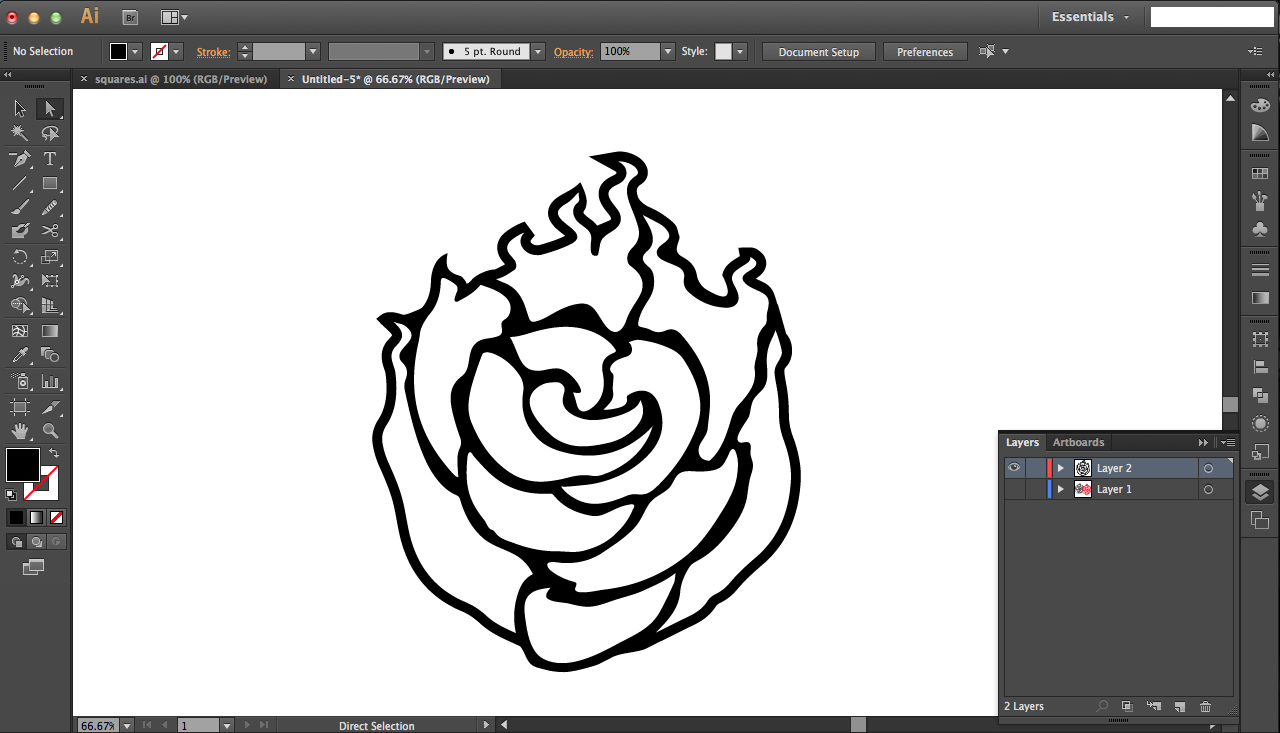

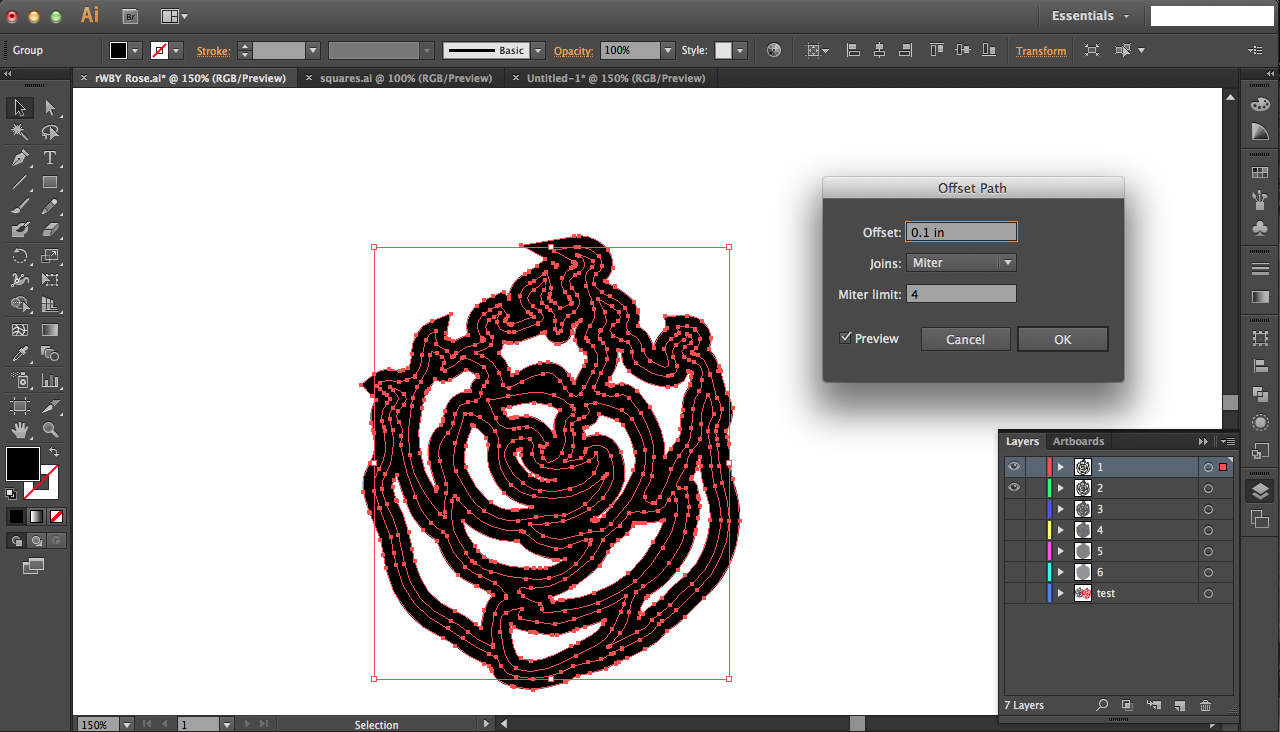


Now that I had the right cutout design, I just needed to create offset layers. This is a slightly different method from what I did for the first flower design, in which I scaled each design outward (as opposed to offset = scale inward and outward). This offset means that I lose the hollow hole cutout parts in my design, which I though would be fine (but I was wrong D: ).
Then cut all the layers out like done previously. The sizes of the layers are:
- 3.2924" x 4"
- 3.3923" x 4.1"
- 3.5081" x 4.2"
- 3.6317" x 4.3"
- 3.7552" x 4.4"
- 3.8788" x 4.5"
See the notes in the pictures above for step-by-step instructions on the graphics part. Final zip file is attached to this step.
Downloads
RWBY Rose Design: Assembly + Tentative Failure


I assembled the layers in the same way that I did the first flower, but this time the problem was that the offset paths method closed up my hollow parts. I had layers of paper blocking the path of light from the bottom (see third image above to see how severe the blockage was).
Not all hope is lost (or all hope is not lost?). The right way to light this up would be to shine light from the sides (so frame the sculpture and add lighting facing toward the layers, not behind them). I didn't have the motivation to build this set up (at least not for now), but I simulated that in the first image. The shadows would create interesting effects, especially if you use an addressable LED strip that had a chasing animation pattern (so the shadows would be constantly shifting) -- an idea to table for the future...
Squares Design
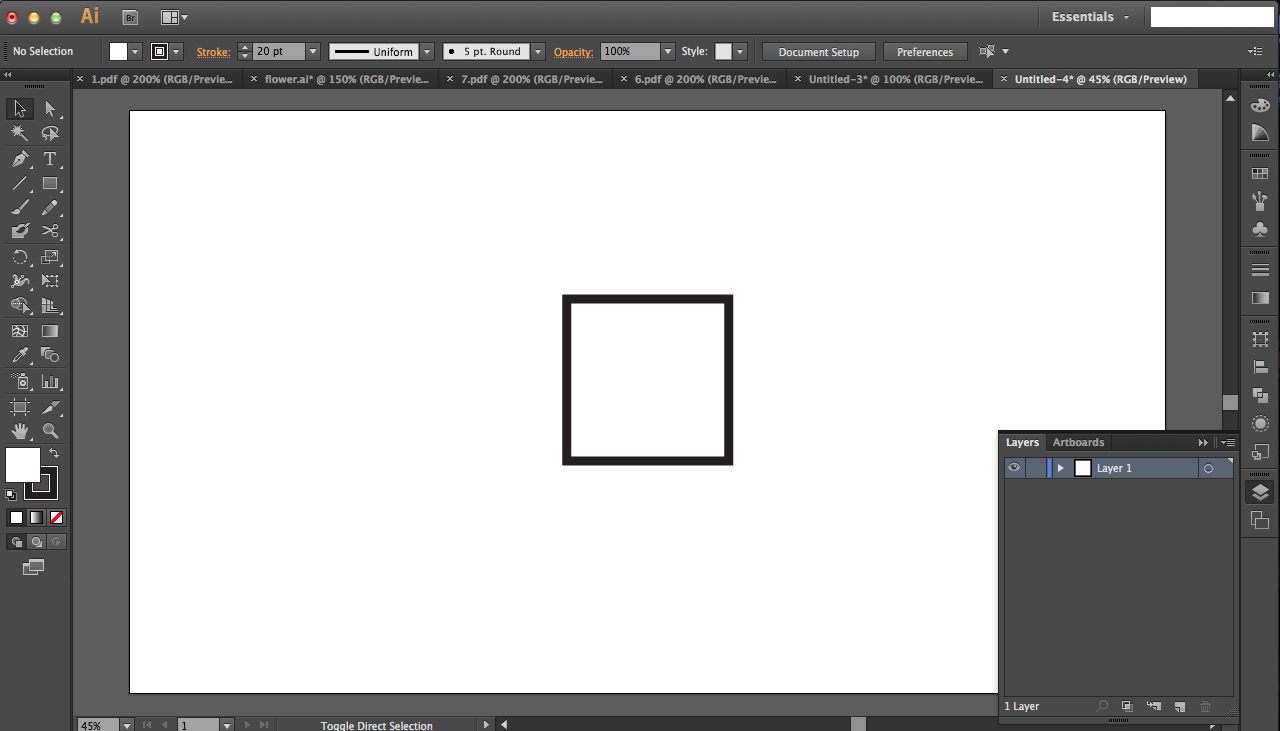


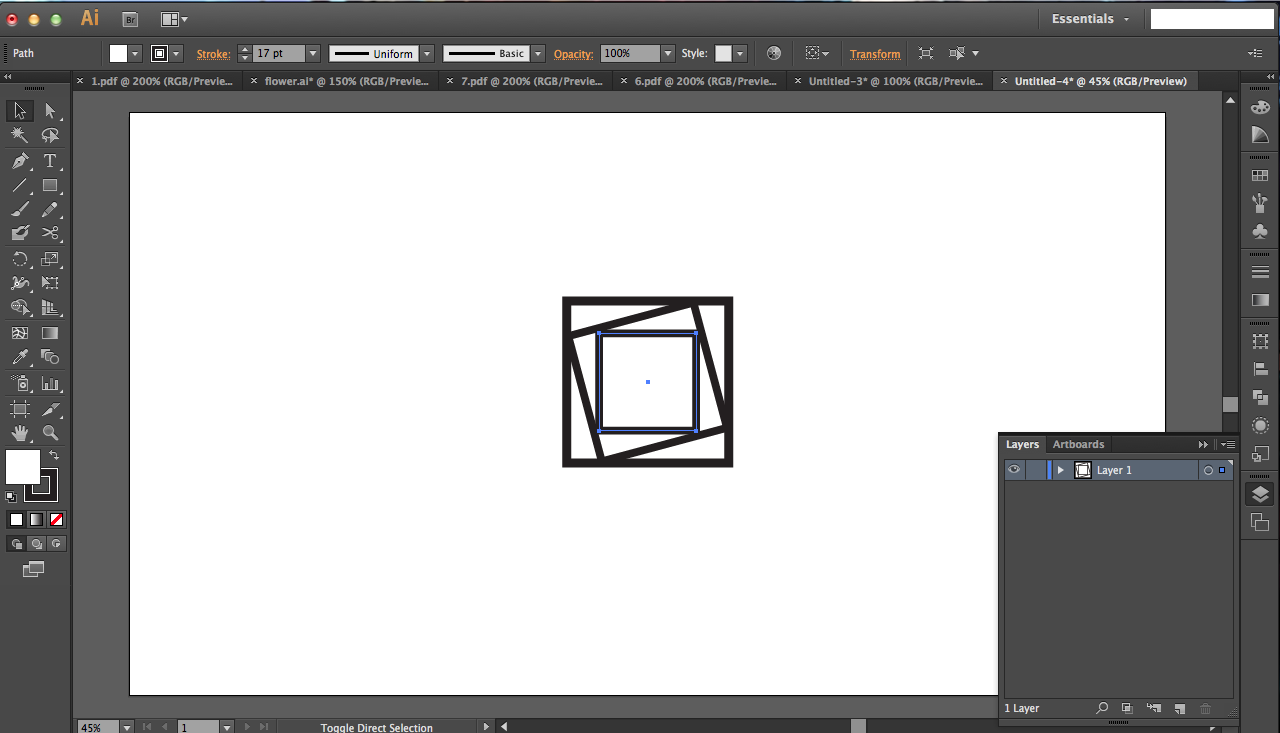
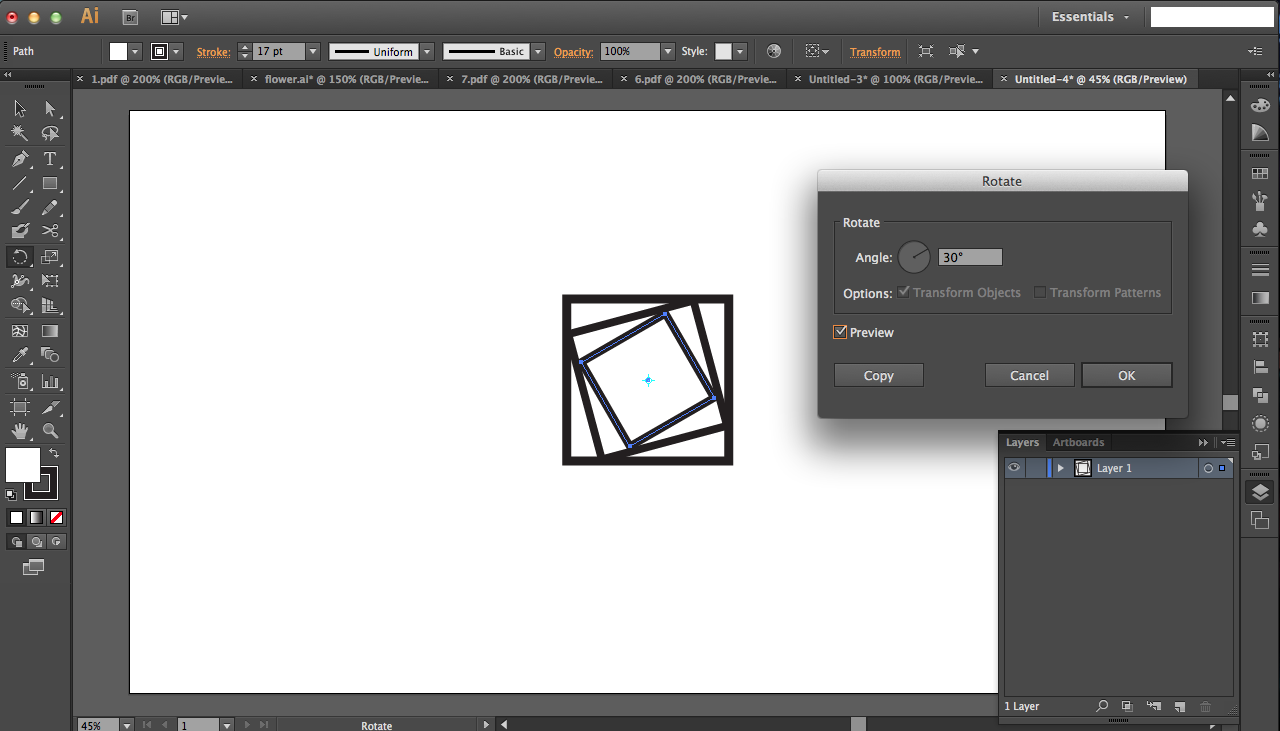
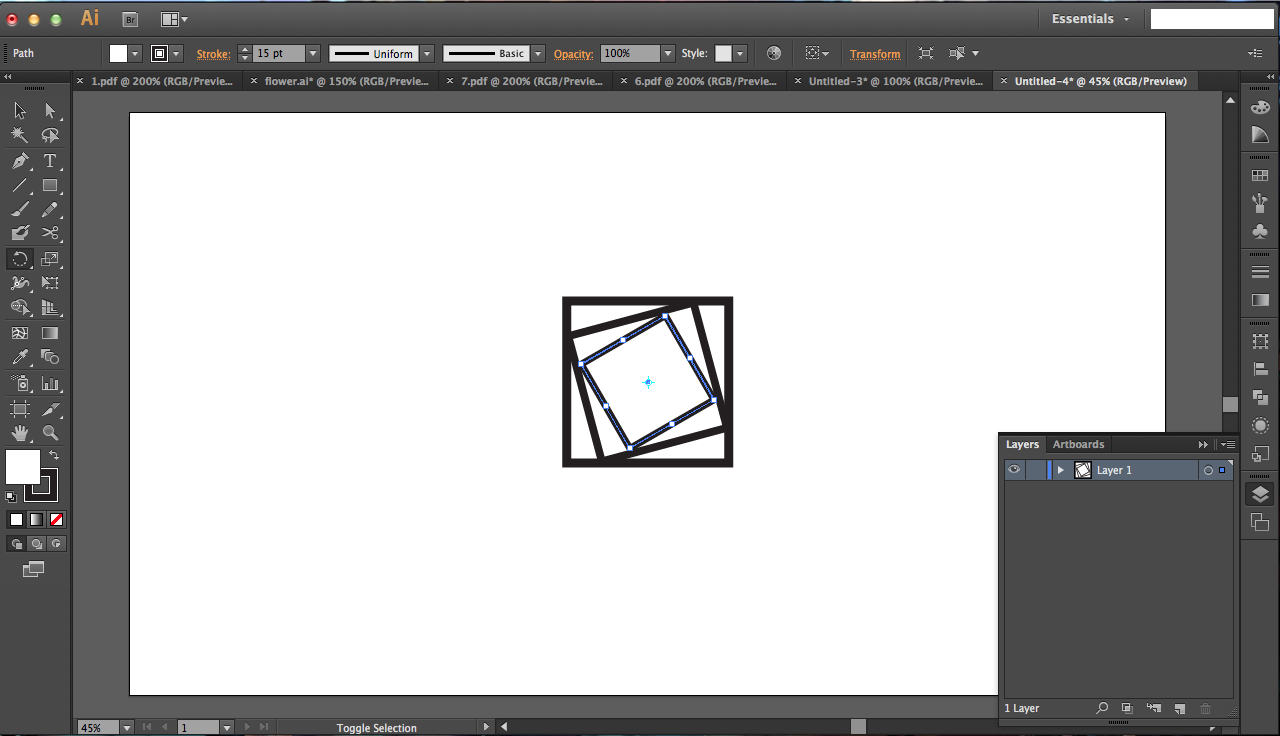
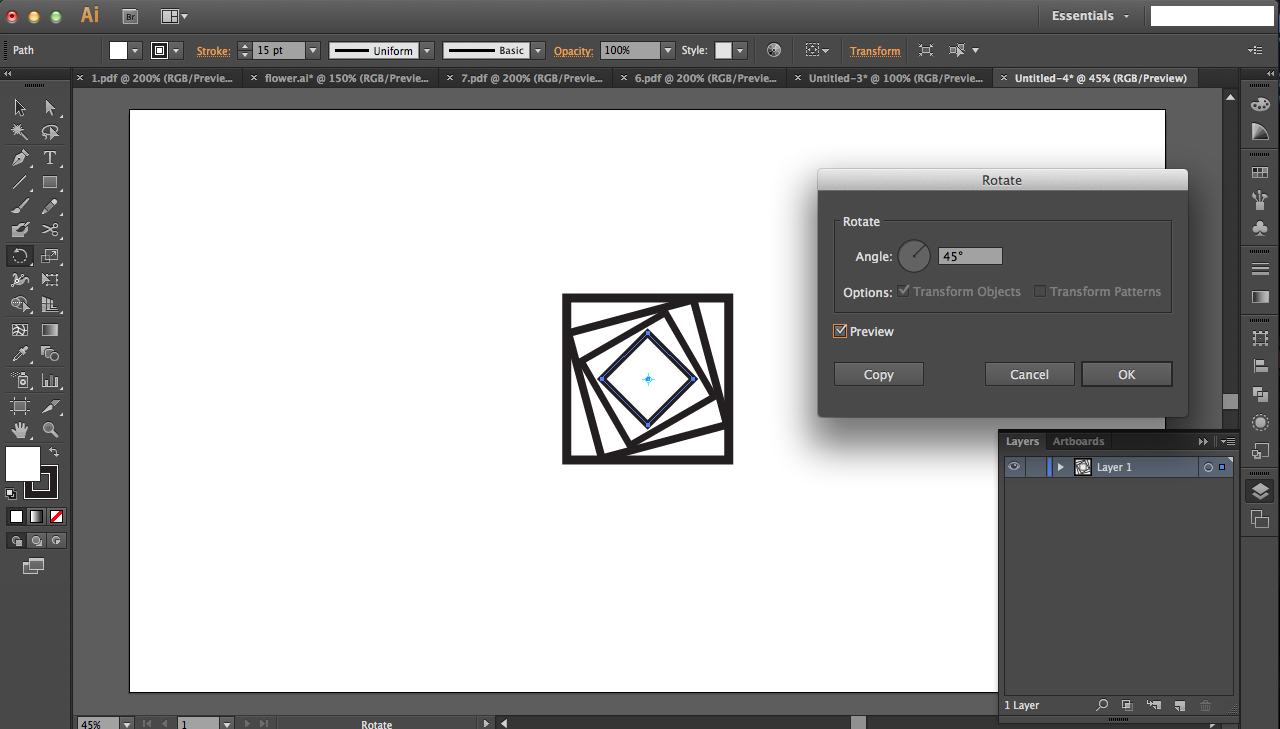


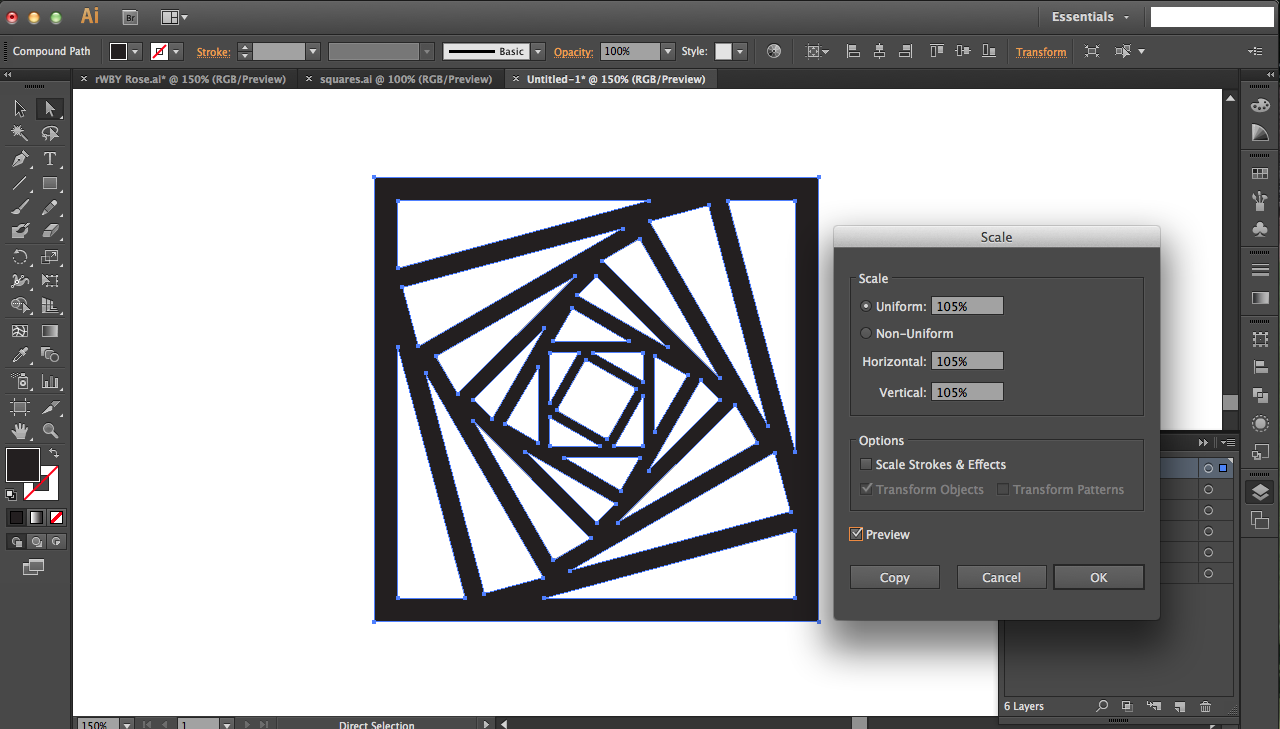


This time I learned from my mistake and created cutouts for my design using the scaling function instead of "offset paths."
This design is made just from rotation of squares: pretty simple, but the geometry looks aesthetically pleasing... In any case, click through the pictures above to see instructions on how to create the design in Adobe Illustrator (you could use any graphics software you'd like though).
Once the design is finished, use the Transform > Scale function to make each successive copy ~105% larger than the previous. I stopped after 6 layers to get the design you see in the last image above.
See step-by-step instructions in the notes of the pictures above.
Final zip file is attached to this step.
Downloads
Assembly


Like before, scale the images on your computer screen, trace, and cut out each layer. Sizes of the layers are as follows:
- 3.9176" x 3.9176"
- 4.1135" x 4.1135"
- 4.3192" x 4.3192"
- 4.5351" x 4.5351"
- 4.7619" x 4.7619"
- 5" x 5"
Then create the 1/4" x 1/8" spacers and stack the layers to form the final piece!
Finished and Future Steps


I really enjoyed playing around with shadows with this lighting project, but the next step is to mount these designs to the wall and enjoy the lighting as subtle wall scones. I also want to get the "offset path" method of creating layered designs to work, probably by using thinner paper that light could definitely penetrate. My only problem with thinner paper is that cutting it with a knife is tricky unless you have a really sharp knife that won't create a ragged edge and rip the paper.
More ideas to try out:
- Try the "addressable LED with chasing animation (so the shadows would be constantly shifting)" idea from the RWBY rose design
- I used solid color paper but try doing this with patterned paper, or paper with different weights.
- You could also use printer paper: print out specific designs and have the white backside facing outward so that the color is hidden. The color will only be revealed when the light is turned on.
- Splice colors of the cutout together so that certain regions (like slices of a pie) are certain colors.
- The holes in the cutouts were a bit... distracting (? can't find the right word) since you could see clearly through them. They'd probably look nicer with tissue paper or vellum covering them: that way they still allow a lot of light through but you wouldn't be able to see the layers below them.
- All my shapes were scaled outward isotropically but maybe asymmetric scaling would look interesting.
- On that note, try rotating each design with less scaling to get a twisted/warped geometry...
- Turn this into an enclosed lamp by creating two sets of layers and gluing them back to back, sealing the light source in side.
As always, leave comments and questions below and I'll help when I can. Enjoy!