Light Up Your VFD Display
by JackIsGoofingOff in Circuits > Arduino
481 Views, 1 Favorites, 0 Comments
Light Up Your VFD Display

Some day when I was browsing on Taobao I just got this Futaba VFD Display (with UART interface), I thought it was easy to light up, and purchased one. But this tiny naughty boy took me a week to get it working, so I will share with you my story...
Supplies
- A standard ESP32 Dev Module (ESP-WROOM-32)
- A Futaba VFD Display (https://aliexpi.com/BYsP Or Taobao)
- A battery (power supply) ranged from 3.3-5V
Connect Your Toys

Here comes the wiring part, well, I must say it is a bit tricky. First of all, this VFD module is using UART communication to talk with ESP32, so we need to connect VFD's RX to ESP32's TX2 (GPIO 17) and, you know, VFD's TX to ESP32's RX2 (GPIO 16). We also need to connect their GNDs. Then it comes to the power supply, we need to connect VFD's VCC to the power's positive (+) terminal and connect ESP32's GND (can use another GND pin) to the power's negative (-) terminal. Congratulations, now you finished the most challenging task.
Config Your Arduino IDE


Open your Arduino IDE, make sure that ESP32 board library was installed (In version 2.0 we can just search ESP32 in board manager section), and you are good to go. Oh, one more thing, connect your ESP32 to your computer and select ESP32 Dev Module in Tools -> Board -> ESP32 Arduino. Now you are ready to the final step.
Get Your Codes Work

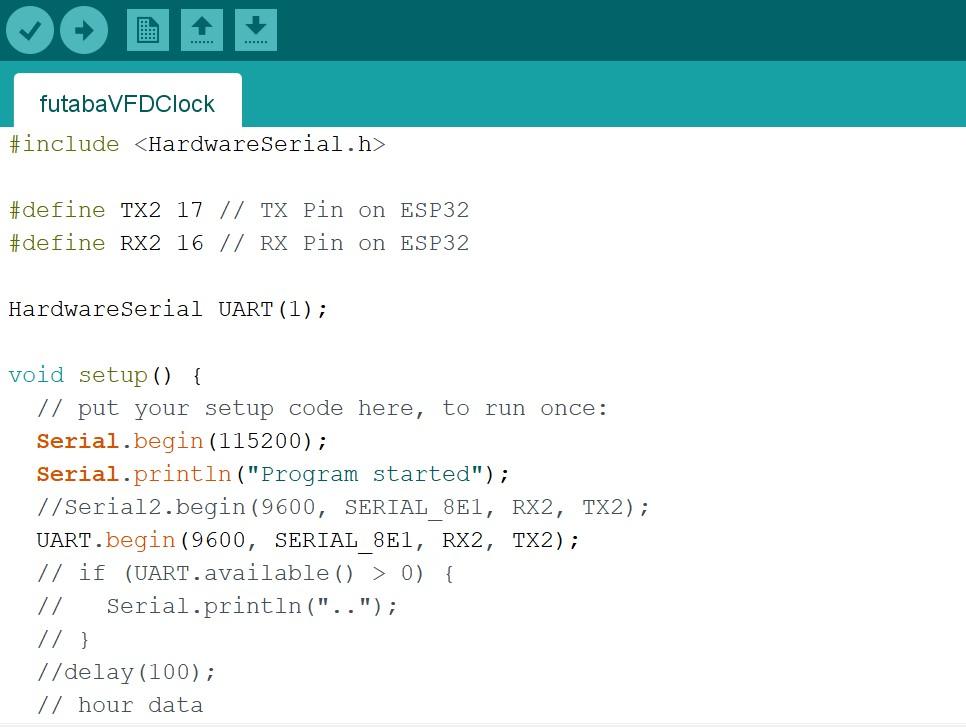
Hooray! Now you can open the demo program and upload the dreamy codes and -- wait for the display to work (sometimes you need to push the reset button on ESP32 after the upload). Oh one more thing, since you cannot find any datasheet of this module on web, I am going to simply explain what's happening and how you can change the display:
UART.begin(9600, SERIAL_8E1, RX2, TX2) is to initialize the communication which you don't need to change
UART.write(...) is the send data through the UART communication and here is the command set
0xFE -> 0xFD -> 0x01 -> 0x00 Light off all
                     -> 0x01 Light on all
             -> 0x02 -> hour data (in hex format)
             -> 0x03 -> minute data (in hex format)
             -> 0x04 -> 0x00 Colon off
                     -> 0x01 Colon on
Using for example UART.write(0xFE), then 0xFD 0x01 0x00 you finish the light off operation...
Have fun! Feel free to leave any comments below.