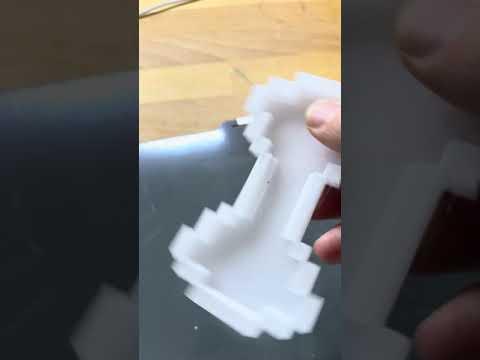
Light Up the Room: DIY 8-Bit Bow Tie With NeoPixel LEDs and Raspberry Pi Pico
574 Views, 6 Favorites, 0 Comments
Light Up the Room: DIY 8-Bit Bow Tie With NeoPixel LEDs and Raspberry Pi Pico


Imagine showing up at your next social gathering with a bow tie that doesn’t just complement your outfit but actually lights it up! Welcome to this guide where you'll create an 8-Bit Bow Tie with NeoPixel LEDs powered by a Raspberry Pi Pico. Perfect for anyone looking to add a splash of tech-savvy flair to their wardrobe, this project combines basic 3D printing, simple soldering, and straightforward programming. By the end of this tutorial, not only will you have crafted a unique piece of wearable technology, but you’ll also possess the skills to explore more advanced electronic wearables. Let’s get started and light up your style!
Supplies


Materials and Tools Needed for the 8-Bit Bow Tie Project
Materials:
- NeoPixel Strip: 7 pixels long. Check this example on Amazon (1m approximately $4).
- Raspberry Pi Pico: Available for around $4.
- Cables: A few connecting cables for assembly.
- Transparent Filament: For 3D printing the bow tie.
Tools:
- Soldering Iron: For connecting the cables to the NeoPixel strip and Raspberry Pi Pico.
- Hot Glue Gun: For securing components inside the bow tie and ensuring a neat finish.
- 3D Printer: To create the custom bow tie base from transparent filament.
Downloading Printing the 3D Model


Downloading the STL File:
- To get started, you can download the ready-to-print STL file for the bow tie from Thingiverse. This file is pre-designed to suit most standard 3D printers.
Modifying the Design:
- If you wish to customize the design to better suit your style or fit specific dimensions, you can modify the design using Tinkercad. Visit the project page to adjust the design as needed.
Printing the Design:
- Once you have the STL file, load it into your 3D printer. For this project, I used a BambuLab X1 and printed with PLA material. The printing process took approximately 50 minutes. Ensure your printer is calibrated, and use standard PLA printing settings for the best results.


Soldering Cables to the NeoPixel LED Strip
Materials Needed:
- Soldering iron and solder
Prepare the LED Strip:
- Identify the input end of the LED strip; this is typically marked and is where you will connect the wires.
- Attention: there is a arrow showing the "direction" of the signal! Make sure its the right end!
Strip and Tin the Wires:
- Strip about 5 mm of insulation off the ends of the red, green, and white wires.
- Pre-tin these stripped wire ends by applying a small amount of solder. This will make the actual soldering to the LED strip easier and more reliable.
Solder the Wires:
- Solder the red wire to the 5V+ pad on the LED strip.
- Solder the green wire to the Din (Data Input) pad.
- Solder the white wire to the GND (Ground) pad.
Connecting Wires to the Raspberry Pi Pico
Connection Points:
- Red wire to VBUS (5V from the USB)
- Green wire to GP12 (Signal)
- White wire to any GND pin
Procedure:
Prepare the Raspberry Pi Pico:
- Ensure the Raspberry Pi Pico is not connected to any power source during this process.
Solder the Wires to the Raspberry Pi Pico:
- Solder the red wire to the VBUS pin. This pin provides power from the USB port to the Pico.
- Solder the green wire to the GP12 pin. This will be used to send data signals to the LED strip.
- Solder the white wire to any available ground (GND) pin on the Pico.
Downloading and Installing Firmware on the Raspberry Pi Pico

Materials Needed:
- A computer with an internet connection
- A USB cable compatible with the Raspberry Pi Pico
Download the Firmware:
- Navigate to the provided GitHub repository to download the ready-to-use firmware. Here is the link to download the firmware. Ensure you download the file specifically designed for the Raspberry Pi Pico.
Connect the Raspberry Pi Pico to Your Computer:
- Using the USB cable, connect the Raspberry Pi Pico to your computer. It should appear as a removable drive named "RPI-RP2" or similar in your system's file explorer. If it does not appear:
- Troubleshooting Connection Issues:
- Hold down the "BOOTSEL" button on the Raspberry Pi Pico while connecting it to your computer via USB. This will force it into USB Mass Storage mode, making it appear as a drive.
Install the Firmware:
- Open the drive associated with the Raspberry Pi Pico.
- Drag and drop the firmware file you downloaded from GitHub onto the Pico's drive. This action will write the firmware to the Pico.
Be the Star at the Next Party

