[LinkIt ONE] GPS Tracker + MediaTek Cloud Sandbox Tutorial
by cavedu in Circuits > Arduino
7443 Views, 20 Favorites, 0 Comments
[LinkIt ONE] GPS Tracker + MediaTek Cloud Sandbox Tutorial
![Screen Shot 2015-10-14 at 3.11.05 PM.png](/proxy/?url=https://content.instructables.com/F4Q/DATK/IFPQR35W/F4QDATKIFPQR35W.png&filename=Screen Shot 2015-10-14 at 3.11.05 PM.png)
This tutorial is to show how to build a wifi-based GPS tracker with MediaTek Cloud Sandbox and even on mobile app.
Prerequisite: Register a Free Account of MCS(MediaTek Cloud Sandbox)
![Screen Shot 2015-10-14 at 3.35.24 PM.png](/proxy/?url=https://content.instructables.com/F87/J4P2/IFPQR3G2/F87J4P2IFPQR3G2.png&filename=Screen Shot 2015-10-14 at 3.35.24 PM.png)
Go to the official website: https://mcs.mediatek.com/
Register a free count https://mcs.mediatek.com/oauth/en/login
Create a New Prototype for GPS
![Screen Shot 2015-10-14 at 3.43.31 PM.png](/proxy/?url=https://content.instructables.com/FSU/NF9N/IFPQR3L9/FSUNF9NIFPQR3L9.png&filename=Screen Shot 2015-10-14 at 3.43.31 PM.png)
Sign into MCS and click "Development", and then click "Create".
Input the Name, Version As Indicated Below, Click “Save” to Complete
![Screen Shot 2015-10-14 at 3.48.30 PM.png](/proxy/?url=https://content.instructables.com/FH3/9HYM/IFPQR3QA/FH39HYMIFPQR3QA.png&filename=Screen Shot 2015-10-14 at 3.48.30 PM.png)
After the Prototype Be Finished, Click "detail" to Edit the Prototype
![Screen Shot 2015-10-17 at 12.25.14 AM.png](/proxy/?url=https://content.instructables.com/FUF/UQH6/IFSJQ97S/FUFUQH6IFSJQ97S.png&filename=Screen Shot 2015-10-17 at 12.25.14 AM.png)
You Will Be Brought to a Fly-through Tutorial to Understand Basic Functions, You May Click “Exit” Should You Wish to Skip Through This Step.
![Screen Shot 2015-10-17 at 12.28.13 AM.png](/proxy/?url=https://content.instructables.com/F25/5C8E/IFSJQ9FT/F255C8EIFSJQ9FT.png&filename=Screen Shot 2015-10-17 at 12.28.13 AM.png)
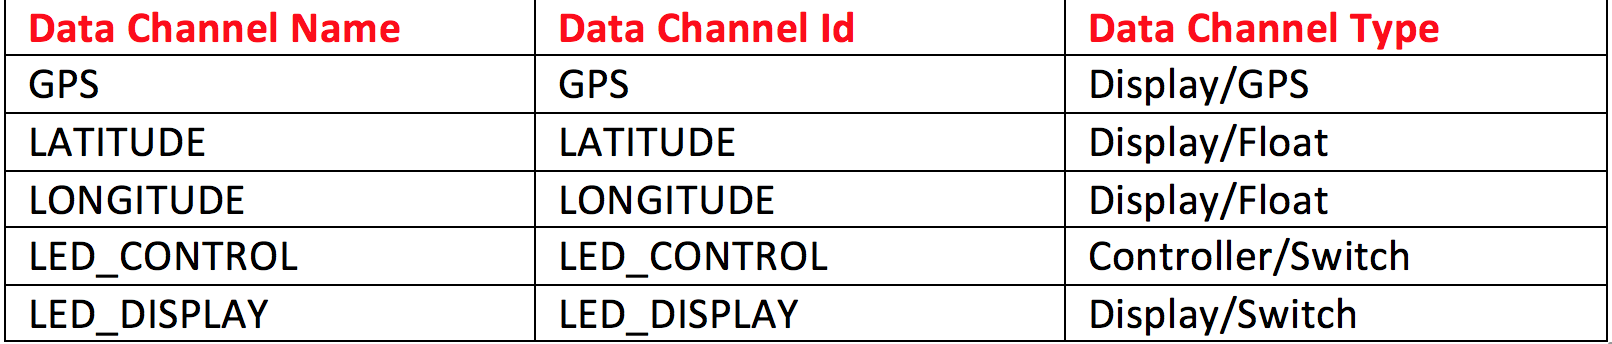
Now Let's Create the Following Data Channels Summarize As Below
![Screen Shot 2015-10-17 at 12.31.19 AM.png](/proxy/?url=https://content.instructables.com/FQZ/DN2H/IFSJQ9SY/FQZDN2HIFSJQ9SY.png&filename=Screen Shot 2015-10-17 at 12.31.19 AM.png)
Click “Add” to Create First Data Channel
![Screen Shot 2015-10-17 at 12.32.08 AM.png](/proxy/?url=https://content.instructables.com/FTQ/LVGX/IFSJQ9WS/FTQLVGXIFSJQ9WS.png&filename=Screen Shot 2015-10-17 at 12.32.08 AM.png)
Click “Add” Under the Display Data Channel
![Screen Shot 2015-10-17 at 12.35.19 AM.png](/proxy/?url=https://content.instructables.com/FW7/L534/IFSJQAGE/FW7L534IFSJQAGE.png&filename=Screen Shot 2015-10-17 at 12.35.19 AM.png)
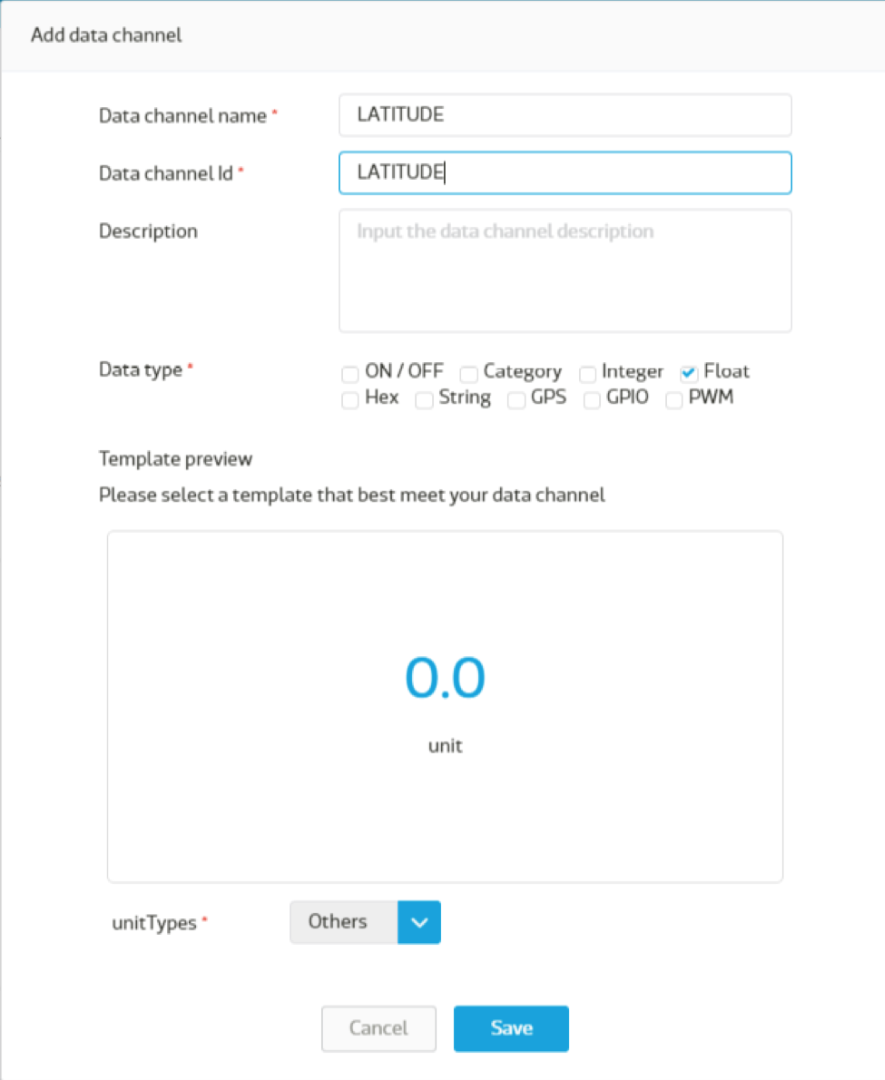
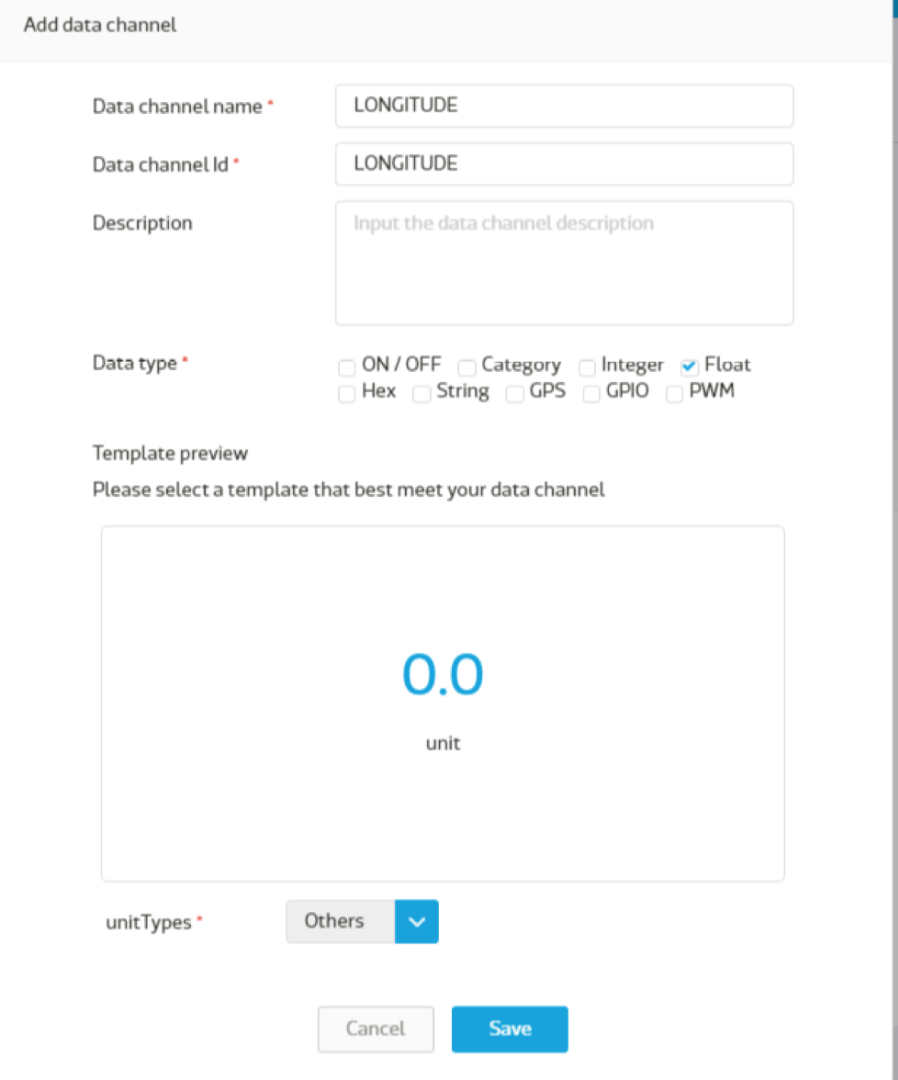
Filling in the Data Channel Detail As Below, Click “Save” to Complete.
![Screen Shot 2015-10-17 at 12.36.24 AM.png](/proxy/?url=https://content.instructables.com/F7U/5958/IFSJQAMW/F7U5958IFSJQAMW.png&filename=Screen Shot 2015-10-17 at 12.36.24 AM.png)
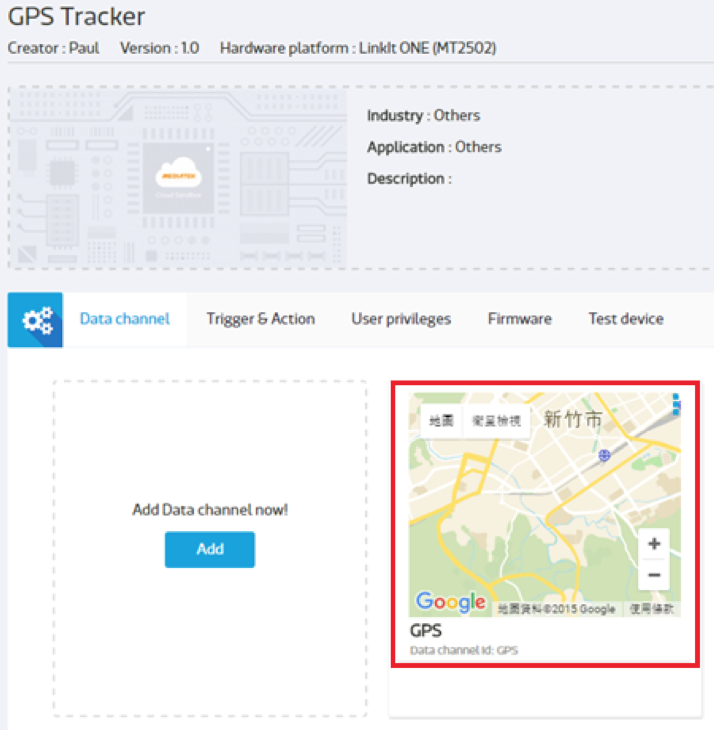
And Then You Will See a Data Channel Is Created As Shown
![Screen Shot 2015-10-17 at 12.37.34 AM.png](/proxy/?url=https://content.instructables.com/FFS/MV32/IFSJQATR/FFSMV32IFSJQATR.png&filename=Screen Shot 2015-10-17 at 12.37.34 AM.png)
Repeat Step 7~10 to Complete LATITDUE, LONGITUDE, LED_DISPLAY Data Channel Create.
![Screen Shot 2015-10-17 at 12.40.08 AM.png](/proxy/?url=https://content.instructables.com/F5C/7GWR/IFSJQB1W/F5C7GWRIFSJQB1W.png&filename=Screen Shot 2015-10-17 at 12.40.08 AM.png)
![Screen Shot 2015-10-17 at 12.40.18 AM.png](/proxy/?url=https://content.instructables.com/FDY/58SM/IFSJQB2S/FDY58SMIFSJQB2S.png&filename=Screen Shot 2015-10-17 at 12.40.18 AM.png)
![Screen Shot 2015-10-17 at 12.40.41 AM.png](/proxy/?url=https://content.instructables.com/FA1/JOR6/IFSJQB3P/FA1JOR6IFSJQB3P.png&filename=Screen Shot 2015-10-17 at 12.40.41 AM.png)
Create LED_CONTROL Controller Data Channel by Selecting Controller Type Data Channel
![Screen Shot 2015-10-17 at 12.41.33 AM.png](/proxy/?url=https://content.instructables.com/FTY/1A9L/IFSJQB99/FTY1A9LIFSJQB99.png&filename=Screen Shot 2015-10-17 at 12.41.33 AM.png)
![Screen Shot 2015-10-17 at 12.41.41 AM.png](/proxy/?url=https://content.instructables.com/FXW/LW94/IFSJQB9C/FXWLW94IFSJQB9C.png&filename=Screen Shot 2015-10-17 at 12.41.41 AM.png)
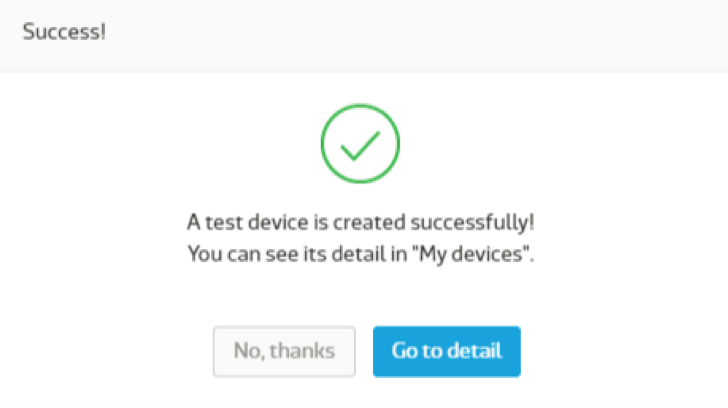
Click “Create Test Device” Button, Fill in the Name, and Then Click “Go to Detail”
![Screen Shot 2015-10-17 at 12.52.36 AM.png](/proxy/?url=https://content.instructables.com/F26/9SPU/IFSJQBHR/F269SPUIFSJQBHR.png&filename=Screen Shot 2015-10-17 at 12.52.36 AM.png)
![Screen Shot 2015-10-17 at 12.53.14 AM.png](/proxy/?url=https://content.instructables.com/FGC/UTCS/IFSJQBHU/FGCUTCSIFSJQBHU.png&filename=Screen Shot 2015-10-17 at 12.53.14 AM.png)
![Screen Shot 2015-10-17 at 12.55.08 AM.png](/proxy/?url=https://content.instructables.com/F8X/291M/IFSJQBP8/F8X291MIFSJQBP8.png&filename=Screen Shot 2015-10-17 at 12.55.08 AM.png)
Here Is the Detail Page of the Created Test Device, and Copy the DeviceId and DeviceKey
![Screen Shot 2015-10-17 at 1.05.14 AM.png](/proxy/?url=https://content.instructables.com/FJL/0N6F/IFSJQCDL/FJL0N6FIFSJQCDL.png&filename=Screen Shot 2015-10-17 at 1.05.14 AM.png)
![Screen Shot 2015-10-17 at 1.05.25 AM.png](/proxy/?url=https://content.instructables.com/FPW/Q6RF/IFSJQCDP/FPWQ6RFIFSJQCDP.png&filename=Screen Shot 2015-10-17 at 1.05.25 AM.png)
Download the GPS Tracker Arduino Code, And
If you don't have the arduino http client library, please download it and import.
https://github.com/amcewen/HttpClient
Edit the GPS tracker code as below:
#define WIFI_AP "YOUR_AP_NAME"
#define WIFI_PASSWORD "YOUR_AP_PASSWORD"
#define DEVICEID "YOUR_DEVICEID"
#define DEVICEKEY "YOUR_DEVICEKEY"
Downloads
After the Code Is Compile and Uploaded to the Board Correctly, the Board Will Send GPS Data to the Test Device You Have Created As in the Screen Shot Below:
![Screen Shot 2015-10-17 at 1.24.04 AM.png](/proxy/?url=https://content.instructables.com/FM7/WL3W/IFSJQJO3/FM7WL3WIFSJQJO3.png&filename=Screen Shot 2015-10-17 at 1.24.04 AM.png)
You Can Also Use MCS Mobile Application to View the GPS Data on Mobile
![Screen Shot 2015-10-17 at 1.26.32 AM.png](/proxy/?url=https://content.instructables.com/F2W/YXMY/IFSJQJKG/F2WYXMYIFSJQJKG.png&filename=Screen Shot 2015-10-17 at 1.26.32 AM.png)
Download the MCS Mobile Application: