LinkIt One Tutorials - #1 Hello World
by gregoryfenton in Circuits > Microcontrollers
1426 Views, 12 Favorites, 0 Comments
LinkIt One Tutorials - #1 Hello World

The most basic form of Hello World when using microcontrollers is turning an LED on and off.
On a lot of microcontrollers there is at least one user controllable LED on board.
There are a number of prerequisites before we can turn the LED on and off, so we will get those out of the way before we progress. This is a once only task so as long as you follow the instructions linked to (or scream for help in the comments section) you'll be good to proceed to the next tutorial once you've finished.
While turning on an LED may not seem like a massive achievement, it means that we have correctly installed the software and connected the LinkIt One.
Each of my tutorials will add a different skill until the final one when we will be able to use many advanced features, at which time I will leave it to you and your imagination to continue where I finish.
Materials Required

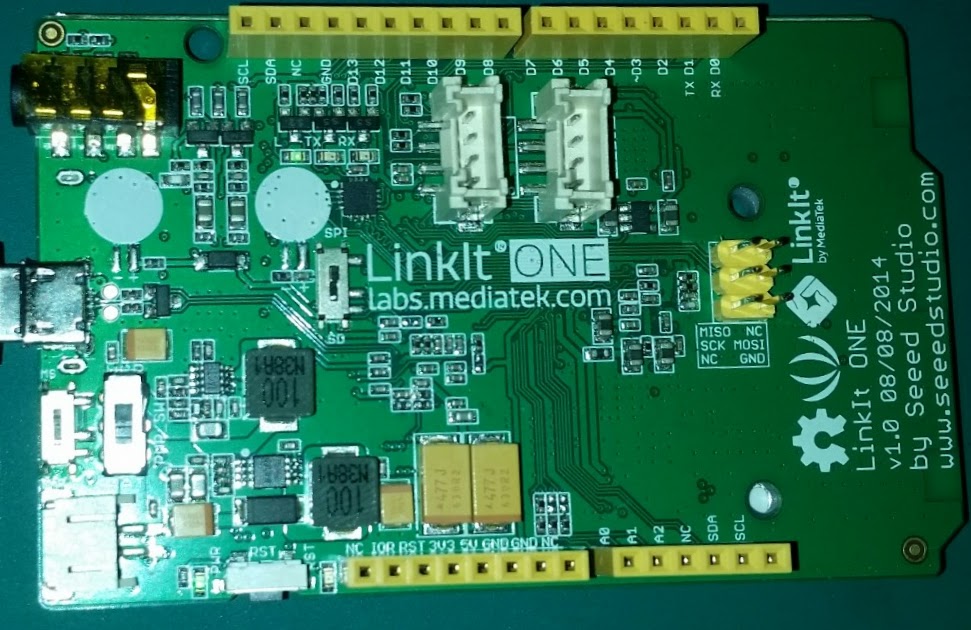
MediaTek LinkIt One board
Available from MediaTek or numerous suppliers around the world
Micro USB cable
Available all over the world, or from your nearest Android phone or tablet
Windows or Mac OS
Linux is unsupported at this time (why?!) although using virtualisation software such as VirtualBox works perfectly
Arduino IDE v1.65
Available at http://arduino.cc
LinkIt One SDK
Available at http://labs.mediatek.com/site/global/developer_too...
Full installation instructions are at http://www.seeedstudio.com/wiki/LinkIt_ONE#Get_sta...
Note that this page refers to Arduino version 1.5.7 beta, the document is outdated. Install Arduino 1.6.5
If you get stuck, leave a comment and I will try and help you. It's not difficult, honestly :)
Configure the Arduino IDE for the LinkIt One


If while installing the Arduino IDE you have left any Arduino IDE windows open, please close them all now.
Start the Arduino IDE.
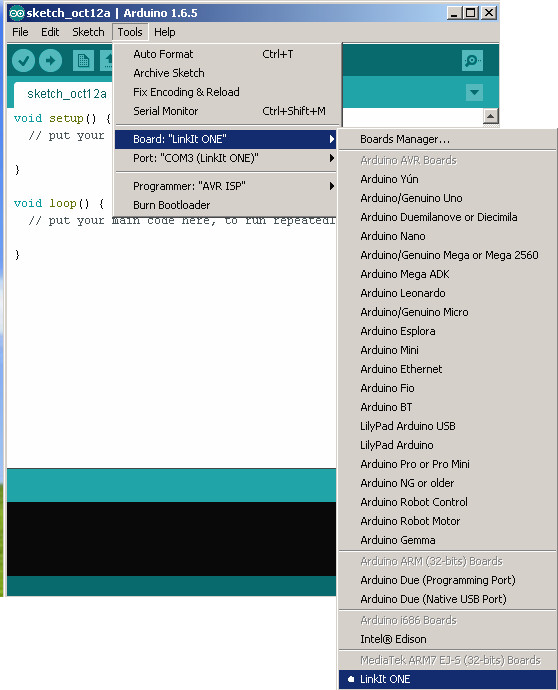
Click on the Tools Menu, Boards and then click on LinkIt One
Click on the Tools Menu, Ports and then click on LinkIt One
Troubleshooting:
If you can't see LinkIt One in the Boards menu you probably haven't installed the SDK. Follow the previous step again, specifically the section about the LinkIt One SDK. If you have tried and failed, leave me a reply and I'll try to help you.
If you can see LinkIt One in the Boards menu but don't see a LinkIt One port there are a number of potential reasons:
Power only USB lead - you need a power and data lead
On board switches set incorrectly - set them as follows:
UART/MS set to UART
SD/SPI set to SPI unless you are using an SD card
BAT/USB set to USB
Driver not installed - follow the previous step again, specifically the section about the LinkIt One driver. If you have tried and failed, leave me a reply and I'll try to help you.
Load the Hello World Program in the IDE


Click on File-Examples-01.Basics-Blink
A new IDE window will open (don't get me started on that one!) with the contents of the Blink program.
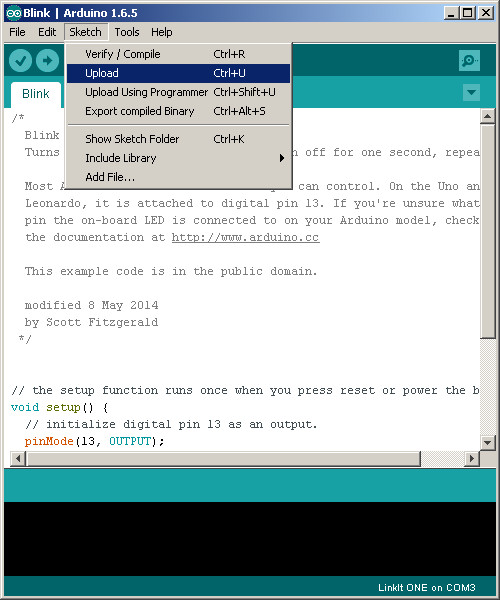
Click on Tools-Upload and wait a short while until all the text at the bottom of the screen stops scrolling.
If all went well you should see "Done uploading" on the IDE and no error messages. If you look at the LinkIt One it should happily be blinking on and off once a second.
If you got any error messages here, leave them in the comments section below and I will try to help you.
Where Next?

Start simple. Have a look at the program and see if you can work out what is going on.
A tip: Don't spend too much time looking at the void setup() {} part just yet, focus more on void loop() {}
The loop() part cycles forever while power is attached, so when it gets to the bottom it loops back to the top again.
How can you make the blink faster? slower? Have a different on and off time?
Have fun and pat yourself on the back for learning something new today.
As ever, feel free to comment on this step and watch out for my next LinkIt One tutorial.