LinkIt One Tutorials - #2 Are You There World?
by gregoryfenton in Circuits > Microcontrollers
580 Views, 6 Favorites, 0 Comments
LinkIt One Tutorials - #2 Are You There World?

I hope you followed my first LinkIt One tutorial and all worked well.
In that tutorial you will recall that we made the LinkIt One say hello to us by blinking the onboard LED.
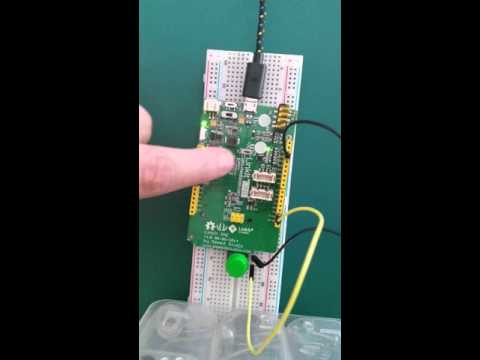
Now we are going to expand on that and have the LinkIt One respond to an external event - in this case turning the LED on when we press a button and back off when the button is released.
Materials Required


MediaTek LinkIt One
If you followed the first tutorial you should already have one, look for a light blinking once per second.
Micro USB cable
If it is not plugged into your LinkIt One, go ask your significant other where the phone charger lead went.
Breadboard
Available anywhere that sells electronics components such as resistors.
Push button
Available anywhere that sells electronics components such as resistors.
Male to male jumper wires
Available anywhere that sells electronics components such as resistors.
Arduino IDE
This was installed if you followed the first tutorial
Wiring the Pushbutton to the Board


Take two of the jumper wires, the pushbutton and the breadboard.
Look first at the breadboard. It will have a lot of holes in the centre going from left to right with a recessed line splitting the holes into two sections, with five rows labelled A to E, a gap then another five rows labelled F to J.
The columns will be labelled from 0 to some number which will change depending on the size of your breadboard.
There may also be smaller columns with red and blue lines next to them. These are called power rails and are not important just yet.
Going back to the rows and columns, it will help you to understand that the rows (A to E and F to J) are connected together - so column 5 row A is directly connected to column 5 rows B, C, D and E but not to rows F to J. F to J are connected to each other.
Columns (the numbered ones) are not connected together so 0 is not connected to 30.
Don't worry too much about it right now. You're new to this stuff remember :)
Take the pushbutton and look at the underside. You will see 4 pins, 2 on one side and 2 on the other.
Insert the pushbutton into the centre of the breadboard, with 2 pins above the centre gap and the other 2 pins below.
Take the two jumper wires and with each wire plug one end into a row above the pushbutton pin. The other end of each jumper wire can be left floating for the moment.
Take a look at the LinkIt One board. On the outside are 2 rows of yellow holes. They don't look like much but those holes are connections to the heart of the board.
If you look closely you will see white writing on the board next to these holes with letters like "NC", "IOR", "RST", "SCL", "SDA", "RX".
There are two connections you need to make - one in GND and the other to D2.
If you have any issues or questions with this step, please respond in the comments section below.
Step 3: Program the LinkIt One


Start the Arduino IDE and ensure it is still set up as in the first tutorial.
Click on the File menu, Examples, 02.Digital, Button
This program has slightly different instructions than this tutorial, don't worry about it for the moment.
Ensure the LinkIt one is connected to the computer via the USB cable as per the previous tutorial and click on the Sketch Menu, Upload.
When the program has successfully uploaded you should see that the LED is on constantly. Press the button and it should turn off.
If you are still with me at this point, congratulate yourself for being able to interact with a microcontroller.
Next Steps


Look at the code and see if you can figure out what is going on.
How can you change the code so that the LED comes on only when you press the button
Can you figure out what to change if you wish to use another connector than D2?
How can you wire a second switch to only toggle the switch when both switches are pressed simultaneously?
Would you do it in hardware or software?
As always, comments and questions are welcomed.
See you in the next tutorial :)