MEDIBOT

by Boateng in Circuits > Arduino

328 Views, 2 Favorites, 0 Comments

MEDIBOT

MEDIBOT
photo_19_2025-01-13_19-42-30.jpg
photo_45_2025-01-13_19-42-30.jpg
photo_11_2025-01-13_19-42-30.jpg

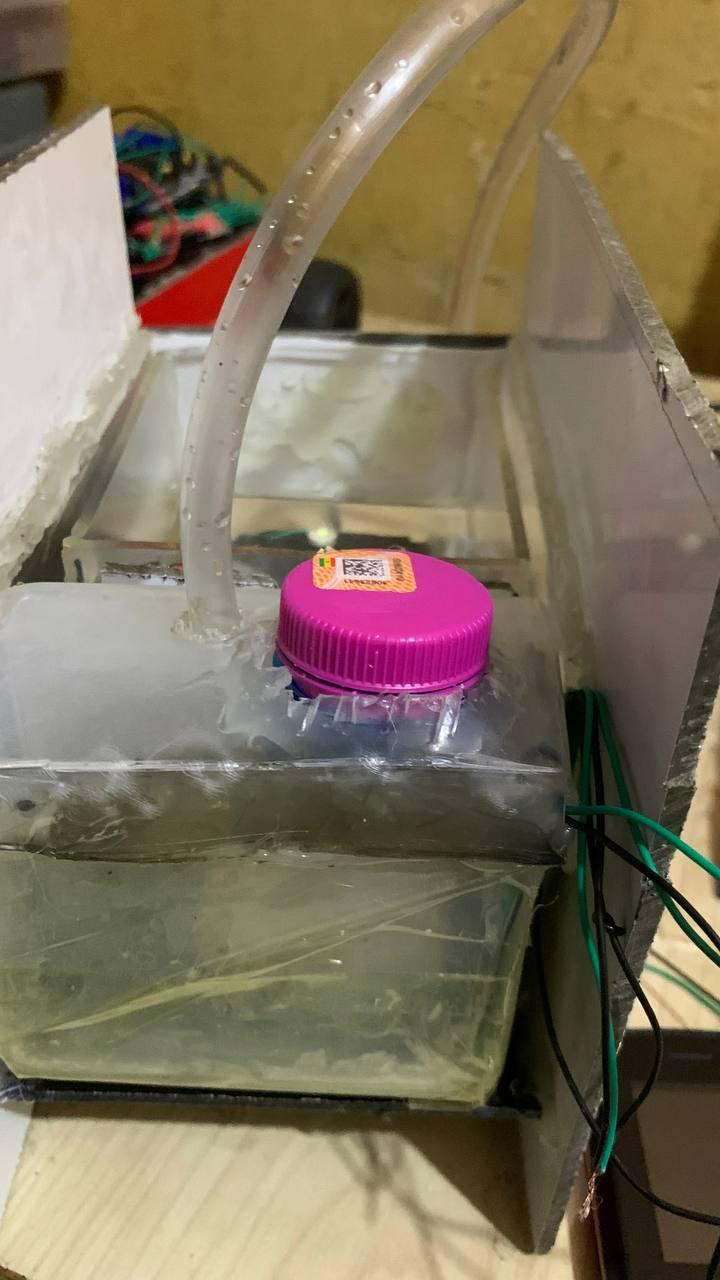
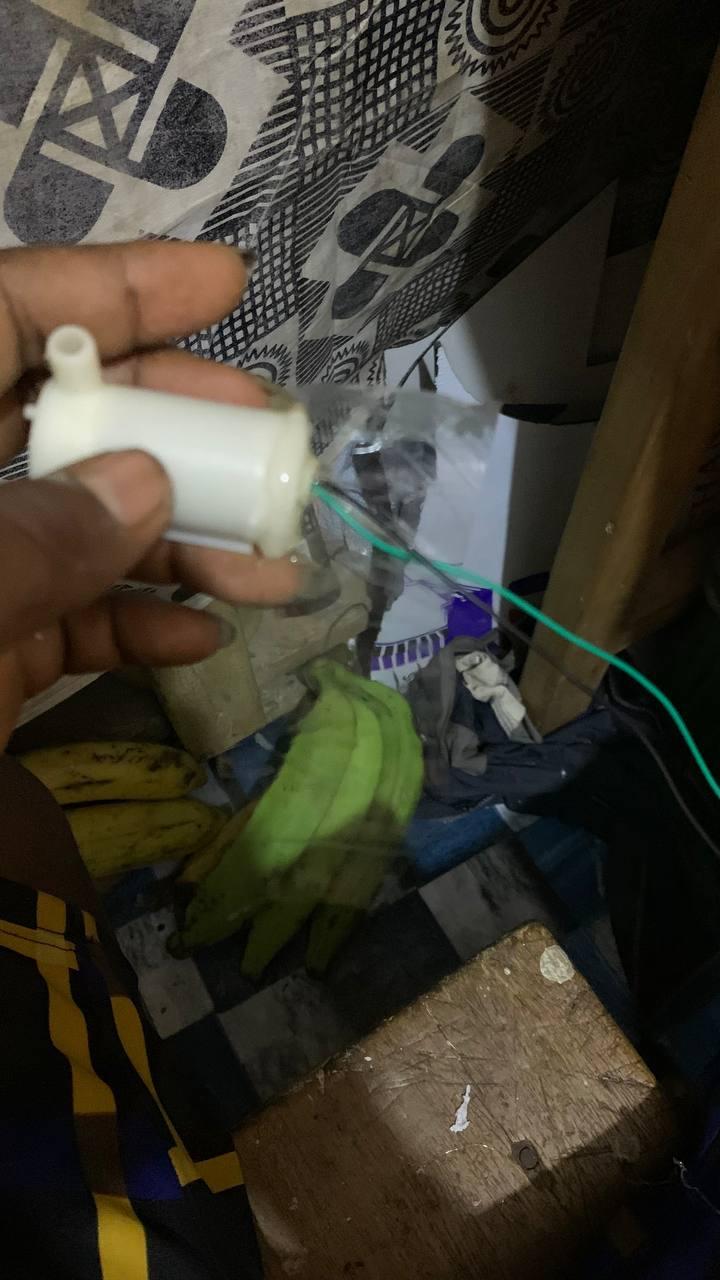
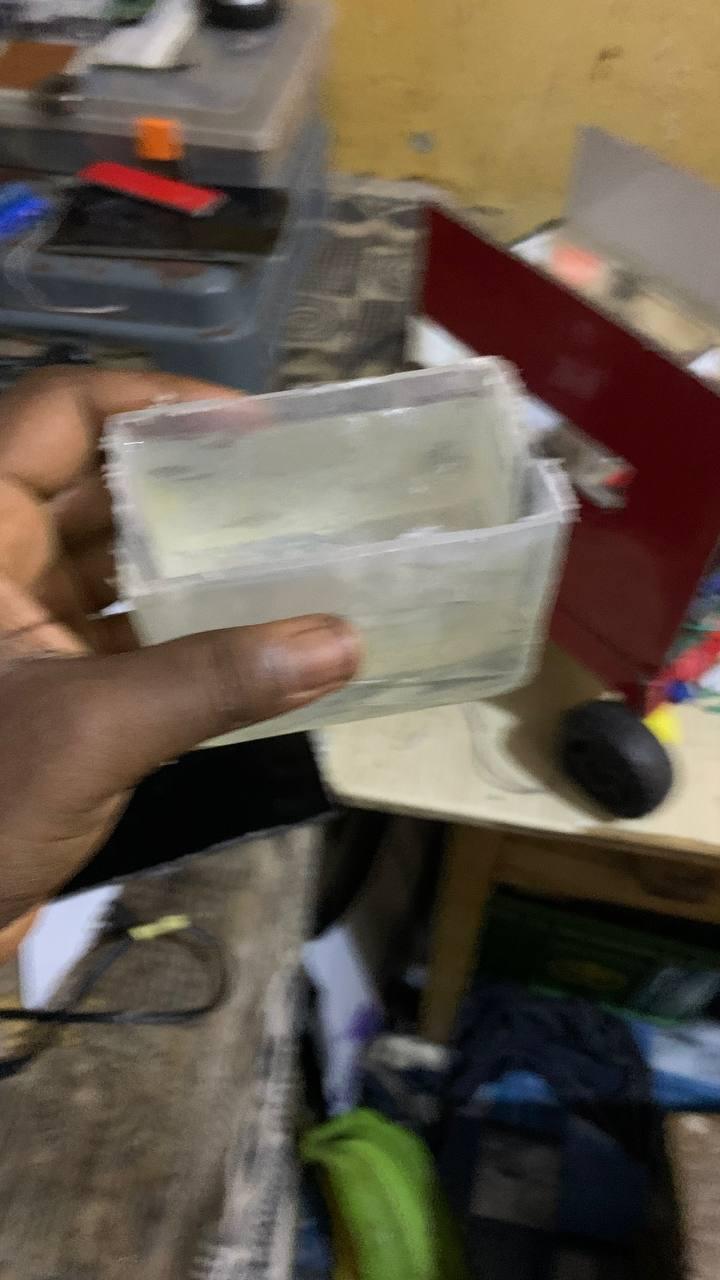
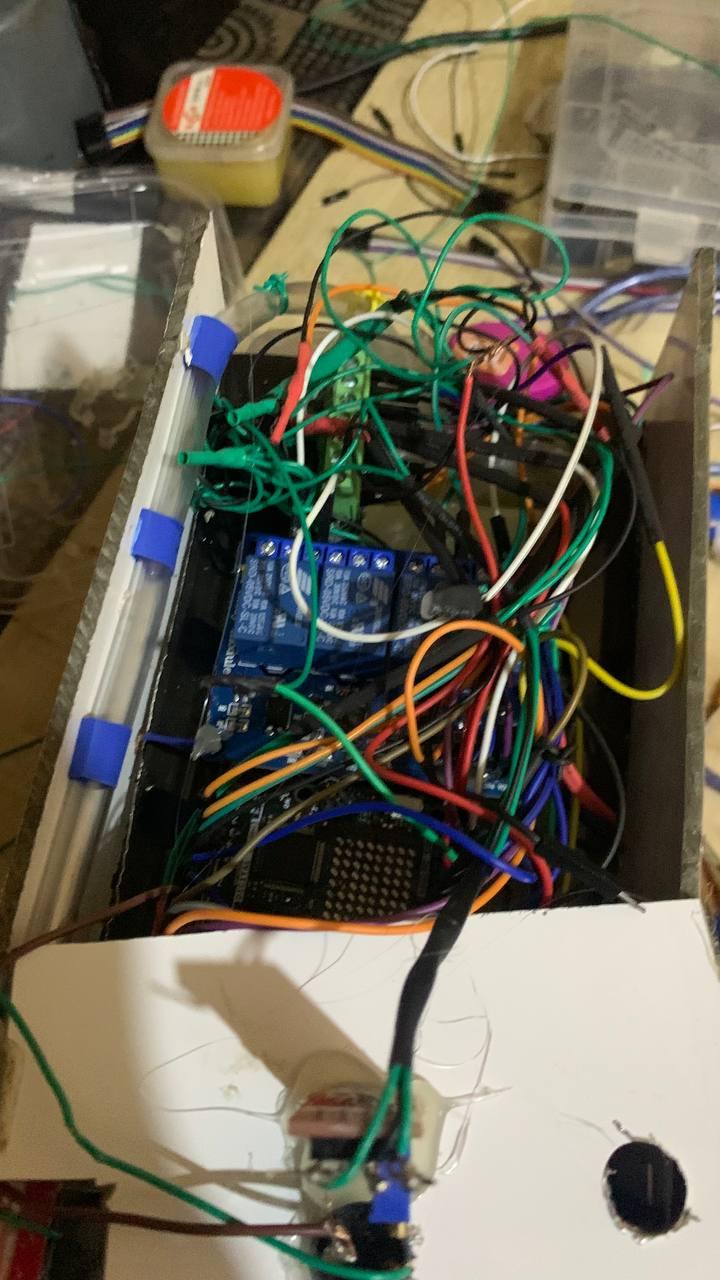
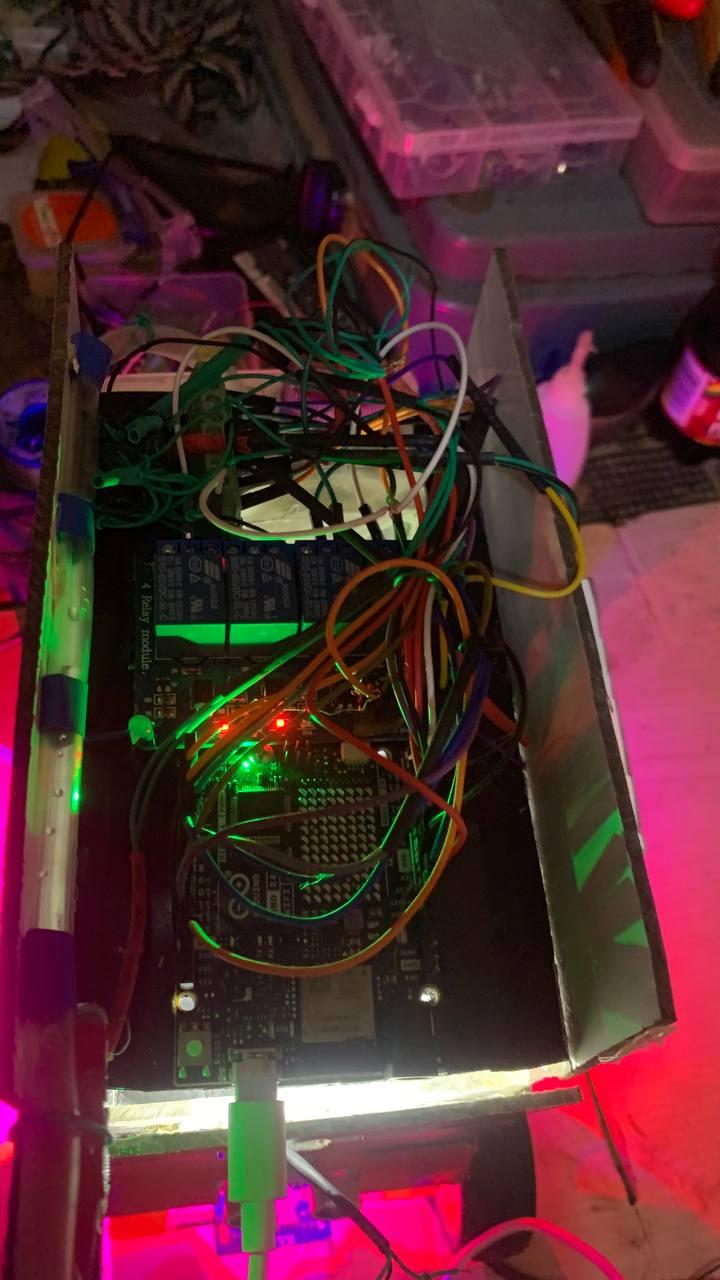
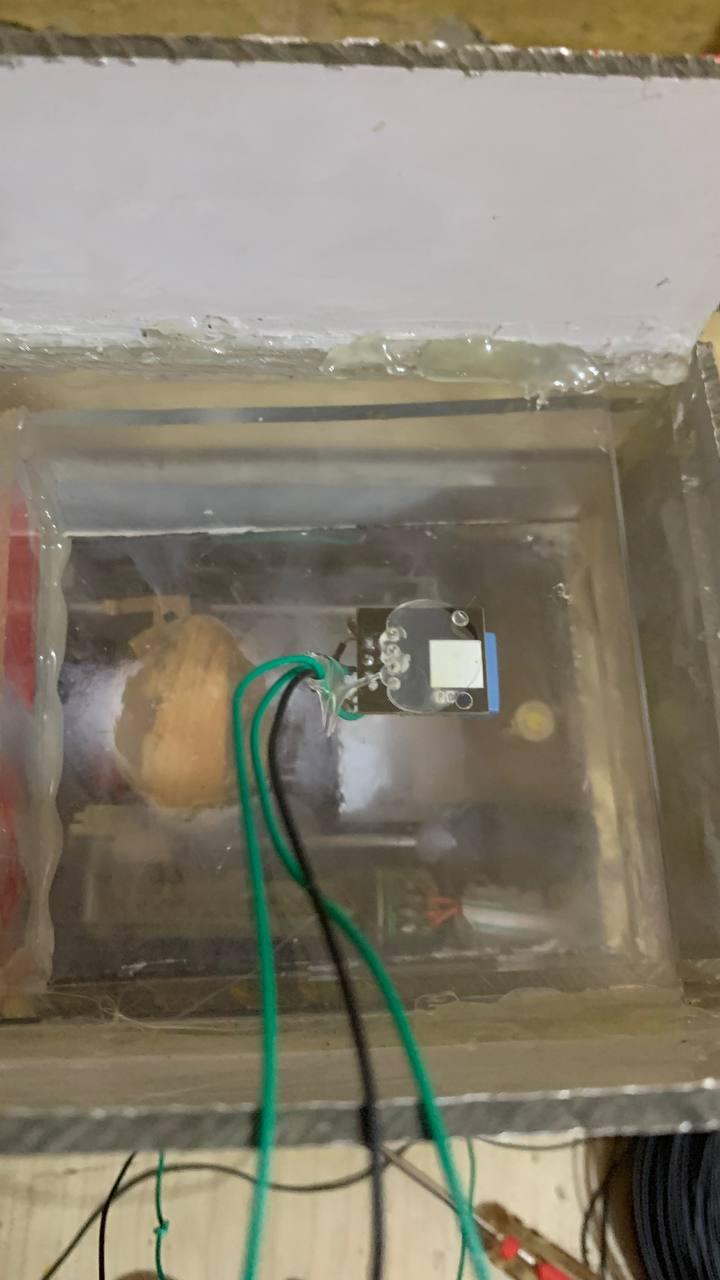
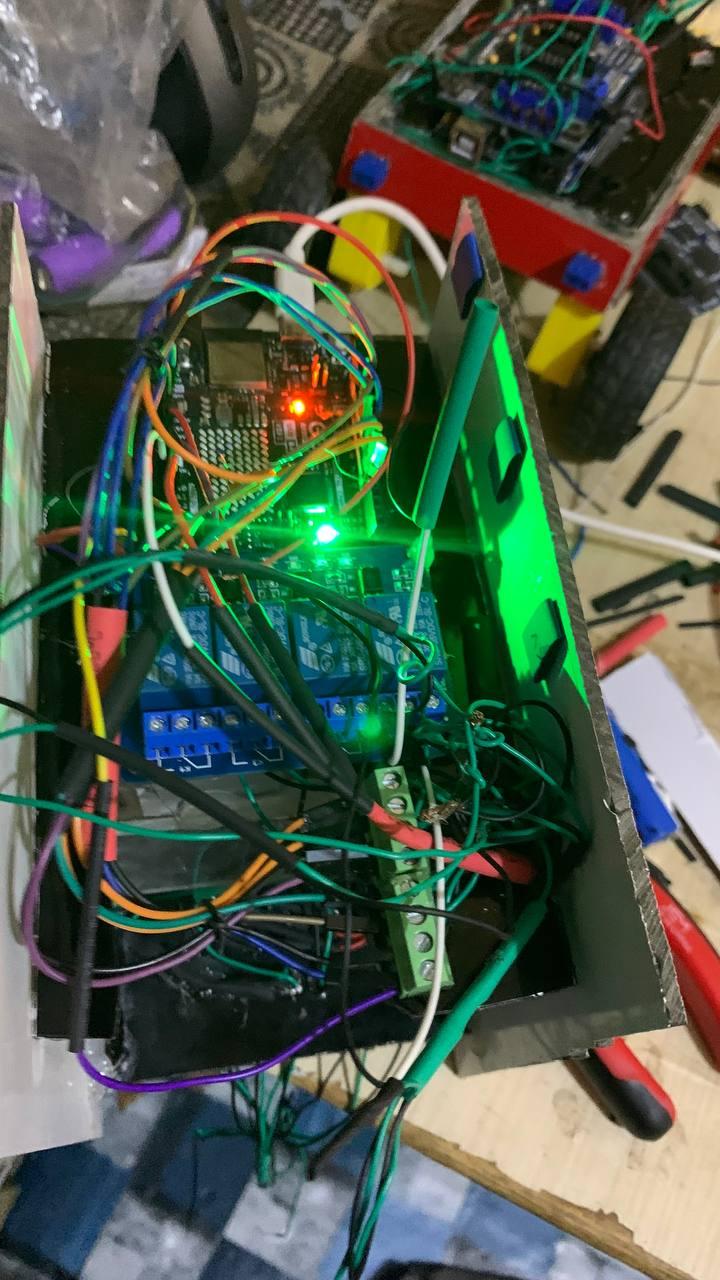
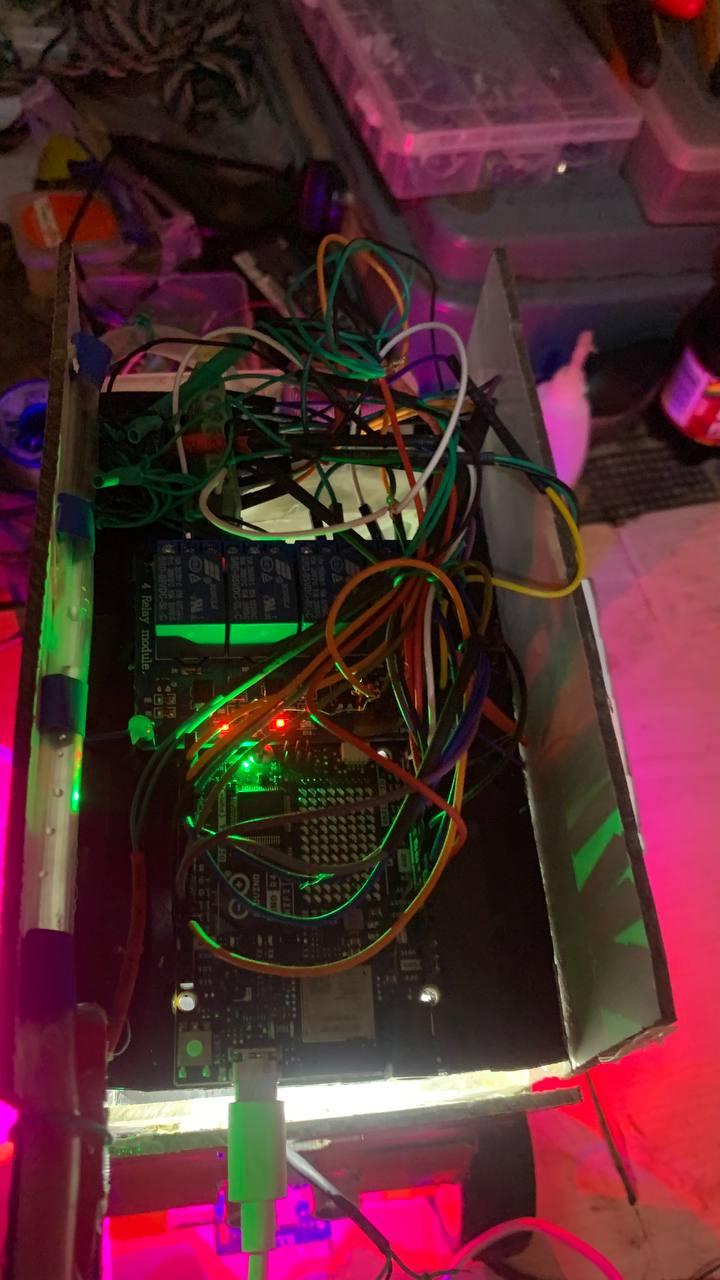
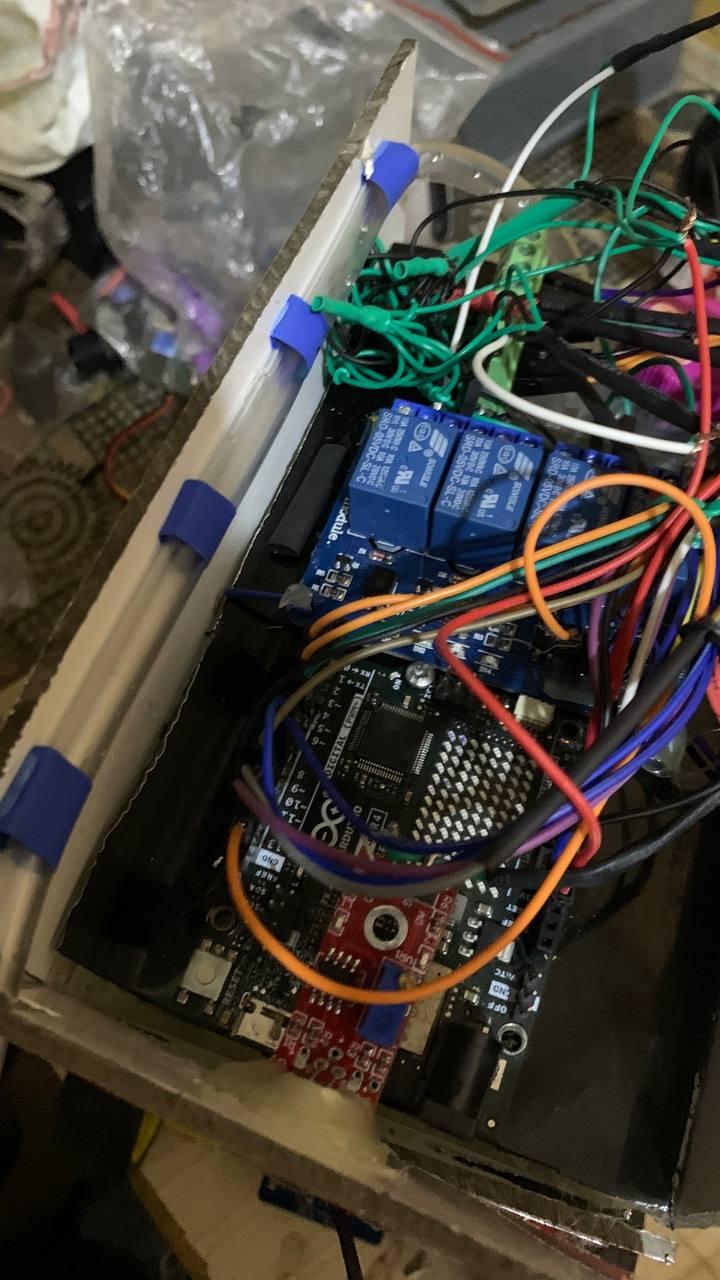
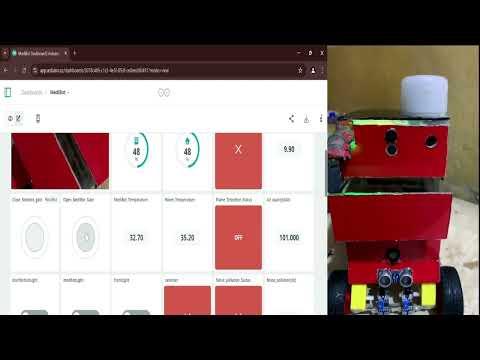
Medibot, the hospital service robot, represents a groundbreaking innovation aimed at transforming healthcare operations. Designed for efficiency, safety, and environmental monitoring, this project is an ambitious effort to integrate advanced robotics with healthcare services. This introductory guide provides step-by-step instructions to help innovators and technologists build their version of Medibot, focusing on modular design and functionality to simplify the implementation process.

The inspiration for Medibot stems from real-world challenges such as the COVID-19 pandemic. During such crises, reducing physical contact between healthcare workers and infected patients can significantly lower the risk of transmission. By automating tasks such as medication delivery, sanitization, and environmental monitoring, Medibot minimizes the contact hours doctors spend administering drugs to patients, enhancing both safety and efficiency.

The project is currently in its first phase, focusing on core functionalities. Once this phase is successfully implemented, it will be scaled up to include more advanced features and broader applications.


Supplies

Tools:

  1. Soldering iron and solder
  2. Screwdrivers (assorted sizes)
  3. Wire cutter and stripper
  4. Hot glue gun
  5. Multimeter
  6. Ruler
  7. pencil

Components:

  1. Arduino Uno
  2. Arduino Uno R4
  3. L293D motor driver shield
  4. 4 DC motors with wheels
  5. Ultrasonic sensor (HC-SR04)
  6. 2 IR sensors (for line following)
  7. Bluetooth module (e.g., HC-05 or HC-06)
  8. LED (
  9. Power source (9V battery or rechargeable Li-ion battery pack)
  10. Jumper wires (male-to-male, female-to-male)
  11. Breadboard
  12. Switches (optional, for manual control)
  13. Mounting chassis for the robot
  14. MQ_7
  15. Flame sensor
  16. Dht11
  17. sound sensor

Designing MediBot With Tinkercad

photo_40_2025-01-13_19-42-30.jpg
Mediboat with the disinfection.png
Mediboat with the disinfection (6).png
Mediboat with the disinfection (1).png

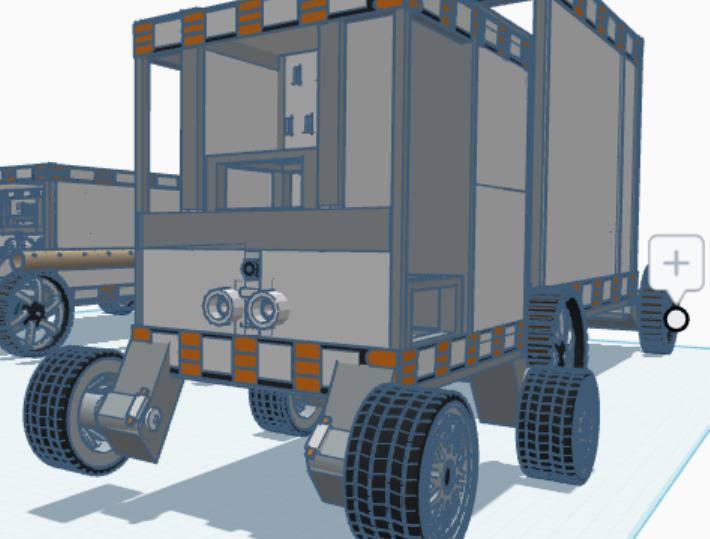
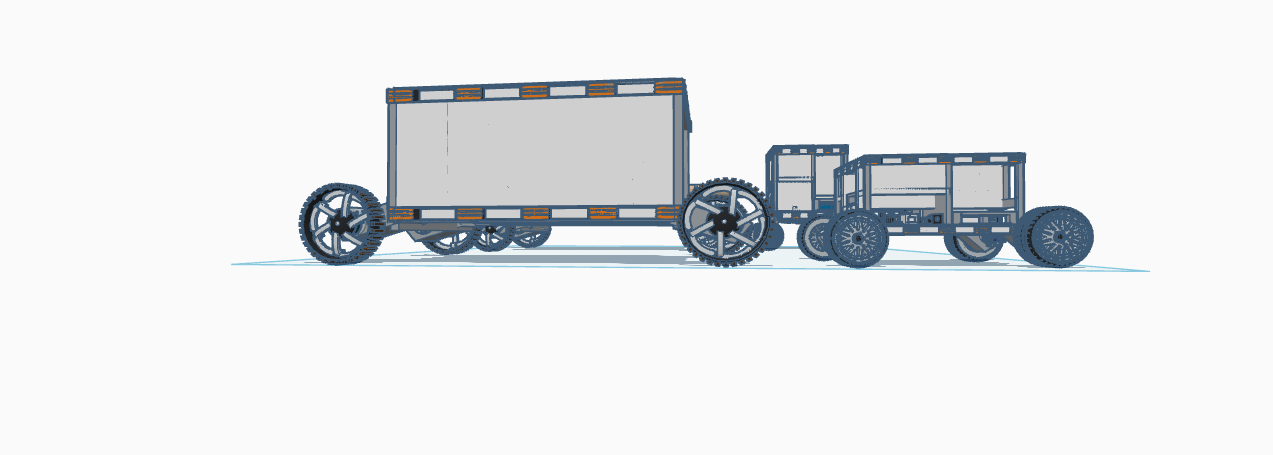
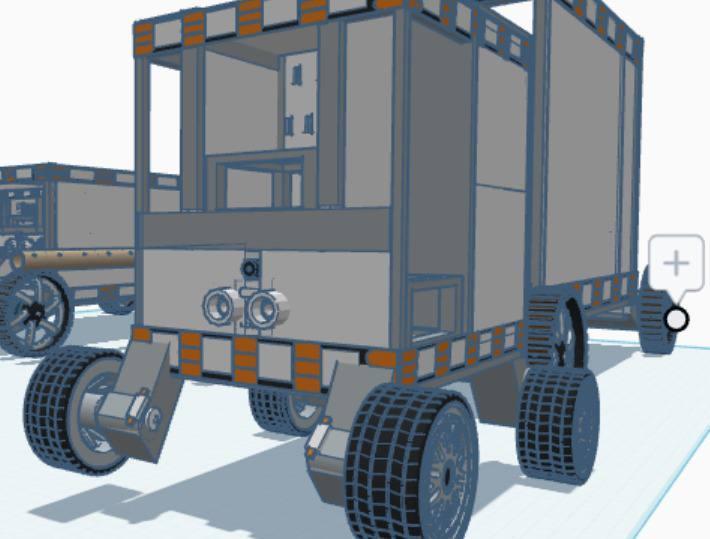
The next step in the project was designing the 3D structure of the bot using Tinkercad. Tinkercad, being a beginner-friendly yet powerful 3D design tool, allowed us to visualize how the bot would look physically. This step involved creating a virtual prototype, defining the placement of key components like sensors, LEDs, the sanitizer module, and the structure housing all these elements.


Using Tinkercad, we designed the overall framework of the bot to ensure it was compact, efficient, and aesthetically pleasing. The virtual model also helped us assess the spatial arrangement and accessibility of all components, ensuring that the wiring and hardware placement would align seamlessly in the physical build.


This 3D design served as the foundation for assembling the physical structure, providing a clear and organized layout for mounting all the electronic and mechanical components.

Build Medibot Using Locoboard and 3D Design
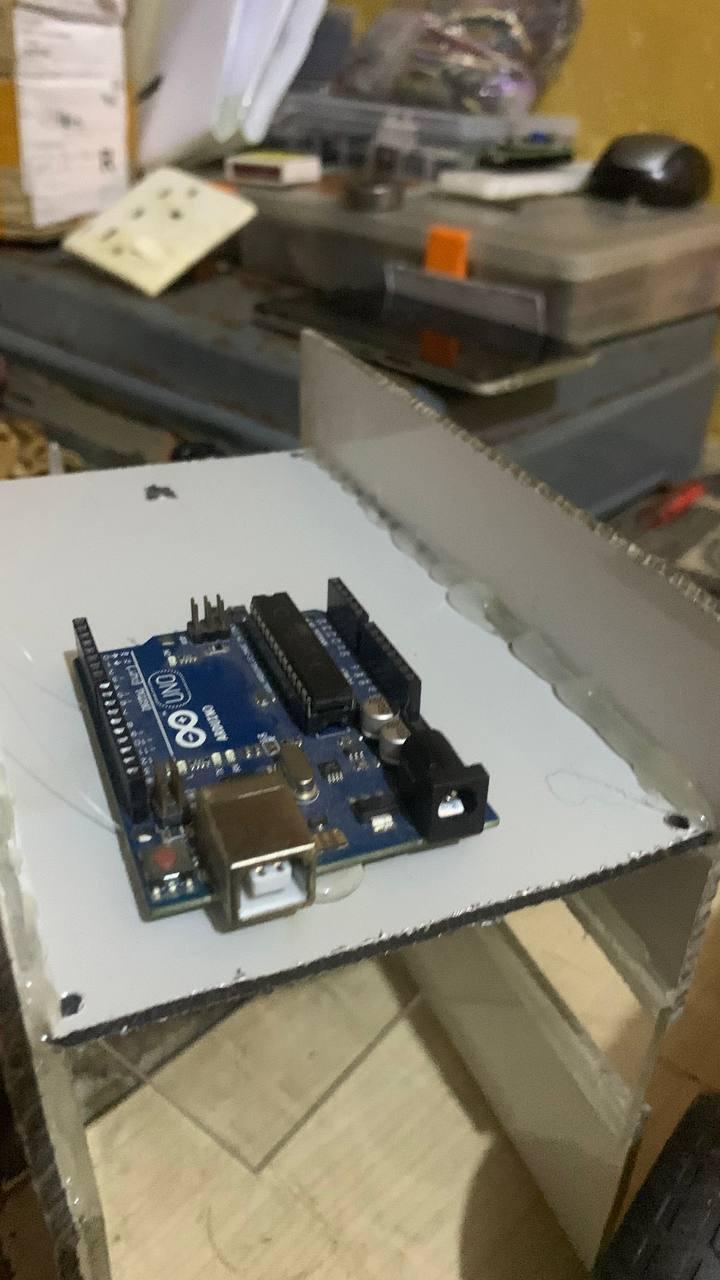
photo_1_2025-01-13_19-42-30.jpg
photo_2_2025-01-13_19-42-30.jpg
photo_3_2025-01-13_19-42-30.jpg
photo_5_2025-01-13_19-42-30.jpg
photo_8_2025-01-13_19-42-30.jpg
photo_28_2025-01-13_19-42-30.jpg
photo_30_2025-01-13_19-42-30.jpg
photo_32_2025-01-13_19-42-30.jpg
FJ2NGQDM5V216TP.jpg

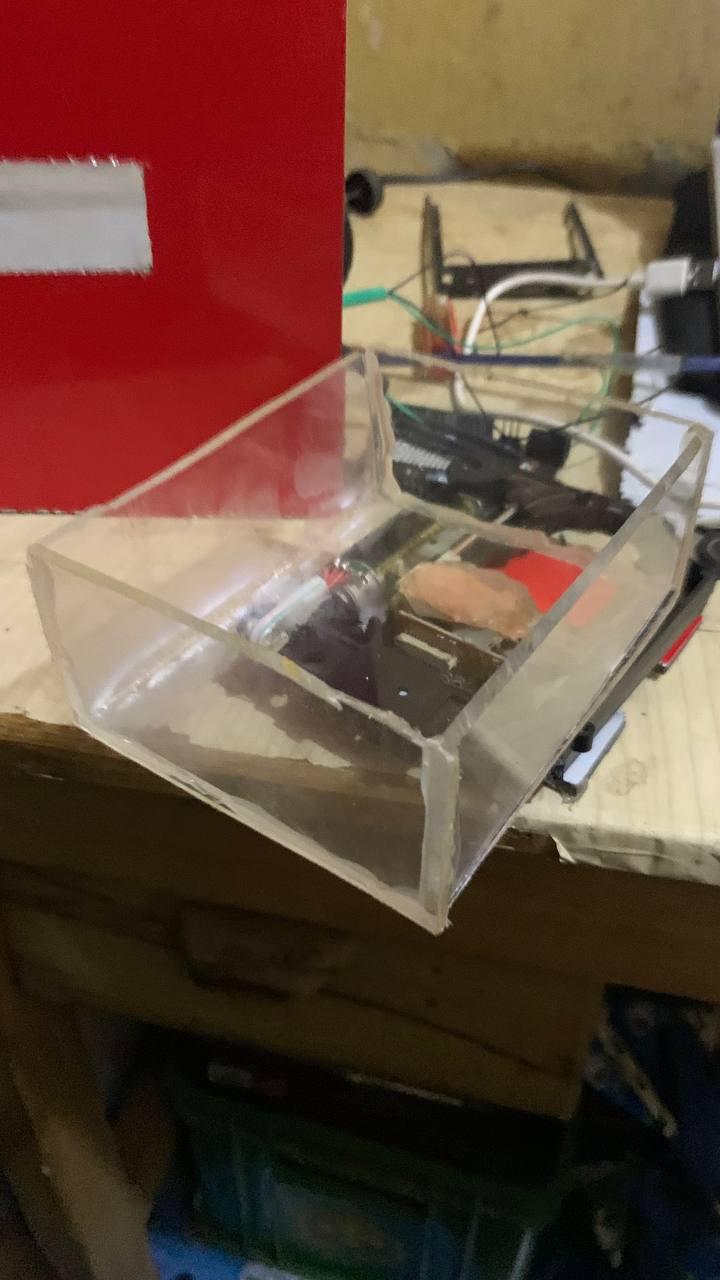
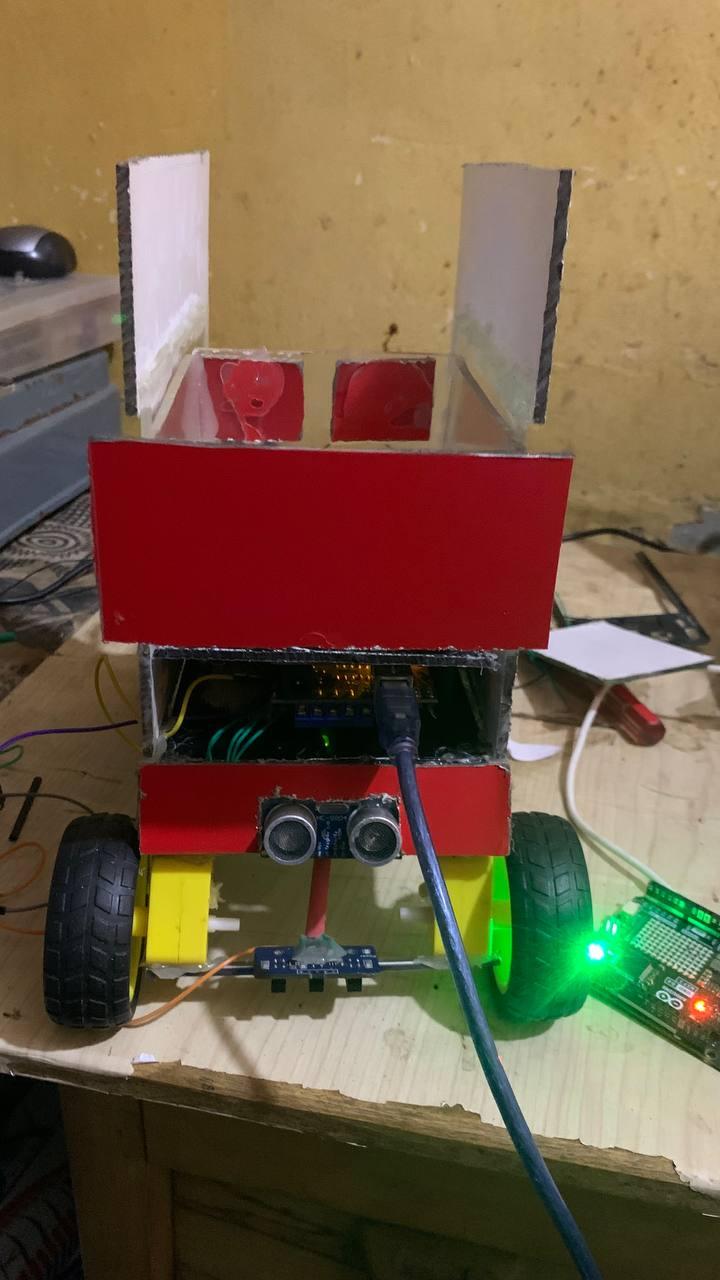
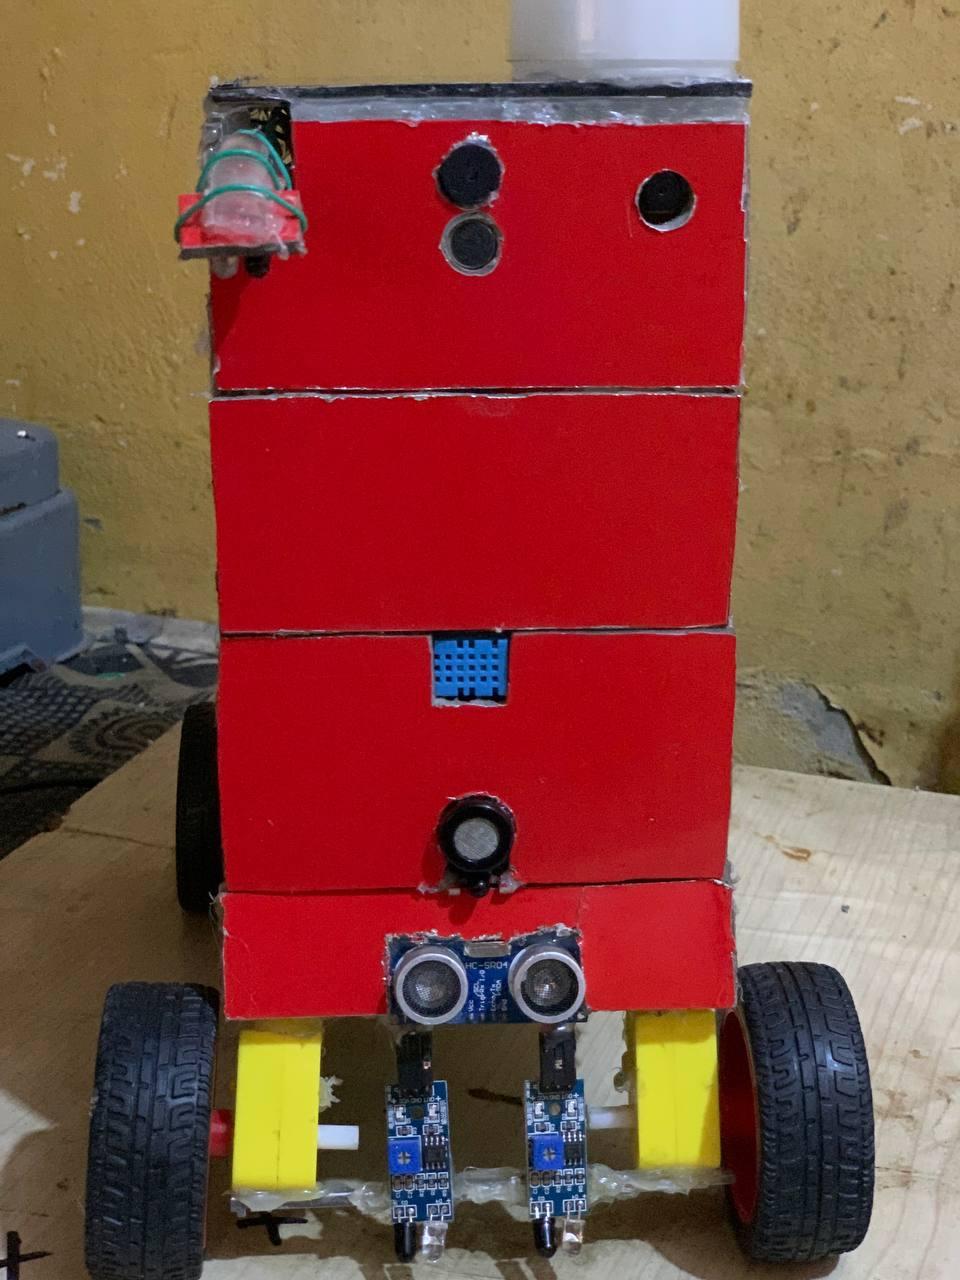
In this step, we will assemble the Medibot using a Locoboard (a modular board for easy construction) and follow the 3D design to ensure proper placement of all components. The goal is to have a sturdy, functional robot with all components securely mounted.

  1. Assemble the Locoboard Structure:
  2. Start by gathering all the parts of the Locoboard that you’ll be using for your robot's frame. Ensure you have all the connectors, panels, and mounting brackets that come with the kit.
  3. Build the base of the robot following the 3D design for the correct dimensions and layout.
  4. Secure the motor driver, motors, and wheels to the base of the Locoboard using the provided screws or brackets.
  5. Mount the Sensors and Components:
  6. Mount the Ultrasonic Sensor (HC-SR04) on the front of the robot for effective obstacle detection, ensuring it faces forward and is slightly elevated.
  7. Position the IR sensors close to the ground for accurate line-following capabilities, securely fastened to avoid misalignment.
  8. Attach the Bluetooth module (HC-05 or HC-06) where it can communicate effectively with your control device (smartphone/laptop).
  9. Mount the MQ-7 Air Quality Sensor on the upper part of the robot’s body for proper airflow and accurate air quality readings.
  10. Position the Flame Sensor on the front or top section of the robot, ensuring it is pointed at an open area for flame detection.
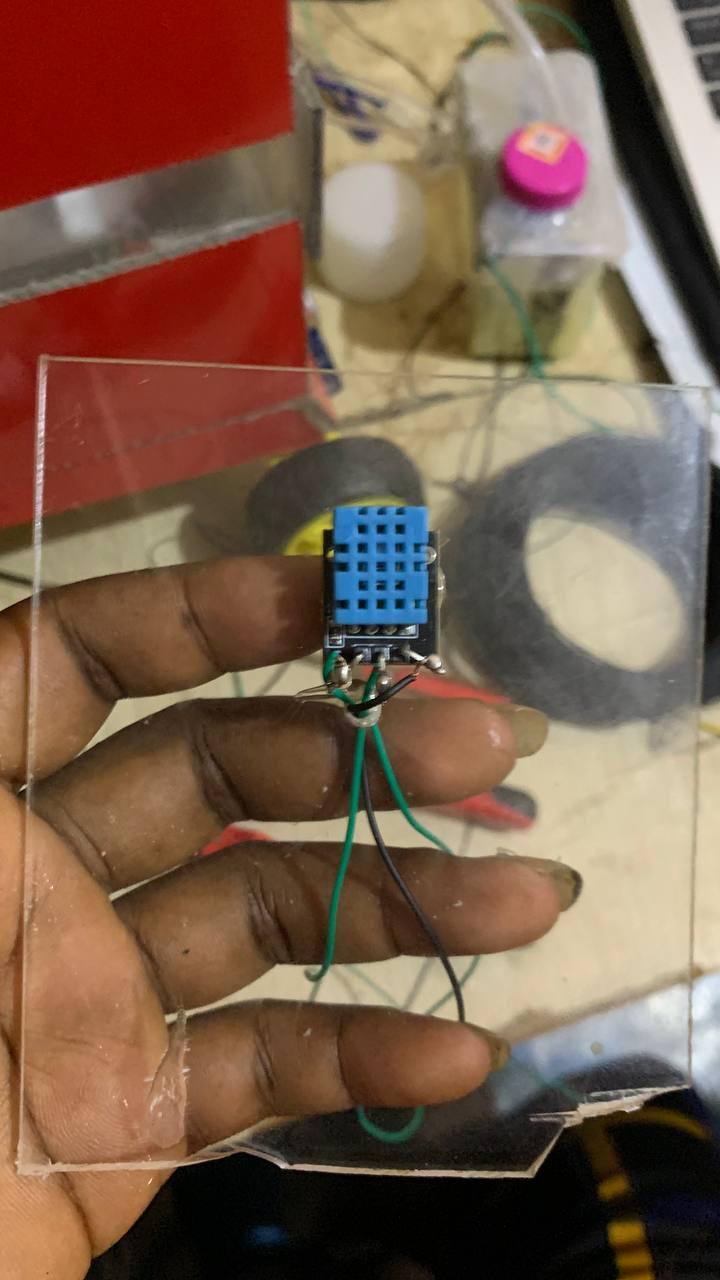
  11. Attach the DHT11 (Temperature and Humidity Sensor) where it won’t be obstructed, ensuring accurate readings.
  12. Place the Sound Sensor where it can detect noise effectively, preferably in a raised position for better detection.
  13. Position the LEDs at visible locations for real-time feedback on the robot’s status.
  14. Secure the Power Source:
  15. Place the power source (either a 9V battery or rechargeable Li-ion pack) in a secure compartment on the robot, preferably near the center of the base for balance.
  16. Connect the power lines to the Arduino and motor driver to provide power to the system.
  17. Ensure Stability and Safety:
  18. After mounting all components, check the stability of the robot. Ensure that the wheels are properly aligned and the sensors are not obstructed by other parts.
  19. Make sure all wires are securely fastened and won’t get caught in the wheels or motors during operation.


Designing and Following the Schematic for the IoT-Enabled Medibot
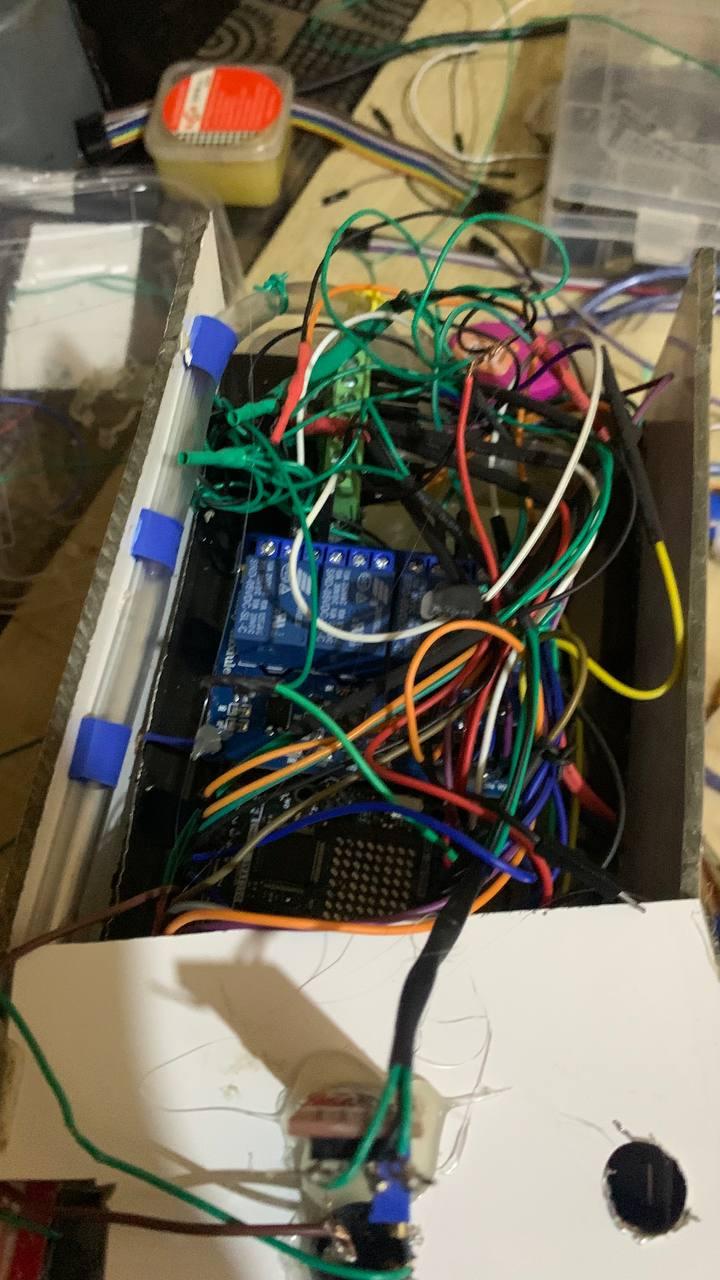
photo_37_2025-01-13_19-42-30.jpg
photo_10_2025-01-14_01-00-52.jpg
photo_11_2025-01-14_01-00-52.jpg
photo_15_2025-01-14_01-00-52.jpg
photo_22_2025-01-14_01-00-52.jpg
Screenshot 2025-01-18 191049.png

The schematic organizes the Medibot’s components into sensors, actuators, relays, and communication modules. Each device is connected to the Arduino Uno board based on the specified pins in your code.

1. Microcontroller: Arduino Uno R4

  1. Central to the Medibot, the Arduino Uno manages data collection from sensors, processes it, and controls actuators and outputs.
  2. The Wire library handles communication with connected modules like the IoT cloud.

2. Sensors and Their Connections

  1. DHT11 Temperature and Humidity Sensors (x2):
  2. Used to measure temperature and humidity at different locations.
  3. Connected to:
  4. Sensor 1 (DHT1_PIN): Digital pin 4
  5. Sensor 2 (DHT2_PIN): Digital pin 5
  6. Data type: Digital signals.
  7. MQ-7 Gas Sensor:
  8. Detects carbon monoxide (CO) levels and calculates Air Quality Index (AQI).
  9. Connected to:
  10. Analog pin A0
  11. Analog input is used for voltage reading and further processed to calculate ppm and AQI.
  12. Sound Sensor:
  13. Monitors environmental noise levels.
  14. Connected to:
  15. Analog pin A2
  16. The analog signal is converted into decibels (dB) using the reference voltage.
  17. Flame Sensor:
  18. Detects flames or fire in the vicinity.
  19. Connected to:
  20. Digital pin 6
  21. Reads a HIGH or LOW digital signal to determine the presence of fire.
  22. IR Sensor for Sanitizer Activation:
  23. Detects objects (e.g., hands) in proximity for activating the sanitizer.
  24. Connected to:
  25. Digital pin 10
  26. The output (HIGH/LOW) triggers the relay controlling the sanitizer dispenser.

3. Actuators and Outputs

  1. Relay Module for Various Functions:
  2. Disinfection Light: Connected to pin 7
  3. Front Light: Connected to pin 8
  4. Medibot Light: Connected to pin 11
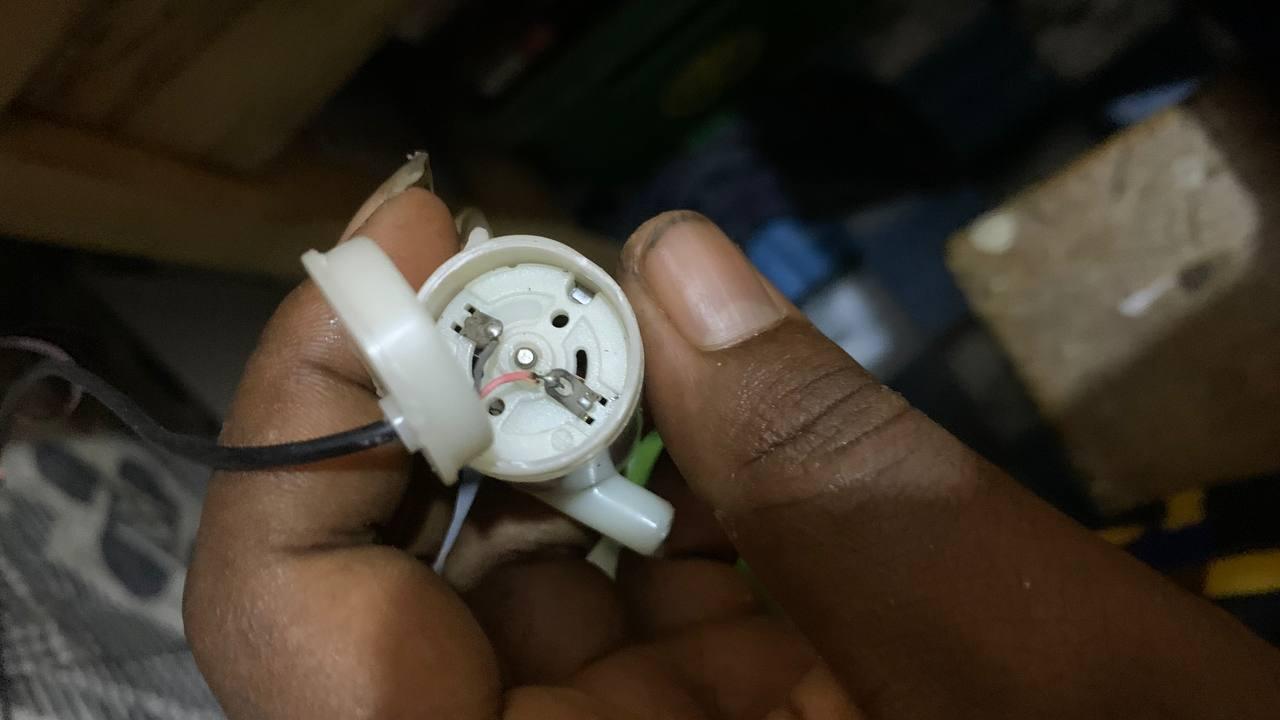
  5. Sanitizer Dispenser Motor: Controlled via a relay connected to pin 12
  6. Buzzer:
  7. Emits sound alerts for harmful gas levels, flame detection, or other hazards.
  8. Connected to:
  9. Digital pin 9
  10. Green LED:
  11. Indicates the sanitizer system's idle state.
  12. Connected to:
  13. Digital pin 2

4. IoT Integration

  1. The Medibot communicates with the Arduino IoT Cloud for remote control and monitoring using the ArduinoCloud and thingProperties.h.
  2. Cloud variables such as gasAlertLight, soundAlert, and handSanitized reflect real-time updates.

Key Features from the Schematic

  1. Centralized Connections:
  2. The Arduino Uno acts as the control hub, processing input signals and sending output commands.
  3. Sensors use both analog and digital pins for optimized functionality.
  4. Modular Relays:
  5. Independent control of lights, sanitizer motors, and alert systems through the relay module.
  6. IoT Monitoring:
  7. Real-time data from the Medibot is synced with the cloud, enabling remote control and condition monitoring.


Wiring Medibot – Connecting Components As Per the Schematics
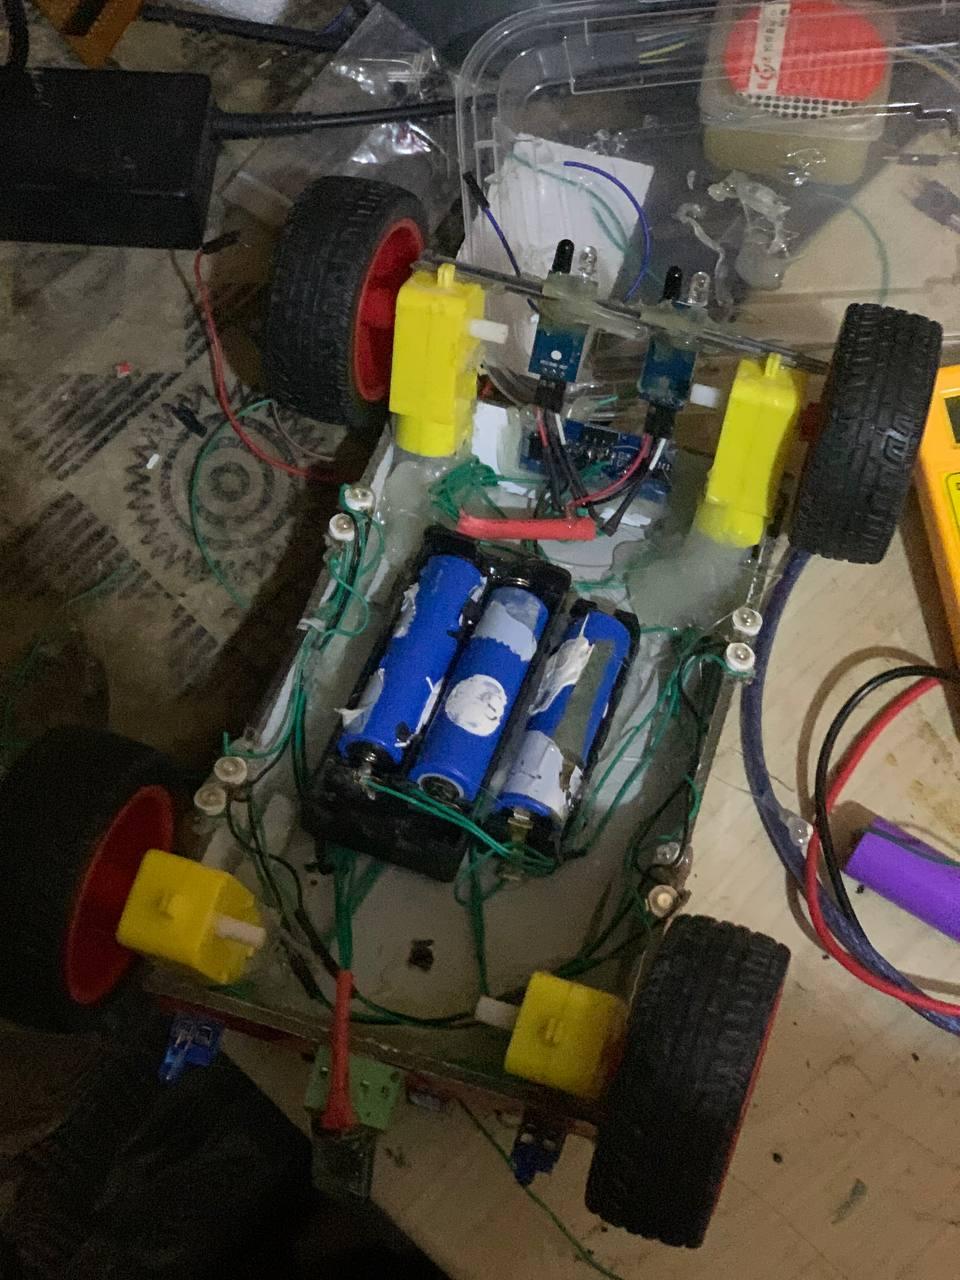
photo_20_2025-01-13_19-42-30.jpg
photo_23_2025-01-13_19-42-30.jpg
photo_27_2025-01-13_19-42-30.jpg
photo_31_2025-01-13_19-42-30.jpg
photo_34_2025-01-13_19-42-30.jpg
photo_35_2025-01-13_19-42-30.jpg
photo_41_2025-01-13_19-42-30.jpg
photo_43_2025-01-13_19-42-30.jpg
photo_44_2025-01-13_19-42-30.jpg
photo_47_2025-01-13_19-42-30.jpg

In this step, we will connect all the components according to the provided wiring schematic. Here's how you’ll connect each component:

  1. Arduino Uno or Arduino Uno R4: The brain of the Medibot.
  2. Connect all wiring back to the appropriate pins on the Arduino.
  3. L293D Motor Driver Shield: Controls the DC motors.
  4. Connect the input pins of the L293D to the Arduino's digital pins.
  5. Connect the output pins to the DC motors.
  6. 4 DC Motors with Wheels: Enable movement of the Medibot.
  7. Connect each motor to the output pins of the L293D motor driver.
  8. Ultrasonic Sensor (HC-SR04): Used for obstacle detection.
  9. VCC to 5V on Arduino.
  10. GND to ground.
  11. Trigger pin to a digital pin on Arduino.
  12. Echo pin to a digital pin on Arduino.
  13. 2 IR Sensors (for Line Following): Help Medibot follow a line.
  14. VCC to 5V.
  15. GND to ground.
  16. Output pin of each sensor to digital pins on Arduino.
  17. Bluetooth Module (HC-05 or HC-06): For remote control.
  18. VCC to 5V.
  19. GND to ground.
  20. TX pin of Bluetooth to RX pin on Arduino.
  21. RX pin of Bluetooth to TX pin on Arduino.
  22. LEDs: For real-time status feedback.
  23. Connect the anode (longer leg) to the digital pins of Arduino through current-limiting resistors.
  24. Power Source (9V Battery or Rechargeable Li-ion Battery Pack): Powers the robot.
  25. Connect the power source to the Arduino and motor driver.
  26. Jumper Wires (Male-to-Male, Female-to-Male): For making connections between components.
  27. Breadboard: To organize connections.
  28. Switches (Optional): For manual control.
  29. Wire switches to the power supply or control pins on Arduino.
  30. Mounting Chassis for the Robot: To secure all components.
  31. MQ-7 Air Quality Sensor: For monitoring air quality (carbon monoxide).
  32. VCC to 5V.
  33. GND to ground.
  34. Output pin to an analog pin on the Arduino for reading CO levels.
  35. Flame Sensor: For detecting fire or heat.
  36. VCC to 5V.
  37. GND to ground.
  38. Output pin to a digital pin on Arduino for fire detection.
  39. DHT11: For temperature and humidity sensing.
  40. VCC to 5V.
  41. GND to ground.
  42. Data pin to a digital pin on Arduino.
  43. Sound Sensor: For detecting sound pollution levels.
  44. VCC to 5V.
  45. GND to ground.
  46. Output pin to an analog pin on Arduino to read sound levels.


Bluetooth Remote Control and Line Tracking

photo_4_2025-01-13_19-42-30.jpg
photo_6_2025-01-13_19-42-30.jpg
photo_9_2025-01-13_19-42-30.jpg
photo_13_2025-01-14_01-00-52.jpg
photo_14_2025-01-14_01-00-52.jpg
photo_16_2025-01-14_01-00-52.jpg
Screenshot 2025-01-18 191236.png

The Bluetooth communication system allows users to control the robot remotely via a smartphone or computer. Here’s how to build and set up this functionality:

  1. *Gather Required Componentity:
  2. HC-05
  3. Arduino microcontroller
  4. Jumper wires
  5. Smartphone or tablet with a Bluetooth app
  6. Connect the Bluetooth Module:
  7. Attach the VCC pin of the Bluetooth module to the Arduino’s 5V output.
  8. Connect the GND pin to the Arduino’s ground.
  9. Link the TX pin of the Bluetooth module to the RX pin of the Arduino.
  10. Link the RX pin of the Bluetooth module to the TX pin of the Arduino.
  11. Write and Upload the Code:
  12. Use the SoftwareSerial library to facilitate communication between the Bluetooth module and the Arduino.
  13. Include commands for motor control based on user input from the paired device.
  14. Test the Setup:
  15. Pair the Bluetooth module with your smartphone.
  16. Open a Bluetooth terminal app and send commands to test robot responses.
Developing the Line Tracking System

The line tracking system ensures that the robot can follow a pre-defined path autonomously. Follow these steps to implement this functionality:

  1. Components Needed:
  2. IR sensors for line detection
  3. Arduino microcontroller
  4. L293D motor driver module
  5. DC motors with wheels
  6. Robot chassis
  7. Setup and Wiring:
  8. Secure the IR sensors to the base of the robot so they face the ground.
  9. Connect sensor outputs to the Arduino’s digital input pins.
  10. Wire the motor driver module to the Arduino for controlling motor movements.
  11. Program the Line Tracker:
  12. Write code to read IR sensor inputs and control motor movement:
  13. When the left sensor detects a line, make the robot turn left.
  14. When the right sensor detects a line, make the robot turn right.
  15. When both sensors detect the line, move forward.
  16. Calibrate the sensors to differentiate between the line and the surrounding surface.
  17. Test the Line Following Capability:
  18. Use black tape on a white surface to create a test track.
  19. Place the robot on the track and observe its ability to follow the path.

With these foundational systems—Bluetooth communication and line tracking—the robot is equipped for remote control and basic autonomous navigation. The next steps will include integrating environmental monitoring, medication delivery, and other advanced functionalities.

Uploading the Code to the Arduino Boards

Medibot uses three Arduino boards, each performing specific tasks. We'll upload different codes to each board:

  1. Arduino Uno R4 for IoT Functionality
  2. Arduino Board for Stepper Motor (Gate Control)
  3. Arduino Board for Movement Control (Bluetooth and Line Tracking)

4.1: Uploading Code to Arduino Uno R4 (IoT Part)

  1. Prepare the Arduino IDE:
  2. Open the Arduino IDE and select the Arduino Uno R4 under Tools > Board.
  3. Select the correct port under Tools > Port.
  4. Insert the Code for IoT Functionality:
  5. This code will handle the IoT-related features like communication and sensor data uploading.
  6. Insert the IoT code here.
  7. Upload the Code:
  8. Click on the Upload button in the Arduino IDE to upload the code to the Arduino Uno R4.
  9. Test the IoT Features:
  10. Power on Medibot and check if the IoT functions are working as expected.

Medibot uses three Arduino boards, each performing specific tasks. We'll upload different codes to each board:

  1. Arduino Uno R4 for IoT Functionality
  2. Arduino Board for Stepper Motor (Gate Control)
  3. Arduino Board for Movement Control (Bluetooth and Line Tracking)

Uploading Code to Arduino Uno R4 (IoT Part using Arduino IoT Cloud)

  1. Set Up Arduino IoT Cloud:
  2. Visit Arduino IoT Cloud.
  3. Sign in with your Arduino account (or create one if you don't have an account yet).
  4. Create a new Thing on the platform, which will represent your Medibot’s IoT functionality.
  5. Create Variables:
  6. In the Thing you've created, define the necessary cloud variables to control and monitor the sensors (e.g., temperature, humidity, sensor values, etc.).
  7. Insert the necessary variables here (e.g., temperaturepin, humiditypin, motion, etc.).
  8. Arduino IoT Cloud Code (ThingsProperty and Main Code):
  9. In the Arduino IoT Cloud, there are two main parts for coding:
  10. ThingsProperty Code: This part handles the configuration of your cloud variables.
  11. Main Code: This part defines how your device behaves based on the variables and communicates with the IoT Cloud.
  12. ThingsProperty Code: You will define your cloud variables in the ThingsProperty section of the Arduino IoT Cloud interface.


// Code generated by Arduino IoT Cloud, DO NOT EDIT.

#include <ArduinoIoTCloud.h>
#include <Arduino_ConnectionHandler.h>

const char SSID[] = SECRET_SSID; // Network SSID (name)
const char PASS[] = SECRET_OPTIONAL_PASS; // Network password (use for WPA, or use as key for WEP)

void onAqiChange();
void onHumSensor1Change();
void onHumSensor2Change();
void onPpmChange();
void onSoundLevelChange();
void onTempSensor1Change();
void onTempSensor2Change();
void onDisinfectionLightChange();
void onFlameDetectedChange();
void onFrontLightChange();
void onGasAlertLightChange();
void onGatebackChange();
void onHandSanitizedChange();
void onMedibotLightChange();
void onSoundAlertChange();
void onSoundExceededChange();
void onStepperbuttonChange();

float aqi;
float humSensor1;
float humSensor2;
float ppm;
float soundLevel;
float tempSensor1;
float tempSensor2;
bool disinfectionLight;
bool flameDetected;
bool frontLight;
bool gasAlertLight;
bool gateback;
bool handSanitized;
bool medibotLight;
bool soundAlert;
bool soundExceeded;
bool stepperbutton;

void initProperties(){

ArduinoCloud.addProperty(aqi, READWRITE, ON_CHANGE, onAqiChange);
ArduinoCloud.addProperty(humSensor1, READWRITE, ON_CHANGE, onHumSensor1Change);
ArduinoCloud.addProperty(humSensor2, READWRITE, ON_CHANGE, onHumSensor2Change);
ArduinoCloud.addProperty(ppm, READWRITE, ON_CHANGE, onPpmChange);
ArduinoCloud.addProperty(soundLevel, READWRITE, ON_CHANGE, onSoundLevelChange);
ArduinoCloud.addProperty(tempSensor1, READWRITE, ON_CHANGE, onTempSensor1Change);
ArduinoCloud.addProperty(tempSensor2, READWRITE, ON_CHANGE, onTempSensor2Change);
ArduinoCloud.addProperty(disinfectionLight, READWRITE, ON_CHANGE, onDisinfectionLightChange);
ArduinoCloud.addProperty(flameDetected, READWRITE, ON_CHANGE, onFlameDetectedChange);
ArduinoCloud.addProperty(frontLight, READWRITE, ON_CHANGE, onFrontLightChange);
ArduinoCloud.addProperty(gasAlertLight, READWRITE, ON_CHANGE, onGasAlertLightChange);
ArduinoCloud.addProperty(gateback, READWRITE, ON_CHANGE, onGatebackChange);
ArduinoCloud.addProperty(handSanitized, READWRITE, ON_CHANGE, onHandSanitizedChange);
ArduinoCloud.addProperty(medibotLight, READWRITE, ON_CHANGE, onMedibotLightChange);
ArduinoCloud.addProperty(soundAlert, READWRITE, ON_CHANGE, onSoundAlertChange);
ArduinoCloud.addProperty(soundExceeded, READWRITE, ON_CHANGE, onSoundExceededChange);
ArduinoCloud.addProperty(stepperbutton, READWRITE, ON_CHANGE, onStepperbuttonChange);

}

WiFiConnectionHandler ArduinoIoTPreferredConnection(SSID, PASS);

  1. Main Code: This section contains the main logic for reading sensors and updating the cloud variables.
#include <Wire.h>
#include "thingProperties.h"
#include <DHT.h>
#include <math.h>

// Define DHT pins and types
#define DHT1_PIN 4 // DHT11 sensor 1 connected to digital pin 4
#define DHT2_PIN 5 // DHT11 sensor 2 connected to digital pin 5
#define DHT_TYPE DHT11

DHT dht1(DHT1_PIN, DHT_TYPE);
DHT dht2(DHT2_PIN, DHT_TYPE);

// Define MQ-7 pin and constants
#define MQ7_PIN A0
const float RL = 10.0; // Load resistance in kOhms
const float RO = 10.0; // Sensor resistance in clean air (calibrated)

// Define Sound Sensor pin
#define SOUND_SENSOR_PIN A2 // Analog pin connected to the sound sensor
#define REFERENCE_VOLTAGE 0.01 // Reference voltage for quiet environment (calibrate)
const float SOUND_THRESHOLD_DB = 65.0; // Threshold level in dB (adjust as needed)

// Define Flame Sensor pin
#define FLAME_SENSOR_PIN 6 // Digital pin for flame sensor

// Define IR Sensor and Relay for Sanitizer Dispenser
#define IRSENSOR_PIN 10 // IR sensor connected to pin 10
#define RELAY_MODULE_PIN 12 // Relay module connected to pin 12
#define GREEN_LED_PIN 2 // Green LED connected to pin 9

// Define Relays for Cloud Variables
#define DISINFECTION_LIGHT_PIN 7 // Relay for disinfection light
#define FRONT_LIGHT_PIN 8 // Relay for front light
#define MEDIBOT_LIGHT_PIN 11 // Relay for medibot light

// Thresholds for harmful levels
const float PPM_THRESHOLD = 35.0; // Harmful gas threshold in ppm
const int AQI_THRESHOLD = 140; // Harmful gas threshold in AQI
int buzzer =9;

// Global Variables
int sensor_value; // Variable to hold IR sensor state

// Function to calculate Rs/Ro
float calculateRsRo(int analogValue) {
float sensorVoltage = analogValue * (5.0 / 1023.0); // Convert analog value to voltage
float Rs = RL * (5.0 - sensorVoltage) / sensorVoltage; // Calculate sensor resistance (Rs)
return Rs / RO; // Return the ratio Rs/Ro
}

// Function to convert Rs/Ro ratio to CO ppm
float calculatePPM(float rsRoRatio) {
float a = -0.45; // Slope of the logarithmic curve
float b = 1.2; // Intercept of the logarithmic curve
return pow(10, (a * log10(rsRoRatio) + b)); // Calculate ppm using logarithmic scale
}

// Function to map CO ppm to AQI
float calculateAQI(float ppm) {
if (ppm <= 4.4) return map(ppm, 0.0, 4.4, 0, 50); // Good
else if (ppm <= 9.4) return map(ppm, 4.5, 9.4, 51, 100); // Moderate
else if (ppm <= 12.4) return map(ppm, 9.5, 12.4, 101, 150); // Unhealthy for Sensitive Groups
else if (ppm <= 15.4) return map(ppm, 12.5, 15.4, 151, 200); // Unhealthy
else if (ppm <= 30.4) return map(ppm, 15.5, 30.4, 201, 300); // Very Unhealthy
else return map(ppm, 30.5, 50.0, 301, 500); // Hazardous
}

// Function to calculate sound level in dB
float calculateDb(int analogValue) {
float sensorVoltage = analogValue * (5.0 / 1023.0); // Convert analog value to voltage
return 20 * log10(sensorVoltage / REFERENCE_VOLTAGE); // Convert to dB
}

void setup() {
Wire.begin(); // Start I2C as Master
Serial.begin(9600);

// Initialize DHT sensors
dht1.begin();
dht2.begin();

// Initialize Flame Sensor
pinMode(FLAME_SENSOR_PIN, INPUT);

// Initialize IR Sensor and Relay
pinMode(IRSENSOR_PIN, INPUT);
pinMode(RELAY_MODULE_PIN, OUTPUT);
pinMode(GREEN_LED_PIN, OUTPUT);

// Initialize Relays for Cloud Variables
pinMode(DISINFECTION_LIGHT_PIN, OUTPUT);
pinMode(FRONT_LIGHT_PIN, OUTPUT);
pinMode(MEDIBOT_LIGHT_PIN, OUTPUT);
pinMode (buzzer,OUTPUT);

// Turn off all relays initially
digitalWrite(DISINFECTION_LIGHT_PIN, LOW);
digitalWrite(FRONT_LIGHT_PIN, LOW);
digitalWrite(MEDIBOT_LIGHT_PIN, LOW);

// IoT Cloud setup
initProperties();
ArduinoCloud.begin(ArduinoIoTPreferredConnection);
setDebugMessageLevel(2);
ArduinoCloud.printDebugInfo();

Serial.println("System initialized with DHT11 sensors, MQ-7 CO monitoring, sound sensor, flame sensor, IR sanitizer system, and light controls.");
}

void loop() {
ArduinoCloud.update(); // Sync with IoT Cloud

// Read DHT11 sensors
float temp1 = dht1.readTemperature();
float hum1 = dht1.readHumidity();
float temp2 = dht2.readTemperature();
float hum2 = dht2.readHumidity();

// Read MQ-7 sensor for CO ppm and AQI
int analogValueMQ7 = analogRead(MQ7_PIN);
float rsRoRatio = calculateRsRo(analogValueMQ7);
ppm = calculatePPM(rsRoRatio);
aqi = calculateAQI(ppm);

// Check if gas levels are harmful
if (ppm > PPM_THRESHOLD || aqi > AQI_THRESHOLD) { // Harmful levels detected
gasAlertLight = true; // Activate gas alert light
digitalWrite(buzzer,HIGH);
Serial.println("Harmful gas detected! Gas alert activated.");
} else {
gasAlertLight = false; // Deactivate gas alert light
digitalWrite(buzzer,LOW);
}

// Read Sound Sensor
int analogValueSound = analogRead(SOUND_SENSOR_PIN);
soundLevel = calculateDb(analogValueSound);
soundExceeded = (soundLevel > SOUND_THRESHOLD_DB);

// Check if sound levels are harmful
if (soundLevel > SOUND_THRESHOLD_DB) {
soundAlert = true; // Update cloud variable for noise alert
Serial.println("Excessive noise detected! Sound alert activated.");
} else {
soundAlert = false; // Update cloud variable for noise alert
}

// Read Flame Sensor
flameDetected = digitalRead(FLAME_SENSOR_PIN);
if ( flameDetected) {
digitalWrite(buzzer,HIGH);
delay(2000);
digitalWrite(buzzer,LOW);
} else {
digitalWrite(buzzer,LOW);
}


// Read IR Sensor and control sanitizer
unsigned long previousMillis = 0;
const long interval = 9000; // 9 seconds duration
bool motorRunning = false;

sensor_value = digitalRead(IRSENSOR_PIN);

if (sensor_value == HIGH && !motorRunning) {
digitalWrite(RELAY_MODULE_PIN, HIGH); // Activate motor
digitalWrite(GREEN_LED_PIN, LOW); // Turn off LED
handSanitized = false; // Update cloud variable
previousMillis = millis(); // Save the current time
motorRunning = true; // Mark motor as running
Serial.println("Obstacle Detected. Sanitizing...");
}

if (motorRunning && millis() - previousMillis >= interval) {
digitalWrite(RELAY_MODULE_PIN, LOW); // Deactivate motor after 9 seconds
motorRunning = false; // Mark motor as not running
Serial.println("9 seconds elapsed. Motor off.");
}

if (sensor_value == LOW) {
digitalWrite(RELAY_MODULE_PIN, LOW); // Deactivate motor
digitalWrite(GREEN_LED_PIN, HIGH); // Turn on LED
handSanitized = true; // Update cloud variable
motorRunning = false; // Ensure motor is off
Serial.println("No Obstacle Detected. Idle.");
}


// Log sensor data
logSensorData(temp1, hum1, temp2, hum2);
}

// Helper function to log sensor data
void logSensorData(float temp1, float hum1, float temp2, float hum2) {
Serial.print("Sensor 1 -> Temp: ");
Serial.print(temp1);
Serial.print("°C, Humidity: ");
Serial.println(hum1);

Serial.print("Sensor 2 -> Temp: ");
Serial.print(temp2);
Serial.print("°C, Humidity: ");
Serial.println(hum2);

Serial.print("CO PPM: ");
Serial.print(ppm, 2);
Serial.print(" | AQI: ");
Serial.println(aqi);

Serial.print("Sound Level: ");
Serial.print(soundLevel, 2);
Serial.println(" dB");

Serial.print("Flame Detected: ");
Serial.println(flameDetected ? "Yes" : "No");

Serial.print("Hand Sanitized: ");
Serial.println(handSanitized ? "Yes" : "No");

Serial.print("Sound Alert: ");
Serial.println(soundAlert ? "Yes" : "No");
}

// onChange functions for new cloud variables
void onDisinfectionLightChange() {
if (disinfectionLight) {
digitalWrite(DISINFECTION_LIGHT_PIN, LOW);
Serial.println("Disinfection Light ON.");
} else {
digitalWrite(DISINFECTION_LIGHT_PIN, HIGH);
Serial.println("Disinfection Light OFF.");
}
}

void onFrontLightChange() {
if (frontLight) {
digitalWrite(FRONT_LIGHT_PIN, LOW);
Serial.println("Front Light ON.");
} else {
digitalWrite(FRONT_LIGHT_PIN, HIGH);
Serial.println("Front Light OFF.");
}
}

void onMedibotLightChange() {
if (medibotLight) {
digitalWrite(MEDIBOT_LIGHT_PIN, LOW);
Serial.println("Medibot Light ON.");
} else {
digitalWrite(MEDIBOT_LIGHT_PIN, HIGH);
Serial.println("Medibot Light OFF.");
}
}

void onGasAlertLightChange() {
if (gasAlertLight) {
Serial.println("Gas Alert Light ON.");
} else {
Serial.println("Gas Alert Light OFF.");
}
}

void onSoundAlertChange() {
Serial.println("Sound Alert status updated in the cloud.");
}

void onStepperbuttonChange() {
if (stepperbutton) {
sendCommand('O'); // Send 'O' for Open
}
}

void onGatebackChange() {
if (gateback) {
sendCommand('C'); // Send 'C' for Close
}
}

void sendCommand(char command) {
Wire.beginTransmission(8); // Slave address is 8
Wire.write(command); // Send command ('O' or 'C')
Wire.endTransmission(); // End the transmission
Serial.print("Command sent: ");
Serial.println(command);
}

void onHumSensor1Change() {
Serial.println("humSensor1 changed!");
}

void onHumSensor2Change() {
Serial.println("humSensor2 changed!");
}

void onTempSensor1Change() {
Serial.println("tempSensor1 changed!");
}

void onTempSensor2Change() {
Serial.println("tempSensor2 changed!");
}

void onPpmChange() {
Serial.println("ppm changed!");
}

void onAqiChange() {
Serial.println("aqi changed!");
}

void onSoundLevelChange() {
Serial.println("soundLevel changed!");
}

void onSoundExceededChange() {
Serial.println("soundExceeded changed!");
}

void onFlameDetectedChange() {
if ( flameDetected) {
digitalWrite(buzzer,HIGH);
} else {
digitalWrite(buzzer,LOW);
}

Serial.println("flameDetected changed!");
}

void onHandSanitizedChange() {
Serial.println("handSanitized cloud variable updated!");
}

Upload the Code:

  1. Click on the Upload button in the Arduino IoT Cloud to upload the code to the Arduino Uno R4.

Test IoT Functionality:

  1. Power on Medibot and check if the cloud variables are updating correctly on the Arduino IoT Cloud dashboard.
  2. Test the cloud monitoring functionality using the IoT Cloud interface to see the sensor readings and other parameters in real-time.


Uploading Code to Arduino Uno for Stepper Motor Control (Gate)

  1. Prepare the Arduino IDE:
  2. Open the Arduino IDE and select Arduino Uno under Tools > Board.
  3. Select the correct port under Tools > Port.
  4. Insert the Code for Stepper Motor Control:
  5. This code will control the stepper motor to operate the gate of Medibot.
  6. Insert the Stepper Motor control code here.
  7. Upload the Code:
  8. Click on the Upload button to upload the code to the Arduino Uno that controls the stepper motor.
#include <Wire.h>
#include <AFMotor.h>

AF_Stepper Stepper1(20, 2); // Stepper Motor connected to Motor Shield
bool isOpen = false; // Tracks the motor state: false = closed, true = open

void setup() {
Wire.begin(8); // Start I2C as Slave with address 8
Wire.onReceive(receiveCommand); // Register the I2C receive event
Serial.begin(9600);
Stepper1.setSpeed(255); // Set stepper motor speed
Serial.println("System initialized. Gate is initially closed.");
}

void loop() {
// The slave loop remains empty as actions happen on I2C commands
}

void receiveCommand(int bytes) {
while (Wire.available()) {
char command = Wire.read(); // Read the command
Serial.print("Command received: ");
Serial.println(command);

if (command == 'O') {
openGate();
} else if (command == 'C') {
closeGate();
}
}
}

void openGate() {
if (isOpen) {
Serial.println("Gate is already open. No action needed.");
return;
}

Serial.println("Opening gate...");
Stepper1.step(250, FORWARD, MICROSTEP); // Adjust steps if needed
isOpen = true; // Update state
Serial.println("Gate is now open.");
}

void closeGate() {
if (!isOpen) {
Serial.println("Gate is already closed. No action needed.");
return;
}

Serial.println("Closing gate...");
Stepper1.step(250, BACKWARD, MICROSTEP); // Adjust steps if needed
isOpen = false; // Update state
Serial.println("Gate is now closed.");
}

  1. Test the Stepper Motor:
  2. After uploading, power Medibot and check if the stepper motor is functioning properly to open and close the gate.

Uploading Code to Arduino Uno for Movement Control (Bluetooth and Line Tracking)

  1. Prepare the Arduino IDE:
  2. Open the Arduino IDE and select Arduino Uno under Tools > Board.
  3. Select the correct port under Tools > Port.
  4. Insert the Code for Movement Control (Bluetooth and Line Tracking):
  5. This code will control the movement of Medibot, including:
  6. Line-following with IR sensors.
  7. Obstacle avoidance using ultrasonic sensors.
  8. Bluetooth control for remote operation.
  9. Insert the Movement control code here.
  10. Upload the Code:


Bluetooth

#include "AFMotor.h"

// Define motor pins
const int MOTOR_1 = 1;
const int MOTOR_2 = 2;
const int MOTOR_3 = 3;
const int MOTOR_4 = 4;

// Create motor objects for each motor
AF_DCMotor motor1(MOTOR_1, MOTOR12_64KHZ);
AF_DCMotor motor2(MOTOR_2, MOTOR12_64KHZ);
AF_DCMotor motor3(MOTOR_3, MOTOR12_64KHZ);
AF_DCMotor motor4(MOTOR_4, MOTOR12_64KHZ);

int state; // Variable to store received state from serial input
int Speed = 130; // Initial motor speed set to 130

void setup() {
// Set the initial motor speed for all motors (0-255 range)
motor1.setSpeed(Speed);
motor2.setSpeed(Speed);
motor3.setSpeed(Speed);
motor4.setSpeed(Speed);

// Begin serial communication at 9600 baud rate
Serial.begin(9600);

// Delay for half a second to stabilize
delay(500);
}

void loop() {
// Check if data is available to read from the serial
if(Serial.available() > 0) {
state = Serial.read(); // Read the data and store it in 'state' variable

// If the received value is greater than 10, set it as new motor speed
if(state > 10) {
Speed = state;
}
}

// Update the motor speed based on the received 'Speed' value
motor1.setSpeed(Speed);
motor2.setSpeed(Speed);
motor3.setSpeed(Speed);
motor4.setSpeed(Speed);


// Control the motors based on the 'state' value
if(state == 1) {
forword(); // Move forward when 'state' is 1
}
else if(state == 2) {
backword(); // Move backward when 'state' is 2
}
else if(state == 3) {
turnLeft(); // Turn left when 'state' is 3
}
else if(state == 4) {
turnRight(); // Turn right when 'state' is 4
}
else if(state == 5) {
Stop(); // Stop when 'state' is 5
}

// Short delay to avoid excessive serial reads
delay(80);
}

// Function to move all motors forward (for moving forward)
void forword() {
motor1.run(FORWARD); // Run motor 1 forward
motor2.run(FORWARD); // Run motor 2 forward
motor3.run(FORWARD); // Run motor 3 forward
motor4.run(FORWARD); // Run motor 4 forward
}

// Function to move all motors backward (for moving backward)
void backword() {
motor1.run(BACKWARD); // Run motor 1 backward
motor2.run(BACKWARD); // Run motor 2 backward
motor3.run(BACKWARD); // Run motor 3 backward
motor4.run(BACKWARD); // Run motor 4 backward
}

// Function to make a right turn by adjusting motor directions
void turnRight() {
motor1.run(FORWARD); // Run motor 1 forward
motor2.run(FORWARD); // Run motor 2 forward
motor3.run(BACKWARD); // Run motor 3 backward
motor4.run(BACKWARD); // Run motor 4 backward
}

// Function to make a left turn by adjusting motor directions
void turnLeft() {
motor1.run(BACKWARD); // Run motor 1 backward
motor2.run(BACKWARD); // Run motor 2 backward
motor3.run(FORWARD); // Run motor 3 forward
motor4.run(FORWARD); // Run motor 4 forward
}

// Function to stop all motors
void Stop() {
motor1.run(RELEASE); // Stop motor 1
motor2.run(RELEASE); // Stop motor 2
motor3.run(RELEASE); // Stop motor 3
motor4.run(RELEASE); // Stop motor 4
}

  1. Click on the Upload button to upload the code to the Arduino Uno that controls the movement.
  2. Test the Movement Features:
  3. Power Medibot and test if the movement features work as expected (line following, obstacle avoidance, and Bluetooth control).


Conclusion
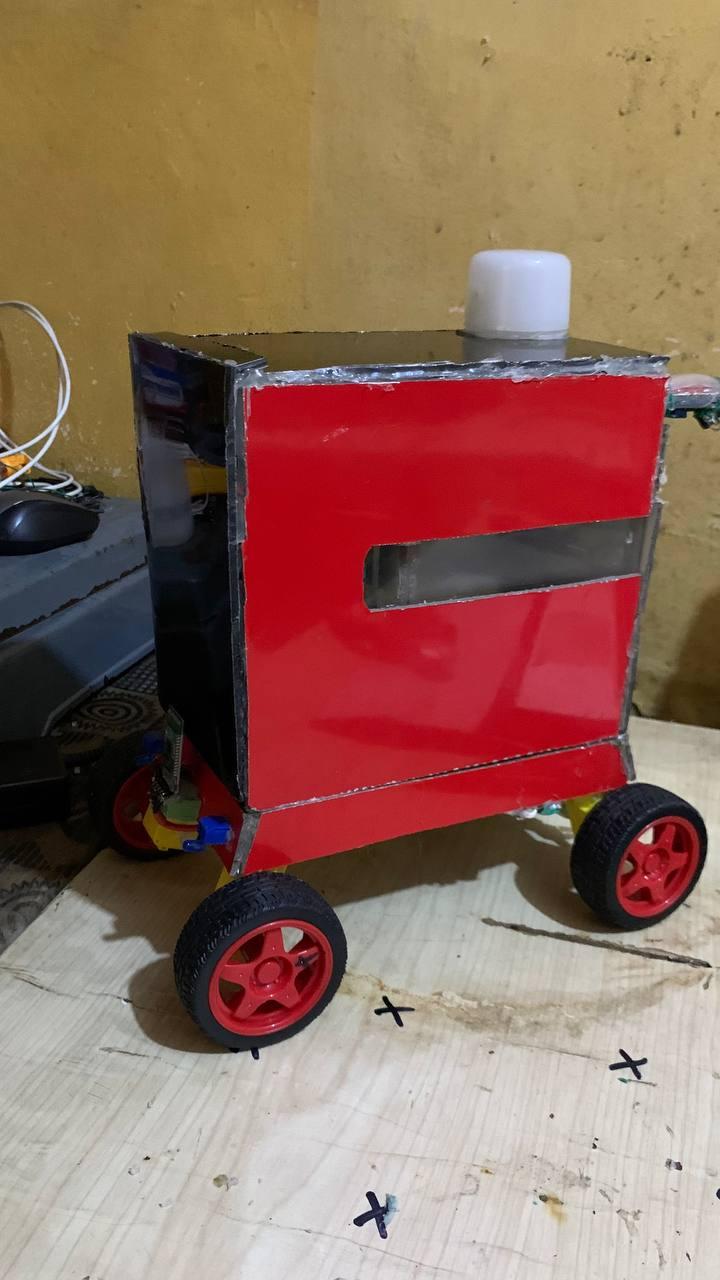
photo_13_2025-01-13_19-42-30.jpg
photo_14_2025-01-13_19-42-30.jpg
photo_22_2025-01-13_19-42-30.jpg

Medibot is a revolutionary approach to enhancing healthcare delivery, particularly in scenarios requiring reduced human interaction, such as during pandemics. By implementing Bluetooth control and line tracking navigation systems, Medibot achieves foundational capabilities for remote control and autonomous movement. These features pave the way for integrating additional functionalities like environmental monitoring, medication delivery, and advanced sanitization mechanisms.

This project represents the first phase of development, demonstrating the potential for practical application in hospitals. Future iterations will scale up Medibot’s abilities, ensuring broader impacts on healthcare safety and efficiency. By following this guide, innovators can contribute to a safer, more efficient healthcare environment while exploring the transformative potential of robotics in medical applications.

Looking ahead, the vision for Medibot includes making it fully autonomous and incorporating AI-driven solutions. With additional funding, these advanced features can be realized, allowing Medibot to make intelligent decisions, navigate complex environments, and enhance its service capabilities to unprecedented levels.