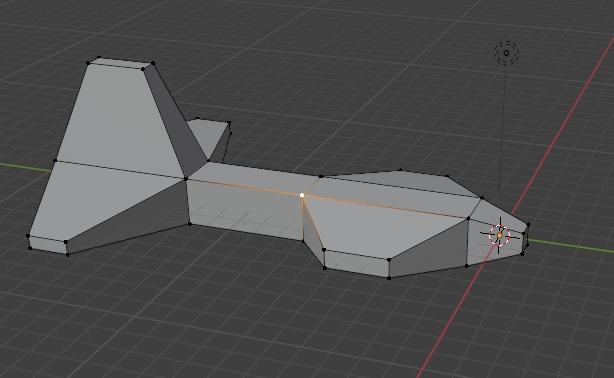
Make It Fly - 3D Plane Animation
by AdanDelAngel in Design > Digital Graphics
279 Views, 2 Favorites, 0 Comments
Make It Fly - 3D Plane Animation


Hi, my name is Adan and I’m going to create an animation about a plane. It is my first time that I have worked in 3D animation, but I wanted to do my best to learn fantastic new things like animation. This project brought me difficulties to made, because I don’t have experience on doing these things, but I learned from my mistakes and fix everything I can.
The program that I used to create this animation was “Blender”, I know there are more programs that you can use, but I used Blender because I heard about it before, and some animations that I saw were from this program.
Note: Blender usually updates the version of the program. The version that I used was 4.3.1
Now I’m going to explain the process and the difficulties that I went through.
Supplies
-Blender (check the version of it).
-A good computer (don't make the same mistake like me).
-Save as an image to put the background.
Learn How to Use the Program.

So, the first problem I had was that I didn’t know anything about the interface of Blender. So how I solve it? I saw a tutorial about how to move, the mechanics, the panels, etc. The best way to use Blender is with a mouse and with the right keypad (I’m going to explain this later why). It took me like 10 minutes to learn how to move and create figures.
The Principles to Make a Plane.

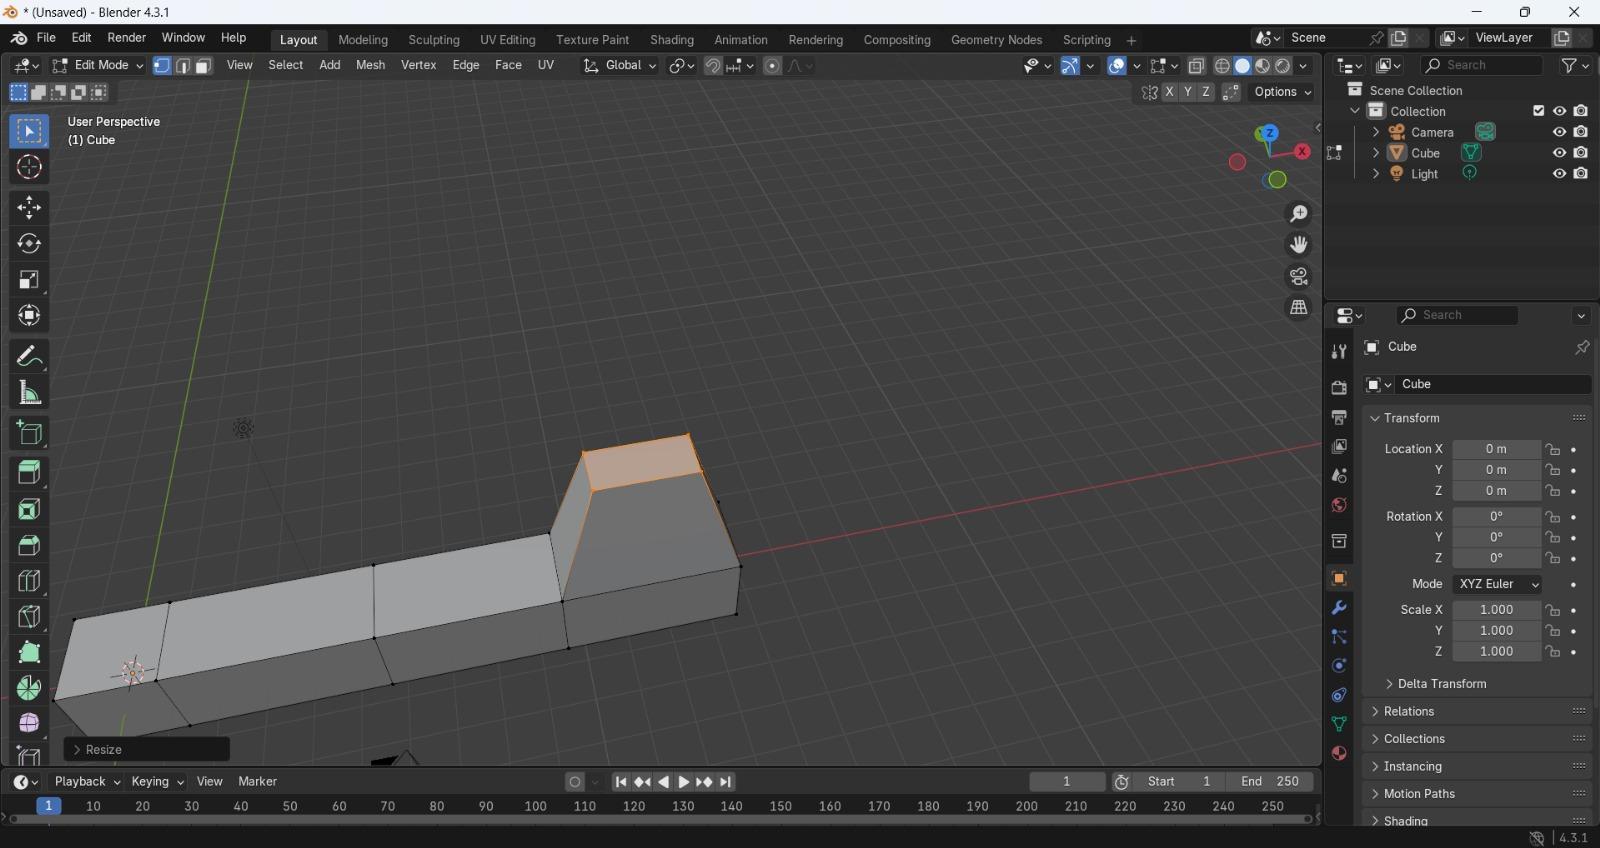
When you open Blender, you start with a cube, a camera, and a light (you can see this in the right panel). You are going to enter in the “editor mode” by clicking “tab” and start to cut out cube by clicking “ctrl + R”, and you select the middle top part of the cube and delete the faces by selecting the faces of the cube holding “left click”.
Making the Form of the Plane.

Now, you need to extrude by selecting the right view of the cube and hold right click with the mouse and use the button “E” and you can now make the form of the plane (you can extend until you think is enough). In the final cube you are going to scale it by clicking “S”, when you are done with that, you are going to extrude again (Click button “E”) the top part of the final cube to make the vertical stabilizers of the plane. Now you are going to the front view of the plane. If you don’t have the face of the first cube, I solve it by “Shift + A” and go to cube, you are going to extrude until you think it’s good. After that inconvenience, you are going to make an incrustation by clicking on “I” for the cabin of the plane, you are going to extrude and scale however you want the cabin to be. Finally, you are going to make the horizontal stabilizers of the plane by going to the final of the plane and see the face of the cube, extruding and scale in both sides. For the wings you go to the second cube you made and go to the extrude and scale it.
Adding the Final Details.
After you have the plane, you are going to deactivate the editor mode by clicking tab, you should be able to see your plane without the boarders. Now you can start to change the color by going to the right panel, and click the last option at the bottom, you will see a lot of options, but you are going to change only the color of the plane. To put a background image, you need to go to the right panel and select the camera icon, you need first to save as a background image to do it, and then you put it.
The Animation.

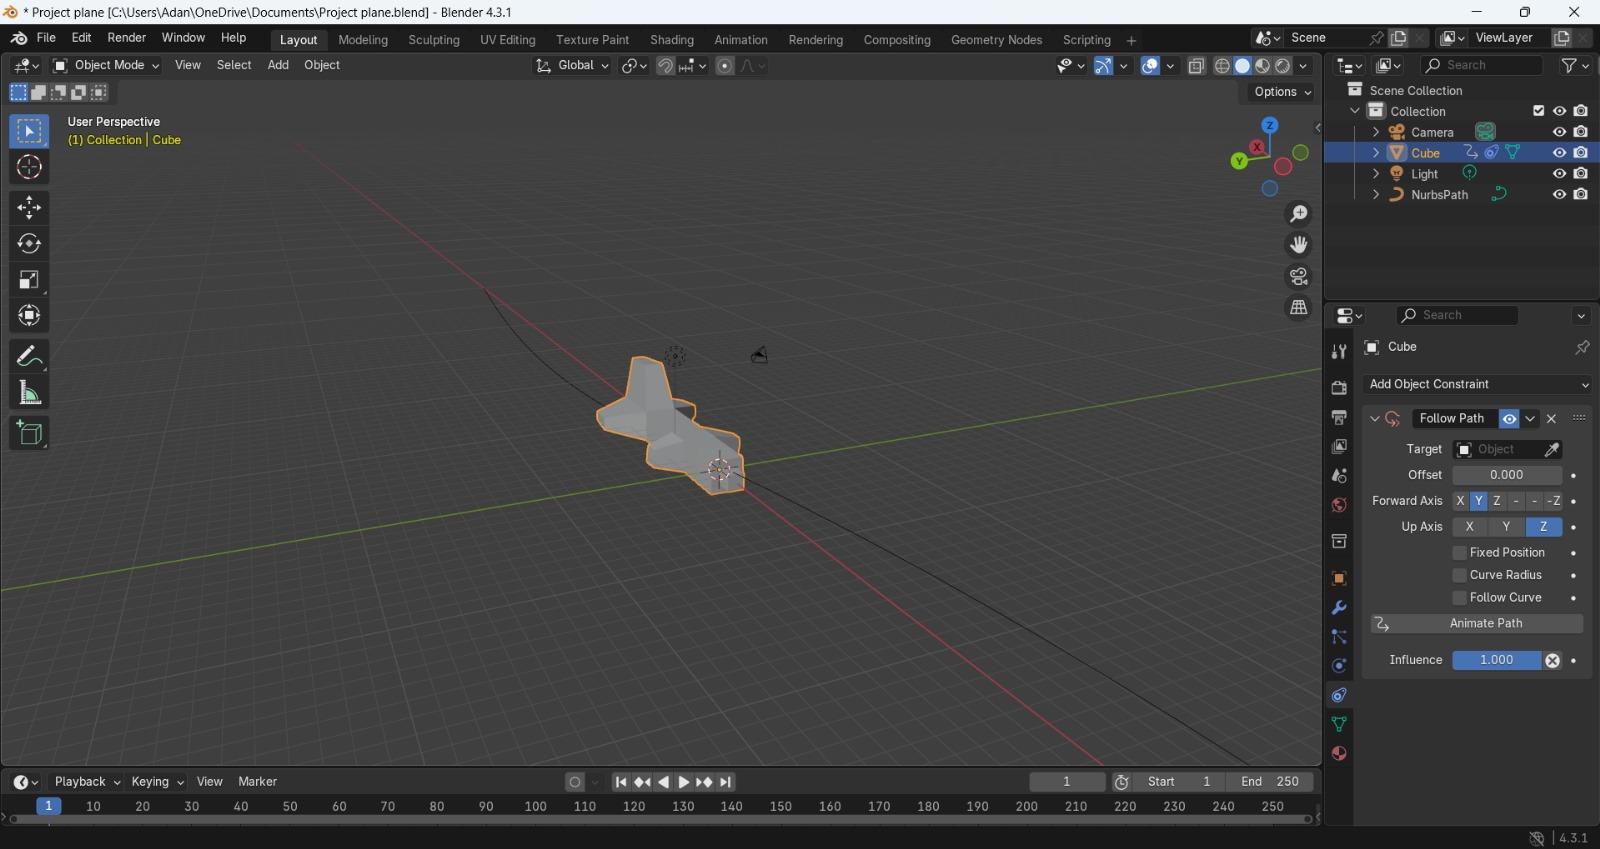
Blender has so many ways to animate, but I animate it by using keyframes. In blender there is a timeline that helps you to animate your object, so using it I made the plane able to fly. First, you need to add a curve and modify the curve to by a path, then you need to press “S” to make bigger your path, if you want curves you press “G” (you can press “Z” at the same time to make the curve only go up and down). Then you are going to the right panel and choose “Object Constraint Properties”, you add one and you will see a lot of options, but you will choose “Follow path”, you are going to click the dropper and click the path you made (If your object is face down, you need to rotate it with the options of the left side). Then you start to animate with the timeline bar.
Conclusion
Update: Thanks to the help of a person, I was able to upload the animation of the plane. The background that I took was from https://polyhaven.com/a/kloofendal_48d_partly_cloudy_puresky.
Conclusion: That would be my 3D animation, I know it is not the best animation you would expect, but I hope you understand that I have do my best to do my first animation. Thanks for your attention!!!
Problems that I had through doing the animation:
Like I said, it was my first time doing animation, so I took my time learning everything about animation.
While creating the plane, I had some problems making it because it wasn’t taking the form that I planned.
One of the problems that I couldn’t solve was to change the color of the plane, my computer had some trouble doing it because when I wanted to change the color, the program closed without any warning. Investigating more about this, seeing so many videos, I concluded that it was because my computer wasn’t the best to do animations.
And for me, the biggest problem is that to record the animation I need a better computer, this happens because my computer doesn’t have so much potency to render the 3D animation.
Result
I was able to upload the animation of the plane, I do it with the help of a person who wanted to help me to render it. Here is the result.