Make Your Own Tropical Headdress for Your Favorite Carnival
374 Views, 2 Favorites, 0 Comments
Make Your Own Tropical Headdress for Your Favorite Carnival


When I saw this contest, I knew I wanted to do something very colorful, something vibrant, exotic, and tropical. Many places in my country host carnivals. One of the most important is the Barranquilla carnival, the city where Shakira was born. This is a very cheerful and colorful carnival, and I wanted to capture this in my headdress.
Supplies


Materials
- Green satin fabric
- Red lame fabric
- Yellow satin fabric
- Gold lame fabric
- Sequins (red, green, gold)
- Thin wire
- Cold silicone
- Gold glitter
- Seed beads
- EVA foam 5


1. On a piece of paper, draw the silhouette of a parrot. It measures approximately 25 cm long and 10 cm wide. This last measurement would be from the parrot's head to its beak.
2. Also, make the flower petal mold. These measure 11 cm high and 7 cm wide. You can make any type of petal shape. I made this one.


To make the parrot's base, I used 5mm thick foam. I wanted the parrot's base to be firm, but not heavy.
3. Draw the mold for the parrot's body on the foam.
4. Using a scalpel, cut around the entire edge.
Note: I didn't want to make the mold baked and filled, since carnivals use foam and water, and the temperatures are also very high. I wanted it to be quick to clean and dry, and also more practical to make.


5. Now trace the parrot's base pattern onto the fabric. I chose a bright green fabric; this type of fabric is known as lame.
6. Cut the fabric and, using cold silicone, glue the fabric pattern onto the foam mold.
Note: Do this on both sides so that it is lined.


7. On a thinner foam of 1mm thickness, trace the mold of the parrot's wings.


8. Once the pattern is cut from the 1 mm foam, place it on the fabric, leaving a small amount of excess around the edge.
9. Cut and glue the fabric pattern onto the foam mold with cold silicone.
10. Along the excess edge, make some tabs to cover the parrot's wing pattern.


11.The same process will be done with the parrot's beak, 1mm EVA foam is used to make the base and with gold lame fabric, it is covered with the help of liquid silicone.


12. It's time to decorate the parrot's wings. I used seed beads in light green, dark green, matte red, and metallic red bugles. Although the fabric already had a spiral texture and is metallic, I wanted it to be more striking and playing with the texture of the fabric, with cold silicone I added round seed beads and metallic red bugles in some spaces, finishing the parrot's tail.


Using hot silicone, glue all parts of the parrot together, first placing the base.


To make the flowers that will accompany the parrot in the headdress, after choosing the petal shape, draw the petal pattern on the fabric. For this first flower, which will be yellow, a satin fabric was chosen.
13. Glue the thin wire around the petal with cold silicone.
14. Let it dry and cut it with scissors, leaving a small edge.
15. Then, use a lighter to burn the entire edge of the petal.


Now decorate the petals.
16. Glue gold sequins around the edge of the petal with cold silicone to create a contrast with the yellow fabric.
17. Make 3 lines with silicone, one in the center of the flower and the other two on the sides, then glue the sequins. On one of the flowers, use sequins the same size as those used on the edge, and on the other two, use slightly smaller sequins.
18. For this flower, make 3 petals decorated with sequins on the inside and 2 petals without sequins on the inside.


19. Now, the same process will be used for the red flower. For this flower, I used two types of fabric: one red lame fabric with some metallic sparkles, and the other red lame fabric with spirals similar to those used for the parrot's wing, but the fabric is red. For this flower, I made two red petals and three red petals with the red fabric with a spiral texture.


20. With the same pattern but in reverse, leaving the round part facing down and the tip facing up, 3 green leaves will be made, doing the same process as the previous steps, but this time with green satin fabric, 2 smooth green leaves will be made and one with a green spiral texture, all this so that the entire headdress matches and has a sequence between the parrot and the flowers.


21. To make the flower pistils, use thin wire.
22. Cut a 20 cm strip and fold it in half, creating two pistils.
23. Apply hot or cold silicone to the end of the wire, let it dry for a few seconds, and add little by little until the pistil is formed.


24. Add glue to the pistils and decorate with gold glitter. These pistils will be for the yellow flower; for the red flower, we will leave them unfrosted.


25. To assemble the flowers, place the petals one on top of the other and place 4 pistils, with the help of the wires that stick out, join them and twist them so that they all stay united, then give shape to the flower.


27. Choose a frayed fabric. In this case, I chose gold lame fabric. Cut a 30 cm x 6 cm strip.
28. Cut a strip of wire and glue the fabric strips together.
29. This type of frayed fabric has vertical and horizontal threads. Pull the matte thread and remove them until the gold threads remain. These will remain loose, as seen in the image.


30. To finish the headband, add the elements you made. For this project, I used a wire headband, which made it easier to tie the leftover wires from each flower.
31. First, glue the parrot to the right side of the headband with hot glue.
32. Then, add the gold strip I made with fabric to decorate the base of the headband so the wires wouldn't be noticeable.
33. At the other end of the headband, place the three green leaves.
34. Add the two flowers. First, place the red one, use the wires to tie it to the headband, and then add the yellow one.
35. Finally, place strips of sequins in the three colors used (red, yellow, and green).


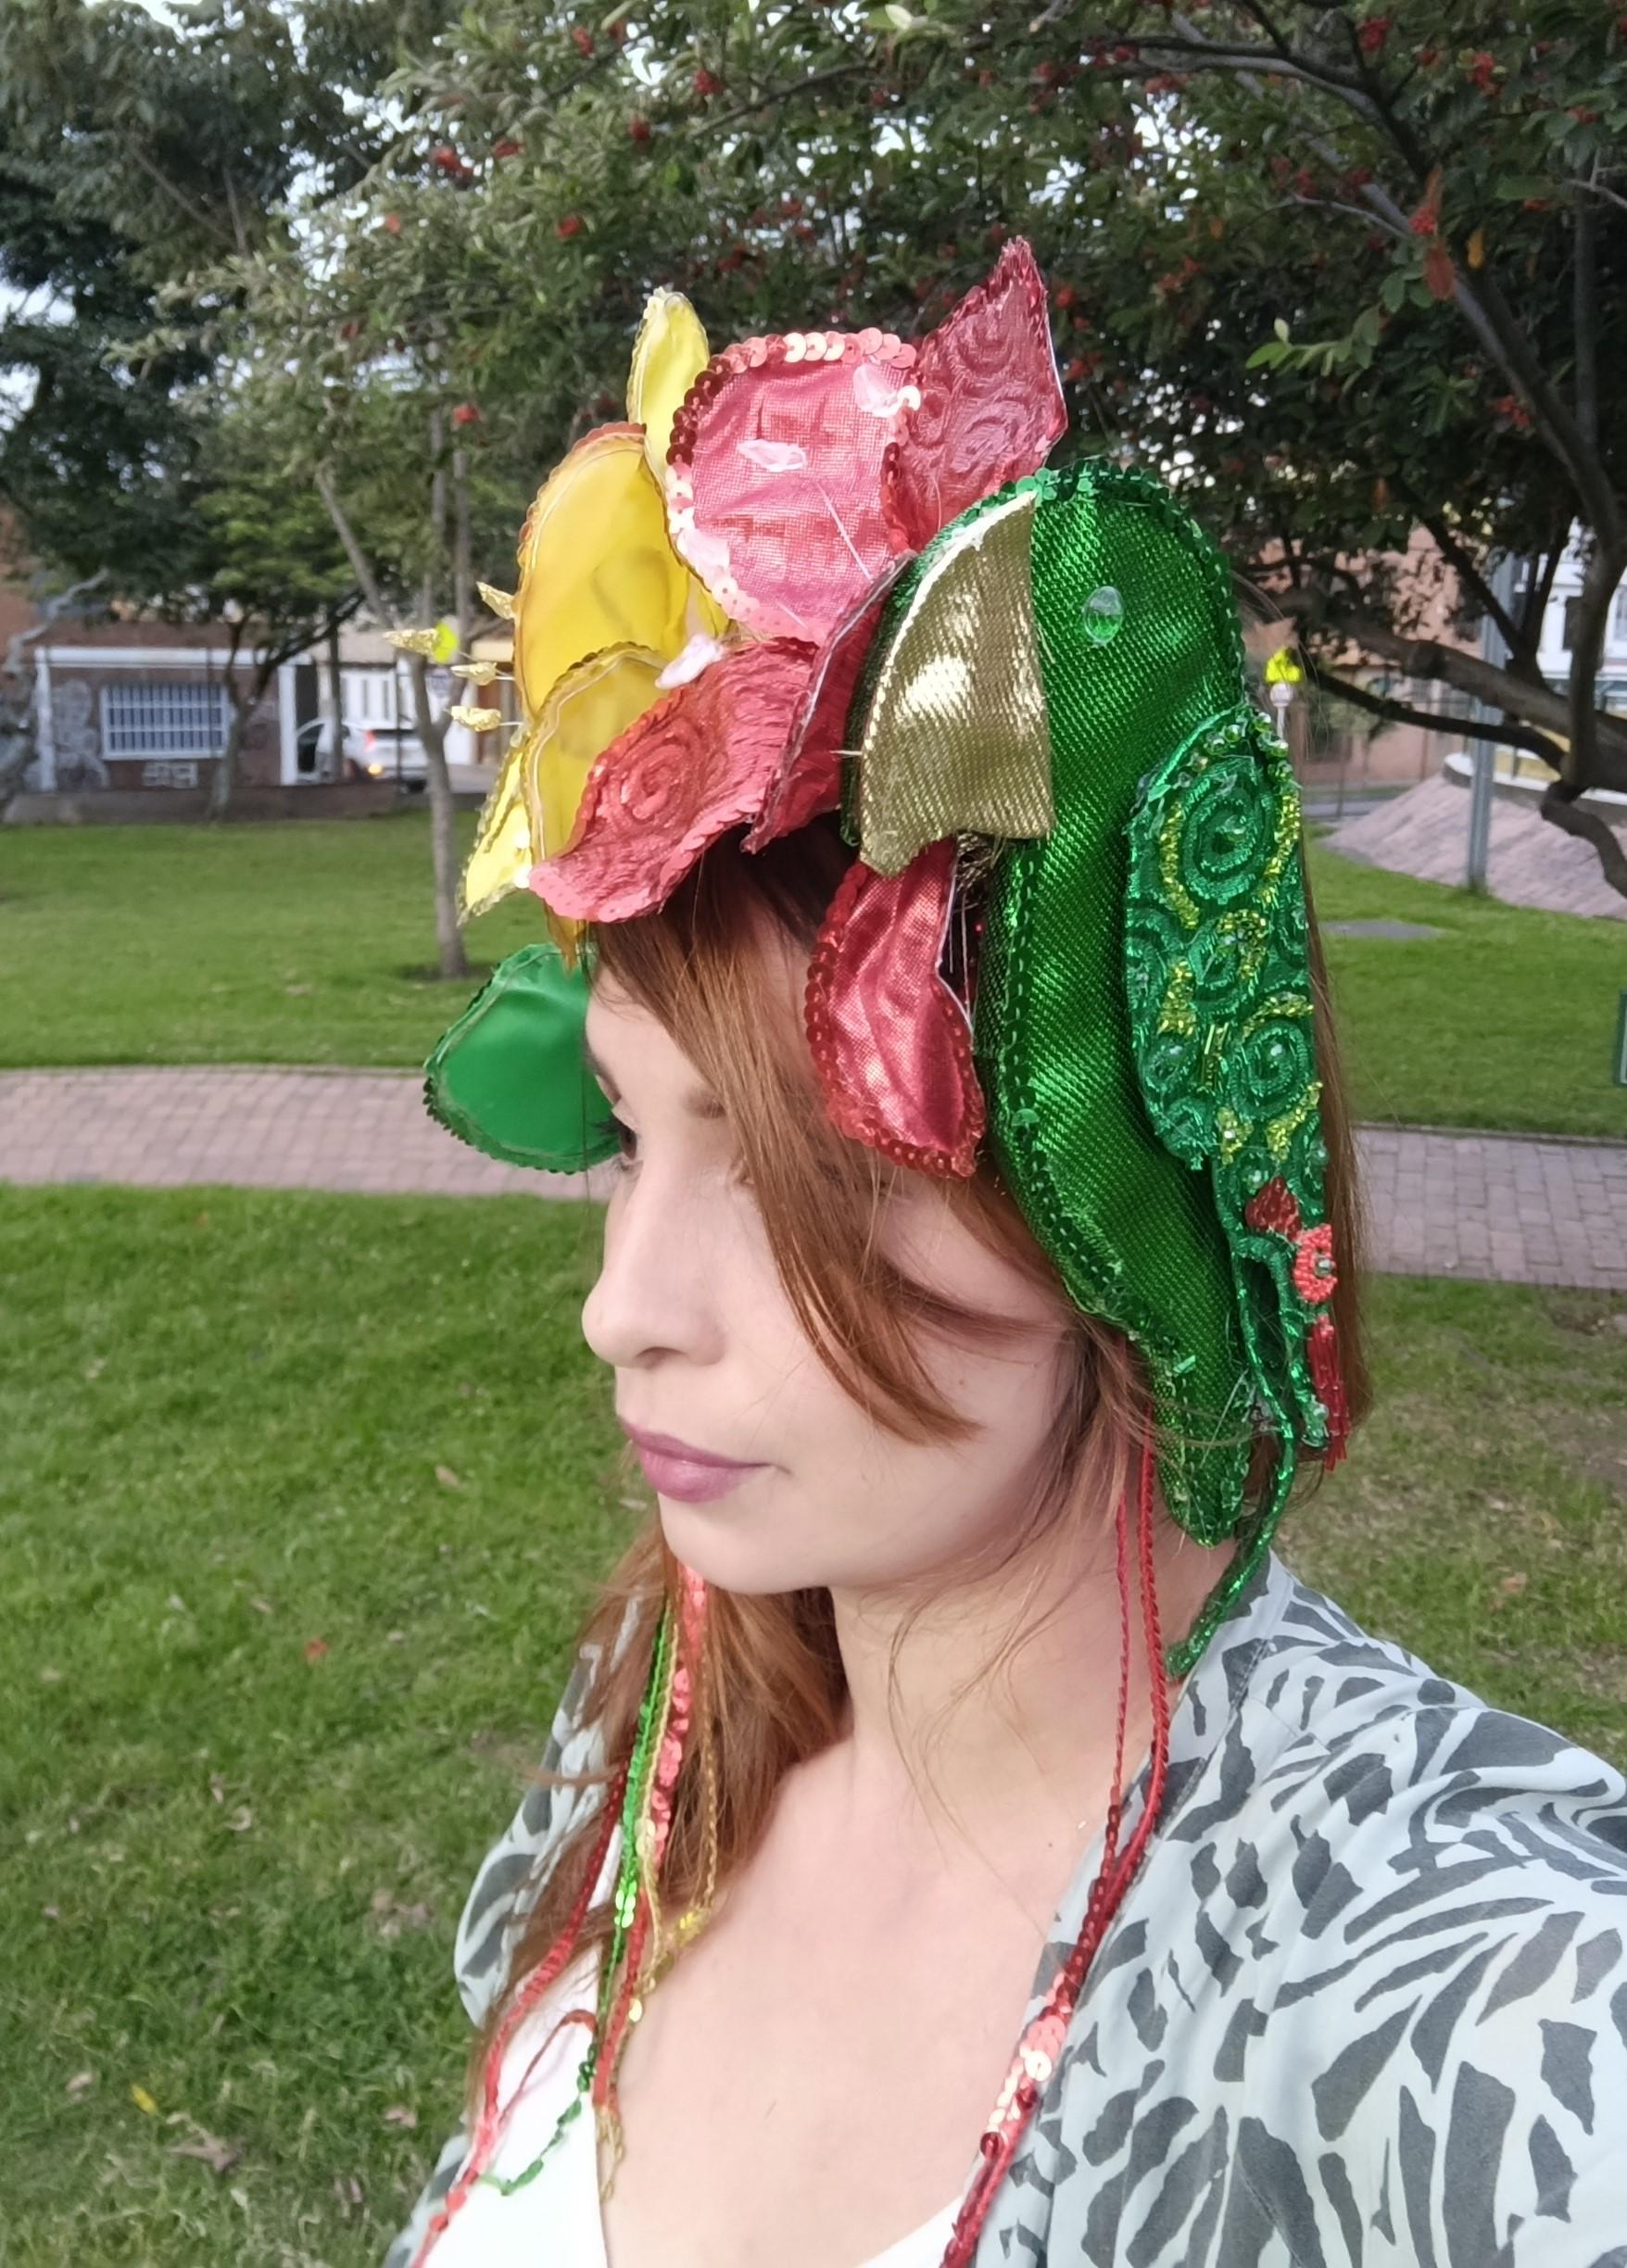
We will finally have a tropical headdress for carnivals.