Make a 3D Printed Light-up Marquee Sign
by colleenjordan in Workshop > 3D Printing
8505 Views, 79 Favorites, 0 Comments
Make a 3D Printed Light-up Marquee Sign


Vintage signage is without a doubt, incredibly neat. The colors, and the forms, and the bright lights are really spectacular. You can still see remnants of these signs today, and these windows into the past can be really interesting.
In the days before smartphones and the internet, this was one of the way's a business could market itself and let you know that it was there. Businesses and places of course still have signs, but many of them lack the charm and creativity seen in older signs. Marquee signs in particular are really cool! There's a reason why they are seen on pinboards and design blogs all over the internet!
The downside of wanting to decorate with vintage signs is that of course they are hard to come by. They can also be very large, and if you're an apartment dweller, you may not have a place to put it. Making your own vintage style sign lets you have the freedom to make it any size that you like!
If you want to celebrate the greatness of vintage signage while playing around with 21st century tools, we can create a vintage style marquee sign using 3D printing! This tutorial will show you how to bring a drawing into the CAD software to create a 3D model of a sign ready to print.
To make your own 3D printed marquee sign you'll need:
- Vector drawing software, like Adobe Illustrator
- CAD/3D modelling software. You can use a paid program like SolidWorks, but free software like 123D Design and Tinkercad will work just as well for this project.
- Access to a 3D printer. If you don't have your own, use a website like 3dhubs.com to find a local one to use, or you can use a service like Ponoko or Sculpteo.
- LED lights and a power source. To make my sign I'm using a battery-powered strand of small LED lights, but you can use individual LEDs and and wire them yourself.
Sketch Out Your Marquee Sign

Before you begin to model and construct your sign, you'll want to start first by planning your sign and sketching it out. Look at signs that you like that, and pick out any elements that you like from them. See if you can include them in your sign.
The sign that I'll be making is a reader style sign similar to ones that show movie listings or are seen on the side of the road with replaceable letters. This step is to help you get an idea of what you would like to make and to help you visualize your idea.
While you're sketching your sign, think about how you want it to light up and how it will be constructed.
Create a Vector Drawing of Your Marquee Sign


Once you have the idea for your sign sketched out, you'll need to create a vector drawing of it. I'm using Illustrator here, but you can use whatever program you are most comfortable with.
Once you have the basic form of your sign drawn out, this is where you will need to start planning for your sign's construction. Some things to consider are:
- What size are the LEDs I will be using? You'll want to draw the holes for your lights the right size at this step. I used 5mm LEDs, so I made the holes 6mm to account for the way the MakerBot draws circles and the shells the software adds to the printed part.
- Will I be printing my sign in multiple parts? If you are save the drawing for each part separately to make importing into your CAD software easier.
- How big will my sign be? Make sure to take into consideration the print bed size of the 3D printer you are going to use.
Also make sure that none of you lines overlap! Don't worry if your drawing isn't perfect. You will be able to trim and add lines if needed in the next step.
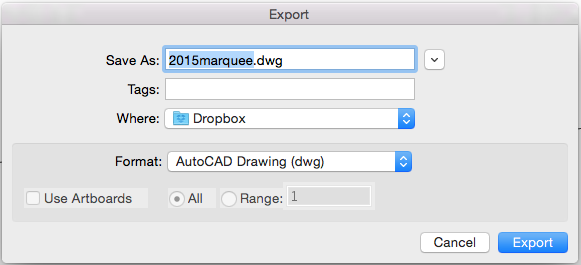
Once you are happy with your drawing, save it in the correct file format for your CAD software. I'm using SolidWorks, so I'll save my file in the .dwg format. Check which files formats your software supports before exporting your file.
Model Your Sign From Your Vector Drawing


Once you have your vector drawing complete, you will bring it into your 3D modeling software to make the form of your sign. I'm using SolidWorks, but you can also use other programs like 123D Design and Tinkercad to model your sign.
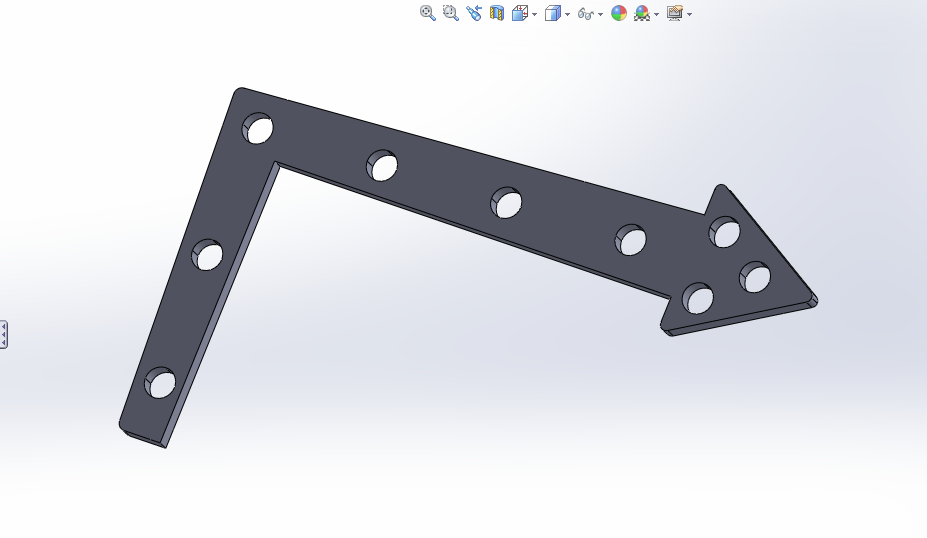
To make for easier printing on the MakerBot, I'm going to print my sign in three component pieces, which I broke out in the last step. Home FDM printers like MakerBots can have issues with overhangs and support material, so I broke this into three pieces to use as little support material as possible. You can make your sign in as many pieces as you need.
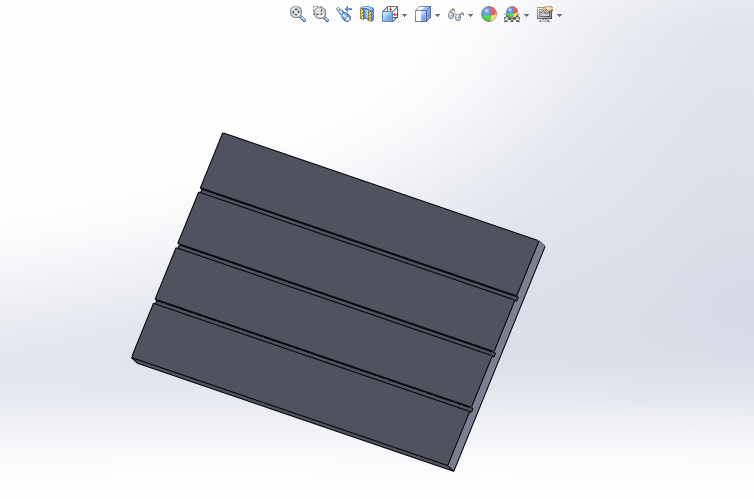
For each piece, I imported it's .dwg drawing into Solidworks. For the form of the letter board and the top of the arrow, I just extruded the shape. You'll want to make these pieces at least .1" deep. I also cut small grooves into the letter board to make it look more realistic. Here you can play around with changing the depths of your sign components to see which looks best!
The largest piece of the sign, the back of the sign was a little more complicated to make. This is where the lights are and where I'm hiding the wiring for my lights. For this piece I extruded the shape out 3/4" to accommodate the wiring for my lights. I then shelled out the shape, and used the extruded cut function to make the cuts for the lights. I also cut two tabs in the back to accommodate wiring or a battery pack that may rest outside the sign, and I added a small hook so I can hang my sign on the wall. Regardless of what kind of sign you choose to make, if your sign is going to light up, the back if the sign will need to be able to hold your wiring.
3D Print Your Sign

Once you've modeled your sign and prepared your files, you're ready to 3D print your sign!
We printed our sign on a MakerBot Replicator 2 in PLA. If you don't have access to a 3D printer, you can try using a 3D printing service like Ponoko or Sculpteo, or find a local 3D printer using 3D Hubs.
Assemble Your Sign


Now that you've 3D printed your sign, you'll need to assemble the pieces of your sign together if you've printed it in more than one piece. We printed our sign in 3 pieces, so we had to assemble it together.
Before you start to assemble your sign, you'll want to get any tools you need together to construct your sign. We had some uneven surfaces on our sign and parts of the raft that did not come off, so we needed a razor blade and sandpaper to remove it. CA glue and epoxies work well to glue 3D prints together. If you're unsure what type of glue to use, just research which one works best for the material you've chosen to print in.
Since we didn't have access to the color of filament we wanted to use, we chose to paint our sign with acrylic paint. PLA and ABS prints take acrylic paint well, so you can paint your sign to improve your design, too.
Put Lights Inside Your Sign

A proper marquee sign has lights that light up and colored LED lights can look a lot like the incandescent bulbs used in the vintage signs.
To light up our sign, we used a strand of battery powered yellow LED lights that we punched through the sign. This is the easiest and fastest way to light up the sign, and these strands of lights can usually be found for less than $5 online. You may need to use some hot glue or epoxy to keep your lights in place.
If you're more technically inclined or up for a challenge, you can wire your own LED lights. There are plenty of tutorials here on Instructables to teach you what to do. You could also program an Arduino or Raspberry Pi to program your lights!
(Extra Credit!) Add Some Text to Your Sign

Text can make your sign work for you (let your friends know the wifi password), or be a decorative element on your sign. Since I decided to make a reader style sign, it needs some text to make the sign complete! I used small vinyl letters to add text to my sign. You could also use labels, stickers, or even dry-erase marker to write on your sign.
Turn on Your Sign and Enjoy!


Or Instagram it and share it with the world!
Turn on your lights and see how your sign looks. Now that you've got your sign finished, it's time to show off your work!
The great part of 3D printing your sign is that now you have the file that you've created to make as many as you would like. You can share this with friends who would like to make their own!
And to show off my work, I instagrammed my sign in front of a local tiny door!