Makey Makey Zootopia


For this project, I made an interactive zoo with 4 different animals. This project is mainly intended for elementary level students who are just starting to learn about animals and living creatures. A group of people would find this useful because it is a hands on way way to learn some cool facts about common yet intriguing animals.
Supplies

-Cardboard (preferably thin)
-Markers
-Colored pencils/crayons
-White paper
-Paper clips
-Scissors
-Glue
-Scratch (not necessary)
Create the Base of the Zoo

Using scissors and cardboard, cut out a rectangle. The great thing about this project is that the zoo can be as big or as little as you would like. After you cut out your rectangle, it is time to move on.
Customizing the Habitat/animals

The animals that are created are totally up to you and can very based on everyone'e preferences. To create an animals, draw the animal first on a piece of cardboard. Then, cut the animal out. Next, spilt white paper into 4 different sections using a pen or pencil. In each of the sections, you can draw the habitats that your animals live in with colored pencils or crayons.
Gluing the Animals

I prefer to glue the animals to the corner of their respective habitats so it allows the viewer to see your beautiful drawings. It also makes it easer when you are trying to connect your Makey Makey.
Attaching the Makey Makey
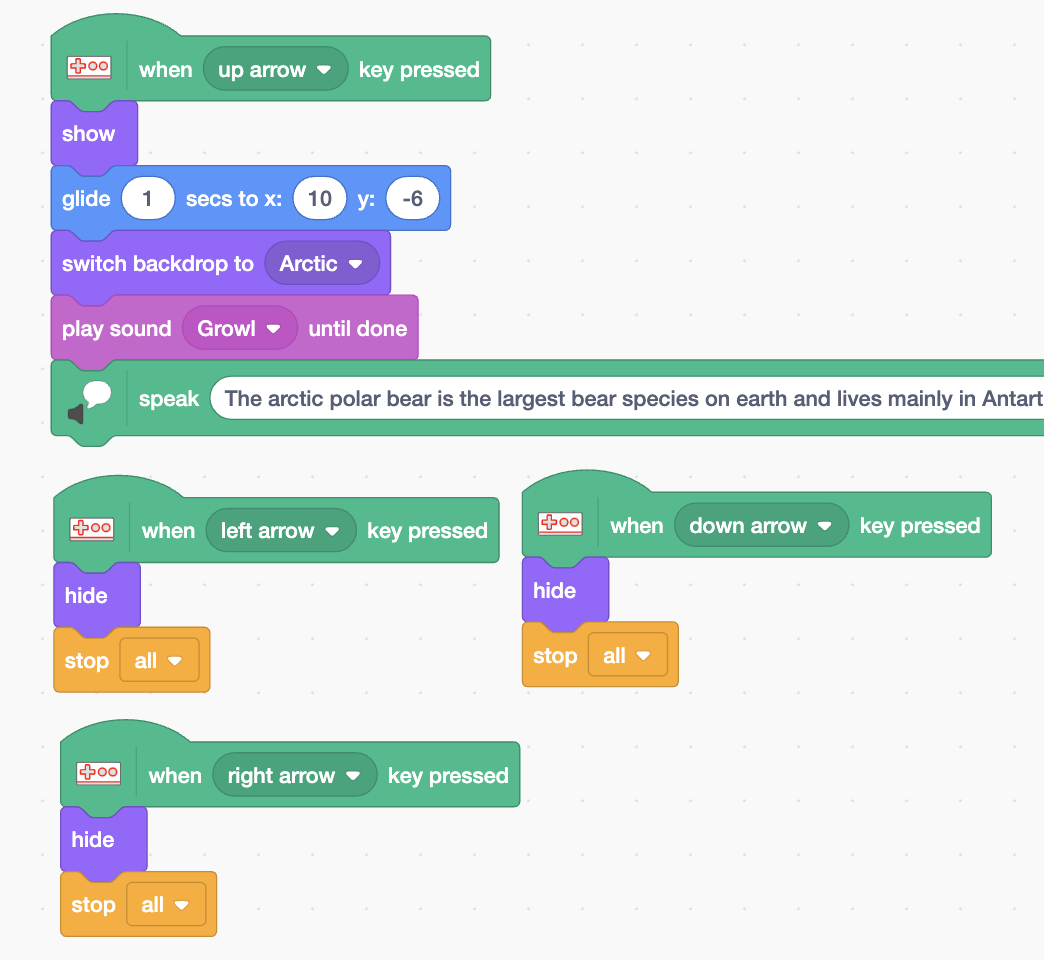
Attaching the Makey Makey is very simple and only requires you to link the alligator clips to the right animal. Make sure the arrow key on the Makey Makey and the command in scratch line up.
Creating the Scratch

For the scratch, a created simple command so when the animal is clicker, it would glide to the center and the text to speech function would start to speak. I used the show and hide commands so that the animals would not all pop up on the screen at once. I also used the glide to spot command so that the sprite would be located in the center of the screen each time an arrow key was pressed.