MatkaCool – the 5000-Year-Old Air Conditioner, Rebooted
by PriyankTyagi in Circuits > Gadgets
242 Views, 3 Favorites, 0 Comments
MatkaCool – the 5000-Year-Old Air Conditioner, Rebooted

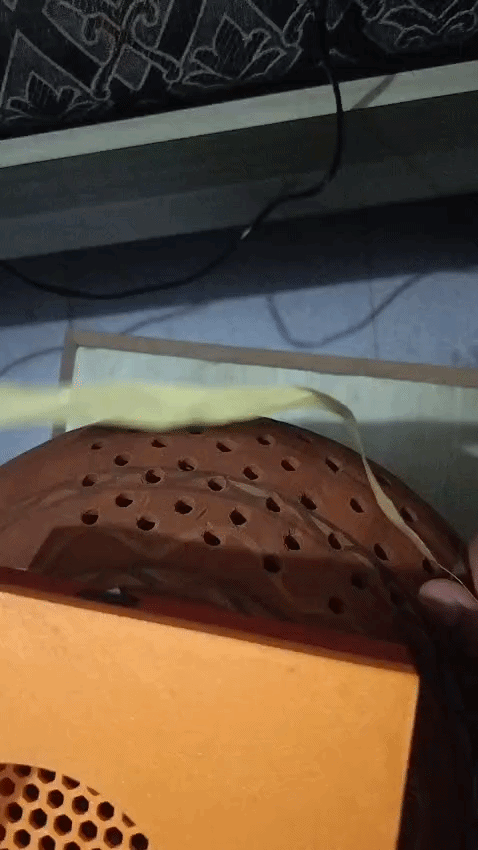
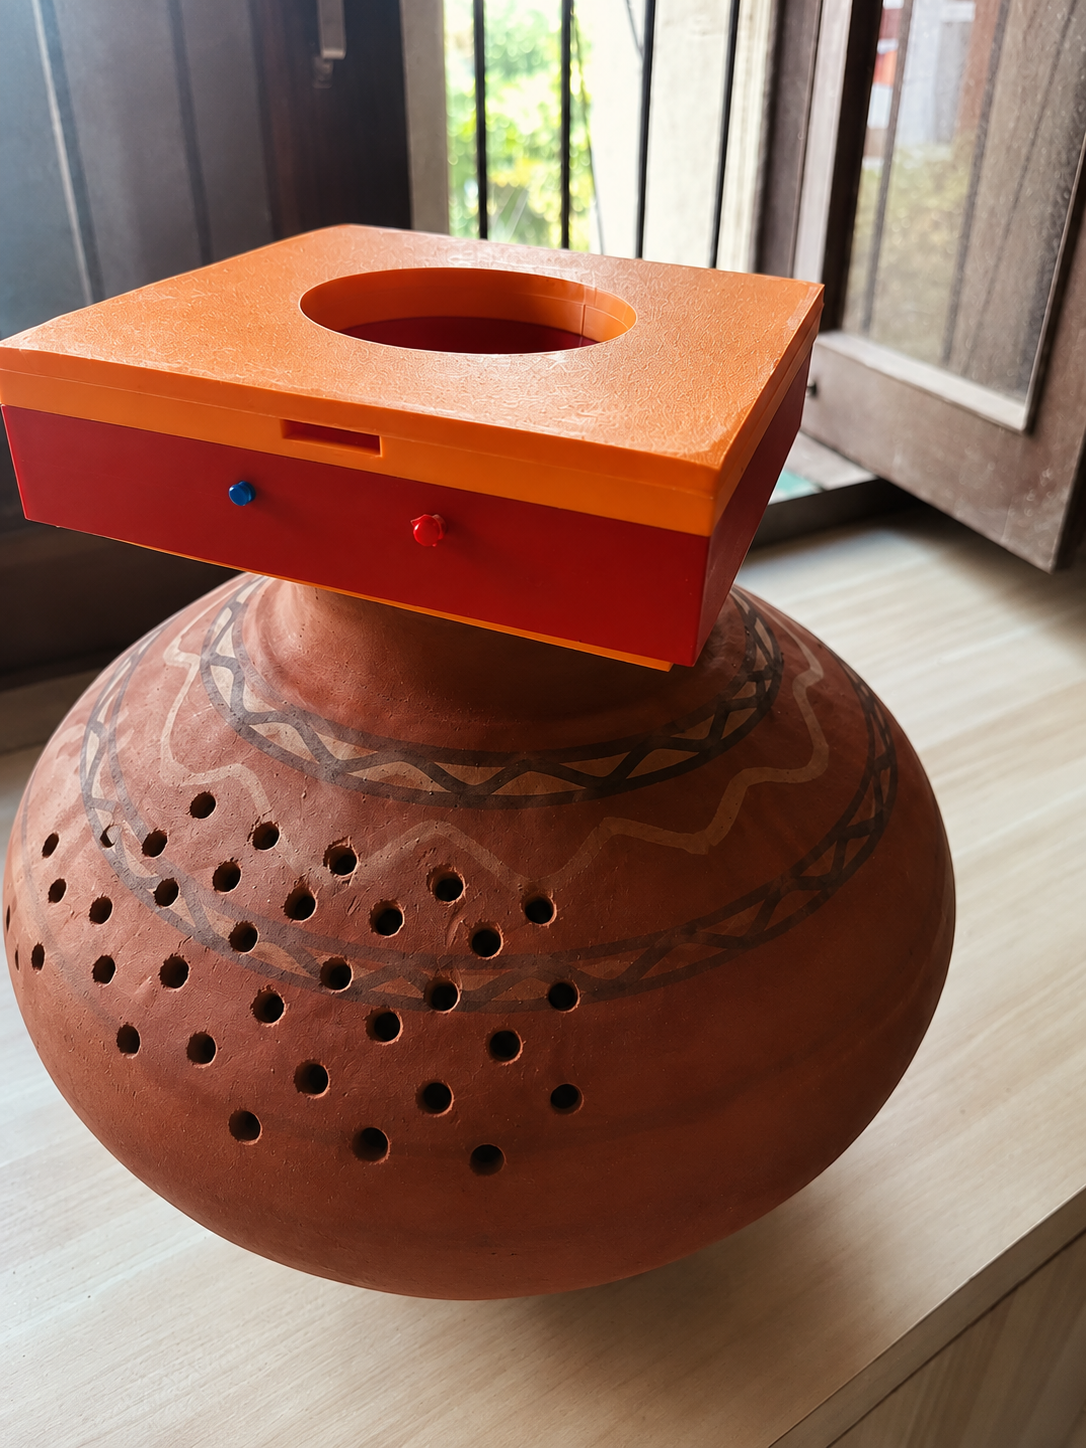

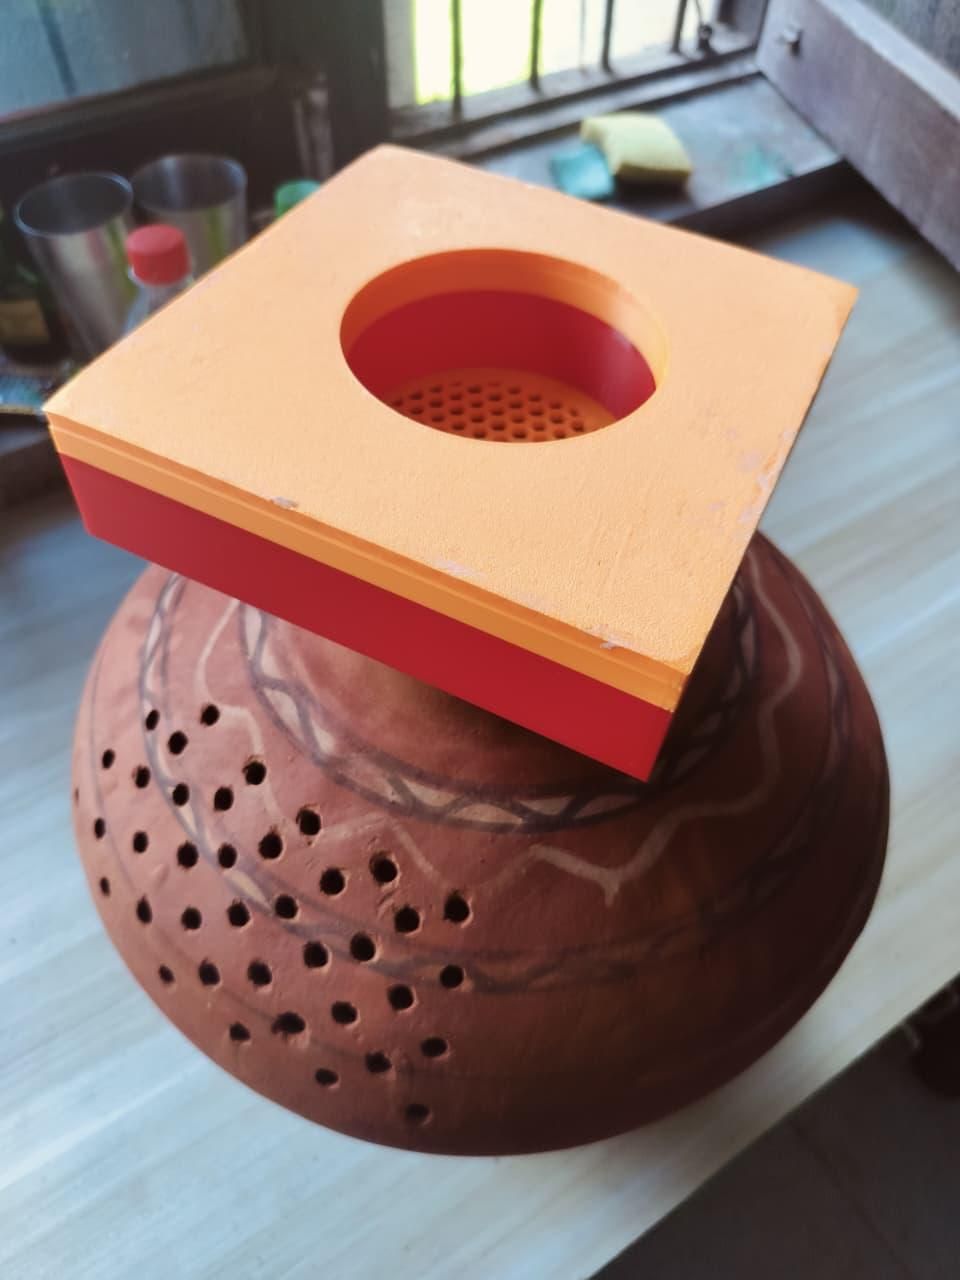
My grandmother never owned an AC. On 45°C summer afternoons, she'd hand me water from her clay matka — somehow always cold — and fan herself on the veranda. When I asked how the pot did it, she smiled: "Mitti saans leti hai." The clay breathes.
She was right. Clay pots have been India's zero-electricity refrigerators for 5000 years. Water seeps through the micro-pores of the clay, evaporates from the outer surface, and carries heat away with it. Pure physics, no compressor, no refrigerant, no electricity bill.
This summer, with temperatures breaking records in my city, I asked myself: what if grandma's matka could breathe harder?
So I drilled it, designed a 3D-printed honeycomb cap in Fusion 360, strapped a high-thrust drone motor to it, and built MatkaCool — a personal evaporative air cooler that:
- costs less than a pizza to build
- runs for hours on a single 18650 cell, or forever on any power bank
- charges over USB-C (and can even top up your phone in a pinch)
- still works as a normal drinking-water pot — cold water on tap!
Ancient wisdom, modern thrust. Let's build it.
Supplies
.jpeg)
Electronics
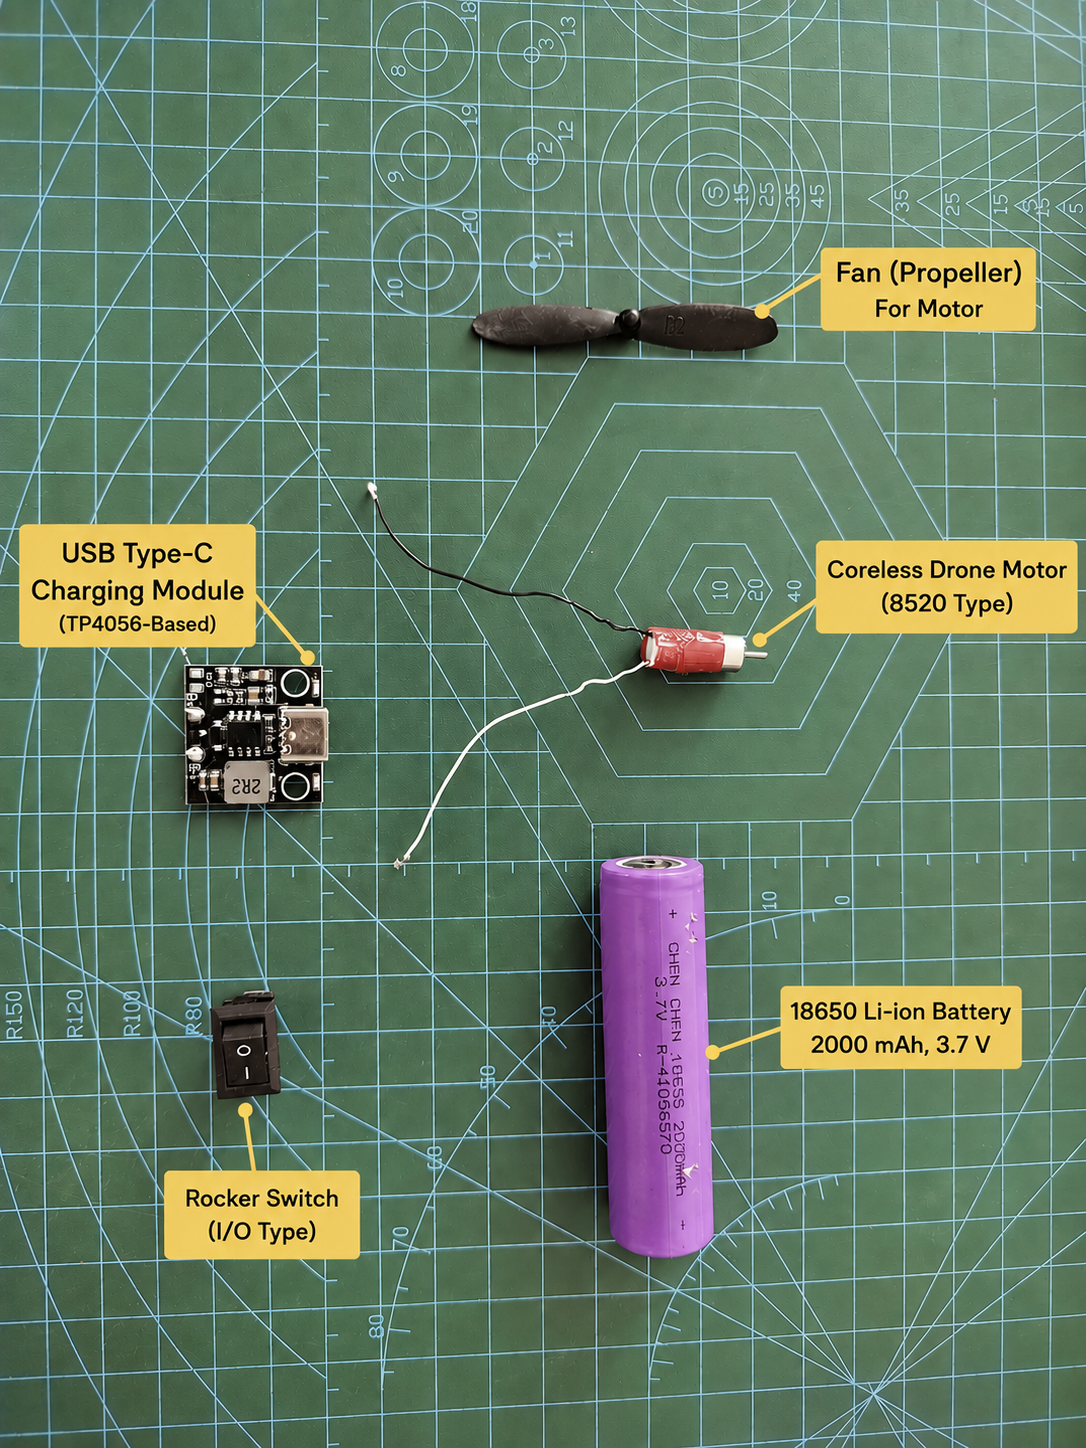
- 1 × coreless drone motor (8520 type or similar) with matching propeller — cheap, light, and produces surprising thrust
- 1 × 18650 Li-ion battery, 2000 mAh, 3.7 V
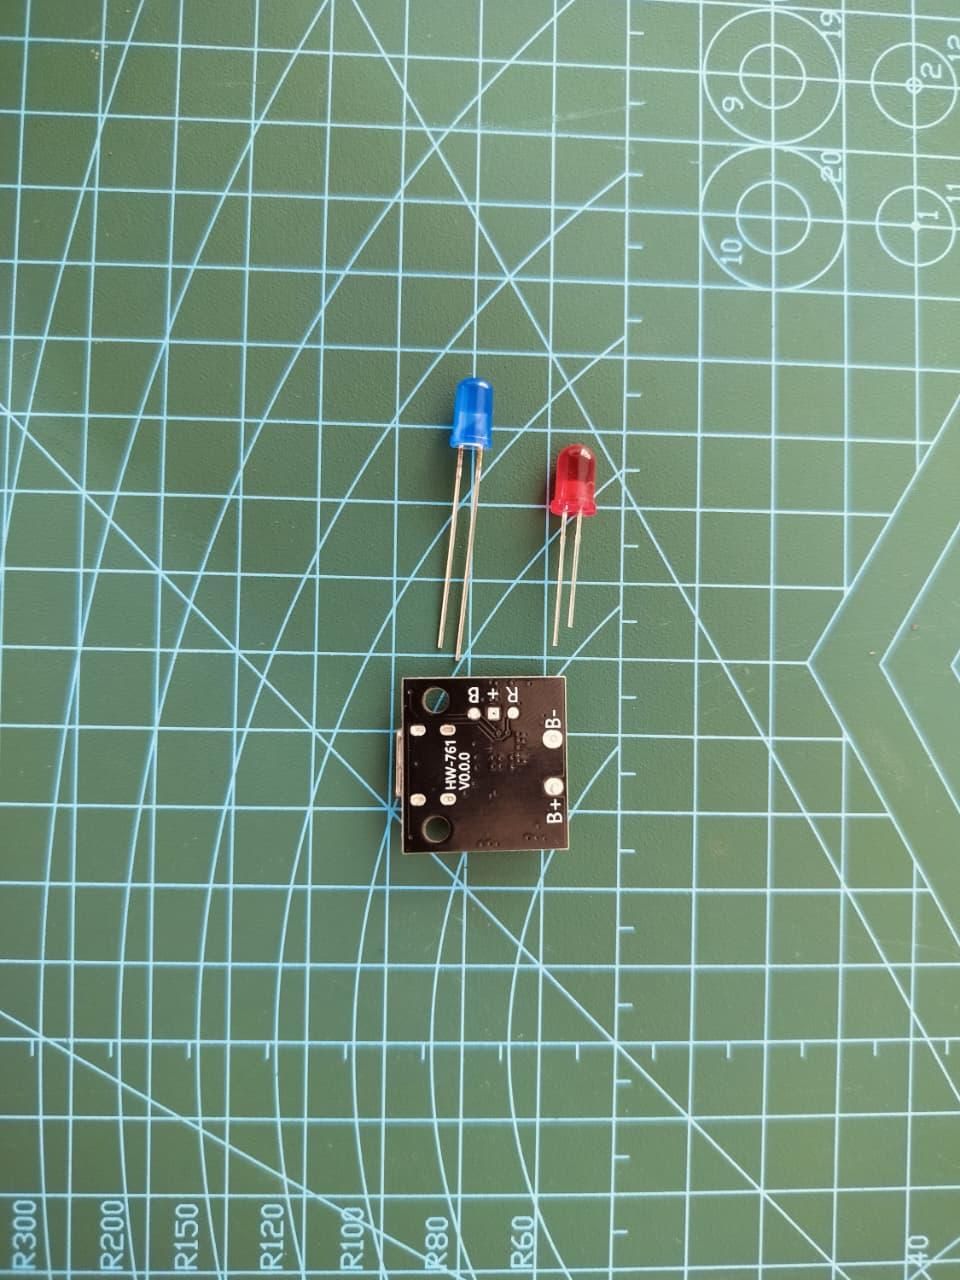
- 1 × USB-C charge (TP4056-based, with onboard red/blue charging LEDs — red = charging, blue = full)
- 1 × rocker switch (I/O type)
- Hookup wire, solder
Structure
- 1 × clay pot (matka) — any size; mine is a standard ~10 L water matka
- 3D-printed cap (2 printed parts) — STL/F3D files attached below
- Square base plate with conical funnel
- Honeycomb grille insert (safety + airflow + looks)
- PLA filament (~150 g total)
Tools
- Drill with masonry bits — one small pilot bit (2–3 mm) and one bit closer to your final hole size (6–8 mm)
- A tub or bucket big enough to submerge the pot
- Soldering iron
- 3D printer (or a local print service)
- Marker, masking tape
Approximate cost: ~$8–10 (excluding the pot you probably already own)
How It Works
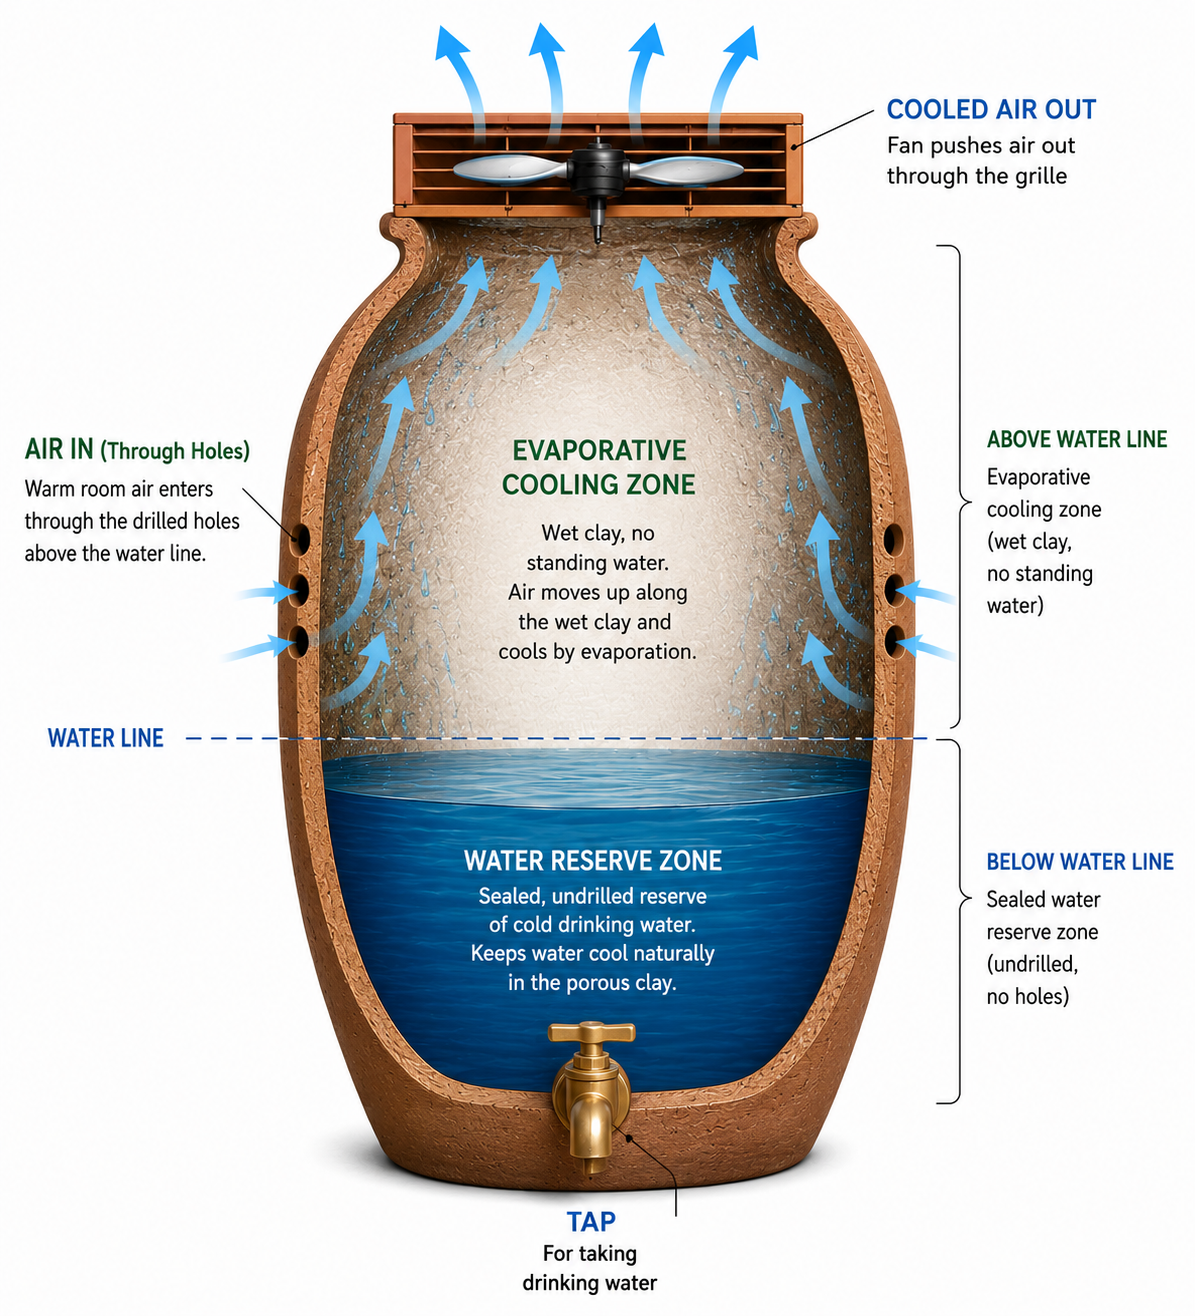
Two separate zones, one pot:
- Below the water line — a sealed, undrilled reserve of cold drinking water, kept cool just by sitting in the porous clay.
- Above the water line — the evaporative cooling zone. The clay here is damp (wicked up from the reserve below) but has no standing water, so this is where the actual air-cooling happens.
The propeller does one job: it pulls warm room air in through the drilled holes low on the belly, forces it to travel up along the full height of that cold, wet inner wall, and pushes it out through the grille. The longer that air stays in contact with the wet clay, the more it cools — which is exactly why the holes are drilled low instead of near the top.
Design the Cap in Fusion 360
.jpeg)
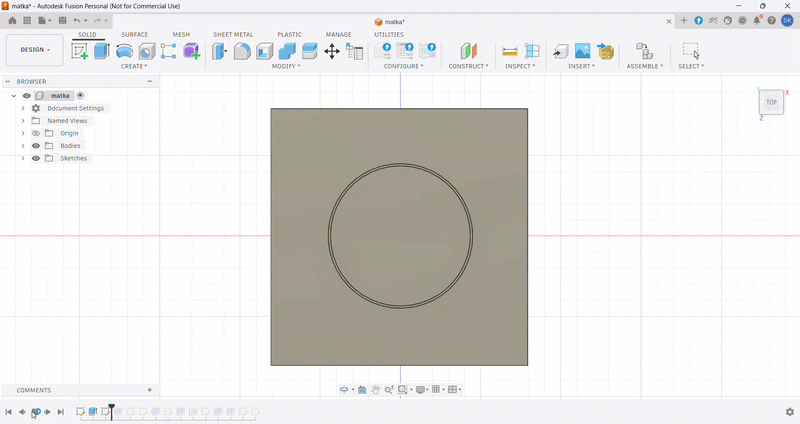
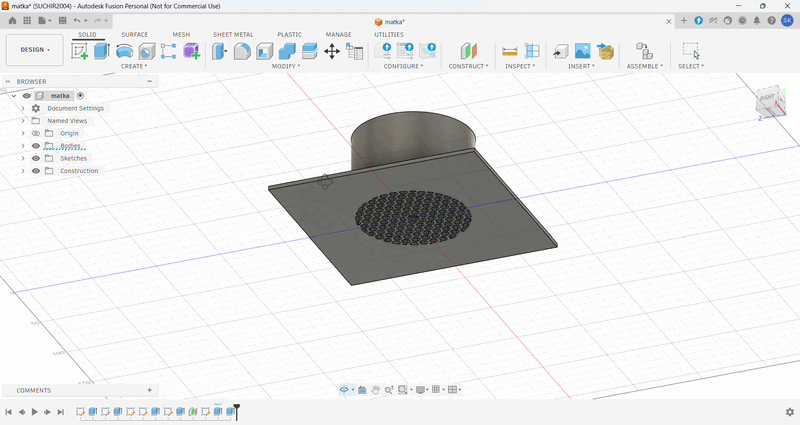
The heart of this build is the 3D-printed cap that turns any pot into a cooler.
I designed it in Autodesk Fusion 360 with three goals:
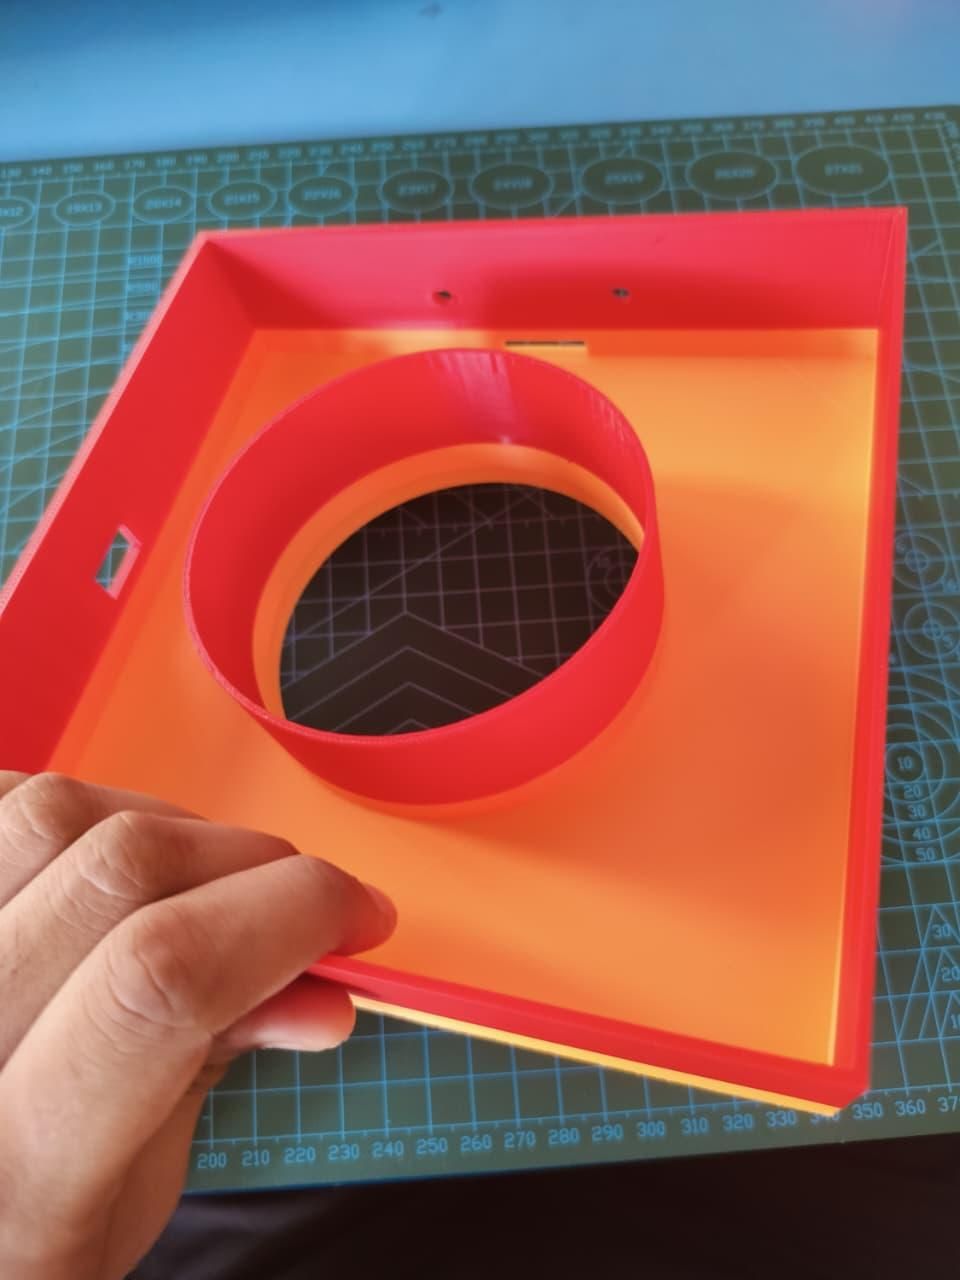
- Universal fit — instead of matching one pot's exact neck diameter, the cap uses a square base plate with a deep conical funnel underneath. The cone self-centres on any round pot mouth from roughly 10 cm to 18 cm across. Gravity + friction hold it in place; no clamps, no glue. Lift it off and the matka is a normal water pot again.
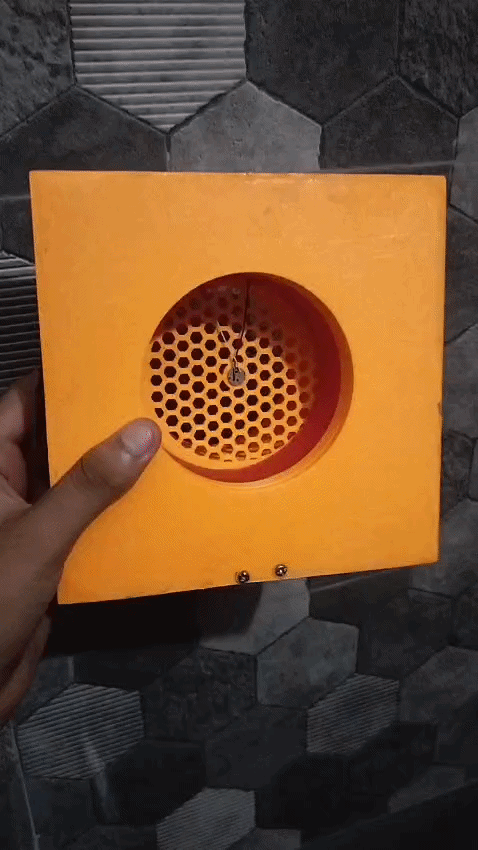
- Safety grille — a honeycomb-pattern grille sits above the propeller so no fingers (or curious kids) can reach the spinning prop. Honeycomb gives the best open-area-to-strength ratio, so airflow loss is minimal.
- Motor mount — a central hub in the funnel holds the coreless motor in a friction-fit socket, with a small wire channel routed out to the electronics bay on the base plate.
Design tips if you're remixing:
- Keep grille openings under 8 mm so fingers can't reach the prop
- The funnel angle matters: steeper cone = fits more pot sizes but adds height. ~45° worked well for me
- Add a slight lip around the base plate edge to stiffen the print and stop warping
3D Print the Parts
.jpeg)
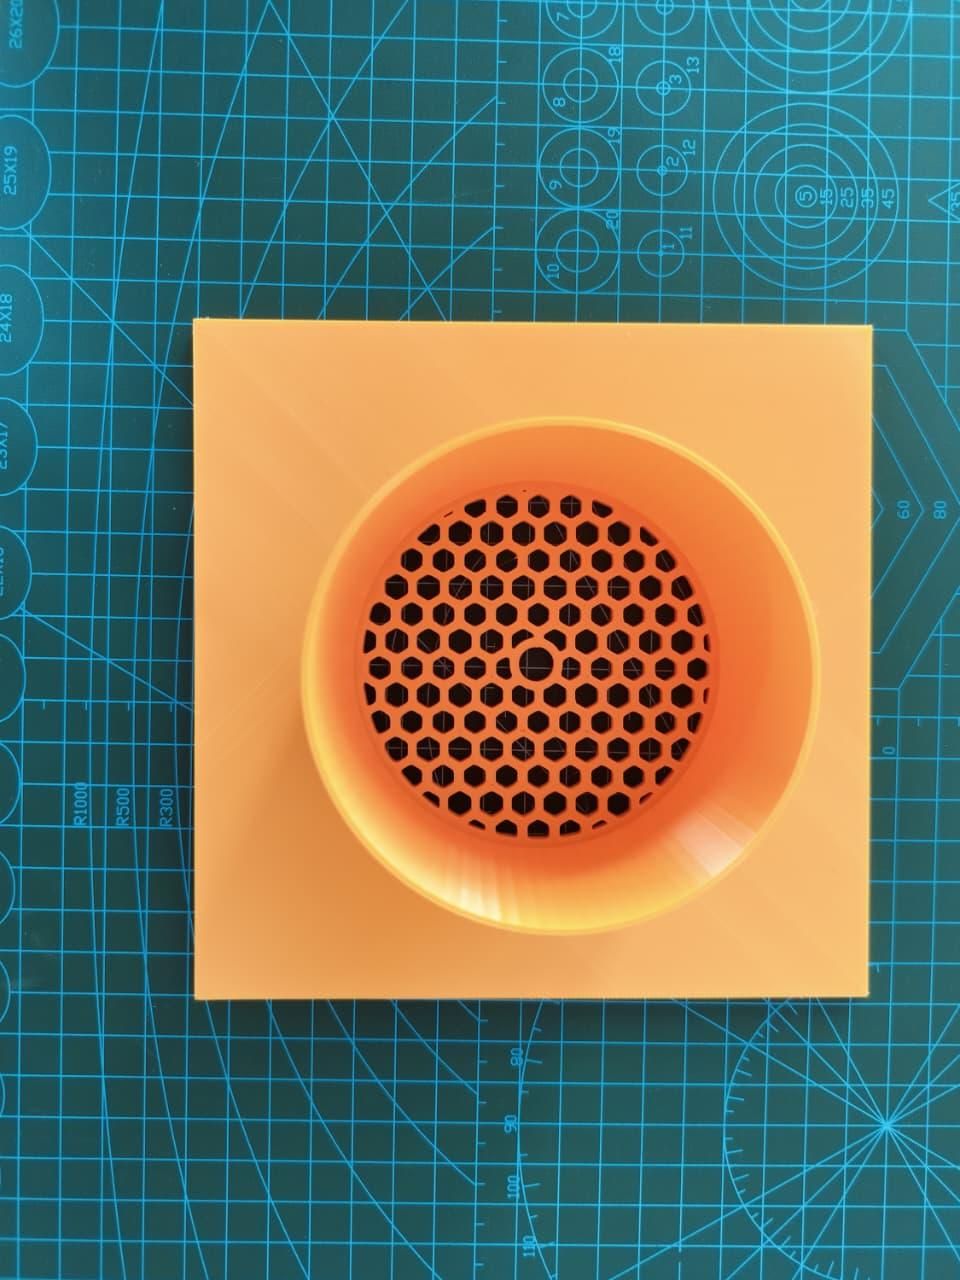
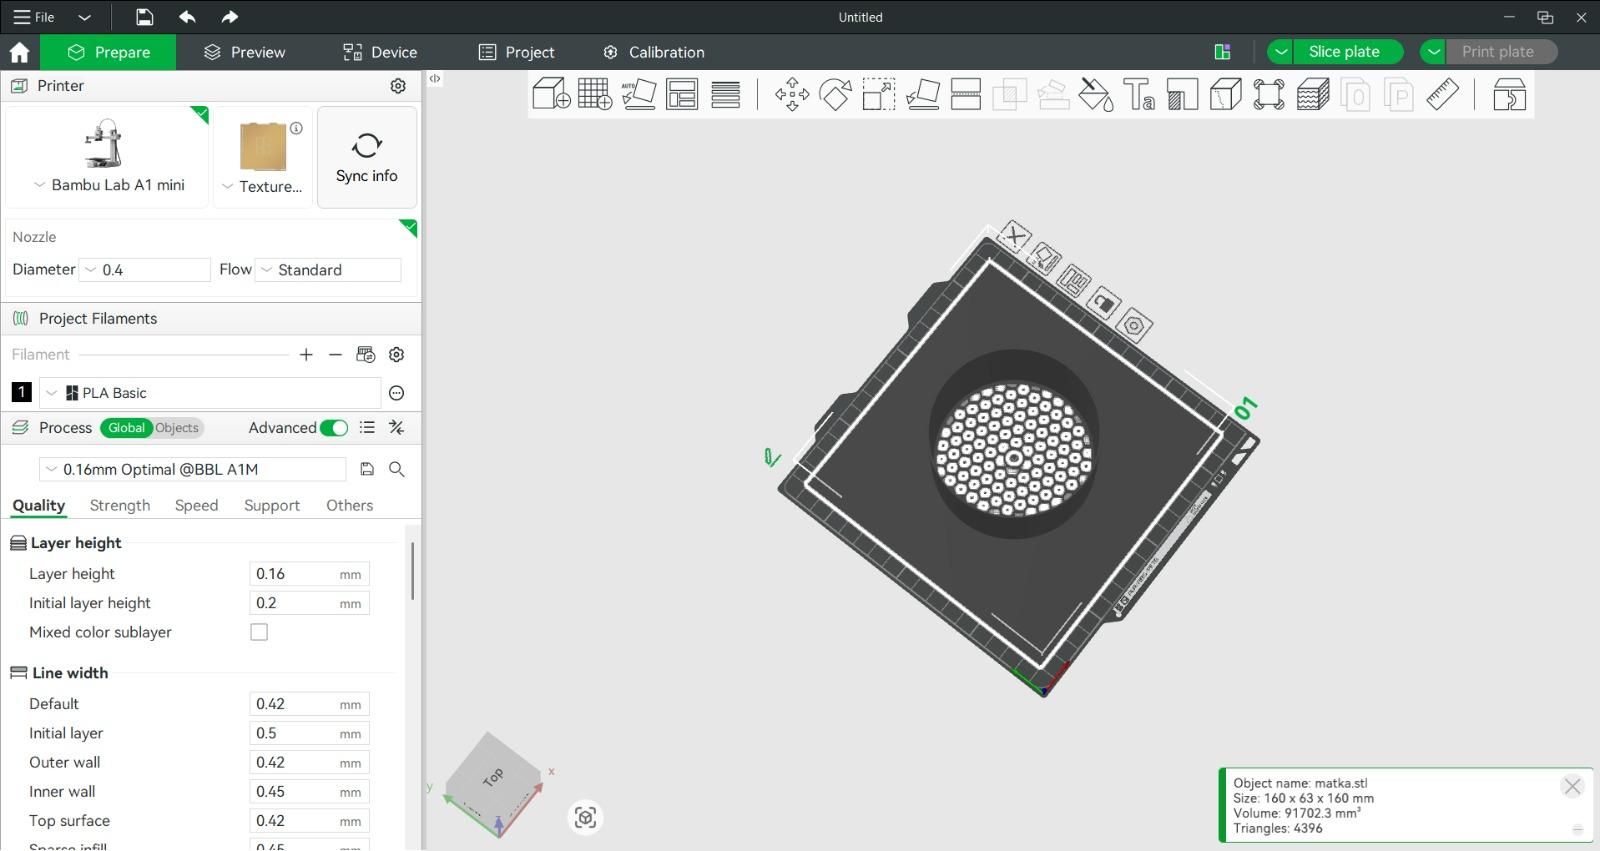
Print settings I used:
- Material: PLA (red + orange, because summer)
- Layer height: 0.2 mm
- Infill: 15% gyroid
- Walls: 3 perimeters (the funnel takes the pot's contact load)
- Supports: none needed — the cone prints upside-down, honeycomb grille prints flat
- Print time: ~6 hours total
The honeycomb grille is a separate insert that snaps into the funnel from the top. Printing it separately means you can iterate on grille patterns without reprinting the whole cap (I went through two versions before the hexagons looked right).
Test-fit the cap on your pot before wiring anything. It should sit centred and stable, with no wobble.
Prepare and Drill the Matka
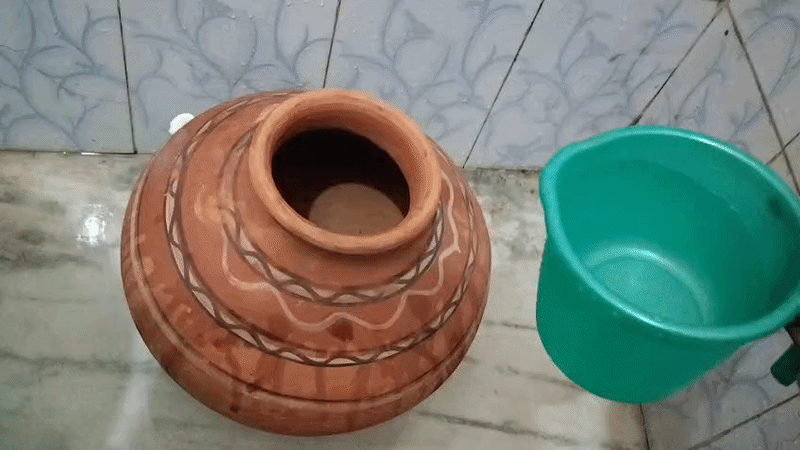
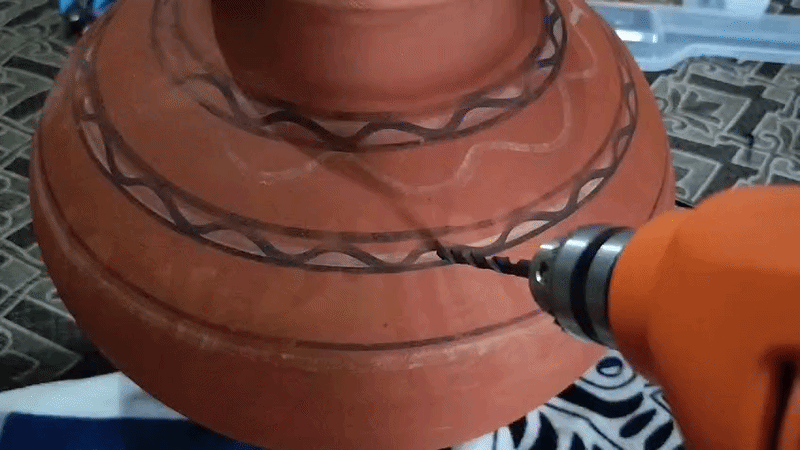
.jpeg)
.jpeg)
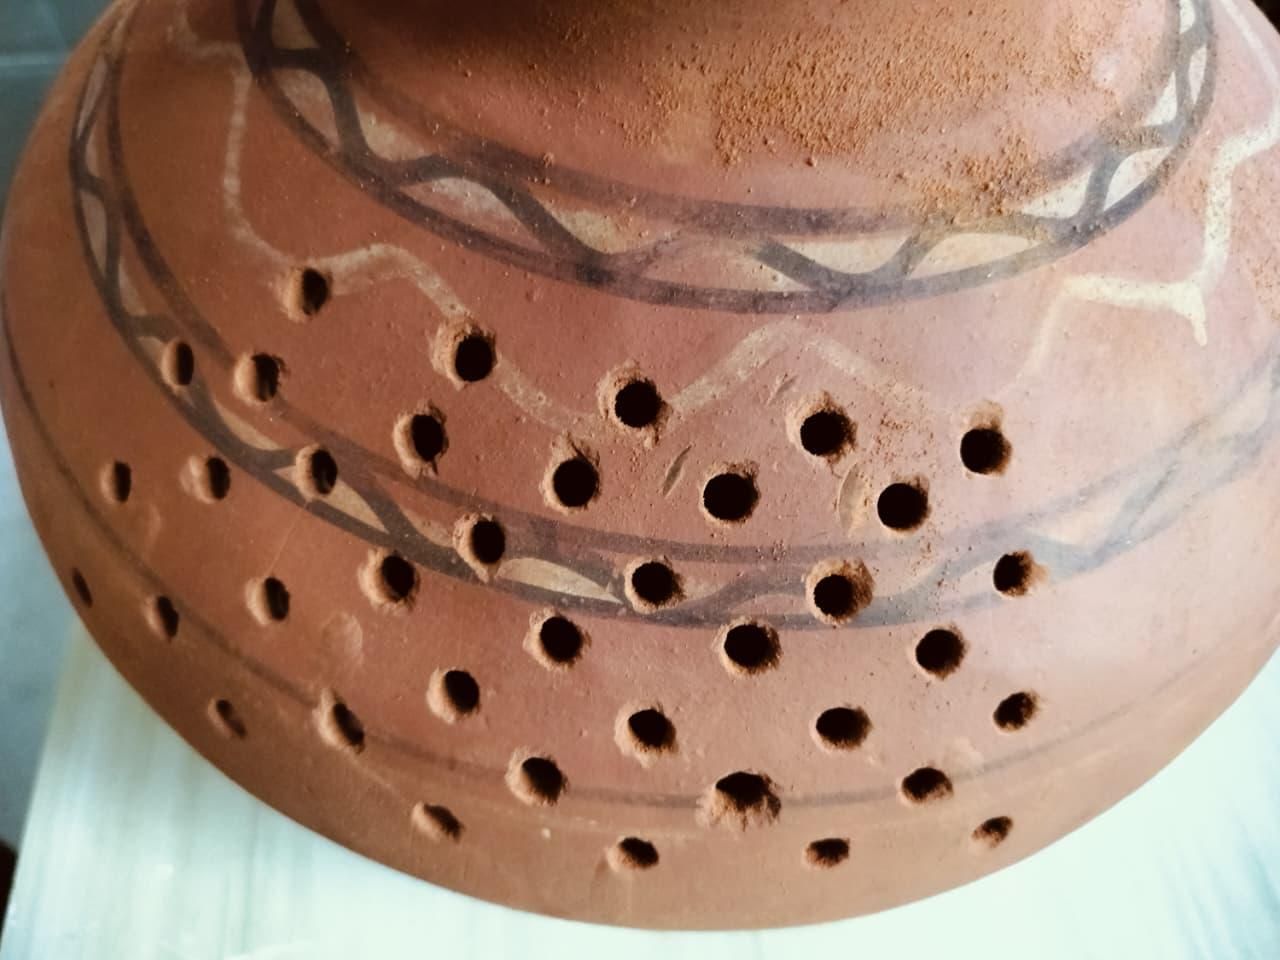
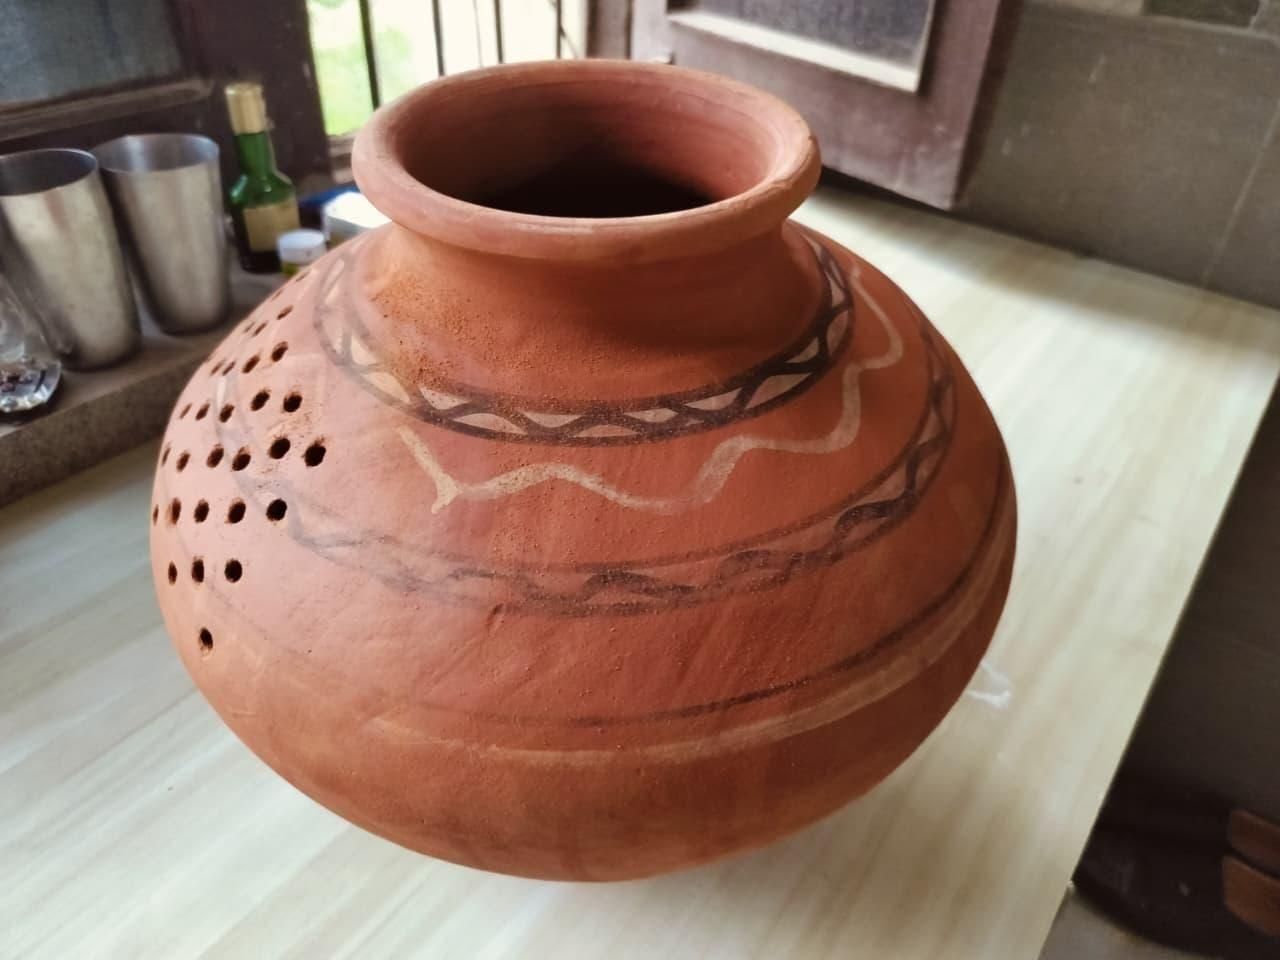
This is the step everyone's scared of — clay is brittle. Here's the technique that got me a clean 35-hole pattern with zero cracks, instead of the "just buy another pot" approach I started with.
- Soak the pot first. Submerge the matka in a tub of water for 20–30 minutes before you drill (or just fill it and let it sit — clay pots are drinking vessels, they're made to hold water). A dry, thirsty pot is stiff and brittle; a soaked one is slightly more pliable and far more forgiving of drill pressure. This single step cut my crack rate from "nerve-wracking" to basically zero.
- Mark your pattern. Mark a band of holes on one side of the pot's belly with a marker — I did ~35 holes in a loose diagonal pattern, 8–10 mm apart. One side only: the undrilled side keeps holding a deeper reserve of drinking water.
- Tape each mark. Put masking tape over every mark — it stops the bit from wandering on the curved, wet surface and reduces chipping at the edges.
- Drill in two passes, small bit first. Start every hole with a small pilot bit (2–3 mm), at low speed and almost no pressure — let the bit grind through, don't push. This pilot hole relieves stress in the clay around the spot before it ever sees a wide bit. Once the pilot hole is through, follow up with your final-size bit (6–8 mm) to open it up to full diameter. Going straight in with a wide bit is what causes most cracks; stepping up in two sizes is what prevents them.
- Keep it wet, keep it slow. If a spot feels like it's about to chip, ease off, dab a little more water on it, and let the bit do the work at a lower speed rather than forcing it.
- Rinse the pot thoroughly afterwards to clear clay dust — you're going to drink from this.
Why holes at the belly and not the top? Air gets pulled in low, travels up along the wet inner walls (maximum contact time with cold clay), and exits through the prop. Longer path = more cooling.
Water level rule: fill water only up to just below the lowest hole. Everything below the holes is your cold drinking reserve; everything above is the evaporative cooling zone kept damp by the clay's own wicking.
Wire the Electronics
.jpeg)
.jpeg)
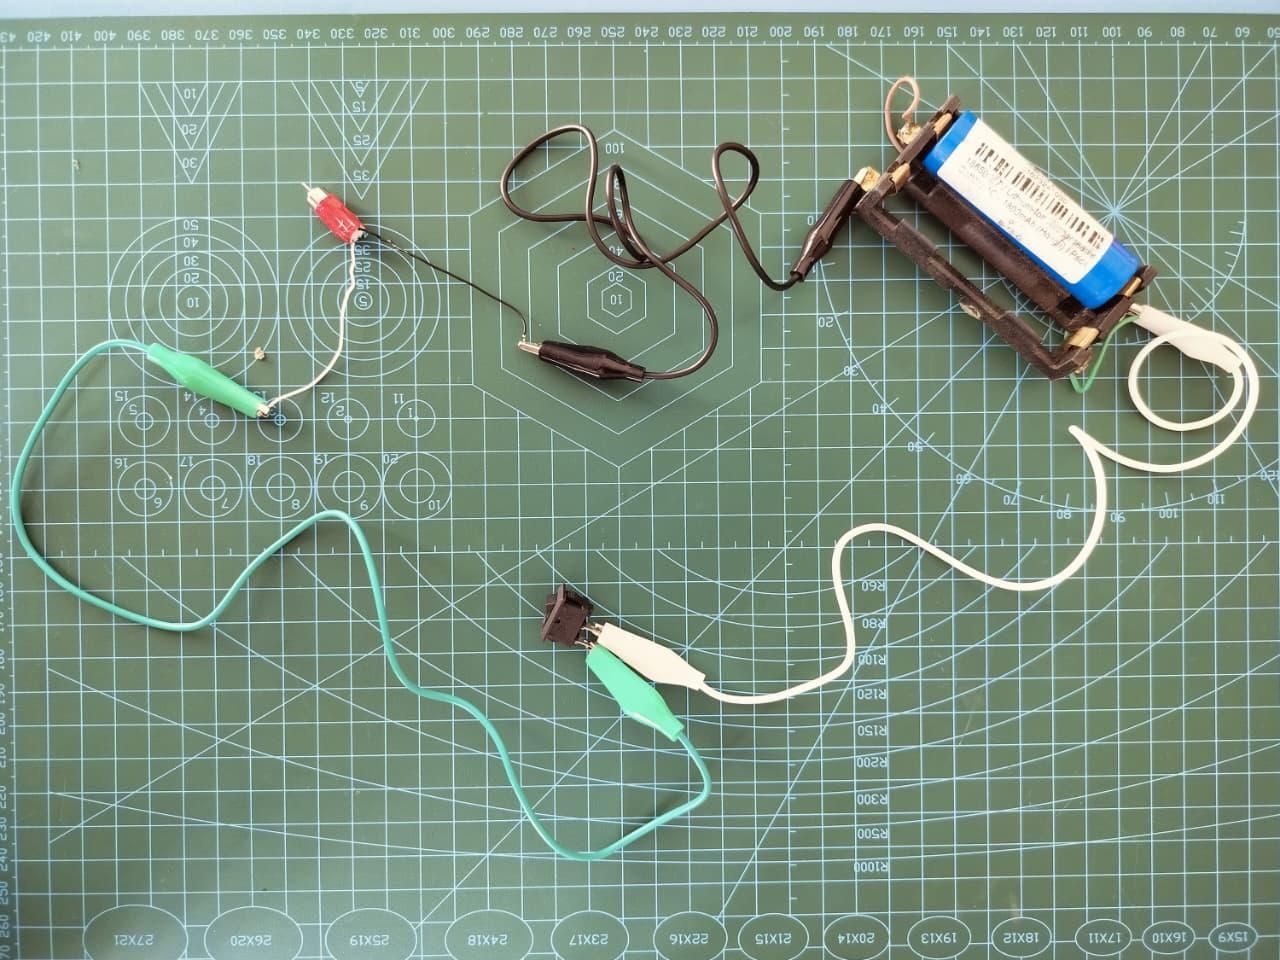
Simple series circuit, four components:
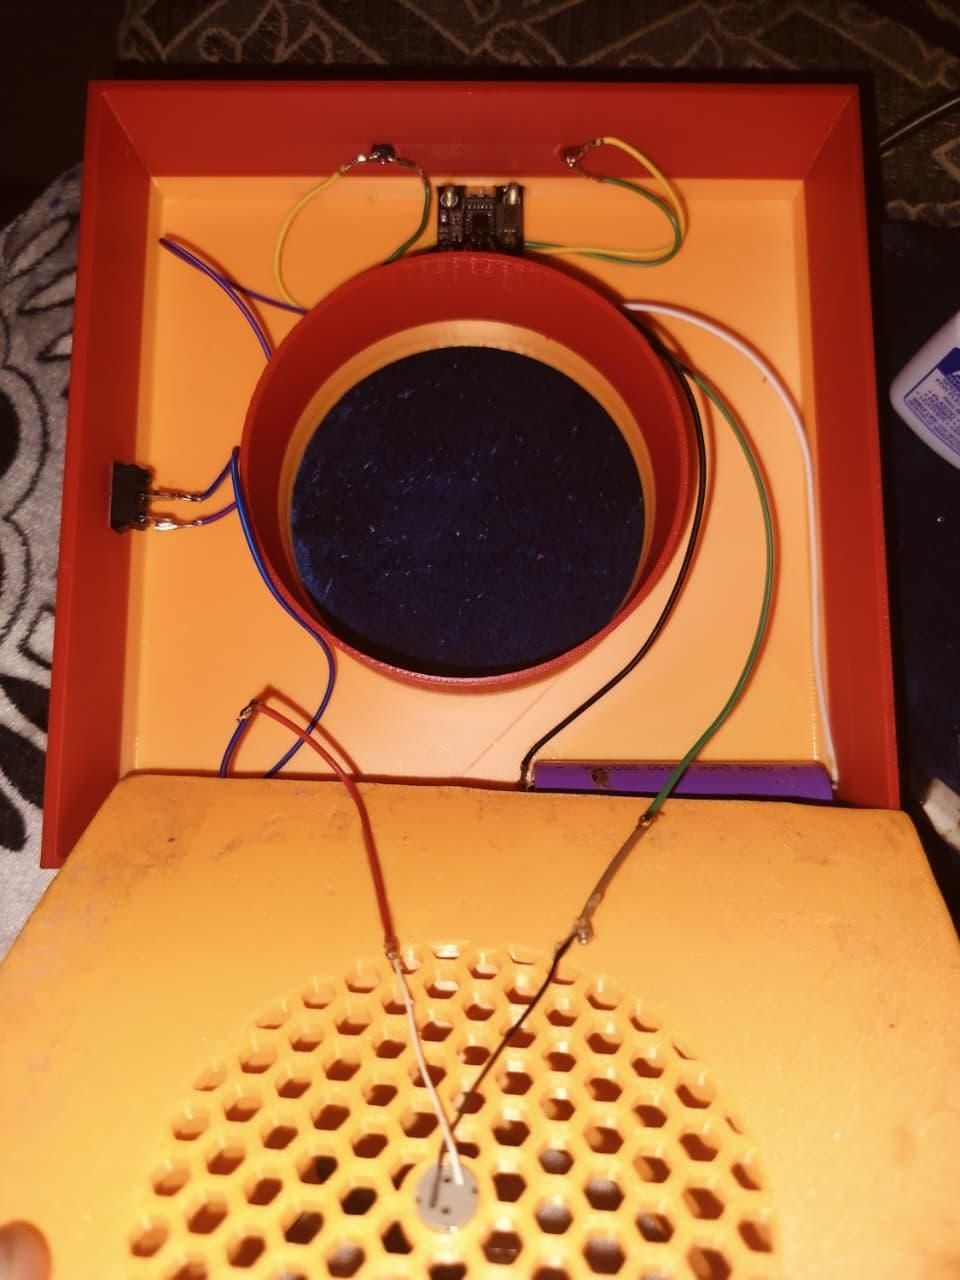
- Solder the battery to the B+ / B− pads of the charge module. Mind the polarity — coreless motors don't care about direction much, but the charge module absolutely does.
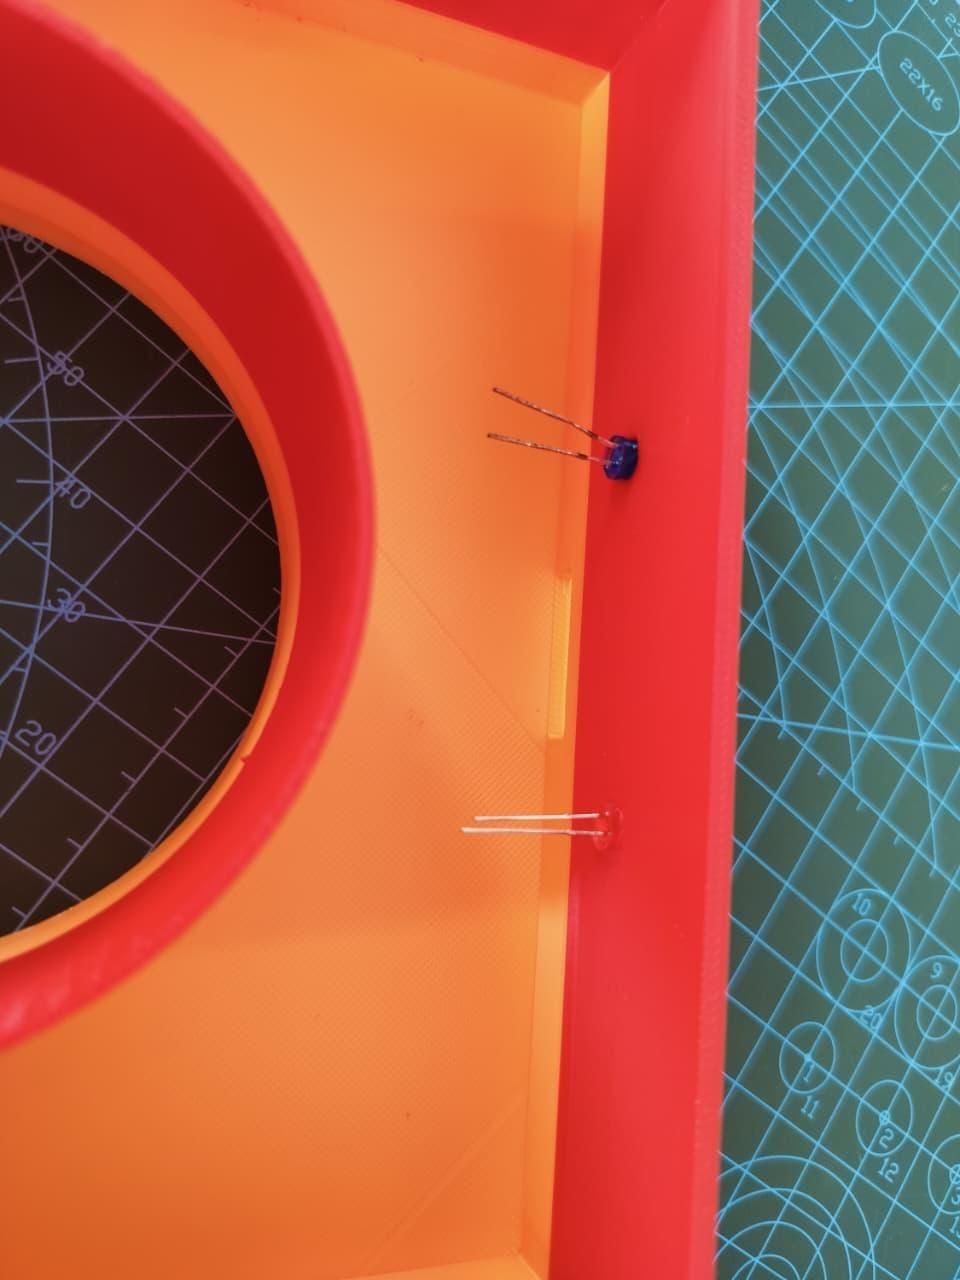
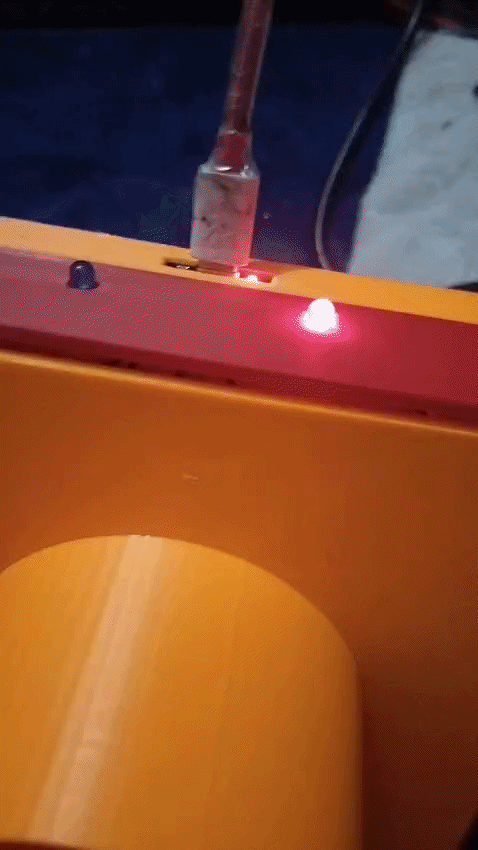
- Solder the two status LEDs (red = charging, blue = fully charged) onto the module's R+ and B pads, exactly as the board is labelled — these will later poke through the side wall of the cap so you can see charge status at a glance without opening anything up.
- Solder the switch inline on the output (OUT+) wire, so it cuts power to the motor but the battery can still charge with the switch off.
- Solder the motor leads after the switch. If the prop blows air the wrong way later, just swap the two motor wires.
- Insulate every joint with heat-shrink.
- Test before assembly: plug in USB-C — the red LED should light while charging, blue when full. Flip the switch — the motor should spin.
The USB-C module is the magic part:
- Charge the internal 18650 from any phone charger
- Onboard LEDs show charge state at a glance
- Run the cooler directly from a power bank for effectively unlimited runtime
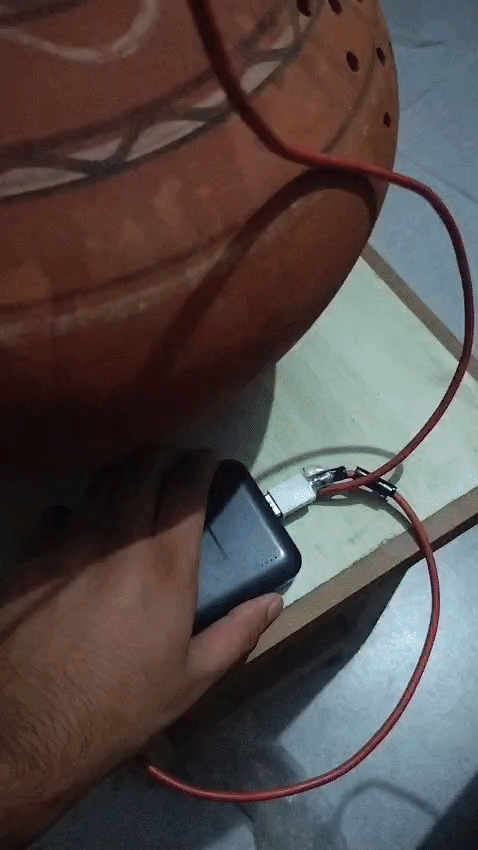
- In a pinch, the module's output can top up your phone — your water pot is now also an emergency power source, which is objectively funny
Runtime: the coreless motor draws roughly 1–2 W at cruise. A 2000 mAh cell gives ~4–6 hours per charge; a 10,000 mAh power bank stretches that to a full day and night.
Assemble Everything
.jpeg)
.jpeg)
.jpeg)
.jpeg)

.jpeg)
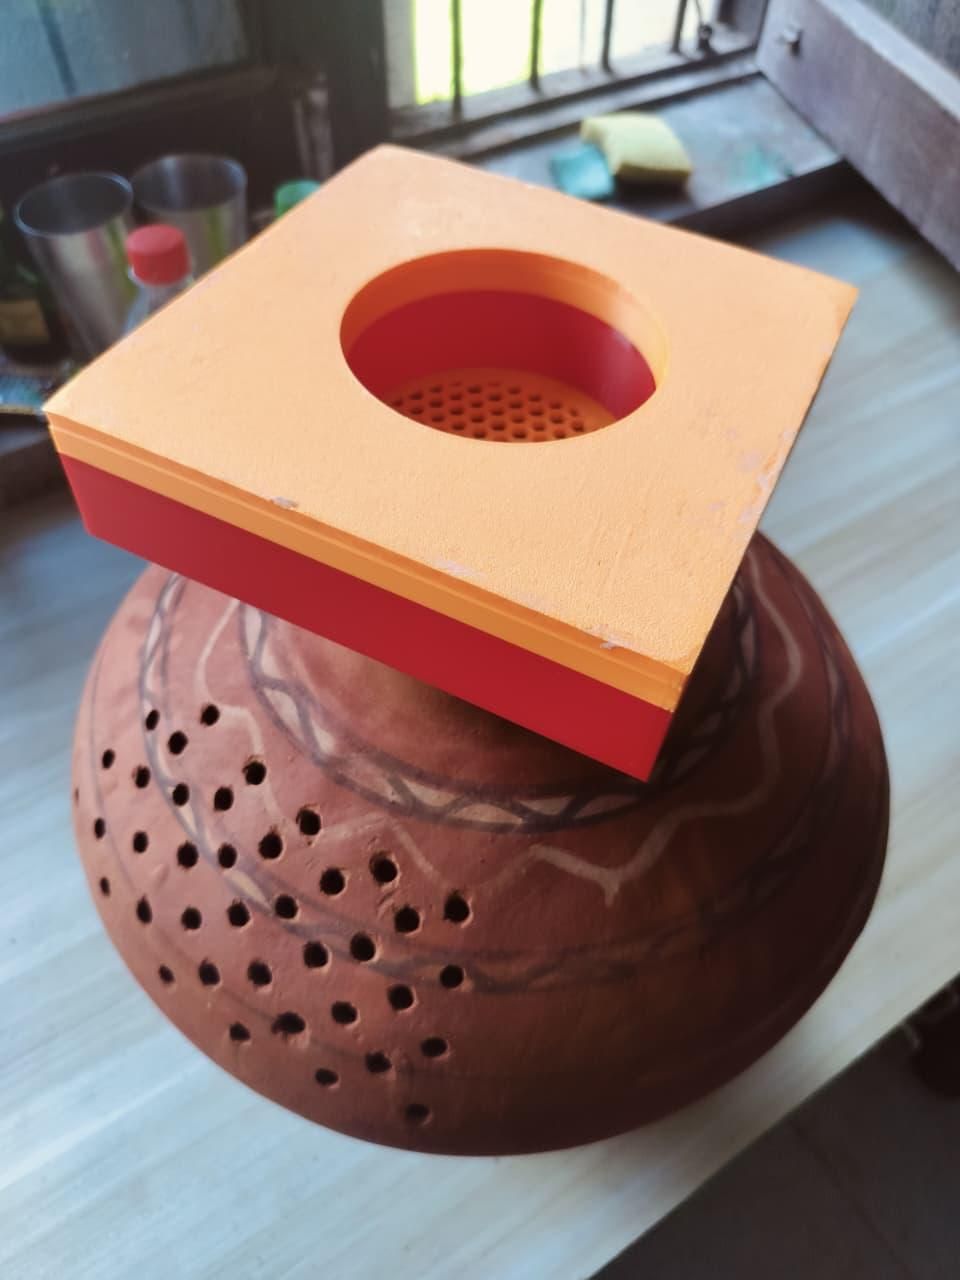
- Press the drone motor into the friction-fit socket at the centre of the funnel, wires routed through the channel and out through the honeycomb grille.
- Push the propeller onto the motor shaft.
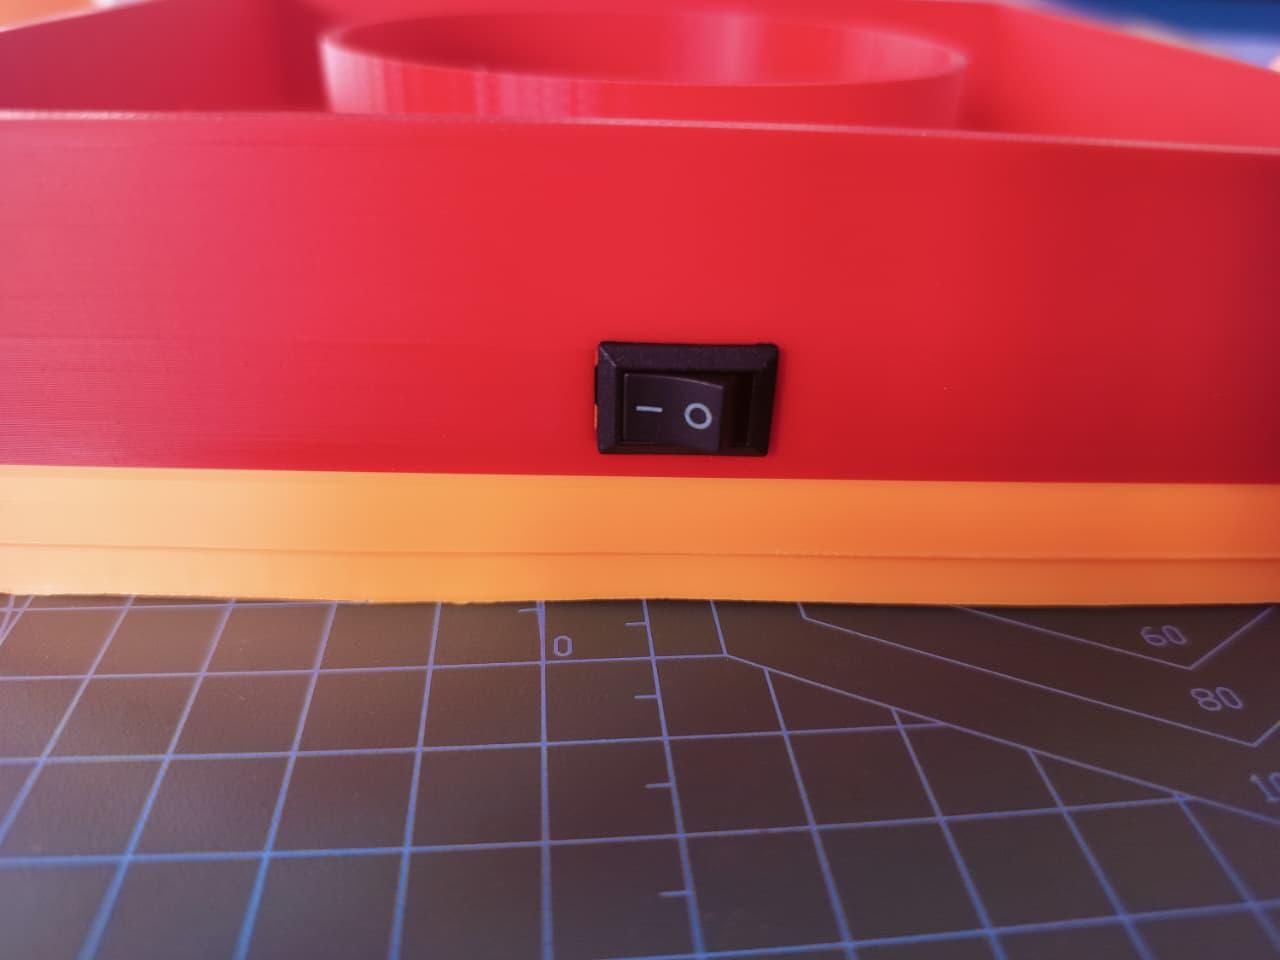
- Mount the rocker switch into its cutout on the side of the base plate.
- Push the red and blue status LEDs through their two small holes in the side wall so they're visible from outside, then stick the charge module into the electronics bay so the USB-C port faces outward through its slot; secure the battery beside it (hot glue or a printed clip).
- Snap the honeycomb grille into the funnel — prop safely caged.
- Place the whole cap on your water-filled matka.
Flip the switch. If you feel air being pulled downward into the pot instead of blown upward out of it, swap the motor wires — you want the prop pulling air up through the pot and out of the grille, so intake happens through the drilled holes across the wet clay.
Test It — Real Numbers
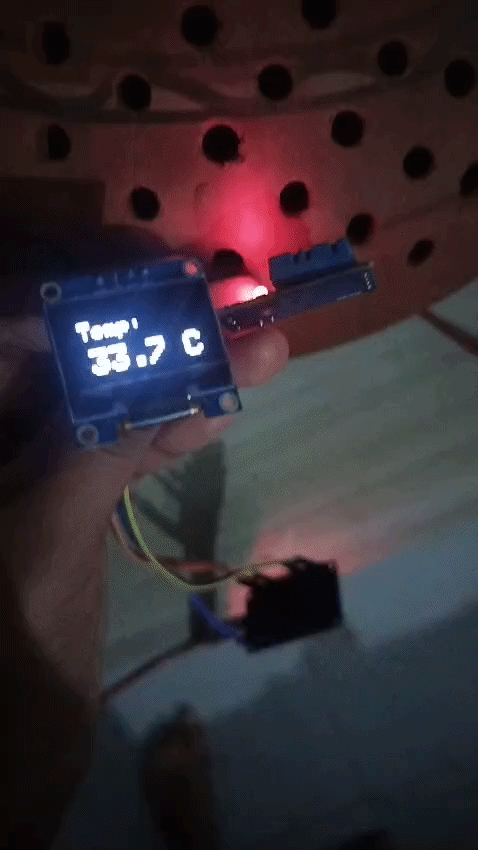
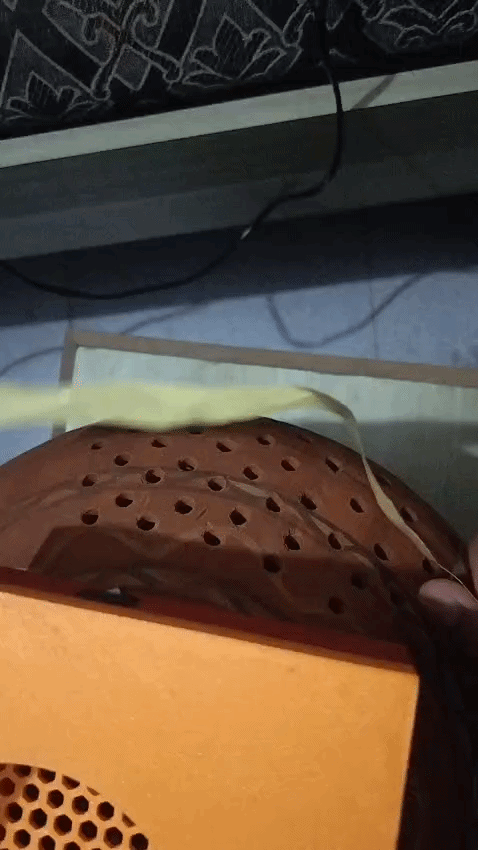
Claims are cheap; sensors aren't (well, actually a DHT11 temperature/humidity module is about $2).
My test on a warm afternoon, pot filled 2 hours earlier, readings taken with a DHT11 sensor:
MeasurementReading
Room air temperature 33.7°C
Air exiting the grille 27.8°C
Noise quiet hum, quieter than a ceiling fan
A 5.9°C drop from a few watts is the quiet superpower of evaporative cooling. For comparison, a room AC burns ~1500 W. This sips a tiny fraction of that.
Best conditions: evaporative cooling loves dry heat. In humid coastal weather the temperature drop shrinks — but the pot still gives you cold drinking water, so you win either way.
Living With MatkaCool
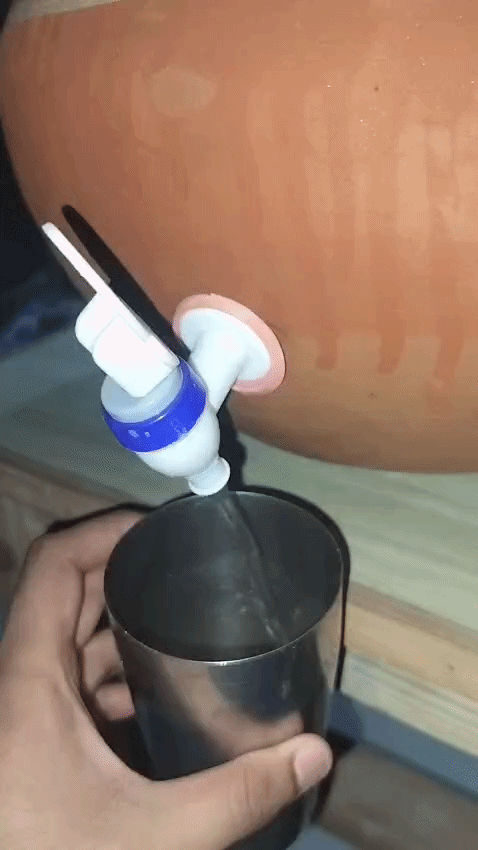
Daily routine, in full:
- Top up water (below the hole line)
- That's it. That's the routine.
Maintenance:
- Rinse the pot weekly like any drinking matka
- Recharge via USB-C when the red LED tells you to, or just leave it on a power bank
- Lift the cap off whenever you want — it's a normal water pot underneath
Remix ideas:
- Scale the cap for bigger pots or a row of small ones
- Add a small solar panel on the cap for daytime autonomy
- Swap the honeycomb for a custom grille pattern — your initials, a mandala, anything
- Add a second drilled band + prop for a two-stage tower
Conclusion: Why This Matters
Millions of people face brutal heat waves without access to — or budget for — air conditioning. And air conditioning itself feeds the problem: massive power draw, refrigerants, heat dumped back into already-hot streets.
MatkaCool is the opposite of all that:
- Nearly free to build and almost free to run
- Repairable — every part is replaceable with a screwdriver and a soldering iron
- Culturally familiar — it is the pot that's already in millions of kitchens
- Honest — it won't turn your room into a fridge, but it makes the hottest hours livable, and hands you cold water while doing it
Sometimes the future of cooling was sitting on grandma's veranda all along.
Mitti saans leti hai. Now it breathes with thrust. 🌬️
If you build one, post a photo in the comments — I'd love to see your pot + grille combos. And if this helped you beat the heat, a vote in the contest would make my summer. 🧡