Multi-Clamp Glue-Up Jig for Fabricating DIY Wood Beams AKA a "MikroBeamer"
by Door County Rustic in Workshop > Woodworking
2934 Views, 19 Favorites, 0 Comments
Multi-Clamp Glue-Up Jig for Fabricating DIY Wood Beams AKA a "MikroBeamer"


.JPG)


.JPG)

As the video linked above illustrates MikroBeams are a very well kept secret, in fact so well kept that even Google doesn't find them. Maybe that's because I just made the word up to describe the small laminated hardwood beams that can be used to build beds, bunks, farmhouse style table bases and small structures. These small ("micro") beams are typically 2-4" wide, 4-6" high and range in length from 18" to 96" and can be laminated from strips of hardwood, softwood or combinations thereof. Because lumber, especially hardwoods like cherry, walnut, maple and others of these dimensions, are not available kiln-dried I have had to make my own beams by stacking and gluing smaller boards. In the real world these are called "Glued Laminated Timbers" aka "Glulams" where they are used to span HUGE distances. They look GREAT and are amazingly strong and stable.
Why a MikroBeamer?
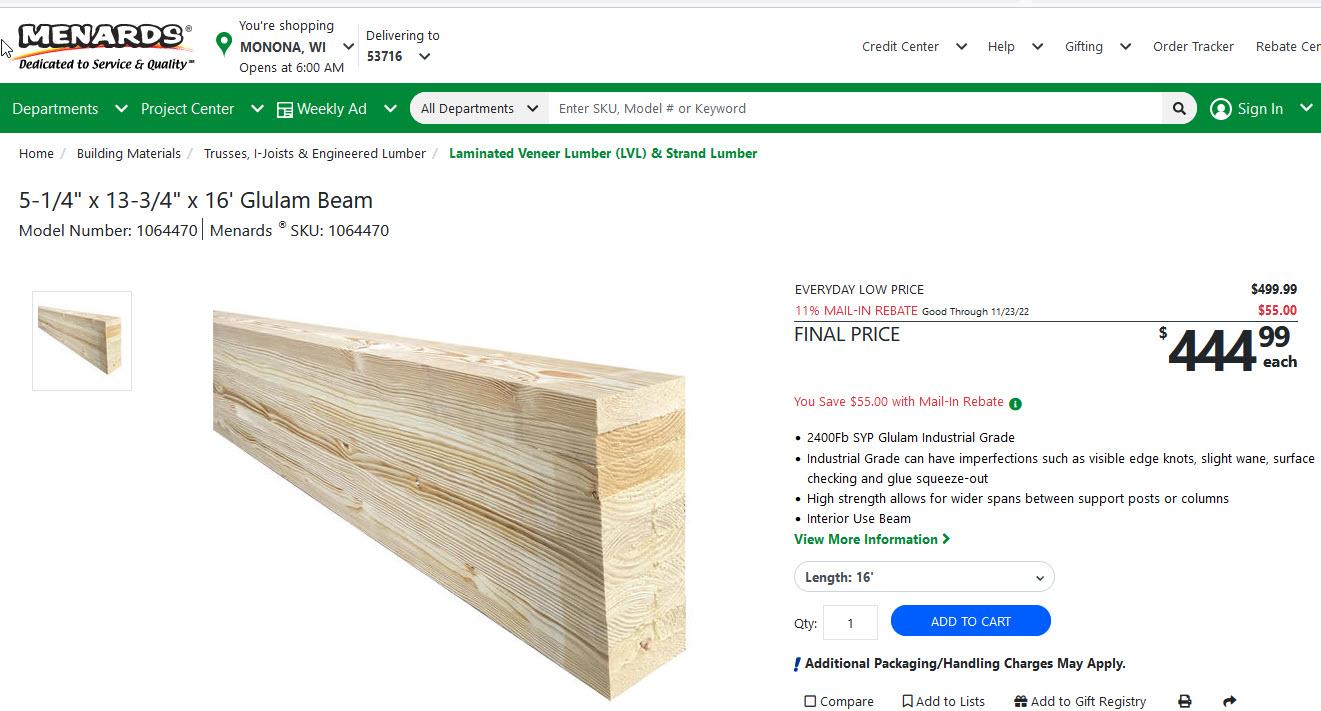
The only Glulams available retail are monsters like these that can be ordered through Menards but those are in a minimum size of 5 1/4" x 13 3/4" x 16', are made from pine/fir and cost $444. Otherwise glulams are mostly available custom-made for commercial uses and manufactured by companies with huge clamping systems.
If woodworkers want to make furniture and "small" structures using beams laminated from hardwoods then we need to make our own. For many years, on client projects, I glued laminated layers of locally milled 4/4 and 5/4 kiln-dried hardwoods using scores of heavy duty R&R Clamps, Bessey K-Body style clamps and Jorgensen style Pipe Clamps on every beam which meant having an inventory of over 100 such clamps at $30 each +-. While those clamps handled the squeezing function they were cumbersome and did nothing to straighten and to keep straight long laminated glue-ups. There are DIY type retail clamping systems and commercial laminating systems available but many of those cost thousands of dollars; eat up huge amounts of shop space; and are designed for edge-to-edge board glue-ups.
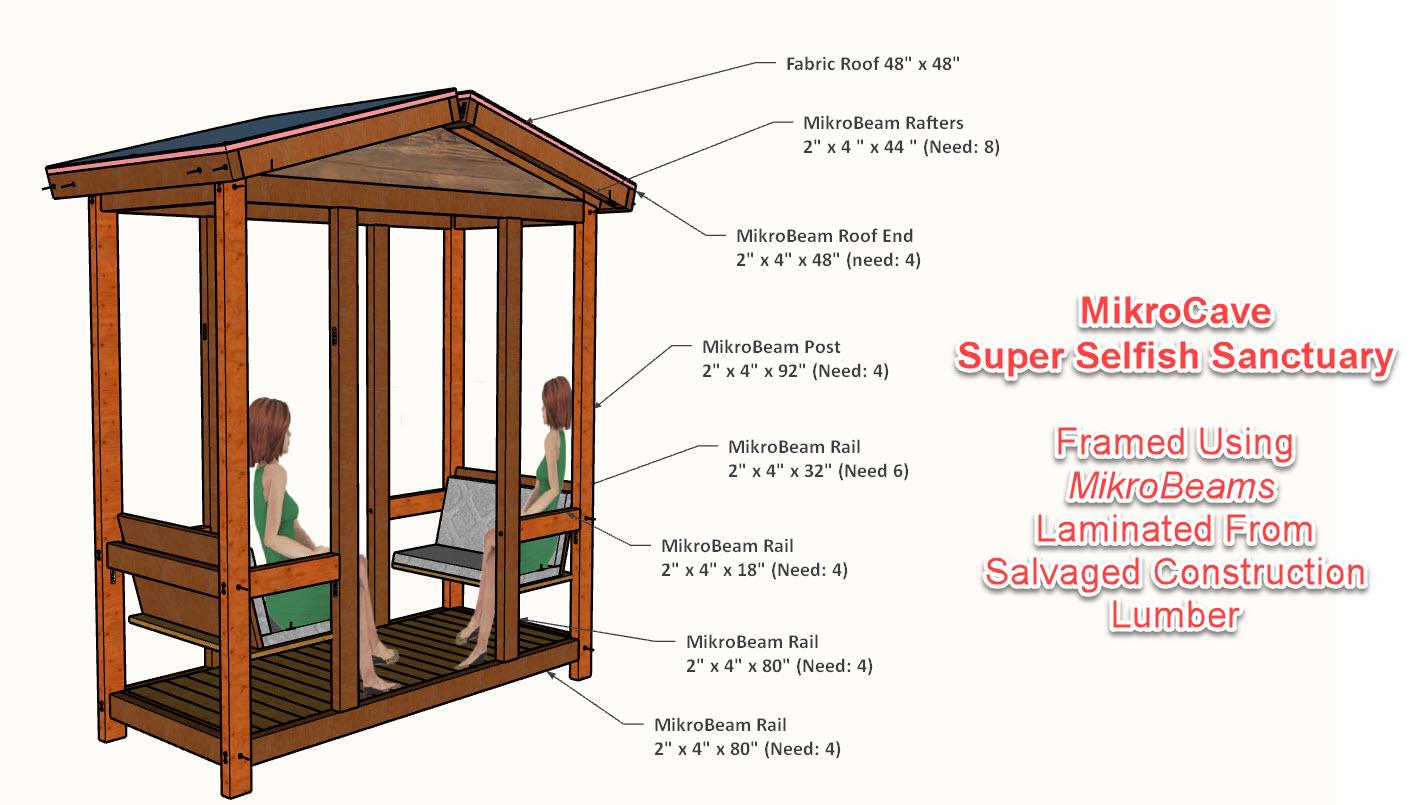
Although I no longer build projects for others I still love MikroBeaming and have several projects, including the Super Selfish Sanctuary, shown in images above, on my project radar that will be built from MikroBeams laminated from salvaged construction-grade lumber. With this and other projects in mind I tried my luck at coming up with a better system for DIY laminating beams, especially long ones.
The MikroBeamer "Sandwich" Concept
After a bit of trial and error the project morphed into a DIY jig for making DIY "MikroBeams" and it was therefore dubbed a "MikroBeamer". The key to the MikroBeamer is a combination of both steel and wood to make a "sandwich". The "bread" consists of two sticks of 1" x 2" Channel steel. The "meat" (or PB&J for the vegans out there) is a 2" thick "Hardwood Spreader". The steel channel provides HUGE strength, stability, true straightness (even in long lengths) but, just as importantly, the flanges of the channel can be drilled and thread tapped to hold the steel bolts connected to the Clamps for repeatable torquing to compress multiple layers of thick glued boards.
Industrial Strength Clamps at a Fraction of the Cost
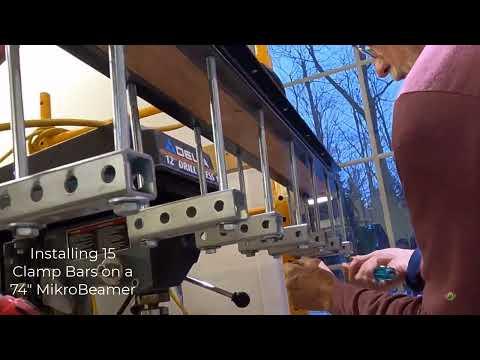
One of the "sandwiches" made for this Instructable was 30" long and contains 12 clamps. The cost of the steel was $11, the wood was from the scrap bin; the predrilled Clamp Bars came in at about $1.50 each and there are 24 Clamp Bolts purchased in bulk at Menards for about $.50 each. The total cost to build a 30" MikroBeamer was less than $30 yet it contains 12 heavy-duty clamps so coming in at about $2.50/clamp. This compares to the $25/each for conventional heavy-duty woodworking clamps. Shown in some of the attached videos and images is a 74" MikroBeamer that supports 15 clamps at 5" O.C. on each side (total of 30 clamps) for fabricating two MikroBeams over 8' long simultaneously, again coming in at only about $2.50/clamp.
Capacity of a DIY MikroBeamer
A DIY MikroBeamer can be made to laminate various depths, heights and lengths of beams:
Depth-of-Beam Capacity: The demonstrated version was set up for building 2" thick MikroBeams. This depth capacity can be changed by removing the 2" Wood Spreader and replacing it with a 3" Spreader to build up to 3" thick beams, a 4" Spreader to build 4" beams etc.
Height-of-Beam Capacity: The build demonstrated used 6" long bolts to laminate up to about 4" high beams. Using longer bolts increases that capacity while using shorter bolts decreases the capacity.
Length-of-Beam Capacity: The 30 " MikroBeamer works great for laminating 40", 50" or longer beams. The 74" MikroBeamer shown would not break a sweat laminating beams to 10' or longer. Images and videos shown later demonstrate how this is done by adding conventional clamps to any beam portions extending beyond the ends of the MikroBeamer.
Welcome to the world of MikroBeaming!
Mike
Supplies


.JPG)


Video: About The Supplies to Make a MikroBeamer:
Tools
- A metal-cutting bandsaw/miter capable of cutting 1" x 2" x 1/8" channel and 1" x 1" tube
- Drillpress capable of drilling 17/64" and 3/8" holes through 1/8" or 3/16" steel
- Powered drill that has "Forward and Reverse" switch
- Impact driver - Best type is typical cordless 12V/18V type
- Fine tip pencils or markers that are visible on steel (standard pencils are not)
- Two 4" +- clamps similar to the Besseys shown in the demo
- 6' or 9' Tape Measure. (Typical 25' or other large tapes will not work well)
- Small accurate measuring device such as an Incra 3" Rule
- Speed Square or other square
Bits
- 17/64" metal drilling bit
- 5/16-18 metal thread tap. High quality recommended. Avoid cheap type!
- I've had very good results from WIDIA (see image for model #)
- 3/8" metal drilling bit
- 1/2" socket bit with adapter to insert into any 12v or 18v impact driver
- 1/2" ratchet wrench
Metal Material
The MikroBeamer can be any length but the hole patterns repeats every 30" so the ideal lengths are 30", 60", 90", 120" and even longer if desired.
The cost of 1 x 2 Channel will vary dramatically depending on where and how it can be purchased.
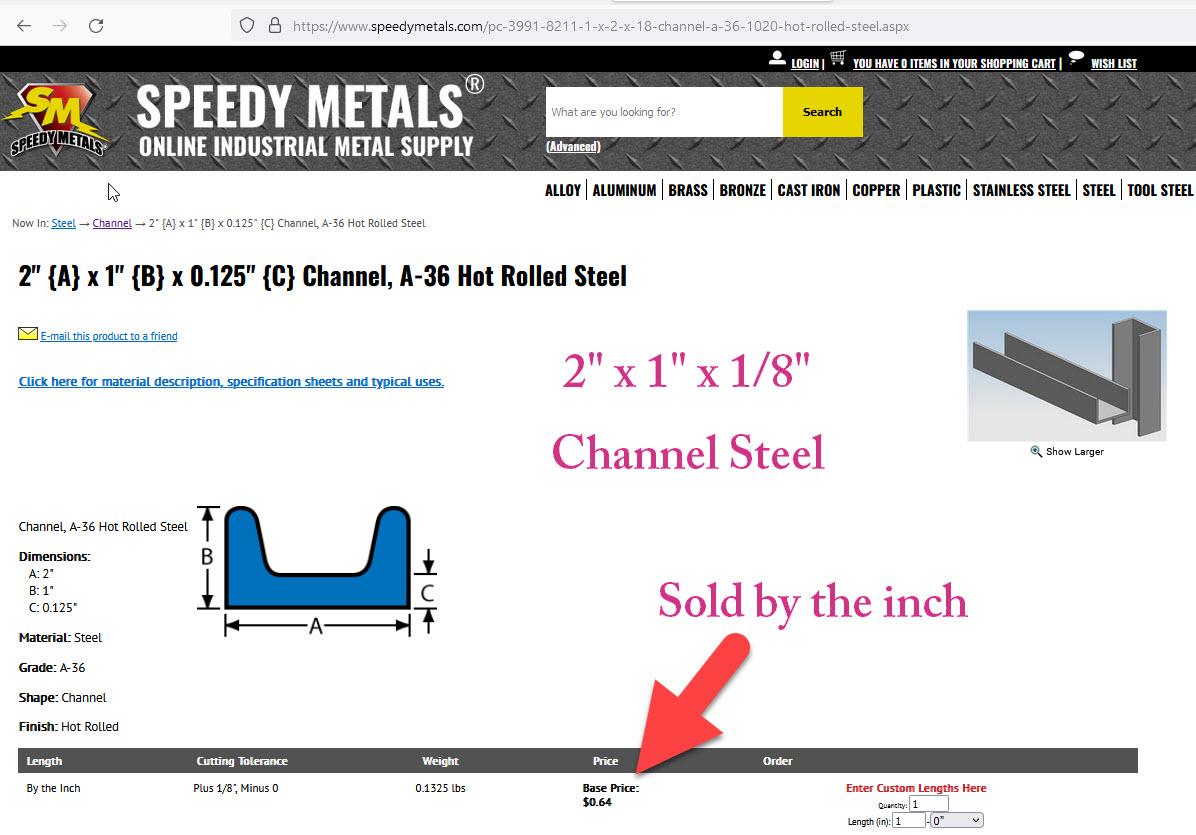
- In our area we have a commercial steel supplier that also sells retail, There I can buy, pick up and bring back here to cut myself a 1 x 2 x 1/8" x 20' stick of Channel steel for about $44.00. That comes out to $5.50 for a 30" piece.
- We also have a Metal Supermarket near here, part of a chain of stores that caters to small orders and they precut to length. They have been an excellent source especially when only needing small quantities.
- You may be pleasantly surprised to find a steel fabrication shop nearby that will precut and sell individual pieces of steel. Probably will cost more than the two options above but less than ordering online especially considering shipping costs.
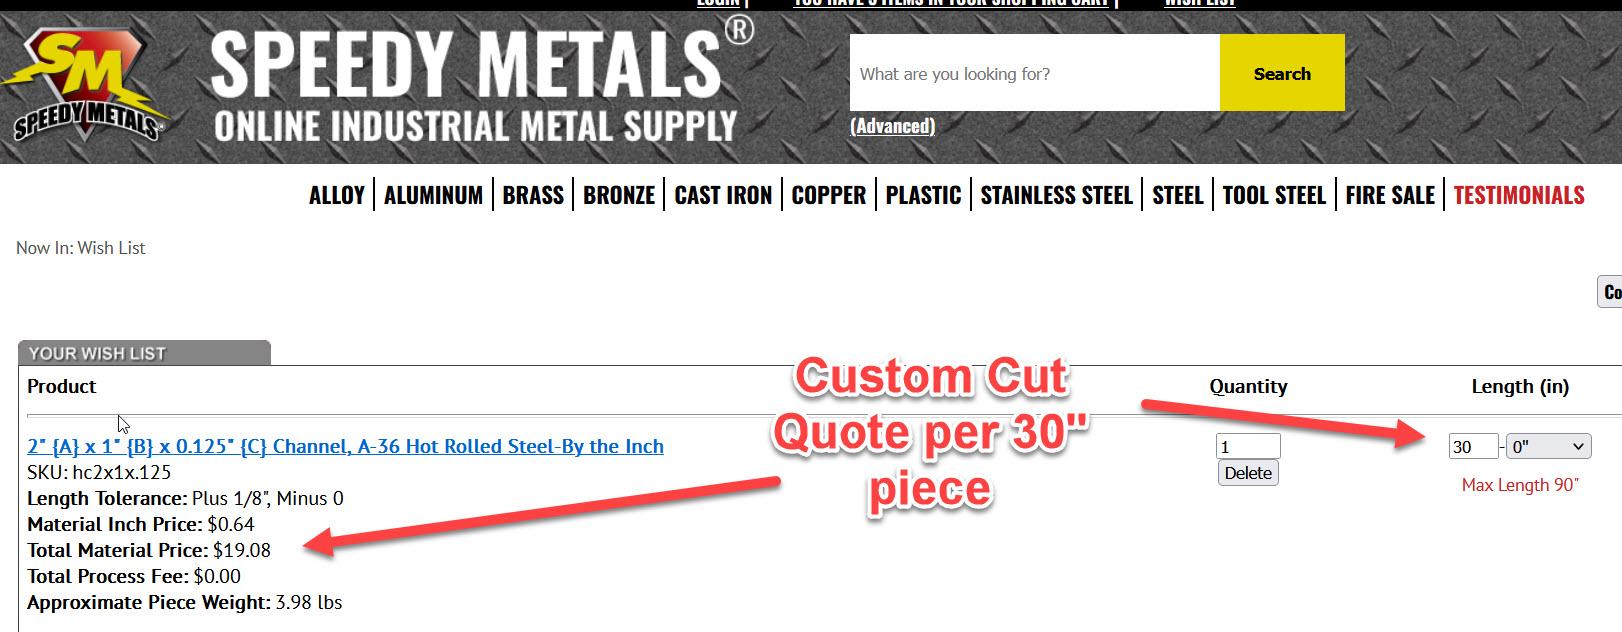
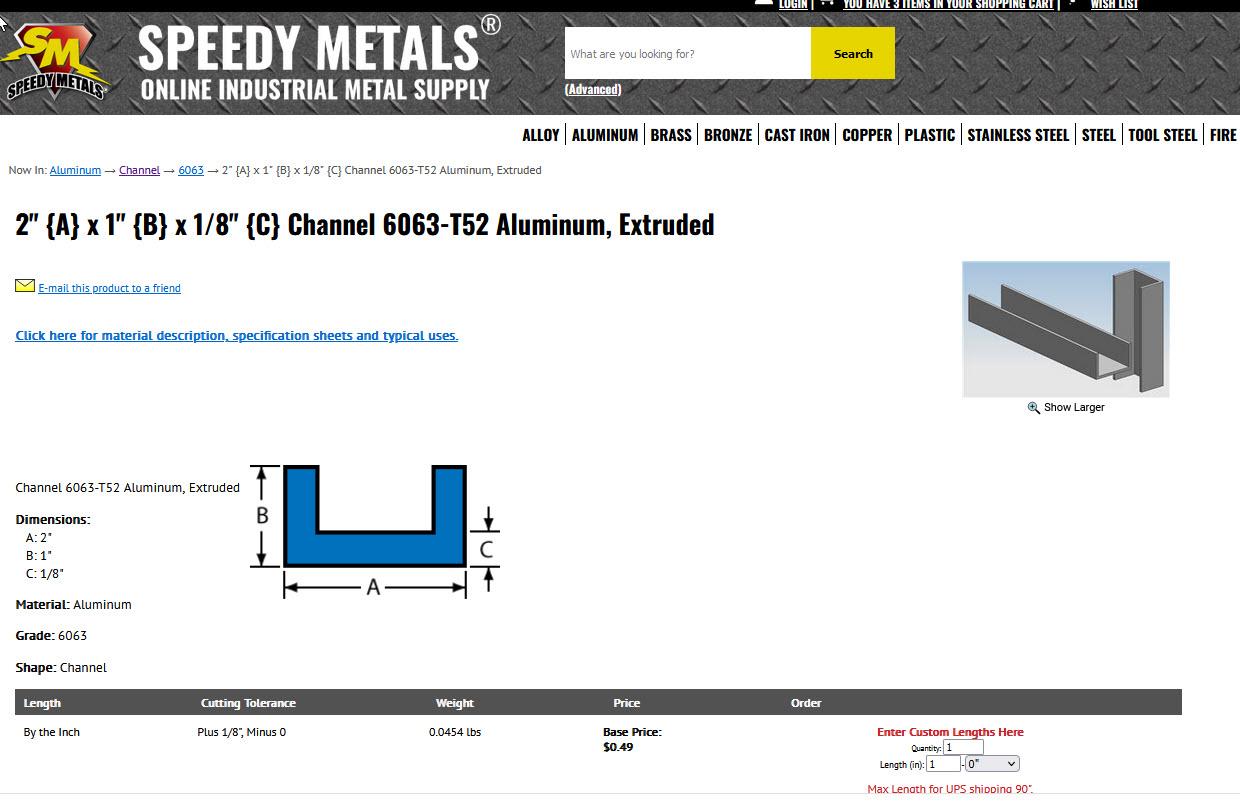
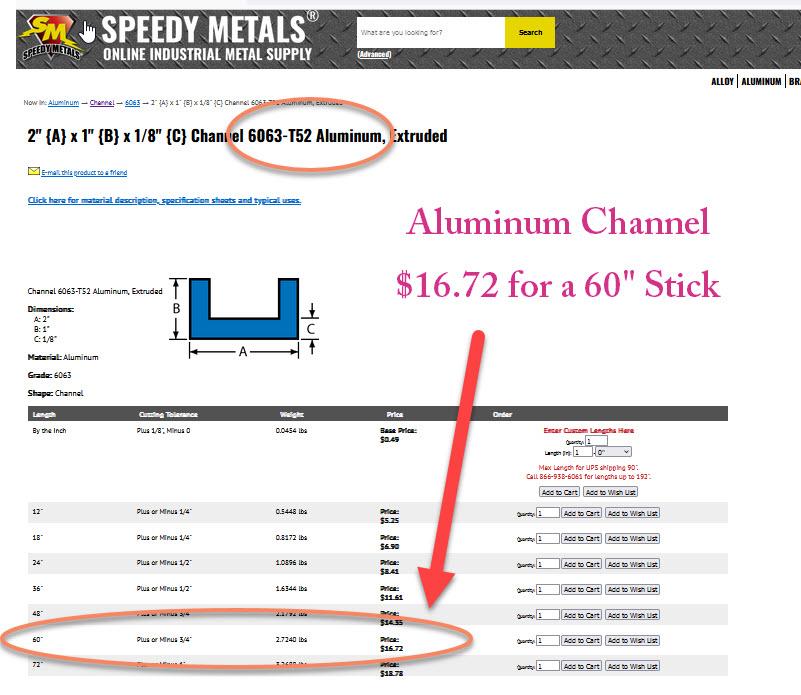
- For those that can't get steel locally the other option may be to purchase online. One source might be SpeedMetals.com. I went to their site and plugged in two options. The images in this step show screen-captures of those quotes. Here is how those came out assuming the build of one 30" MikroBeamer needing two channel at 30" each:
- If ordered as a "Custom Cut" to 30" each Channel would cost $19.88 so about $40 total (plus shipping)
- Much cheaper if ordered off their precut list as a 60" piece costing $21.68 and then cut it in half DIY so only about $11/each (plus shipping)
- Channel is also sold in aluminum. I have not yet tried aluminum to build a MikroBeamer so can't give an opinion. My guess is that it would work quite well on short versions but would not think it would stay true on longer versions. If anyone builds one from aluminum please post a comment. About aluminum:
- Aluminum channel currently costs less than steel
- A 60" aluminum 1" x 2" x 1/8" is $16.72
- A 60" steel is currently $21.68
- If purchased online the shipping cost for aluminum should be less due to weight
- Aluminum can be cut with woodworking tools
- Aluminum is much easier to drill and clean up than steel
- Aluminum requires no finish coats (paint, varnish....)
Hardwood Spreader
The MikroBeamers demonstrated in this Instructable were intended to create finished beams at 2" width therefore the Hardwood Spreader was 2" wide. For a wider finished beam substitute the 2" wide Spreader with a board equal to the width of the finish beam. For example:
- One 2" x 2" x 30" hardwood board for a 30" MikroBeamer to laminate 2" wide beams or...
- One 2" x 2" x 60" hardwood board for a 60" MikroBeamer to laminate 2" wide beams or...
- One 2" x 4" x 30" hardwood board for a 30" MikroBeamer to laminate 4" wide beams or...etc...
Sacrificial Plywood Strips: These optional 1/4" +- plywood strips are cut to the the length of the boards that are being glued together and ripped to 1/2" wider than the Hardwood Spreader of the MikroBeamer. For example:
- Two Sacrificial Strips 2 1/2" x 48" for a beam laminated from 2" x 48" boards
- Two Sacrificial Strips 4 1/2" x 96" for a beam laminated from 4" x 96" boards
Clamp Bars
One "Clamp Bar" is needed every 5". Two bolts pass through each bar. These are the "clamps" that tighten down on the boards being laminated squeezing them tight together to create the beam. Several options for "Clamp Bars" are shown in the images. Because I had multiple sticks of 1/4" flatbar and steel tube in storage I initially made my own Clamp Bars from that but found it to be a huge mess, take way too much time and could not get the accuracy on hole locations I was looking for. For these reasons I returned to simply purchasing the 1" x 1" Perforated Steel Tube. That said any of those listed below will work. The key is that the holes through the Clamp Bar must align to the threaded holes in the top flange of the Channel. I recommend beam widths in 1" increments (2", 3", 4" etc) which allows for use of the off-the-shelf prepunched steel bars listed below or DIY fabricating of your own.
Clamp Bar Options:
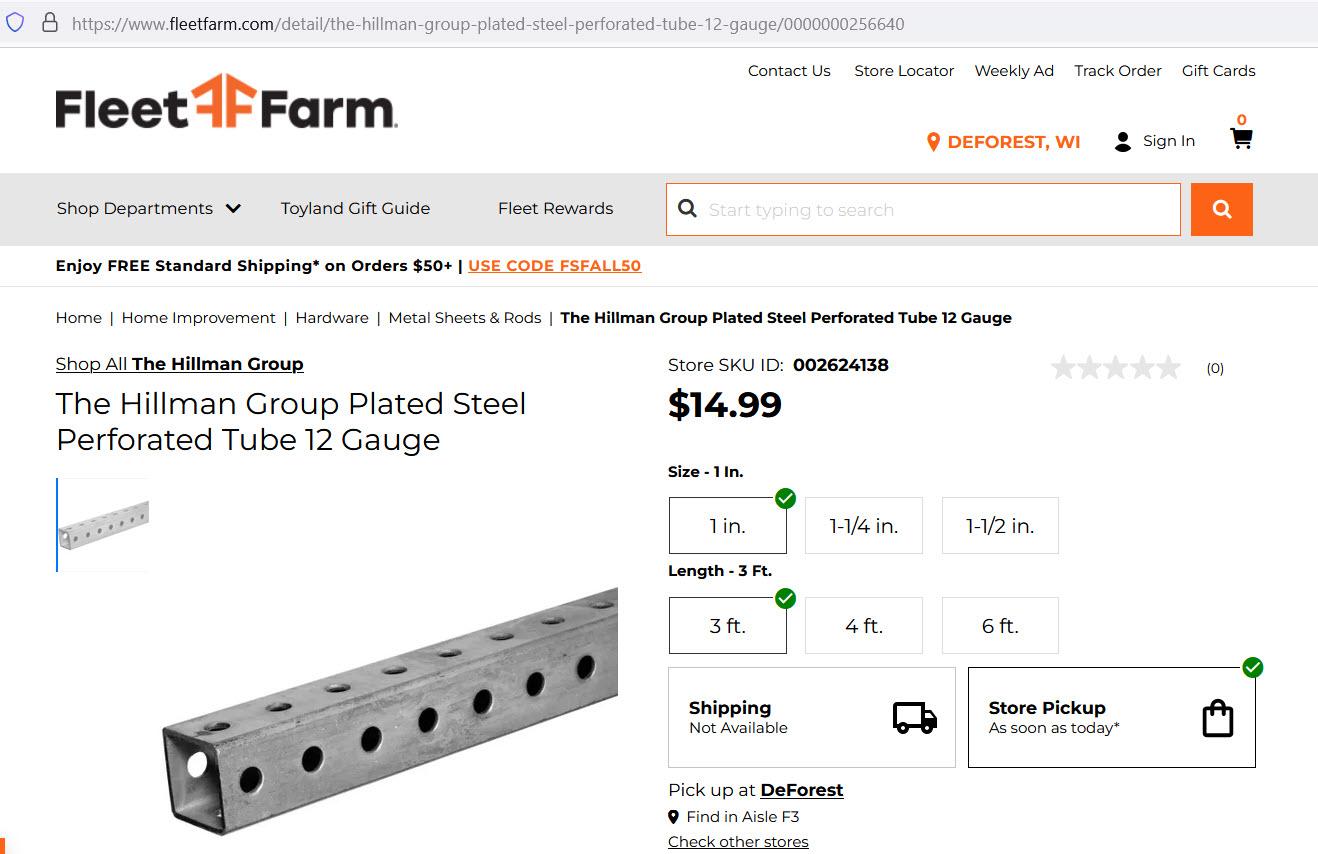
- Off-the-Shelf 12ga 1" x 1" Perforated Steel Tube with holes at 1" O.C.
- 1" x 1" solid steel/aluminum or 1" x 1" tube steel/aluminum DIY drilled
- 1/4" (or thicker) x 1" or 2" steel/aluminum flatbar DIY drilled
- 1" x 2" Clear Hardwood DIY drilled
Hardware (5/16"-8 Hex Bolts)
Bolt Length
The MikroBeamers built for this Instructable were designed to create MikroBeams with a finished height of 4". For this finish height the laminated stacks of boards will have a rough height of 4 1/4" +-. Then allowing for 1" needed for the Clamp Bar (1" x 1" Perforated Steel Tube) and about 3/8" for threading into the steel channel flange the Clamp Bolts used were 6" long. There are several options for purchasing 5/16" x 6" bolts including the finish on the bolts, grade etc. Some examples include:
- I purchased some at Menards for about $0.50/each
- Sometimes I order zinc coated like these from BoltDepot.com at $.35/each in quantity
- We can buy at our local Fleet Farm for $2.99/pound which is about $.29/each
Bolt Quantity:
Clamp Bolts: 5/16" x length TBD per above
The MikroBeamer layouts attached show dimensions for threaded holes at 5" O.C. which means there are two bolts every 5".
Example:
- A 30" MikroBeamer has 6 sets of holes on the top flange and 6 sets on the lower flange. All of those holes when threaded are capable of supporting a Clamp Bar.
- Each Clamp Bar uses two bolts so to fully loaded 30" MikroBeamer with 12 Clamp Bars needs a total of 24 bolts
- A 90" MikroBeamer holds up to 36 Clamps so would need 72 bolts.
- Washers are recommended for each bolt
- Nuts are NOT used since the flanges are threaded instead
Assembly Bolts aka "Thru-Bolts"
MikroBeamers are a "Sandwich" of two channel steel on the outside with a Wood Spreader between. The Spreader in the MikroBeamer demonstrated was 2" thick. A 5/16" bolt is inserted about every 10" to complete the sandwich so in this 30" example three bolts @ 5/16" x 2 1/2" were used plus two washers and a nut per. If building a 3" wide MikroBeamer use 3 1/2" bolts instead. If a 4" use 4 1/2" etc. and figure one set per 10" length.
Mounting Bolts
The hole pattern layout provided with this Instructable shows recommended layouts to mount a MikroBeamer to common scaffolding, rolling tool carts, wall studs and both Festool and Kreg work tables. The holes are recommended at 3/8" which makes easy insertion of a 5/16" bolt. The length of those bolts will be determined by the mounting method. In many cases it is recommended that 1" thick wood spacers are placed between the MikroBeamer and the surface it will be mounted to. This allows more room for the impact driver to torque the Clamp Bolts during a glue-up. Bolts @ 6" long work quite well as long as the excess does not interfere with something on the back side of the mounting surface.
Using the Bolt Hole Layout Drawings




.JPG)
.JPG)
.JPG)
.JPG)


Using the Attached "Bolt Layouts"
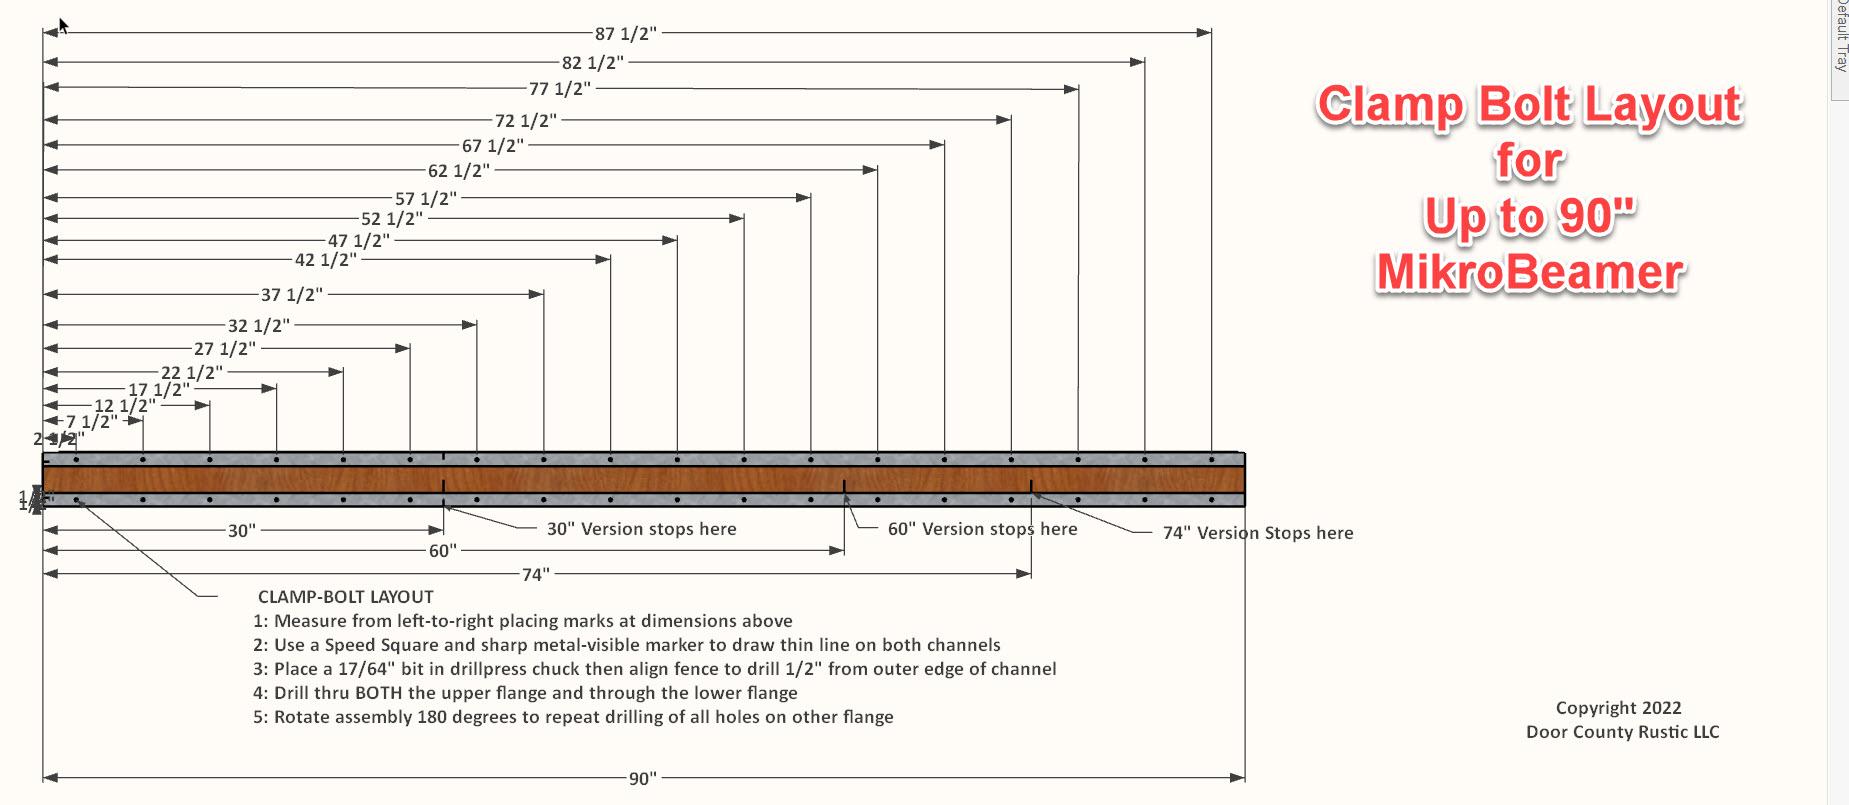
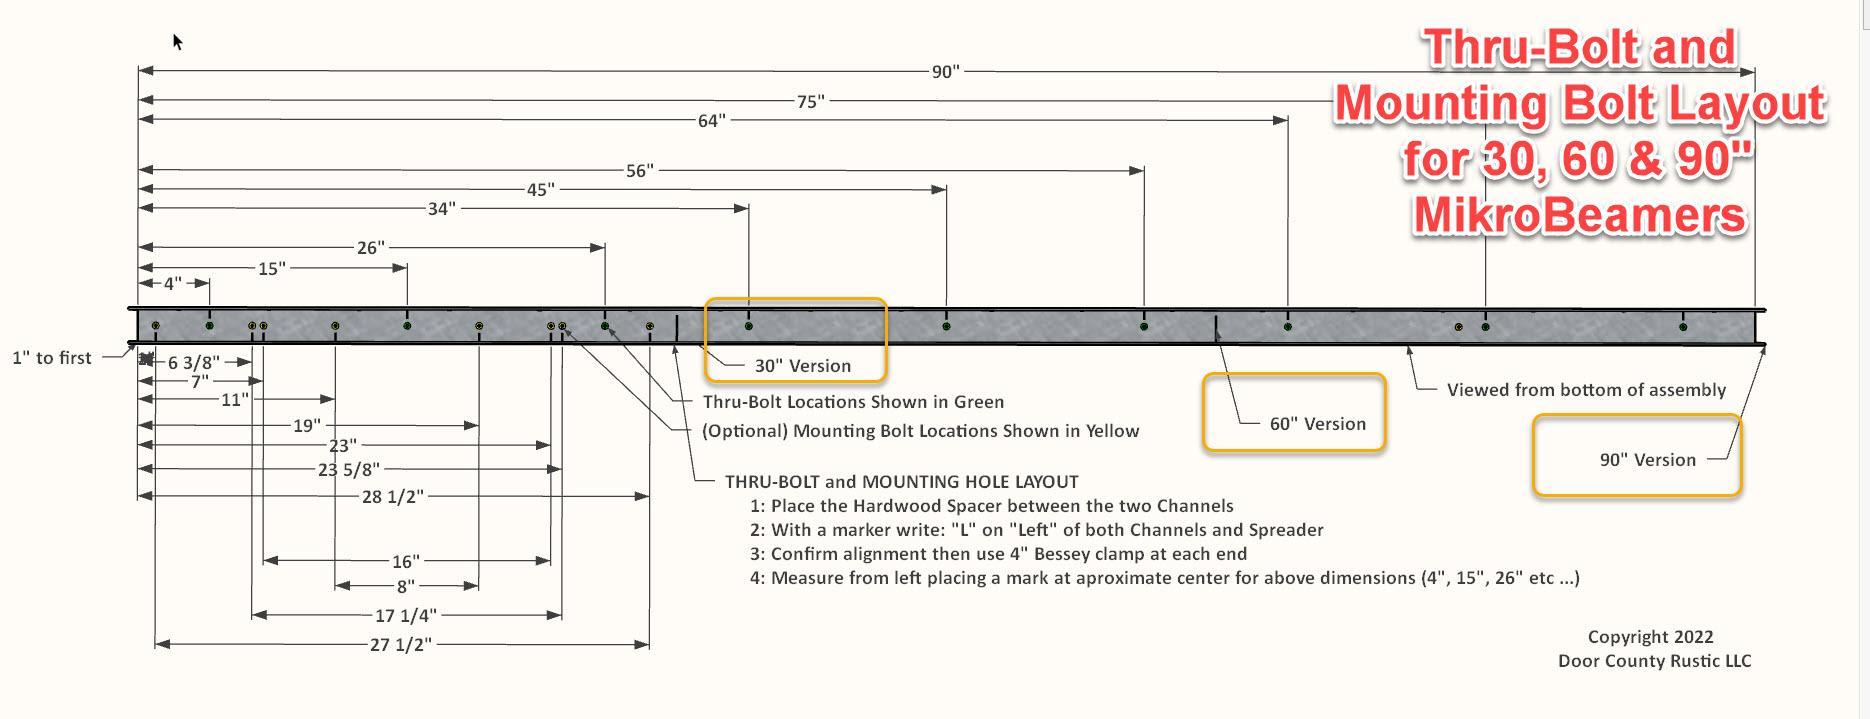
Marking the locations for drilling of every bolt is done using the attached "Bolt Layout" drawings. There are the .jpg versions shown above but also the PDF versions that can be opened for better clarity and printing below. There are several showing the layout for a very long 90" MikroBeamer and then a more detailed version for the 30" MikroBeamer as demonstrated for this Instructable including the following:
- The 3/8" holes for thru-bolts to lock together the channels and wood Spreader
- Multiple (Optional) 3/8" holes to make ready for mounting
- The 17/64" holes @ 5" O.C. that will be tapped for 5/16" Clamp Bolts
Avoiding Conflicts
Some bolts travel through the MikroBeamer in one direction while others go through at 90 degrees to that. If the bolt holes are not spaced properly there is a very good chance there will be a collision. This issue is prevented if the attached Hole Pattern Layouts are used and if the MikroBeamer is built in an increment of 30".
Marking With a Marker
Since I am right handed I tend to place the end-clip of a tape measure on the left edge and then mark with my right hand. Since it is much more accurate to leave the end-clip of the tape measure in one place (rather than trying to move the end-clip from one mark to the next) the layouts start with the first mark @ 2 1/2" then 7 1/2" etc to lay out the increments. The video shows how the marking is done for all three sets of holes on a 30" MikroBeamer. The attached layouts also contain layouts for much longer lengths.
Drill for Thru-Bolts and Mounting Bolts


.JPG)
.JPG)


.JPG)
.JPG)
.JPG)
.JPG)

About Drilling for Thru-Bolts and Mounting
This Step focuses on the two sets of holes that involve a 3/8" bit:
- The "Thru-Bolt" holes for the bolts that will attach the two steel channels with the Hardwood Spreader sandwiched between.
- The optional "Mounting Bolt" holes that make easy the mounting of the MikroBeamer to commonly found rolling carts, scaffolding, woodworking worktables and walls.
The video demonstrates the initial setup of the drillpress for correct bit depth and distance from the edge. The demo shows how well a simple DIY fence for the drillpress can be made from scrap 1" x 2" channel steel and how easy that is to mount and tweak as a result of the flanges.
Mounting Option Hole Patterns
One set of hole patterns is for mounting the MikroBeamer to common scaffolding, rolling carts, Festool and Kreg Dog Hole style tables and to stud walls at 16" O.C. These hole patterns included:
- 27 1/2" O.C. to match the narrow end of "Baker Style" Scaffolding found in most big box stores used by painters, carpenters etc. Since I had 5 of these sets left over from the old days this will be a very common mounting location especially since these carts are on casters and can be rolled anywhere.
- 72" O.C. to match the wide end of the same type Scaffolding
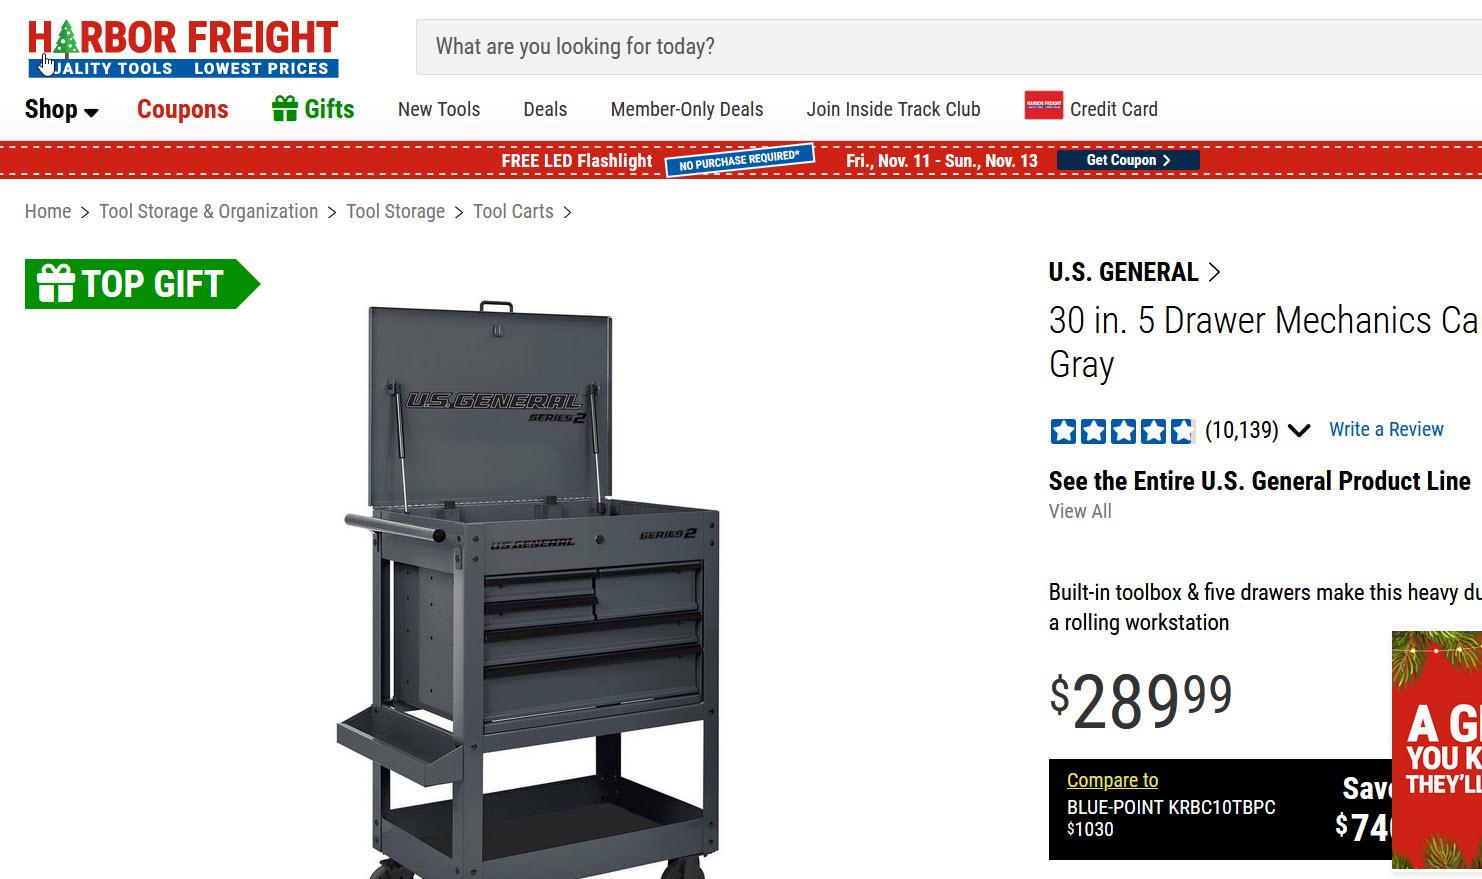
- 17 1/4" O.C. to match the existing bolt holes on Rolling Tool Carts commonly found at places like Harbor Freight
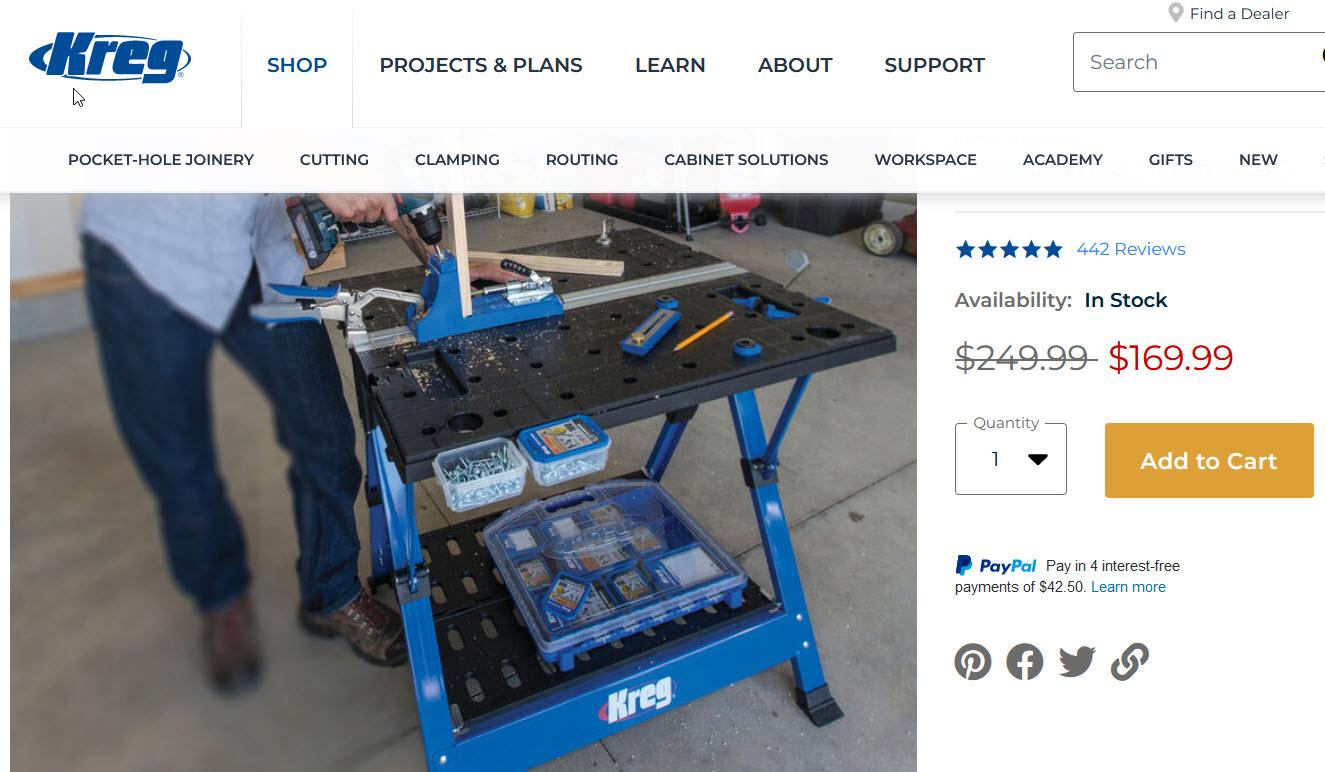
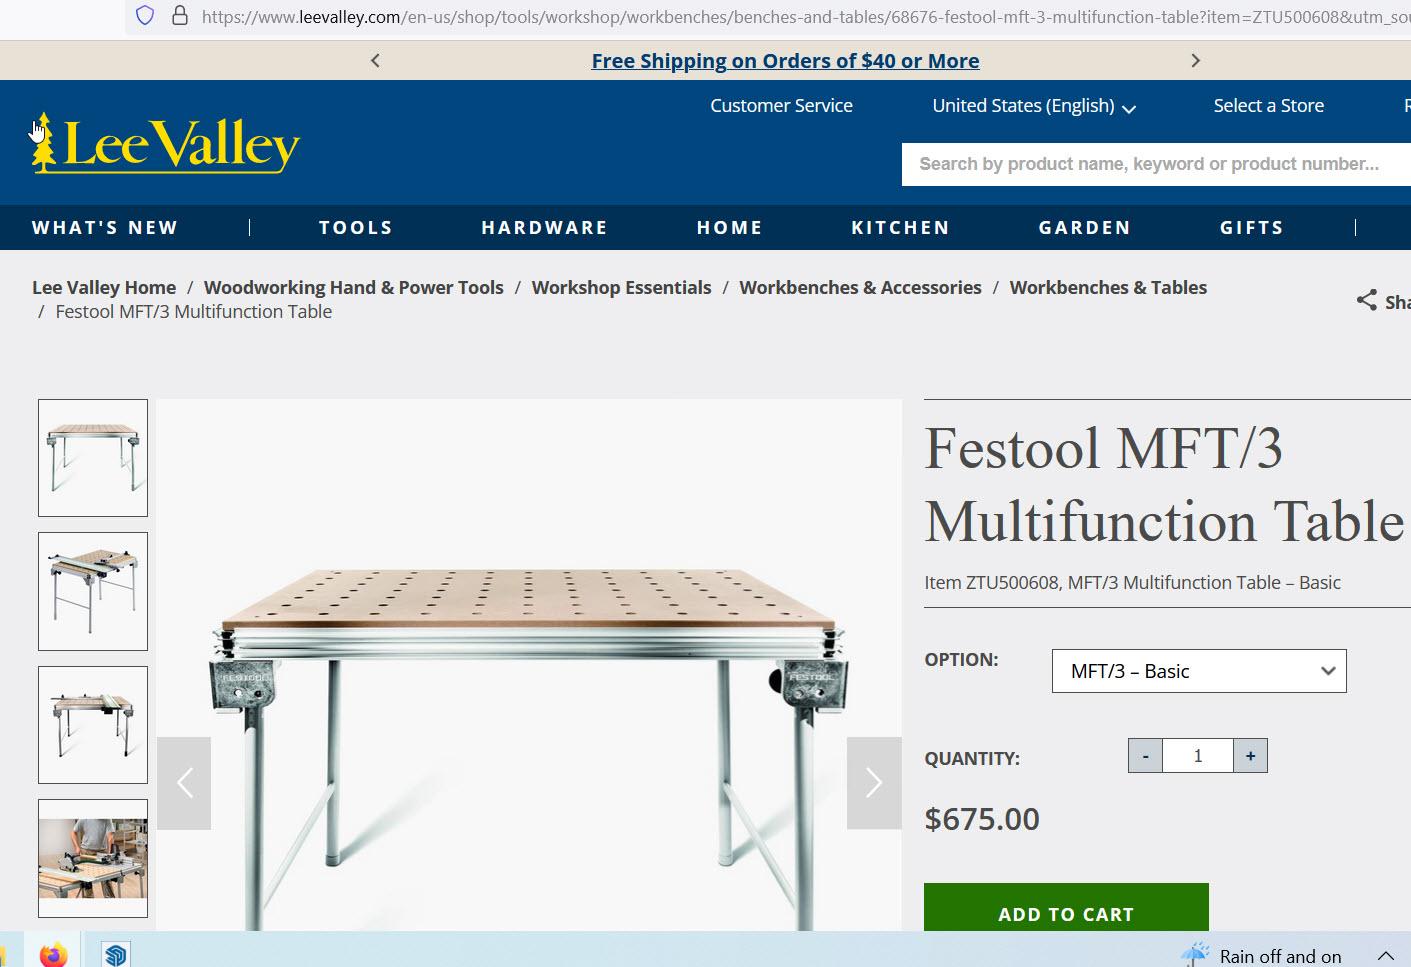
- 8" O.C. to match the hole pattern in Kreg Work Stations and the metric spacing of the dog holes in a Festool Work Stations.
- 16" O.C to match the common spacing of wall studs allowing the option of mounting to any wall surface with a stud spacing of 16" O.C. behind.
Other mounting options can be added so long as the hole patterns for same stay clear of the 5" O.C. hole pattern for the Clamp Bolts to avoid collisions.
The 30" Repeating Hole Pattern
After some trial and error of the 27 1/2", 72", 17 1/4" etc. it turns out that a pattern can be repeated every 30". This is why I build most of my "Shorties" at 30", Middies at 60", Longies at 90" and, if it ever comes up, could build 120", 150"... up to whatever length 1" x 2" Channel Steel can be obtained in. The one exception to the 30" increment is when the MikroBeamer is intended to be mounted on the long side of a Baker Style Scaffolding. Since the distance between the centerlines of those two vertical posts is 72" I didn't want to go too far past for fear of some serious head-bump potential. For those applications I limit the Channel length to 74" leaving very little sticking out into the shop.
Drill 17/64" Holes for Tapping
.JPG)
.JPG)


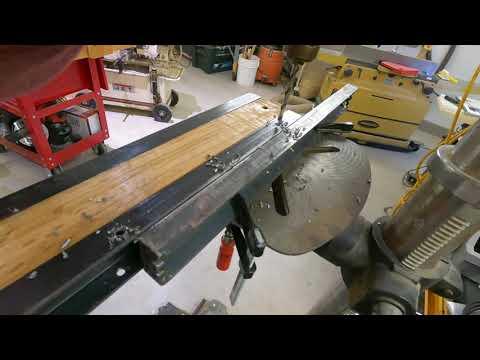
Drilling For Holes That Will Be Threaded
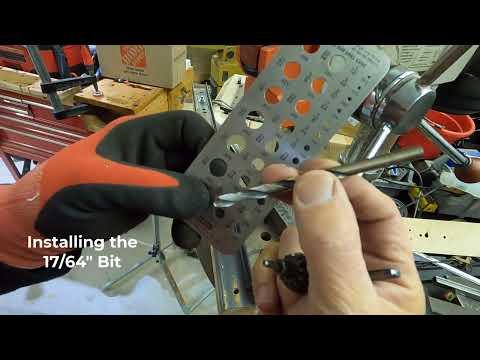
It would be very difficult to try holding a washer and nut under the flange for each and every bolt coming from the Clamp Bars so instead of drilling a hole for a 5/16" bolt to pass through I drilled 17/64" holes. This is the diameter specified as the pilot hole for 5/16" bolts in metal.
If I were to go into any sort of production mode I would have set up a separate drillpress but instead demonstrate how the 3/8" bit from the earlier drilling steps is removed and replaced with the 17/64". This change also required recalibrating locations by moving the DIY metal fence and then raising the drillpress table to accommodate the shorter bit.
Double the Holes Equals Twice as Many Clamps
In earlier iterations I only drilled through the top flange but then realized how twice as many clamps could be mounted to the same MikroBeamer if the 17/64" bit simply continued through the lower flange so now, when drilling the 17/64" hole in the top flange, I continue drilling through the bottom flange as well.
Tap Holes Using a 5/16-8 Thread Tap


.JPG)

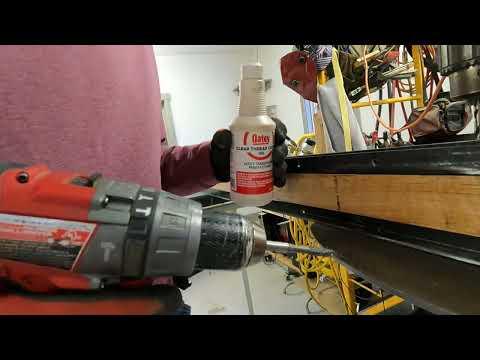
Pressure is HUGE!
Glue-ups, especially of laminates totaling 4" or more, require a HUGE amount of torque and need to be spaced reasonably close together. The 1" x 1" x 4" (or other size/shape TBD) "Clamp Bars" are placed every 5" over the boards to be compressed. In each of the two holes a 5/16" bolt is placed. While one could simply drill 3/8" holes in the flanges below and then use washers and nuts that is a real nightmare in real-time trying to hold the nut while trying to tighten the bolt. The solution was to drill the 17/64" holes at 5" O.C. and then thread those holes via a "tap".
Tapping Threads in Metal is AMAZINGLY EASY Even for Non-Metalworkers
The video shows how easy and quick it is to use a 5/16" metal tap even when mounted in a hand-held 18v driver. The key is to have a quick switch for constant reversing of the tap. All cordless drivers have this. The other important step is to add a drop of cutting lube to the tip of the tap. I do this about every third hole. This not only makes the tapping go much easier it adds greatly to the life of the tap. Using these tips to tap it takes about 5 seconds per tap.
Tapping 30 Holes During Live Version of Bittersweet by Bighead Todd and the Monsters
Seriously! I was listening to the live version of Bittersweet by Bighead Todd and the Monsters when I started tapping the 30 holes on a 74" MikroBeamer when I realized all of those could be tapped in the 6:37 minutes of that live version. Now if that doesn't tell ya how easy and quick tapping holes is... :-)
This was a MikroBeamer built a few days earlier, before I realized the capacity could be doubled simply by drilling and tapping identical holes at " O.C. on the other flange so I went back to redrill then retap the 30 holes. Later that MikroBeam is demonstrated mounted on the long side of a Baker Style Scaffold where the lower 15 sets of holes were used to laminate a 96" beam.
Making and Installing the Clamp Bars

.JPG)
.JPG)


.JPG)
.JPG)
.JPG)

About Clamp Bars
The primary function of a MikroBeamer is to impose huge amounts of pressure to laminate multiple layers of wood into a single beam. That pressure is applied via the "Clamp Bars". After testing several materials (steel flatbar, aluminum flatbar, mild steel 1" x 1" tube and others) and variations in spaces between each the results kept coming back to the following:
- Clamp Bar Material: 1" x 1" Perforated 12ga steel tube. Why?
- It's off-the-shelf available at almost any hardware store, big box...
- It's affordable coming in at about $1.50/4" bar
- It's easy to cut (other than the burr it leaves..)
- There is NO DRILLING!! This is HUGE
- It's already zinc coated so there is no need to apply finish coats
- Placement: Located 5" O.C
- Seems to be enough pressure but not overkill
- The 5" increment plays well with bolts going the opposite direction
- Bolt Size: 5/16"
- Plenty of pressure
- Plenty strong
- Without overkill
More About the Clamp Bar Material
The 1" x 1" Perforated Steel was available at Menards, Home Depot and others in 14 ga steel for about $15/piece for 36" but then I found the same brand, Hillman, in the heavier 12 ga at Fleet Farm, a regional big box store, for the same price. Although the 14 ga will be fine for the short 4" bars I prefer the heavier 12 ga when going to 6" bars so when I can I buy the 12 ga stuff.
Cutting and Deburring The 1" x 1" Tube
The video demonstrates how the 36" perforated tube was cut to 4" lengths. Although the metal-cutting bandsaw has an adjustable Stop that could have been set at 4" for repeated cuts I found just being off by a little bit accumulated causing the cuts to not be half way between the prepunched holes. The solution was to set the end-clip of a tape measure on one end and then mark on 4" centers or even to simply eyeball half way between every fourth hole.
Finishing the Clamp Bars
The only downside of using a horizontal bandsaw on the 1" x 1" Perforated Tube was it tended to leave a rather sharp edge that needed to be cleaned with a grinder or sanding methods. I own a metal-cutting Milwaukee Miter saw but, as of this writing, had not tested that yet so see if the burrs can be avoided. In the meantime the demo video shows how I used both a grinder and a unique powered sanding tool that is only 1/2" wide. This tool placed the moving sandpaper inside the 1" x 1" tube eliminating the burr.
Clean-Up, Deburr and Apply Finishes
.JPG)
.JPG)
.JPG)
.JPG)

Since the finished MikroBeamers will typically remain and be used indoors there was actually no need to apply any finish coats. That said there was still the need to remove the steel burrs that could cut one's fingers and then there were aesthetic considerations so I spent a little more time and energy to make them look good.
Finishing the MikroBeamer
There are two methods that could be used for final cleanup and finishes:
- The Hardwood Spreader between the two steel Channels is connected via the Thru-Bolts. Not only does this allow for the substitution of a wider Spreader to make wider beams it also means these components can be disassembled for segregated finish coats. Once the Thru-Bolts are removed the Hardwood Spreader can be sanded, varnished, etc as with any wood product with the only caution being not to change the thickness of the Spreader or lower the finished height of the wood so it would no longer be flush with the top flange of the steel channel. This approach would also allow separate grinding of the steel channel with metalworking tools and applying finish coats more common to metal.
- The other approach is to simply leave it all together, use a metal grinder on the steel, even if it crosses over to the wood Spreader, and then a powered sander on both the steel and wood. After that both materials get wiped with paint thinner to remove any oil and then spray painted. I use the Rustoleum "Clear Coat" oil-based spray shown in the photos. This works very well on both the wood and the steel. BTW don't worry about getting sprayed varnish in the threaded holes. It does not interfere with performance other than a minor stickyness the first time a bolt goes thru.
Mounting a MikroBeamer and Loading Clamp Bars
.JPG)
.JPG)
.JPG)
.JPG)

Mounting Options
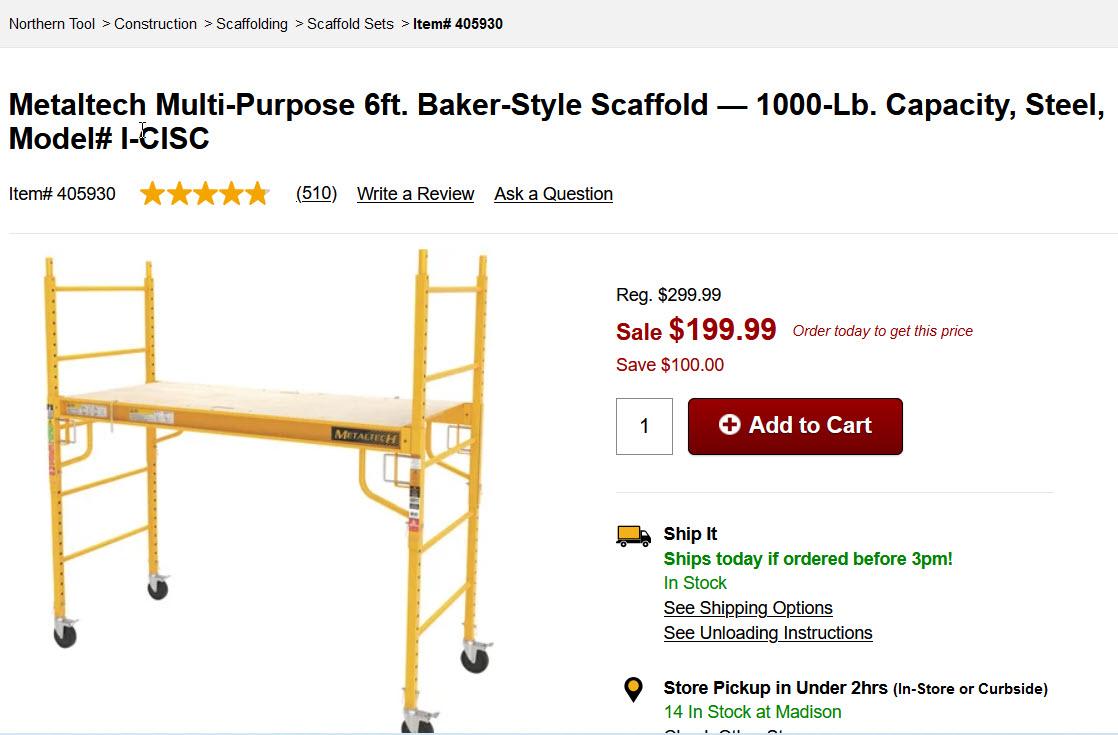
The Mounting Hole Layout (attached in PDF and .jpg formats) includes several hole patterns for a 30" MikroBeamer including those for many common mounting applications. In this Step I show several methods for mounting the MikroBeamer and then loading it with Clamp Bars. Once mounted and loaded, especially on the Rolling Tool Carts, Baker Scaffolding and other portable units, it is pretty much out of the way yet ready for use at any time.
Mounting to the Short Ends of Baker Style Scaffold
The two 27 12" O.C. holes can be used to mount the MikroBeamer to the short end of a Baker Style Rolling Scaffold sold by Home Depot, Menards, Lowes, Harbor Freight and other stores like Northern Tool for under $200. It seems that all the manufacturers use the same dimensions so the 27 1/2" should fit any but would need to be confirmed. In the video I show how I mounted a 40" MikroBeamer to the short end of a Baker Style Scaffold including the following:
- Placed a 1" thick wood spacer between the MikroBeamer and the scaffold
- Sent a 5/16" x 6" bolt through each of the two 27 1/2" O.C. mounting holes
- Aligned those bolts to the predrilled holes on the scaffold uprights
- Attached a threaded metal bar on the back of the scaffold then sent those home
- Installed a wood Clamp Bar at each location using two 5/6" x 6" bolts
Mounting to the Long Side of Baker Style Scaffold
The same Baker Style scaffolding has a center-to-center distance of about 72" between vertical posts on the long side. This is an ideal location to mount long MikroBeamers. The one demonstrated in this video is 74" and holds up to 36 Clamp Bars. The 72" distance can vary since there is some flex on that long of a span. There are no predrilled holes on that surface so holes need to be drilled first. Those holes could be 3/8" to allow for bolts to pass through then washers and nuts but since I prefer to drill smaller holes and fewer of AND since an 18V driver was already loaded with a 5/16" tap I went the threaded hole method instead. To mount a MikroBeamer on the long face of Baker Style Scaffolding:
- Mark a preferred mounting height on the two vertical scaffold posts.
- Use a 17/64" bit to drill only through the first layer of steel on each post
- Use a 5/16-8 tap to thread tap those holes
- Place a temp bolt in one hole (or have someone hold the tape measure for you)
- Note the center-to-center distance between those two holes
- Mark and punch for drilling those same distances on the MikroBeamer channel
- Use a 3/8" bit to drill both holes in the MikroBeamer channel
- Place a 5/16" x 5" bolt with washer in each of the MikroBeamer mounting locations
- Place a 1" wood spacer between the MikroBeamer and the scaffold leg
- With one end of the MikroBeamer on the floor lift the other end and align the bolt
- Insert the bolt but only turn it enough to hold in place
- Lift the other end; align the bolt; thread it into the post; snug
- Alternate snugging at each end until firm
Mounting to Rolling Tool Carts
The two 17 1/4" O.C. holes can be used to mount to the factory holes on the end of a Harbor Freight Rolling Tool Cart. These carts are sold under the name of U.S. General so probably the same hole spacing as versions sold by other retailers but would need to be confirmed. To mount the MikroBeamer to a Rolling Tool Cart:
- Remove the two bolts holding the handle on the short end of the tool cart
- Place a 1" wood spacer between the MikroBeamer and the rolling tool cart
- Send two 5" x 5/16" thru the 17 1/4" O.C. holes of the MikroBeamer
- Continue those bolts thru the holes on the Rolling Cart then apply washers and nuts
Mounting to Festool or Kreg Mobile Workstations
Both the Festool Workstations and the Kreg Workstation have 3/4" (+-) "Dog Holes" on the top surface. These holes are at a metric center-to-center on the Festool tables (aprox 4") and exactly at 4" on the Kreg Workstations. The "Mounting Layout" attached includes locations for 8" O.C. mounting holes. Those 8" O.C. holes "just" make it on the Festool tables and are perfectly aligned on the Kregs. This 8" spacing provides plenty of stability even if the MikroBeamer is wider than the table. If your mounting will only be to a Festool then I suggest modifying the attached Layout to reflect those metric locations instead. To mount a MikroBeamer to either a Festool or Kreg Workstation:
- Place a 5/16" x 6" bolt in the two 8" O.C. mounting holes of the MikroBeamer
- Place a 1" +- thick spacer between the MikroBeamer and the table top
- Align the two bolts with the Dog Holes (they will "just" make it on the Festool)
- Send the two bolts through those holes
- Because the underside of the Festool MDF top is flat a washer and nut can be used
- The underside of the Kreg (a molded plastic) has very large cavities so I use a 1/4" x 3" flatbar steel with a 5/16" threaded hole instead of a washer and nut. This spans the cavities and also spreads the load over the flexible plastic table.
Mounting to Finished or Unfinished Stud Walls
The attached Mounting Hole Layout includes dimensions for two holes spaced 6" O.C. These holes can be used for mounting a MikroBeamer to either an open stud wall or finished wall with studs spaced at 16" O.C. Because this mounting goes into wood studs a decision needs to be made whether the MikroBeamer will be mounted and then remain or if the MikroBeamer will be removed, stored and then remounted repeatedly.
If the mount is permanent: Heavy duty lags (like the GRK 1/4" or greater x RSS Fasteners) will work great but should not be removed and then replaced in the same holes since this will cause failure:
- Select a height on the stud wall clear of any hidden wiring, plumbing etc
- Use a long level or mark up/down from the floor/ceiling to mark a level line
- If the studwall is finished use a Stud Finder to locate the centerline of two 16" O.C. studs
- Place a heavy-duty (ie 5/16" GRK RSS) that is long enough to reach through the MikroBeamer and well into the stud to provide the needed holding power yet without hitting electrical wiring, plumbing etc.
- Align the MikroBeamer at level and the GRKS with the marked stud locations
- Send the GRKs into the studwall confirm solid grab
If MikroBeamer will be removed from the wall when not in use:
- Select a height on the stud wall clear of any hidden wiring, plumbing etc
- Use a long level or mark up/down from the floor/ceiling to mark a level line
- If the studwall is finished use a Stud Finder to locate the centerline of two 16" O.C. studs
- Permanently mount a
5/16-8 threaded metal fastener to the wall - Place a 5/16-8 x 4"+ bolt in the two 16" O.C. mounting holes
- Align those bolts with the threaded metal fasteners
- Place a 1" +- thick spacer between the MikroBeamer and the wall/stud
- Thread and snug those two bolts into the threaded metal fastener
Mounting Multiple MikroBeamers on Rolling Carts, Scaffold. Worktables or Stud Walls
To glue up long beams without needing to fabricate long MikroBeamers two shorter ones can be mounted in an equal-height series. This can be done using two Rolling Carts, two Baker Scaffolds, two same height Worktables or on a stud wall. This will provide the support and alignment on long beams. The methods used above for each would apply then use conventional clamps (R&Rs, Besseys, Pipe Clamps etc) to compress the glue-up layers in areas where there are no MikroBeamer Clamp Bars.
Any Other Mounting Options
All of the hole patterns above are shown on the attached drawings for convenience. Any other mounting holes can be drilled as needed however it is important to confirm their location will not collide with the Clamp Bolts going through at the opposite direction.
Using a MikroBeamer (Examples)


About "Examples" Vs Detailed Applications
The intent of this Instructable was to provide the drawings and instructions for building one or more MikroBeamers. The actual "art" of "MikroBeaming" is a much larger topic with all sorts of variables. It is my hope to publish project-based Instructables where MikroBeams are a key component. Until then the video and images above show several examples of gluing/laminating beams using a MikroBeamer.
About Sacrificial Plywood Strips
One or two "Sacrificial Plywood Strips" can be placed between the boards being glued and the surface of the MikroBeamer and/or the Clamp Bars. The image above shows how this optional filler is used.
- When placed between the rough boards being laminated and the MikroBeamer surface this strip levels any unevenness between the steel flanges and the Hardwood Spreader. Since it is also "sacrificial" it can be tossed as it gets gooped up with glue residue.
- When the lower set of Clamp Bars are being used (hanging underneath the MikroBeamer) this strip spans the 5" distances between Clamp Bars again providing a more even transition for the length of the glue-up and will help catch some of the dripping glue.
- When the boards being glued together are the finished surface (not oversized) the Sacrificial Strip protects the finished surface of the beam from dents made by the pressure imposed by the Clamp Bars.
Example #1: Creating a 2" x 4" x 44" MikroBeam for a Rafter on a MikroCave Structure
One of the projects on my radar is a "MikoCave", a small, covered shelter that has a variety of uses. The footprint is about 3' x 7'; has a raised wood floor; several options for exterior wall finishes; and a fabric roof. This was intended to be a project to enter in the "Reuse Contest" here at Instructables but simply didn't get done in time. That said I still intend to build the structure from scrap lumber that came off of old shelters, a vine tresle, and a kayak rack on an old boat trailer and other salvaged boards. The tear-downs of those old structures was videotaped along with the initial drying, ripping and precuting of the old lumber in preparation for the project.
In the video I bring into the shed a cart full of 2 1/4" x 1 1/2" x 48" cutoffs from the salvaged lumber. Several surfaces of those boards were cleaned up a bit on a jointer; glue applied and then the three placed in the 40" MikroBeamer that had been mounted on the short end of a Baker Style Scaffold in a previous Step of this Instructable. The Clamp Bars were drawn down tight as the edges of the three boards were kept aligned. This is a very typical application for a MikroBeamer. After the gldue dries the laminated beam will be removed, scraped clean of glue residue; jointered; planed and then recut on a miter saw to yield an absolute perfect 2" x 4" x 44" MikroBeam. Eight of these will be fabricated to use as the Rafters on a MikroCave.
Example #2: Creating a 2" x 4" x 95" Beam for one of the Main Posts of a MikroCave Structure
The same "MikroCave" project calls for four Posts at 2" x 4" x 92". Several of the salvaged construction lumber boards were this long so had previously been ripped to 2 1/4" widths. In this example I run those boards through the planer for a very thin removal of just the outer surfaces then apply glue followed by inserting all three into the 74' MikroBeamer where they Clamps were brought down to compress for lamination. Because the boards were longer than the MikroBeamer I show how conventional clamps can be added to the cantilevered portions for continuous pressure on the laminate.