Mimimalist Van Bike Rack Rear Door Mount
by will-iamalpine in Outside > Camping
4562 Views, 24 Favorites, 0 Comments
Mimimalist Van Bike Rack Rear Door Mount


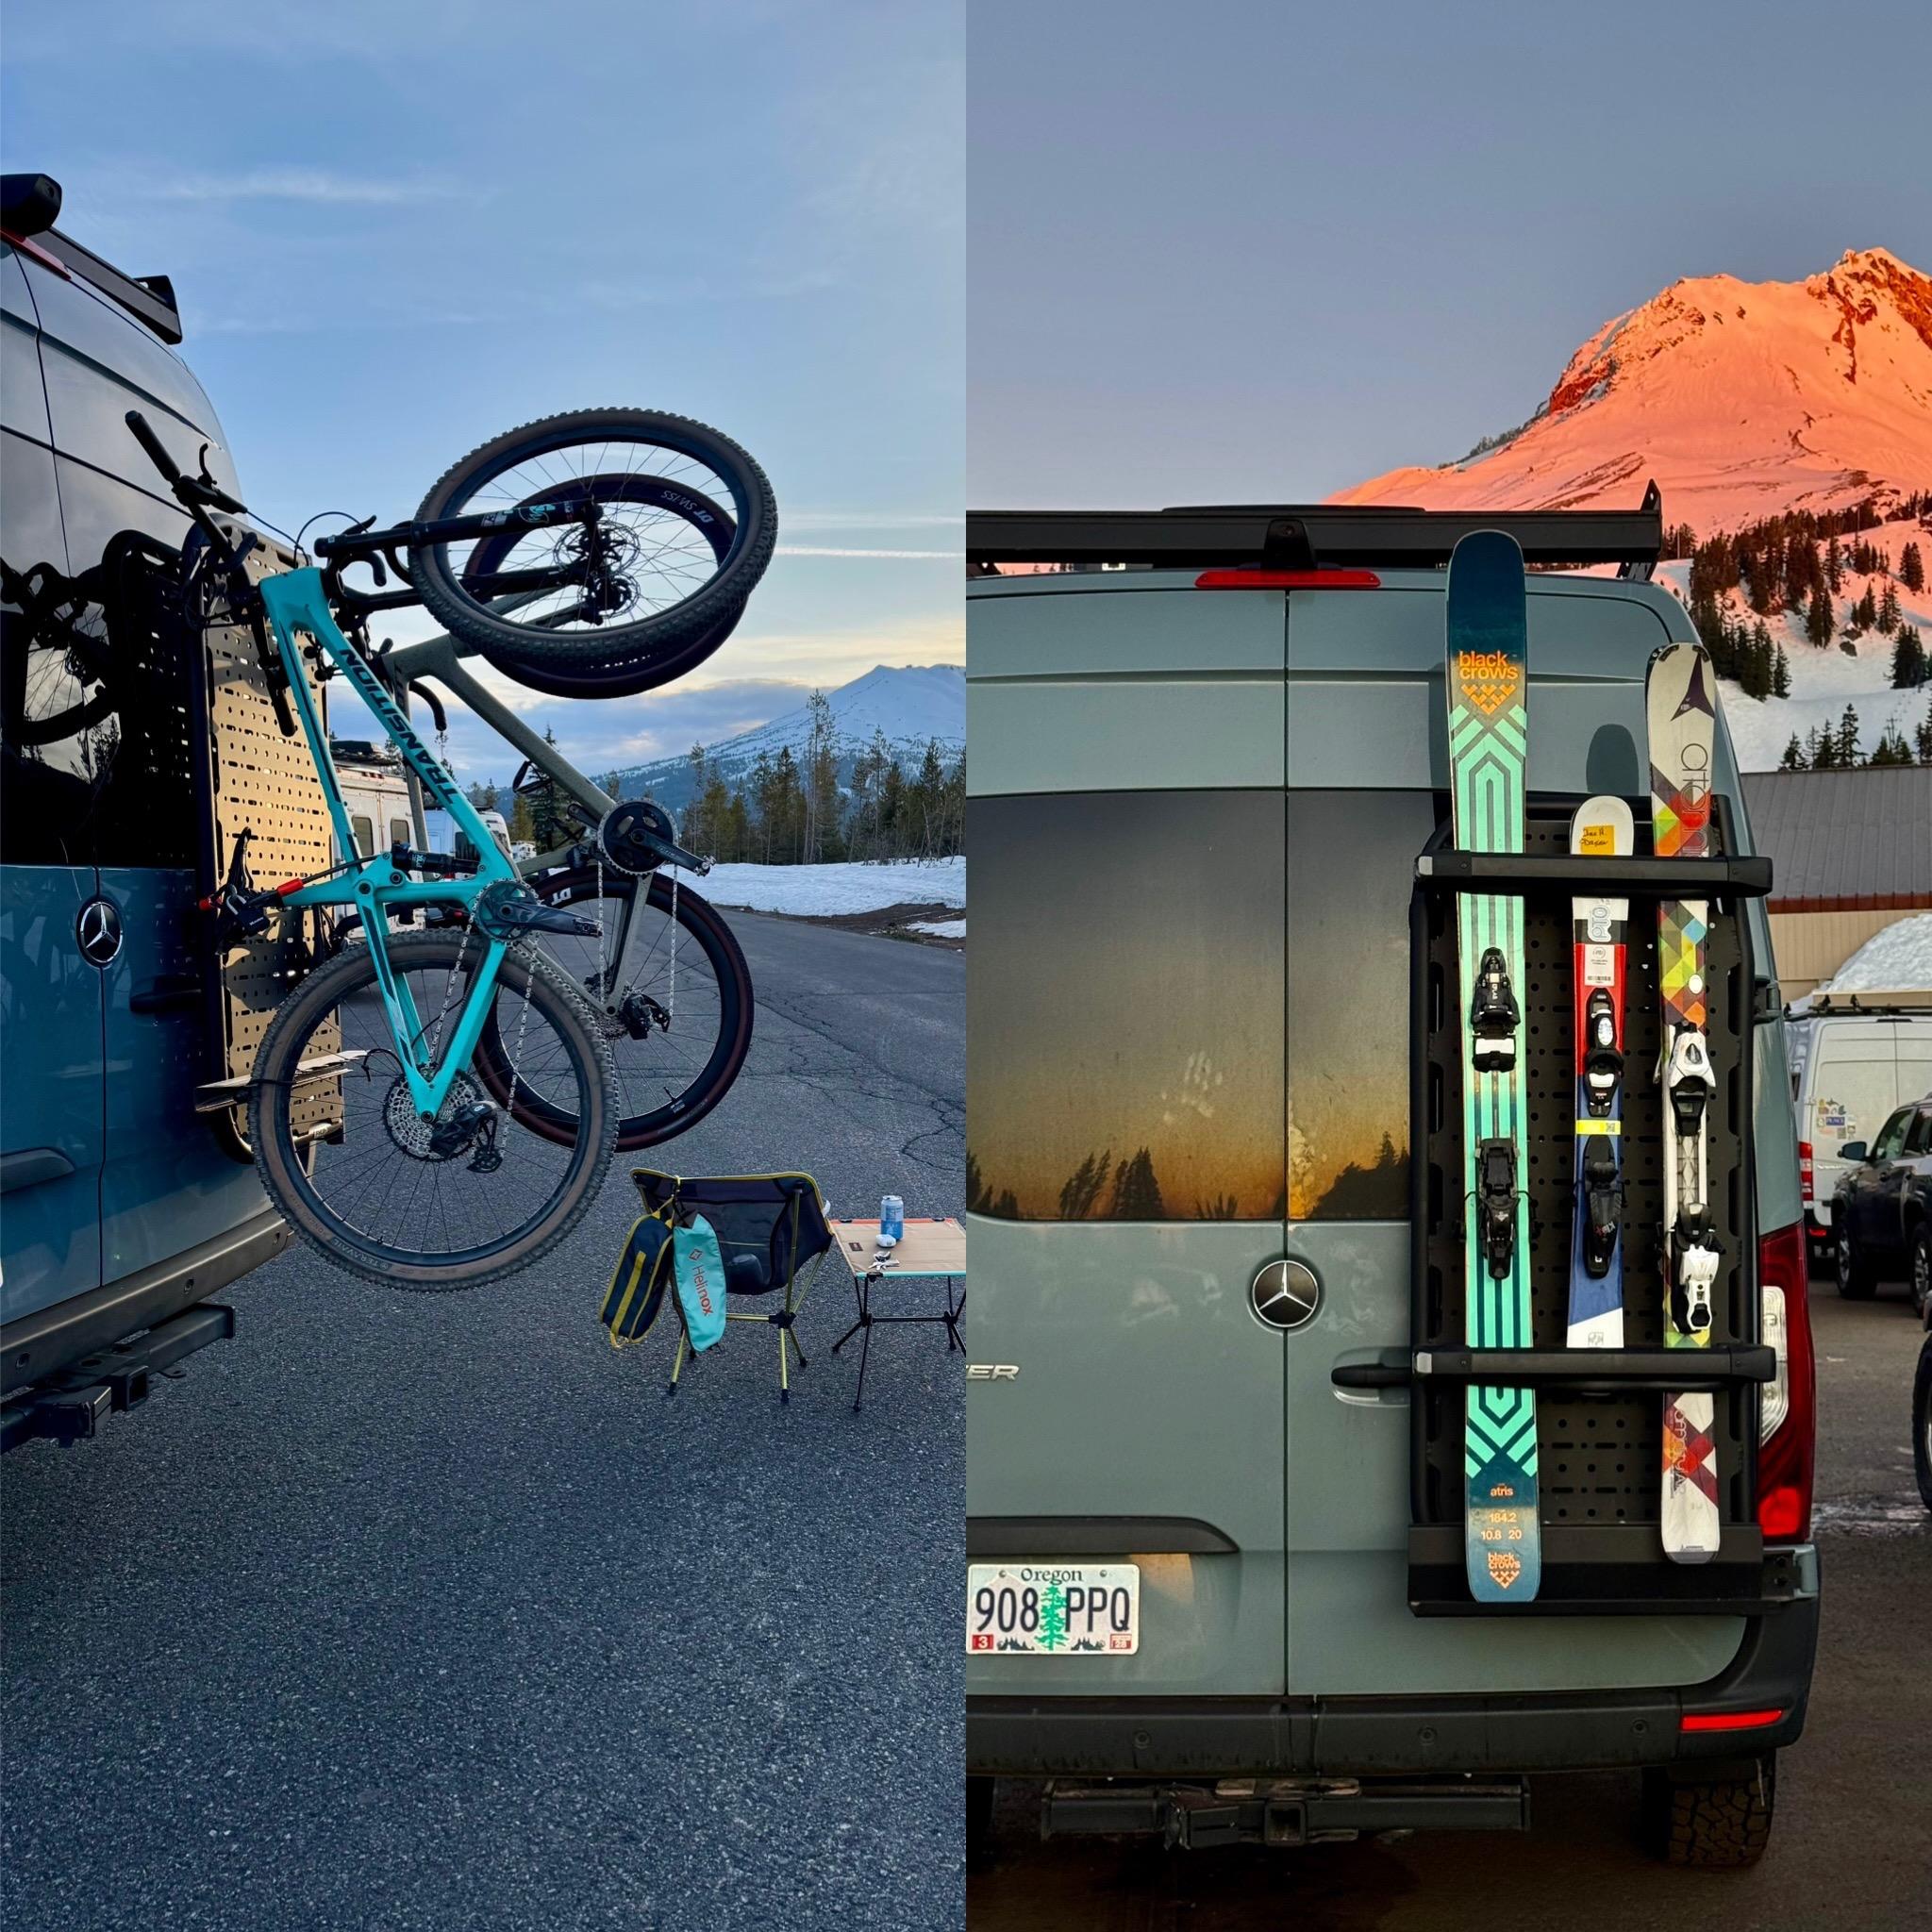
The beauty of this system is how minimal it is. All you have is this hanging off the back when your bikes aren’t there. I looked at a ton of options before choosing this one; everything else was too complex or too much equipment. Here is the original inspiration. Here's a video showing it integrated with a full back rack solution.
We’ve done a few thousand miles over the toughest roads you could imagine, and it’s held up with zero issues.
Supplies
Cost: ~$400 in total
- 2X Lolo single hook rack: $45 ea
- 2X Sea Sucker: $59 ea
- 2X Master cuff: $80 ea
- 8X Long carriage bolts, minimum M6 or ¼”20 (consider using an angle grinder to cut the extra length off)
- 20X nuts
- Bars to act as strut and spacer
- loctite
Recommended: Hexlox security bolt lock (for wheels)
Position Rack (Drivers Side Door)

Putting the bikes on your driver side door lets you access the inside of the van through the passenger side door, and you’re not having to slam the door with bikes hanging off the door. It’s stronger that way, since the locking mechanism acts as a sort of support.
NOTE: ensure you can open/close your door with bikes installed. This distance between door edge and your hole pattern is crucial. You’ll likely have handlebars protruding a few inches out from the driver side.
Reinforce Bolts


Make sure the back of the door is supported by a crossbar that is adjacent to the bent metal corners on the inside (lower down, as pictured). The bends provide extra strength, so be certain the crossbar spans the entire width of the door.
NOTES:
- It's crucial to reinforce the door with this through-bolt support system; without it, the sheet metal will eventually crumple and the rack will become wobbly. The nuts keep the sheet metal securely apart and are absolutely essential for long-term durability.
- Keep in mind that the van door is slightly curved, so exercise dimensional care when tightening against a flat reinforcement/support bar, or you'll bend things too much.
Add Spacer


Be sure to install a spacer under your wheel as pictured so your seat doesn’t smash the glass when you go over bumps. The suction cups are okay...on a curved and/or dusty door, or rough road, they'll sometimes come undone.
NOTE the ski strap underneath the block. It’s pinned between the Sea Sucker and the wood standoff block. The seat currently has to be dropped so it doesn’t smash against the glass; I would suggest about 3-4” block so as to not have to adjust the seat.
Mount Bikes


This can be a little awkward; you should be able to lift and balance the weight of the bike (~30 lbs) above your head.
- Lift the bike in front of you (wheels facing away) so that the seat post is in a squat clean position
- Balance the seat post in your left hand, while keeping your right hand on the left handlebar grip.
- Place the bike on the rack
Alternate Ideas

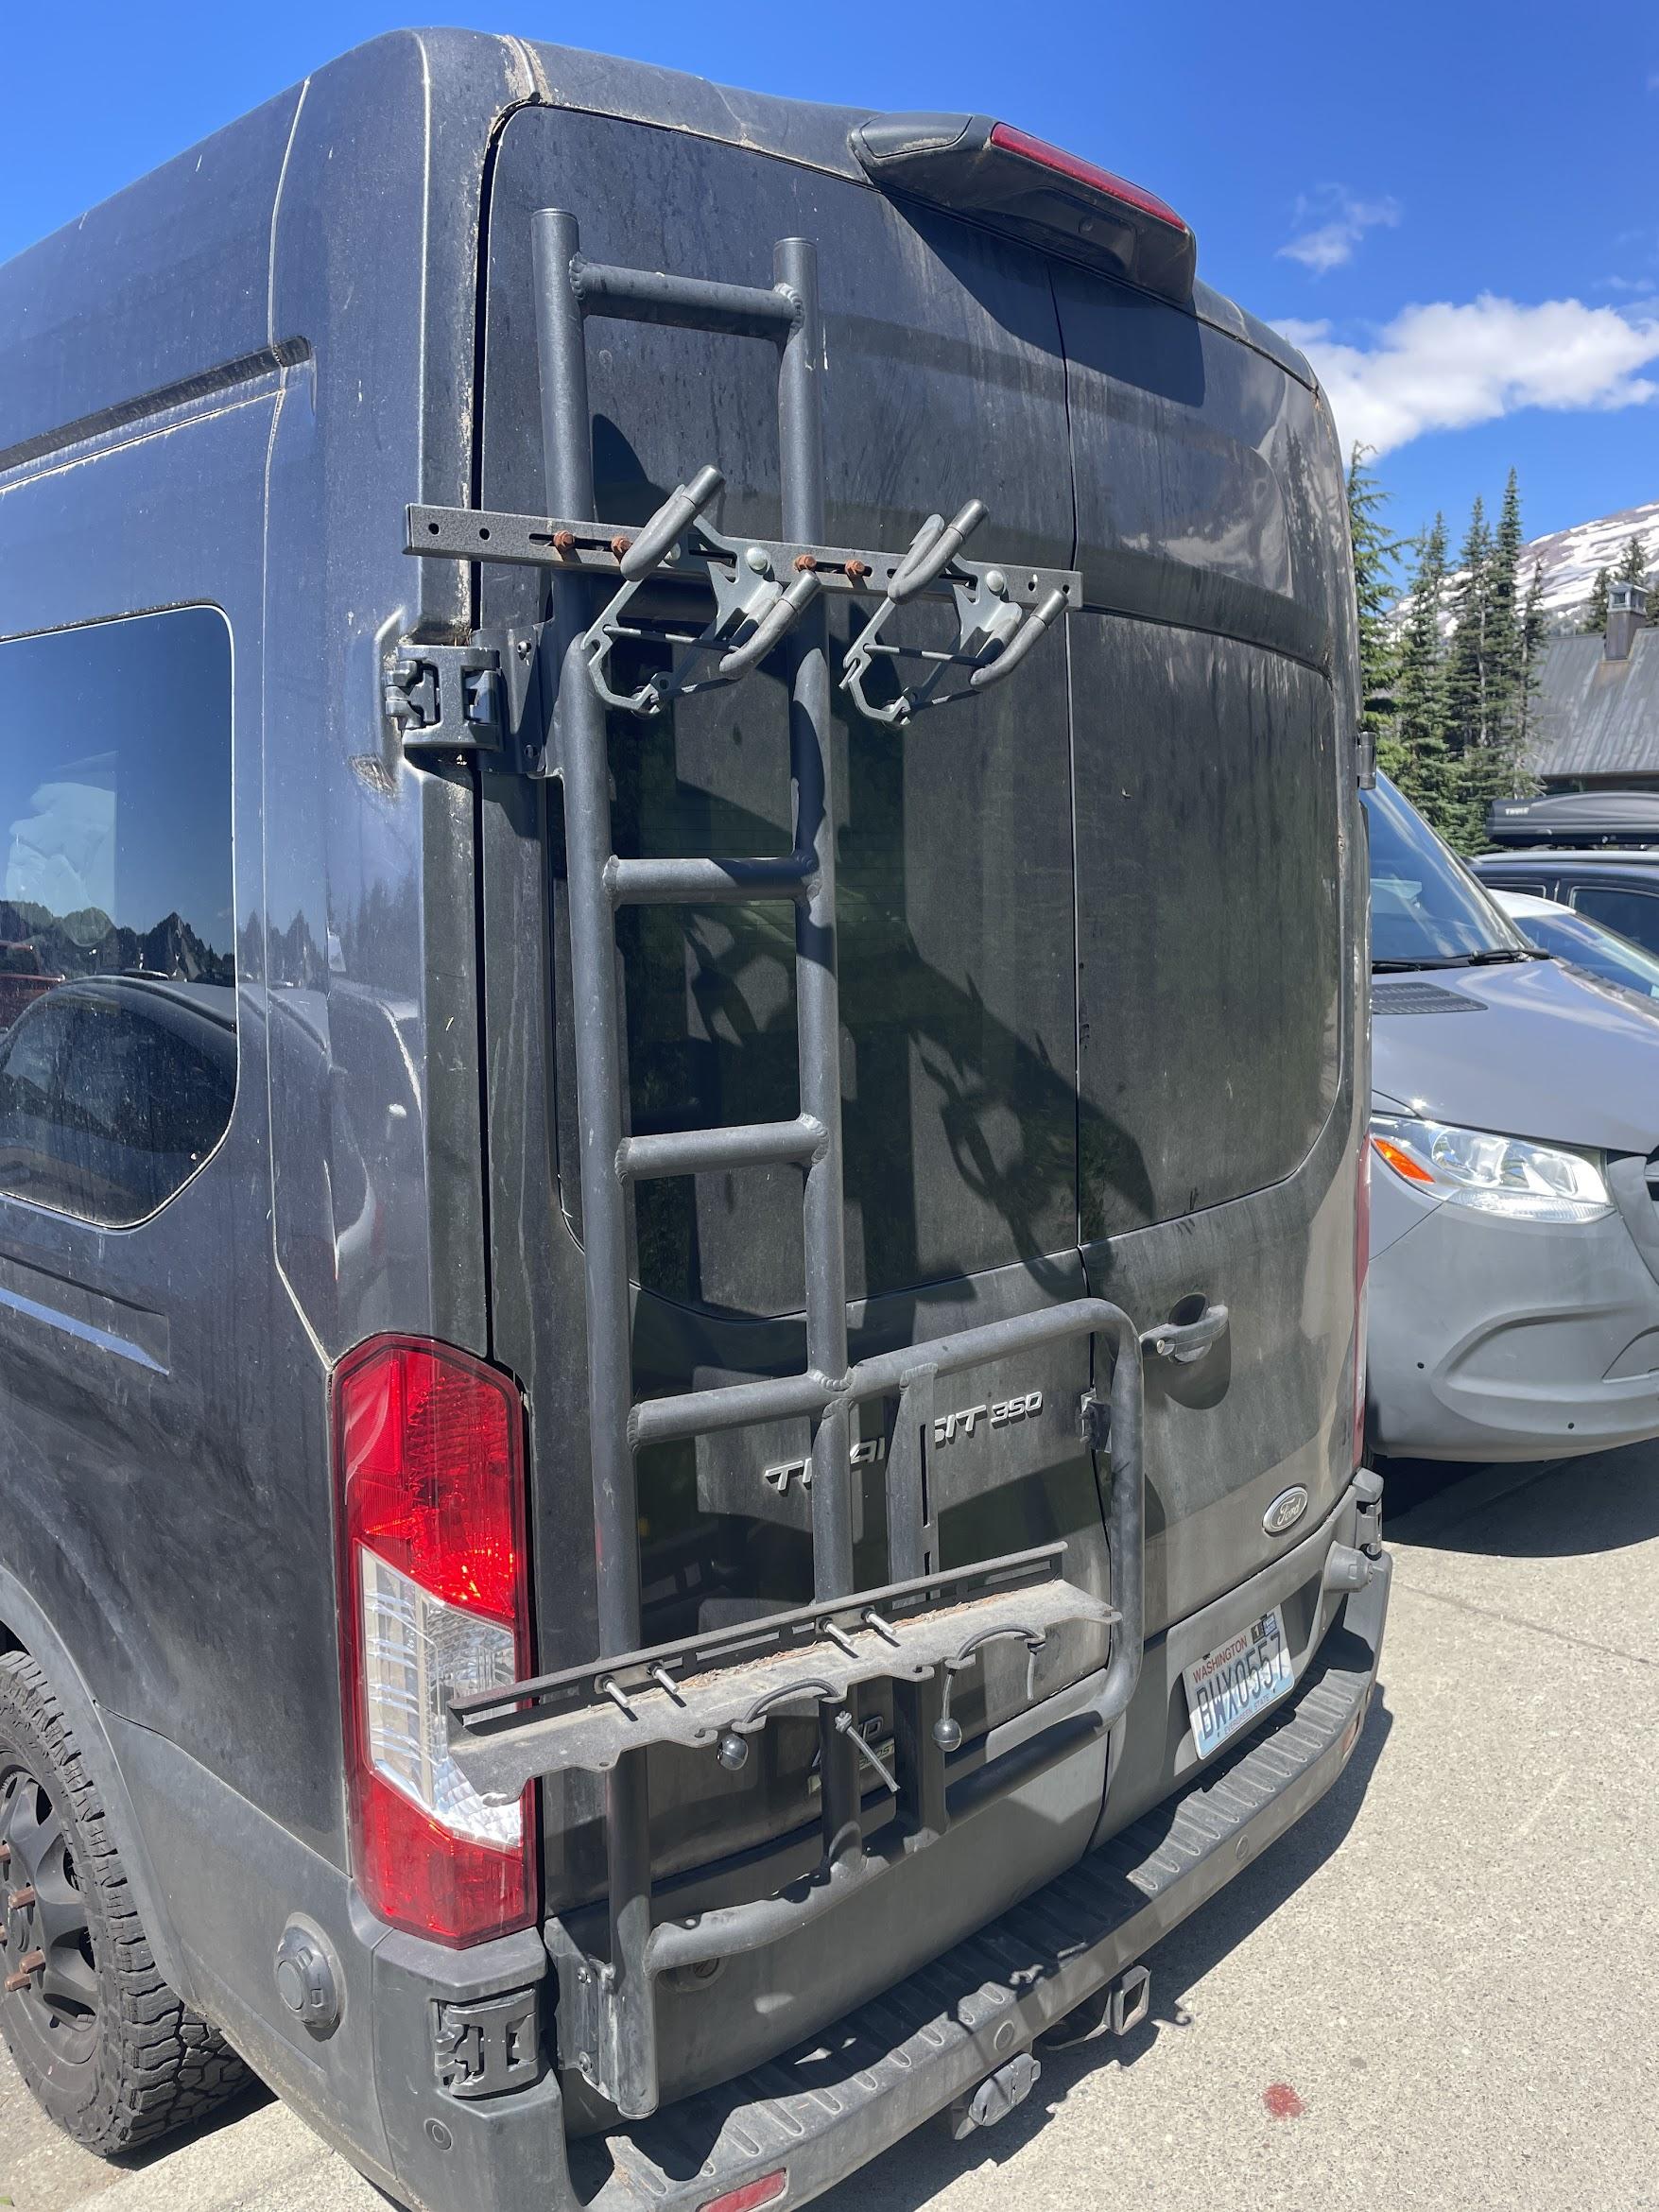
NOTE If I were to do it again, i’d consider two options
- Rear door platform method: https://www.youtube.com/watch?v=RhGJgiXyLOk&ab_channel=Andy%27sGarage
- This is especially nice because you can switch out for ski racks in the winter
- Lolo ladder attachment: Lolo rack Ladder-mount idea: $350-ish would be worth it considering the amount of time it takes to learn to do the above technique correctly
- Pros: stands the wheels and seat off the back
- Cons: requires a ladder?