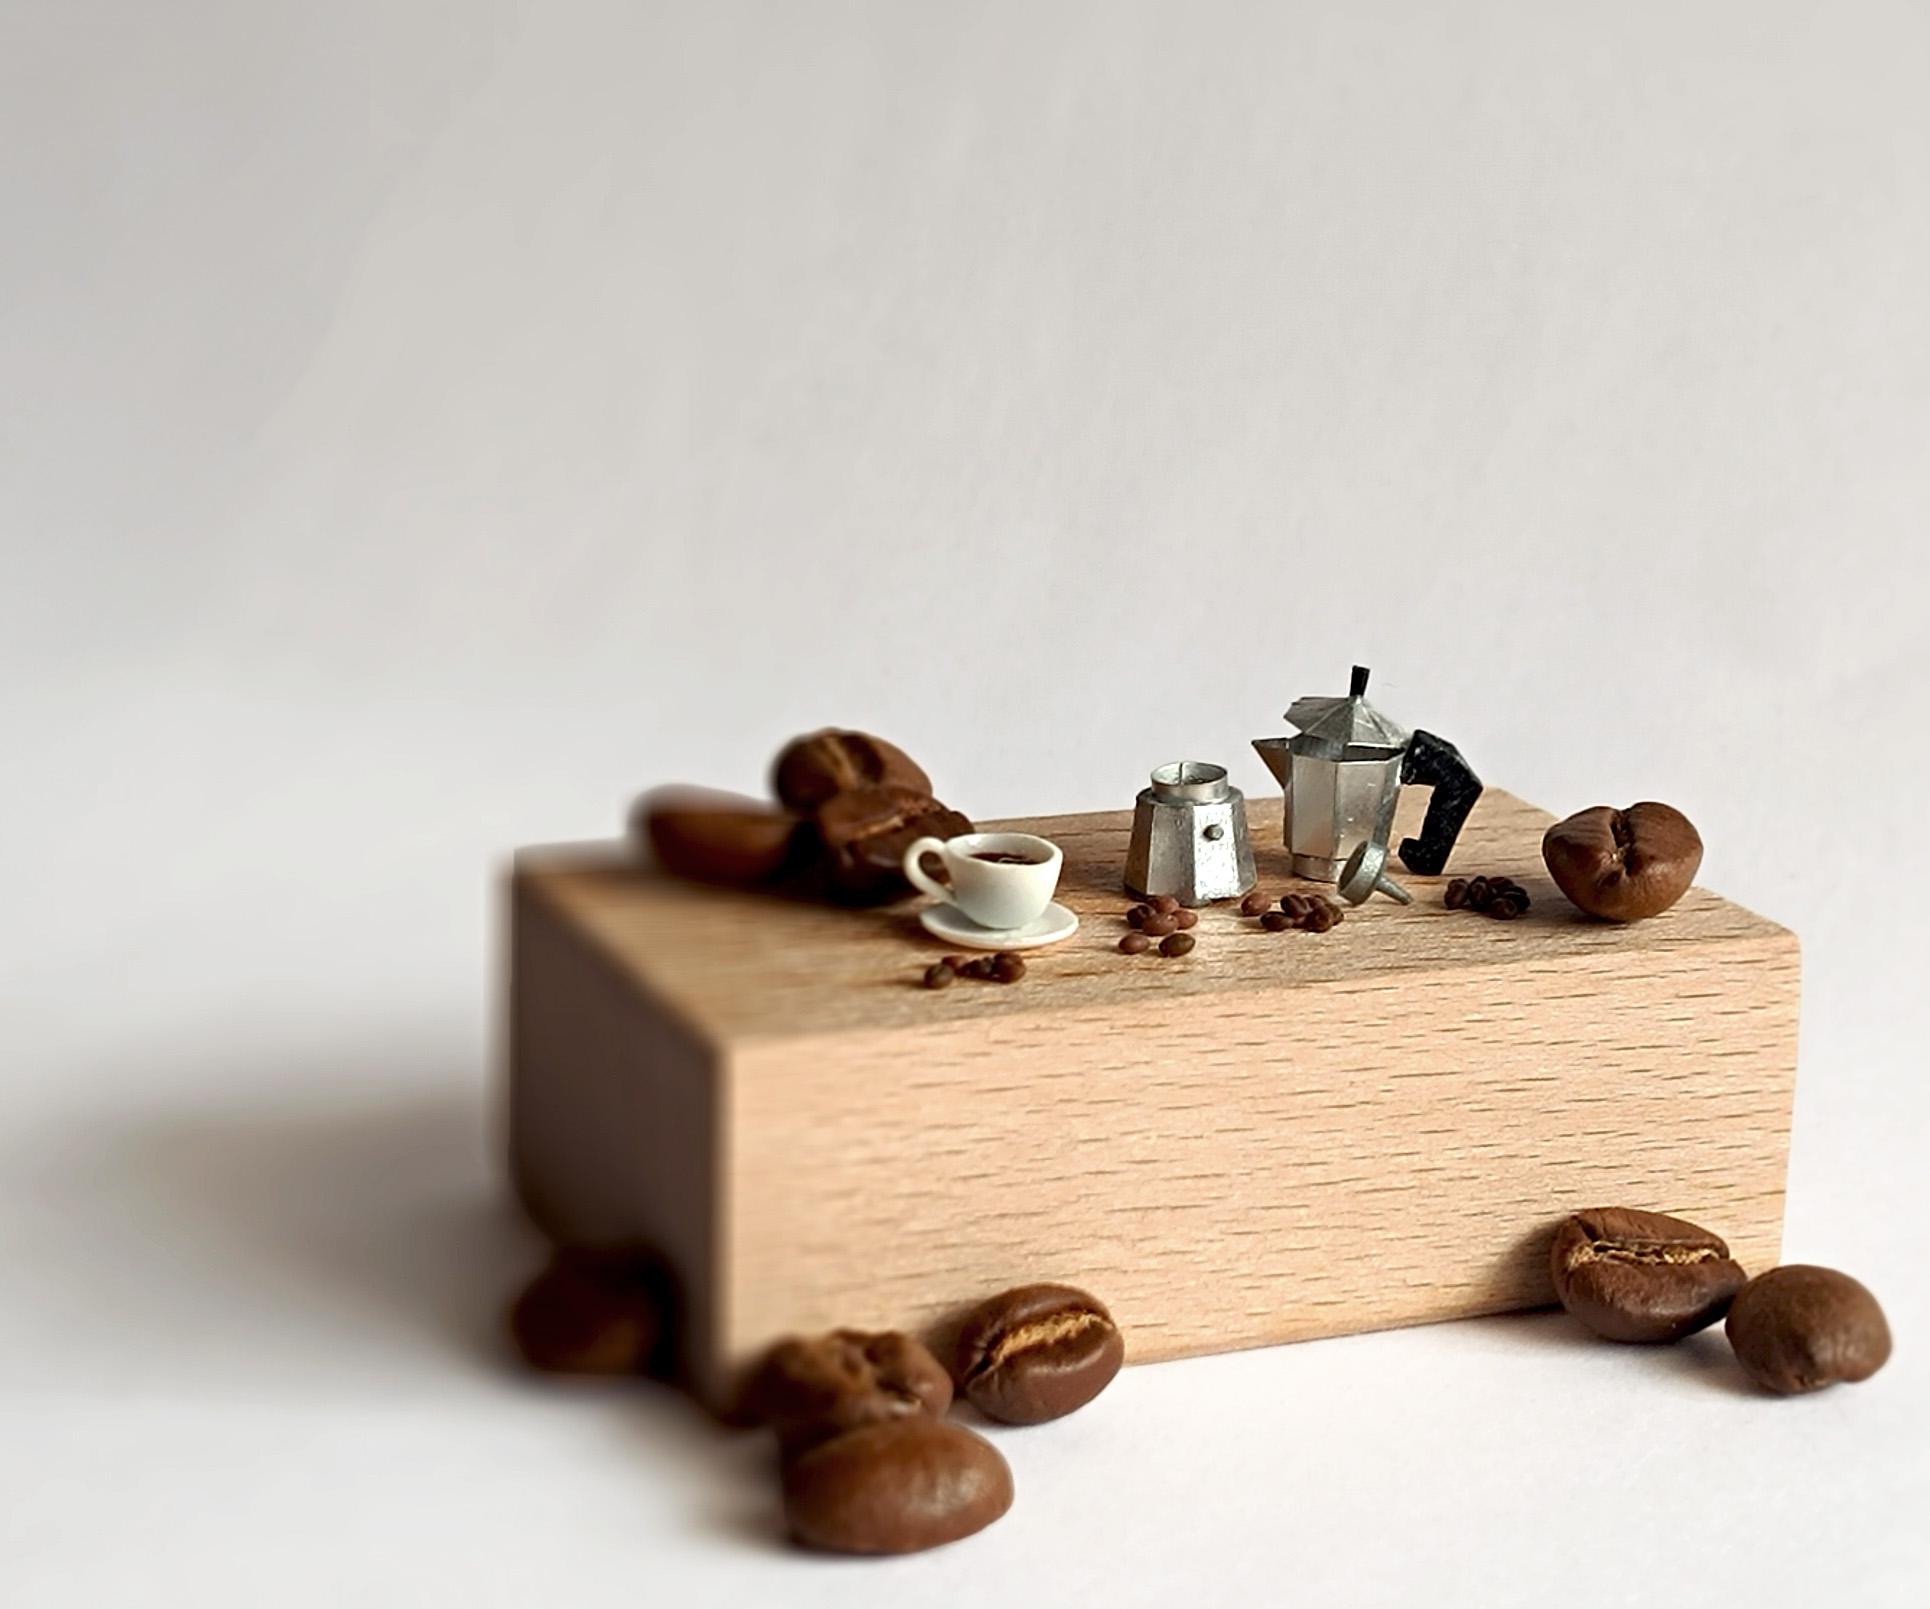
Miniature Moka Pot (that Opens!)
by Ahona Mukherjee in Design > Art
662 Views, 9 Favorites, 0 Comments
Miniature Moka Pot (that Opens!)
Hello, readers!
Fancy a cup of freshly brewed coffee? Maybe a tiny cup? Then you have come to the right place!
Today we will be making a 1:12 scale Moka pot with all the parts inside just like the real one AND with a working hinge for the lid! It's the perfect addition to your miniature project, as you can set the scene in any way you like!
Now if all the details seem like a bit of a challenge or perhaps you don't need it all, don't worry! You can build a simpler pot as well. I have tried to keep the project as flexible as I can, so no matter the experience, the skill or the requirement, everyone should hopefully be able to follow along and make the cute little pot.
And as a bonus, we will also be making a little espresso cup with a saucer and some coffee beans to go with our Moka pot.
So, let's begin!
Supplies


Here I have listed all the materials you will need to follow exactly along, and I have tried to include as many alternatives as possible. I have also listed the requirements stepwise so you know what you need before you start a step and it is easier to follow along!
Materials:
- The metal cup from an old tea candle
- You can also try it with paper or metal from a packing container. I wanted the silver finish, but you can also paint it with acrylics for an enamel finish.
- Polymer clay in silver, black, white and shades of brown
- In case you don't have all the colours, you can use the one you have and paint it with acrylics later!
- Super Glue or any glue that works with the metal. I used Feviquick, a cyanoacrylate adhesive.
- Glue stick
- Liquid clay like TLS or Fimo Liquid Gel
- The folding template printed out. I have attached the PDF here, and there are three different sizes depending on what you prefer. I modelled it on Fusion 360 and extracted the net from the 3D form
- Thin wire for the hinge. I used a piece from a spool I got in a flower-making kit
- UV resin for the coffee in the cup
- You can make it with Fimo Liquid Gel too
- Talcum powder or starch powder
]Tools:
- Scissors to cut the metal. I just used my regular pair, but you can choose to use a precision pair or even a paper cutter if you prefer.
- Paper cutter
- A clay blade
- A clay roller
- Circle cutters to punch out circles from the clay but also as a guideline to bend the rings
- I have a box of assorted cutters, but if you don't have that, you can collect a few pen caps, pen refills, straws or anything in the diameter that fits the scale.
- A few basic clay tools like a needle tool and a ball tool
- A circle-master or the stencil we use to trace circles from. What do you guys call it?
- A paintbrush or anything else that has a cup-like shape
- Tweezers to make handling the small pieces easier
- Soft Pastels or dry pastels in dark brown or black
I prefer to bake all the clay pieces at once to save energy and avoid using the oven multiple times. However, for clarity, I’ve organised the instructions part by part. This means we’ll be working with clay in separate steps throughout the tutorial. To help you stay on track, I’ve listed all the clay parts here in one place so you can make and bake them together in a single batch without losing the flow of the project. This will make more sense when you read through and you can come back to use this as a reference.
The Baking To-Do list:
- From Step 3:
- Bases of the chambers (3 of them)
- The inner outlet or spout inside the upper chamber
- The tiny valve outside the lower chamber
- From Step 5:
- All the parts of the filter basket
- From Step 6:
- The handle
- The hinge detail
- The little knob on the lid
- From Step 7:
- The espresso cup and saucer
- From Step 8:
- The coffee beans
Whew, with all that out of the way... let us brew some miniature magic!
Downloads
The Parts of the Pot
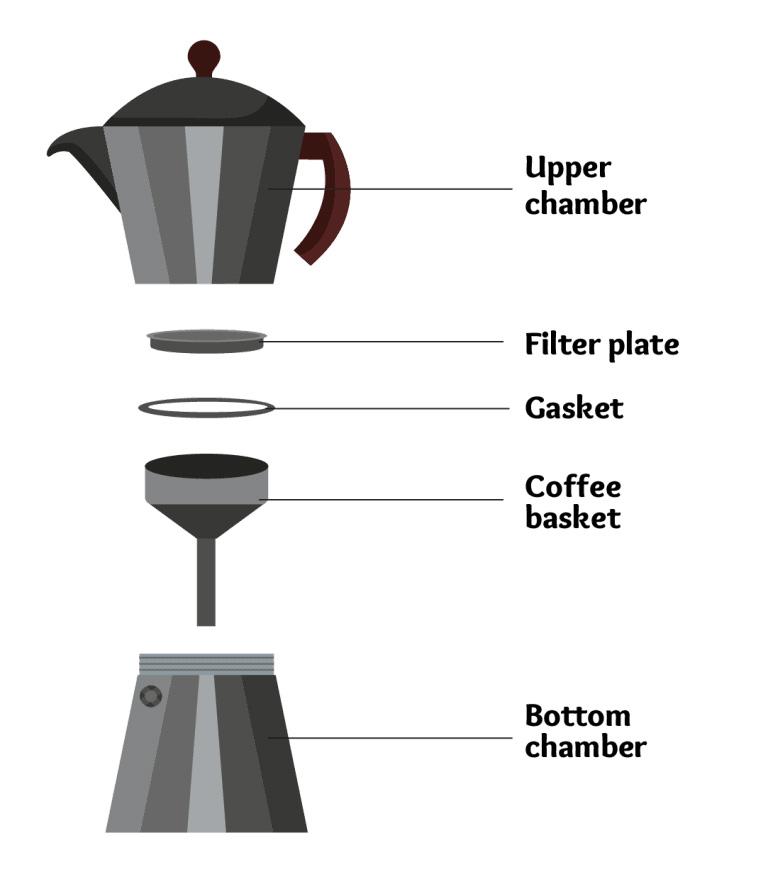
Before we head to the worktable, let us take a moment to understand all the parts of the moka pot that we will be making. I will be using these terms to refer to the parts while explaining, so you can refer back in any case.
- The Upper Chamber: Folded from the metal sheet with some polymer clay details
- The Lower Chamber: Folded from the metal sheet with some polymer clay details
- The Lid: Folded from the metal sheet with some polymer clay details
- The Handle: Mainly sculpted with polymer clay except from the hinge
- The Filter basket: Sculpted with clay
I decided to not include the filter plate and the gasket at all, as it did not add a whole lot to the piece in a miniature. And in case you want to make just the whole pot instead of making it openable or in parts, then you can skip a few steps for each of the parts and not make the filter basket at all.
Image Credits: https://www.fluentincoffee.com/how-to-use-a-moka-pot/
Folding the Pot


Let's begin with the main body of the pot. I have found the best way to get the most realistic results while making a miniature of something is to try and mimic the way it is made in real life and try following a similar technique in scale. So naturally, to get the characteristic edges, I decided to fold it from 'sheet' metal.
What you will need for this step:
- The metal sheet from the tea candle (I cut out the side and rolled it out a couple of times to flatten it.)
- A glue stick
- The printed folding template (it's attached on the supplies page)
- Scissors and a paper cutter
- Super glue
- Some nail polish remover and a cotton earbud (to clean any glue residue)
Steps:
- Cut out the paper net and stick it on to the metal strip. I used the glue stick because it made it just so much easier to remove the paper later without too much residue on the metal. Make sure you leave a little paper along the edges so you can cut it carefully in the next step.
- Cut along the metal using the solid edges printed as a guideline.
- Score along the dotted edges with the blade gently so we can get crisp folded edges. Be VERY gentle, as the metal is quite soft, and if the score is too deep, it can break from that fault line when we fold.
- With the help of the scoreline, slowly fold along all of them to form as close to an octagon as possible on both ends. Don't fold all the way; just a gentle bend will do as it begins to curve in.
- This step might call for a little bit of patience, as depending on how strong and thick your metal is, it can be delicate and break. It did for me a bunch of times, but once I got the hang of the material, it was much easier.
- Once you are happy with how it has come together, we can glue the edges together. I found the usual flaps in a paper folding project to not be very useful in this scale, and so I did away with it. To glue it together, hold the two edges close and put a drop of super glue as precisely as you can.
- Super glue tends to be quite watery and get everywhere. Be careful not to glue your fingers together, and don't worry too much about it going on other parts of your folded piece...
- ... because we can clean it up later once it has dried. Soak the cotton bud in some acetone or nail polish and dab it on all the dried spots of glue you want to remove. It will soften the residue, and then you can go in with the paper cutter blade and scrape it or peel it cleanly off.
- Repeat these steps for all the 3 main pieces: the upper chamber, the lower chamber and the lid
With these pieces ready, we can move on from the metalwork to a little clay work.
Finishing the Chambers

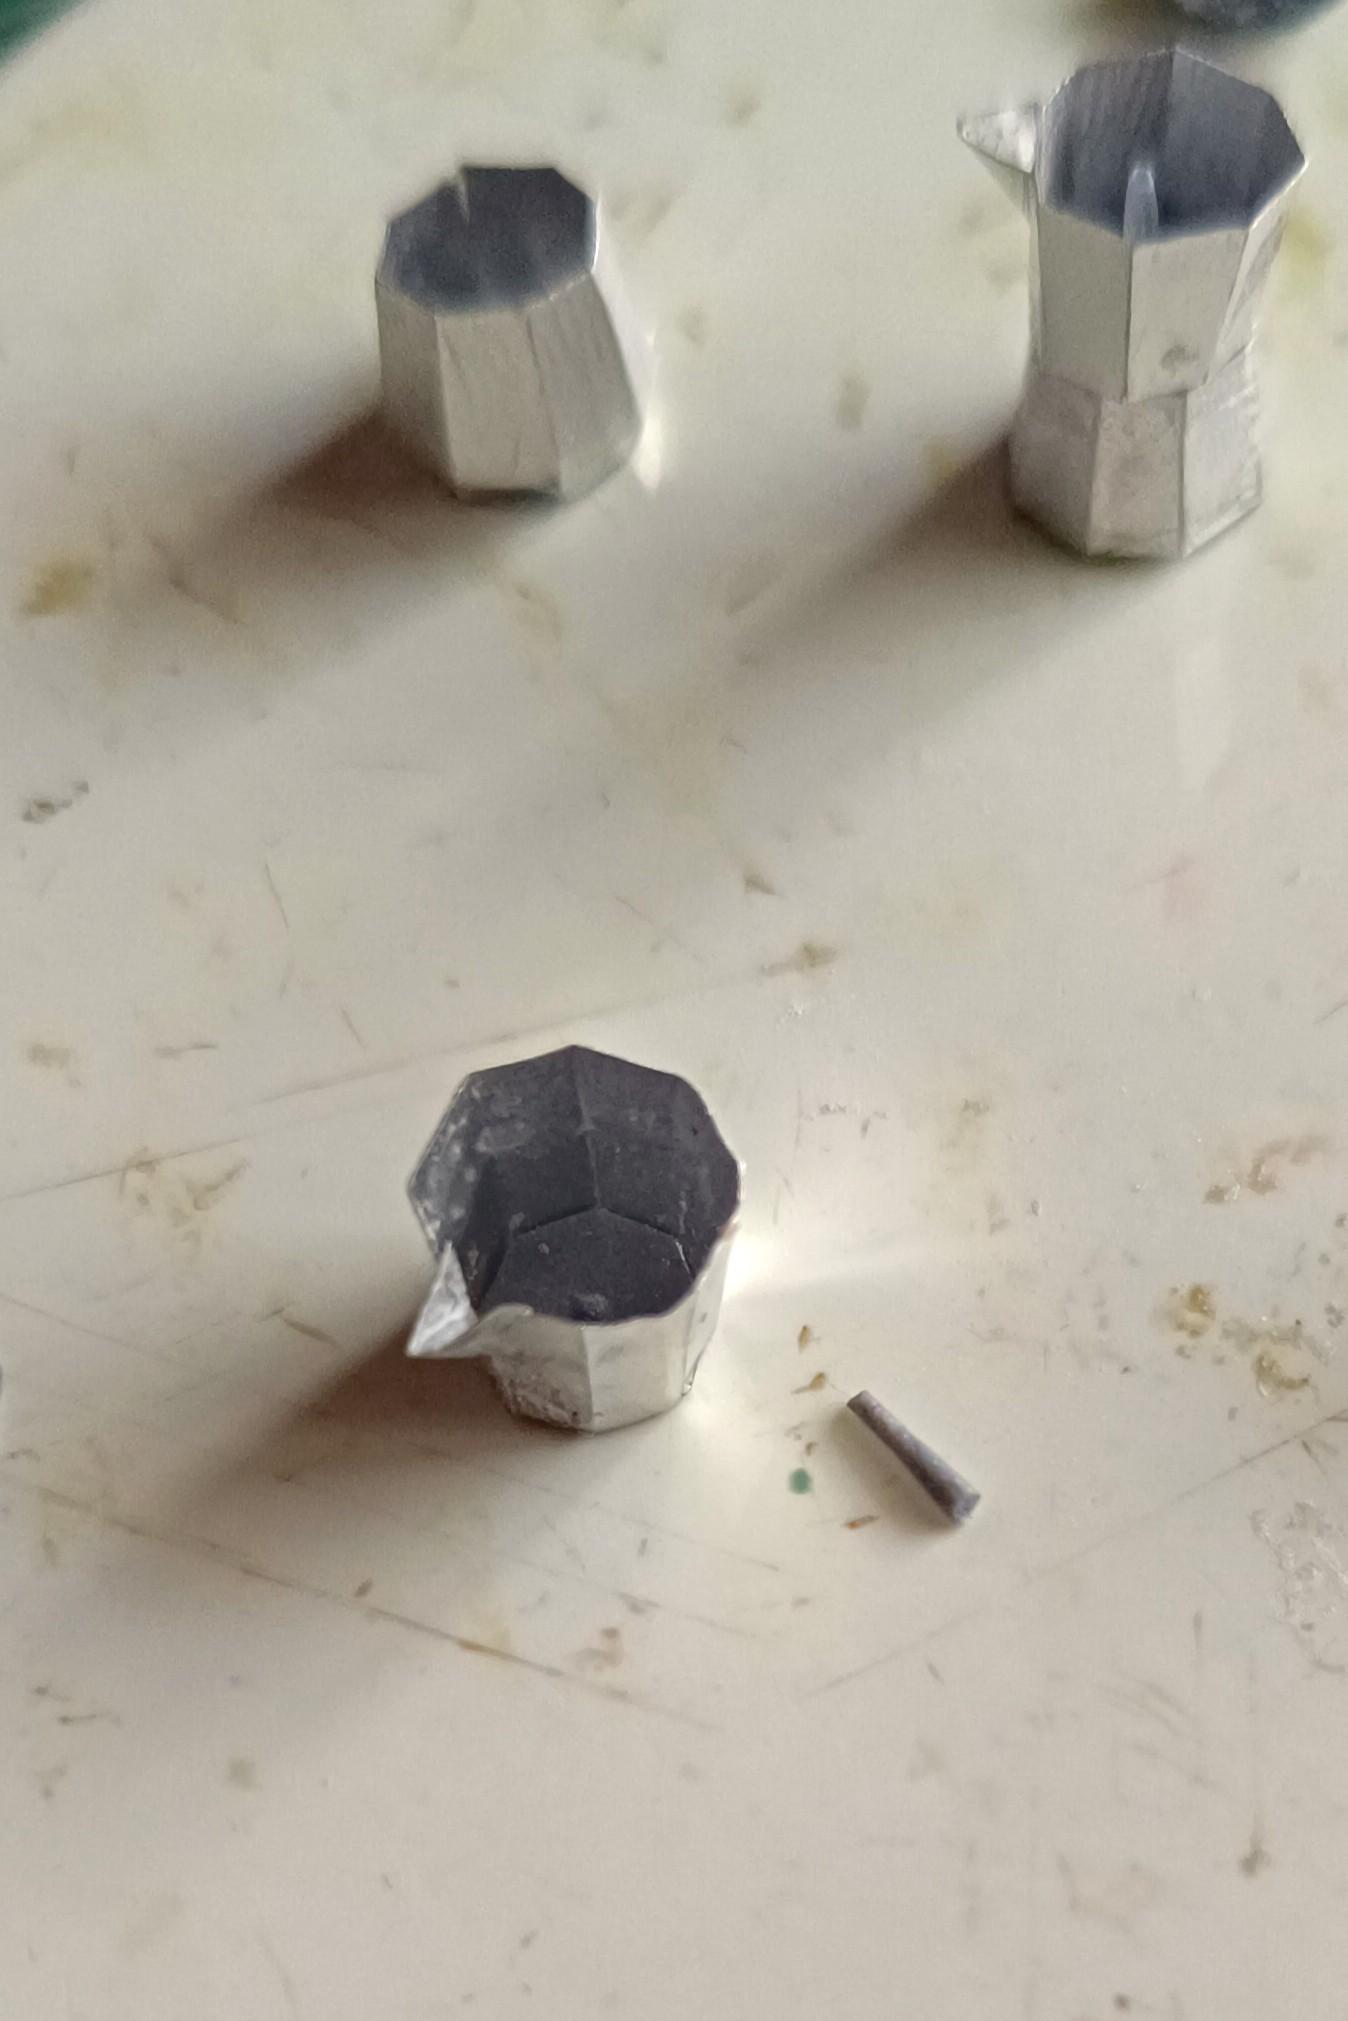


In this stage, we will add the next layer of details to the two chambers of the pot. As we are folding it all by hand, it might be a little hard to get a perfect octagon profile for the pieces, and that is okay!
What you will need for this step:
- Silver polymer clay
- A circle cutter
- Super glue
Steps:
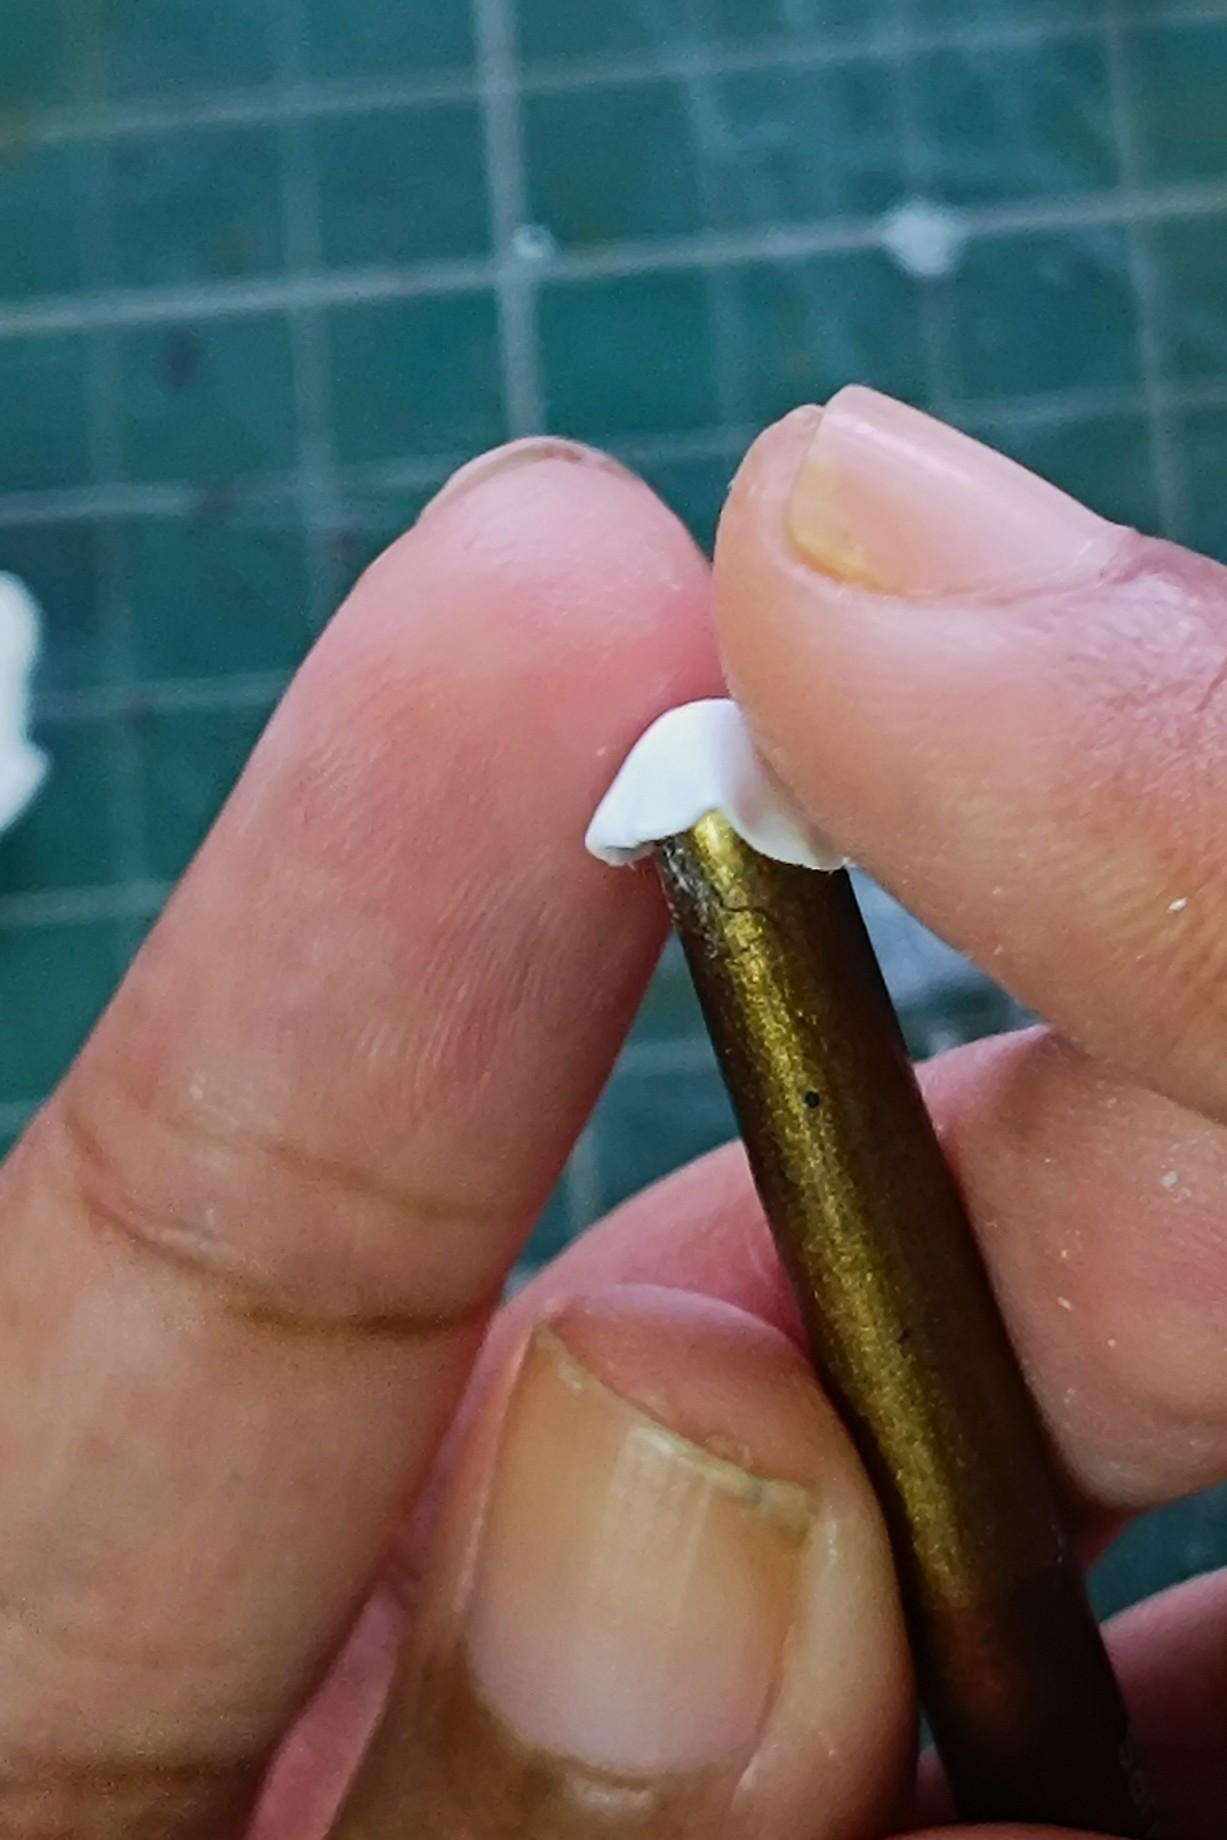
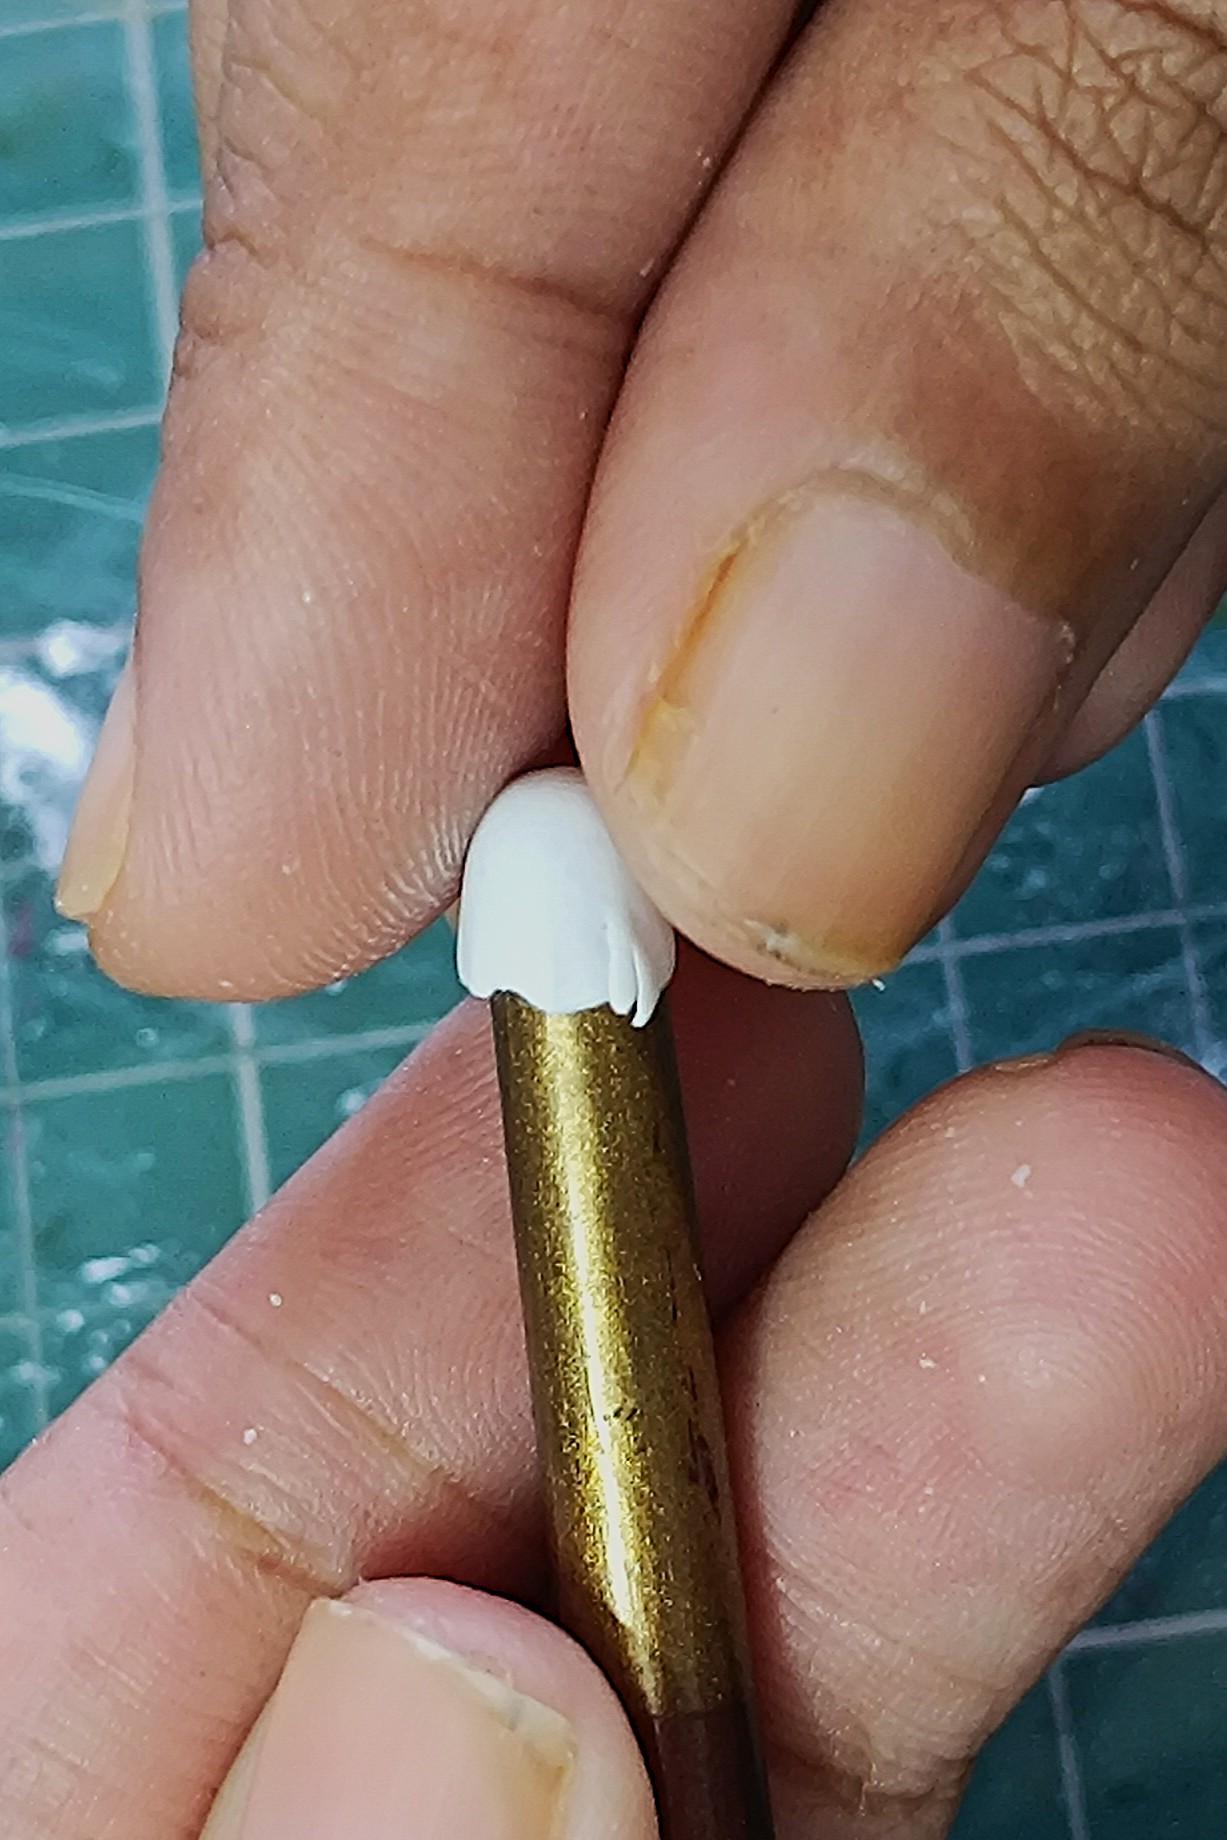
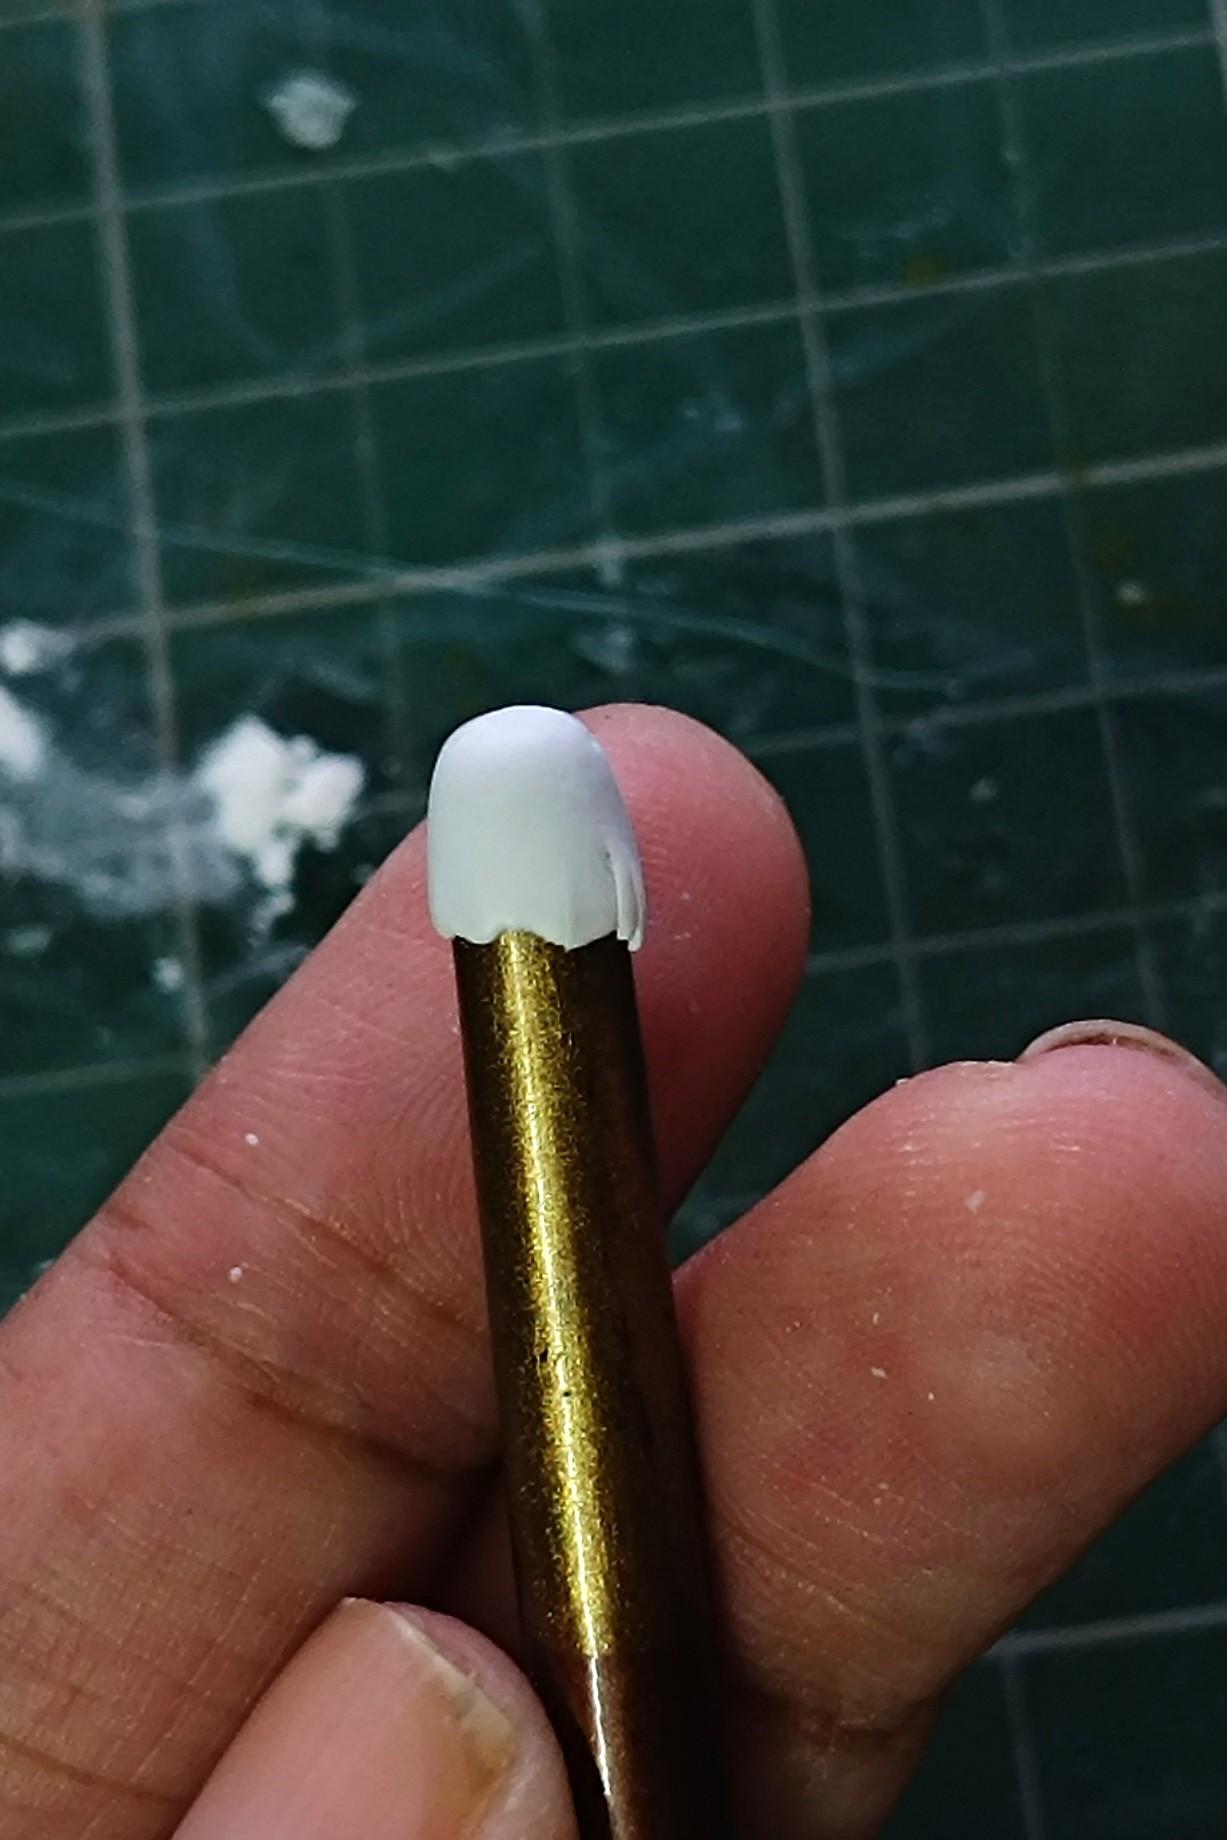
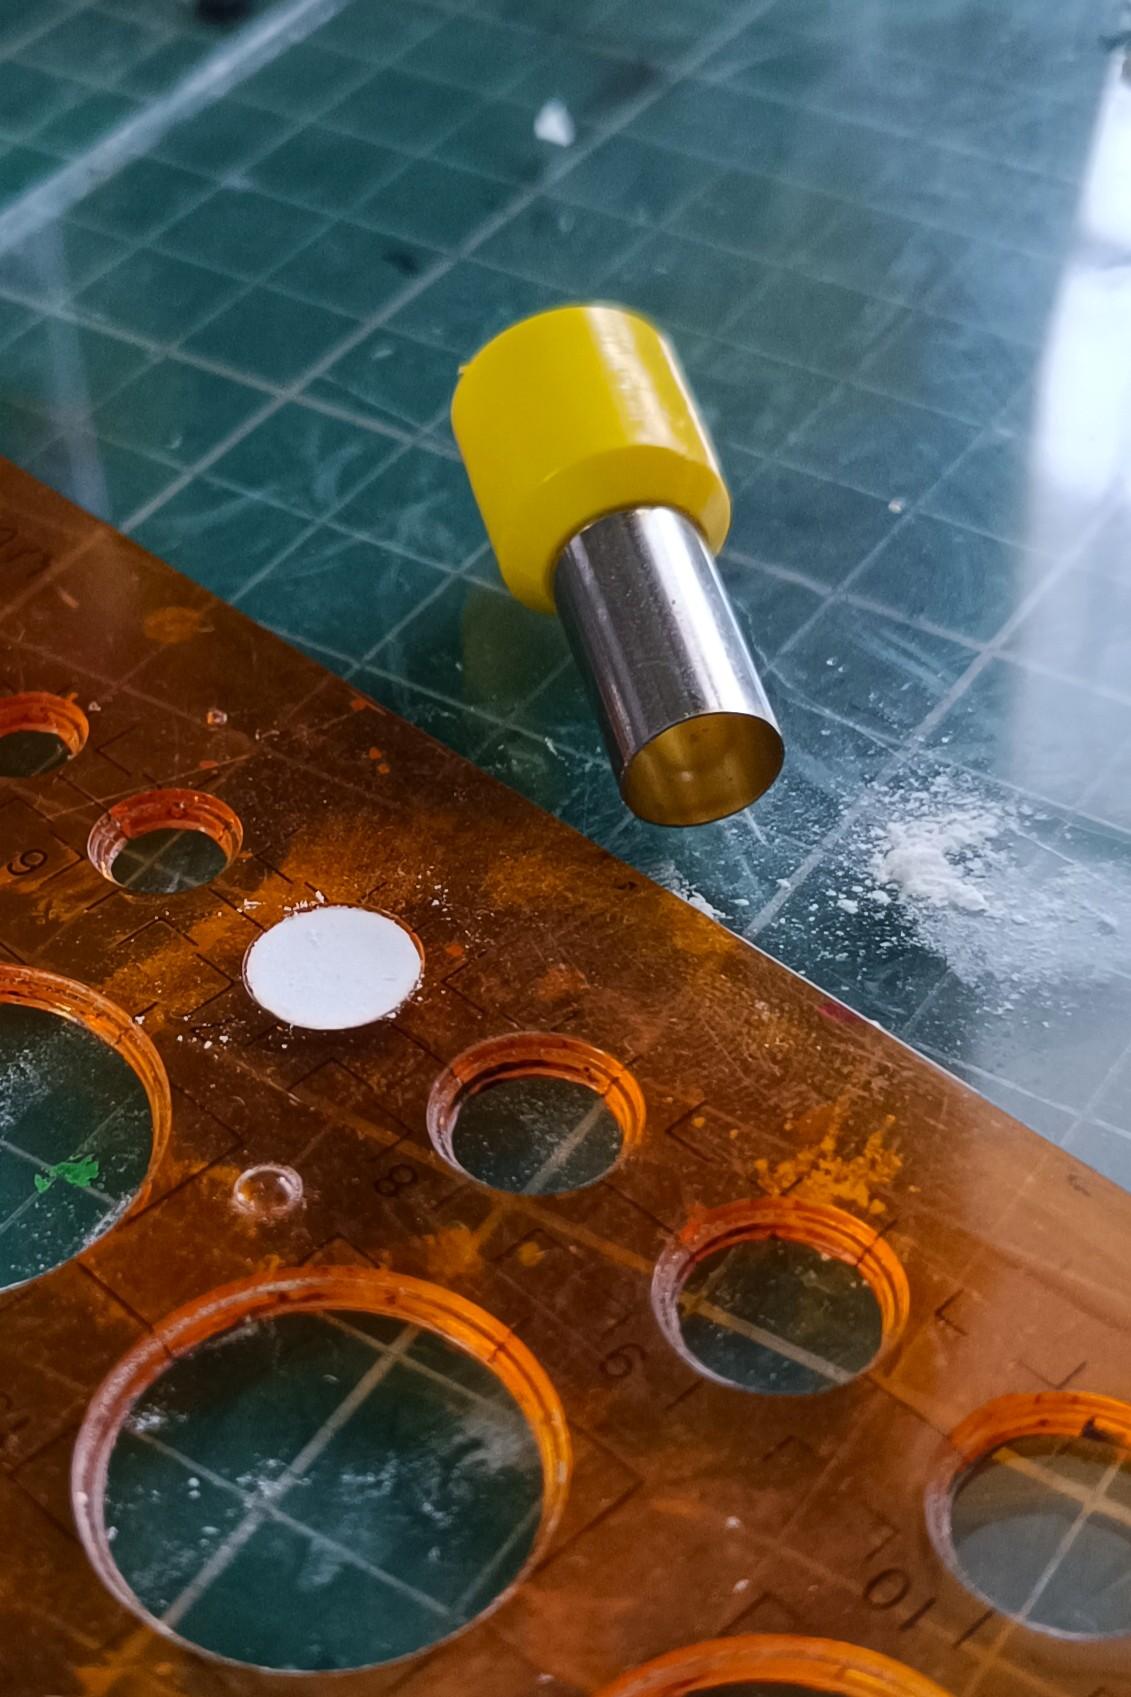
- To cap the bottom for the upper chamber and both ends of the lower chamber, we will use the clay. This way we can get the exact shape of the base. Roll out a thin sheet of the clay and cut out the shape by pressing down the folded piece (the metal works as a cutter! But be careful to not press down so hard as to squish it completely. Yes, it happened with me).
- Also, roll out a little tapering little cylinder from the clay for the outlet for the coffee that is inside the upper chamber.
- Assemble the baked pieces
- The upper chamber:
- Glue the base down into the folder chamber. To do so, I simply put the clay piece flat against the glass top and aligned and pressed down the metal piece on top. The fitting will naturally be very snug. Then I put a drop of superglue from the top and spread it along the edges.
- Glue the little cylinder piece in the centre.
- The lower chamber:
- We will start with the top piece first and then work on the bottom piece (the bottom is wider).
- Glue the top the same way we did for the upper chamber. Now, if you want to make the moka pot openable, you can skip the next step.
- Using the circle cutter, punch out a hole from the clay base. Doing this after we baked the clay and glued it in is better than doing it before in order to get more accurate fitting and a sharper edge along the hole. (Keep the circle you punched out too! We will need later.)
- After the 'top' base is glued, flip it over and glue the bottom base too (reminder: this is the wider base). It might be tricky to glue it the same way we did twice before, as the edges might be more inaccessible. If you have a precision tip, go through the punched hole and glue along the edges. Otherwise, or if you skipped the previous step, you can carefully glue it from the outside too.
- Remember to make a tiny 'valve' with the clay to be glued on the side of the lower chamber
In the next step we will make the 'middle part' between the two chambers.
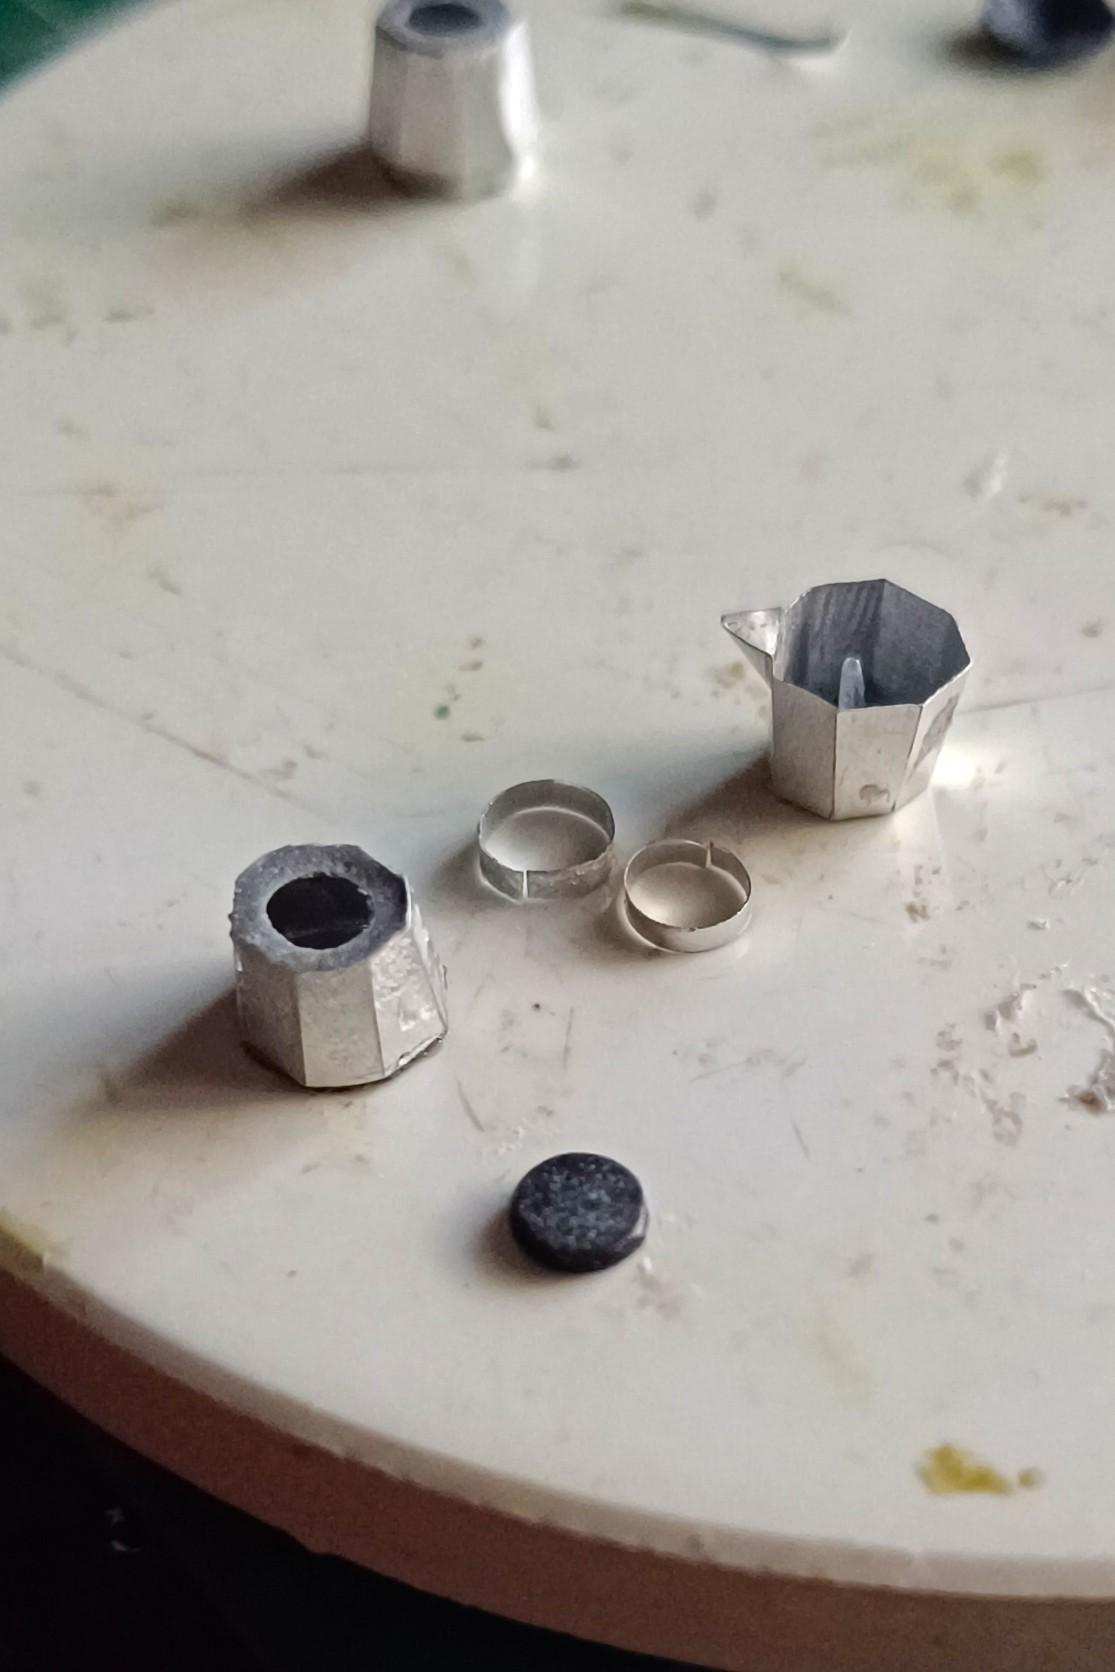
Joining the Two Chambers

.jpg)
In this step, we will make the 'middle' cylindrical part, which is the one where we screw or unscrew the two chambers.
What you will need for this step:
- Bit of the metal sheet
- Scissors or paper cutter
- Super glue
- Any cylindrical item that is just a little bigger than the hole inside the chamber. I used the backside of a circle cutter.
Steps:
- Cut out a thin strip of the metal using scissors.
- Wrap it around the cylinder reference. Wrap it all the way around so it curls completely. That way we get a more perfect ring.
- Mark the point where it overlaps and cut along it. Put it along the reference and roll it across a hard surface a couple of times to help it hold the shape.
- Now make another ring that is just a little smaller than the first ring. Repeat the steps and cut it a little shorter than the point it overlaps. Gently roll it again to bring the edges together.
- Glue the smaller ring on the lower chamber, along the punched hole. The bigger ring will go below the upper chamber. Before you glue the second one, make sure you check the central alignment once.
Now, if you are making the assembled non-openable moka pot, you don't have to make the inner ring at all. Just glue both the chambers to the same ring. You can also punch out a circle of clay with a cutter in the thickness you need for the middle part and glue that instead of making the ring. You can also skip the next step!
The Filter Basket


Here we will make the little filter that nestles inside the lower chamber and is where the coffee grounds go.
What you will need for this step:
- Silver polymer clay
- Liquid clay
- Needle tool
Steps:
- Remember the little circle we had punched out in the 3rd step from the lower chamber? We will use that as the base of the filter basket. In case you don't have that, you can cut out another circle too.
- Cut out a thin strip from a thin sheet of the polymer clay. Dust it lightly with some talcum powder or starch to prevent it from sticking and tearing apart.
- Using the needle tool, gently roll against the strip on your finger so it starts to curl. The dusting helps to keep it from sticking to your fingers
- Glue it along the edge of the circle using the liquid clay.
- Roll out another little tapering cylinder to make the pipe that goes below the filter.
- After baking both of the pieces, glue the piece in the centre behind.
Now, to add the handle, hinge and lid.
The Handle and Hinge


The main element missing from the pot now is, of course, the handle. Now if you want to make it functional, you can make the hinge like I did. Or to simplify, you can just glue the lid in place in the angle you like! In this case, just read steps 1, 8 and 10.
What you need for this step:
- Black polymer clay
- Scraps from the metal sheet
- Thin wire
- Super glue
- Scissors and paper cutter
- Tweezers
Steps:
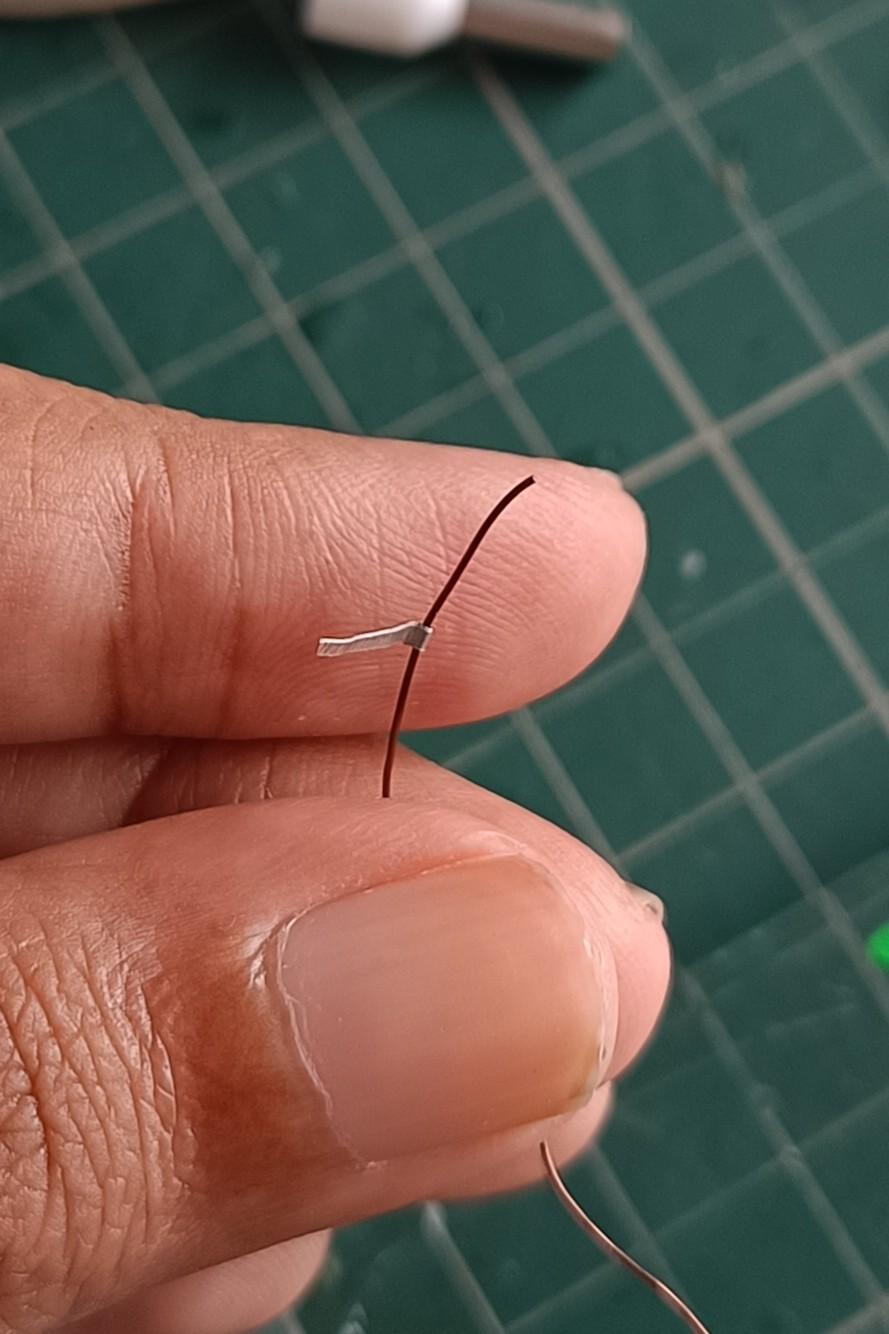
- Roll out a sheet of polymer clay with the thickness of the handle and cut the shape out with a blade. I freehanded it, but you can find a reference in the template sheet from before.
- If you want to make the hinge, don't make the top corner (marked with the dotted line) solid. Instead, cut two triangles out of a thinner layer of clay with a small hole (make it with your wire) in the centre to pass the wire later. You can attach one of them to the handle with liquid clay and bake it together. Bake the other one separately, and we will attach it later.
- We will need another strip of the metal now. Make sure the combined thickness of the two clay triangles and the width of the strip are as close to the thickness of the handle as possible.
- Wrap the strip around the piece of wire to form a simple hinge. You don't have to glue this down; instead, just overlap the wrapping to hold it in place. As it is a very small piece, the glue can spill over and block the movement completely.
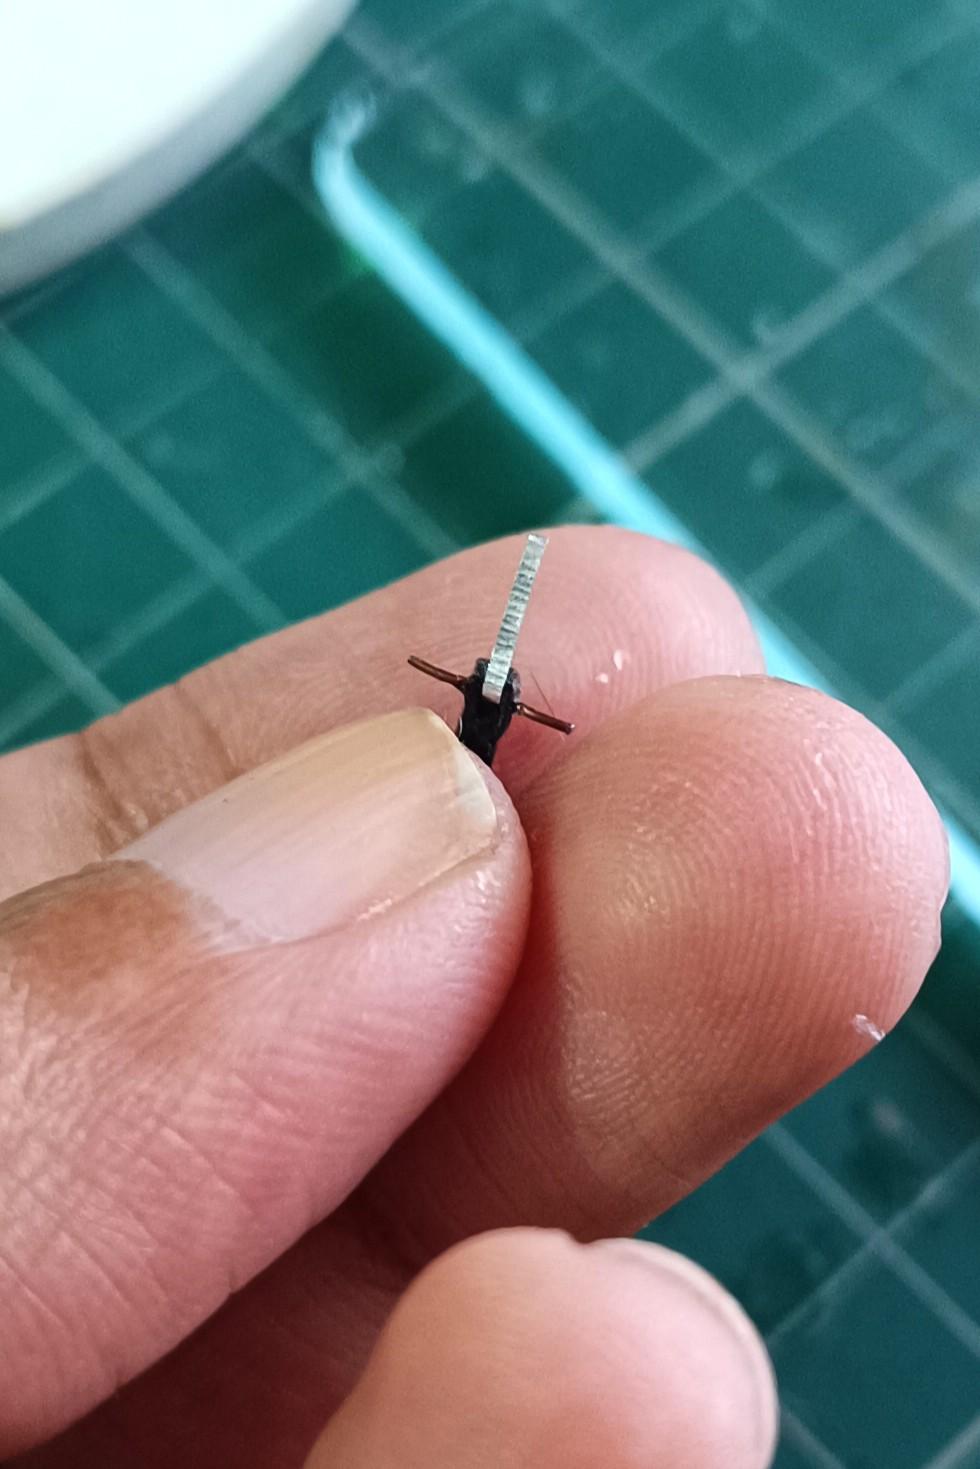
- Once the handle and triangles are baked, we can put the hinge together. Pass the wire through the hole of the triangle attached to the handle and secure the wire with a tiny drop of glue from the outer side of the triangle (not the one with the metal loop).
- And once that has dried, pass the other triangle through the piece of wire so as to sandwich the metal loop with the two pieces of clay. Just like before, secure the wire sticking out with a drop of glue.
- Snip the extra metal from both sides after it has dried completely.
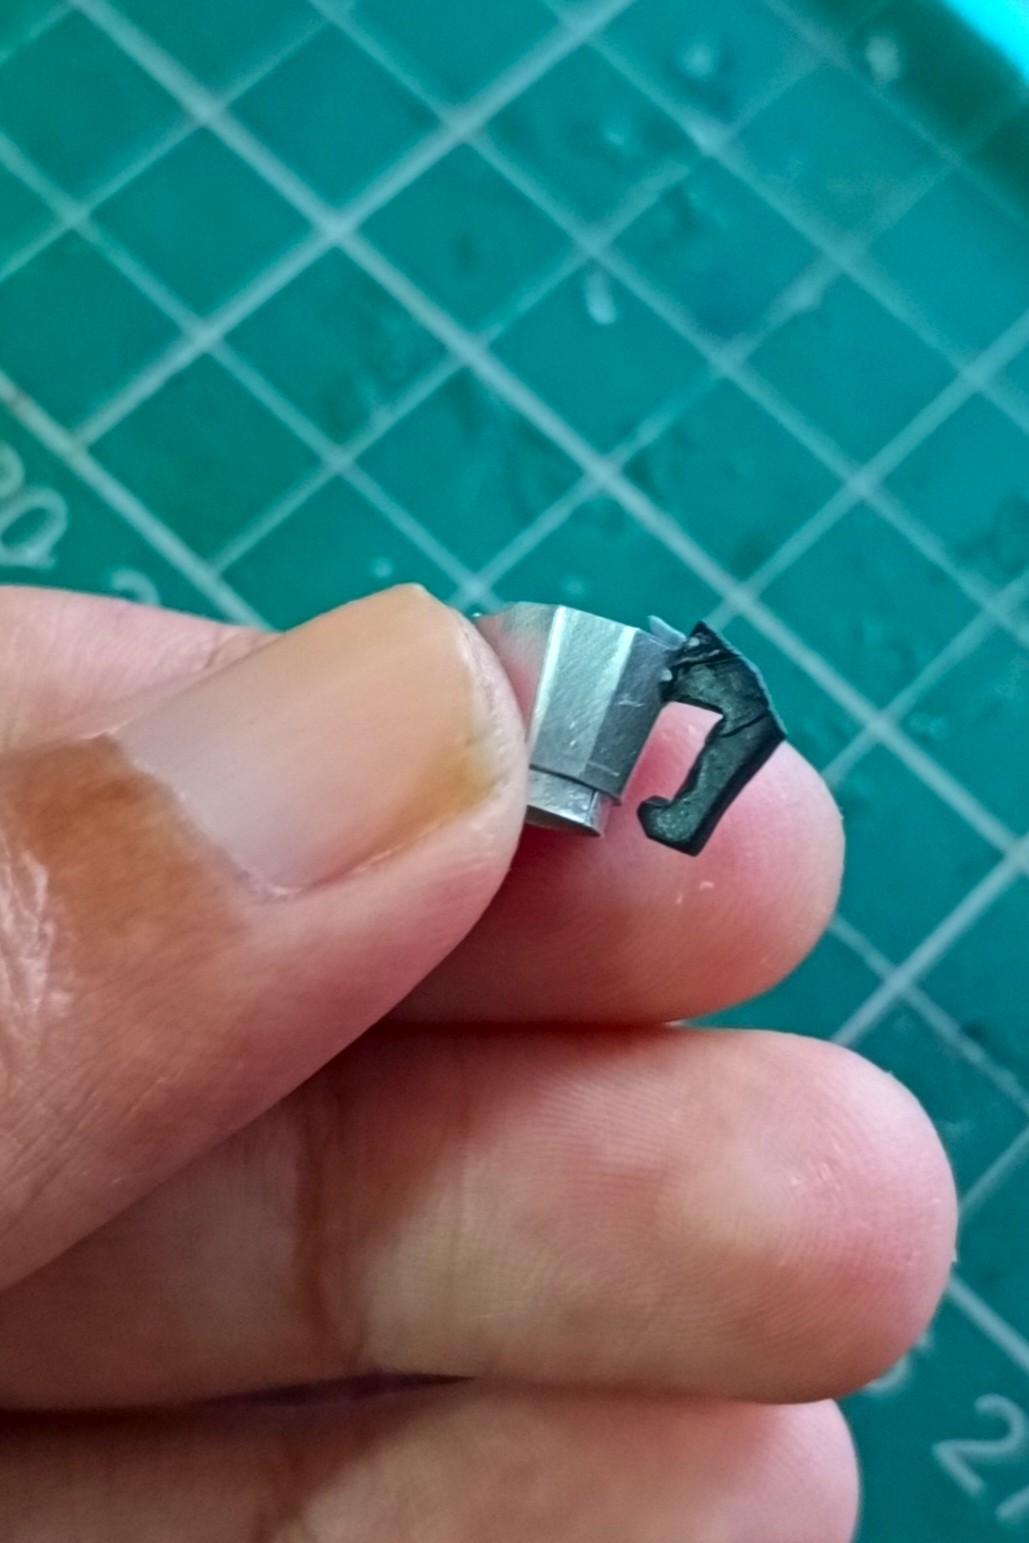
- With the super glue, attach the handle base to the side of the upper chamber diametrically opposite to the mouth or spout. Ensure the metal loop is still moving freely.
- Glue the metal loop to the folded lid. Move the loop outwards so it's more accessible and cut it to size in case it is longer than necessary. Then put a drop of glue on the tip and place the lid on it. I used a tweezer to hold it together as it bonded.
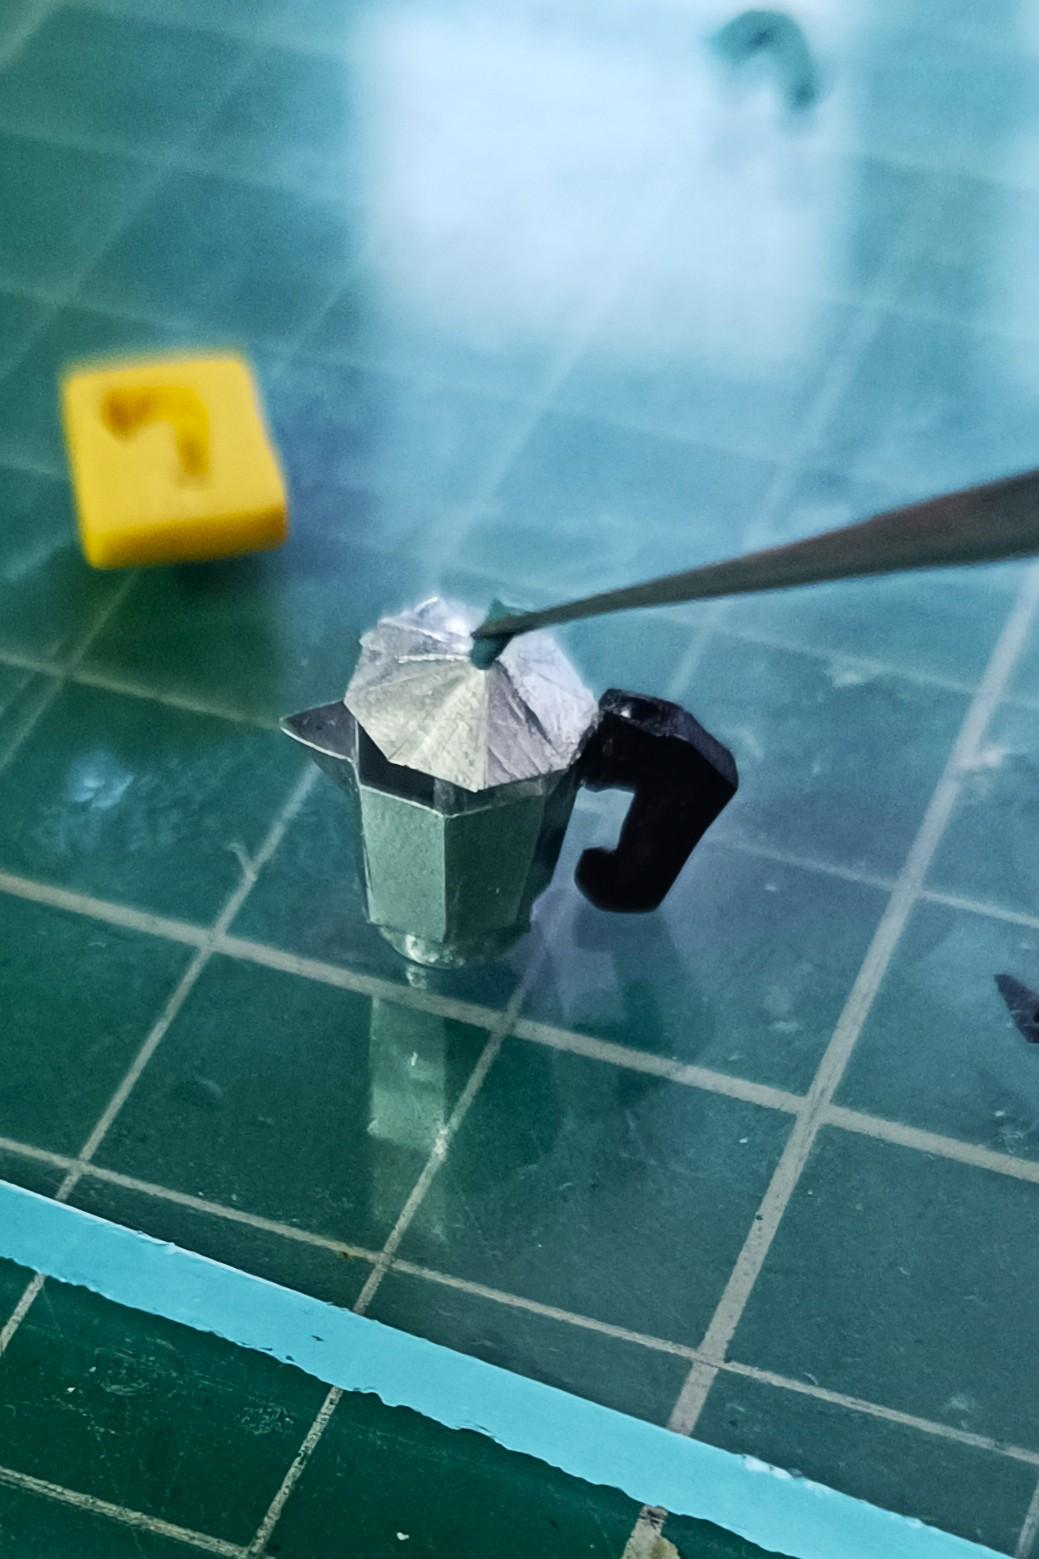
- Make a tiny clay knob or handle that is on top of the lid (I had made it with some scrap blue clay and painted it later). Glue it on top after baking.
Observation: I did notice after making it and attacking it that the weight of the clay was a little more than what the light metal body could handle. So sometimes while assembling the whole pot with the upper chamber on top of the lower one, it would topple over. A way to fix this would be to put a little bit of silver clay inside the upper chamber to balance out the weight. Or if you have access to lighter clay, like foam clay, you can try that too. Let me know if it works!
And with this, our Moka pot is ready to serve!
Bonus: the Espresso Cup and Saucer


Bonus! Let's make a tiny espresso cup and saucer to keep the moka pot company!
What you will need for this step:
- Polymer clay
- Circle clay cutters
- A paintbrush with a 'cup'-like 'bottom
- A circle master
- Liquid clay
- Clay blade
Steps:
- I decided to make a white cup set, as I think the clean white ceramic will really go well with the browns and metals of the composition I had in mind. But you can choose any colour you like for your cup.
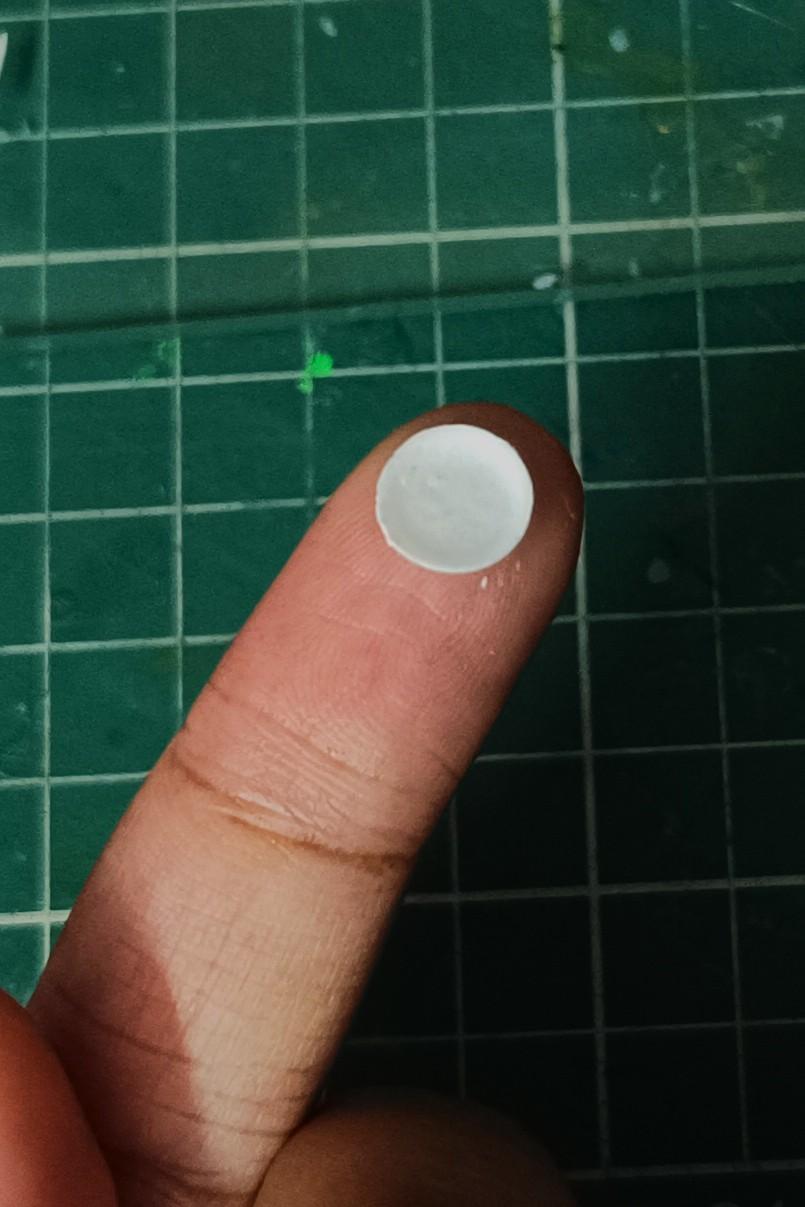
- Tips to keep the white clay white: White clay picks up dust and lint like no one's business. Any clay artist would know this struggle! What I do is wipe down the surface and tools with cleaning alcohol or hand sanitiser. I also touch the clay as little as possible with my fingers, and when I do, I dust it generously with talcum powder. This helps me get a clean finish without dust or fingerprints.
- Roll out the clay in a thin sheet in the thickness of your cup wall or plate. Cut out two circles: a smaller one for the saucer and another larger one for the cup (this doesn't have to be exact).
- For the cup:
- An espresso cup is smaller than a cappuccino cup or a regular coffee mug. And that is what I wanted to make. I found the end of my number 10 round brush to be the perfect size and close enough in shape. Just raid through your brushes or pens to find the one you like!
- Gently drape the second circle we cut out from the clay on the edge. Slowly press and pull down to evenly cover the tip without tearing it and while avoiding folds.
- Once it the shape is there, go around with a blade to cut off the excess and get the neat and even edge. Pre-bake once.
- Once cooled, attach a little rolled-out snake of the white clay as the handle to the side. Put a drop of liquid clay on the tip and place the strip going upwards and blend it into the cup's body with a ball tool.
- Once it is smooth, gently curve the handle downwards and attach the other end as well. Bake once more, and it's ready!
- For the saucer:
- Soften the sharp edges of the cut with your fingertip. Make sure to use powder so it is smooth.
- Find the corresponding circle that the clay piece would fit perfectly in your circle master and pop it in.
- Gently press down with your finger or along the edge with a ball tool to give the plate edges a bit of a lift. The edge of a circle master will act as a reference, while the centre dips down gently.
- It will pop out quite easily because of the talc. Put it on your baking tray and flatten the centre 'base' with a flat end of any tool (I use my X-acto knife end).
- And bake!
What else is missing...?
Bonus: Itty Bitty Coffee Beans
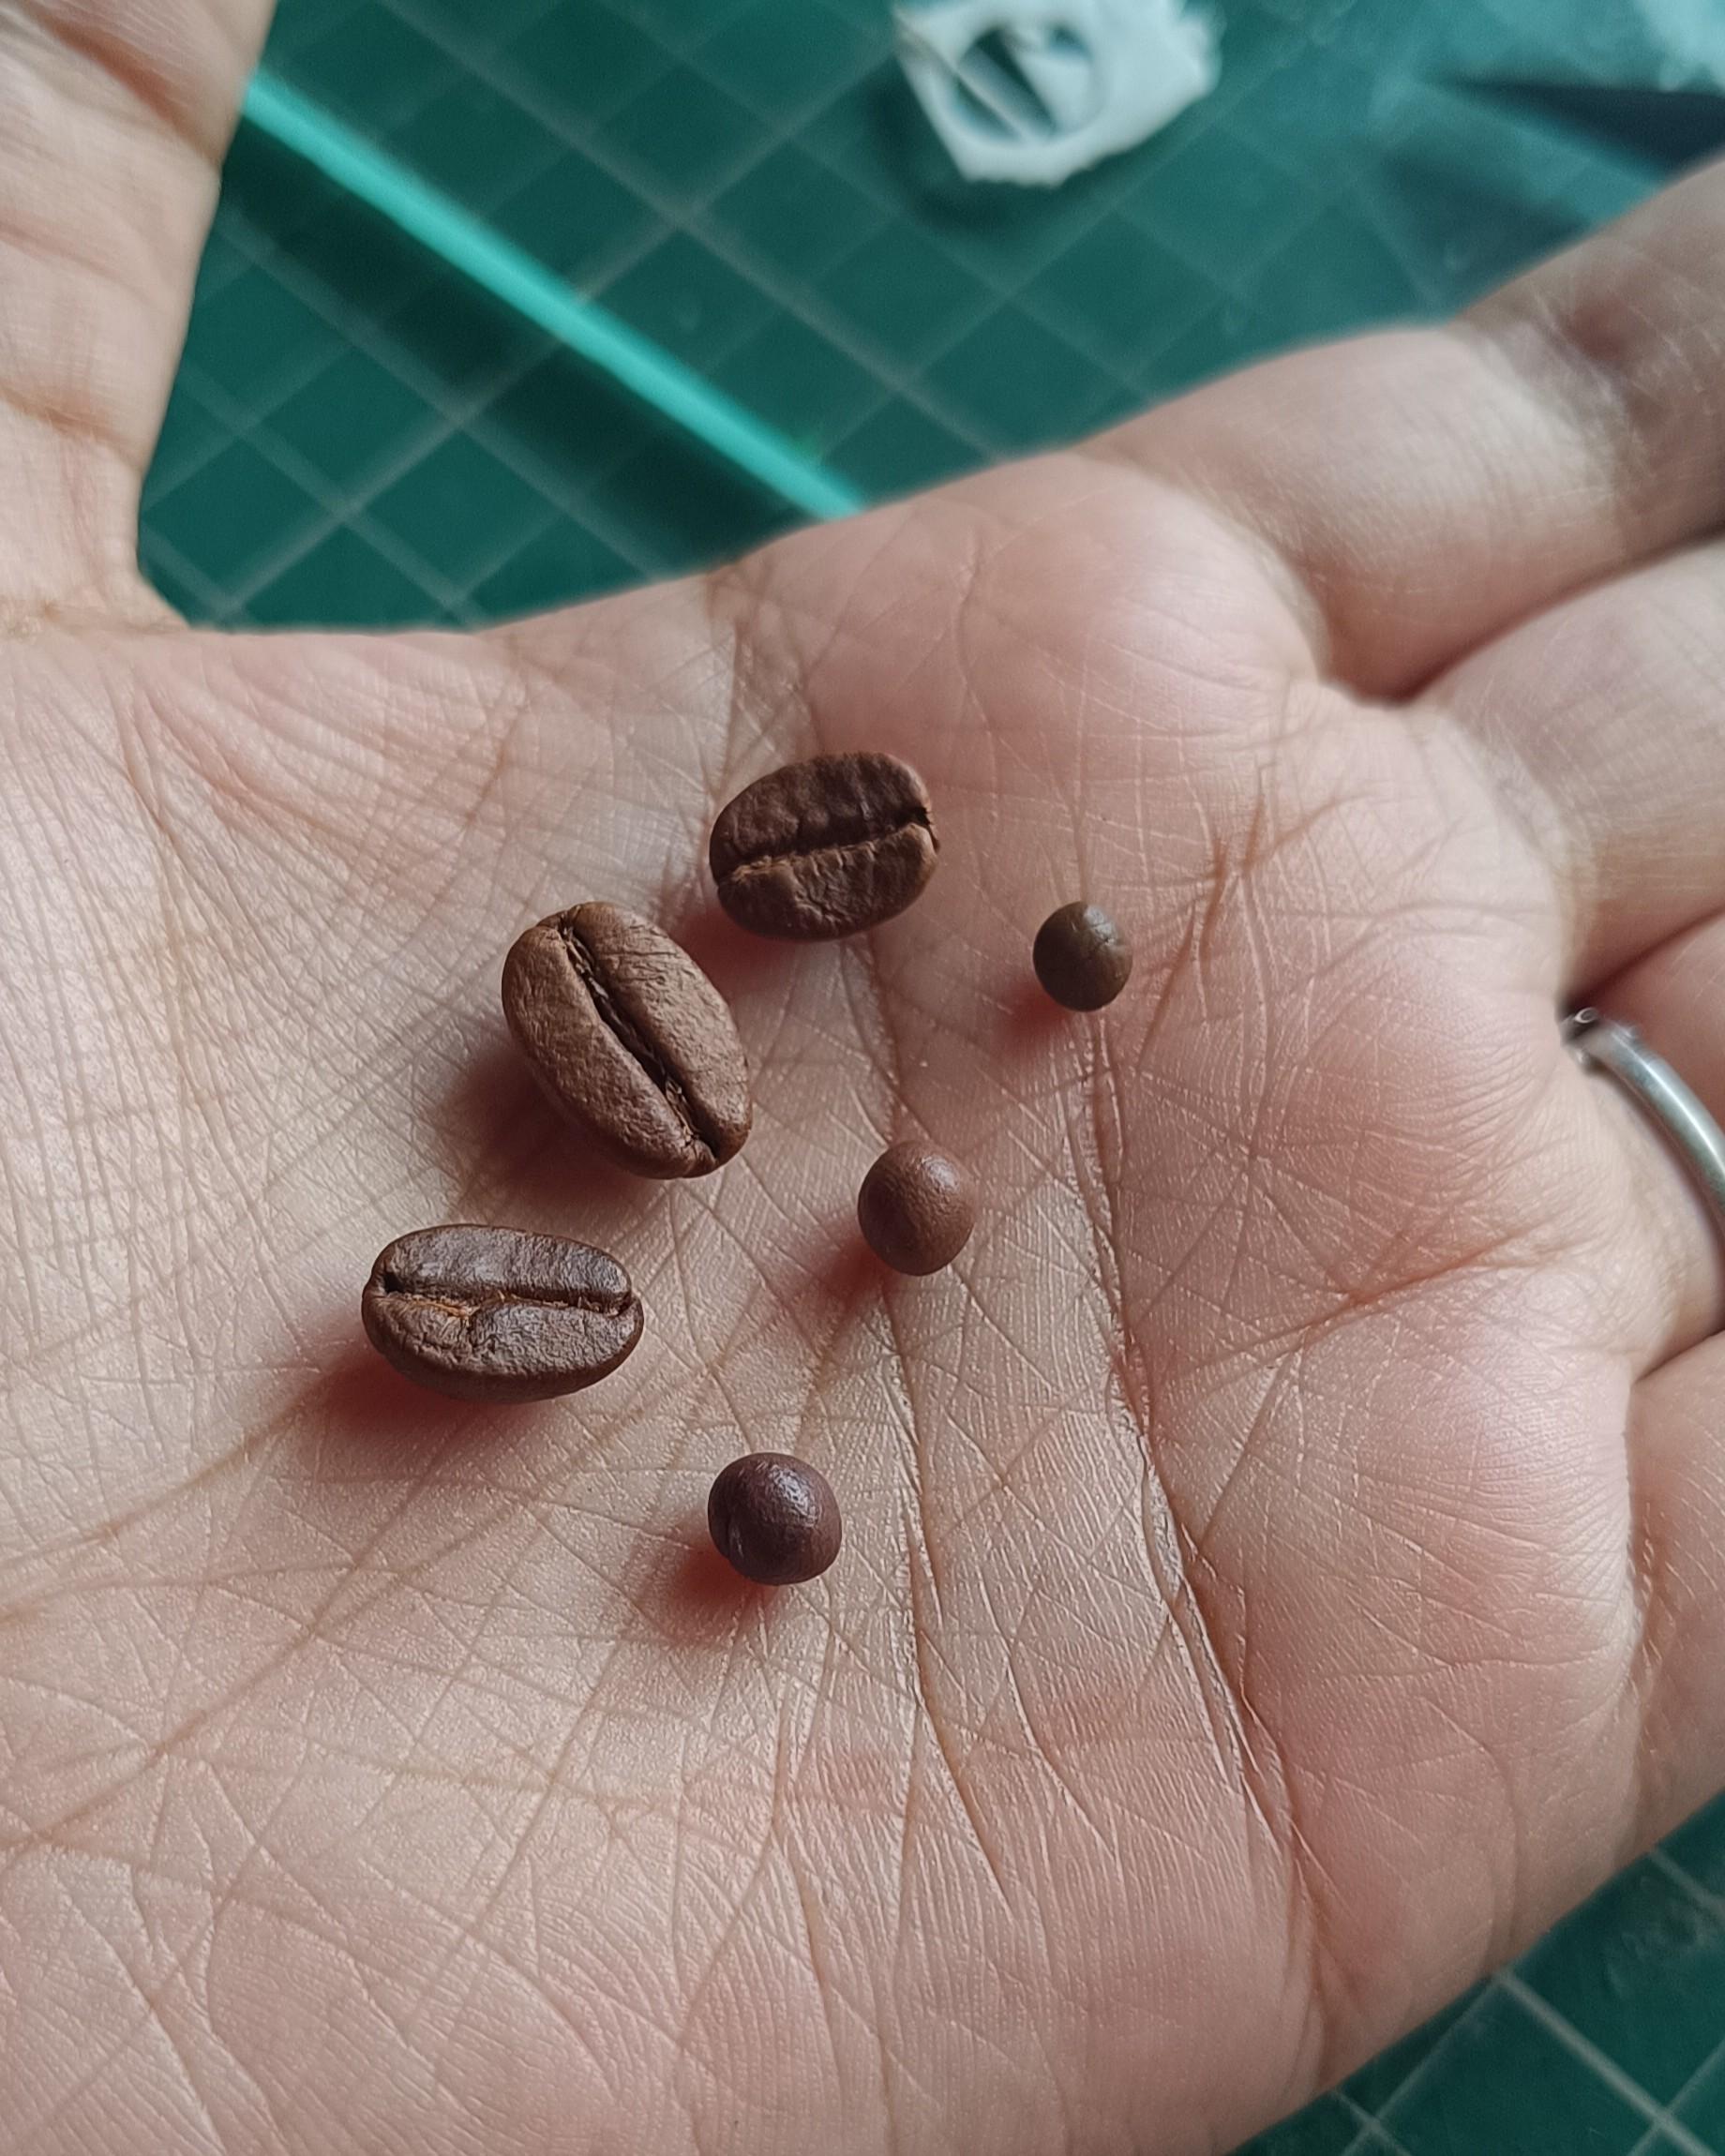


....The coffee and beans, of course! To finish the scene, I rolled out some quick little beans and filled my cup with coffee. Although I prefer milk in mine, we will be making a nice black espresso here.
What you will need for this step:
- Polymer clay in shades of brown: I used Fimo Caramel, Fimo Chocolate and Nara Brown.
- A needle tool and clay blade
- UV Resin
- Soft pastels
Steps:
- Mix a couple of shades of brown so that the beans have a variation. This looks much more realistic than all of them being in just one colour.
- Roll out a snake and cut tiny bits from it. Roll it into the bean shape on your palm.
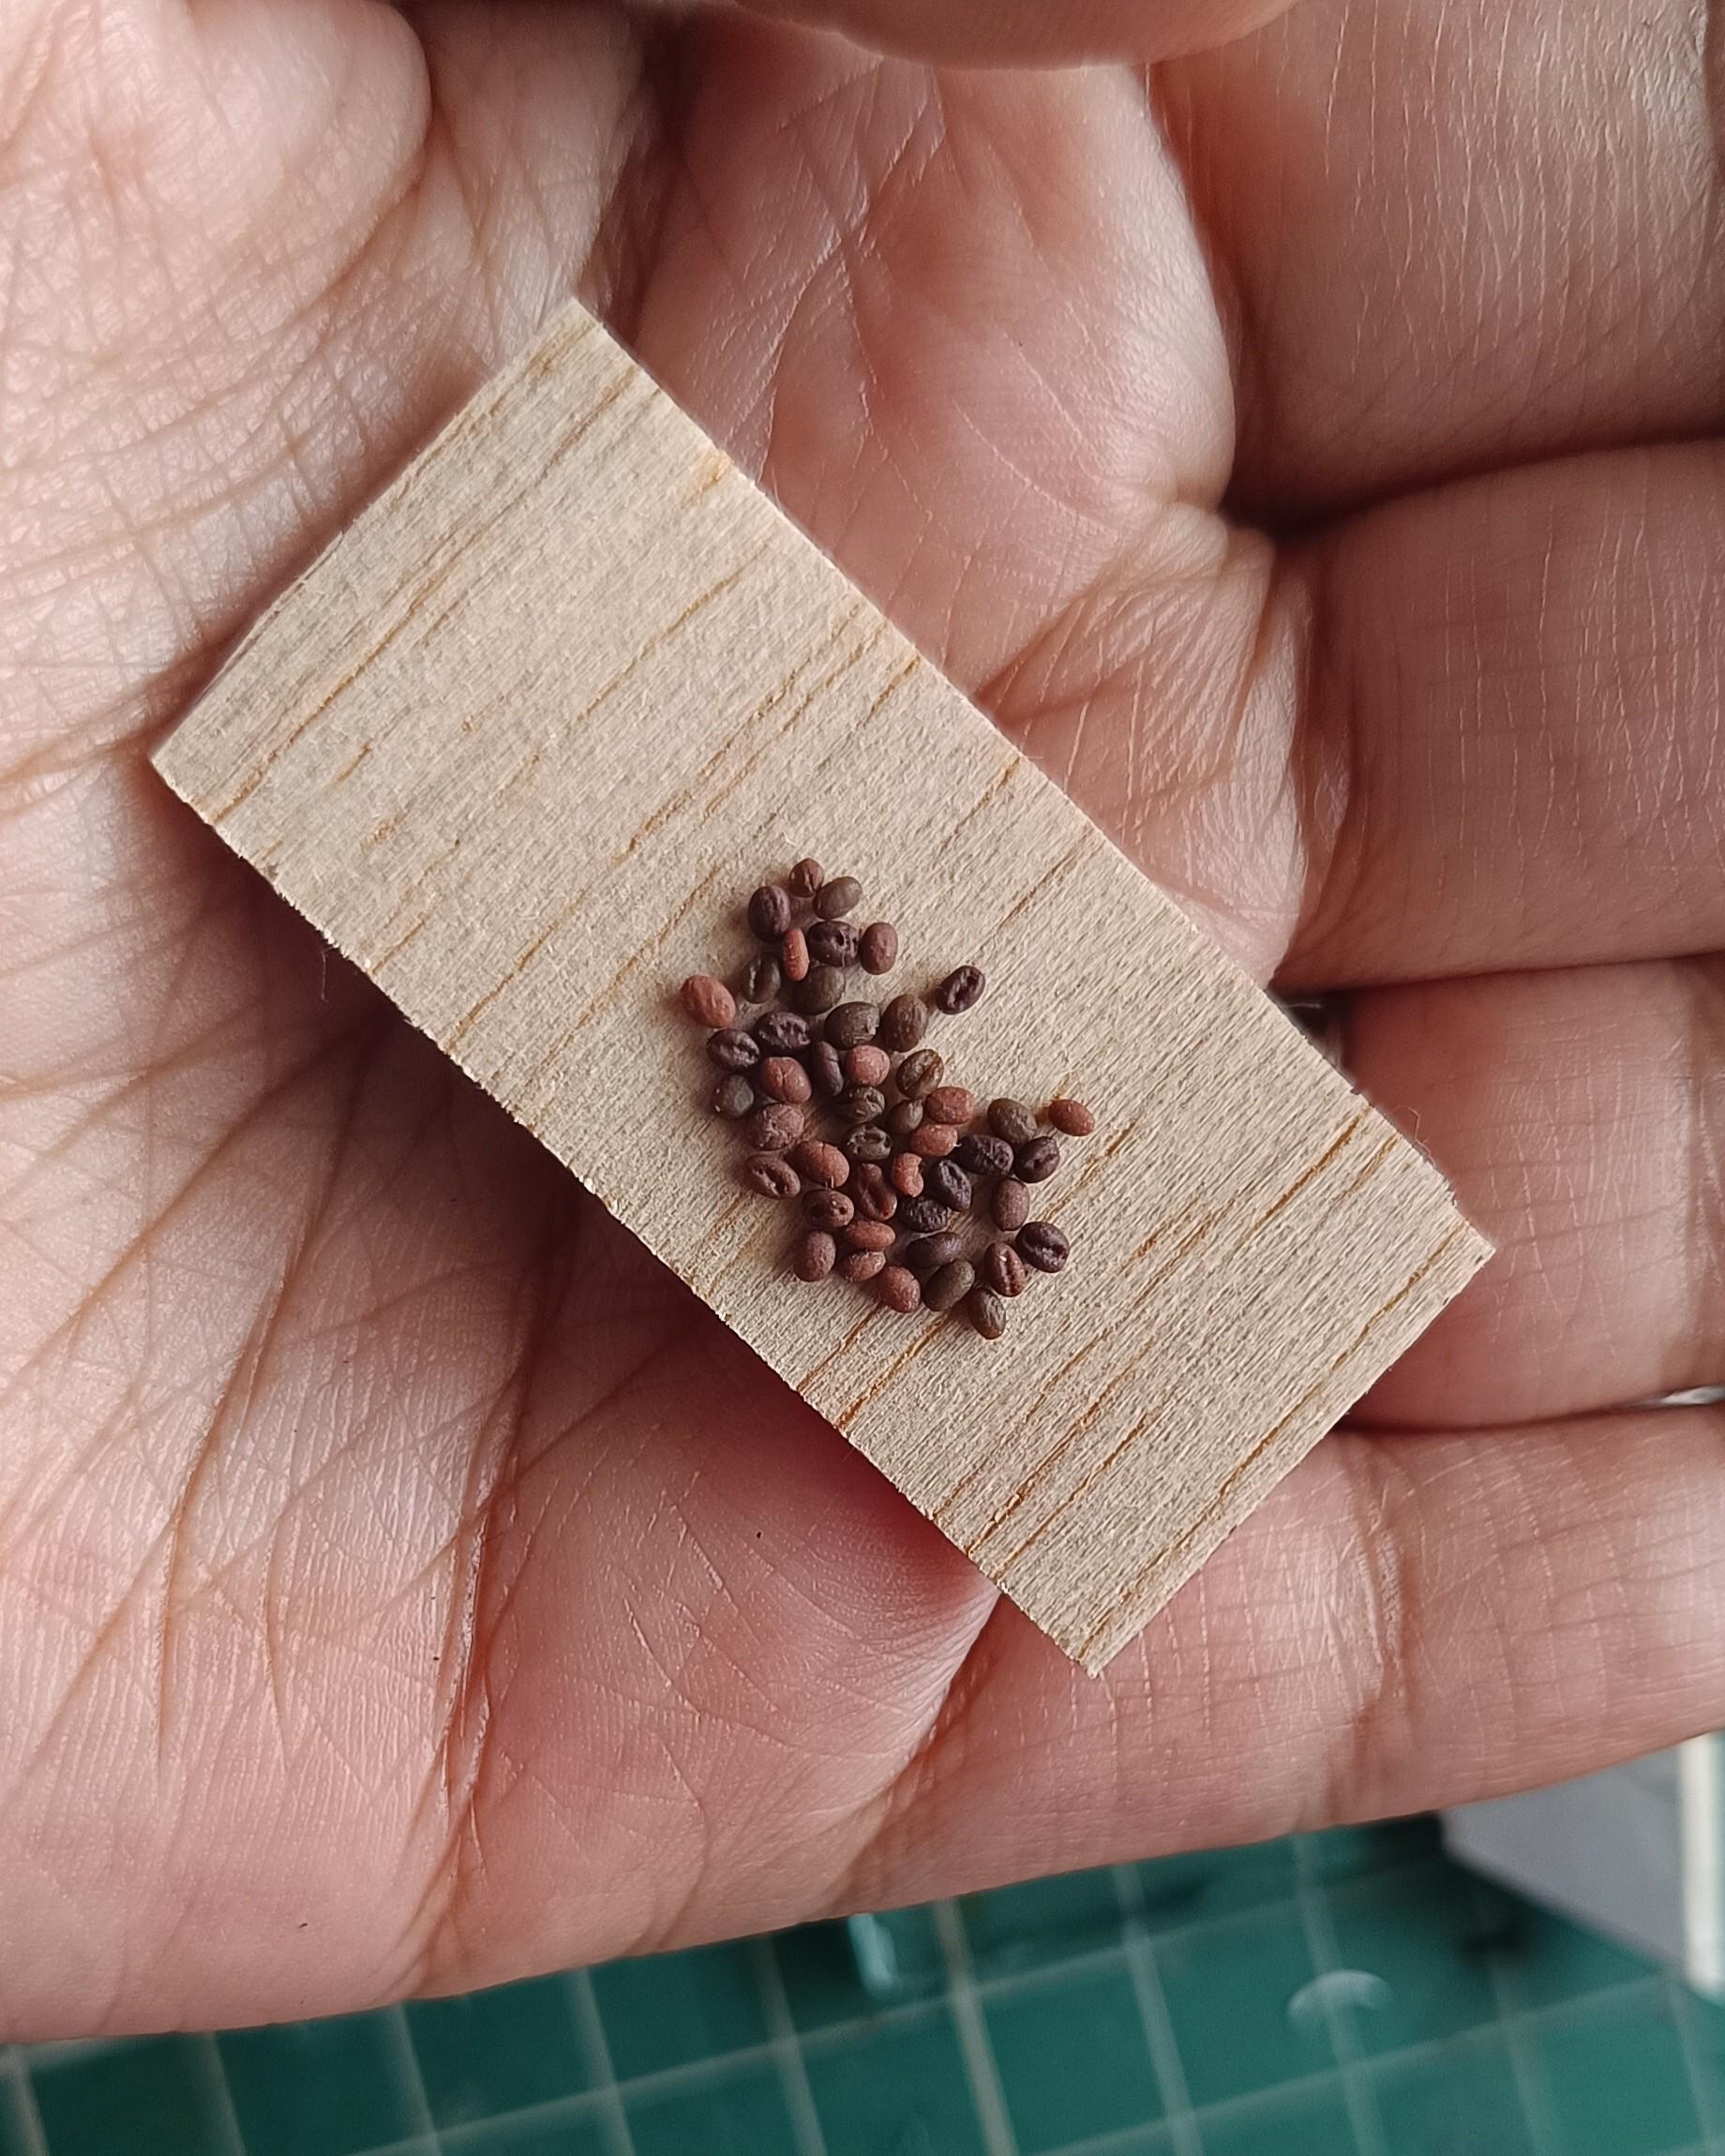
- Using the needle tool, make the split line in between. I found it more realistic to use little dots to make the line rather than a sharp incision with a blade. Make as many as you like or have patience for and bake!
- For the black coffee, just mix some dark brown pastel pigments with the UV resin. Put a drop in and cure in the sun or with a UV lamp.
Do you smell it...? The coffee? Or maybe the sweet smell of a successful project!
Time for a Cup of Coffee

Congratulations on having finished the project! Time to enjoy a well-deserved cup of real coffee to celebrate.
I am currently building a miniature coffee bar, and my moka pot will find its place of honour there. Would you like to see more tutorials for all the other bits I make for the scene? Let me know in the comments and follow along on my Instagram @meraki.ahona to see it come together. And I can't wait to see how your moka pots turn out! Drop in photos of your build or any question you might have here too, and I will get back to it as promptly as I can.
Until the next mini!
Cheers, Ahona ☕