Miniature Sustainable Housing
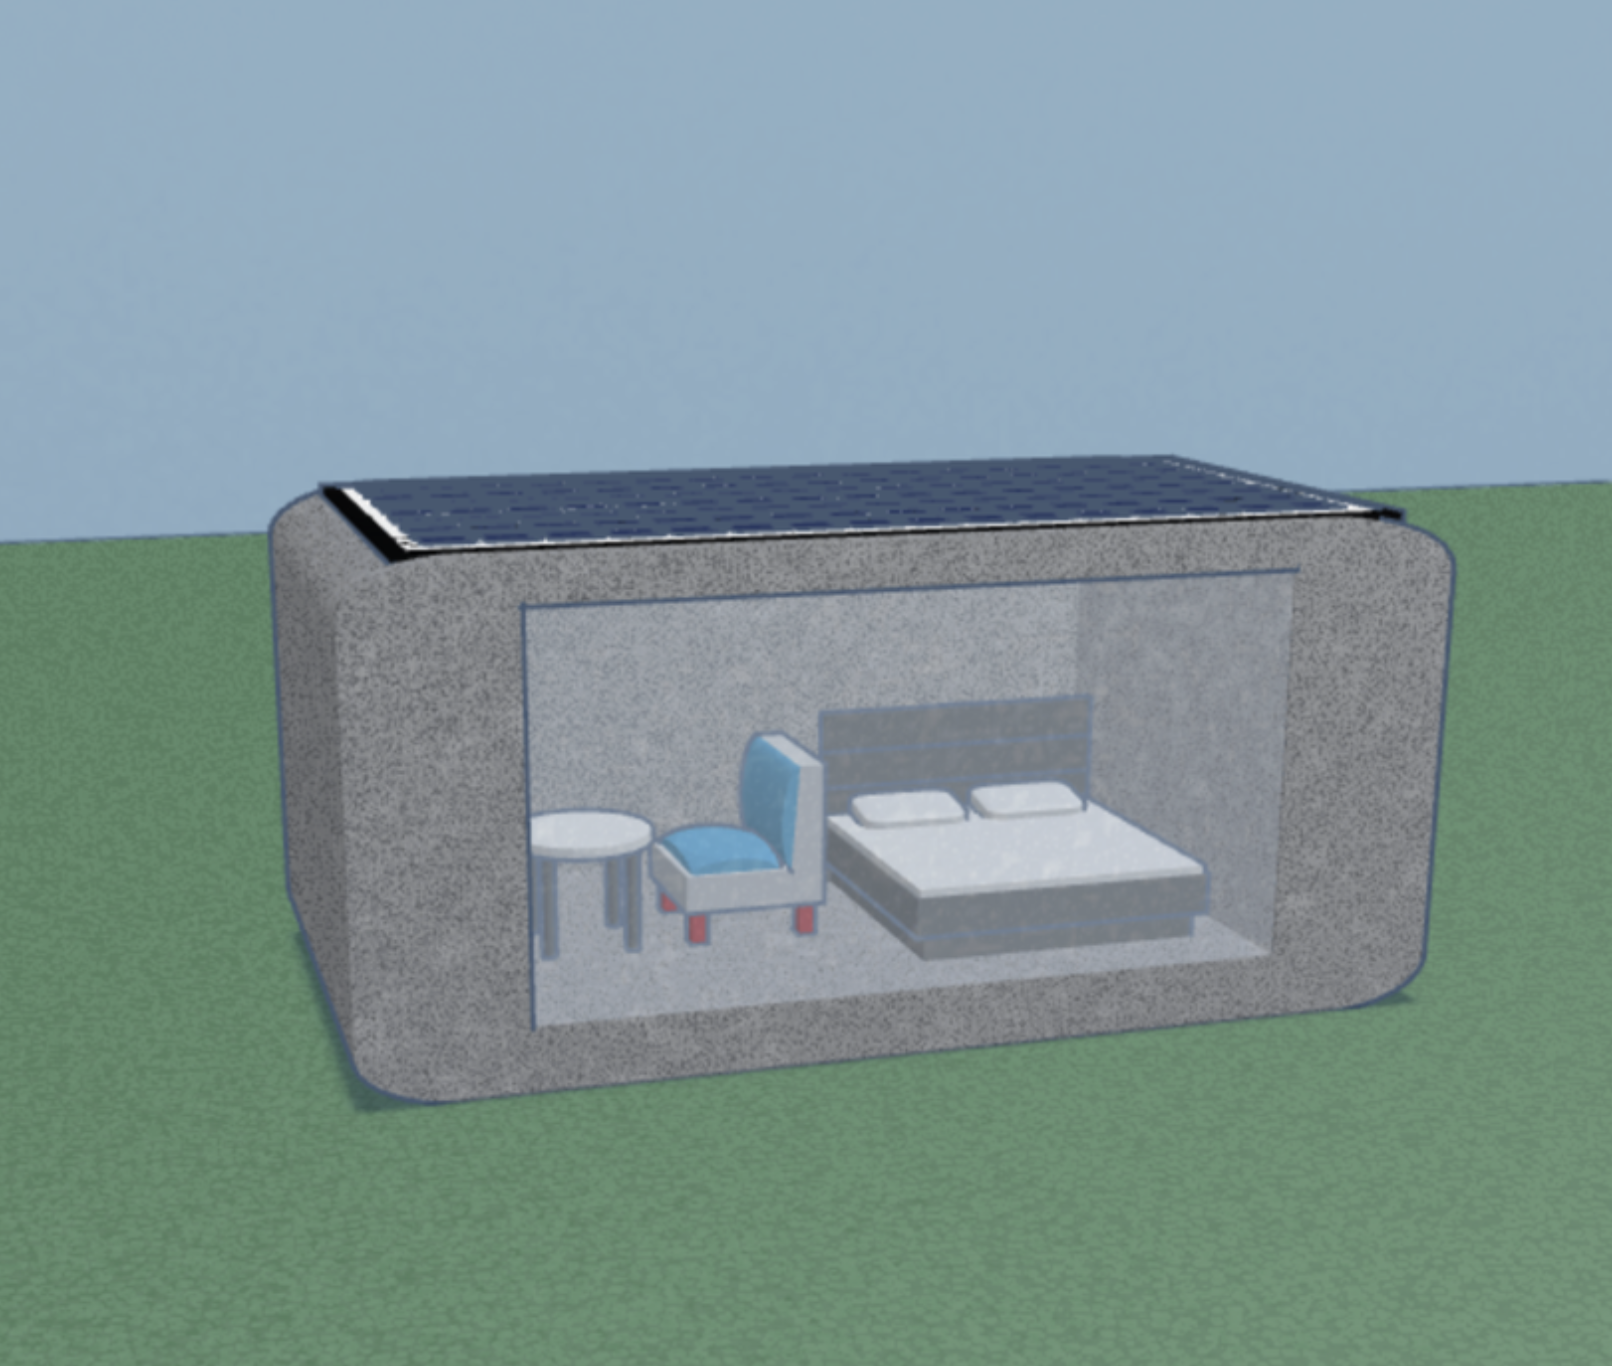
Designing an eco-friendly house in Tinkercad presents an exciting opportunity to explore how modern technology can help create more sustainable and energy-efficient living spaces. With the increasing focus on reducing our environmental impact, using innovative design tools like Tinkercad allows for a highly customizable approach to building homes that are both functional and eco-conscious. By employing 3D printing for the construction of the main structure, this approach significantly reduces waste typically associated with traditional building methods, offering a more sustainable solution. 3D printing enables precise control over material usage, reducing excess and ensuring that only what’s needed is used, thus minimizing the carbon footprint of the construction process.
In addition to the sustainable building techniques, the incorporation of solar panels on the roof is a key feature that enhances the house's energy efficiency. Solar panels not only contribute to reducing the reliance on non-renewable energy sources but also empower homeowners to generate clean, renewable energy, helping them achieve greater energy independence. This renewable energy solution plays a crucial role in lowering utility costs while also contributing to a reduction in overall environmental impact. By integrating these eco-friendly technologies, the house not only supports sustainable living but also provides a model for how modern design can be harmoniously aligned with environmental stewardship.
Using Tinkercad to digitally design this eco-friendly home provides a platform for experimentation and simulation, enabling designers to refine their ideas and optimize the structure for efficiency before physical construction begins. The ability to visualize and modify every aspect of the design—whether it's the 3D-printed structure, the placement of solar panels, or the materials used—ensures that the final product is both sustainable and functional. With a focus on reducing waste, optimizing energy use, and harnessing renewable resources, this approach to house design represents a forward-thinking solution for building homes that are not only visually appealing but also mindful of the planet’s future. By embracing sustainable design through tools like Tinkercad, we pave the way for a more eco-conscious approach to construction and living, demonstrating that technology and sustainability can come together to shape a greener, more energy-efficient future.
Supplies
Software:
Tinkercad
Tools:
Computer
Sketching
.png)
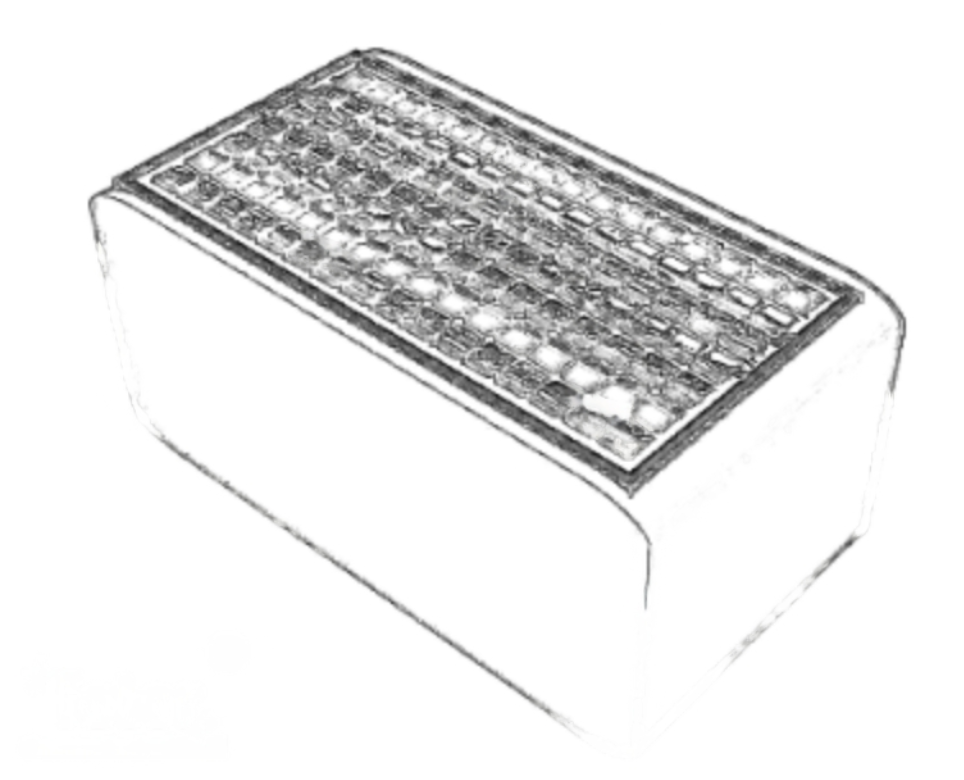
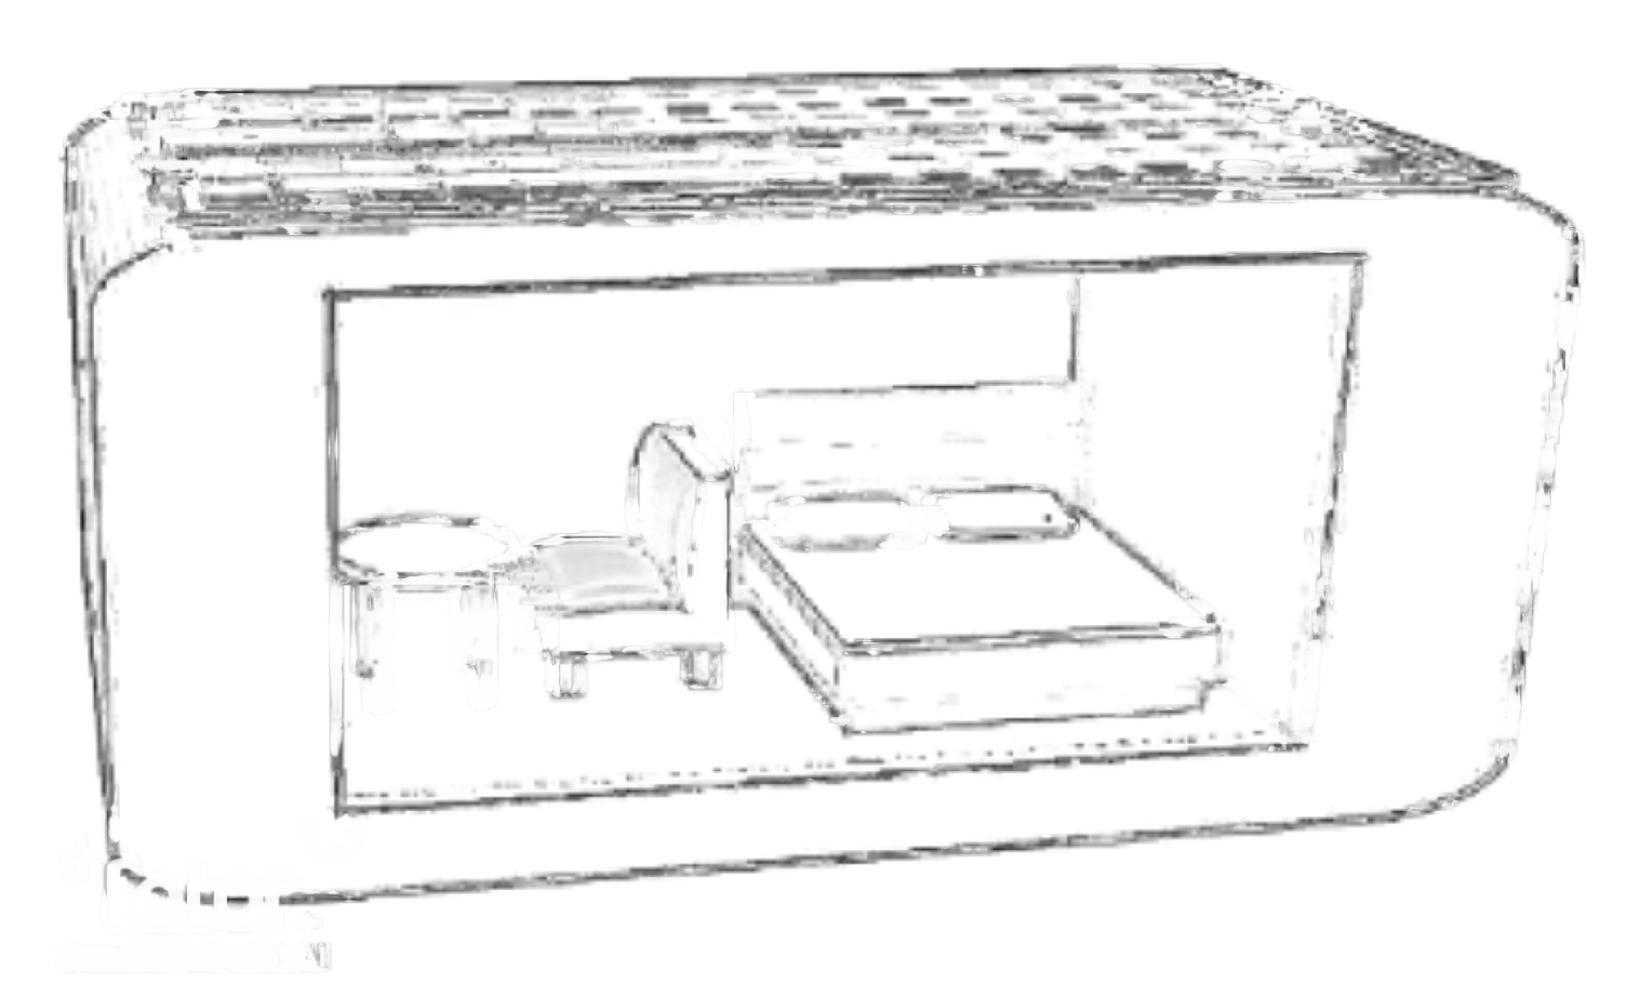
When designing and building a one-room house, sketching the layout is a crucial part of the process. Even though the design is simpler, careful planning is necessary to make the most of the available space and ensure the house is functional and comfortable. Here’s why sketching is so important for a one-room house:
Maximizes Use of Limited Space
In a one-room house, space is extremely limited, and using it efficiently is key. Sketching helps you organize different areas within the room, such as sleeping, cooking, dining, and working, to ensure everything fits and functions well. By sketching, you can decide where to place the bed, whether you want a kitchenette or bathroom, and how to allocate space for storage and furniture. It also helps in ensuring proper traffic flow so that moving around the space doesn't feel cramped.
Ensures Functionality
The goal of a one-room house is to make the space as functional as possible. Sketching helps visualize how to combine different functions in a single space, such as using furniture that serves multiple purposes—like a folding bed or a hidden desk. If you plan to separate areas for different uses, you can sketch out where to place partitions, curtains, or screens without overcrowding the space.
Visualizes Key Design Elements
Even though the space is small, design matters. Sketching allows you to visualize elements such as lighting, ventilation, and overall aesthetics. It helps determine where windows and doors should go to allow natural light and proper airflow, and ensures that artificial lighting is positioned to avoid dark corners. It also helps plan how to create a pleasant atmosphere with color schemes and materials that make the space feel open and inviting.
Defines the Placement of Utilities
In a one-room house, things like plumbing, electricity, and heating need to be carefully planned. Sketching helps you figure out how to fit a kitchenette and bathroom in the limited space, where the sink, stove, and fridge will go, and how to separate these areas from the rest of the room. The sketch will also show where electrical outlets and switches should be placed to ensure everything is functional and convenient.
Helps with Structural Considerations
Even in a one-room house, the building needs to be structurally sound. Sketching out the layout allows you to visualize load-bearing walls, where supports or beams are necessary, and how the roof will be structured. It also helps you plan for ceiling height and ensures that the roof design doesn’t make the space feel too cramped. If you're adding partitions or larger windows, the structure must support these changes, and sketching helps make sure the design is feasible.
Determines Storage Solutions
Storage can be a challenge in a small house, and sketching gives you the chance to plan for efficient storage solutions. You can sketch out built-in shelves, cabinets, or hidden compartments to make use of vertical space, or plan for multifunctional furniture like an ottoman that doubles as a storage unit. Planning for storage helps keep the room organized and free of clutter.
Helps with Budget and Materials Selection
Sketching the design allows you to estimate the materials needed for the build, whether for walls, flooring, or insulation. This helps you estimate costs and avoid buying too much or too little material. It also helps identify areas where you can save on costs without compromising the quality or comfort of the space, such as by choosing more affordable materials for certain parts of the house.
Communication
Once you have a sketch, it’s much easier to communicate your vision to builders, contractors, and others involved in the project. The sketch acts as a visual reference, making it clear what you want and helping avoid misunderstandings. It also makes it easier to collaborate with contractors or designers who can suggest modifications based on your sketch.
In conclusion, even for a one-room house, sketching the layout is an essential step in the design process. It helps you visualize the space, plan its functionality, optimize the use of space, and ensure the house is comfortable and efficient. Sketching allows for better communication with contractors, more effective use of resources, and ultimately a well-organized, practical living space.
Why Concrete 3D Printing?
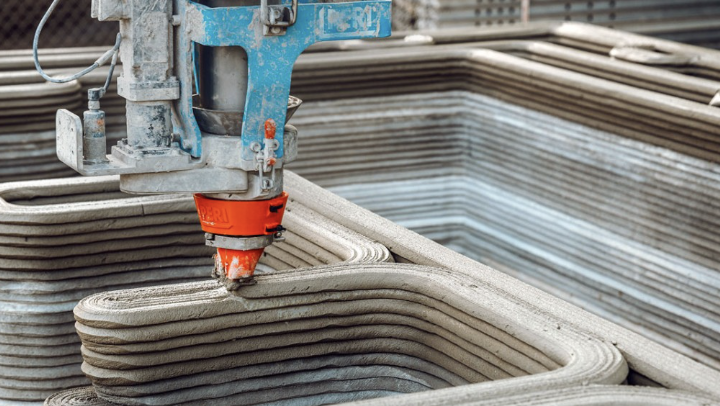
3D printing concrete is emerging as a sustainable alternative in the construction industry due to several key factors that make it more environmentally friendly compared to traditional building methods. Here’s how 3D printed concrete can be a more sustainable choice:
1. Material Efficiency and Reduced Waste
Traditional construction methods often involve cutting, shaping, and disposing of excess materials, which results in significant waste. With 3D printing concrete, the process is highly material-efficient because the concrete is extruded layer by layer directly according to the digital design, with minimal waste produced.
- Exact Material Placement: The 3D printer places concrete only where it is needed, reducing the need for extra material that might otherwise be trimmed off in conventional methods.
- Minimal Surplus: With traditional concrete pouring, there’s often a significant surplus that must be disposed of. In contrast, with 3D printing, waste is minimized since the printer follows precise paths and uses just enough material to complete the structure.
- Optimized Structures: 3D printing allows for the creation of complex geometries that are impossible or cost-prohibitive with traditional construction methods. These structures often use less material by incorporating advanced design techniques like hollow cores, reducing the amount of concrete required without sacrificing strength.
2. Use of Sustainable Materials
Concrete used in 3D printing can be made with eco-friendly or locally sourced materials, further reducing its environmental impact.
- Recycled Aggregates: Some 3D printers use recycled aggregates or waste materials such as crushed concrete, glass, or even industrial by-products like fly ash, which can replace a portion of the traditional materials (like sand or gravel) in concrete mix. This reduces the need for virgin resources and minimizes landfill waste.
- Low-Carbon Concrete: Researchers are working on developing more sustainable concrete mixes for 3D printing, including those that use lower carbon emissions. For example, some formulations incorporate geopolymers or alternative cementitious materials that have a significantly smaller carbon footprint compared to traditional concretes made around the world.
3. Energy Efficiency
While 3D printing concrete still requires energy, it can be a more energy-efficient process compared to conventional construction methods.
- Automated Process: The 3D printing process is highly automated and can operate with less energy than traditional construction techniques, where labor-intensive processes such as heavy machinery, scaffolding, and manual labor are required.
- Fewer Steps: Traditional construction involves several steps (e.g., preparing materials, transportation, pouring concrete, waiting for curing). With 3D printing, the construction process can be streamlined, and material transport is reduced. Additionally, because the material is placed directly into the desired shape, less energy is spent on tasks like formwork construction or cutting.
- Optimized Curing: 3D-printed concrete structures can often cure more quickly and efficiently because the material is placed with greater precision, minimizing the energy required to maintain specific temperature and moisture conditions.
4. Reduced Transportation Emissions
Transportation of building materials to construction sites is a major contributor to carbon emissions in traditional construction. 3D printing can help reduce the need for transporting heavy construction materials over long distances.
- Local Material Use: 3D printing concrete can be done on-site, using locally sourced materials. This reduces the need for transporting large quantities of materials to the site, which in turn lowers transportation emissions.
- On-Demand Production: Since 3D printers can mix and extrude concrete directly on-site, the need to transport pre-mixed concrete or other building materials is significantly reduced. This on-demand production eliminates packaging waste and the carbon footprint associated with transporting bulky materials.
5. Lower Carbon Footprint Through Customization
3D printing allows for the customization of building components in a way that reduces the environmental impact.
- Optimized Structural Design: 3D printing allows for highly optimized structural designs that are stronger with less material. Complex geometries can be printed that reduce the amount of concrete used, for example, by incorporating hollow sections or lighter, more efficient designs. These reductions in material use help lower the overall environmental impact of the building.
- Targeted Reinforcement: 3D printing allows for the incorporation of specific reinforcement where it’s needed most in the structure, reducing the need for unnecessary material and ensuring that each part of the building is as efficient as possible in terms of energy and material use.
6. Longevity and Durability
Buildings constructed using 3D printed concrete have the potential to be longer-lasting and more durable than those built with traditional methods.
- Stronger, More Resilient Structures: With precise printing, it's possible to create structures with more uniform material distribution, which can lead to increased durability and strength. This means that buildings made from 3D-printed concrete might require less maintenance over time, which reduces the overall resource consumption during their lifecycle.
- Weather Resistance: Certain mixes of 3D-printed concrete can be designed to be more resistant to extreme weather conditions, such as heat, moisture, or even seismic activity, resulting in a more resilient and sustainable building over its lifetime.
7. Reduced Labor and Resource Consumption
3D printing requires fewer manual laborers compared to traditional construction methods, which not only reduces labor costs but also the resources needed for construction.
- Less Human Labor: With much of the construction process automated, fewer workers are required for tasks like mixing concrete, pouring it into forms, or assembling the structure. This reduces the use of human resources, which can be a more efficient way to manage labor.
- Fewer Tools and Machinery: Traditional construction involves heavy machinery (cranes, cement mixers, etc.) that consume a lot of energy and resources. With 3D printing, the need for heavy machinery is reduced, leading to less energy use and fewer emissions associated with these machines.
8. Potential for Offsite and Modular Construction
3D printing enables the creation of modular building components offsite, which can then be transported and assembled on-site. This approach allows for more controlled, factory-based production of building parts, which can be more energy-efficient and precise.
- Pre-fabricated Units: Entire walls, floors, or other building components can be 3D printed in a factory-like setting. This allows for better quality control, less waste, and more energy-efficient production processes, which contrasts with the waste generated by traditional on-site construction.
- Speed: 3D printing offers faster construction timelines, meaning less time is spent on-site and fewer resources are consumed in the process.
9. Reduced Need for Landfill Waste
Construction waste is a major issue for the building industry, with large amounts of materials being discarded in landfills. 3D printing concrete helps reduce the volume of this waste.
- Waste Reduction: By printing only what is necessary and using materials that are recycled or locally sourced, much less waste is generated. Even materials like unused concrete can be recycled for future prints, eliminating the need to dispose of excess concrete.
Conclusion
3D printing concrete is a highly sustainable alternative to traditional construction methods for several reasons. It significantly reduces material waste, enables the use of eco-friendly or recycled materials, lowers energy consumption, and minimizes transportation emissions. Furthermore, the ability to create precise, optimized structures with reduced material use and the potential for modular construction makes it a highly efficient and eco-conscious option for the future of building. By improving both the efficiency of construction and the sustainability of the materials used, 3D printing in concrete presents a powerful tool for reducing the environmental footprint of the construction industry.
Building Proccess
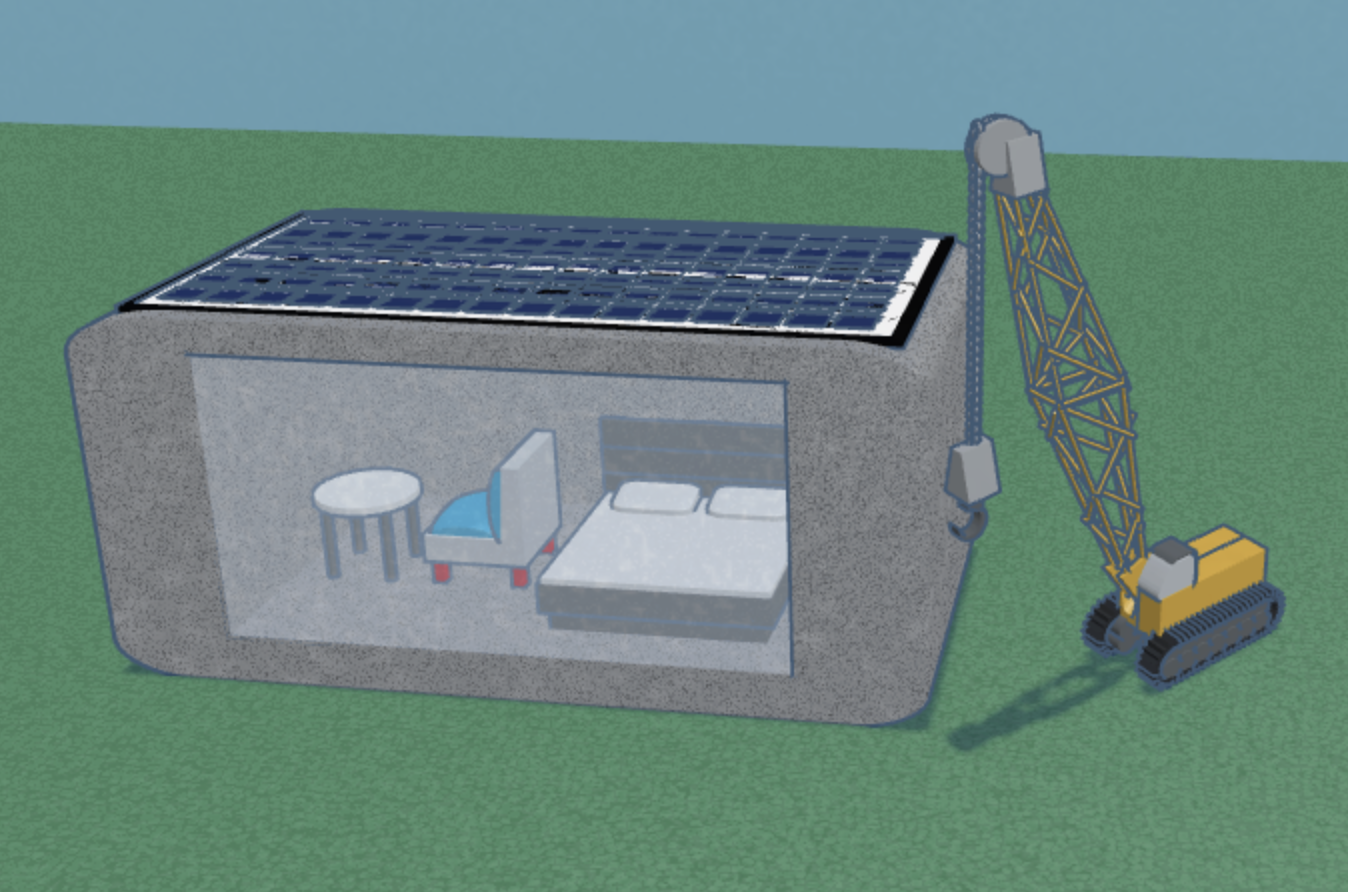
In a real-life building construction scenario involving 3D-printed concrete and solar panels, the process of integrating the solar panels with the structure involves two main phases: 3D printing the building and then installing the solar panels onto the roof. I’ll break down how to approach the 3D printing of the building structure, including the preparation for solar panel integration, followed by the installation of the solar panels on the completed 3D-printed structure.
Foundation and Preparation:
Before starting the 3D printing process, the site needs to be prepared. A solid, level foundation must be poured, whether it's a concrete slab or another suitable base, to support the 3D-printed concrete structure. This foundation ensures stability for both the walls and roof once printed.
Setting Up the 3D Printer:
A specialized 3D concrete printer is used to extrude layers of concrete to build up the walls, floor, and other structural components of the building. These printers work by laying down concrete in precise, controlled layers, following the architectural design.
The 3D printer uses a composite concrete mix, often including cement, sand, aggregates, and additives that allow for it to set quickly and bond well when printed. For sustainable construction, the mix can incorporate recycled materials or eco-friendly ingredients to minimize its environmental impact.
The printer typically moves on a track or gantry system, with a robotic arm that extrudes the concrete in the form of walls, columns, and other structural components. The concrete is deposited in layers, each layer bonding with the previous one.
Design for Solar Panel Mounting:
While printing the building, the design must accommodate the solar panel installation. This involves two important considerations:
Roof Design: The roof structure should be designed with sufficient load-bearing capacity to support the solar panels. It may include pre-designed attachment points or structural reinforcements where the mounting system for the solar panels can be fixed.
Solar Panel Integration: As the 3D printer creates the roof, there needs to be a plan for mounting the solar panels later. The roof can be printed with a slight incline (for optimal solar exposure), or flat, depending on the design requirements. If the roof is sloped, this slope will help improve solar energy capture.
Completing the Structure:
The printer continues to build the walls and roof, while ensuring there are spaces for windows, doors, and any other design elements. Special openings are left for the installation of a large window at the front and any potential wiring or connections for electrical systems, including the solar panels.
Solar Panel Installation on the Roof
Once the 3D-printed building is complete, the next task is installing the solar panels on the roof. Here’s how that process unfolds:
Roof Reinforcement for Solar Panels:
After the 3D printing is finished, the roof structure must be inspected to ensure it can support the weight and mounting system of the solar panels. If needed, additional reinforcement may be added to areas of the roof that will hold the panels. This could include adding brackets or mounting plates to provide extra support.
Transporting Solar Panels:
Solar panels are typically large, fragile, and heavy. They are delivered to the construction site via large trucks. The panels are carefully unloaded, often with the help of forklifts or other lifting machinery.
Crane and Heavy Machinery for Placement:
Given the size and weight of the panels, a crane is usually required to lift and position the solar panels onto the roof. The crane ensures the panels are lifted safely and lowered onto the prepared roof space.
Installing the Mounting System:
Before placing the panels on the roof, a mounting system needs to be installed. This system consists of metal rails, brackets, or frames that secure the solar panels in place.
These mounting systems are typically pre-fabricated and are designed to fit standard solar panel sizes, allowing for easy integration.
The rails or brackets are fixed to the roof structure using strong bolts, ensuring they are securely attached to the concrete roof. In some cases, the mounting system can be integrated into the 3D printing process if the design calls for it.
Wiring the Solar Panels:
Once the panels are mounted, the wiring can begin. Each panel has electrical connectors that need to be linked to the solar inverter, which converts the DC power generated by the panels into usable AC power for the building. The wiring will run through conduits to avoid damage from weather conditions.
- The solar inverter is typically located in a mechanical or utility room within the building, where it is connected to the grid or battery storage system.
- A battery storage system may also be installed to store excess energy generated by the panels, allowing for off-grid usage or use during times of high energy demand.
Electrical System Integration:
Once all solar panels are connected, and the inverter is installed, the system is tested to ensure that it is functioning correctly. Any issues are addressed, and safety protocols are confirmed, such as proper grounding and surge protection for the electrical system.
The 3D printing process should have already created an opening in the wall where the window will be inserted. Since only one opening is left for the window, it is crucial that the size and shape of the opening are accurate and properly prepared for window installation.
- Accurate Dimensions: The opening should be printed with precise dimensions to match the size of the window frame and the window itself. A small variation could result in gaps or difficulties when inserting the window.
- Smooth Edges: Ideally, the 3D printer should produce smooth edges around the opening, or any rough areas should be manually smoothed using tools like sanders or a grinder. This ensures that the window frame fits properly and provides a secure seal.
- Reinforcement: Depending on the size of the window, the concrete around the opening should be reinforced with rebar or other reinforcing materials, either during or after the 3D printing process, to ensure structural integrity. The area surrounding the window frame will bear weight, so it needs to be adequately supported.
2. Preparing the Window Frame
After the window opening is ready, the window frame must be prepared for insertion into the opening.
- Custom Fit: Measure the opening and compare it to the size of the frame. The frame should fit snugly within the 3D-printed opening. If the frame is slightly larger, you may need to adjust the opening by trimming the concrete. However, it's better to ensure the opening is accurately printed to minimize this.
- Pre-Attach Mounting Brackets: The window frame will likely have mounting brackets or holes that align with the fasteners. Attach any necessary brackets or hardware to the frame to ensure it can be securely fastened into place once it's positioned.
3. Inserting the Window Frame into the Opening
- Position the Frame: Carefully lift the window frame and align it with the opening. For larger windows, you will need heavy machinery or a crane to move and position the frame accurately.
- Check Alignment: Make sure the frame is level and centered within the opening. Use a spirit level or laser level to check alignment. The window must be properly aligned to ensure it functions well and avoids operational issues later (e.g., jamming or poor sealing).
- Secure the Frame: Once aligned, the frame should be secured to the 3D-printed concrete wall. This is typically done by drilling into the concrete and using anchors, screws, or masonry bolts. These fasteners hold the frame tightly to the wall, ensuring stability.
4. Installing the Window
After the frame is secured in place, the window itself can be installed.
- Place the Window: Since the front window is a sliding window that is also used as a door, you need to place a track into the opening before hand so that the window can slide open.
- Seal the Edges: Once the window is in place, apply weatherproof sealant around the edges where the window meets the frame and the concrete wall. This can be done using silicone caulk or polyurethane foam. Proper sealing is crucial for energy efficiency and preventing drafts or water leakage.
- Check the Fit: Ensure the window fits well in the frame and that there are no gaps around the edges. The window should be securely fastened within the frame to prevent any shifting or movement over time.
5. Final Adjustments and Sealing
- Additional Insulation: Depending on the climate, you may want to add additional insulation around the window to improve the building’s thermal performance. This can be done by applying foam insulation or weatherstripping around the edges.
- Trim and Finishing: Once the window is installed and sealed, you can apply trim or molding around the interior and exterior of the window to give it a finished look and to further seal the edges.
6. Testing the Window
- Check for Air and Water Leaks: Inspect the window for any gaps that could lead to drafts or water leakage. Ensure that the weather seal is intact and that no air or moisture is seeping through.
Conclusion
Integrating solar panels into a 3D-printed concrete building requires careful planning both in the design and execution stages. The 3D printing process builds the structure, including the roof that will support the panels, while leaving the necessary openings for windows and electrical components. Once the building is finished, a crane, is used to lift the solar panels onto the roof. A mounting system is then installed to secure the panels, followed by wiring them into the building’s electrical system, ensuring everything is functioning efficiently. Finally, the window is placed into place for the final touch.
In this process, the combination of 3D-printed concrete for structural integrity and solar panels for energy efficiency creates a highly sustainable building, utilizing modern technology to minimize environmental impact.
Designing the Main Structure
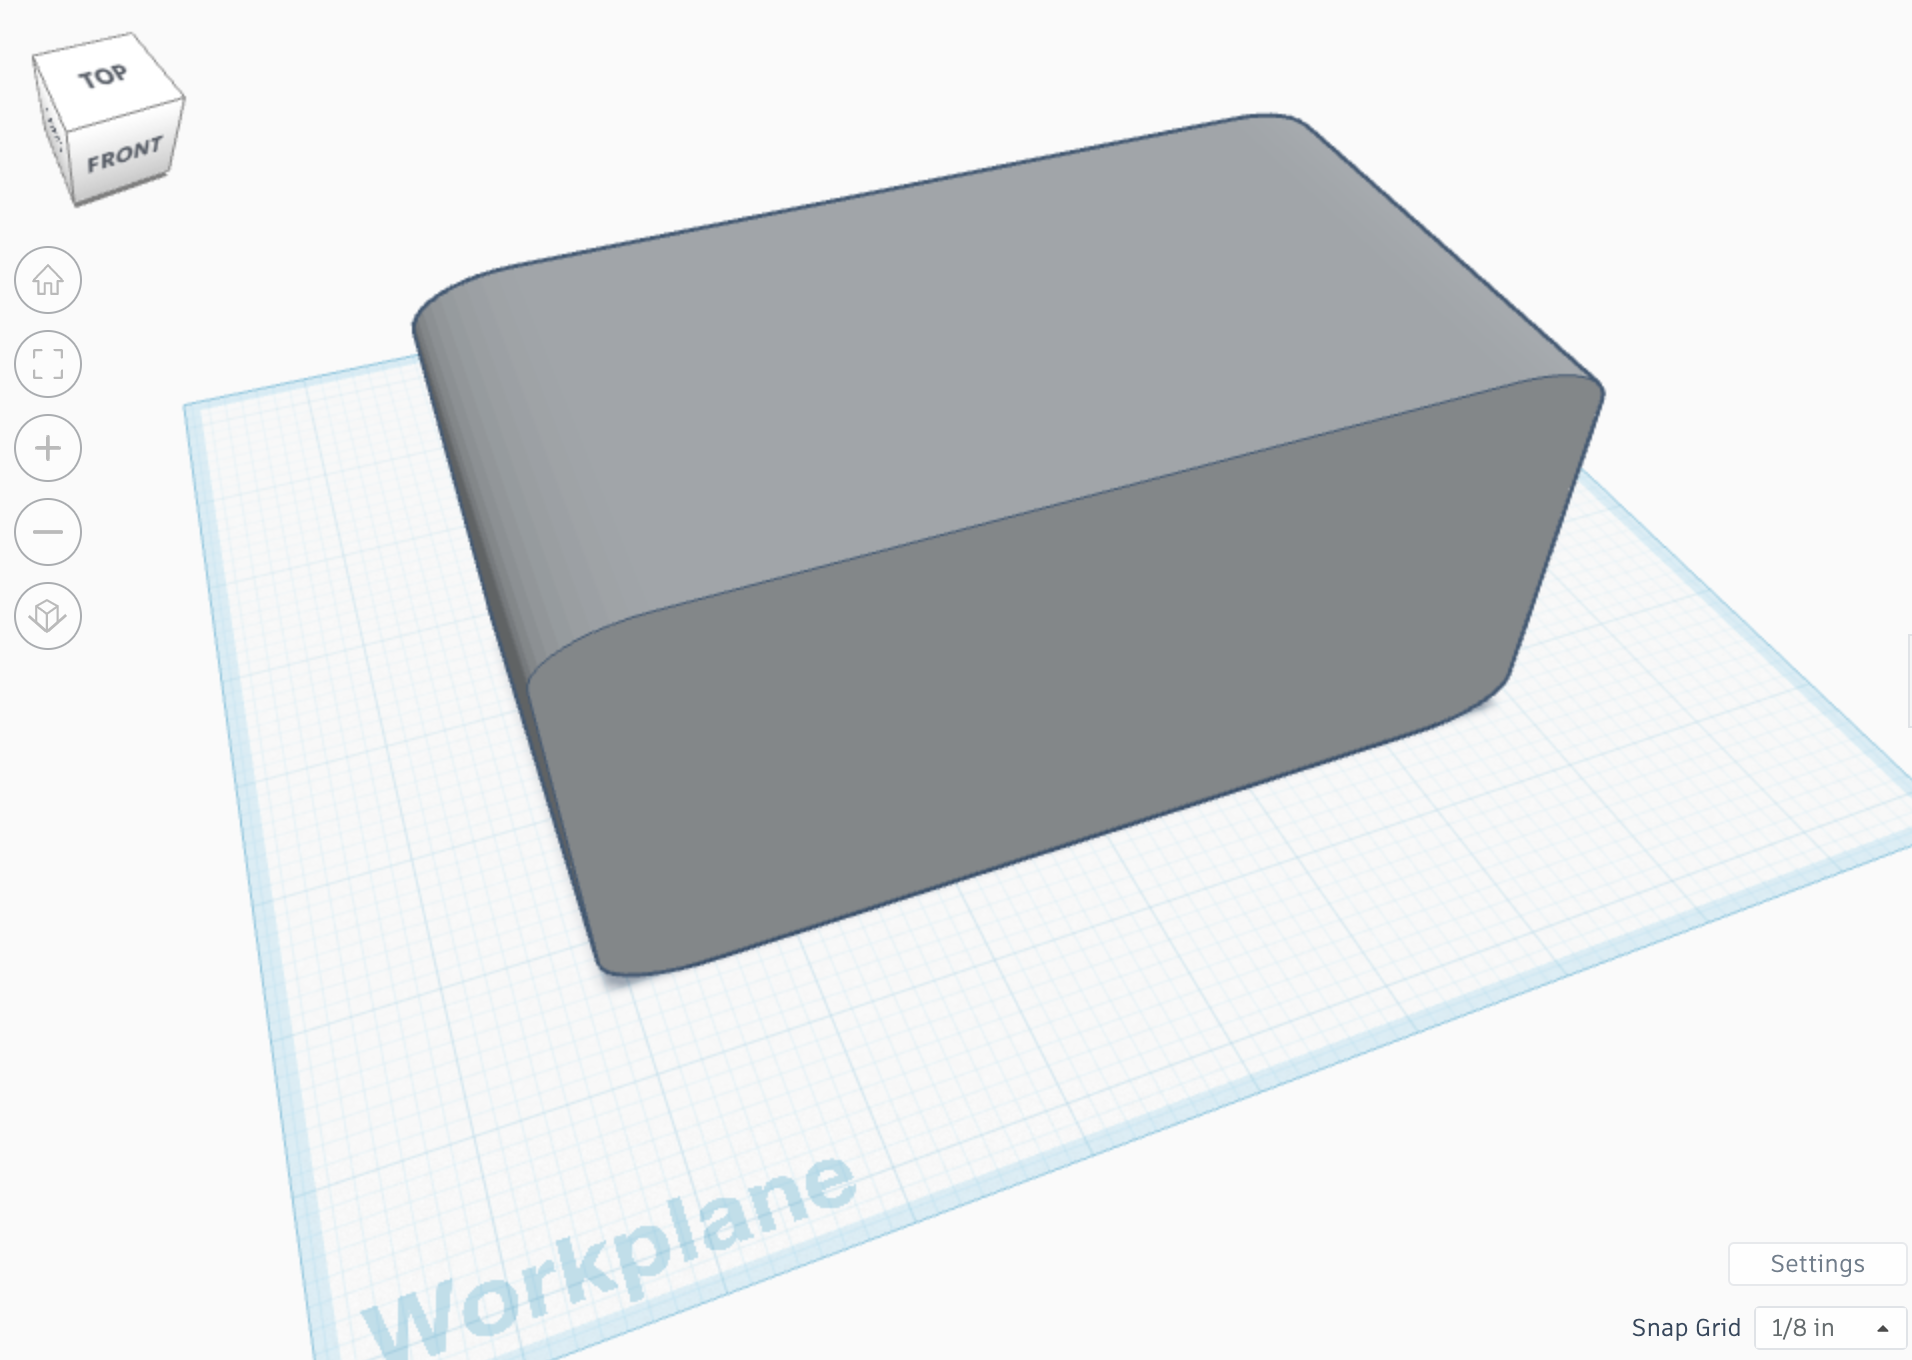
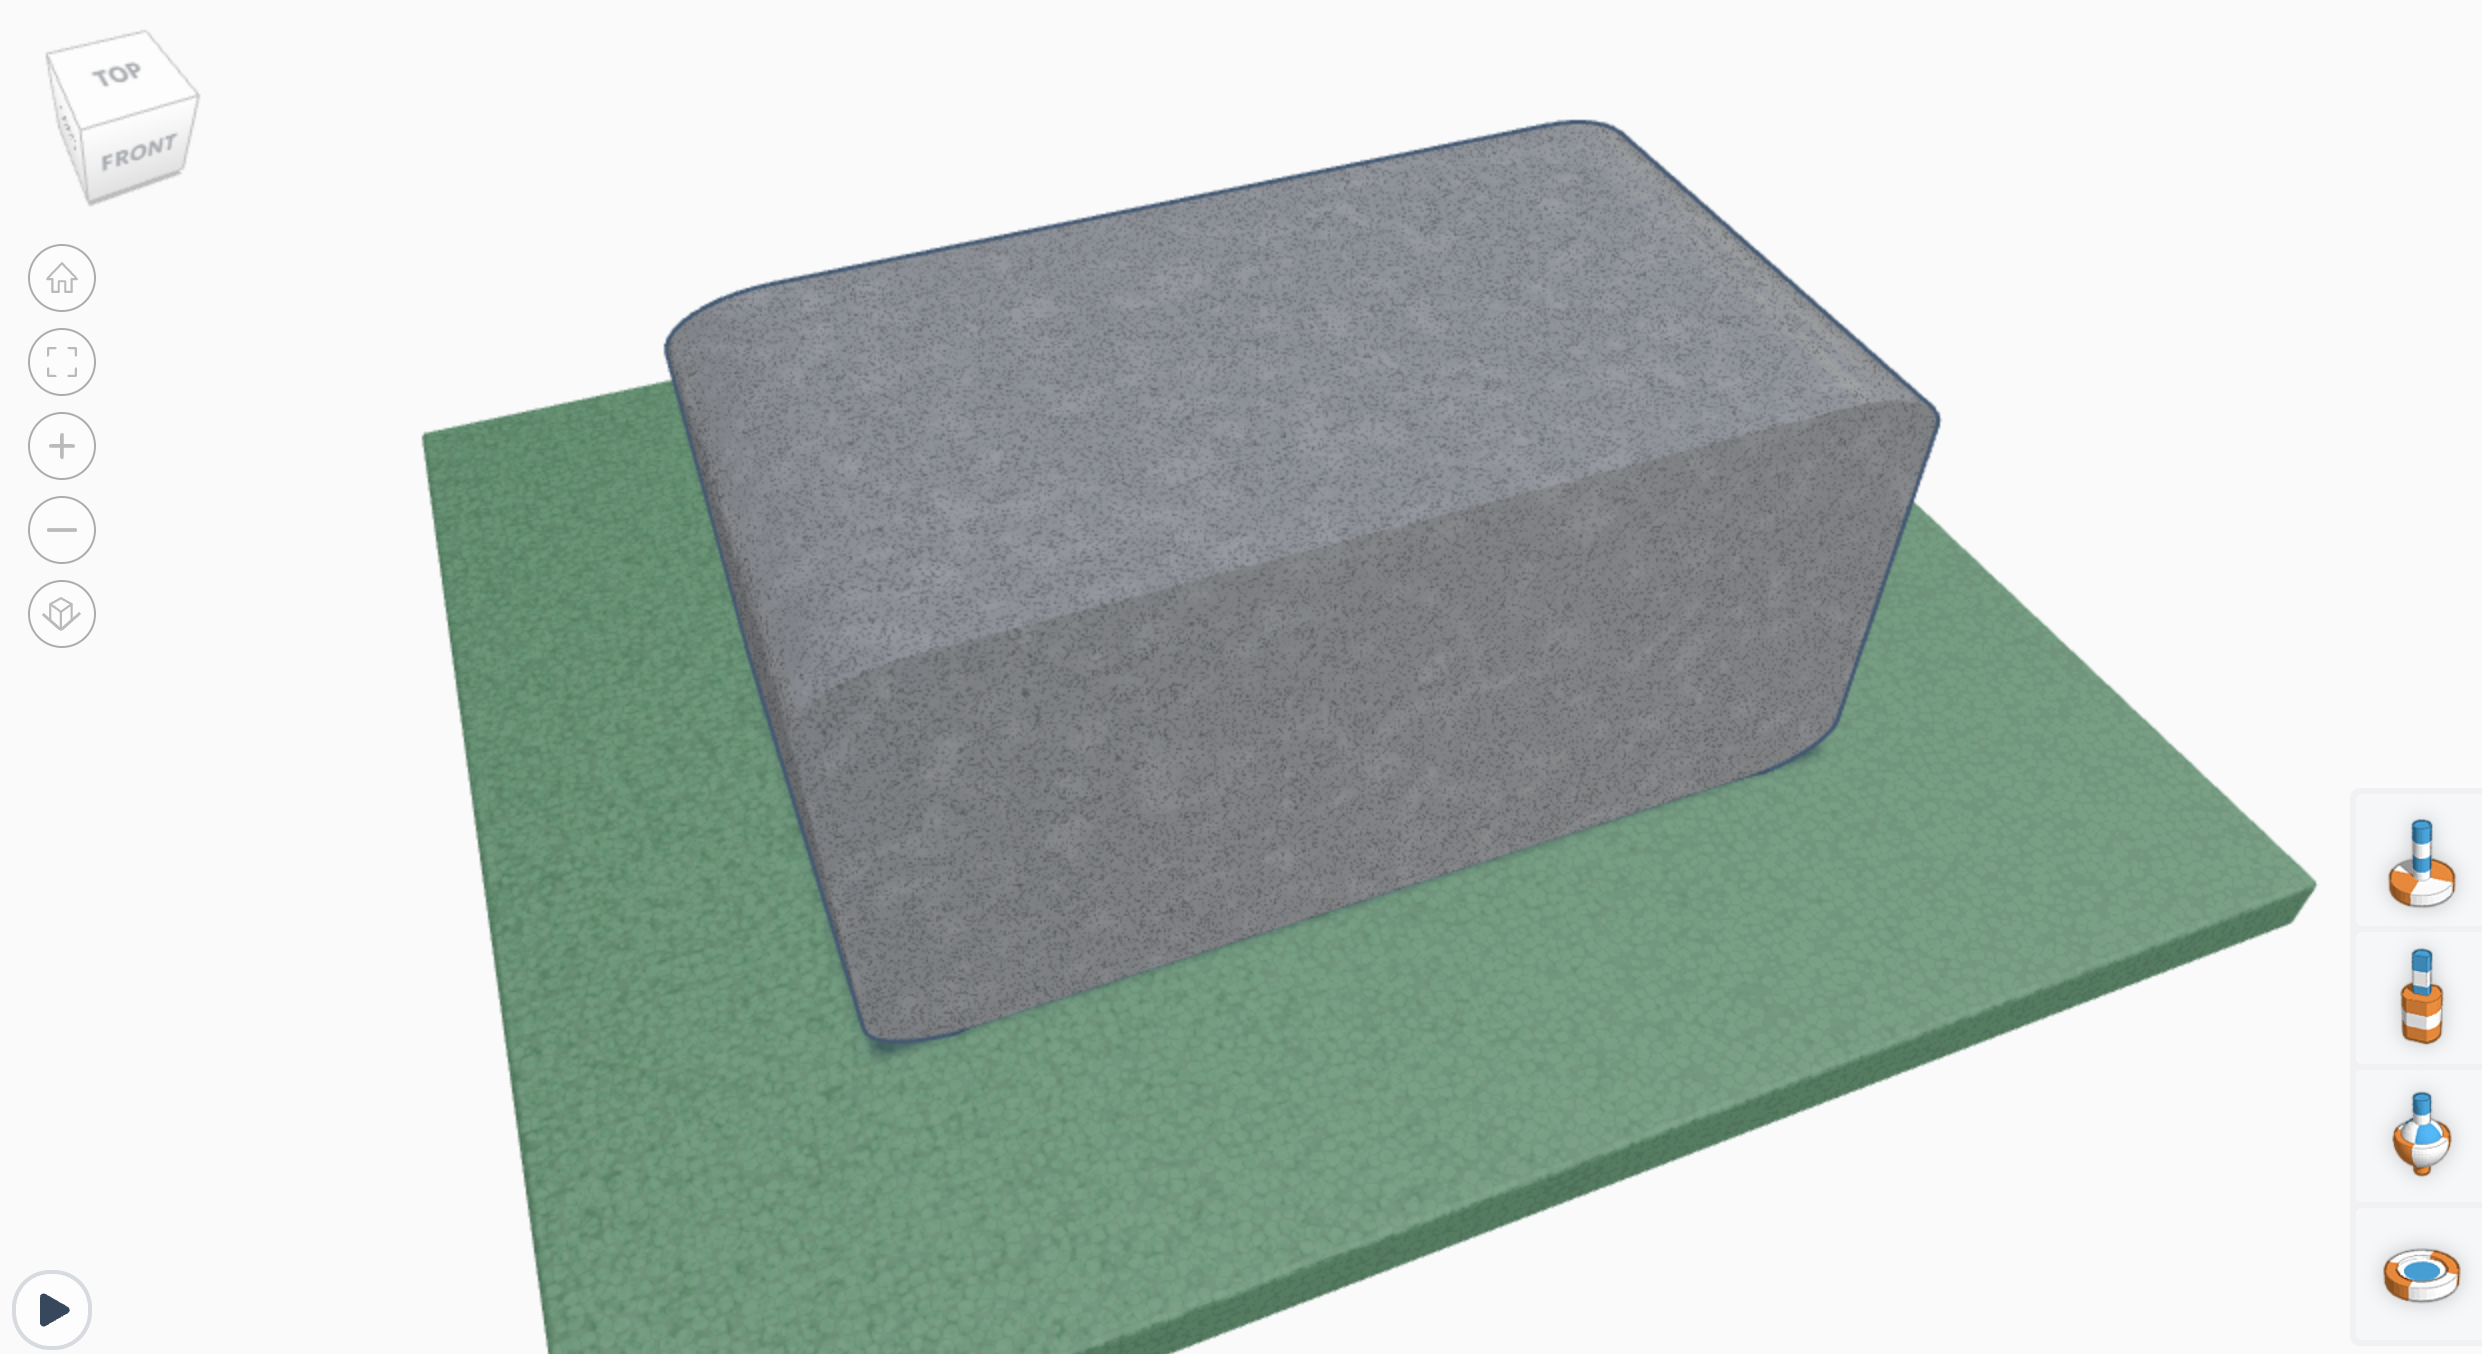
In Tinkercad, when you're designing a 3D model, especially for a shape like a beveled rectangle, flattening surfaces, and applying realistic materials via SimLab, each step helps bring a model closer to looking like a real-world object.
The bevel tool in Tinkercad is a simple yet effective way to add smooth, angled edges to your shape. By beveling the corners of a rectangle, you give the object a more refined, less rigid appearance. The bevel process softens the sharp angles, which can make the model look more polished and ergonomic, especially when you're working with geometric designs. Applying bevels can also help with functionality by preventing sharp edges that could be problematic in a physical model.
Next, flattening the front and back sides of the rectangle helps make the design feel more purposeful. With the front and back faces flat, you ensure the surfaces are uniform and even, which is crucial for both aesthetic appeal and structural integrity. In designs where symmetry matters, like a minimalist one-room house or other compact forms, this flatness can bring balance and simplicity to the look.
Once the shape is refined, you can move on to enhancing its realism through SimLab. Inside Tinkercad, SimLab allows you to apply materials to your model directly. You can choose materials like wood, stone, metal, or plastic, each of which provides a different texture and appearance. The real benefit of using SimLab is that it allows you to simulate how these materials would behave in the real world. For example, applying a wood material to your model can give it the texture and look of natural wood, while a stone material might offer a more rugged, earthy appearance.
After choosing a material, SimLab in Tinkercad gives you the ability to visualize how light interacts with the material, making it look more lifelike. This is particularly helpful when trying to simulate how a real-world object would look in various environments. The materials you select can be tailored to the context of your design, whether it’s the smooth surface of a metallic finish or the ruggedness of a stone structure. By applying these materials thoughtfully, you can elevate the overall look and realism of your model.
In summary, by using the bevel tool, flattening the surfaces, and then applying materials with SimLab, you can transform a basic geometric shape into a realistic, well-designed 3D model. This approach ensures that your design is both visually appealing and true to how it would appear in a real-world scenario.
The Window
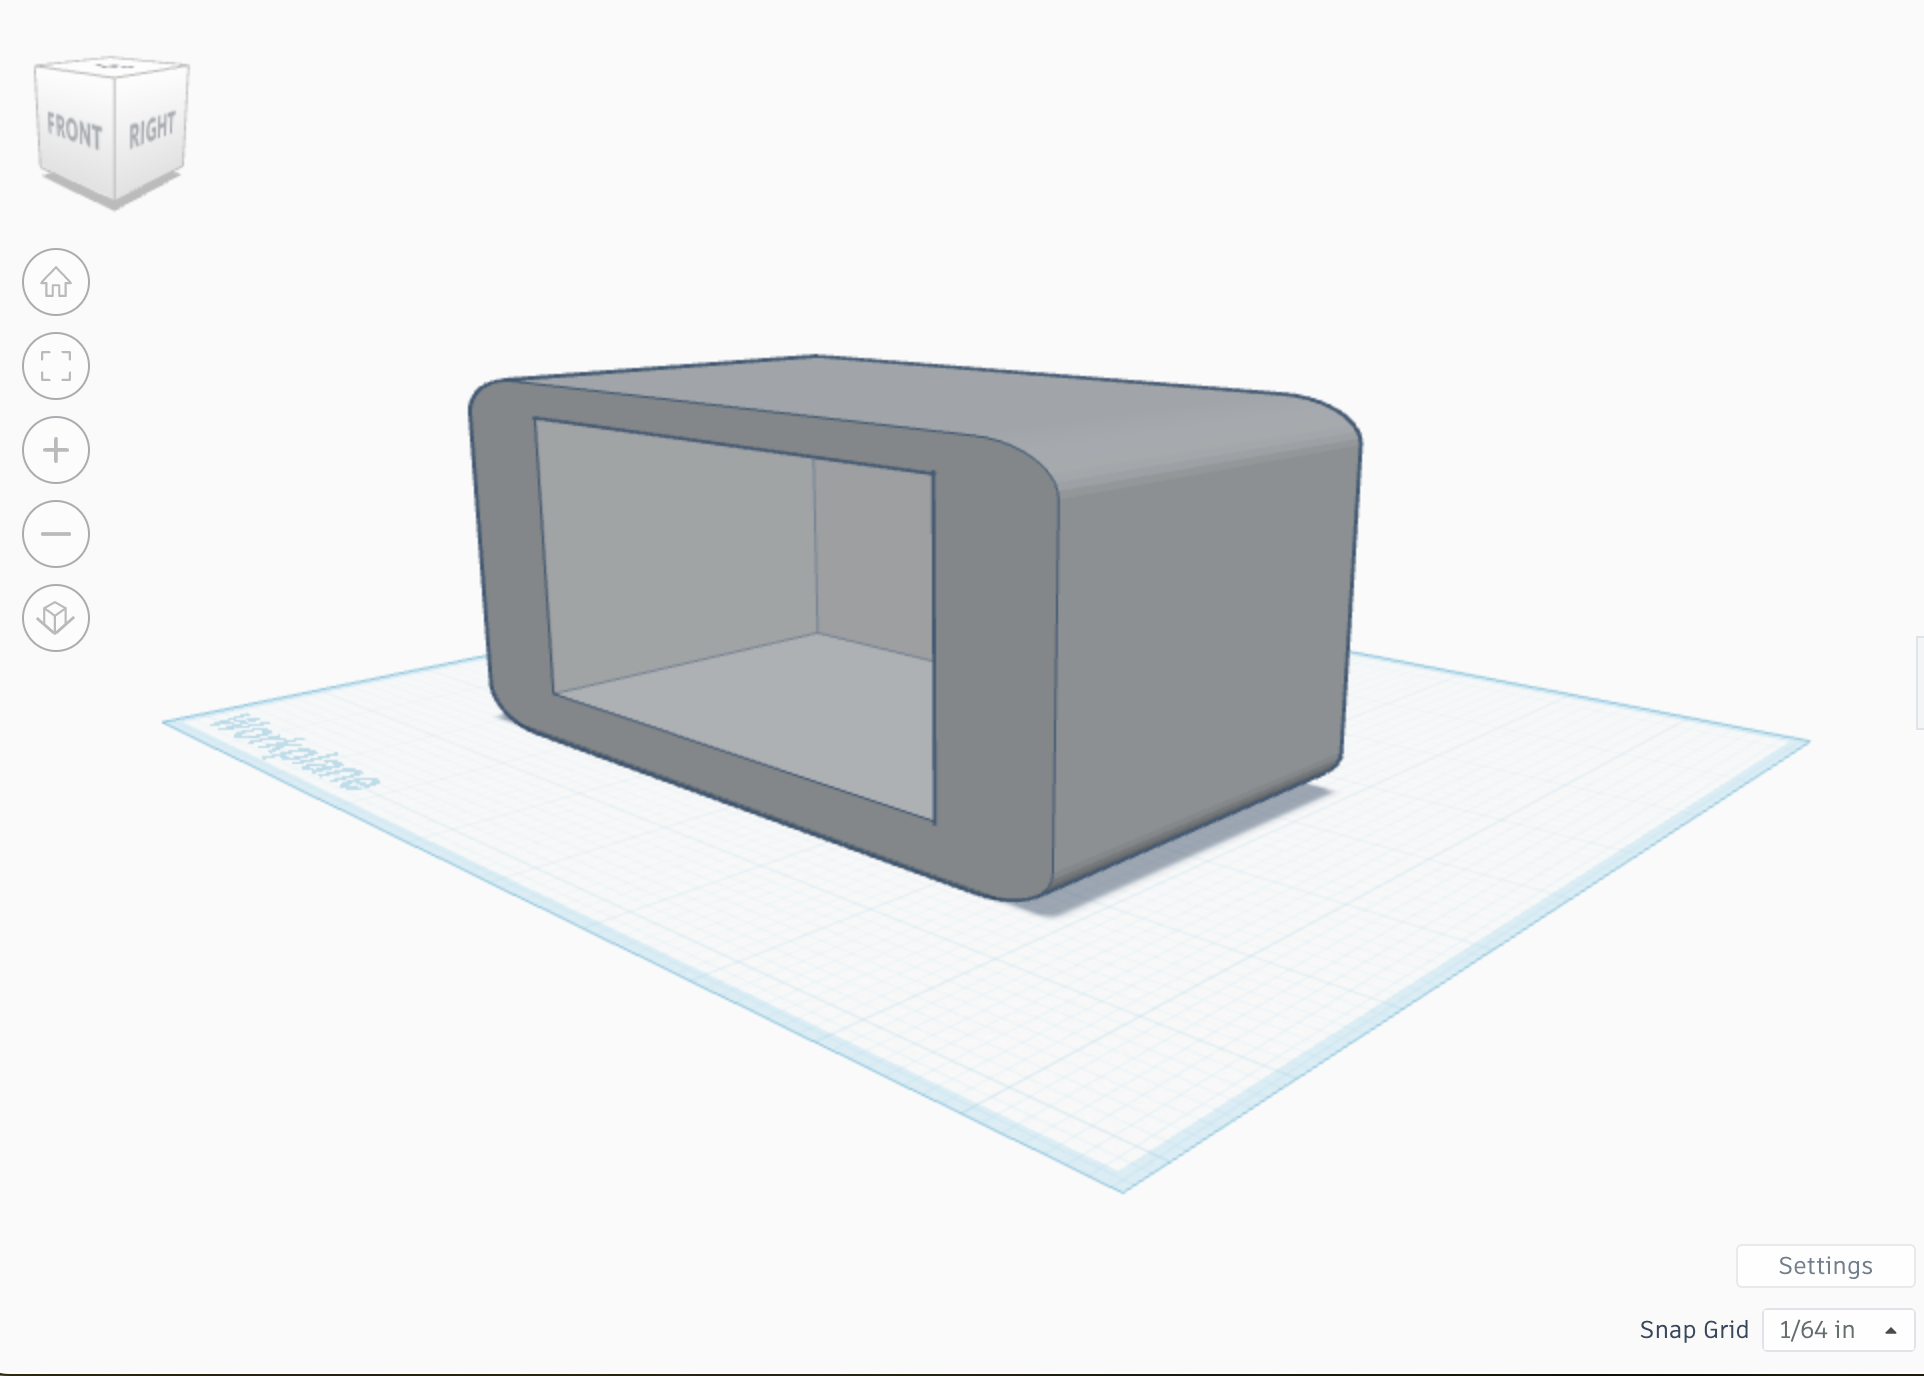

To hollow out a 3D model and add a transparent window in Tinkercad, you can use a combination of the hole feature and transparency tools. After creating the basic shape for your model, a smaller shape is used to subtract from the interior, effectively hollowing out the space. The window itself is created with a transparent shape, making it appear like glass. Once that’s done, SimLab can be used to enhance the materials of the model, giving it realistic textures like stone for the walls and glass for the window. By applying a glass material to the window in SimLab, the transparency of the window becomes more lifelike, allowing light to pass through. SimLab also enables you to refine the exterior materials of the structure, like making it look like real wood, stone, or metal, further enhancing the realism of your design. This process lets you create a model with a hollow interior and transparent glass-like windows, all while using SimLab to make the materials look as realistic as possible.
The Interior
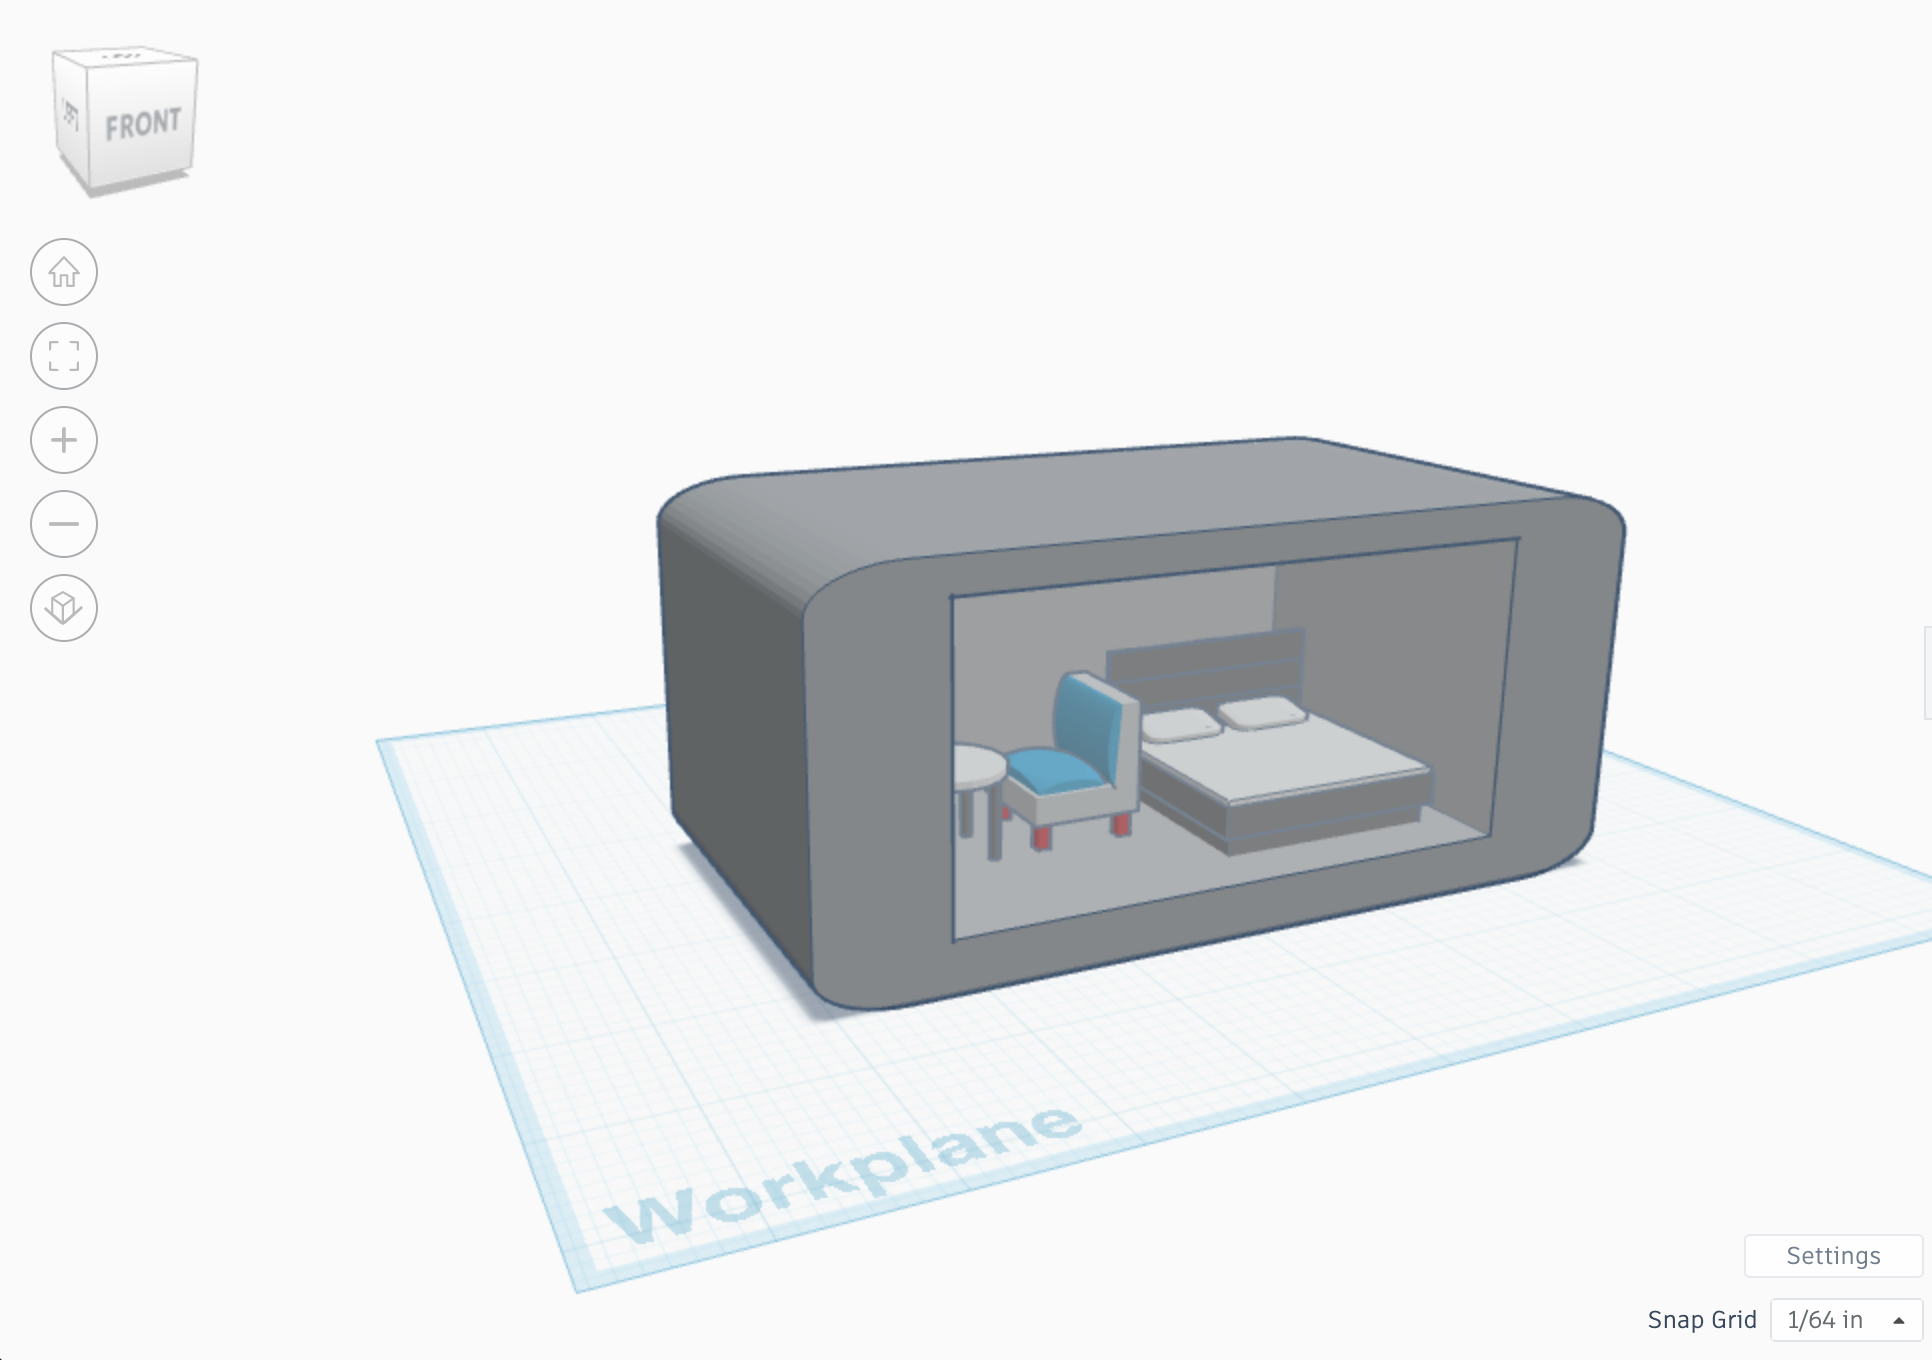

Once you've placed your table, chair, and bed inside the room and positioned them on the left and right sides as you like, SimLab allows you to simulate the overall appearance of your model as it would look in a 3D viewer. While you can't adjust lighting or shadows, you can still preview how the default materials of the furniture interact with the rest of the room, giving you a more realistic sense of scale and design.
In SimLab, even without changing the materials:
- The furniture, though still in basic colors and default materials, will be displayed in a way that gives a better sense of how your design looks in 3D space.
- You'll be able to assess the relationship between the furniture and the rest of the room, checking for correct alignment and spatial fit.
- SimLab helps visualize how each object fits into the model's design, which is especially useful when you're thinking about proportion and layout, even without applying specific textures like wood, metal, or fabric.
So, without adjusting the materials in SimLab, it still provides a way to simulate the overall look of the design by offering a more complete 3D view of your room with furniture in place, showing how everything interacts in the model. This helps you visualize the final scene, even before diving into material-specific changes or detailed texture applications.
The Solar Panels
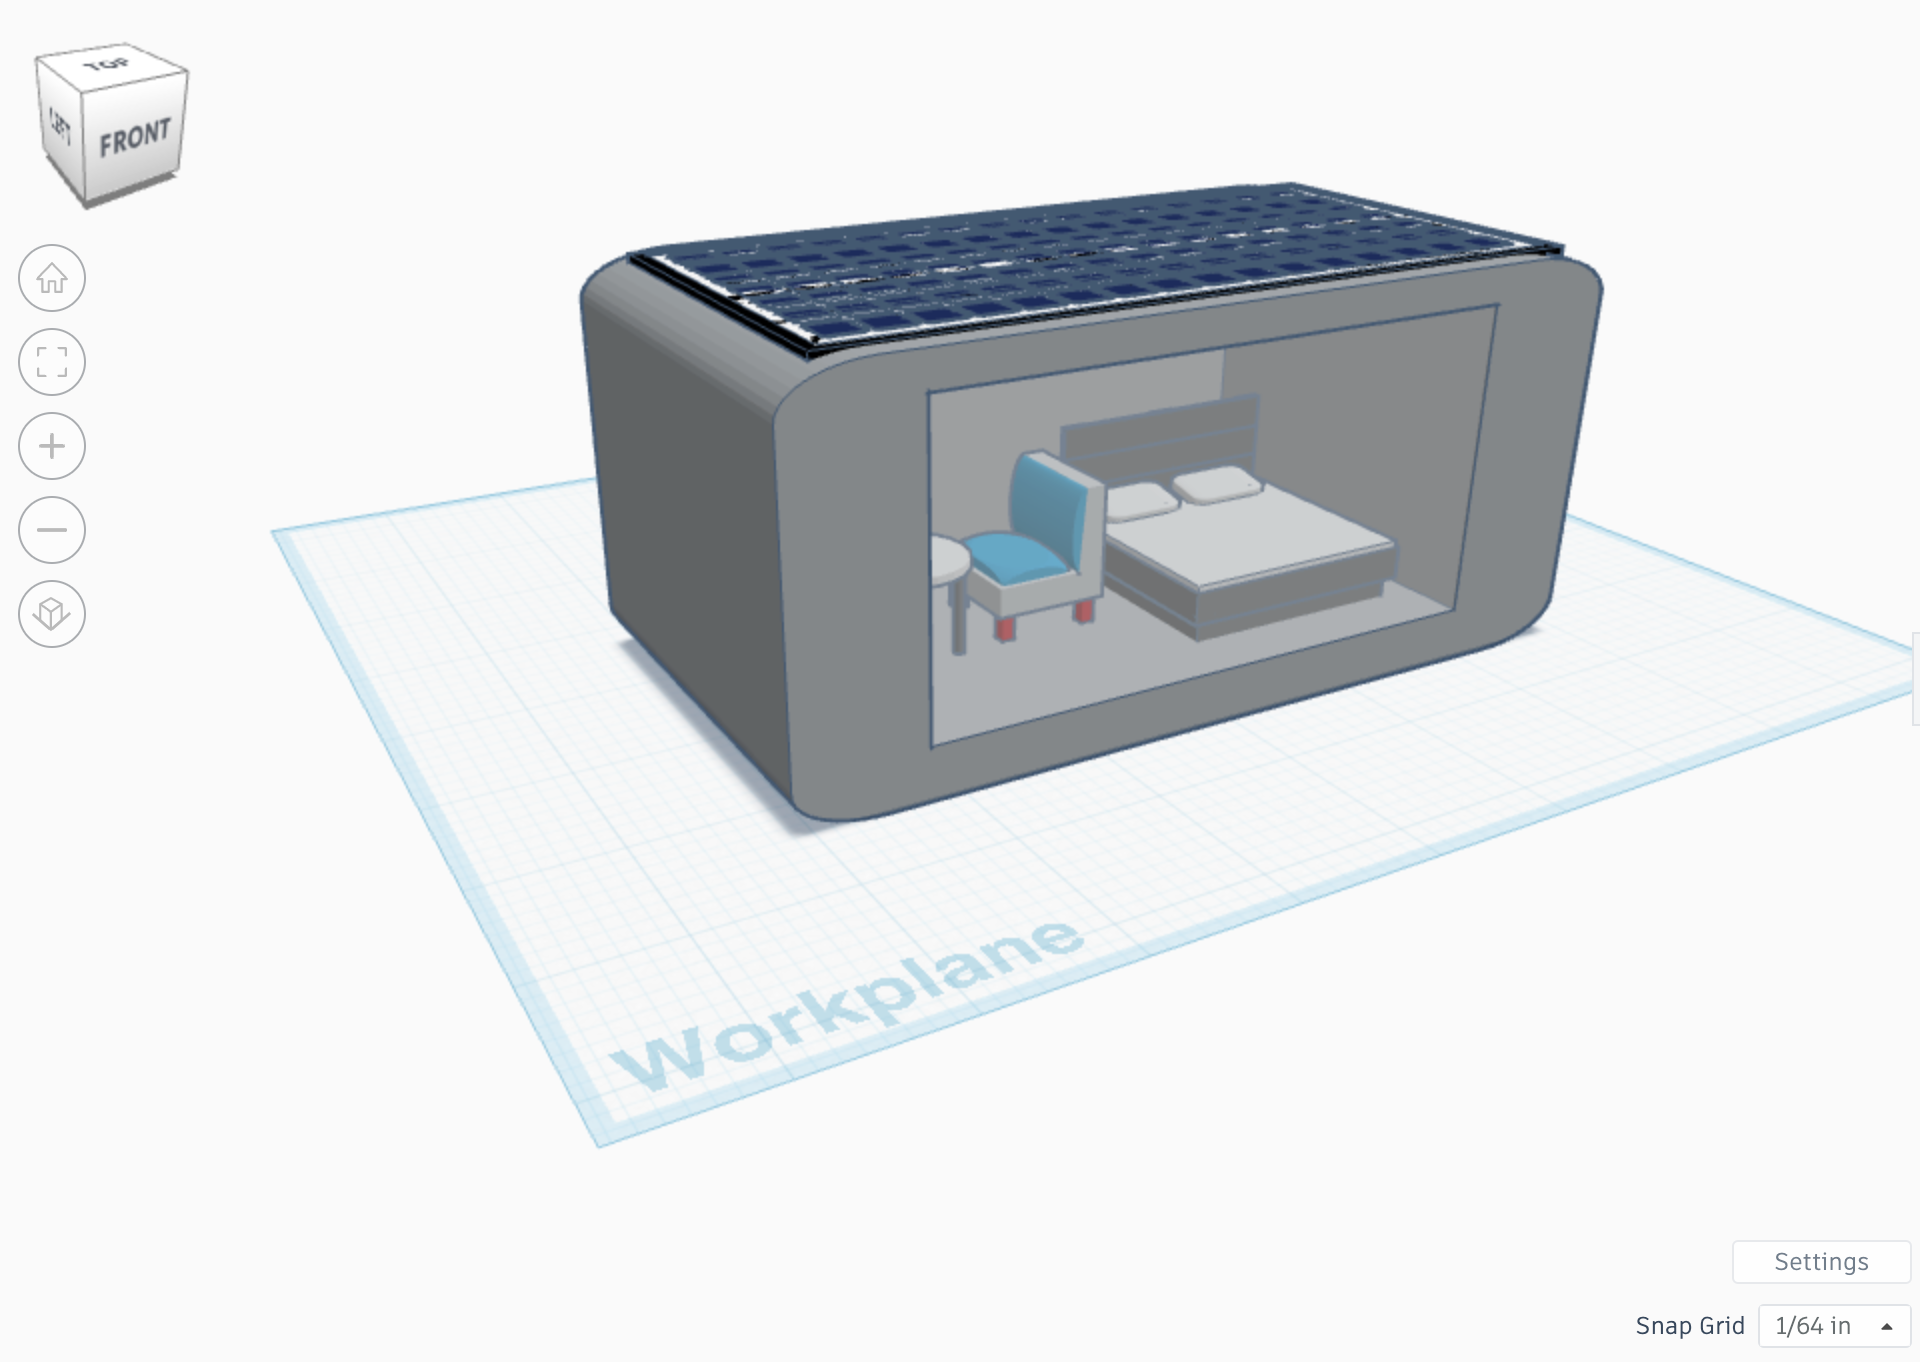
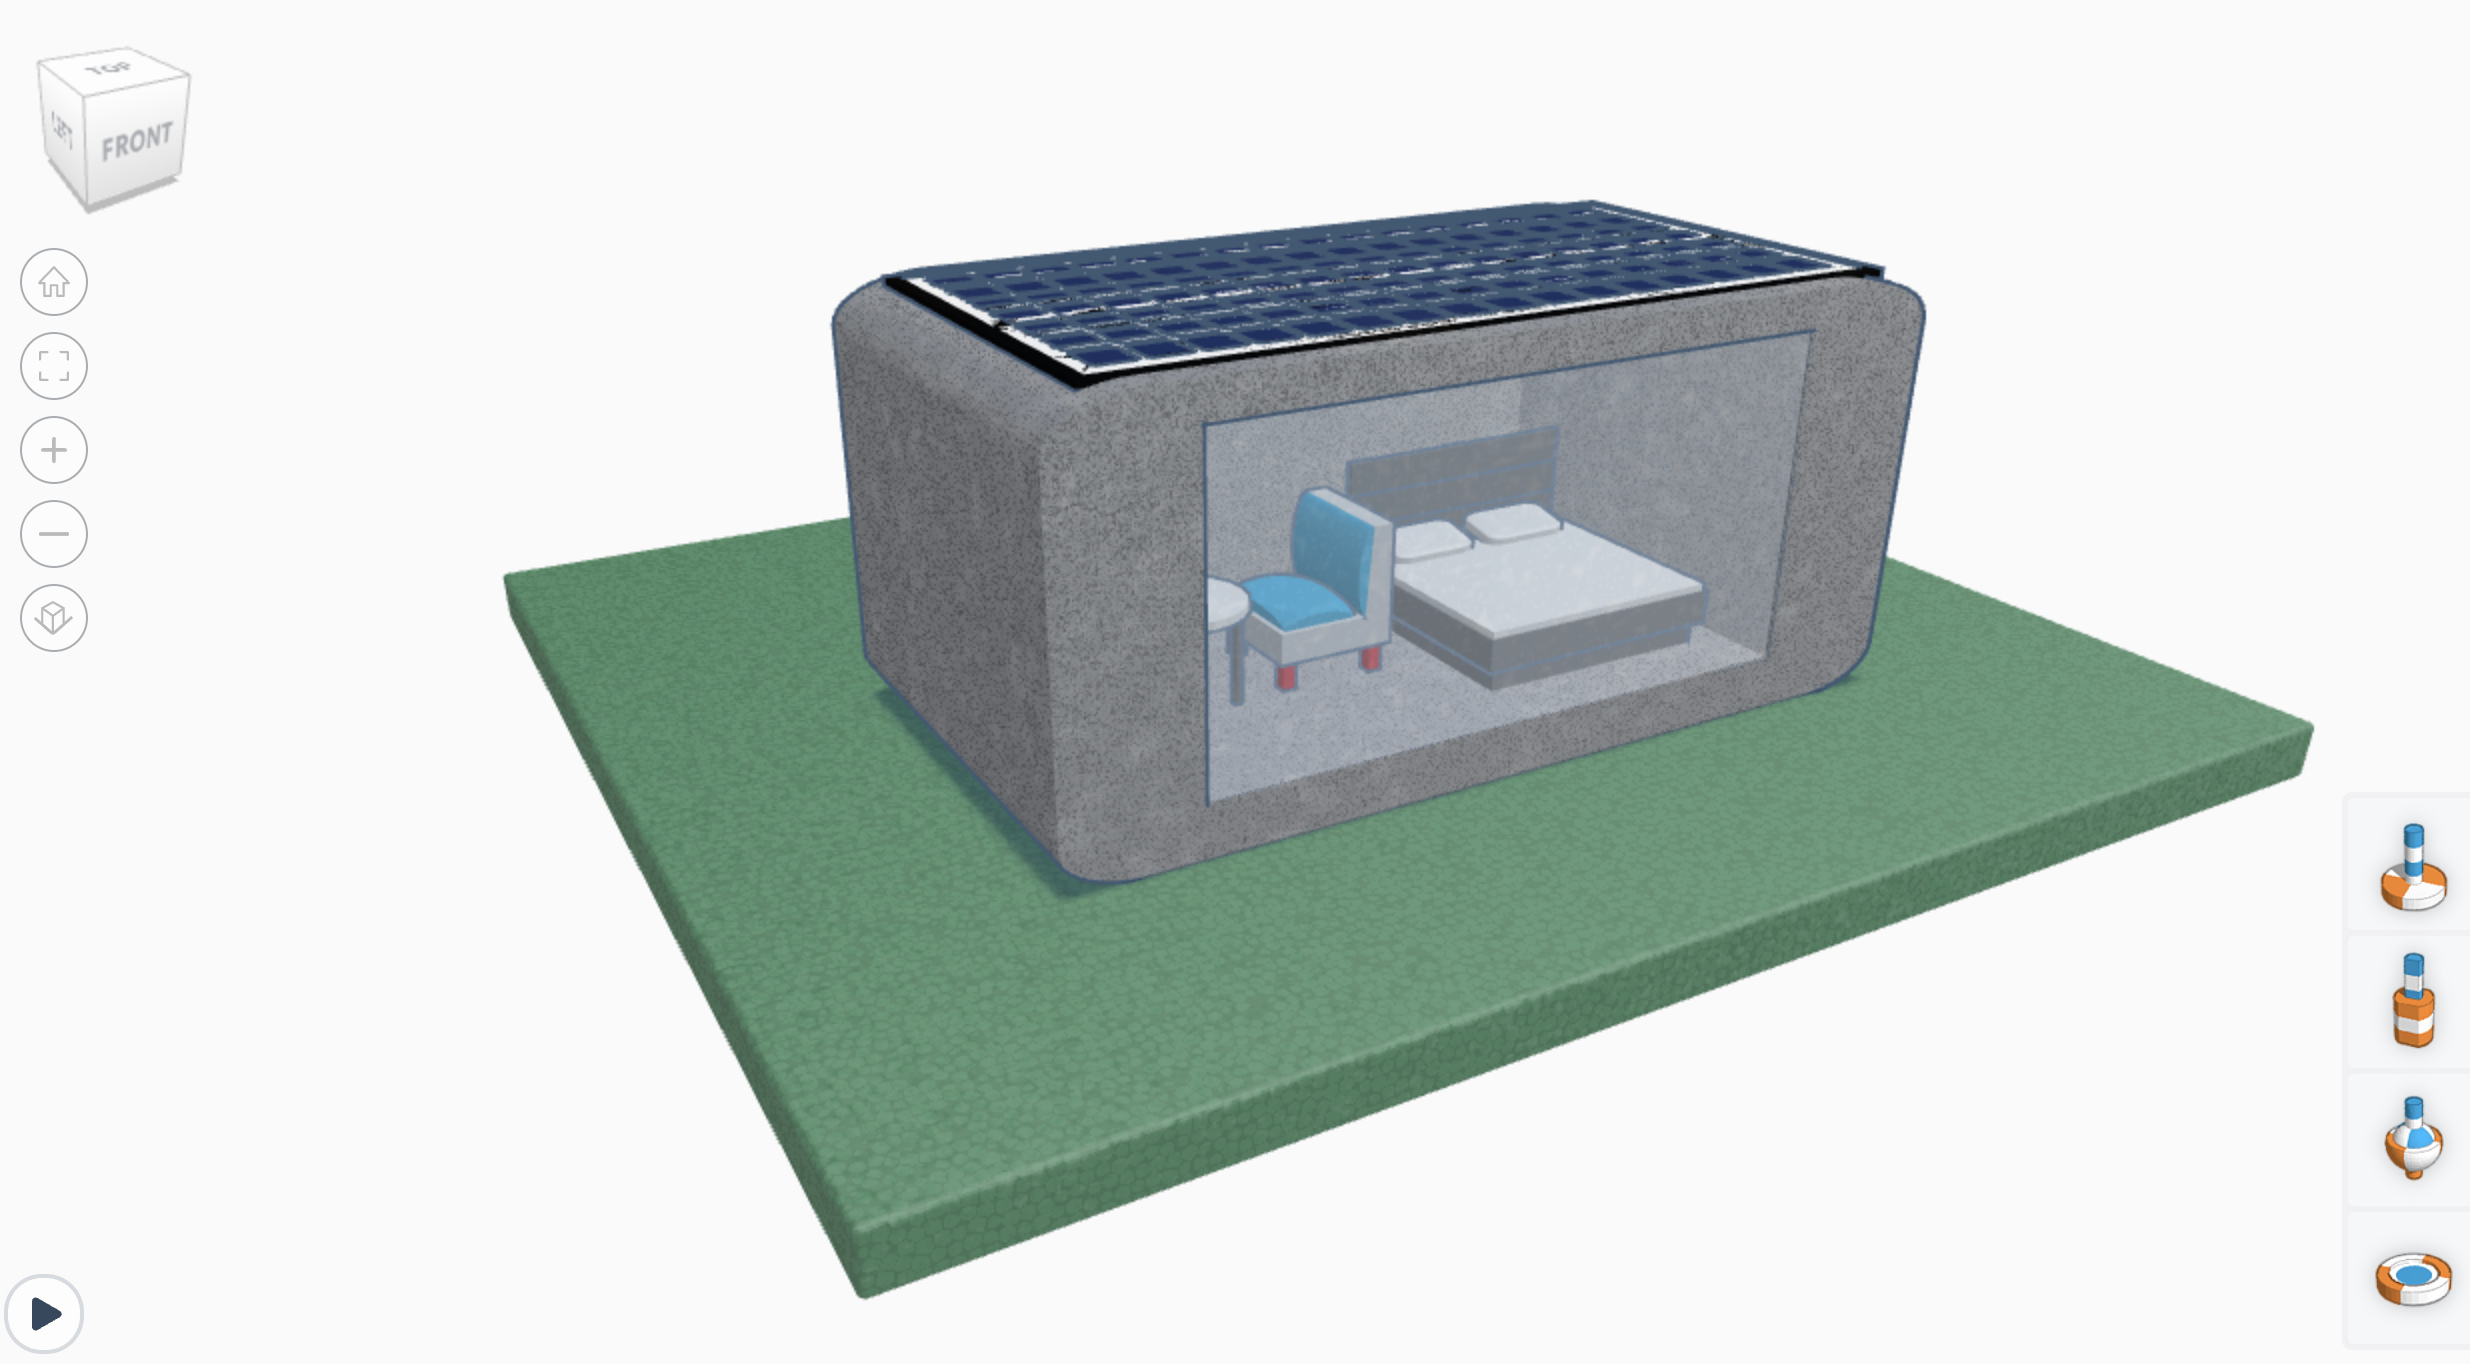
The solar panel is placed flat on the roof, providing both a functional and aesthetic solution for your design. While its positioning is horizontal, this approach is often used in real-world applications for simplicity, ease of installation, and a clean, streamlined appearance. The flat installation ensures the panel is securely placed on the roof, maximizing the available surface area without requiring adjustments or tilting for sun exposure.
The flat positioning of the solar panel on the roof also allows for easy integration into the model, where it doesn’t require any complex structural changes or tilt adjustments. The panel sits neatly, ready to be visualized and simulated as part of the model's energy-efficient features. By keeping the design simple and functional, the flat solar panel makes a solid contribution to the overall sustainability of the building, while maintaining a balanced, clean aesthetic.
Once the solar panel is placed flat on the roof, you can simulate the entire design in SimLab to visualize how it fits within the 3D model. In SimLab, you can rotate and adjust the view to inspect how the solar panel integrates with the roof and the overall structure. The simulation gives you a realistic preview of how the flat solar panel interacts with the rest of the model, ensuring the panel's placement is both visually appropriate and functional. The simulation helps you check that the panel aligns well with the roof, contributing to the sustainability of the building while maintaining the clean and simple look.
Conclusion
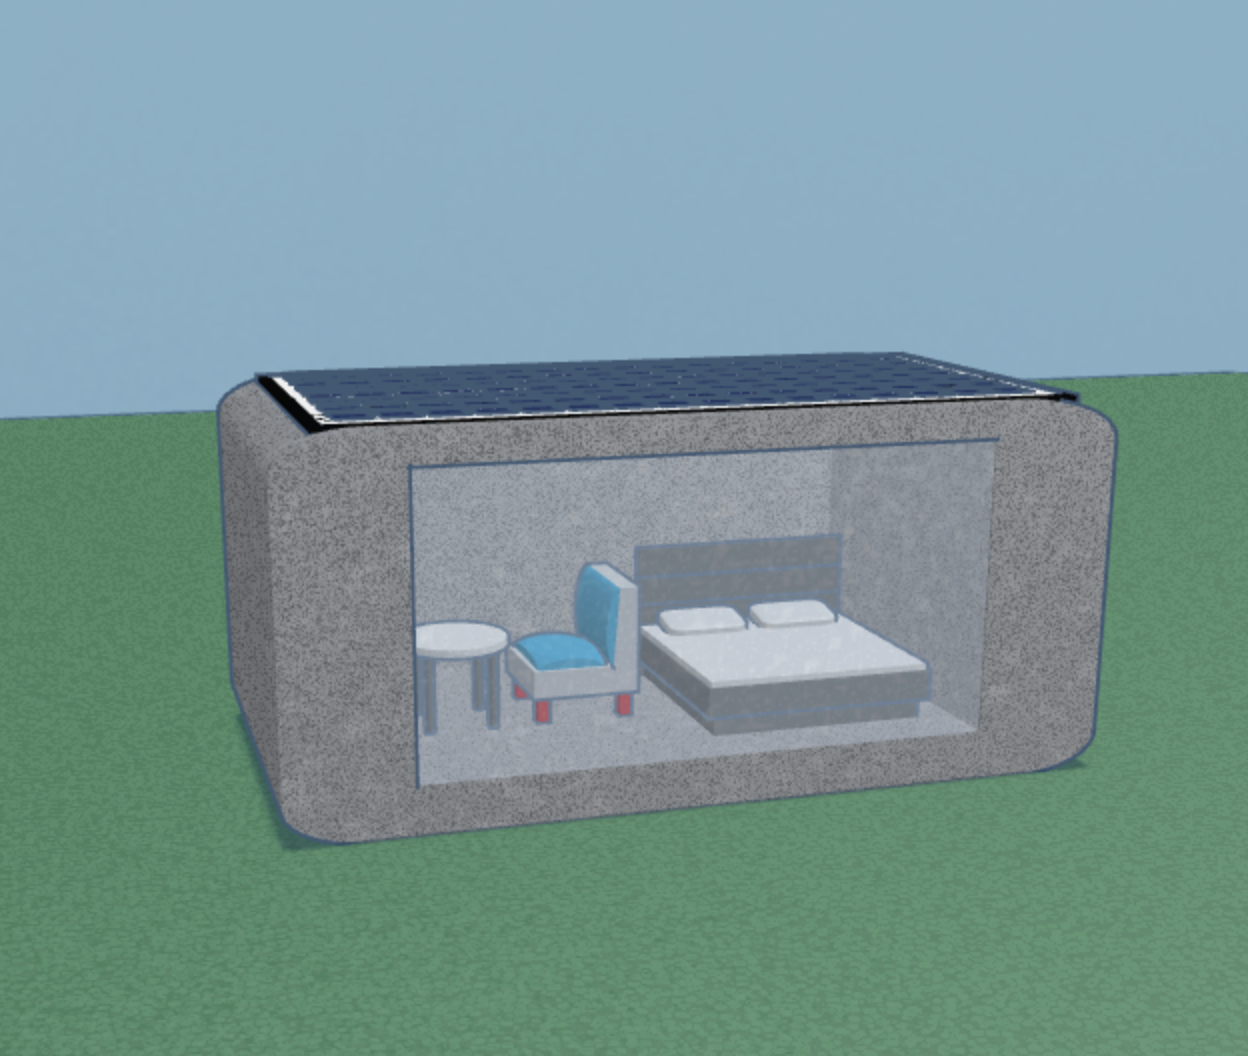
Designing a house in Tinkercad with eco-friendly features, like 3D printed concrete structures, solar panels, and sustainable materials, provides an innovative approach to creating energy-efficient and environmentally responsible homes. The use of 3D printing for the main structure minimizes construction waste and allows for more precise and sustainable building techniques. The incorporation of a solar panel on the roof contributes to the building’s energy independence, harnessing renewable energy to power the home. This design not only helps reduce the home's carbon footprint but also promotes a more sustainable future by utilizing cutting-edge technology and design principles.
By focusing on eco-friendly materials and solutions, such as solar power and sustainable construction techniques, the house design in Tinkercad serves as a model for environmentally conscious living. The ability to simulate and refine these designs digitally before building them in the real world ensures that the final structure is both functional and environmentally responsible. In this way, the design process not only emphasizes the importance of reducing environmental impact but also demonstrates the potential of technology to create sustainable and efficient living spaces. With careful planning and the integration of sustainable elements, the house built in Tinkercad exemplifies how modern design can contribute to a greener, more sustainable future.