Modernized Digital Clock


Recently I discovered a laser cutting service in my locality which offer the service for very cheap, which I had to definitely try out and to my surprise they have this particular acrylic which allows only limited light to pass through it like a translucent material but does not scatter the passing light and retains shapes. But one thing missing was Idea and then I remember I once started a project of digital clock and then had to abandon it due to unavailability of laser cut acrylic and now that I have found one its time revisit and build a digital clock.
The particular reason to use this acrylic sheet and place it over display is that it allows the light emitted by the segments of 7 segment display to pass and the light from segments which are not lit gets blocked because they are less brighter. This give the clock a more Modernized look.
So, lets build a Modernized Digital Clock.
.
Find me on Social Media : maker.ATOM
Supplies
Electronics:
- Arduino Pro mini ___________________ x 1 ____ Link
- TM1637 clock display _______________ x 1 ____ Link
- DS1302 RTC module _______________ x 1 ____ Link
- XY 016 boost module _______________ x 1 ____ Link
- Rotary Encoder____________________ x 1 ____ Link
- TP4056 charging module ____________ x 1 ____ Link
- Slide switch_______________________ x 1 ____ Link
- 18650 Li - Ion battery _______________ x 1 ____ Link
- 18650 single cell holder _____________ x 1 ____ Link
- Passive Buzzer____________________ x 1 ____ Link
- 100 ohm resistor___________________ x 1 ____ Link
- 10K resistor_______________________ x 3 ____ Link
Supplies:
- M2.5 x 5mm insert _________________ x 4 ____ Link
- M2.5 x 6mm bolt___________________ x 4 ____ Link
- M3 x 6mm insert___________________ x 4 ____ Link
- M3 x 6mm bolt ____________________ x 4 ____ Link
- Double side perf board 5 x 7xm_______ x 2 ____ Link
- Single side perf board 7 x 9cm________ x 1 ____ Link
- Pin headers - male_________________ x 4 ____ Link
- Pin header - female ________________ x 4 ____ Link
- Single strand wire
- Mutli strand wire
- Ribbon cable
Tools:
- Soldering iron (pointed tip)
- solder wire
- Mutli-meter
- 3D printer / service
- Laser cutting service
- Arduino Uno (for programming)
- Twezzers
- utility cutter
- plier
- rubber band
- sand paper
The Idea
.png)

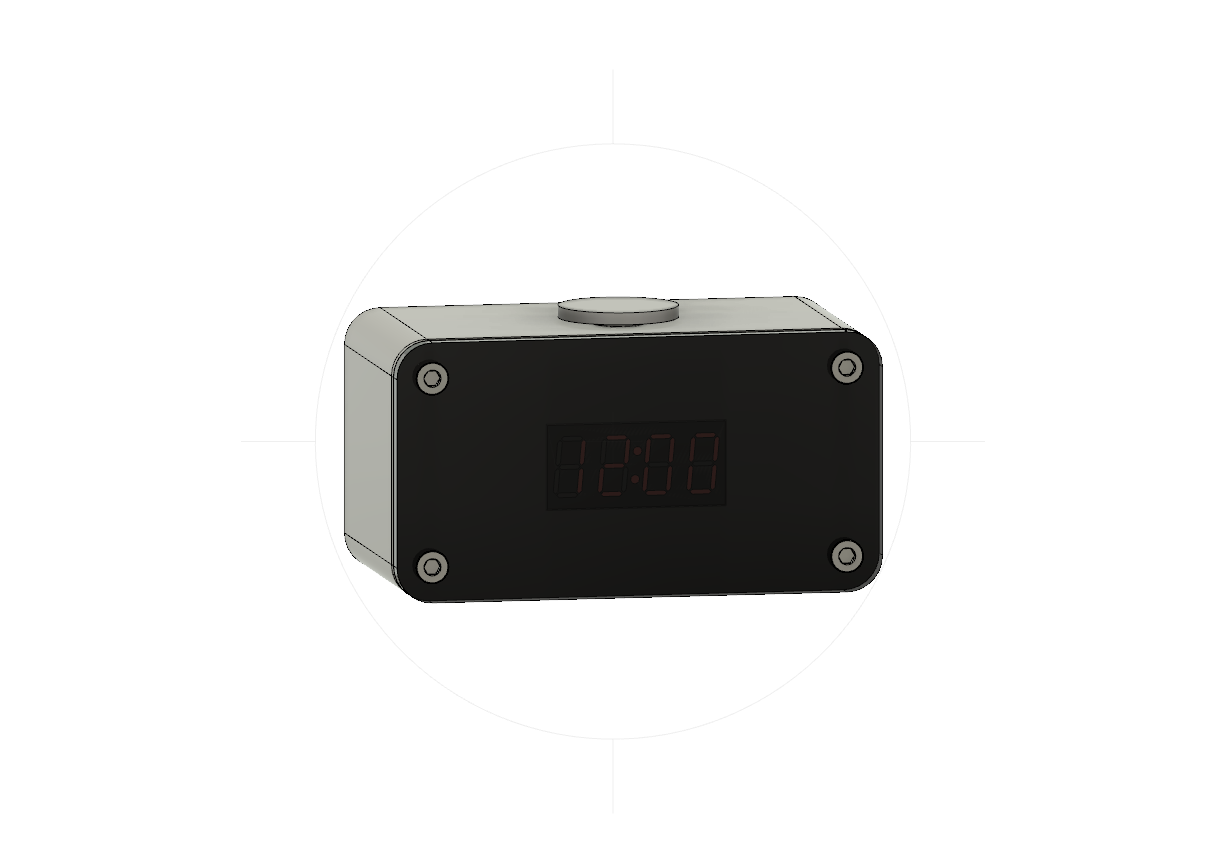

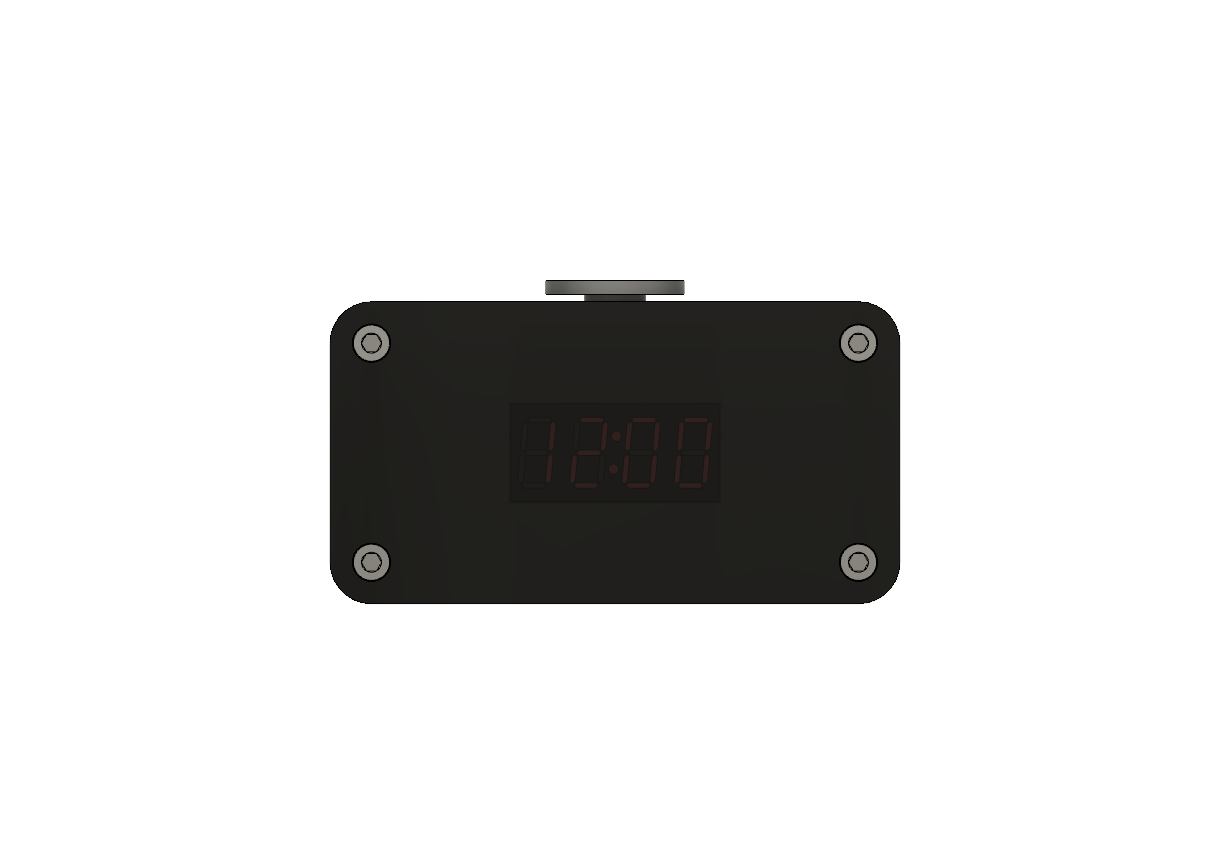

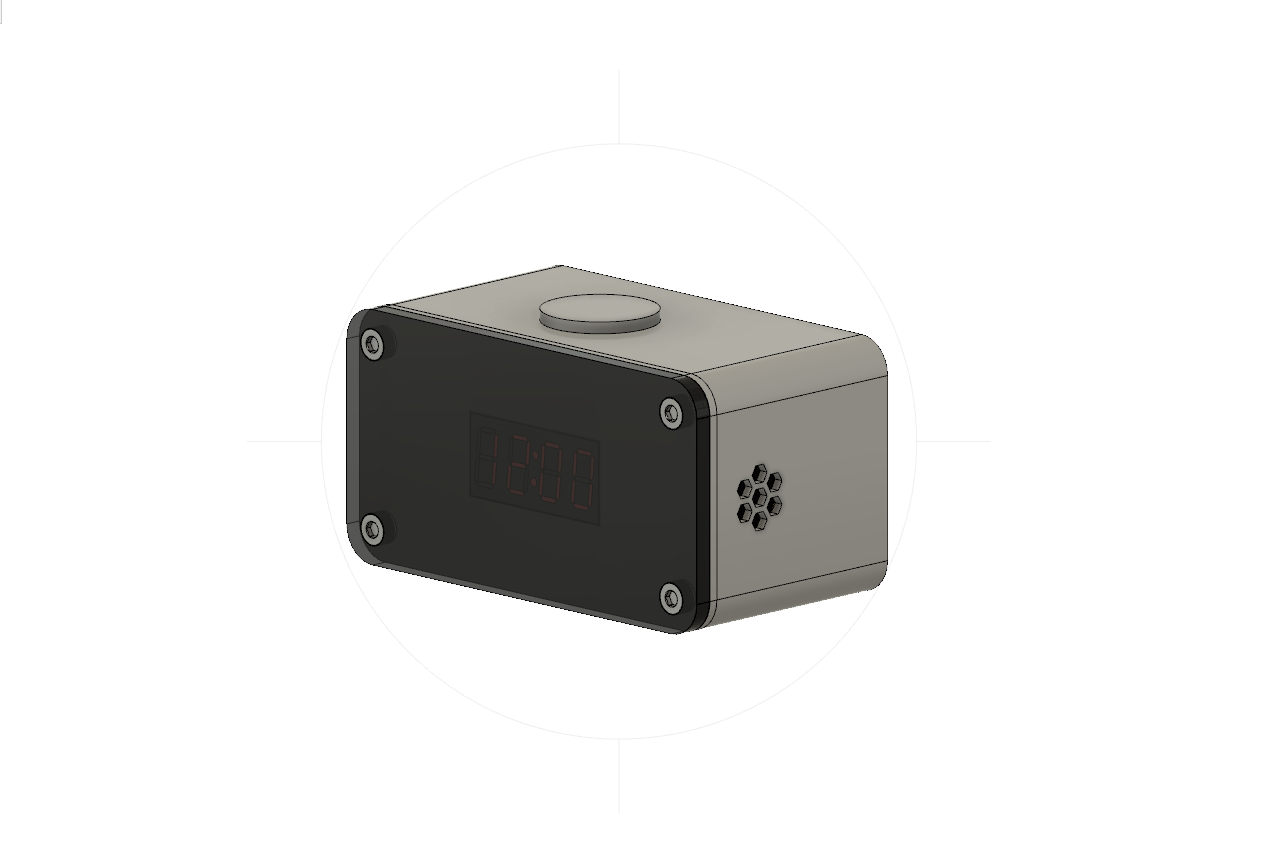
The primary goal of he build is to make the clock look more modernized. If we look at general purpose 7 segment displays which when turned on, the glowing segments are visible as well as the non glowing are visible which actually does not look really nice. So we want something which will actually make the non glowing segments invisible.
And here comes our 1st part Translucent Acrylic sheet (which retain shape of objects). So a 7 segment clock display like the TM1637 module will be used to display time and the acrylic sheet will be placed over it.
As of power source, Li- ion battery will be used to power the system with TP4056 charging module to charge the battery.
To boost the voltage from battery to 5V, XY-016 step up module will be used, as it is much smaller in size.
To keep track of time we will use DS1302 RTC module which is a tiny module too.
And lastly Arduino Pro Mini as a microcontroller unit with complementary components like passive buzzer and Rotary encoder for user interaction.
The body for the clock will be 3D printed with threaded inserts and bolts to hold things together and every module solder on a perf board.
Well you might wonder why modules are being used and not components soldered on PCB, because this being the prototype version of the clock I have decide to go with perf board rather than spending on PCBs.
After finalizing every component I used Fusion 360 to design and find the optimal component placing with minimal spacing.
Acrylic Sheet

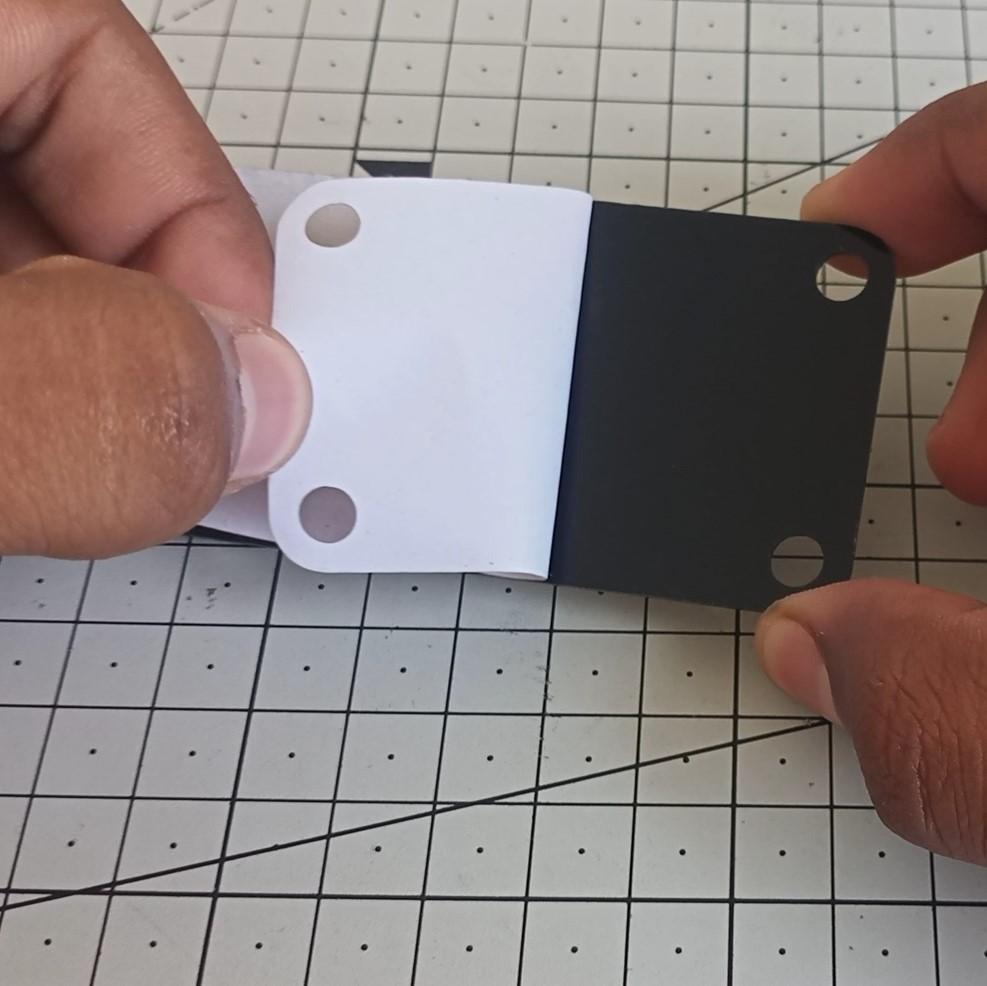
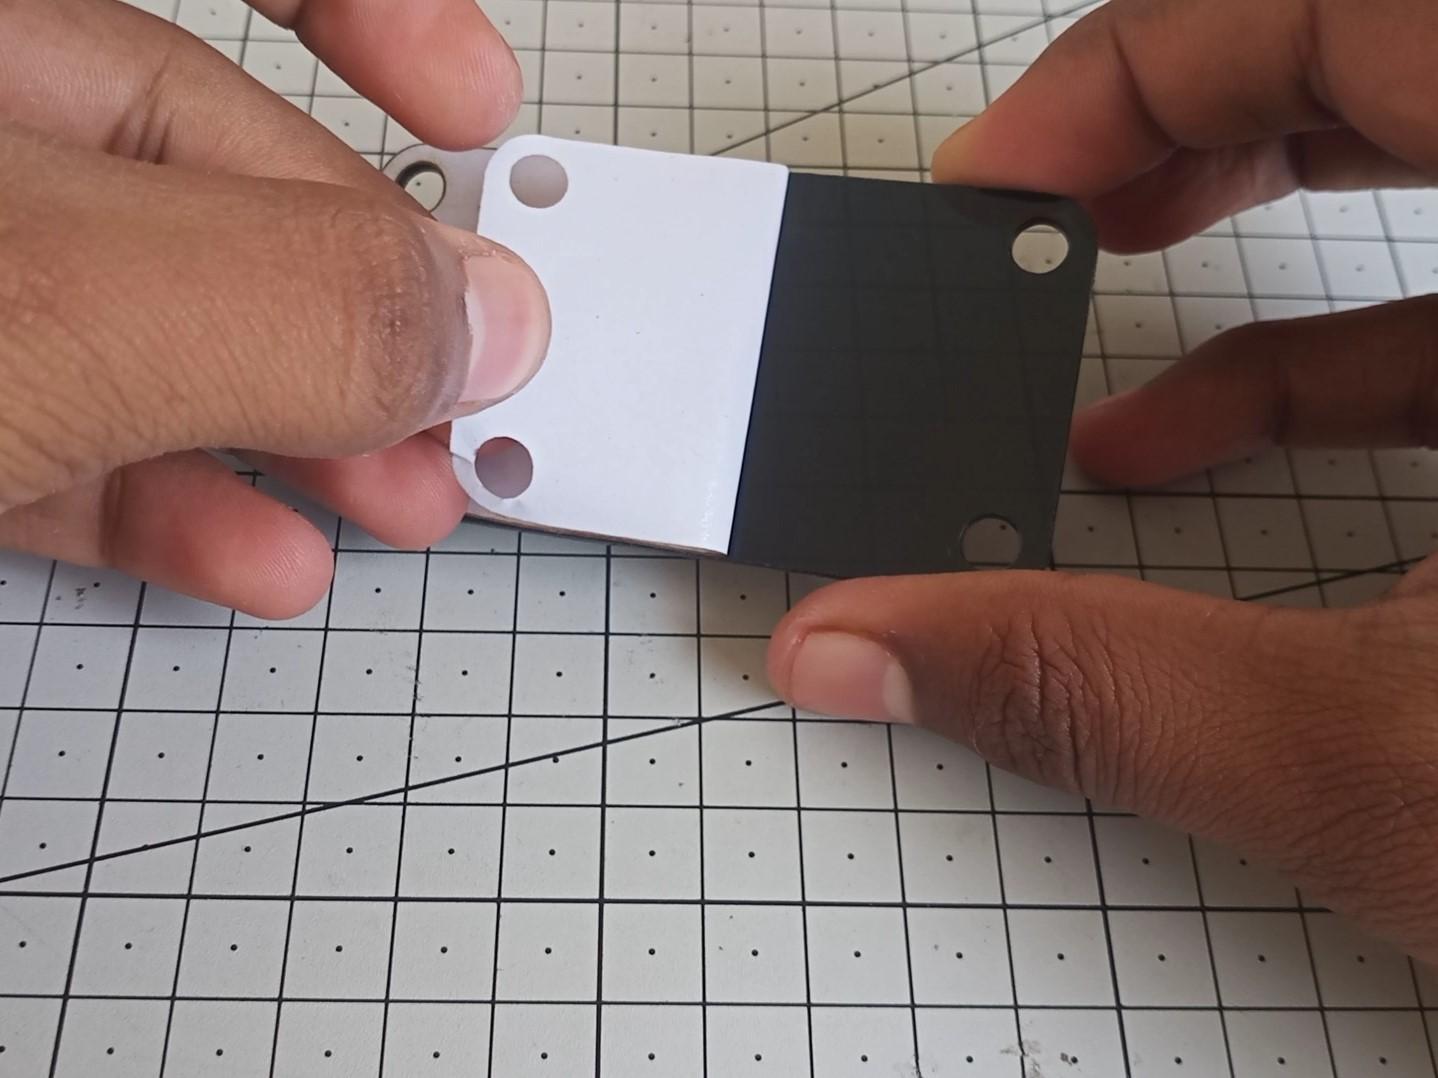
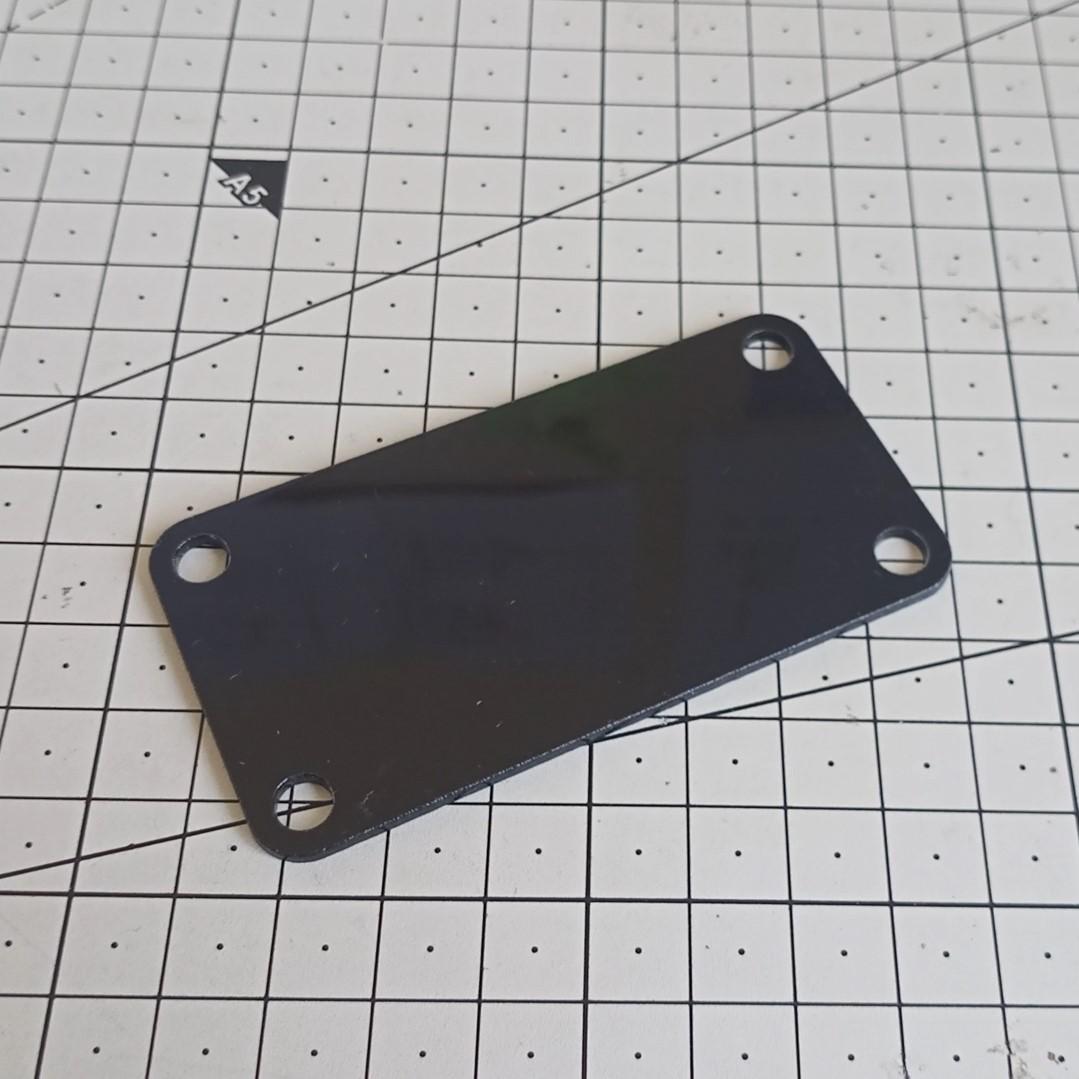


Lets start by getting a laser cut acrylic sheet. I have used a local laser cutting service and so you can.
The acrylic sheet is 3mm thick clear black (that's what it is called). The sheet has a tint of black color, if rear part of the sheet is covered then it seems like it is a black opaque acrylic sheet.
Use the attached face plate.dxf file for laser cutting.
Downloads
3D Printing Parts


We will 3D print the body - which holds all components together, back plate - where TM1637 module is attached and knob - which used to change time, brightness, set alarm etc.
The parts can be printed in PLA material with 0.4mm nozzle, 0.2mm layer height and 100% infill. I would suggest to go with GREY color.
I have also attached the orientation of how the parts should be printed with STL files
Post Processing the Printed Parts


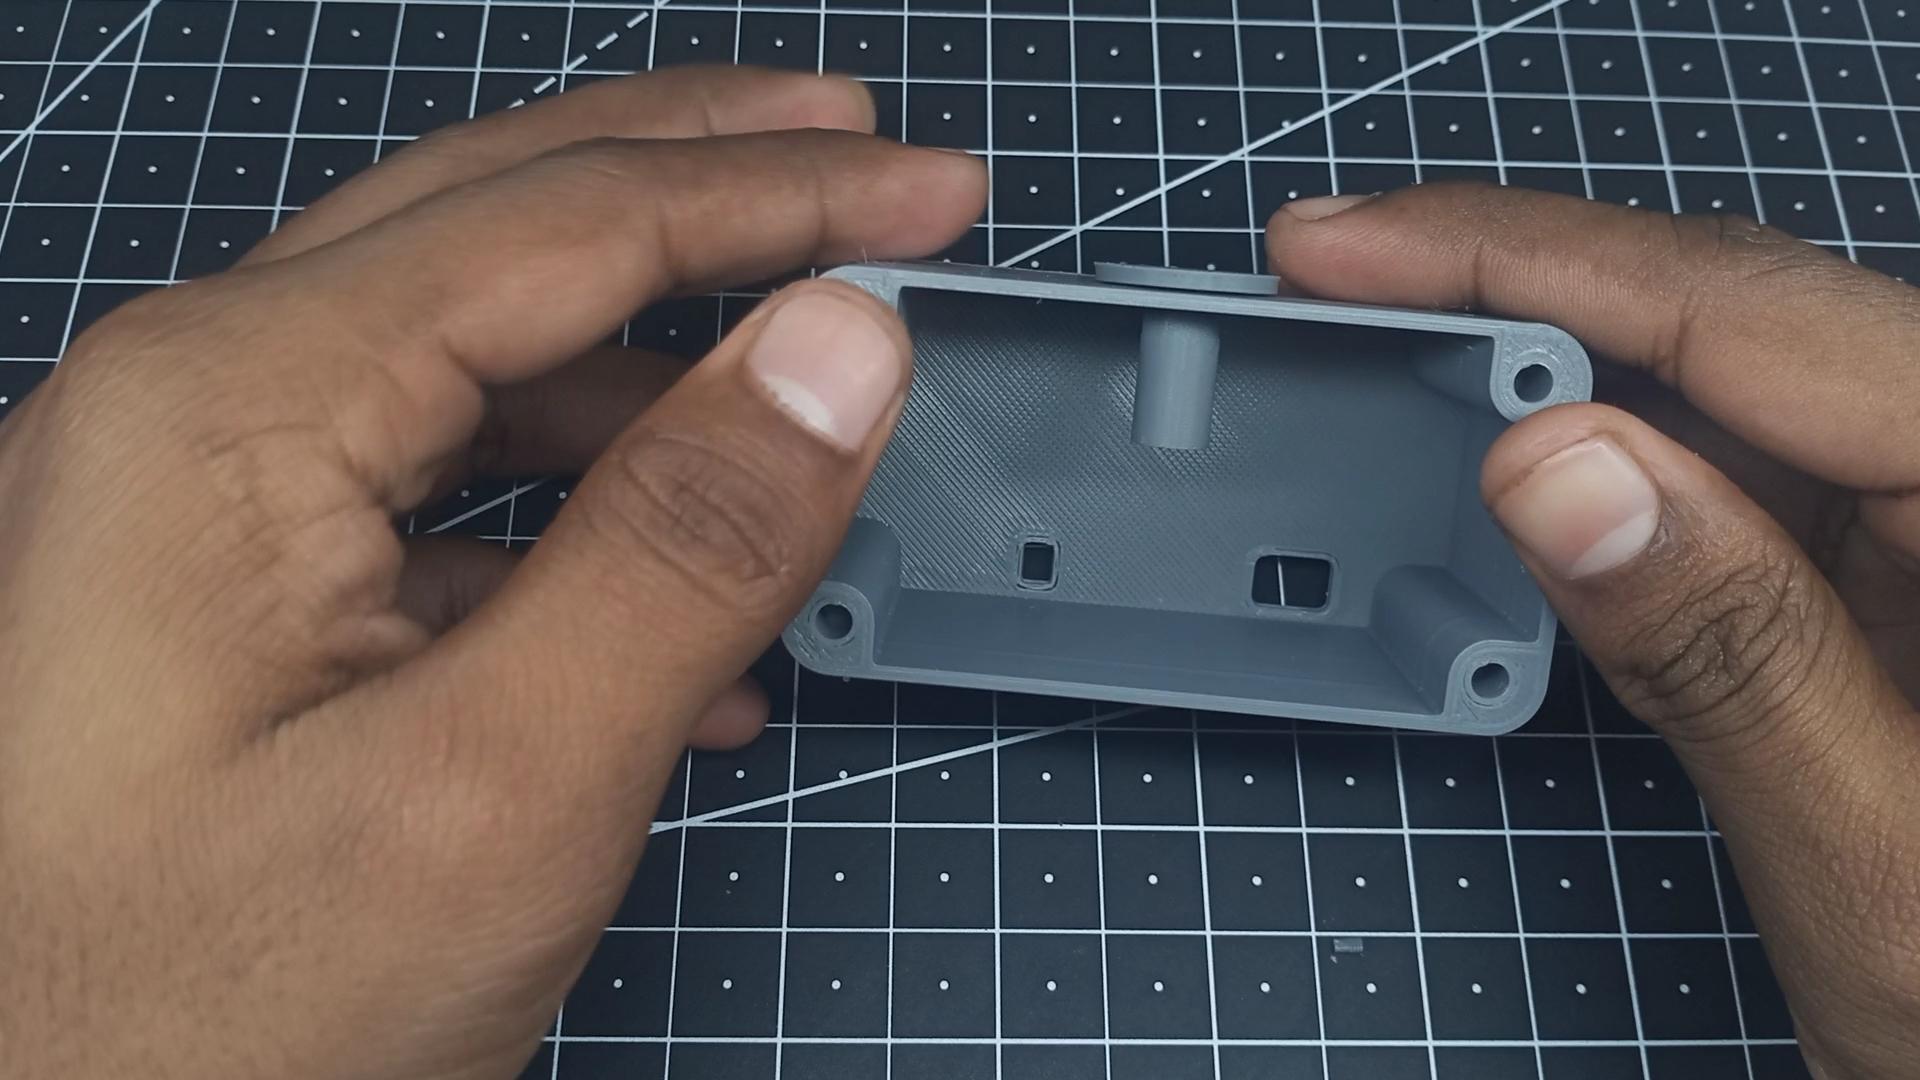
The body part requires a bit of post processing because the hole for knob to is printed vertically.
Instead of using teardrop shape for vertical holes or introducing support while generating G-code I have used sacrificial bridging where the bridge the is introduced while designing and not while generating G-code. This gives us the full control of position and thickness of the bridge.
The wall being just the 1 nozzle diameter (0.4mm) thick it is easy to break off. They can be removed using any tool.
This leaves a bit of cornered profile which needs to be cleaned and to do so use a solder iron to remove the excess material. After a bit of trial and error the knob should go smoothly and it should turn around.
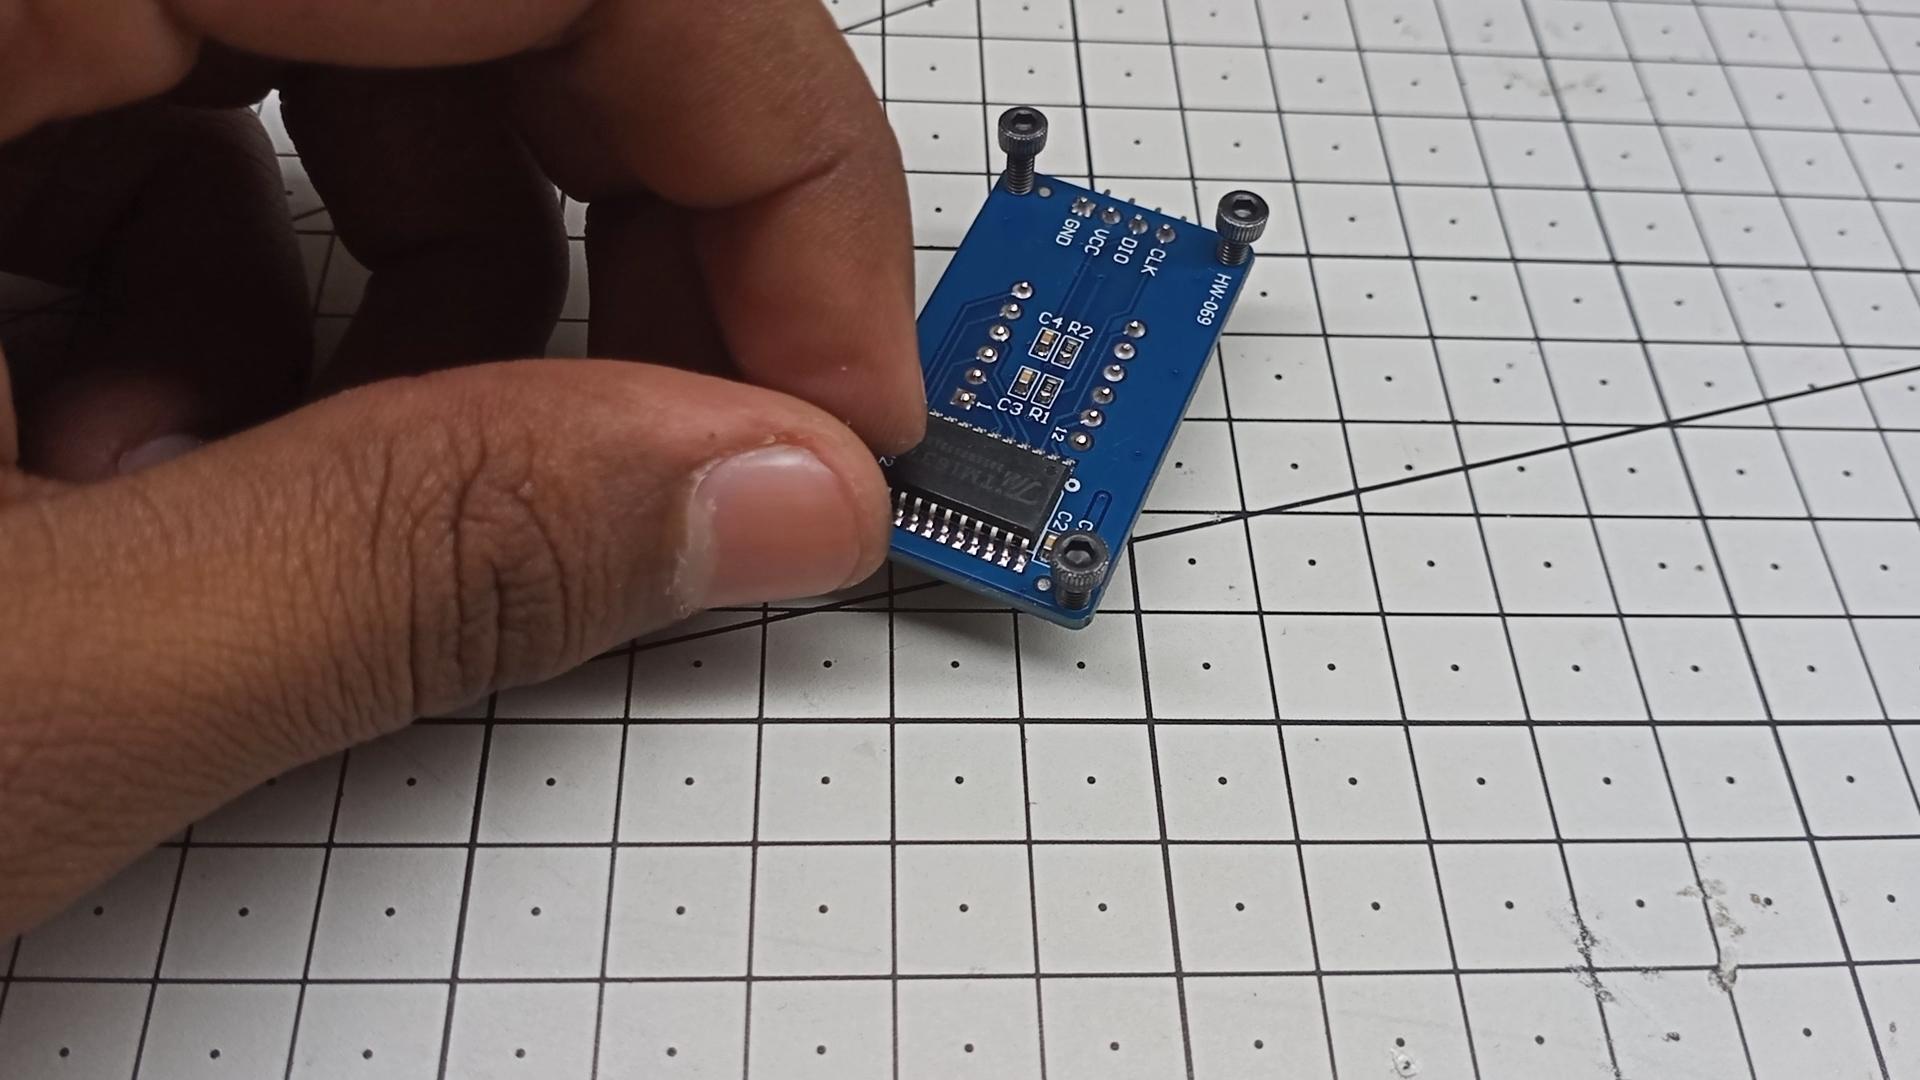
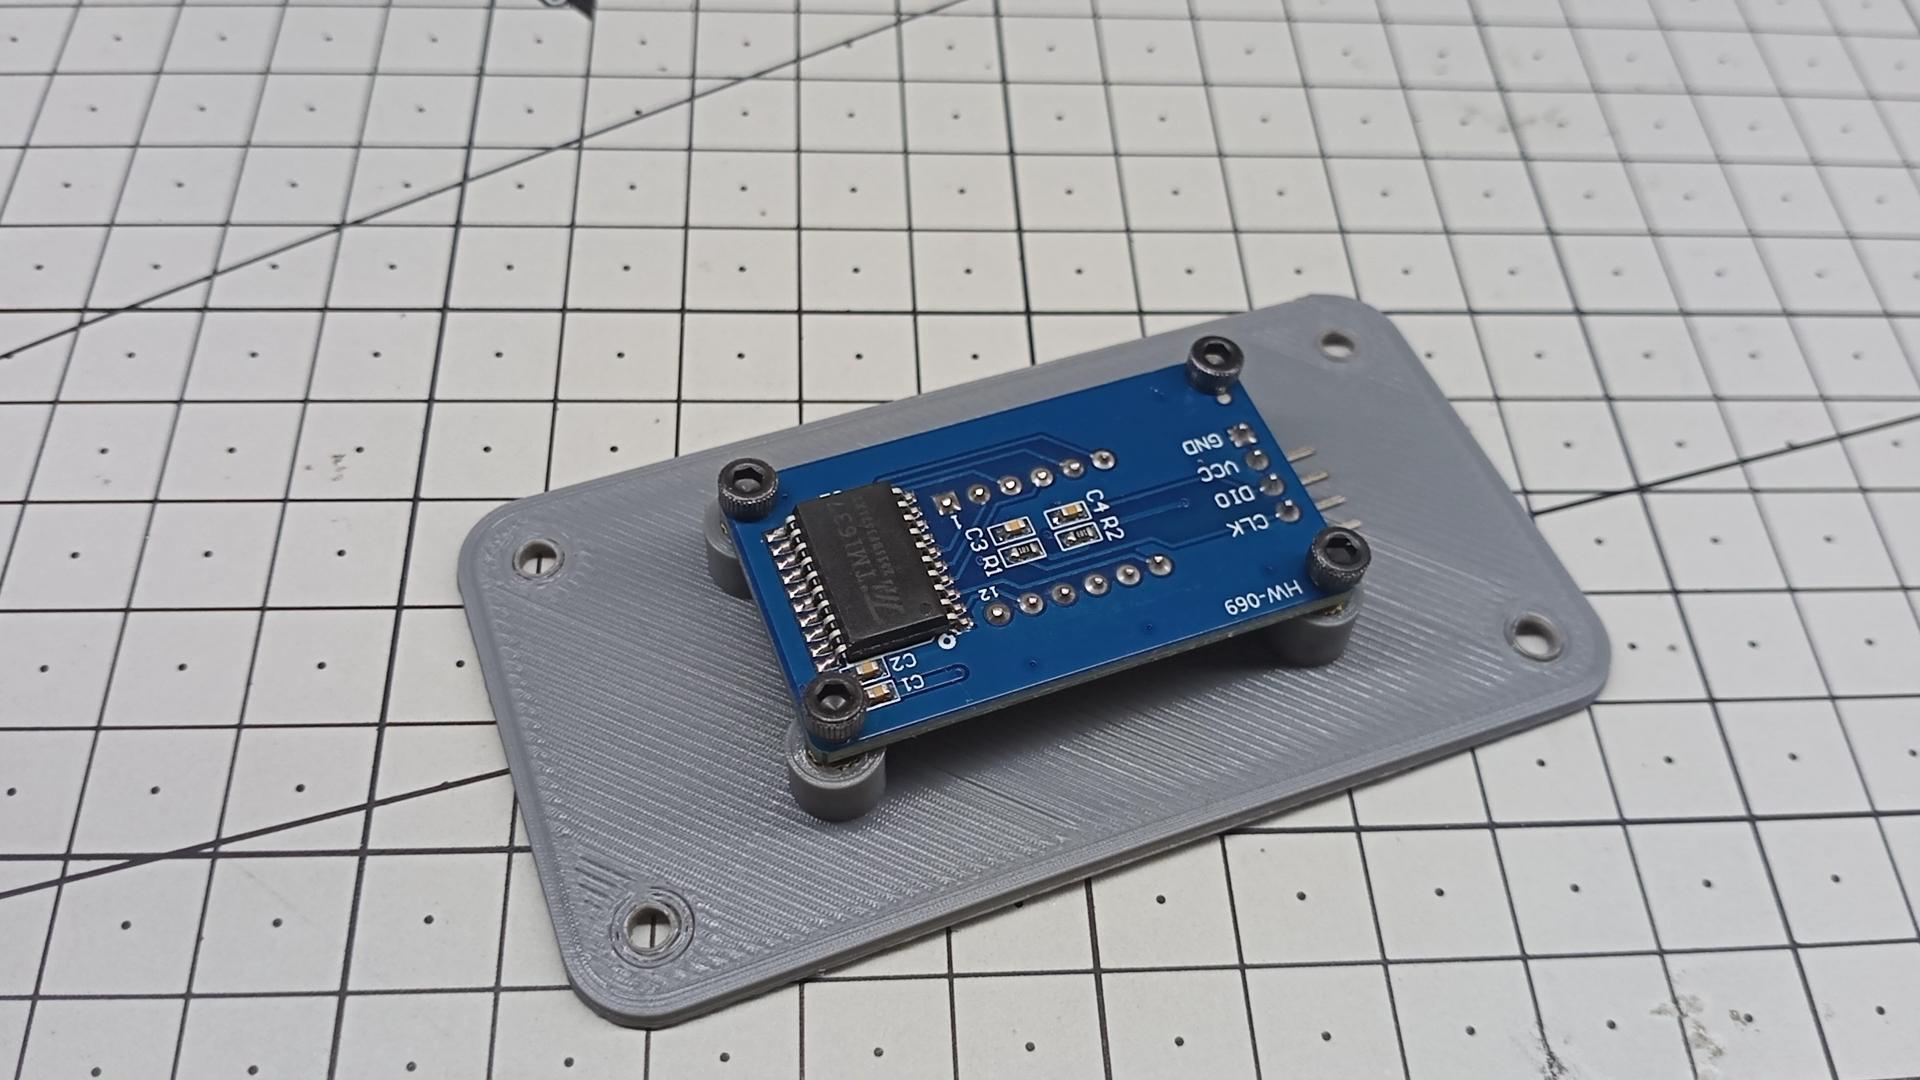
Installing TM1376 Module on the Back Plate


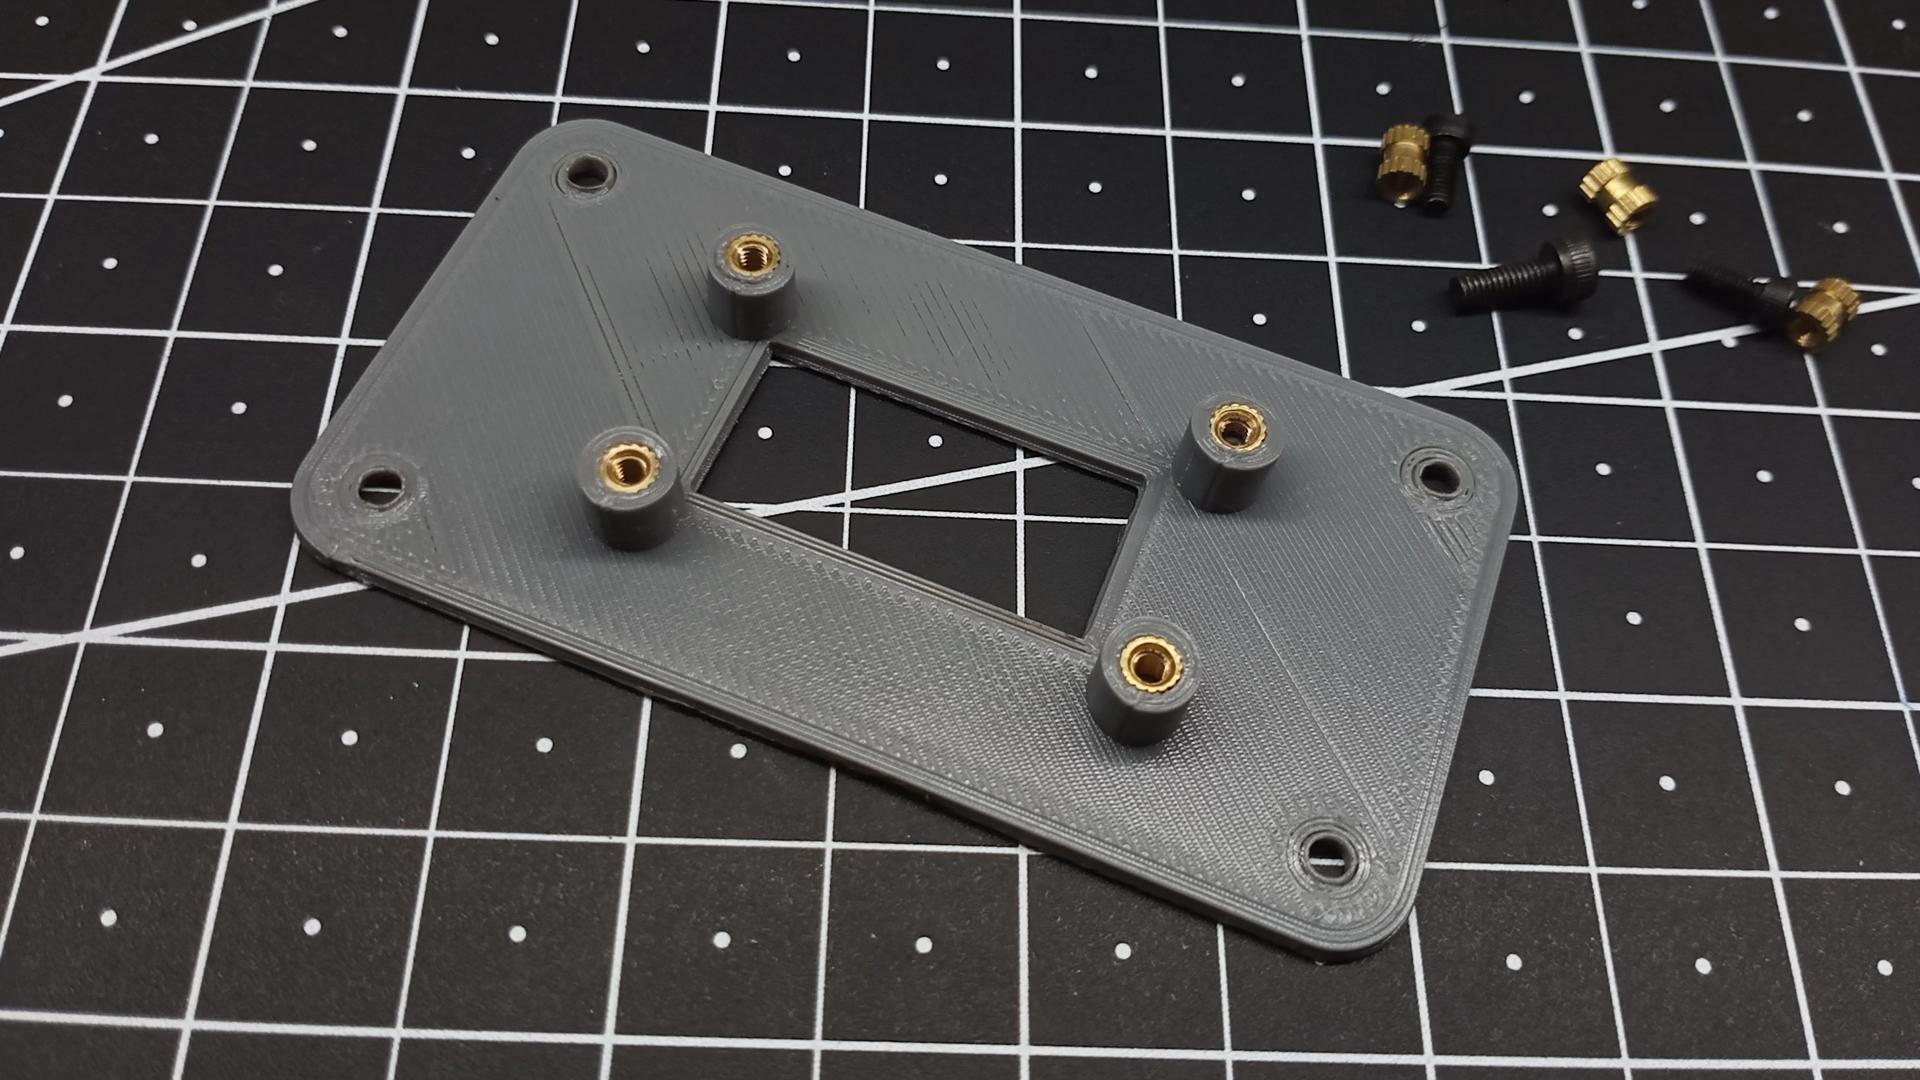




Adding inserts
The best way to install a heat insert is to use a pointed tip solder iron. We will insert a insert of size M2.5 in the back plate inside the profile which are located besides rectangular profile.
- Hold the solder iron straight vertically.
- Use a tweezer to hold the insert in its place.
- Now insert the tip of iron inside the insert.
- And press the iron until the inserts goes though in.
The heat of iron passes to insert which melts the near by material and the insert slides through it. The solidified material holds the insert in its place.
Bolt down the module
Insert the bolt of M2.5 in the TM1637 module from the side where IC is present.
Before fixing the module to the back plate the orientation should be considered as the print is not symmetric. The cylindrical profile we used for M2.5 insert is not equidistant from the rectangular profile because the 7 segment is is not aligned with PCB so the the pin headers should point towards the cylindrical profile which is closer to rectangular profile.
Fix the bolt all the way inside the insert till the face of back plate and of 7 segment don't match up.
Adding Inserts to Body
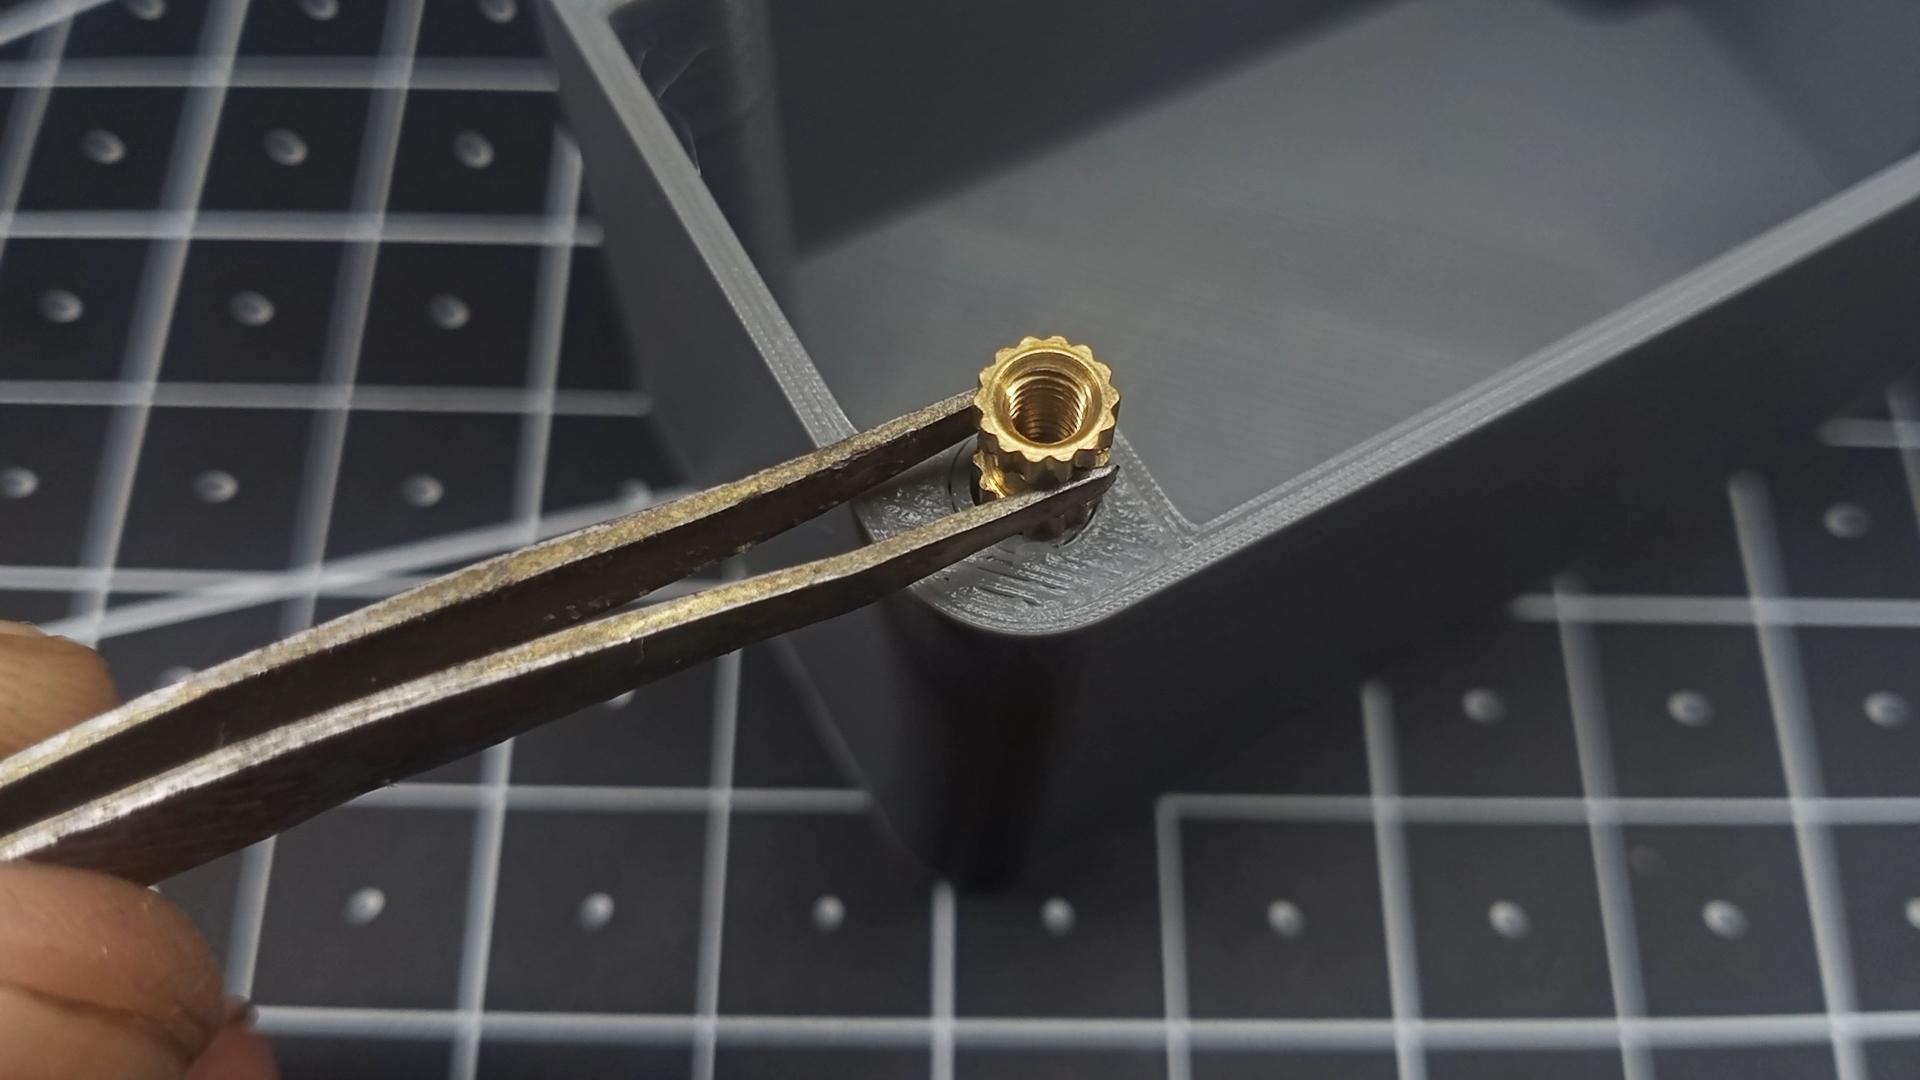


The body uses a M3 inserts and bolts. Use a pointed tip solder iron to insert the insert the same we inserted M2.5 inserts in back plate in the previous step.
Building the Battery Module - Cutting the Perf Board


We will cut the perf board as we need and then solder the battery holder on it. The module will be placed on the back part of the body.
- Take 7 x 9 cm single side board.
- Use a utility cutter to mark along the edge of board.
- Then span off the part using a plier.
- Similarly mark along the perimeter so that we get a board having 8 x 31 usable holes.
Also ones if the battery module and other perf board snug fits inside the 3D printed body, if they don't fit you can sand down till they snug fit. If the fit is bit loose they you can hot glue the board later once we install it.
Soldering the Battery Holder

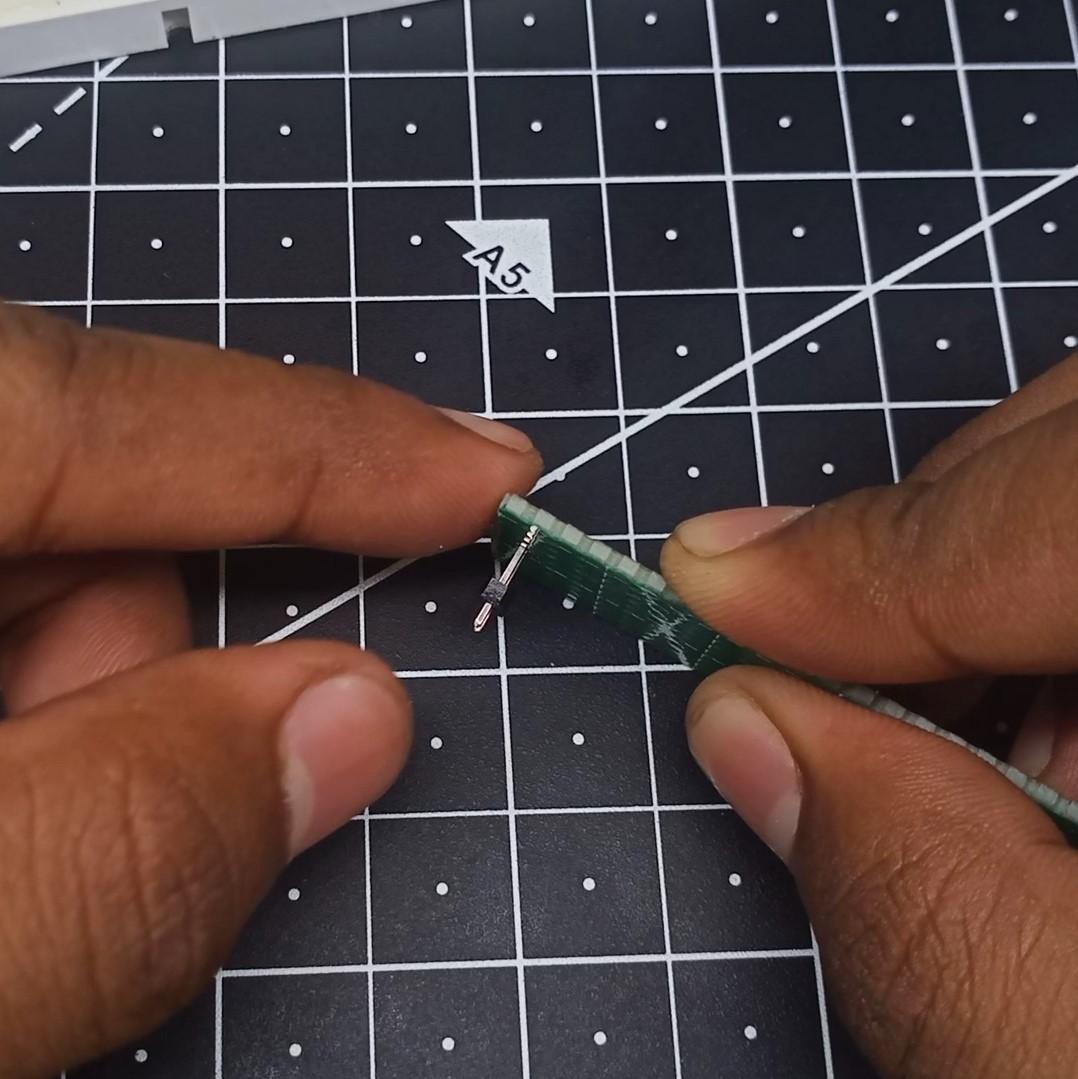
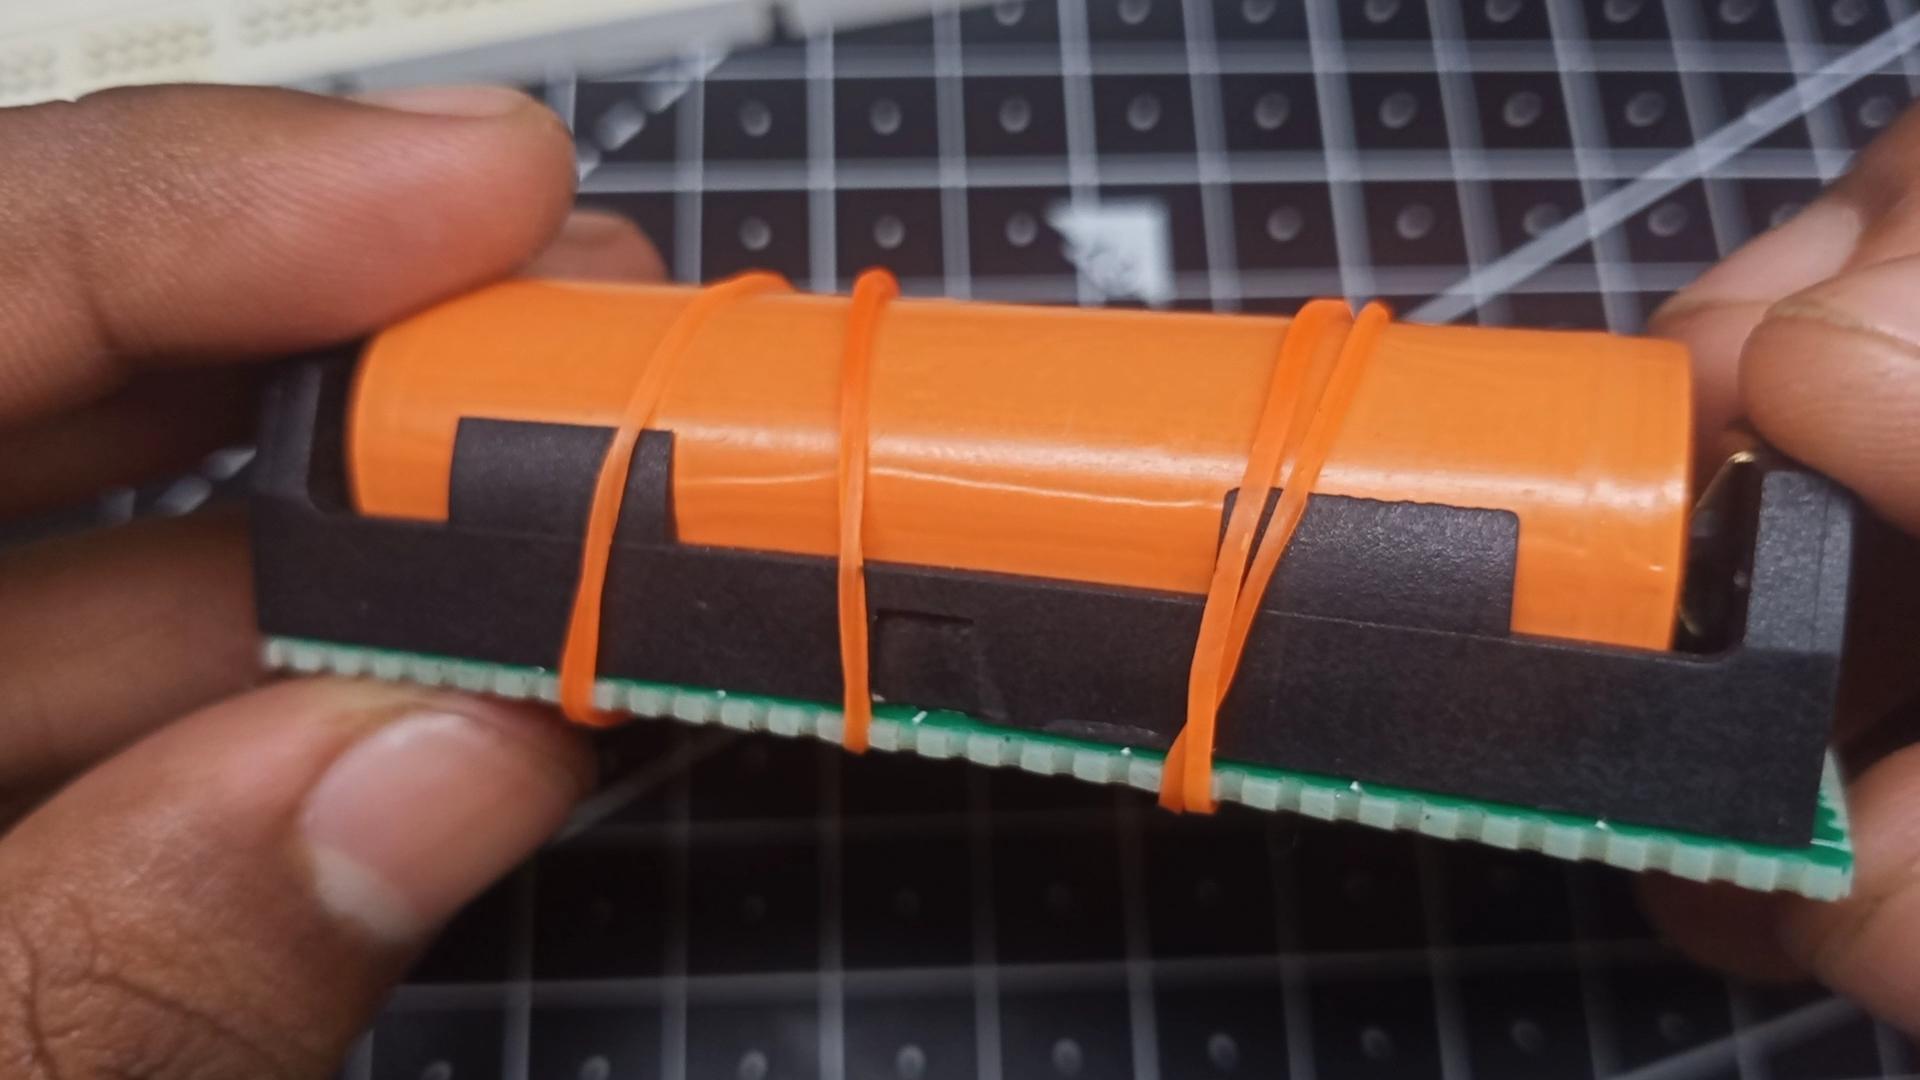
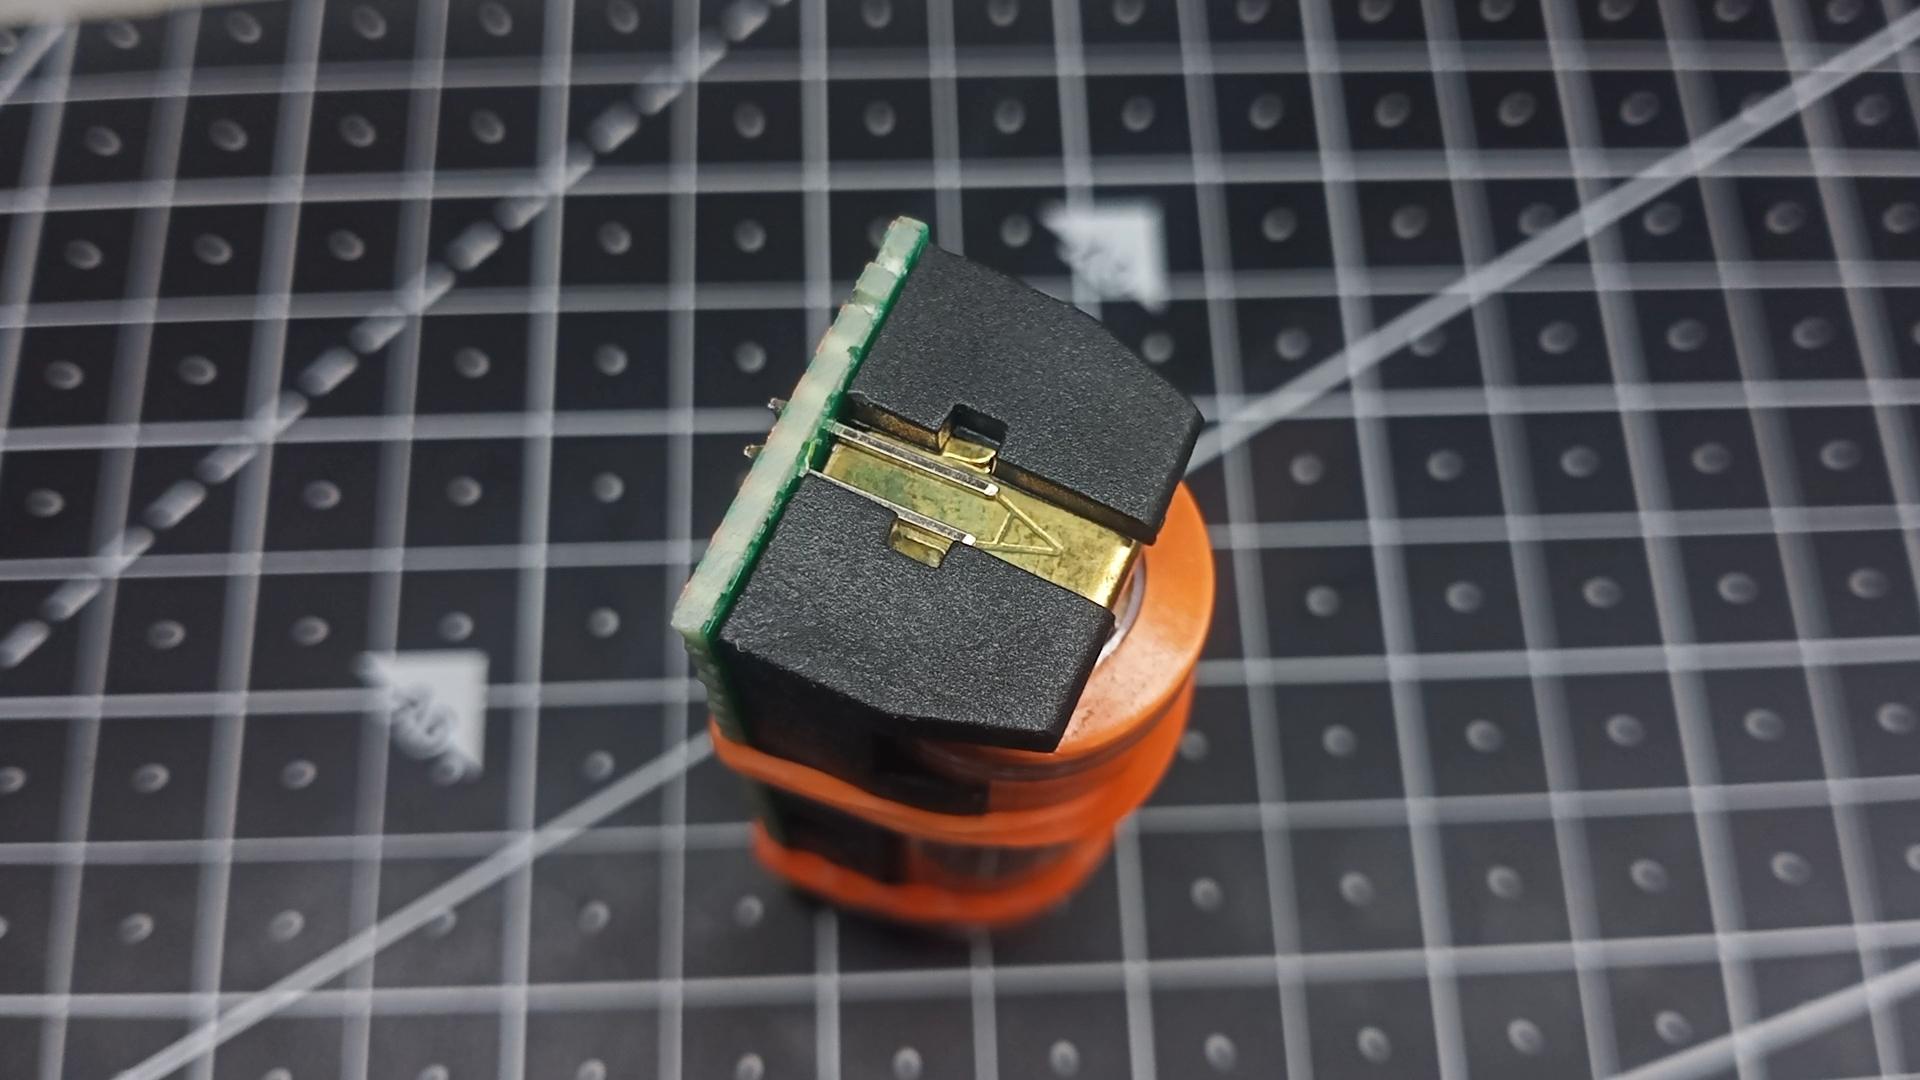
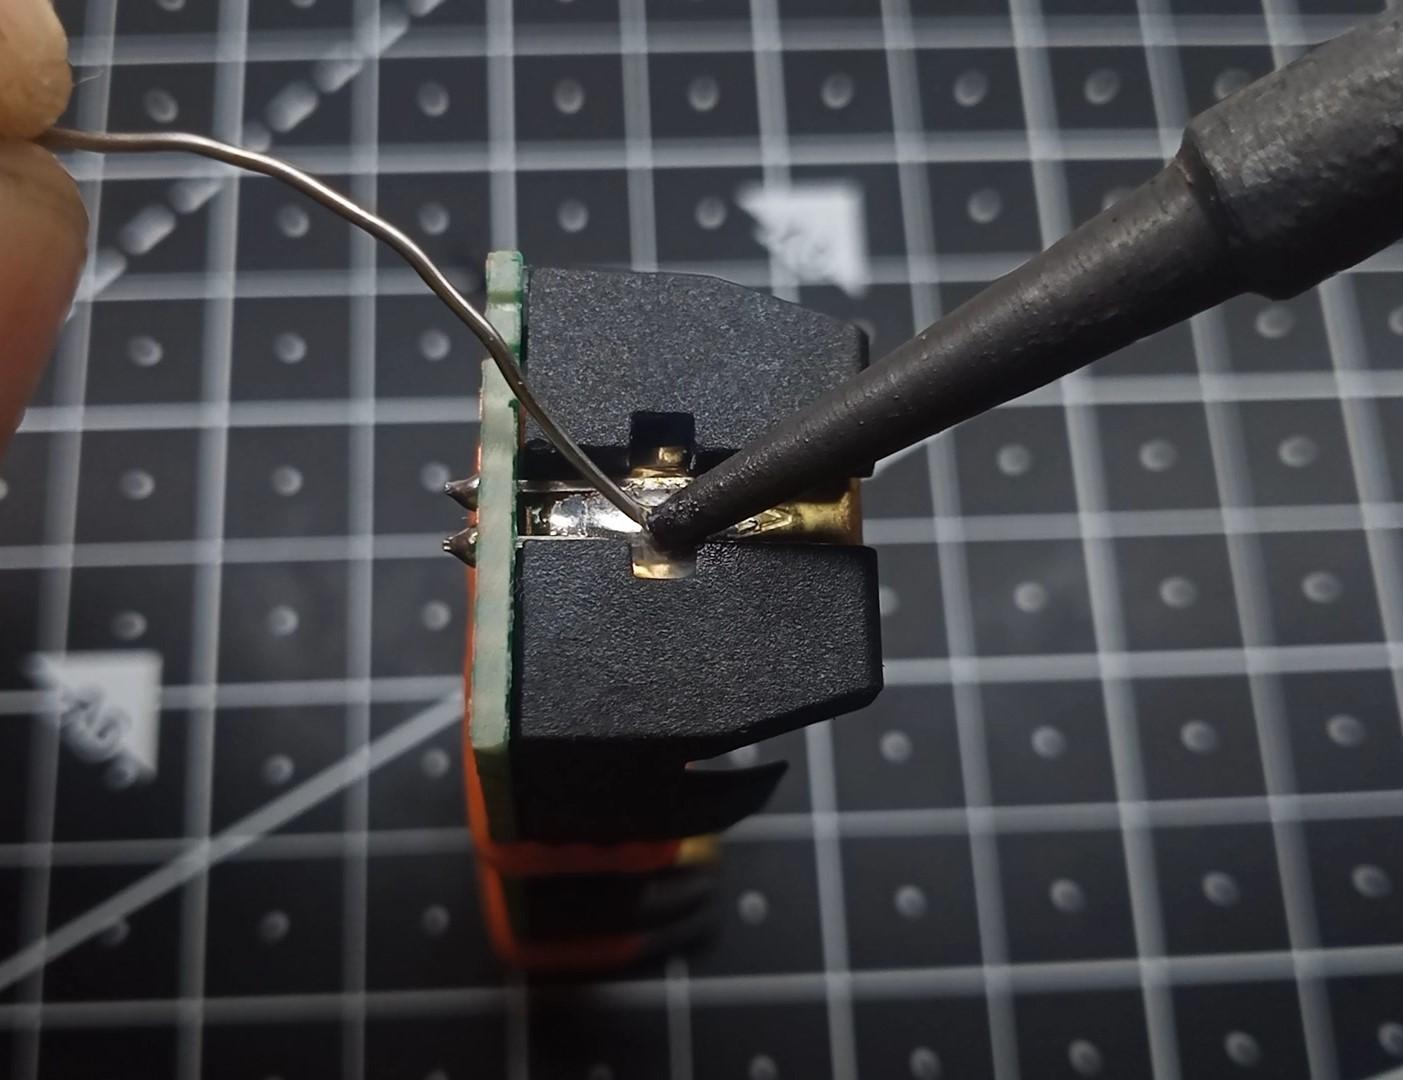


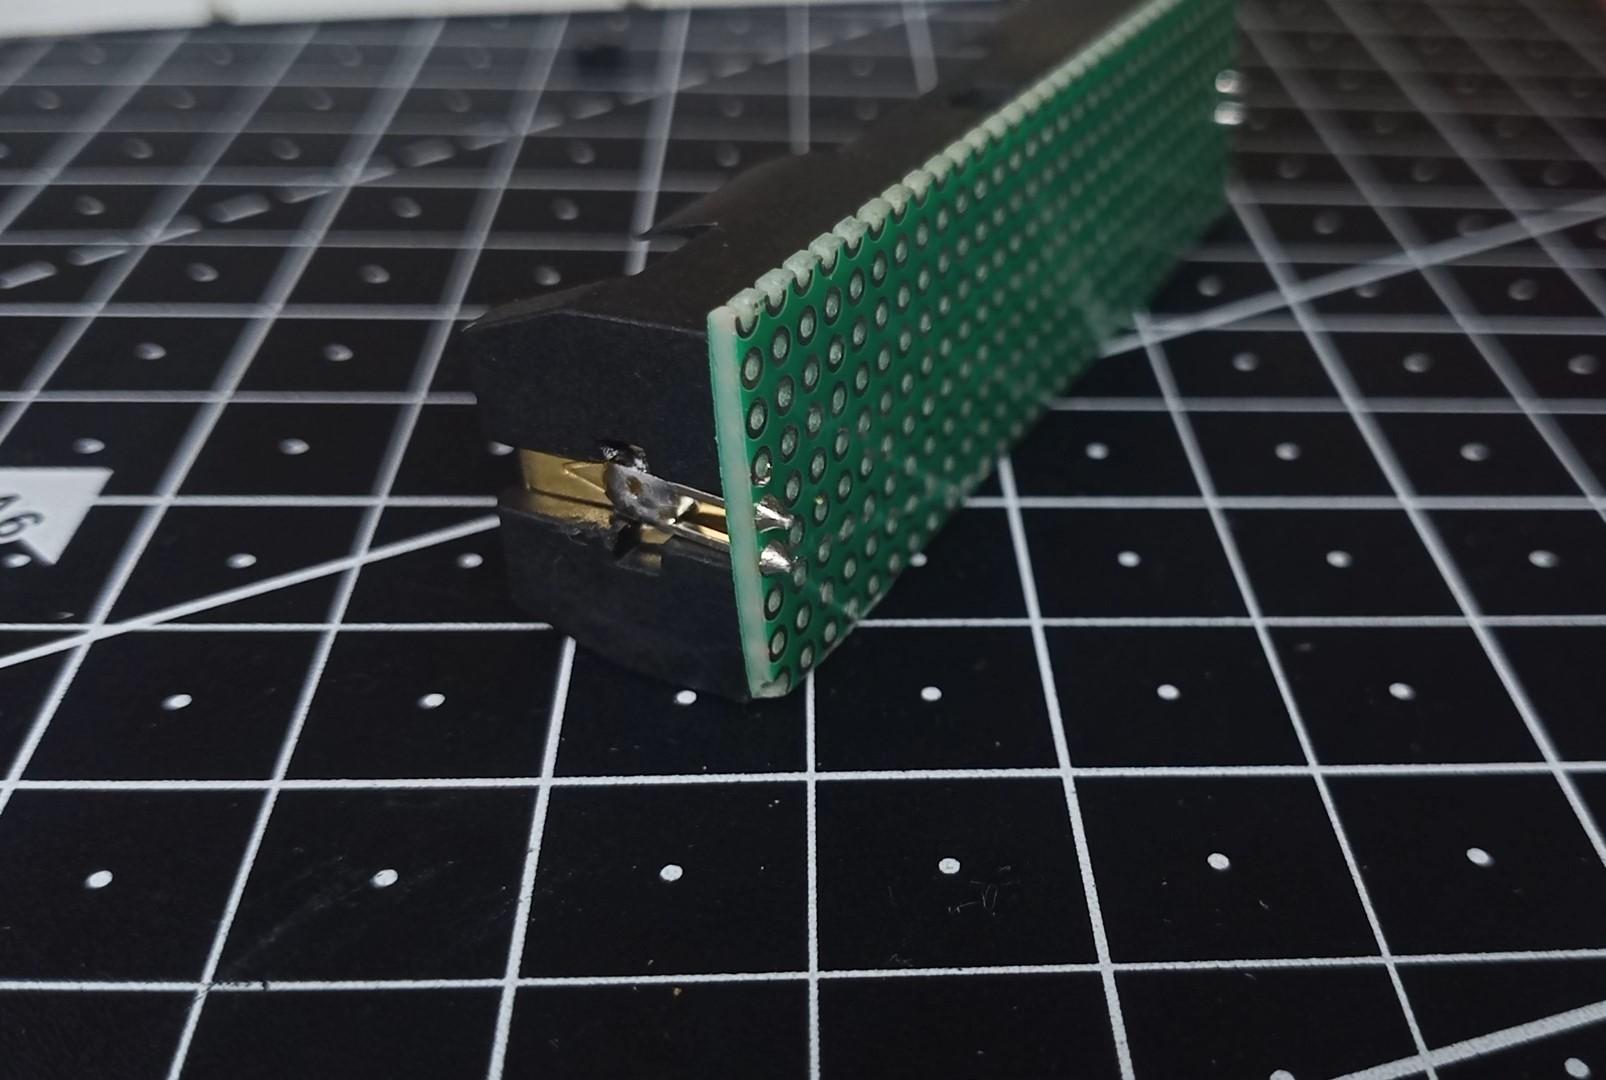
NOTE: In the further steps you will see the Li-Ion battery installed in the holder, please do not place the battery in the holder unless all the soldering work is complete to avoid unexpected incidents.
- Insert a 1x2 male header inside a breadboard, so that it stays firmly while soldering.
- Place the perf board we cut previously on the header so that 3 holes are equidistant from longer side and 1 hole from shorter side.
- Solder the header on the PCB.
- Similarly solder the header to other side but this time closer to smaller edge.
- Remove the black spacer so that battery module fits without leaving any gaps between it and the board.
- Place the battery holder between the headers and solder it.
The battery holder being symmetric can be soldered any way.
Bottom PCB - Installing the TP4056 Charging Module


First cut of a perf board of 15 x 24 holes. We will call this as bottom PCB. Then cut single strand wire of about 5mm, remove the insulation and bend the wire in middle to get a L-shape. Get about 4 to 5 of these. We will use these wires to solder TP4056 onto perf board.
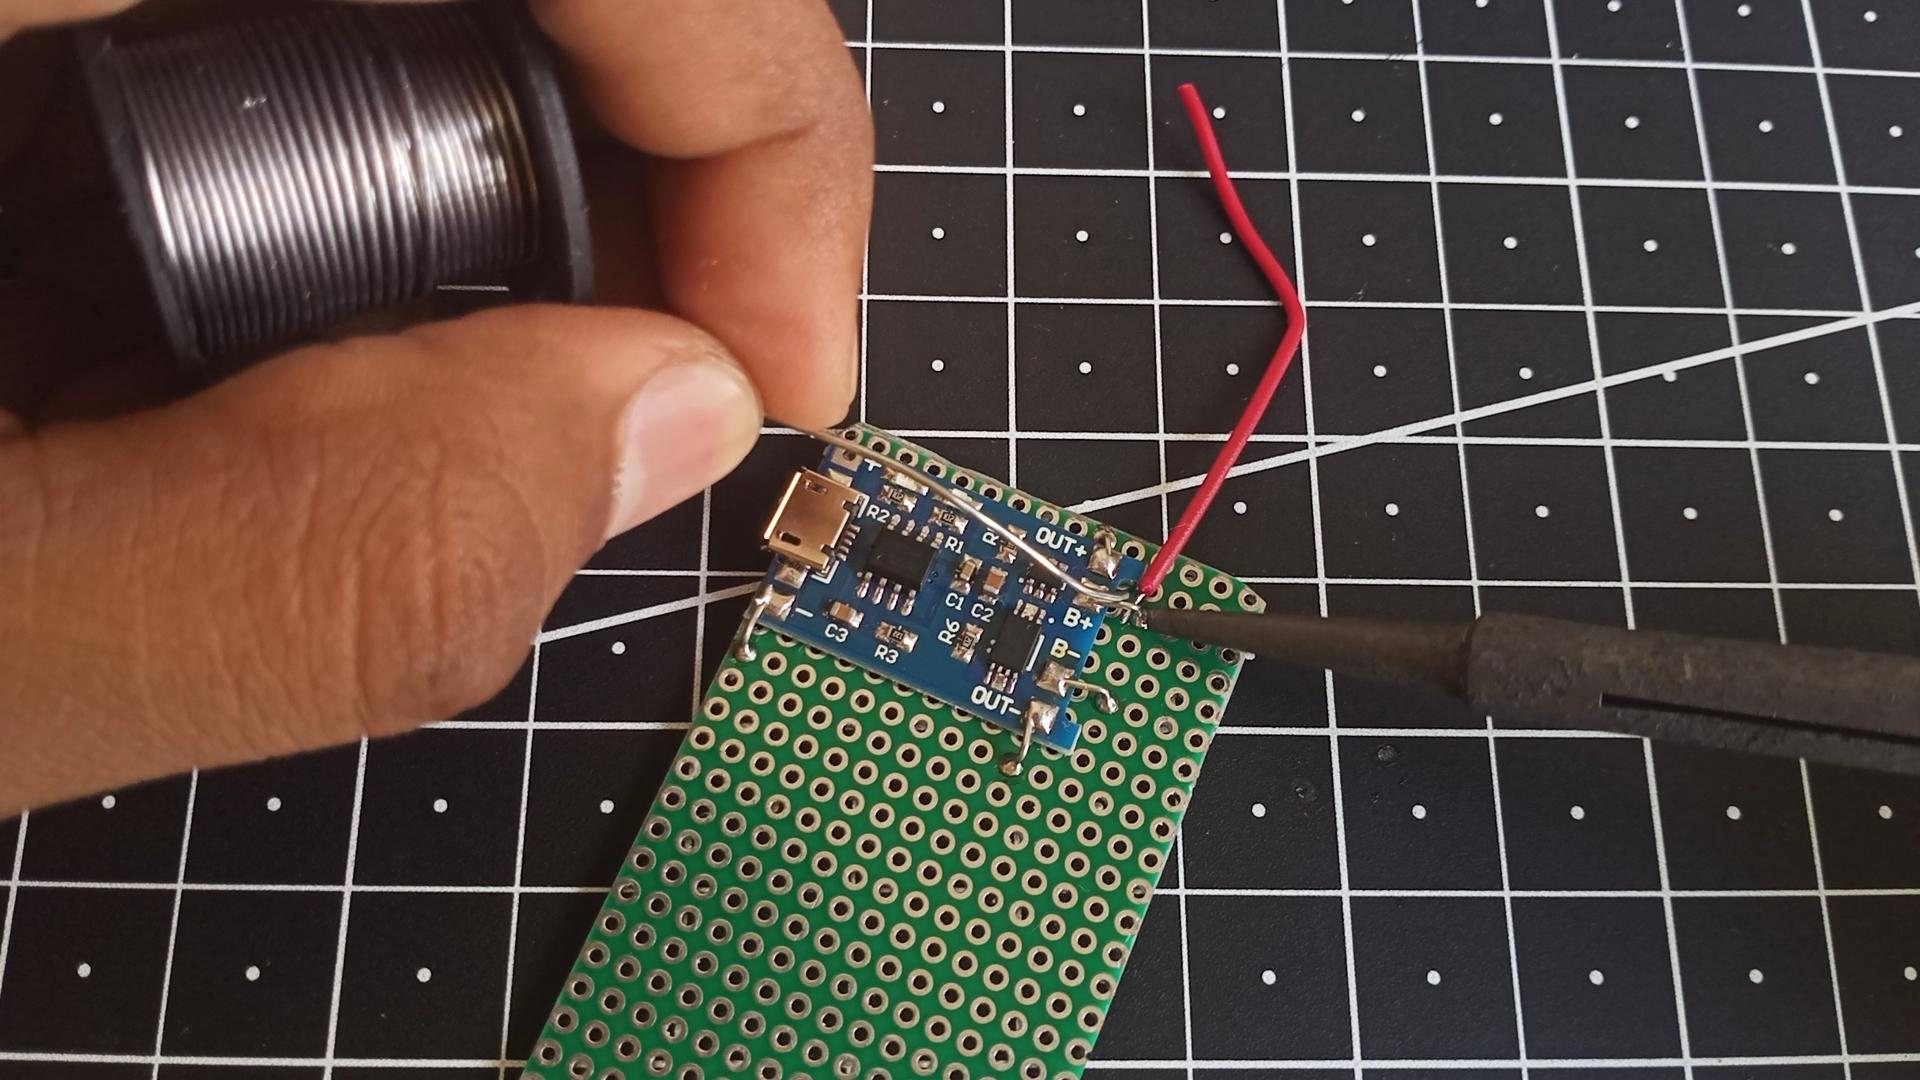
Then place TP4056 on any one corner of the board leaving 1 hole from shorter side and aligned to longer side. USB connector should face outside, which will be used to charge the battery.
Now solder TP4056 module using the wires we cut out. While soldering wires to perf board ensure enough room between them for other wire to route.
Connecting TP4056 to Battery



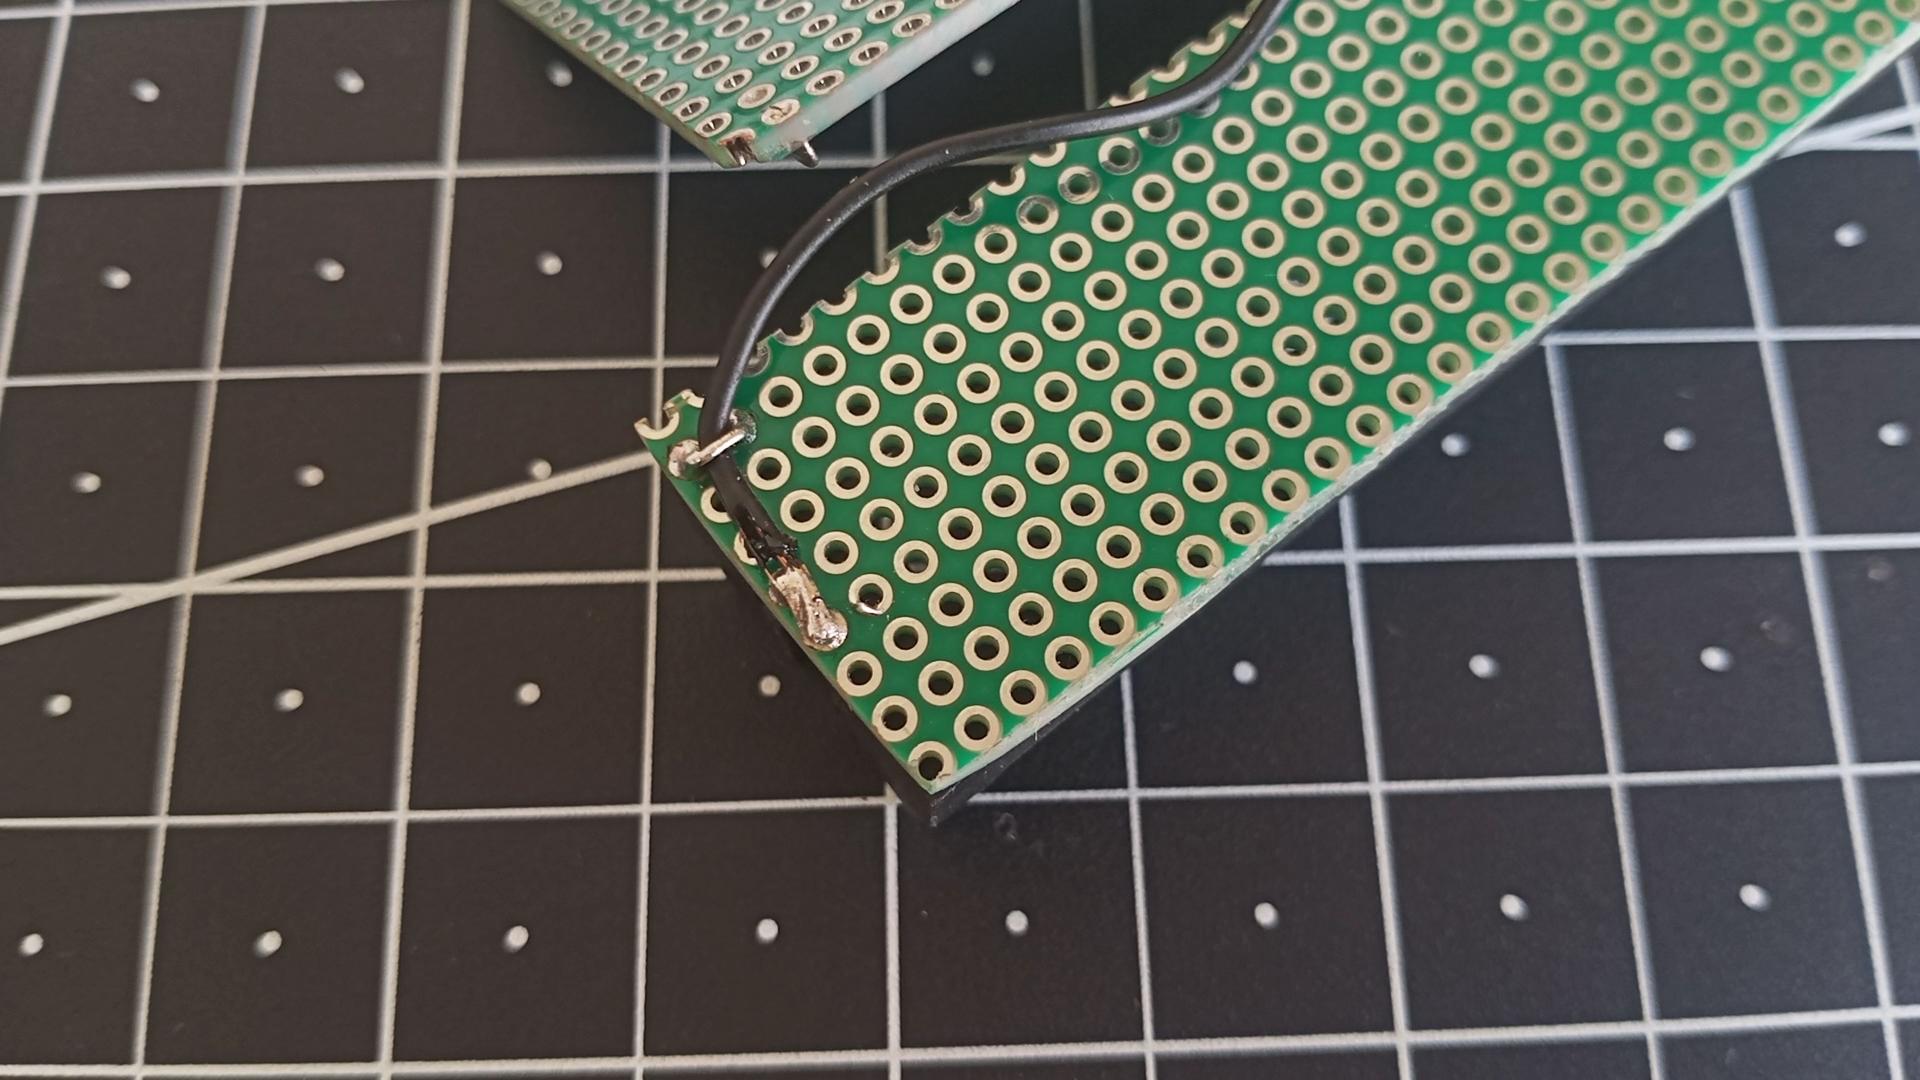


To connect the battery module to TP4056, cut a wire of red and black color of length 55 and 90mm respectively.
Trim one end of red color and solder it B+ of TP4056 module. Bend it and bring it to USB connector. Trim the other end and solder it to positive of battery holder.
Similarly solder one end of black wire and other to negative of battery holder.
If there is no marking on the holder then check which way the battery goes into the holder, if its both ways then solder to any terminal. Make sure the black and red wire don't cross each other.
Adding the Switch

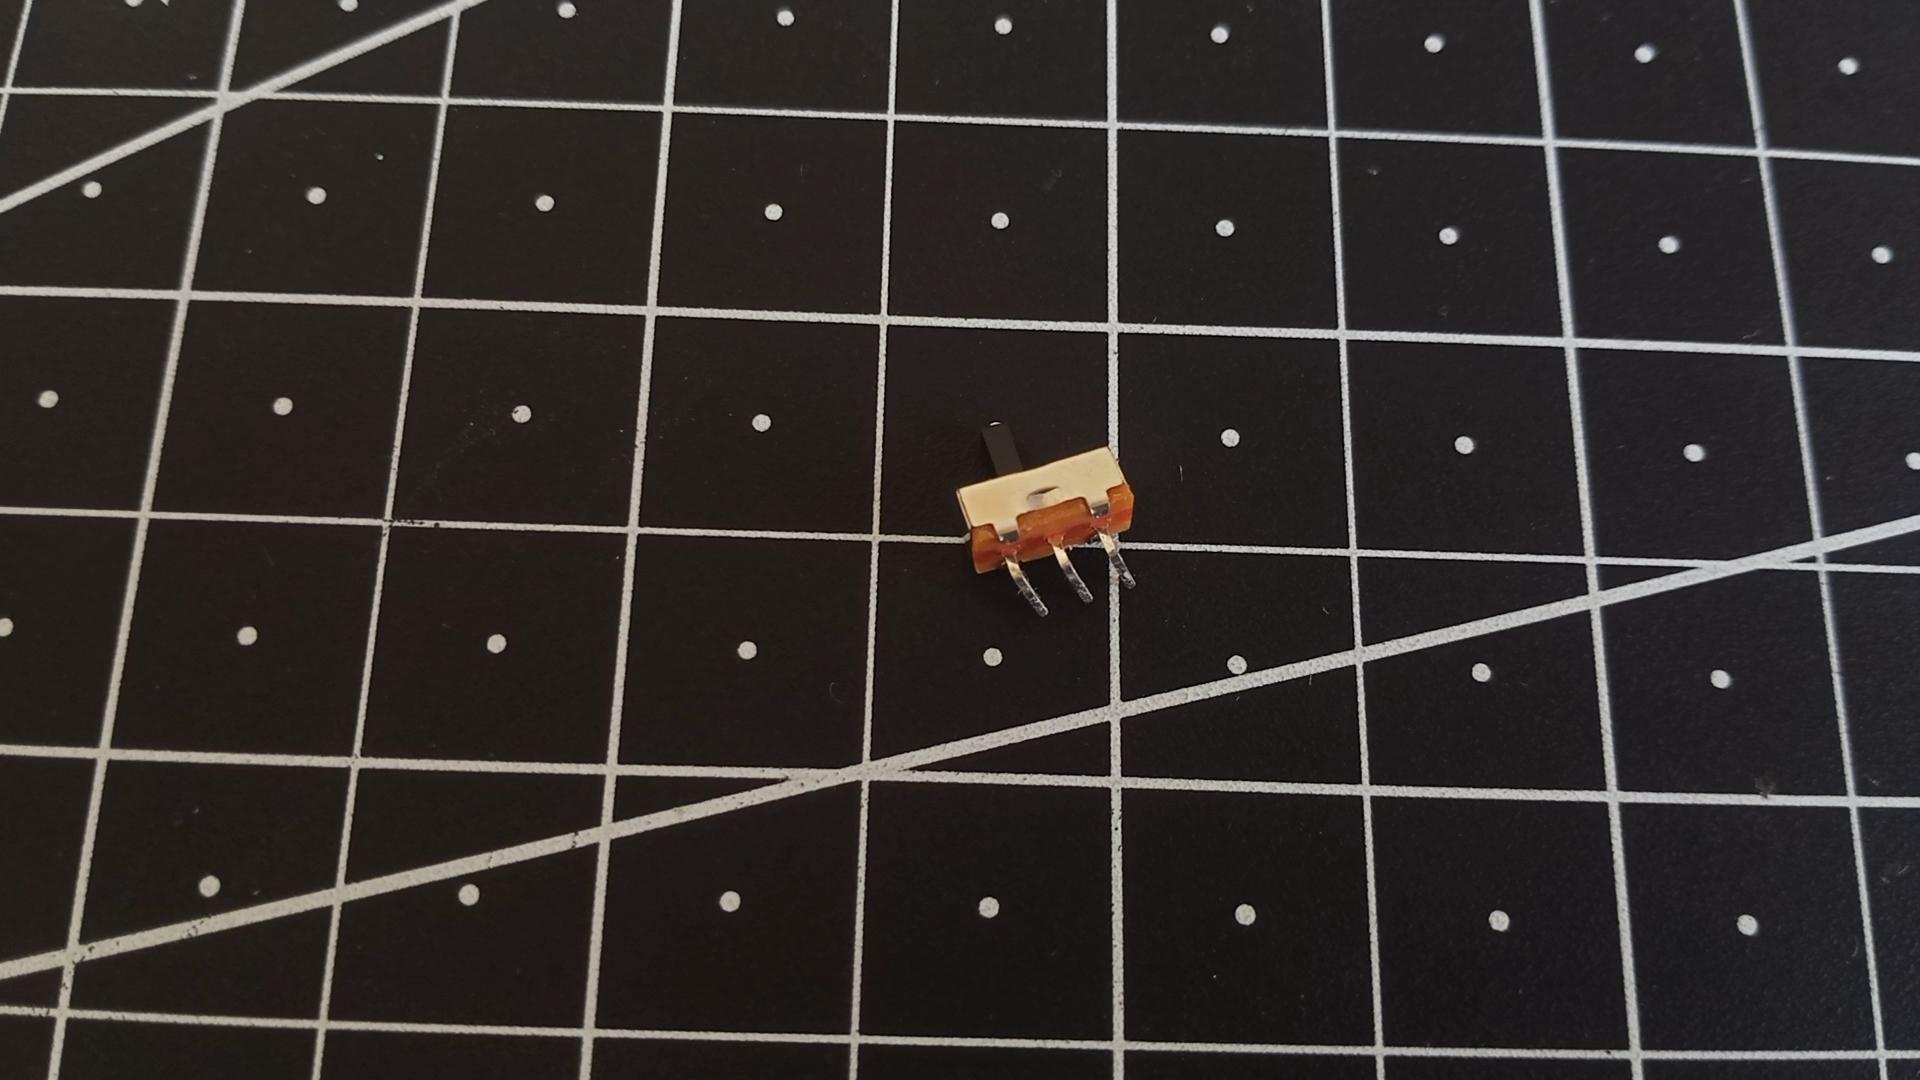


Before soldering the switch, we need to modify it a little bit. Bend the legs of the switch at 90 degrees and then again bend them a lit on vertical axis.
Now mark a area of 3.5 x 0.5 holes, leaving 5 holes from top right.
Solder the switch, because we bend the legs of switch it now fits perfectly in the area and the legs go in the hole perfectly.
Solder a red wire from OUT+ of TP4056 to right most terminal of the switch.
Cutting the Top PCB

Cut another PCB of same dimension as of bottom PCB. Remove a 4 x 7 hole wide section from the PCB using a utility cutter.
This section will be used to insert the knob onto rotary encoder.
And we will call this new board as top PCB.
Installing Boost Module


The boost module XY-016 has a micro USB B connector on it which can be used to boost power from phone chargers which we definitely don't need. It can be desoldered but it isn't a barrier of other components so we will keep as it is.
Solder the module on the left side of top PCB keeping the cut out to front and the USB towards you, using single strand wire as we did for TP4056.
Connecting Boost Module to Lower PCB


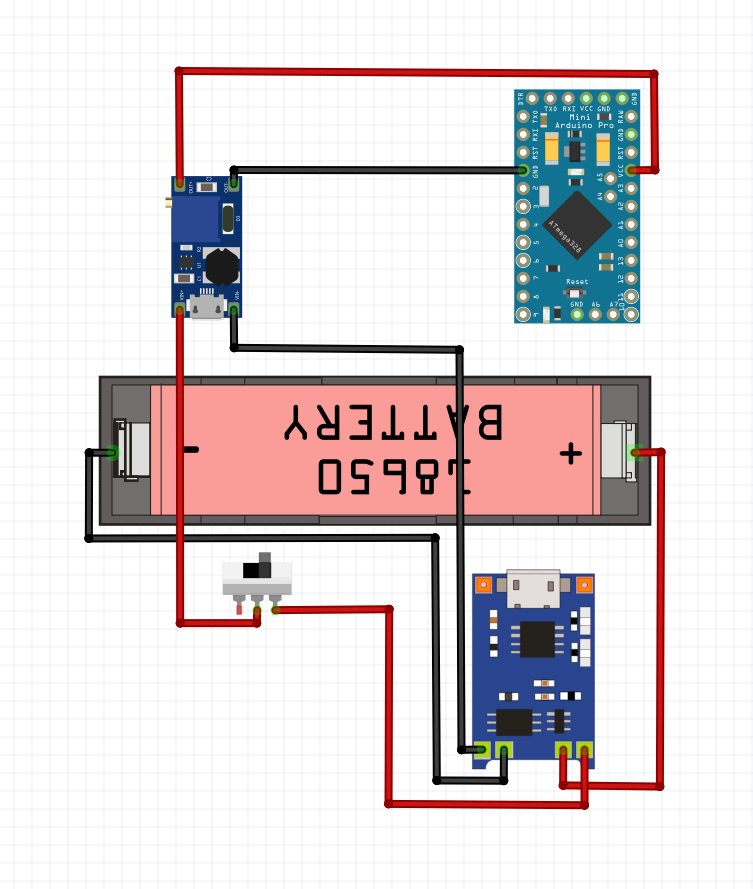
Cut out a red color wire of length 50mm, strip the ends and solder it to middle terminal of slide switch. Route the wire under the battery holder and solder to VIN + of boost module.
Now get a black wire of about 90mm, strip the ends and solder to OUT - of TP4056 module. Route the wire under the battery holder and solder the other end to VIN - of boost module.
This way we have connected the battery to protection and charging circuits and then to boost circuitry which step the voltage of battery to 5V with a switch in between so that the clock can be turned off when needed.
Setting the Boost Module to 5V
Insert the battery, flip the switch, which should now provide power to the boost module. Take a Digital Multimeter and measure the voltage across OUT+ and OUT- of boost module, use the potentiometer on the module (blue color box like component) to set the voltage to 5V. Rotate the knob of potentiometer to get desired output value.
Now the boost module is ready to power our micro-controller once we solder it in further steps.
Do remove the battery from the battery holder.
Installing Arduino Pro Mini


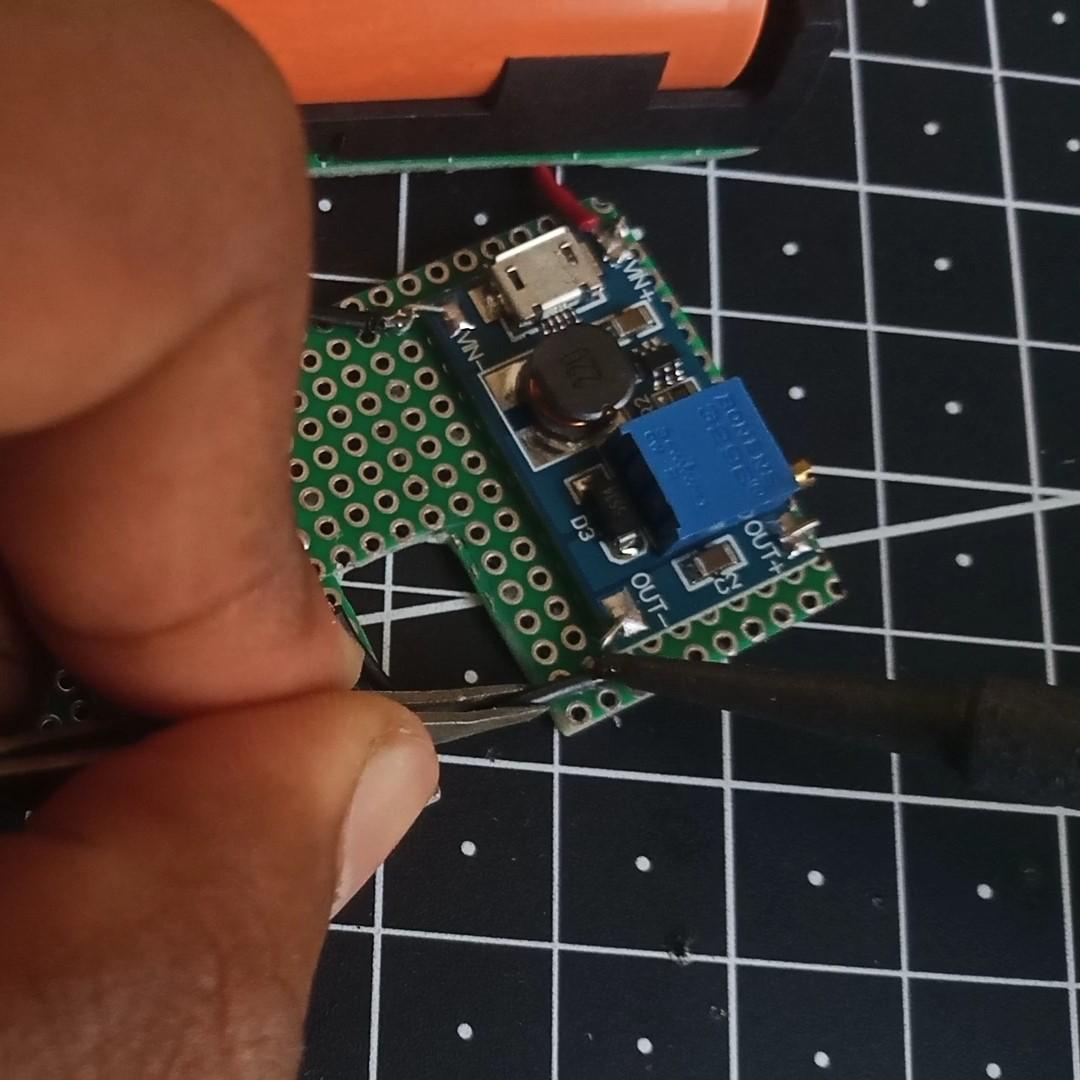


The Arduino Pro Mini will be solder on the other side top PCB where in the reset switch of pro mini will face same as USB on boost module.
Will use the same technique of single strand wire but this time the wires will go through the holes unlike previous where they were soldered outside the module.
We are going to use VCC, GND, A0 and D2 to D9 pin of pro mini so solder only them.
Now connect the GND of pro mini to OUT - of boost module. First bring the wire along the pro mini then along the edge of PCB because the lower portion of the cut section is reserved for the knob to go.
Now connect VCC of pro mini to OUT + of boost module and the wire should route along the edge of PCB.
You can check if everything went so far is correct by inserting the battery and flipping the switch, Pro mini should turn on indicated by the power on LED on pro mini.
Connector for TM1637


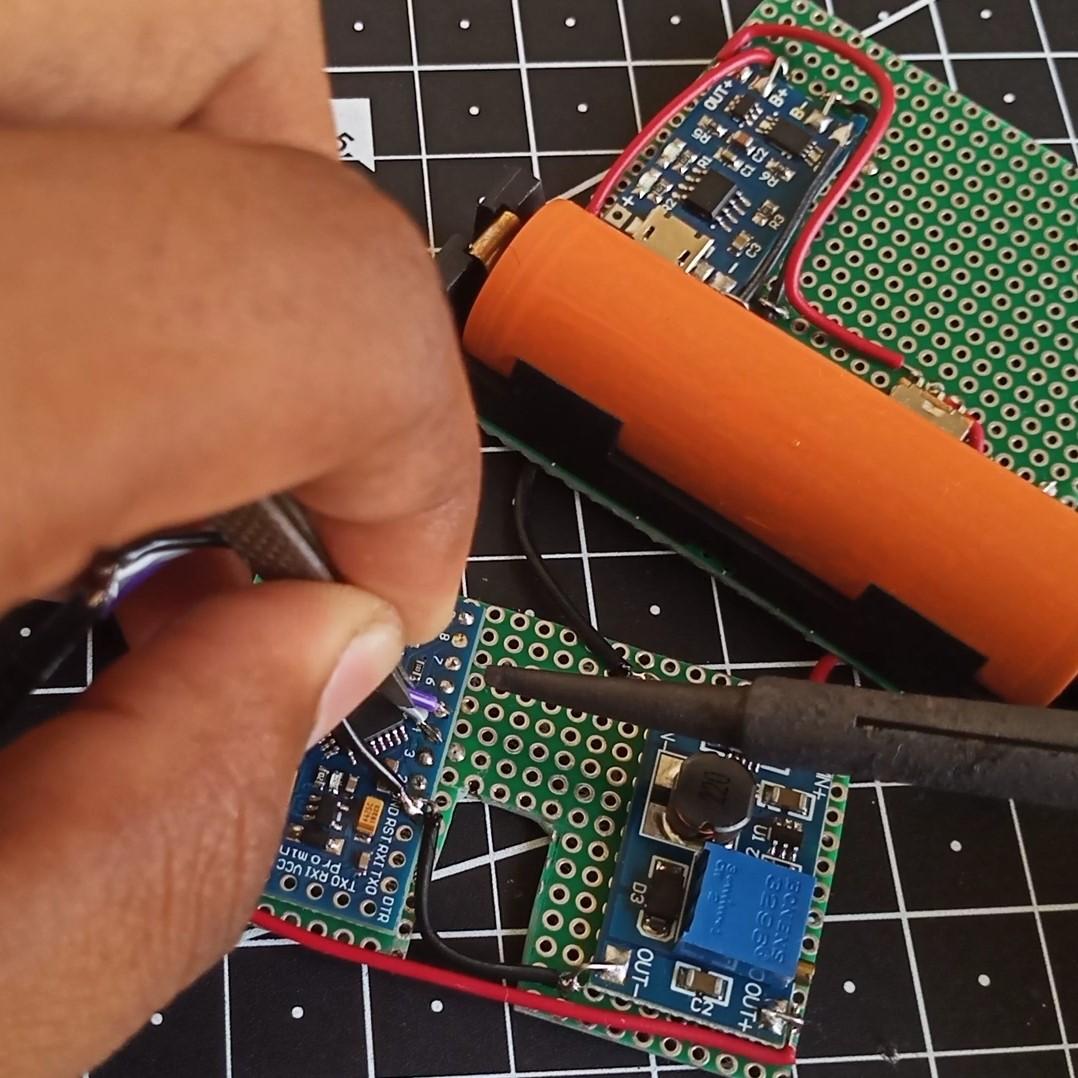

The TM1637 clock display will be connected to Arduino pro mini using female pin header and ribbon wires.
First cut out a 1 x 4 female pin header and a ribbon cable of about 50mm length with 4 wires. solder one end of ribbon cable to female pin header.
Solder the 1st wire of cable of GND, 2nd to VCC, 3rd to D4 and 4th to D5.
The TM1637 module can be connected by sliding the female header into male header.
By doing so we connected:
---------Pro Mini---------TM1637------
- -----VCC--------------VCC--------
- -----GND-------------GND--------
- ------D4---------------DIO---------
- ------D5---------------CLK--------
Removing the Cell Holder From DS1302 Module


The coin cell which is used to retain the time when the chip is not powered by main supply, will be removed and soldered on bottom PCB.
To remove the coin cell holder, first apply a fresh solder on both of the terminals. Now again heat one of the terminal using solder iron and lift that end while the solder is molten. Go for other end and lift it repeat the process so that the cell holder is removed.
Adding the Cell Holder to PCB

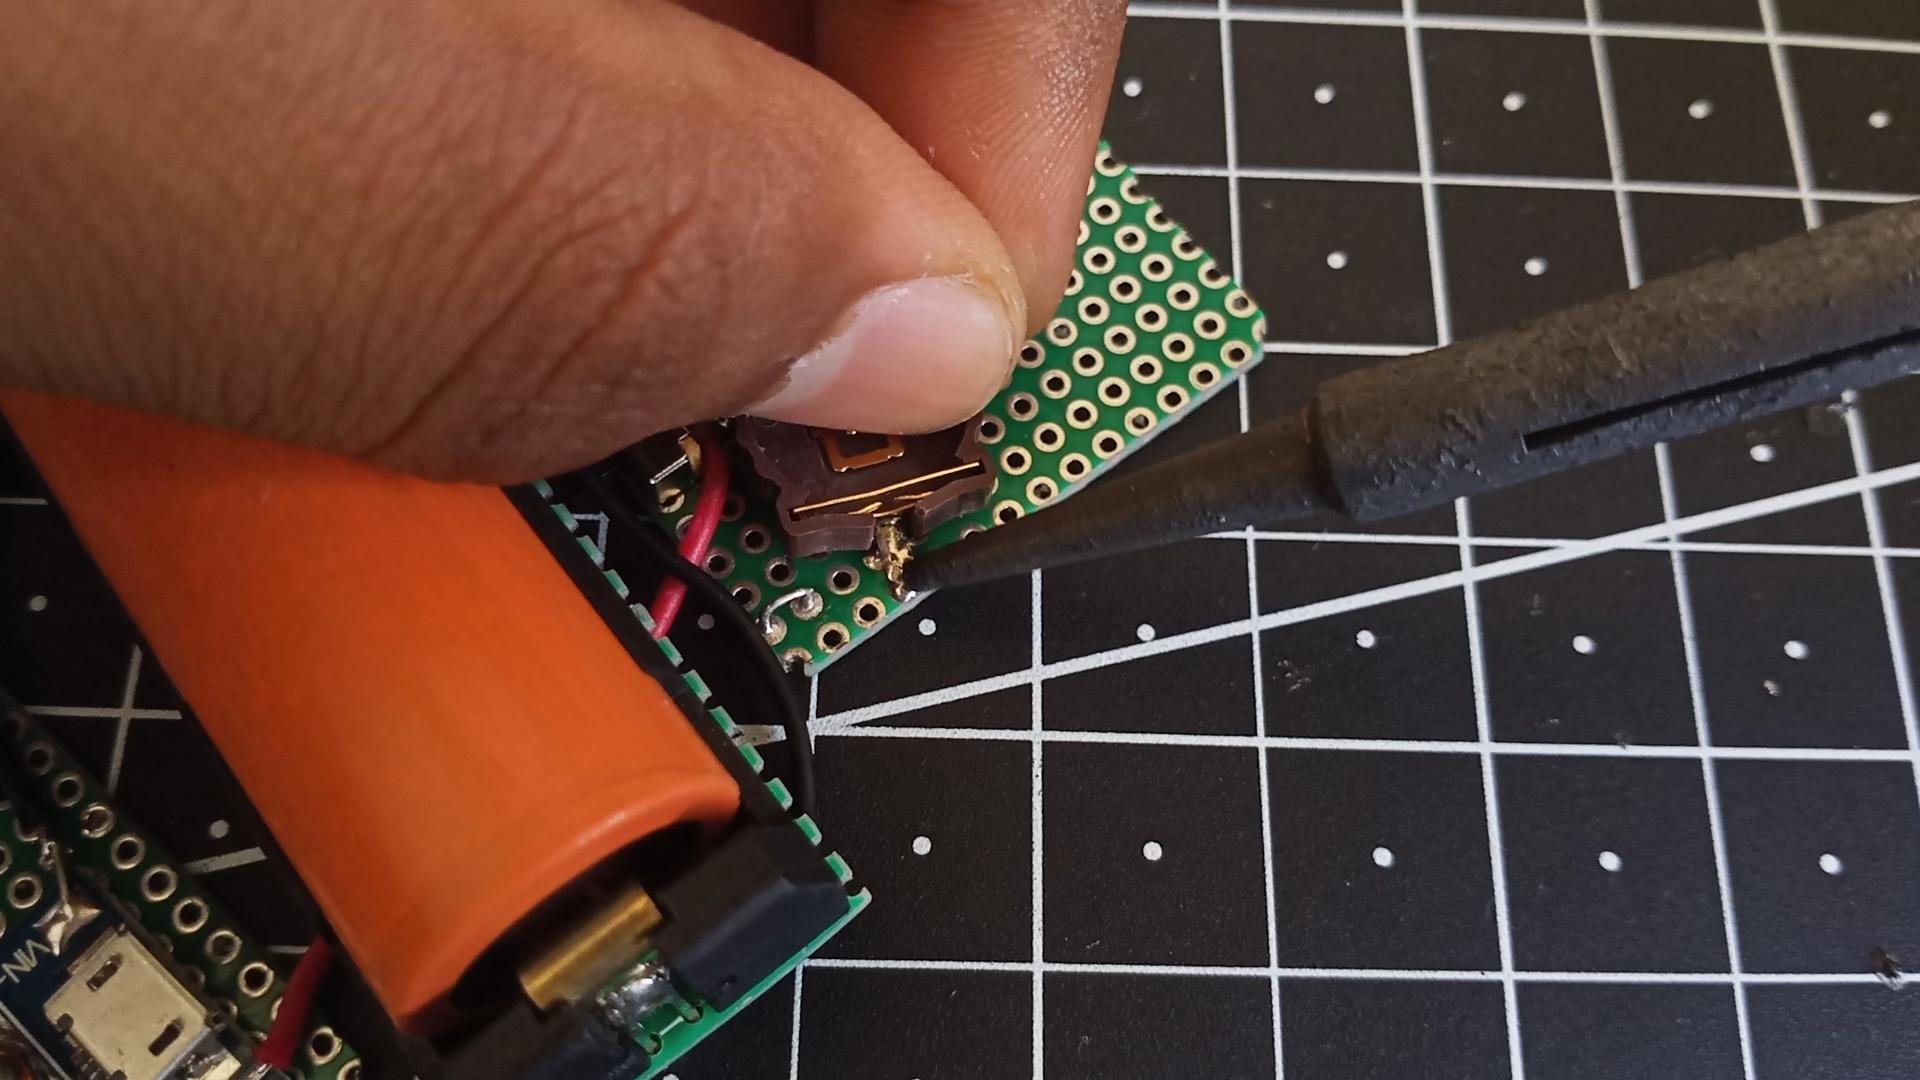


The cell holder will be placed on bottom PCB below the switch.
Mark the holes particularly 4th hole from top and aligned to left and 4th hole just below the the middle terminal of switch. The flat part of holder connects to positive of cell and other connects to negative. So the negative gets soldered on the mark directly below the switch and positive to other mark.
Removing the Connector From DS1302 Module and Adding New Connector


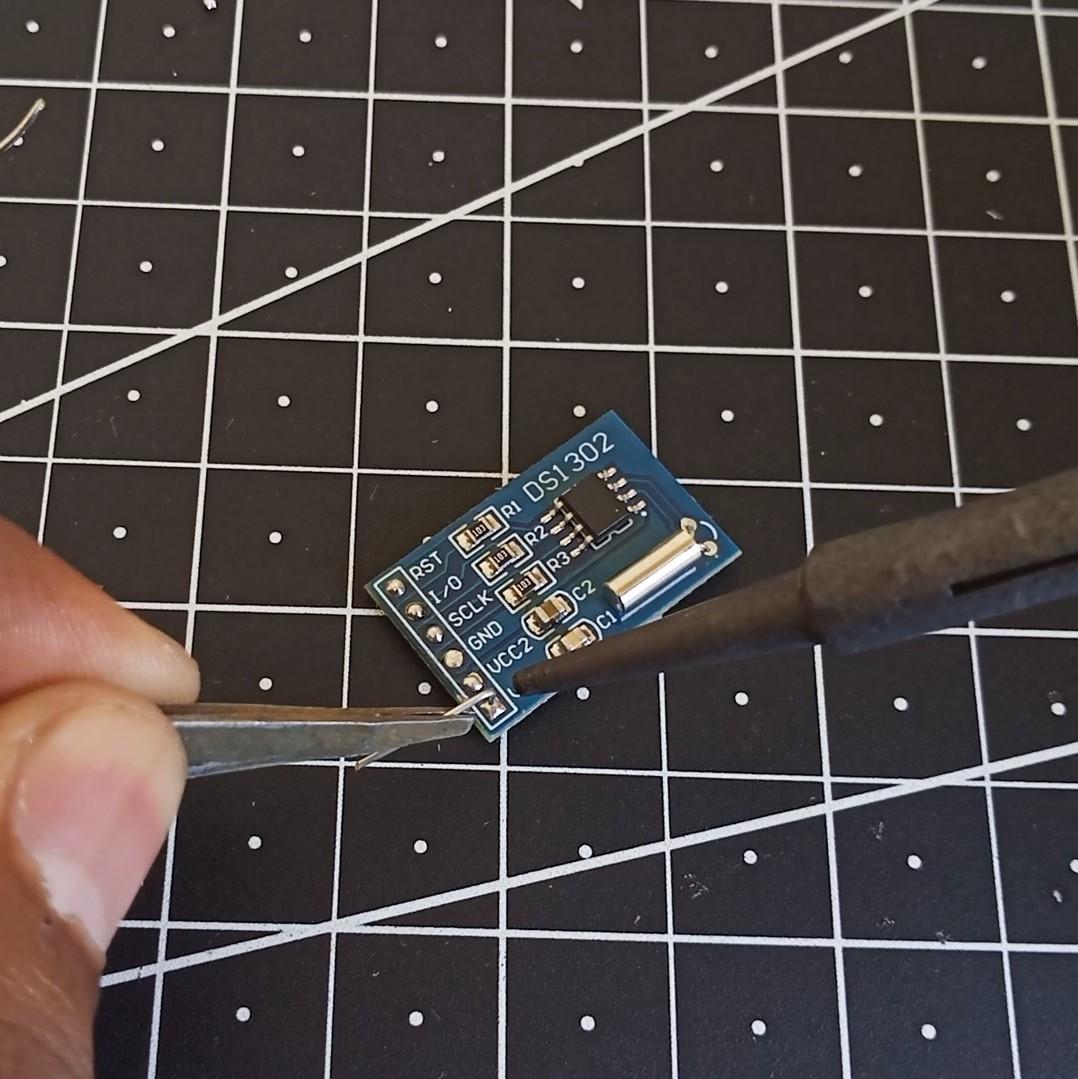

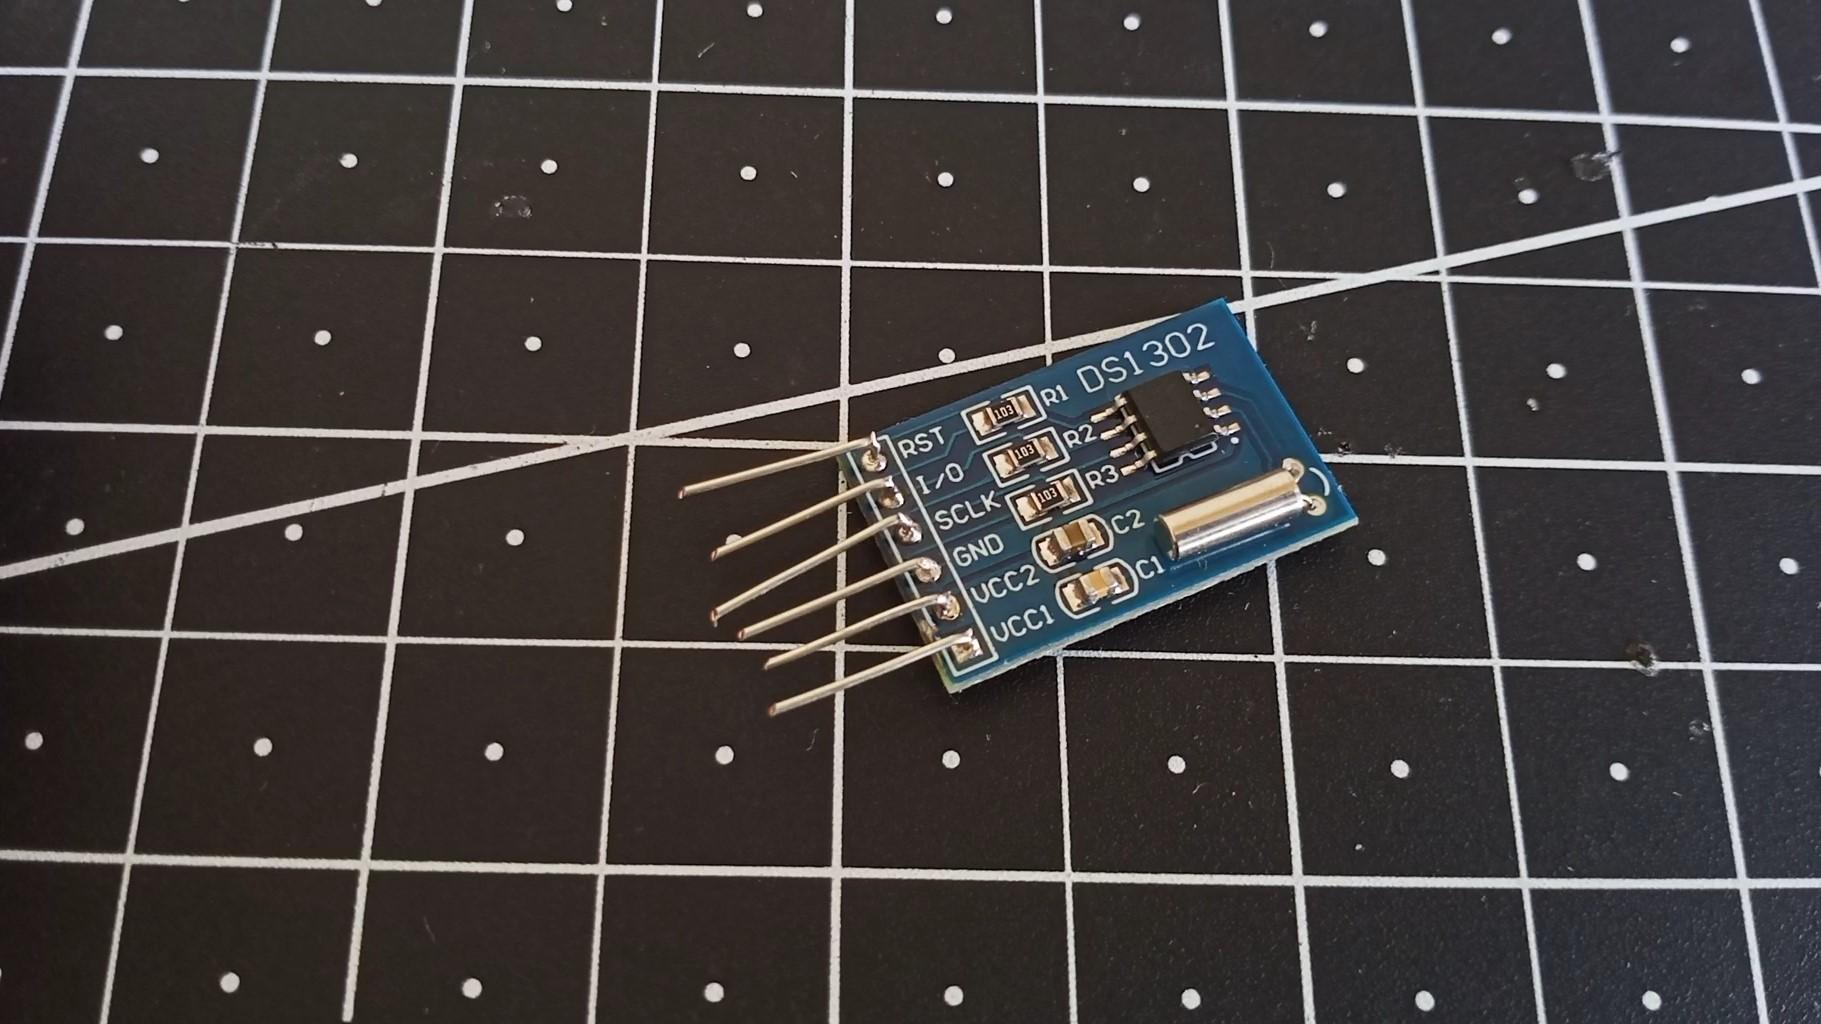
The pin header on DS1302 module needs to be removed because room needed to solder wires is not sufficient so we need to remove them and add ours own which is nothing different but single strand wire.
First using a plier straighten the bend pin header. Now cut then as much as possible. Using plier remove the black spacer by twisting it. Desolder the remaining pin header. As we desolder, the holes for pins to go must have filled with solder. There is no need to remove them. Bend single strand wire into L shape but the shorter length should be less than the height of black spacer because that's what we want.
Hold our custom pin header above the filled solder and push it using a solder iron the heat passes to filled solder through the wire and melts the clogged solder and wire gets inserted into the hole.
Attaching the DS1302 Module to PCB


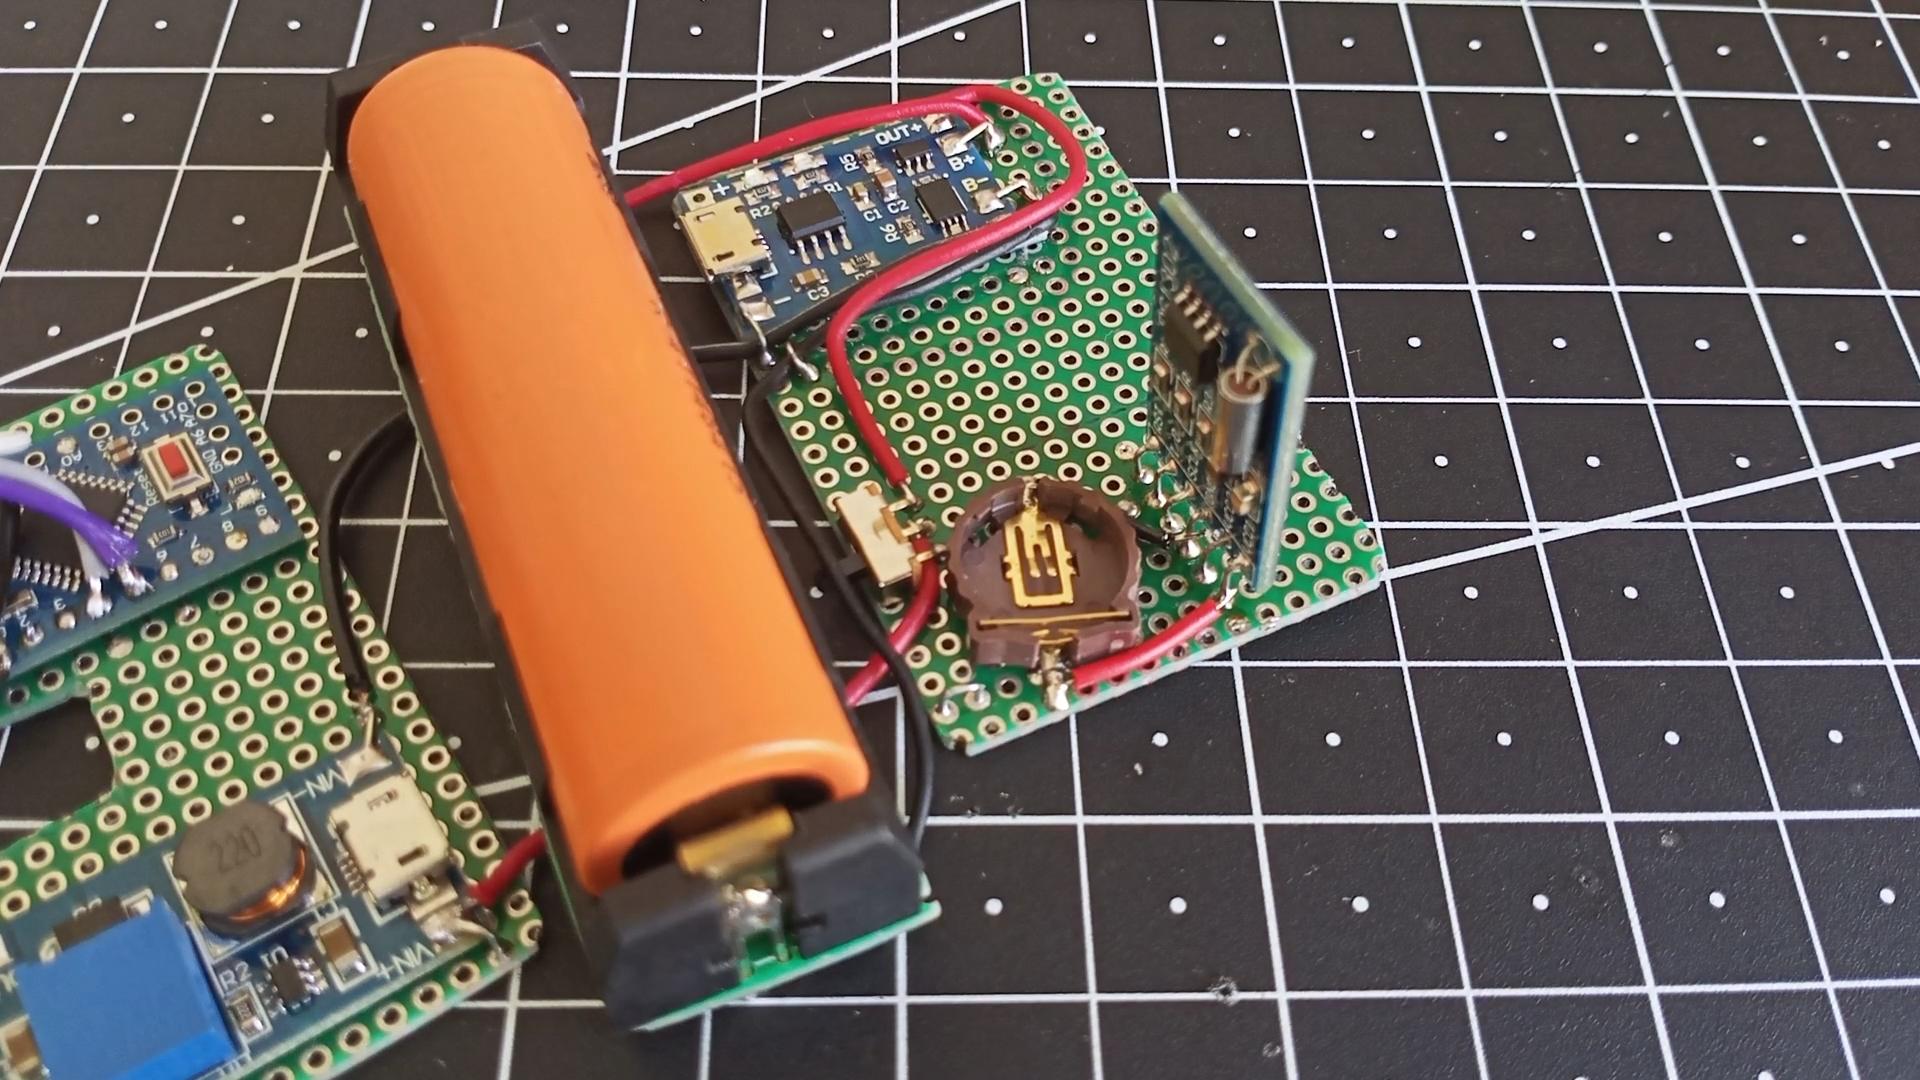
The DS1302 will be soldered just below cell holder leaving one hole space. The wires we attached previously to DS1302 were bend intentionally so that we can attach DS1302 vertically for minimum space occupancy.
Insert the module in PCB just so that the module is raised about 4mm from bottom PCB. Cut the legs coming out from other side so that they get flush. The chip on the module should face to cell holder hence the VCC1 pin of module should be closer to edge of bottom PCB.
Connect positive of cell holder (the flat terminal) to VCC1 of DS1302 module and negative part to GND of DS1302 using wires.
Connecting DS1302 Module to Arduino Pro

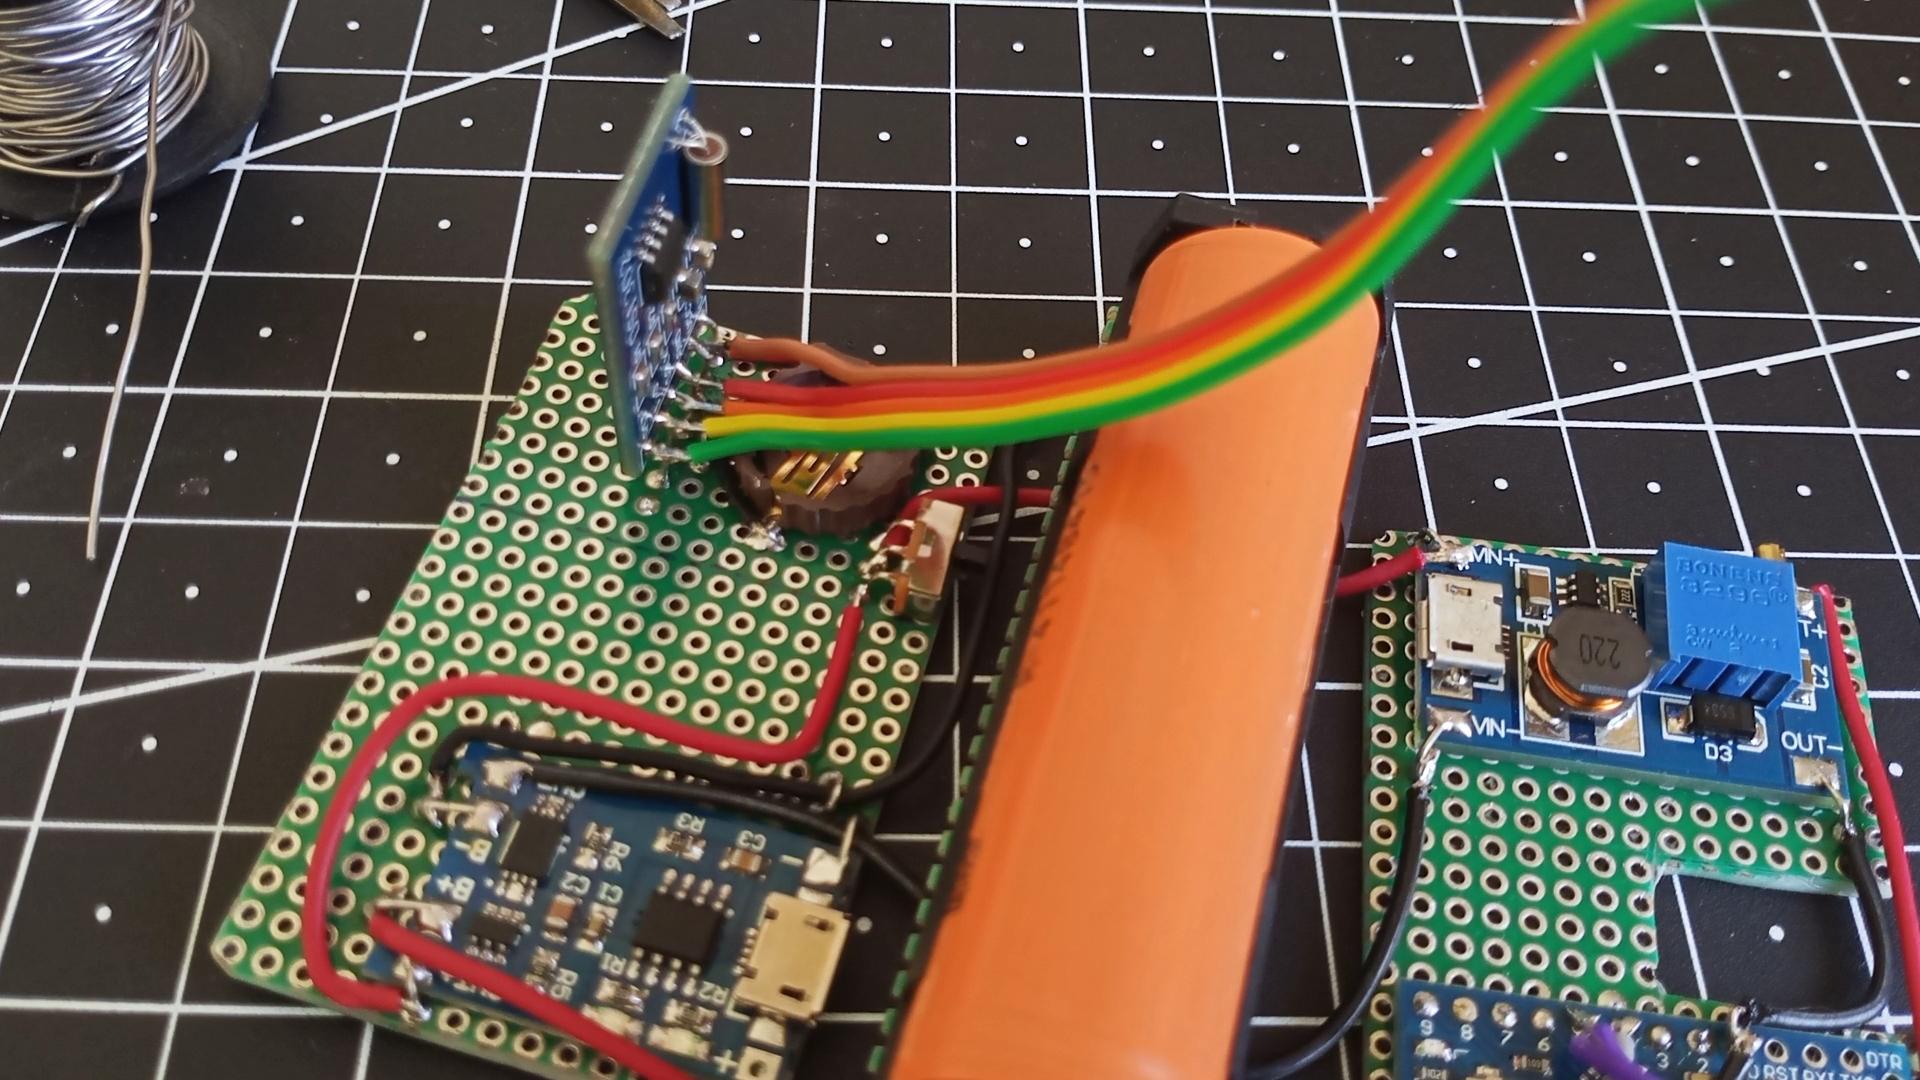


Take a ribbon wire of about 100mm with 5 wires. Strip one end each wires. Now solder them to pins RST, I\O, SCLK, GND and VCC2. The most feasible location to solder is at the bend of our pin headers. Bring the wires from under the battery to Pro Mini. Strip the other end of ribbon cable. And solder according to following scheme
--------DS1302-----pro mini-----
- ----GND---------GND-------
- ---VCC2---------VCC-------
- ---SCLK----------D6 --------
- -----I\O------------D7--------
- ----RST-----------D8--------
Attaching the Buzzer to Pro Mini


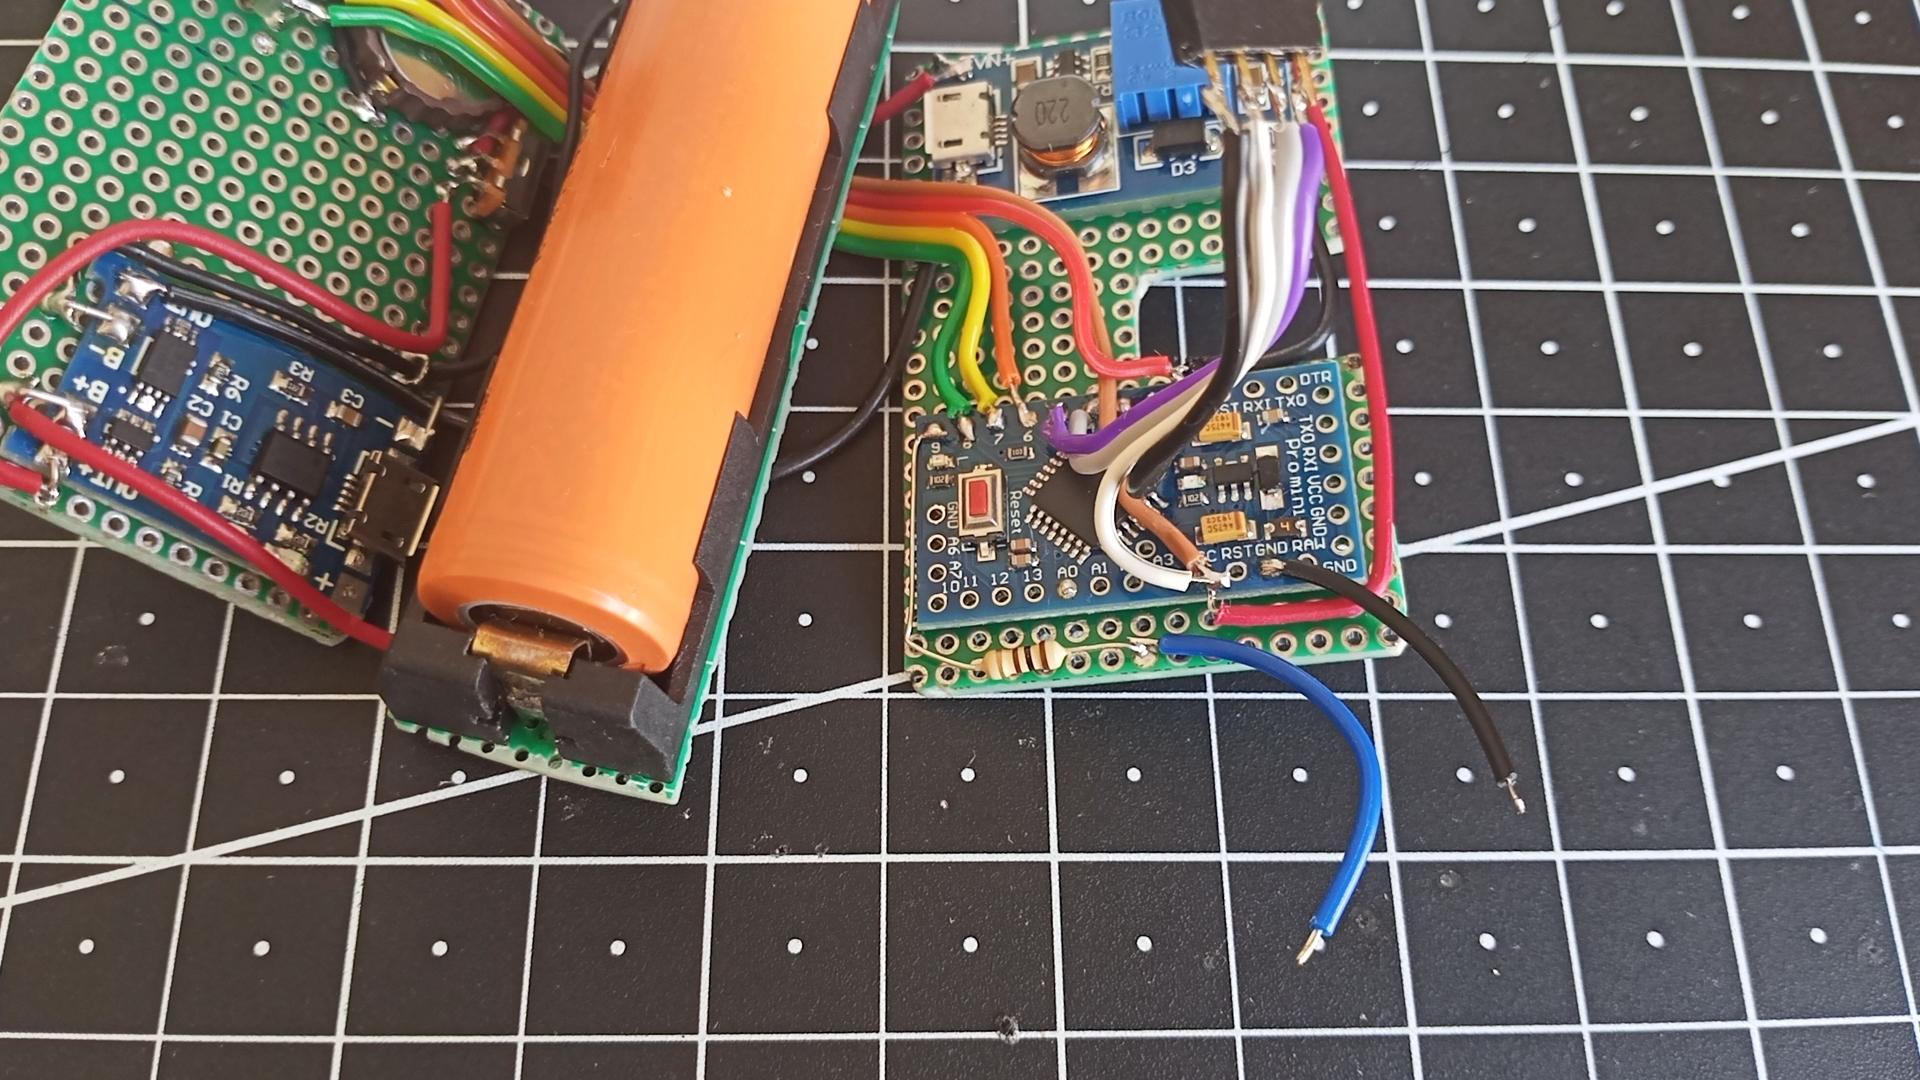

Its time to attach buzzer so we get nice beeping sound for alarm and we can use it as indication for each press and rotation of rotary encoder. The buzzer used will be a passive so that we can use varying frequency as required. For passive buzzer we need a PWM to drive it and hence pin 9 of Pro Mini will be used.
A 100 ohm resistor will be required to limit current through buzzer. Solder one end of the resistor to pin 9 of pro mini. Bring it along the edge of PCB. Solder the other to PCB near A1 pin so that it doesn't move around much.
Take a wire of about 30mm, strip both ends and solder it resistor. Also solder a wire of same length to GND terminal of pro mini. Now solder the positive pin of buzzer to end of wire connected to 100 ohm and negative terminal to wire connected to GND.
Installing the Rotary Encoder on PCB


The rotary encoder will be used as interaction device to change time, brightness and set alarm.
If you get a bare encoder its best but if you don't you can also desolder one from its module and use. Encoder has 5 terminals 3 on one side and 2 on other and will get solder on bottom PCB. The 2 terminal side should face towards switch and the left most pin of 3 terminal side should be 4 holes away from RST pin of DS1302 and should be on the 3rd row from above.
Connecting the Rotary Encoder to Arduino
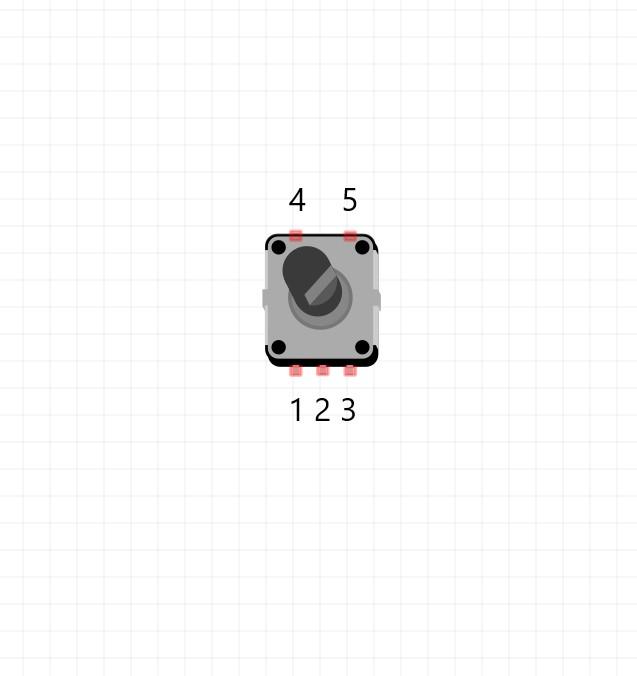


The pins 1, 3, 4 connect to CLK, DT and SW on module which are floating pins and when rotated / clicked it connects to ground pin which are 2 and 5. Hence SW, DT, CLK should be pulled up.
Use a 10K resistor to pull the pins. The nearest 5V to encoder is of connected to DS1302 so connect one end of 10K resistor to each pin and other to VCC2 of DS102 which is 5V.
Connect the negative of cell holder which is connected to GND to pin 2 and 5.
Take a ribbon cable of 3 wire and connect pin 1 of encoder to D3 of Pro Mini, 3 to D3 and 4 to A0 of Pro Mini.
Connections:
-----Encoder----Pro Mini----
- ---1------------D3---------
- ---2----------GND--------
- ---3------------D2--------
- ---4------------A0--------
- ---5----------GND-------
Done With Connections
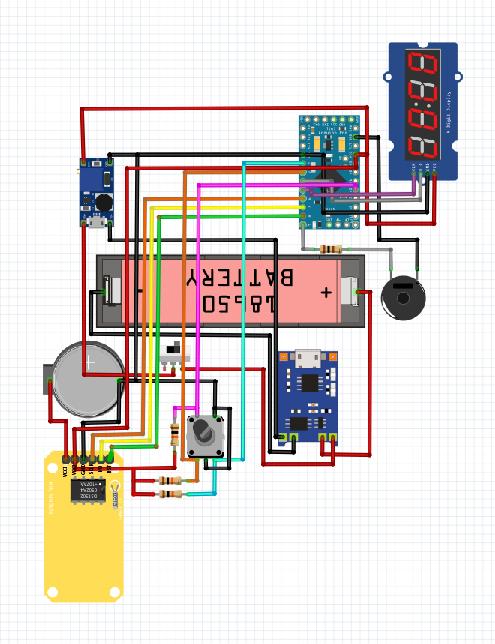
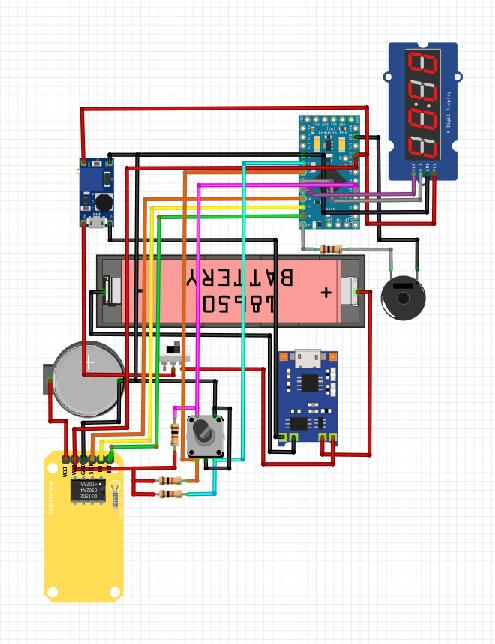
And finally we are done connecting everything electrically.
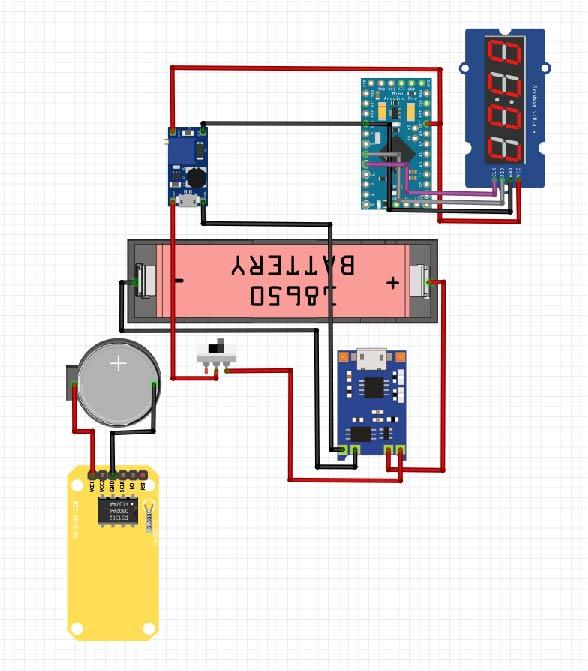
To summaries the connections:
---- Battery-|-TP4056-|-XY 016-|-Pro Mini-|-TM1637-|-DS1302-|-Cell holder-|-Encoder-|-Buzzer-|
- -- +ve ---|---- B+ ---|-----------|-------------|-------------|-------------|-----------------|-------------|------------|
- -- -ve ----|---- B- ----|-----------|-------------|-------------|-------------|-----------------|-------------|------------|
- ------------|-- OUT + -|-- Vin + |-------------|-------------|-------------|-----------------|-------------|------------|
- ------------|-- OUT - --|-- Vin - -|-------------|------------|--------------|----------------|--------------|------------|
- ------------|-------------|--Vout + |-- VCC ---|-- VCC _--|-- VCC2 ---|-----------------|-------------|------------|
- ------------|-------------|-- Vout --|-- GND ---|- GND --|--- GND ---|----- -ve ------|---- 2,5 -----|-- -ve - --|
- ------------|-------------|-----------|---- D2 ----|------------|-------------|-----------------|----- 3 ------|-----------|
- ------------|-------------|-----------|---- D3 ----|------------|-------------|-----------------|------ 1 -----|-----------|
- ------------|-------------|-----------|---- D4 ----|-- DIO ---|-------------|-----------------|--------------|-----------|
- ------------|-------------|-----------|---- D5 ----|-- CLK ---|------------|------------------|-------------|------------|
- ------------|-------------|-----------|---- D6 ----|------------|- SCLK ---|------------------|-------------|------------|
- ------------|-------------|-----------|---- D7 ----|------------|--- I\O ----|------------------|-------------|------------|
- ------------|-------------|-----------|---- D8 ----|------------|-- RST ----|------------------|-------------|------------|
- ------------|-------------|-----------|---- D9 ----|------------|-------------|------------------|-------------|- +ve ----|
- ------------|-------------|-----------|---- A0 ----|------------|-------------|------------------|---- 4 ------|------------|
- ------------|-------------|-----------|-------------|------------|-- VCC1 --|----- +ve ------|-------------|------------|
Now its time to insert the PCBs, program Pro Mini and our clock will be alive.
Downloads
Inserting PCBs Inside the Body


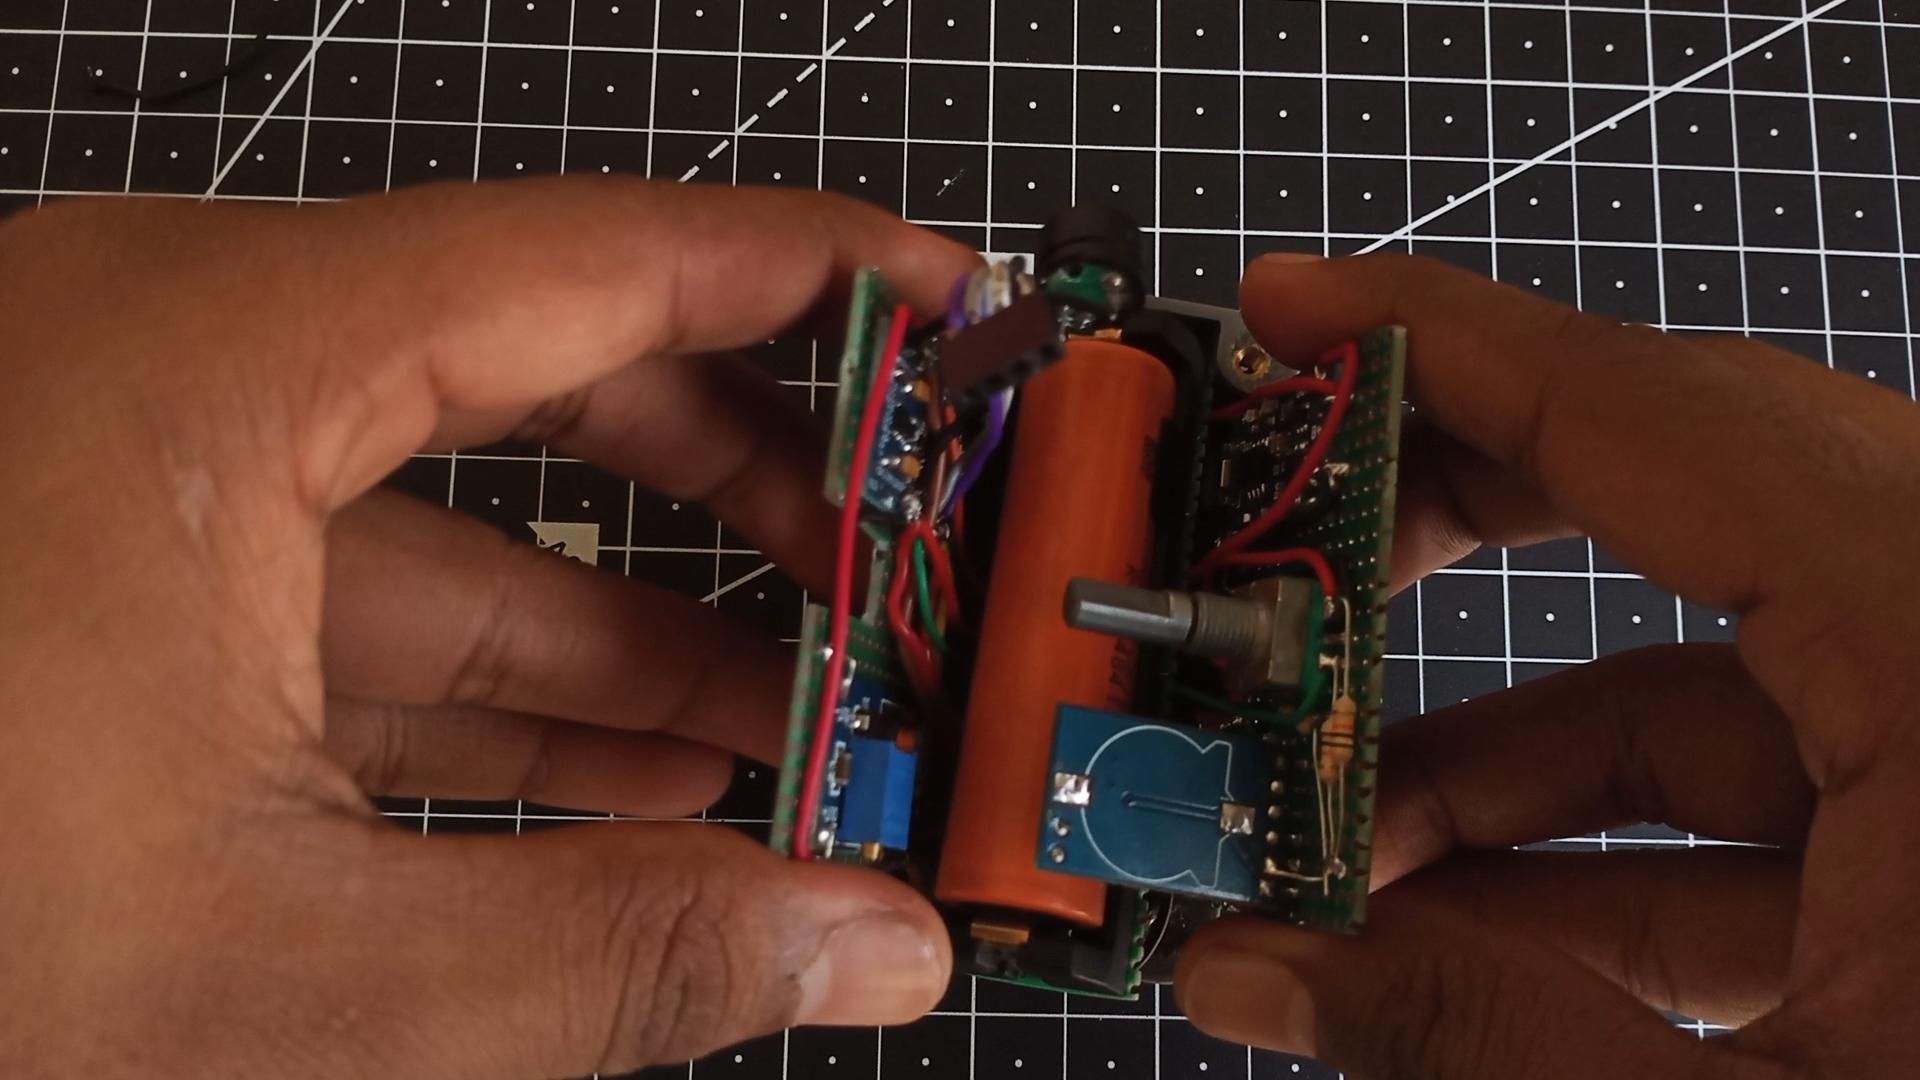


Insert the coin cell in its holder as well as 18650 battery into battery holder.
The PCB just slide into body. The top PCB sticks to the surface where we have circular hole. Bottom PCB sticks to surface where 2 slots are present one for slide switch and other for TP4056 and the battery module on the surface between bottom and top surface.
Place the body opening facing upwards. Hold the PCBs over the opening. Now bring the top and bottom PCBs towards each other till they become parallel to each other and push the battery module inside. The PCB being snug fit do not fall off particularly upper board.
Inserting the Knob


The knob gets inserted using the hole in body on the upper side. The cut on upper PCB is made so that knob gets inserted easily. The D shaft of encoder makes it easy to rotate it.
Insert the knob from above rotate it until it gets fit into the shaft to encoder.
Fixing the Knob (super Gluing)
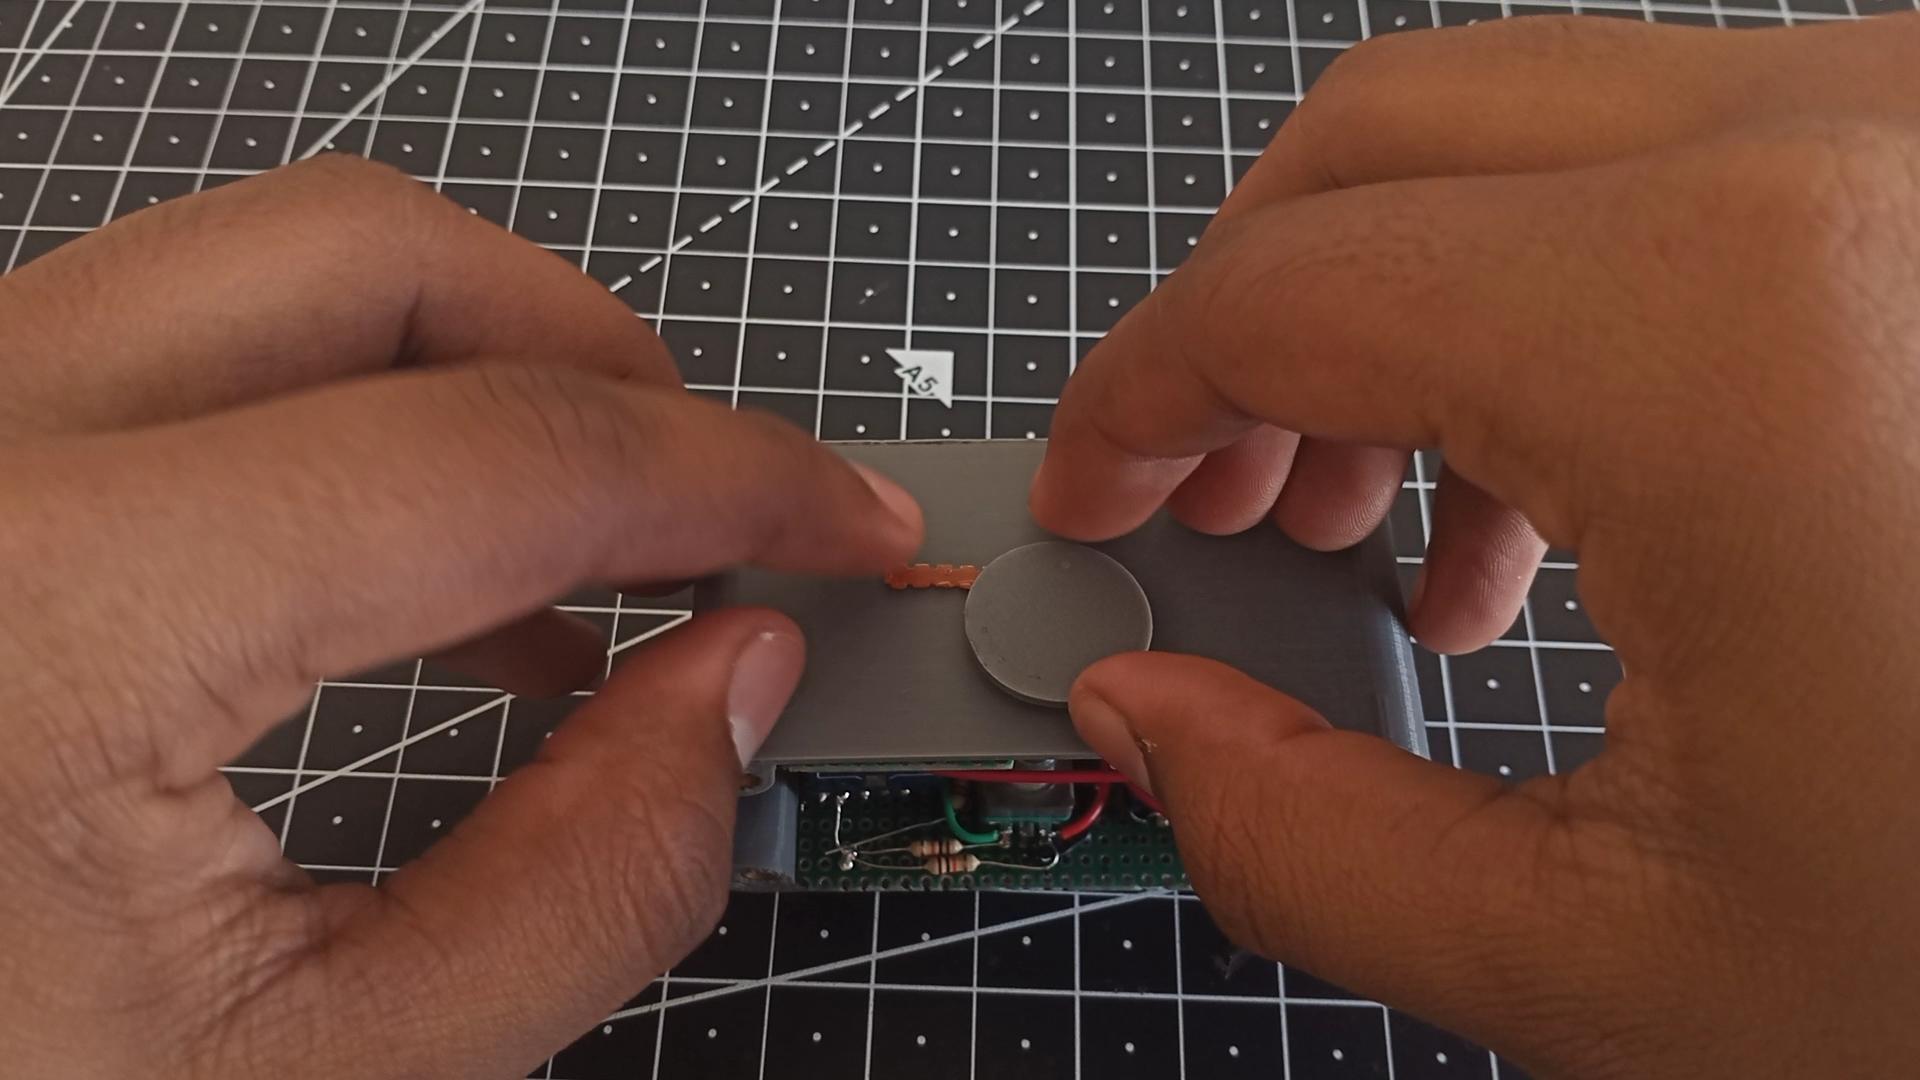


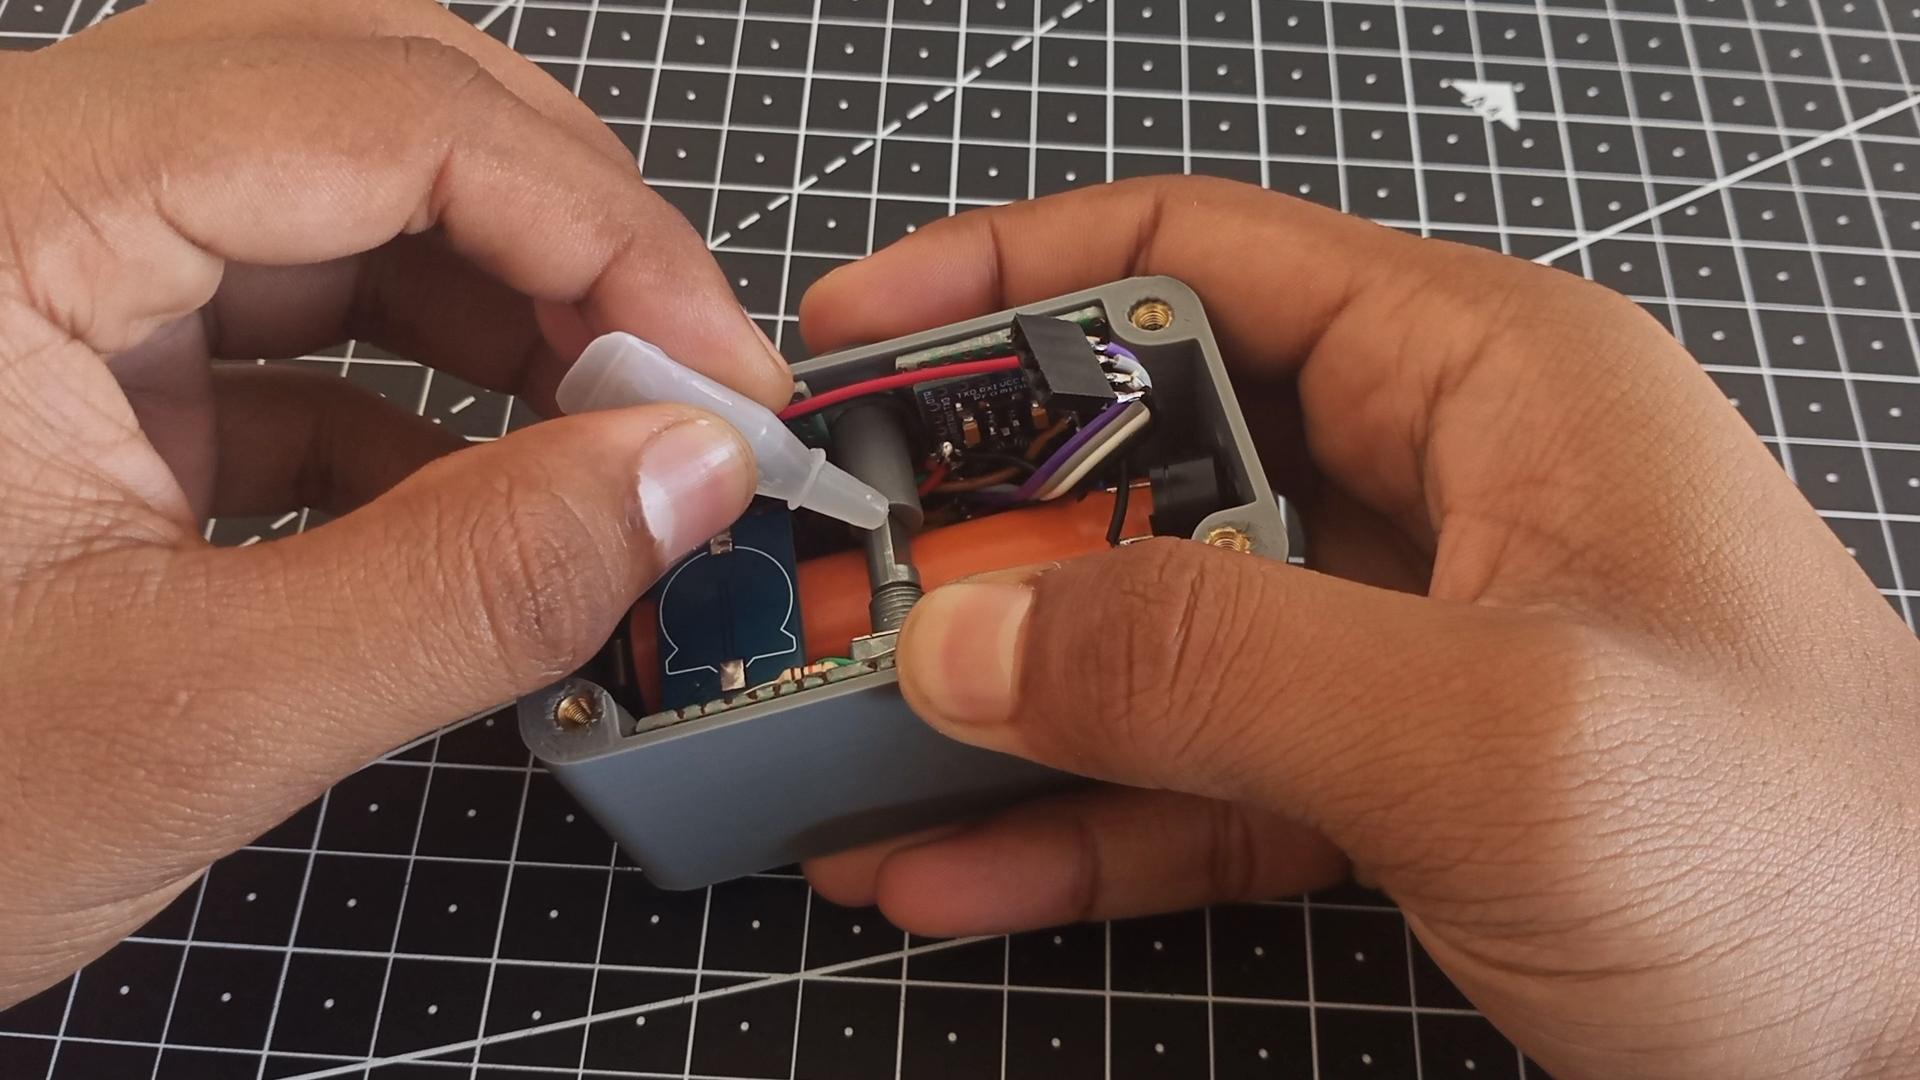


Because the shaft touches the battery there is no room for the knob to go through and so has been deigned to get a tight fit. Even though the rotation part works we need to fix the knob just a bit above the body to get button pressing feature.
To keep the knob above the surface you can insert anything which has a height of about 1mm. I used a scrap piece of perf board. Now apply some pressure to knob and super glue it. Make sure to keep rotating the knob so that it does not stick to other components particularly the battery.
Getting Necessary Libraries
.png)
Library for DS1302
Rinky Dink has made a great library for DS1302. Head to the link here. Download the zip file and extract the contents using any zip extractor. After extraction copy the folder and paste inside libraries folder of Arduino directory.
Library for TM1637
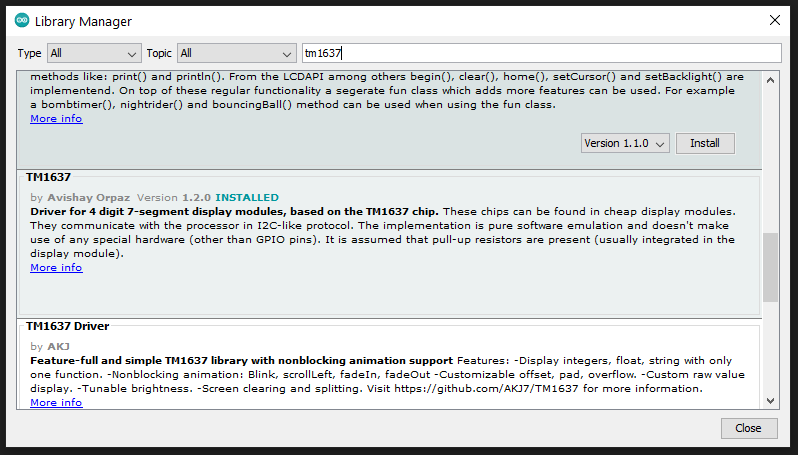
Go to Sketch -> Include Library -> Manage Libraries. Search of TM1637 in the search bar. We are looking for library TM1637 by Avishay Orpaz. click on it and hit install. Restart the IDE and both the library should be visible in the include libraries menu under sketch tab.
Arduino Uno As a Programmer


Because we are using a MCU board hence the atmega328 comes with a bootloader loaded in it. So to program it we just have utilize its RX, TX, DTR pins.
I used Arduino Uno to program it but you can use a FDTI programmer too.
For Uno to use as a programmer, first remove the atmega328 IC from its base. I created a handy extension cable so that it becomes easy to program pro mini in further projects. Ribbon cable consists for 5 wires connecting to VCC, GND, RST, TX and RX of Uno. Both the ends have pin headers soldered to it. But the arrangement of wires is according to pro mini DTR, TX, RX, VCC and then GND.
Programming the Arduino Pro Mini
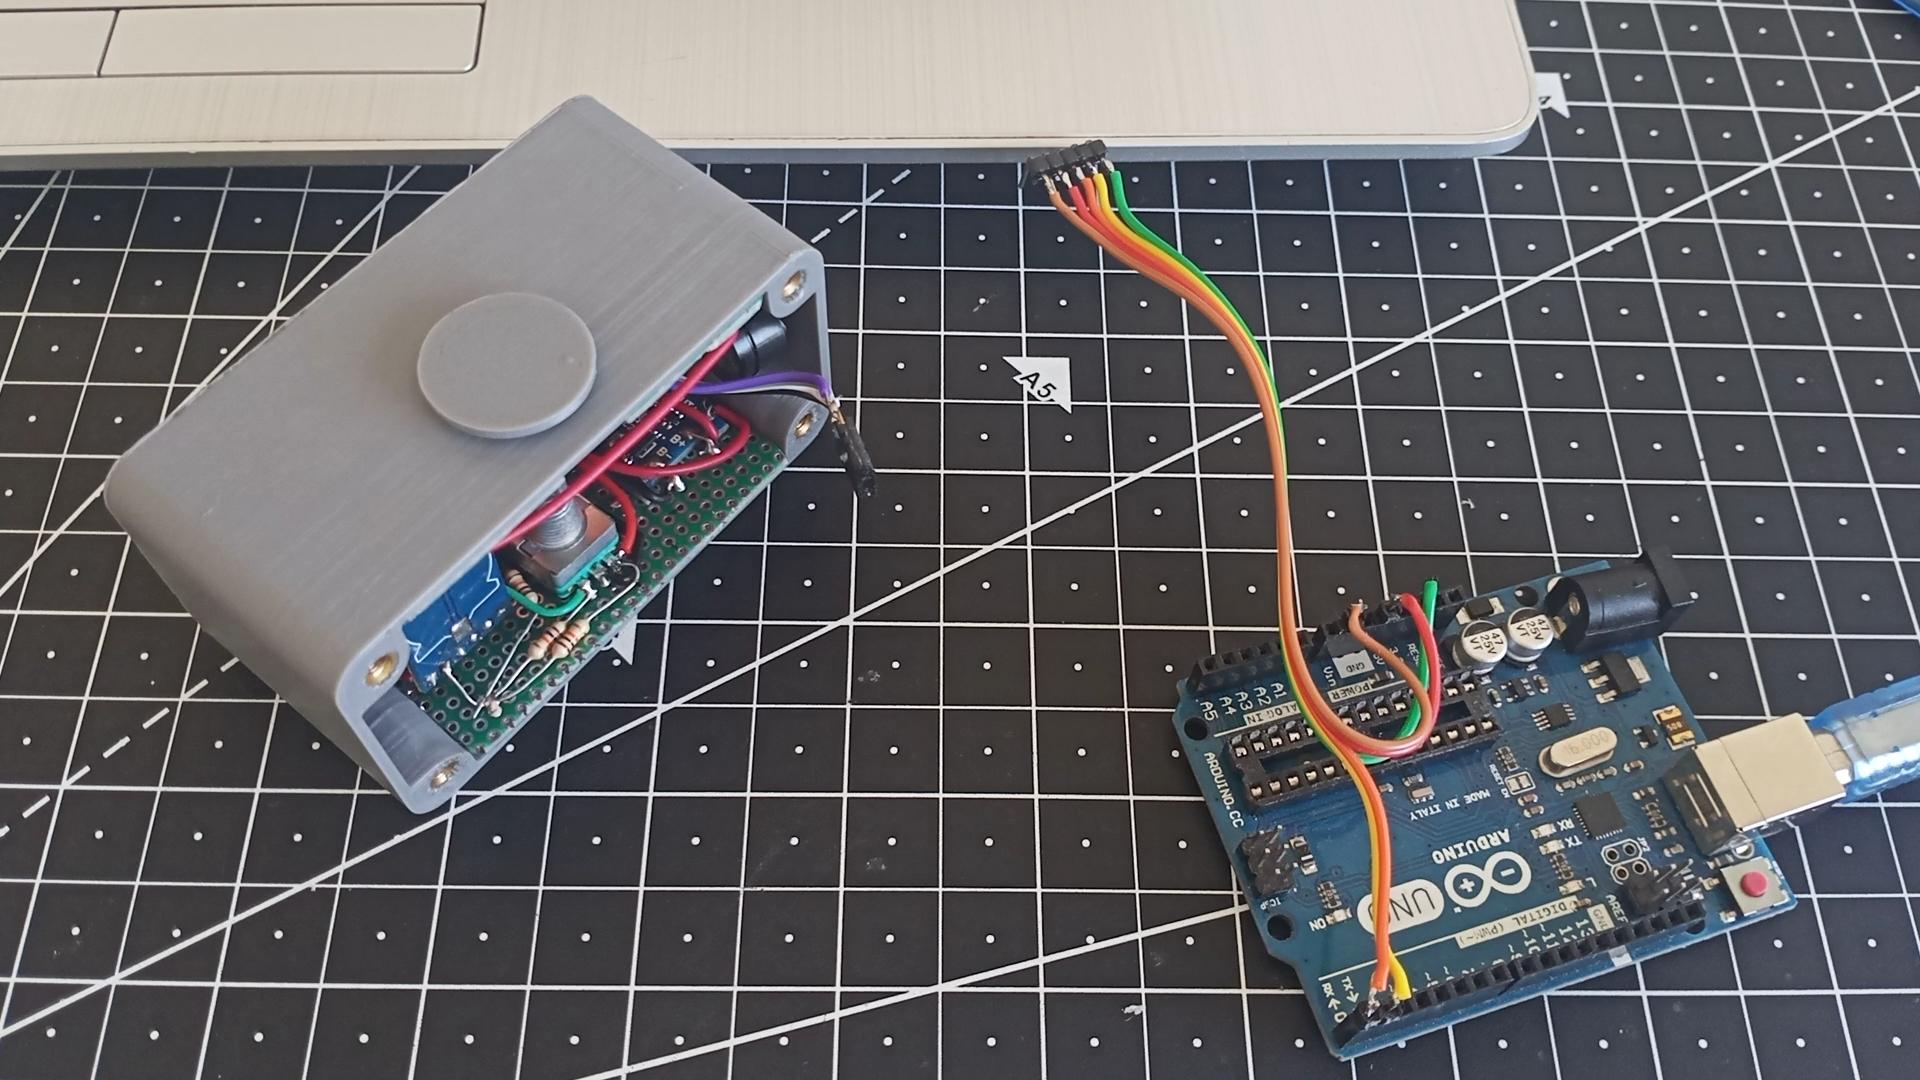


Copy paste the below code in Arduino IDE. Plug in Arduino Uno board to your computer. Select Arduino Pro Mini (5V) in boards and appropriate port. The placement of pro mini so as to ease out the process of programming. Hook the connector to pro mini and hit upload. And so have we programmed our micro-controller.
PROGRAM:
//libraries
#include <TM1637Display.h>
#include <DS1302.h>

//macros
#define TM_CLK 5
#define TM_DIO 4

#define RE_CLK 3
#define RE_DT 2

#define RTC_CLK 6
#define RTC_DIO 7
#define RTC_CE 8

#define buzzer 9

//varibles
volatile byte nowRE_DT = 1;
volatile byte prevRE_DT = 1;

volatile byte button = 0;
byte buttonPressed = false;

volatile byte counter = 0;
byte prevcounter = 0;

byte td1 = 0, td2 = 0, td3 = 0, td4 = 0;
byte ad1 = 0, ad2 = 0, ad3 = 0, ad4 = 0;

byte digichange = 0;
int gettime = 0;

byte brightness = 4;

int setalarm = 0;
byte alarmFlag = false;

//array to display strings
uint8_t full[] = {0xff, 0x0ff, 0xff, 0xff};
uint8_t blank[] = {0x00, 0x00, 0x00, 0x00};
uint8_t bright[] = {0x7c, 0xd0, 0x6f, 0x31};
uint8_t set[] = {0x6d, 0x79, 0x31, 0x00};
uint8_t timearr[] = {0x31, 0x30, 0x52, 0x79};
uint8_t dipy[] = {0x5e, 0x30, 0x73, 0x66};
uint8_t alarm[] = {0x77, 0x38, 0x50, 0x52};
uint8_t on[] = {0x00, 0x3f, 0x54, 0x00};
uint8_t off[] = {0x3f, 0x71, 0x71, 0x00};

//instance of TM1637
TM1637Display display = TM1637Display(TM_CLK, TM_DIO);

//initializing DS1302
DS1302 rtc(RTC_CE, RTC_DIO, RTC_CLK);

Time t;

//---------------------------------------------------------------------------------//

void setup()
{
  //register maipulation to set pin change interrupt on A0 pin
  PCICR |= B00000010;
  PCMSK1 |= B00000001;

  pinMode(RE_CLK, INPUT);
  pinMode(RE_DT, INPUT);

  //set the pin to high impedance so humming is not introduced
  pinMode(buzzer, INPUT);

  attachInterrupt(digitalPinToInterrupt(2), updateEncoder, CHANGE);
  attachInterrupt(digitalPinToInterrupt(3), updateEncoder, CHANGE);

  display.setBrightness(brightness);

  rtc.halt(false);
  rtc.writeProtect(false);
}

//---------------------------------------------------------------------------------//

void loop()
{

  switch (button)
  {

    case 1: //show time
      display.setSegments(dipy);
      delay(1500);
      display.setSegments(timearr);
      delay(1500);
      while (!buttonPressed)
      {
        t = rtc.getTime();
        gettime = t.min;
        gettime = gettime + (t.hour * 100);
        display.showNumberDecEx(gettime, B01000000, false, 4, 0);
        if ((setalarm == gettime) && (alarmFlag))
        {
          prevcounter = counter;
          while (prevcounter == counter)
          {
            alarmSound();
          }
          alarmFlag = false;
          buttonPressed = false;
        }
        delay(2000);
      }
      break;

    case 2: //change time
      beep();
      display.setSegments(set);
      delay(1500);
      display.setSegments(timearr);
      delay(1500);
      while (!buttonPressed)
      {
        buttonPressed = false;
        if (counter != prevcounter)
        {
          display.setSegments(blank);
          if (counter > prevcounter)
          {
            digichange = (digichange + 1) % 4;
          }
          else
          {
            switch (digichange)
            {
              case 0:
                td4 = (td4 + 1) % 10;
                break;
              case 1:
                td3 = (td3 + 1) % 10;
                break;
              case 2:
                td2 = (td2 + 1) % 10;
                break;
              case 3:
                td1 = (td1 + 1) % 10;
                break;
            }
            rtc.setTime(td4 * 10 + td3, td2 * 10 + td1, 00);
          }
          switch (digichange)
          {
            case 0:
              display.showNumberDec(td4, false, 1, 0);
              break;
            case 1:
              display.showNumberDec(td3, false, 1, 1);
              break;
            case 2:
              display.showNumberDec(td2, false, 1, 2);
              break;
            case 3:
              display.showNumberDec(td1, false, 1, 3);
              break;
          }
          beep();
          prevcounter = counter;
        }
        delay(5);
      }
      break;

    case 3: //change brightness
      beep();
      display.setSegments(set);
      delay(1500);
      display.setSegments(bright);
      delay(1500);
      while (!buttonPressed)
      {
        buttonPressed = false;
        display.setSegments(full);
        if (counter != prevcounter)
        {
          if (brightness > 7)
          {
            brightness = 0;
          }
          brightness++;
          display.setBrightness(brightness);
          prevcounter = counter;
          beep();
        }
        delay(5);
      }
      break;

    case 4: //set alarm
      beep();
      display.setSegments(set);
      delay(1500);
      display.setSegments(alarm);
      delay(1500);
      while (!buttonPressed)
      {
        if (counter != prevcounter)
        {
          alarmFlag = !alarmFlag;
          if (alarmFlag)
          {
            display.setSegments(on);
            beep();
            delay(2000);
            while (!buttonPressed)
            {
              if (counter != prevcounter)
              {
                beep();
                display.setSegments(blank);
                if (counter > prevcounter)
                {
                  digichange = (digichange + 1) % 4;
                }
                else
                {
                  switch (digichange)
                  {
                    case 0:
                      ad4 = (ad4 + 1) % 10;
                      break;
                    case 1:
                      ad3 = (ad3 + 1) % 10;
                      break;
                    case 2:
                      ad2 = (ad2 + 1) % 10;
                      break;
                    case 3:
                      ad1 = (ad1 + 1) % 10;
                      break;
                  }
                  setalarm = (ad4 * 1000) + (ad3 * 100) + (ad2 * 10) + ad1;
                }
                switch (digichange)
                {
                  case 0:
                    display.showNumberDec(ad4, false, 1, 0);
                    break;
                  case 1:
                    display.showNumberDec(ad3, false, 1, 1);
                    break;
                  case 2:
                    display.showNumberDec(ad2, false, 1, 2);
                    break;
                  case 3:
                    display.showNumberDec(ad1, false, 1, 3);
                    break;
                }
                prevcounter = counter;
              }
              delay(5);
            }
          }
          else
          {
            display.setSegments(off);
          }
          prevcounter = counter;
          beep();
        }
        delay(5);
      }
      break;

    default:
      button = 1;
  }
  buttonPressed = false;
}

//---------------------------------------------------------------------------------//

ISR (PCINT1_vect)
{
  if (!digitalRead(A0))
  {
    button++;
    buttonPressed = true;
  }
  delay(1);
}

//---------------------------------------------------------------------------------//

void updateEncoder()
{
  nowRE_DT = digitalRead(3);
  if ((nowRE_DT != prevRE_DT) && digitalRead(2))
  {
    if (nowRE_DT)
    {
      counter--;
    }
    else
    {
      counter++;
    }
  }
  prevRE_DT = nowRE_DT;
}

//---------------------------------------------------------------------------------//

void beep()
{
  tone(buzzer, 1500);
  delay(50);
  noTone(buzzer);
  pinMode(buzzer, INPUT);
}

//---------------------------------------------------------------------------------//

void alarmSound()
{
  tone(buzzer , 1000);
  delay(200);
  noTone(buzzer);
  tone(buzzer, 1000);
  delay(200);
  noTone(buzzer);
  delay(1250);
}

//---------------------------------------------------------------------------------//
Installing the TM1637 Module


The TM1637 module we attached to black plate is now ready to be connected to our control unit.
Just slide in the female connector into the male one of TM1637. Make sure the connection our as required and not opposite of that.
Screwing the Back Plate
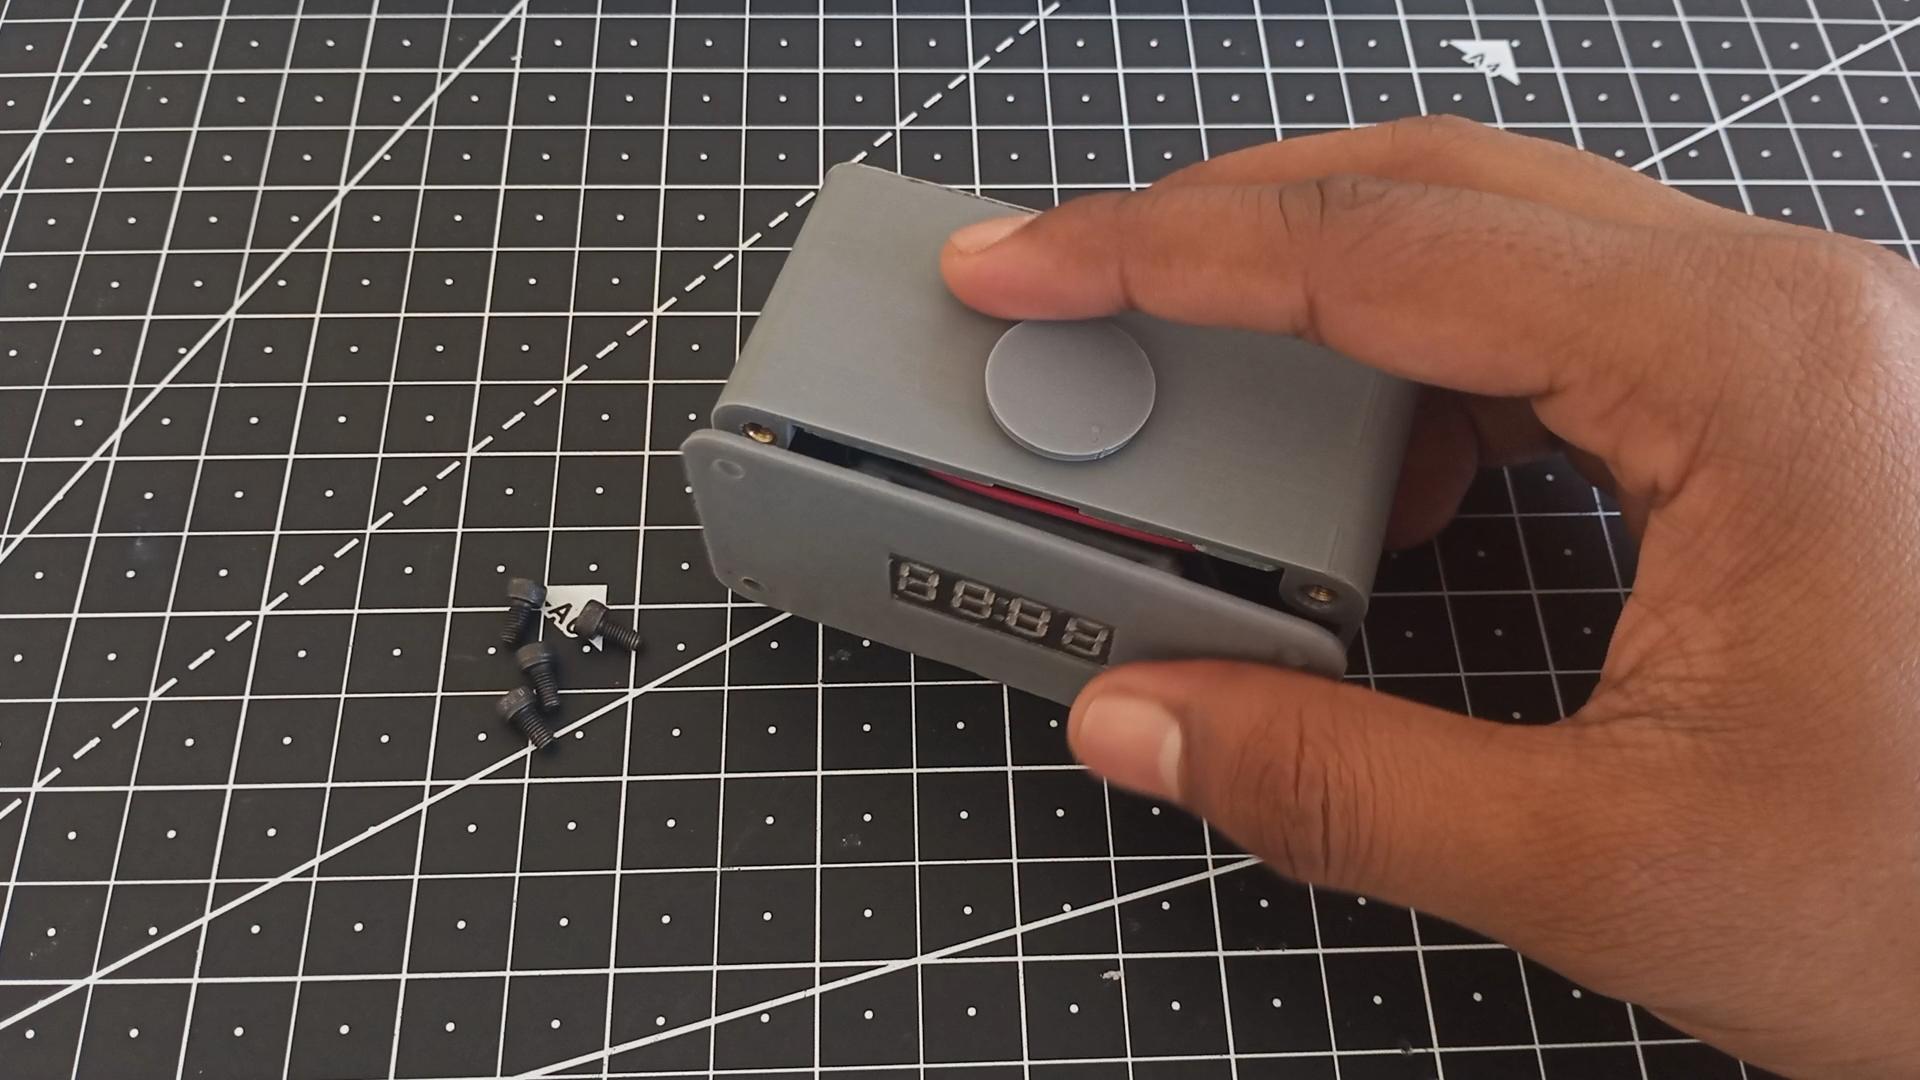


Press the back plate till it touches well to the body. Now screw the plate to the body using M3 bolts. To bolt down we need not necessarily need a hex key they can inserted using bare hands too.
Placing the Acrylic Cut
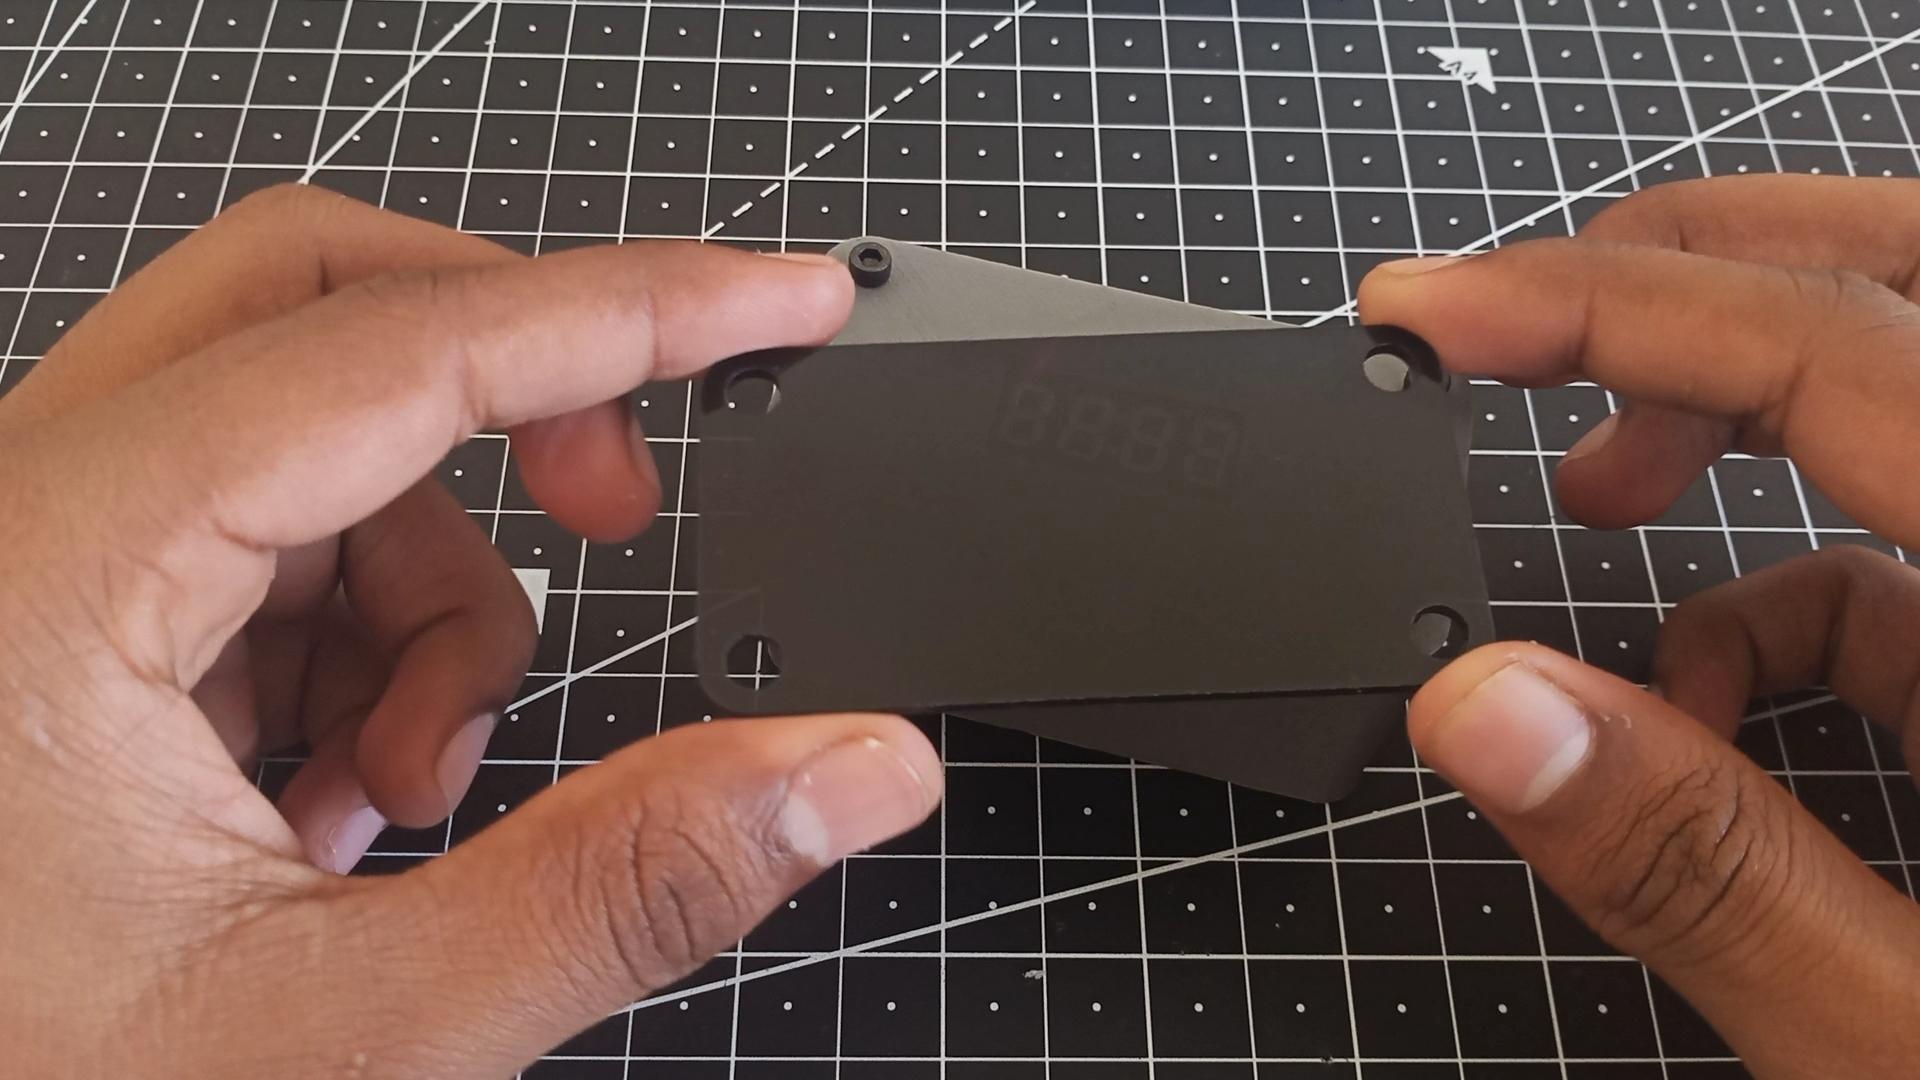


The acrylic sheet just snug fits over the front plate mostly covering everything with flushing the bolts.
And so have we created our modernized clock, but what about the usage? Let find it in further steps.
Using the Clock

TURNING THE CLOCK ON :
To turn the clock on we need to simply flip the switch on the back of the clock.
CHANGING TIME :
We have different menus to switch between different settings. Once the clock is powered up after flipping the switch, current time is displayed which will be 00:00 as we have powered it for first time. To change the time press the knob once. Every time we want to jump from one menu to other we simply pressed the button at the right time. When the button is pressed we jump to SET TIME menu. It displays 'SET TIME' string and waits for the user input. To change the time rotate the knob. To change the value of single digit rotate the knob clockwise and to shift to other digit rotate the knob anti clockwise. Once satisfied with the time you have set press the knob and the the time will be changed accordingly. As soon we pressed the knob the values are stored it exits the menu but to see the changes we need to enter DISPLAY TIME menu and to do that we jump through every menu without altering it.
SETTING BRIGHTNESS :
To change brightness of the display we jump to SET BRIGHTNESS menu which is after the SET TIME menu. Once the system enter into SET BRIGHTNESS mode it first displays 'SET BRIGHTNESS' string then light ups all the segments and dots of the display. Rotate the knob in any direction to change the brightness. We have 7 different steps, 0 being minimum brightness and 7 being brightest. Irrespective of rotation direction of the knob the steps increase from 0 to 7 and revert back to 0. Once satisfied press the button to confirm the brightness and it saved and it exits from BRIGHTNESS menu.
TURNING ALARM ON AND SETTING IT :
To turn on the alarm we need to 1st enter SET ALARM menu after that the clock waits for user input, rotate the knob in either direction, 'OFF' word will be displayed rotate again and the alarm will be turned on by displaying 'ON' string after two seconds same interface is popped as we have for changing time and using it we set the alarm required after setting pressed the knob to save the alarm.
TURNING THE ALARM OFF:
When the alarm is set and the current time is equal to alarm time the buzzer keeps beeping until we rotate the knob to turn the alarm off
To turn off the alarm without triggering it, enter SET ALARM menu and rotate the knob once 'OFF' string is displayed press the knob and the alarm will be turned off irrespective of its content.
Charging the Clock


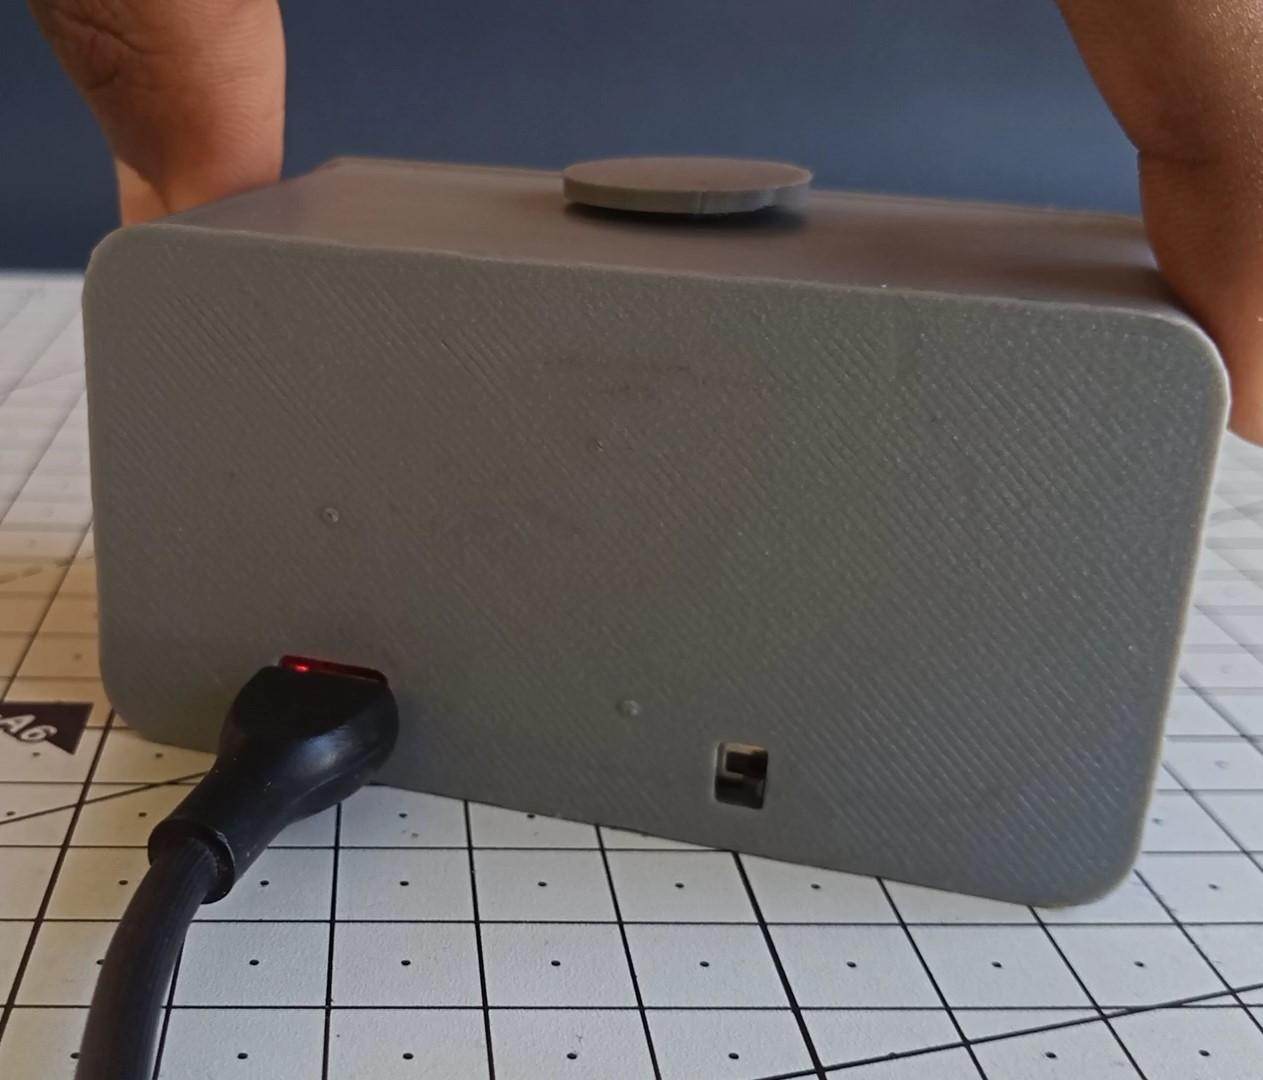
As we use a Li-Ion battery to power our clock which is a rechargeable one of course we need to recharged whenever the battery depletes.
The battery will be charged using the TP4056 module we attached. The USB connector on TP4056 is USB type B mini. Before plugging the charger make sure the clock is turned off. Use a phone charger to charge our clock.
Done!
And we are done!! You have just completed building on your very own Modernized Digital Clock.
Further Improvements:
Being the prototype version it has a lot of improvement areas. Which we will address in the next version of it.
- Using professionally fabricated PCB rather than perf boards.
- Using components than modules.
- Reducing the power usage by sending various sections of clock to sleep.
- Introducing more colored 7 segment display