Modustack the Stack & Snap Block
by AdrakChai in Workshop > Furniture
132 Views, 4 Favorites, 0 Comments
Modustack the Stack & Snap Block
.png)
I am big into multifunctional and collapsible furniture. Something about clever design which is as smart as it is stylish has always tickled my brain. The challenge lies in creating pieces that are not only aesthetically pleasing but also durable. I wanted to create something that’s not just practical but also fun to use- in my project's case, fun to arrange.
It started with some brainstorming, and a lot of poking around meshes. After many prototypes, countless iterations and struggling with the 'satisfaction factor' of my designs- I finally hit on my closing framework. Carrying customizability and efficient shape use as central principles, I came up with Modustack!
ModuStack isn’t just a piece of furniture- it's a way of shaping your space. It adapts to your needs and your creativity- Sort of like Lego. The video I've attached is a demonstration of how it works!
Modustack's pros:
- Customizable Configuration: The stackable, foldable, and collapsible units allow users to tailor the setup to their specific needs, whether for storage, display, or workspace purposes. Modustack transforms into desks or tables, adapting to different environments—perfect for work, dining, or creative projects. Three units seamlessly fold into one, and two roofs extend neatly out of the main structure to minimize physical strain or serve aesthetic purposes.
- Sustainable and Lightweight: Modustack's assets were designed for 3D printing. It is a strong option for people who relocate often and for temporary setups.
- Durability: Modustacks are capable of withstanding wear and tear. Equipped with a slanted drainage system and containers for water collection, ModuStack ideal for drying utensils or managing moisture for plant pots. It's handy in kitchens and sun-exposed areas.
Now that I am done sounding like a salesperson, let's get to the nitty-gritties.
Downloads
Supplies
For 3D printing:
- Preferred CAD software
- Preferred Slicing software
- 3D Printer
- Pliers
Otherwise:
- Wood-based materials/Thermocol and cardboard
- Saw and sand paper/Cutters
- Wood glue/Thermocol binding glue and a glue gun
- Friction stay hinges, other joints and #6 to #12 sized screws/Toothpicks
- Coarse Threads/Rubber bands
- Latex or acrylic paint (Optional)
- Varnish or other polishing materials (Optional)
Modelling
Hop onto any CAD software and use the provided concept files to make your model. Or- you can just take up the attached STL files to make this step faster and easier. The Modustack works best in the proportions I have used, yet feel free to modify it to your wants. Measurements in the concept files have been made in centimeters.
3D Printing/Cut-outs
Upload the STL files to your slicer program. Set your printing parameters to your preference, but remember- strength will increase with increasing line dimensions. I propose a ratio of line width to layer height at least 2:1, and to use breakable supports. After 3D printing, you'll get 13 separate parts (2 units + 2 flaps + 2 arms + 1 slab + 1 extruding pillar + 1 cup for drainage + 4 hooks).
If your base material is wood or cardboard(only for working models), begin by cutting out different surfaces of the models given in the concept files. Run any wood that feels too rough or has an old finish through a sanding.
Assembling & Painting


.jpeg)

.jpeg)
Remove the breakable supports using pliers in the 3D printed pieces.
Attach different surfaces together using glue (if you are working with cardboard or wood) to assemble Modustack's parts. The first unit's top surface has a slight tilt for drainage and many 'V'-shaped separations to align bases of ranging dimensions neatly.
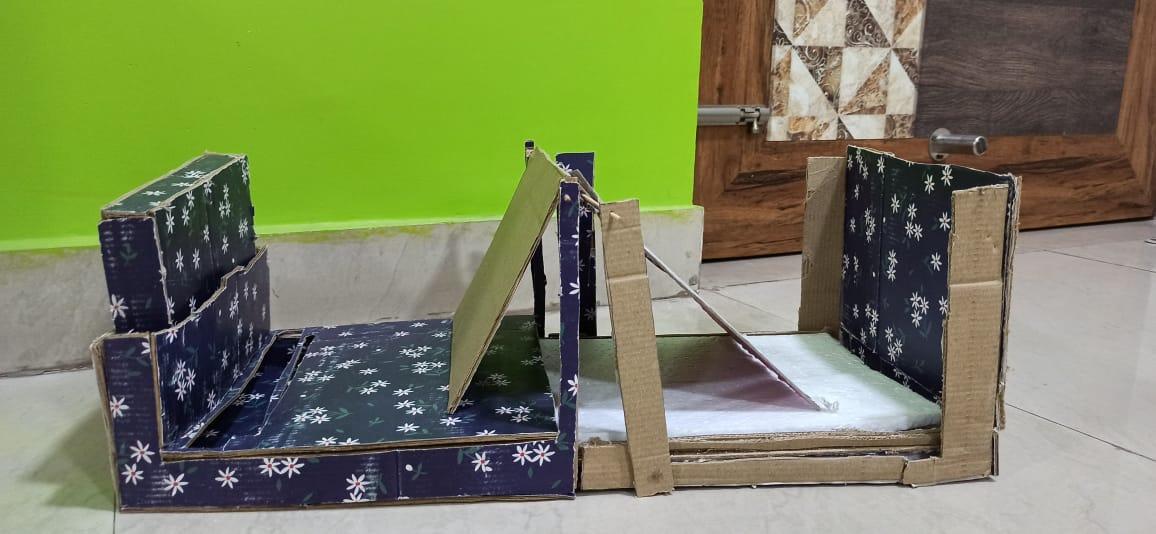
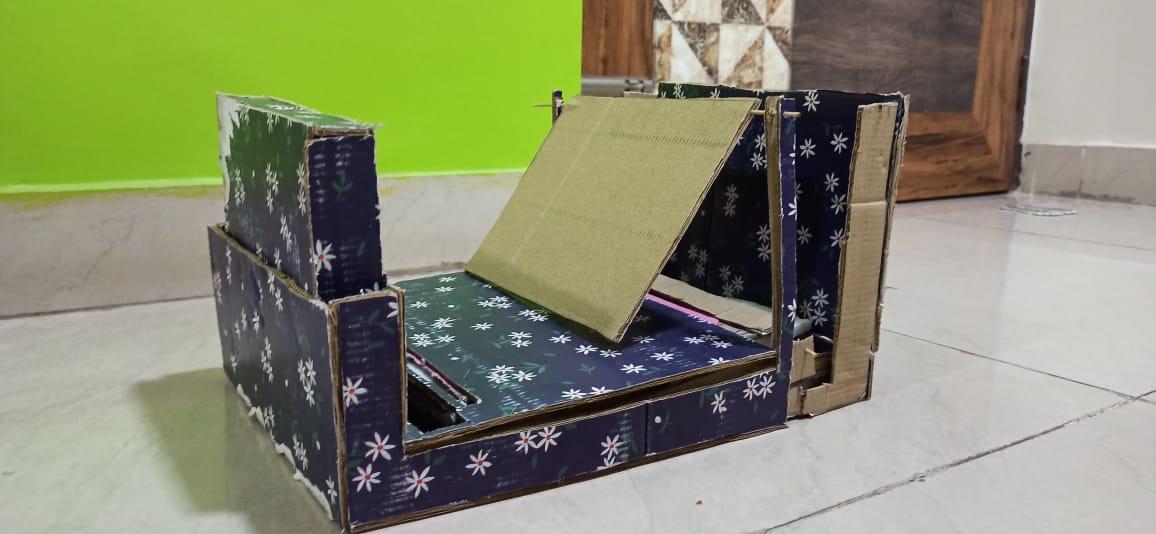
For your reference- In the first picture, you'll notice the first and second units without flaps. The second picture is of the Modustack's complete assembly, and the third picture shows an expanded version of the model. The last three photos are of a working model which I built of the Modustack.
At last, you can use alkyd-based oil paints(or acrylics) and varnish to give your model a finishing touch.
Downloads
Hinges, Joints and Other Little Things
The STL file has some variations of the Crocodile buckle screw clips (a smooth one and one with triangular rips) for sliding movements, hinges for hook extension, and rods for the movement of flaps. The two identical joints behind the parallel surfaces of the first piece have circular screws which are to be attached with the base of the second unit. Mounted on the first unit's pillars are two distinguishable blocks, which are to be shifted from one face to another to hold up the flaps(roofs) using rubber bands. While this will work spectacularly for light material, I suggest friction stay hinges for plywood.
I advise #6 screws for the arms of the flaps if you keep them in my proportions. For those using slicing software, you can get the joints and screw models provided in STL files. Remember that the cup for drainage goes into the first unit.
Enjoy Stacking, Restacking and Reconfiguring Your Modustacks!


Some lil renders and a few patterns to try out!