Multi Voice Speaking 24 Hour Clock Using an ESP32 and DFPlayer Mini
by oliverb in Circuits > Clocks
1212 Views, 14 Favorites, 0 Comments
Multi Voice Speaking 24 Hour Clock Using an ESP32 and DFPlayer Mini


I wanted a speaking clock to say the time using any recorded or downloaded voice.
You could record any number of family voices, grandparents or your childrens change of voices and diction as they grow up.
If you want a standard voice you can use a Text to MP3 web page and select any voices you require and download them as MP3 files.
I use Immersive reader (part of Office 365 or Edge) , https://ttsmp3.com/ as it is simple to use yet is very adjustable and or https://www.narakeet.com/.
The voice recordings or MP3 files are simply saved into named folders on a micro SD card and labeled using a set format.
I designed the clock around a RTC rather than using NTP time from the internet as in years to come I want the clock to still work without programming knowledge if the WIFI code changes. Connecting to a master clock allows time synchronization daily or every minute on 30 seconds if required.
The clock also chimes the quaters and hours using the enclosed chime files or you could easily use your own.
Supplies


OLED 1.3" Display I2C 128x64 SSH1106
ESP WROOM 32
DS3231 AT24C32 I2C Precision Real Time Clock Module
DFPlayer Mini Note avoid MP3-TF-16P modules these are often suplied instead of DFPlayer Mini
Veroboard https://amzn.eu/d/0te58j9
5x 10K ohm resistors
1x resistor to suit LED below
1 x LED colour/type as required
5v volt power adaptor 1A.
1 x 0.1 pico farad cermic capacitor
1 x 470mF electrolytic capacitor
3D printed box or project box 120x60x150mm
Small 3watt 8ohm speaker
1 x 6 Pin Self-locking Switch Push Button Switches DPDT 8 x 8mm with button caps
8 x 6x6x8mm non locking tactile Push Button Switches with button caps https://amzn.eu/d/2awX5at
1 x 2 way power socket and plug if external speaker is used
Hardware depending on the box used.
4 off M3 Hex bolts
4 off M3 washers
4 off M3 Threaded Insert https://amzn.eu/d/ePQYw0E
7 off M2 Hex bolts
6 off M2 Hex washer
3 off M2 nyloc nuts
LED holder to match your LED
RTC Module Modification


My clock uses a DS3231 AT24C32 I2C Precision Real Time Clock Module.
The module comes supplied for use with a Lithium-Ion rechargeable battery. I use a non rechargeable battery as they are not prone to catching fire. I have removed resistor R5 from the module by simply breaking it off the circuit board.
Pic 1 R5 in place.
Pic 2 R5 broken off the board.
Component Mounting
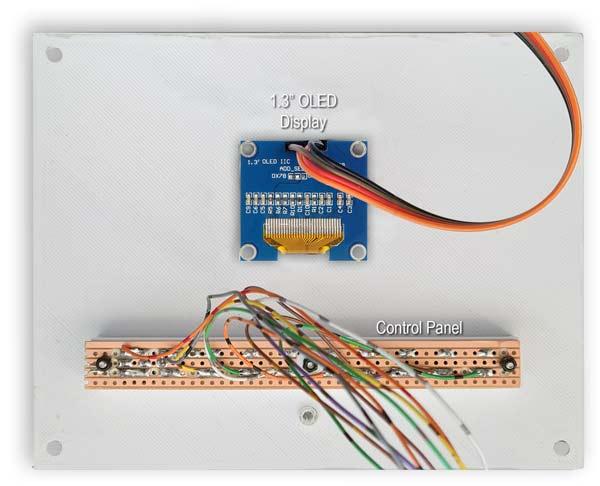

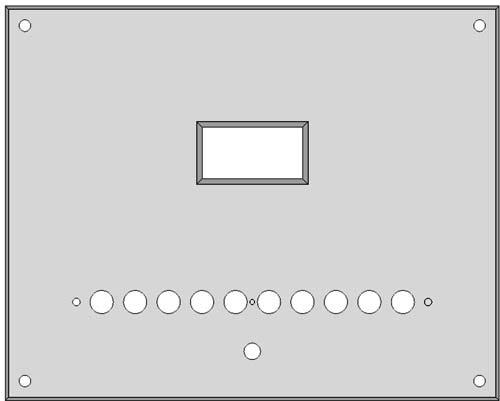
1 Underside of lid. The OLED is hot melt glued in place with the control panel fixed with 2 off M3 hex bolts and nyloc nuts and washers.
2 Inside of Case
The main Veroboard is fixed by 4 off M2 self tappers into 4 off round spacers that have been super glued to the bottom of the base.
M3 press in nuts are inserted into the top corners of the base. The top is fixed to the base with 4 off M3 bolts and washers.
An internal speaker is hot melt glued into case or if an external speaker is required this is plugged into a socket on the side of the base.
Clock Operaton

On power up the clock displays the clock name (speaking clock) for 2 seconds. In the code these are lines 144 and 146.
The display then blanks until "SAY TIME" is pressed.
When "SAY TIME" is pressed the current time is announced and the OLED display shows the current time, the time announcement volume, the chime volume, the selected voice and the clock sync status.
The clock sync is optional and the clock waits for a low pulse on pin 4 (synctime).
This pulse is sent from my master clock at 21:11:30 and when received sets the Speaking Clock RTC to this time.
See code line 236. This pin is pulled up so just leave it disconnected if time sync is not required.
When this sync pulse has been received "WTG Time Sync" changes to "Time Sync OK".
At 21:11:00 each day "Time Sync OK" reverts back to "WTG Time Sync".
Every time "SAY TIME" is pressed the time is announced and the time is displayed.
Note the "SAY TIME" is disabled while the clock is chiming the quarters or the hours.
Pressing the "FUNCTION" button cycles the display menu letting you set the clock, voice & volume levels.
Changing the Speaking Clock Voice
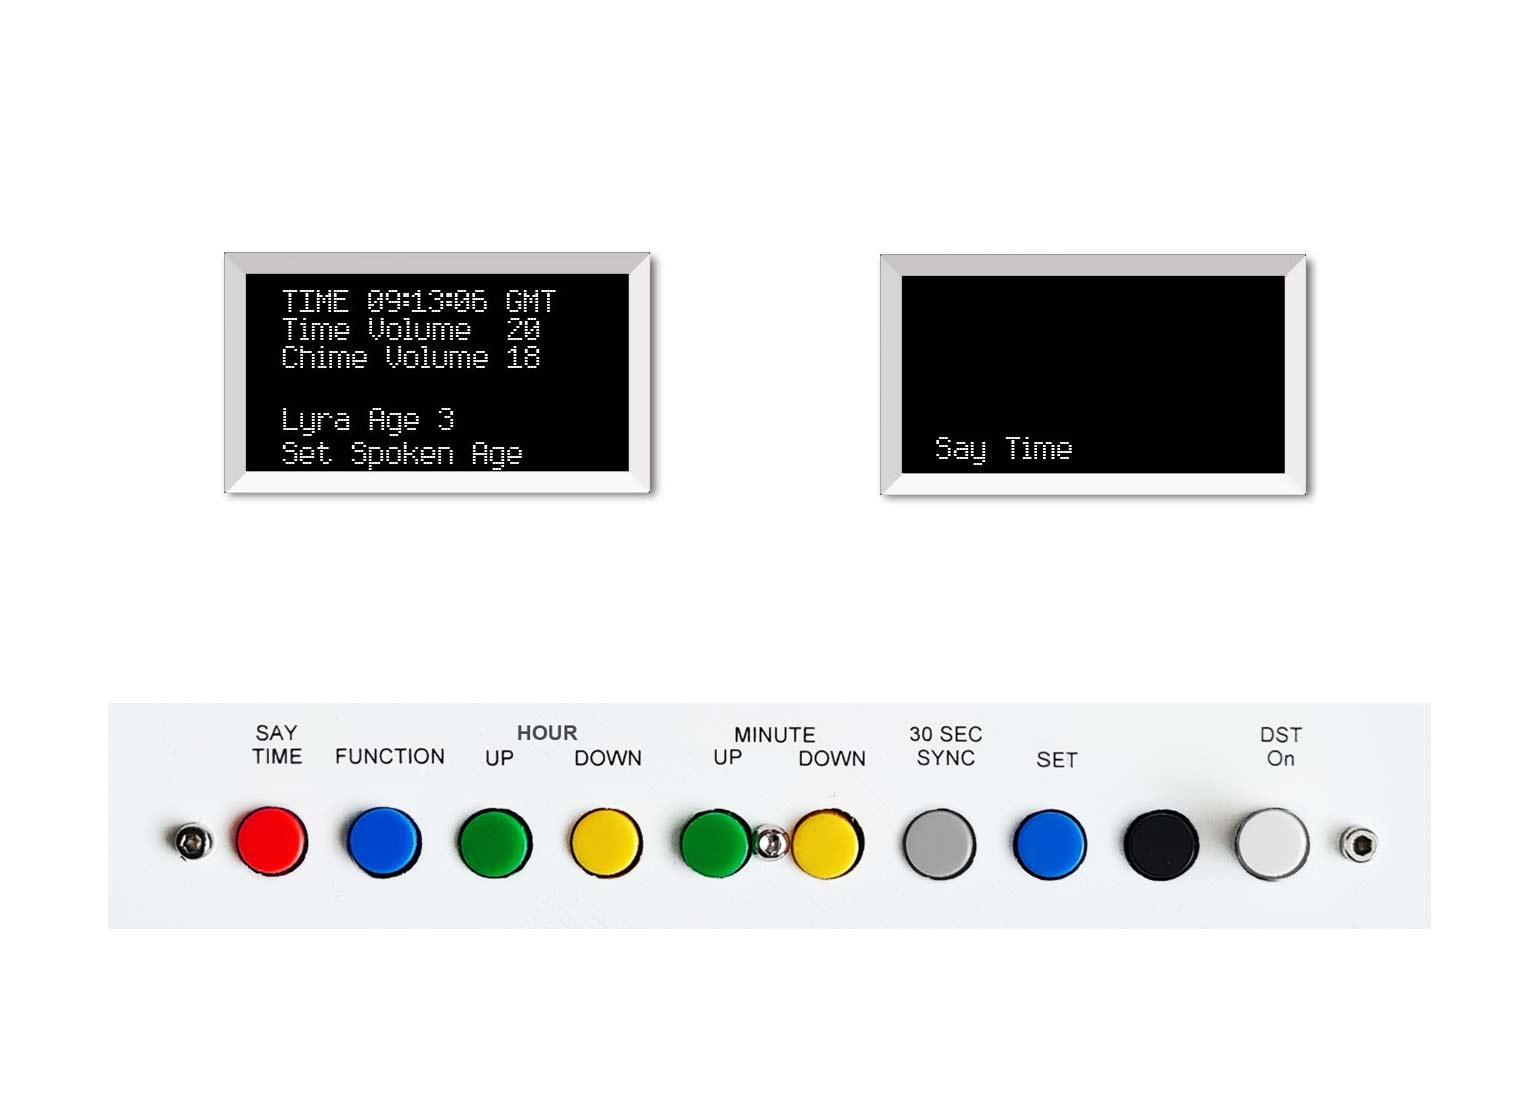
Let the display blank itself and then press the "FUNCTION" once.
This menu lets you set the "VOICE" of the clock.
Press "HOUR UP" to select the next voice or "HOUR DOWN" to select the previous voice.
On my clock the age goes from 3 to 8.
If you want a selection of voices you can change "Lyra Age" to whatever name you want to give your various voices.
Once you are happy with your selected voice press and hold "SET" until the screen shows "Say Time".
The voice has now been set.
Note the voice default on power up is set on line 97 with the "age" integer.
Setting the Time Announcement Volume

Let the display blank itself and then press the "FUNCTION" button twice.
The screen will show the volume of the time announcement in this case 20.
Press "HOUR UP" to step the volume up (max 30) or "HOUR DOWN" to step the volume down (min 0).
Once you are happy with your selected volume press and hold "SET" until the screen shows "Say Time".
The volume has now been set.
Note the volume default on power up is set on line 75 with the "volume" integer.
Setting the Chime Volume

Let the display blank itself and then press the "FUNCTION" button three times.
The screen will show the volume of the chime in this case 20.
Press "HOUR UP" to step the volume up (max 30) or "HOUR DOWN" to step the volume down (min 0).
Once you are happy with your selected volume press and hold "SET" until the screen shows "Say Time".
The volume has now been set.
Note the volume default on power up is set on line 76 with the "chimevolume" integer.
Setting the Time

Let the display blank itself and then press the "FUNCTION" button four times.
The screen will show the current time from the previous clock setting.
Press "HOUR UP" to step the hour by 1 and "HOUR DOWN" to step the hour by 10.
The hours return to zero if you set above 23.
Press "MINUTE UP" to step the minutes by 1 and "MINUTE DOWN" to step the minutes by 10.
The minutes return to zero if you set above 59.
If you do not want to accept the set time press and hold "FUNCTION" until the display changes to "Say Time".
To accept the displayed time press and hold "SET" until the display changes to "Say Time"
30 Second Synchronization

To manually sync the seconds press "30 SEC SYNC" exactly on 30 seconds. This sets the seconds to 30 and updates the RTC.
This input could be connected to a master clock to keep the RTC in sync.
Setting Winter & Summertime

Pressing the DST button puts the clock into summertime adds 1 hour.
Releasing the DST button sets the clock to wintertime.
Voice File Folder Formats

The voice files are MP3s and are stored on the micro SD card inserted in the DFPlayer Mini.
In the main folder of the SD cards are folder names starting from 01.
Folder 01 contains the chime files.
The other folders contain the voice files for the clock.
Folder 02 contains the voice files for Hours for Age 3.
Folder 03 contains the voice files for Minutes for Age 3.
Folder 04 contains the voice files for Hours for Age 4.
Folder 05 contains the voice files for Minutes for Age 4.
The voice folders continue in this order for as long as you like.
You may want to change the menu naming if you are just using different styles for you chosen voices.
The image above shows the folder in the main(root) micro SD folder.
Chime Folder
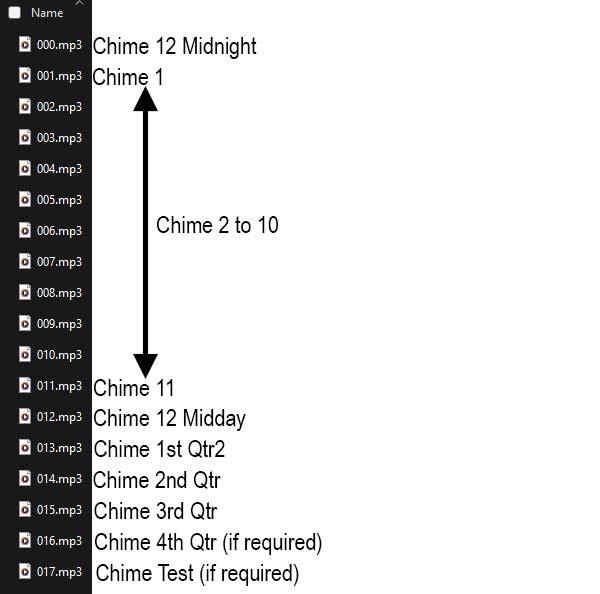
This is folder 01 and it contains all the chime files from 000.mp3 to 017.mp3
Files 000.mp3 to 012.mp3 contain all the hour chimes.
Files 013.mp3 to 016.mp3 are the quarter chimes.
Note I do not use the 4th qtr chime. To use it call it before O'clock allowing sufficient time for it to complete before calling the hour chimes.
Hour Folders

Hour folders 2,4,6,8 etc. contain the voices for the hours.
They are named xxxhxx.mp3. 000hoo.mp3 says "ZERO" the rest of the files upto 23h23 say the hour.
Minute Folders

Minute folders 3,5,7,9 etc. contain the voices for the minutes.
They are named xxxmxx.mp3.
000m0.mps says "hundred hours" and is used at O'Clock.
Files 001m1 to 009m1 say "Oh" and then the minute number.
Files 010m10 to 059m59 just say the number.
File 060m00 is not used.
3D Printed Parts
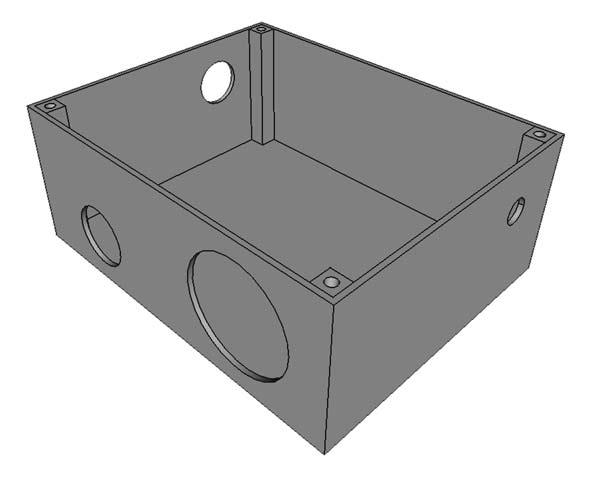

3D Printed Parts available here.
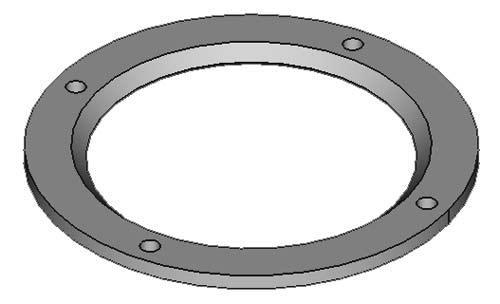
1 Base- fiited with 4 times M3 Threaded Insert https://amzn.eu/d/ePQYw0E
2 Speaker Surround- super glued to the Base around the speaker cutout.
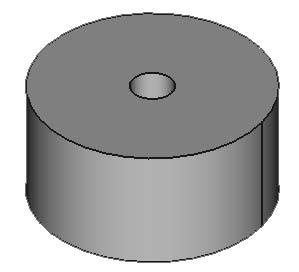
3 Vero Spacer round - super glued to the base to line up with the 4 fixing holes in the main Veroboard.
4 Switch Spacer- fixed to the control panel Vero with M2 nuts bolts and washer.
5 Top- fixed to the base with M3 bolts and washers
Veroboard Layouts
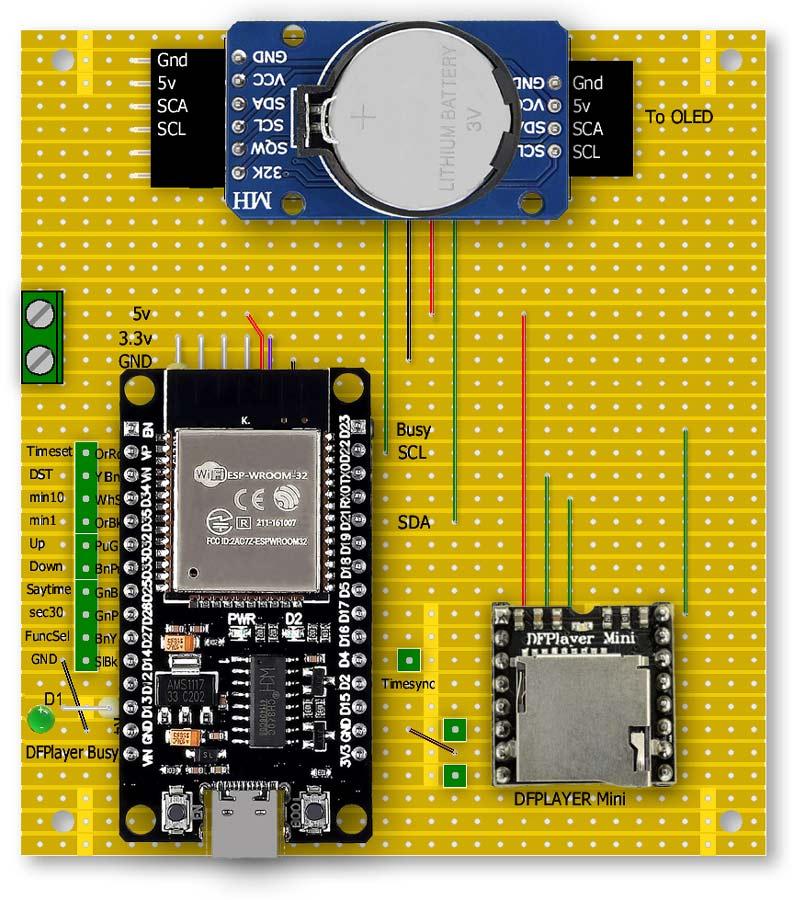

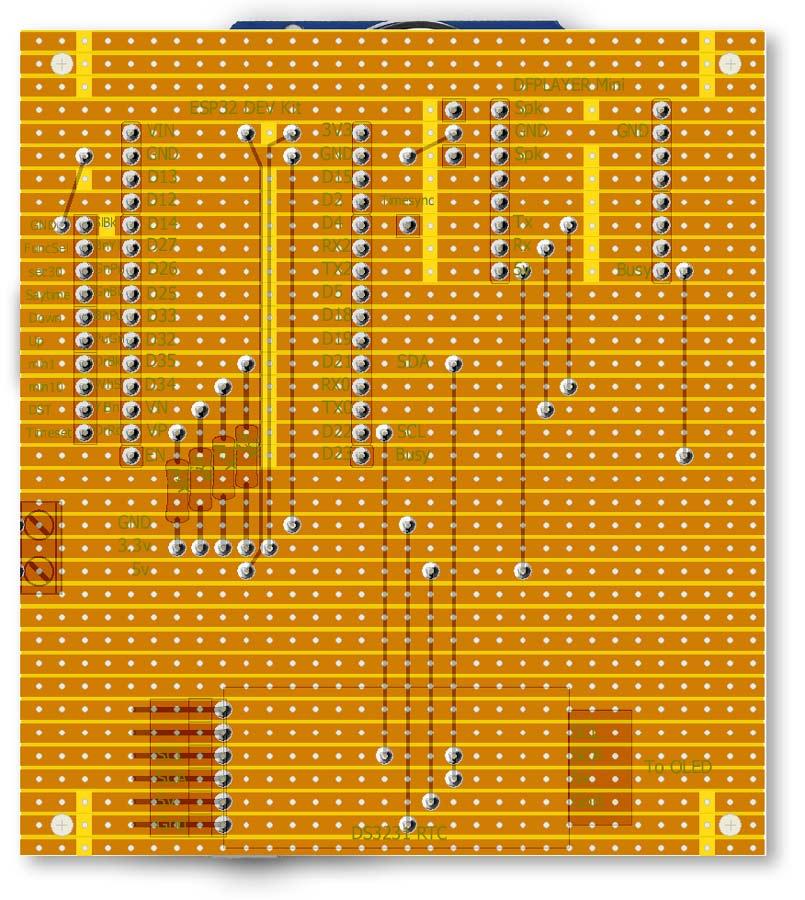
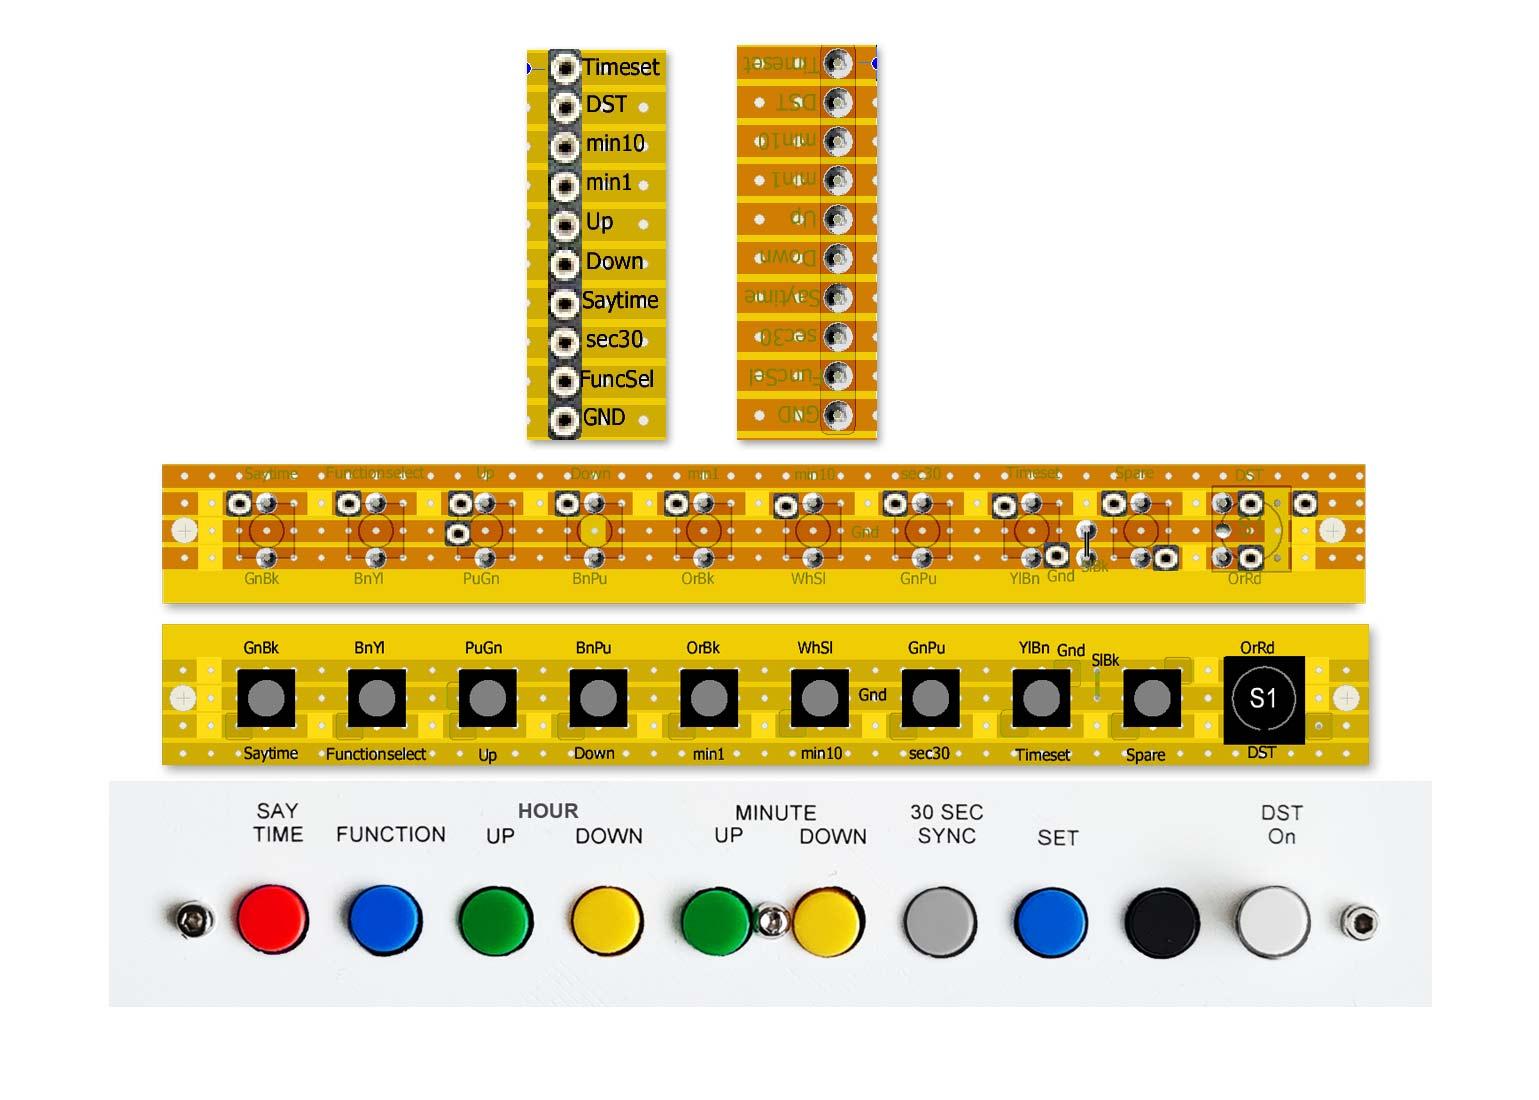
1 Top with modules in place
2 Top no modules
3 Rear of Main Veroboard.
4 Control Panel and wiring connector VeroBoard
Schematic

View full size schematic here.
Downloads
Download sound files, 3D printer files and ESP32 codes here .