Multifunctional Desk Buddy Bot
by Lina Maria in Design > 3D Design
510 Views, 8 Favorites, 0 Comments
Multifunctional Desk Buddy Bot

Who better to help you brainstorm and sketch ideas than the multifunctional Instructables Robot itself? This project transforms the classic robot into a 3D-printed desk companion packed with useful tools.
Supplies
- 3D printer with filament in yellow, grey, black, and red
- Pencil sharpener (small size, to embed in the head)
- Super glue or nail glue
- Thin black nail polish
- Erasers (that will become the fingers in one hand)
- A soft children’s toothbrush (to turn into the brush hand)
- Two BIC ballpoint pens (black and red)
- A paper clip (for the antennae)
- Masking tape
Sketching the Idea
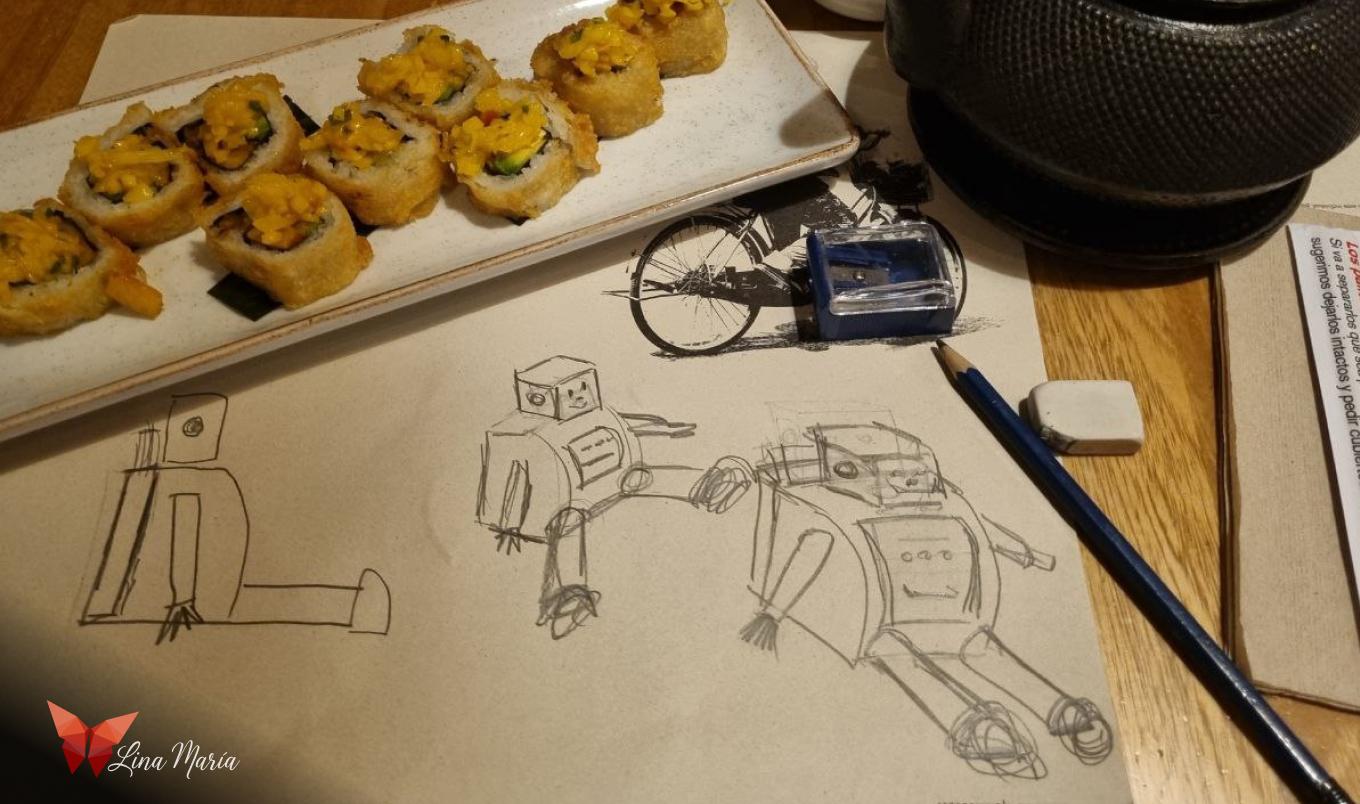
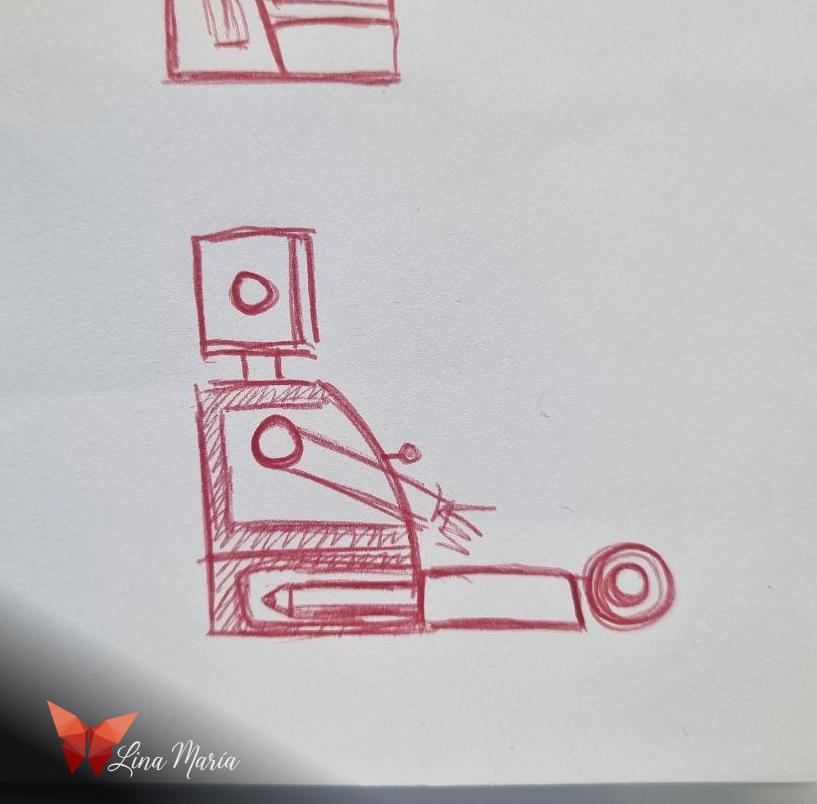
The idea of creating this multifunctional 3D-printed robot was born while I was eating sushi in a restaurant. I grabbed a pencil from my bag and turned the placemat into my sketchpad.
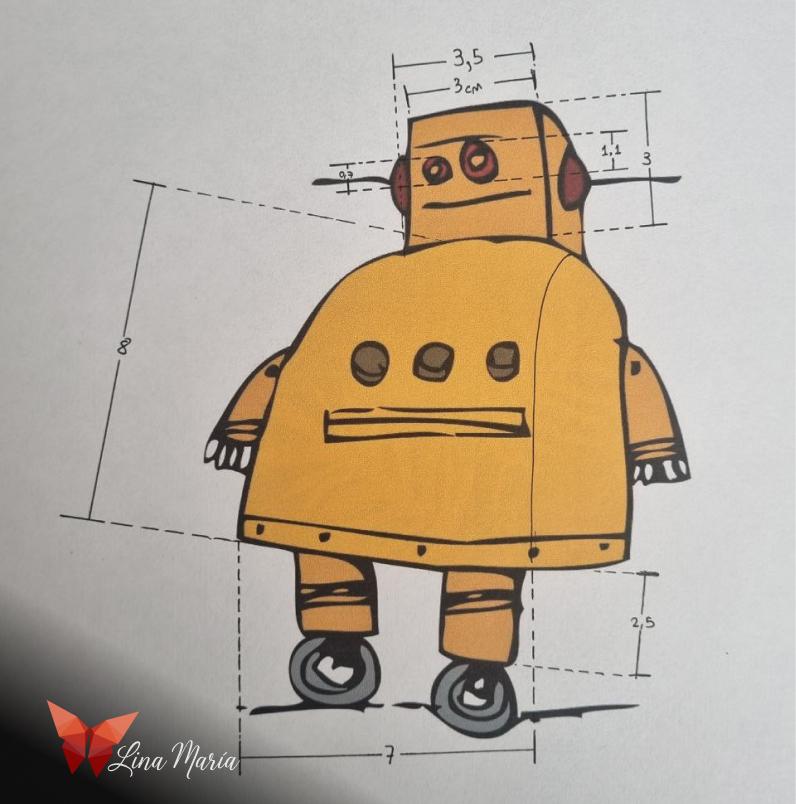
Later at home, I printed an image of the Instructables Robot and measured it roughly with a ruler to get a sense of proportions. Although I ended up changing many of those measurements during the 3D modeling process, those first approximations gave me a starting point to work from.
Designing the Body
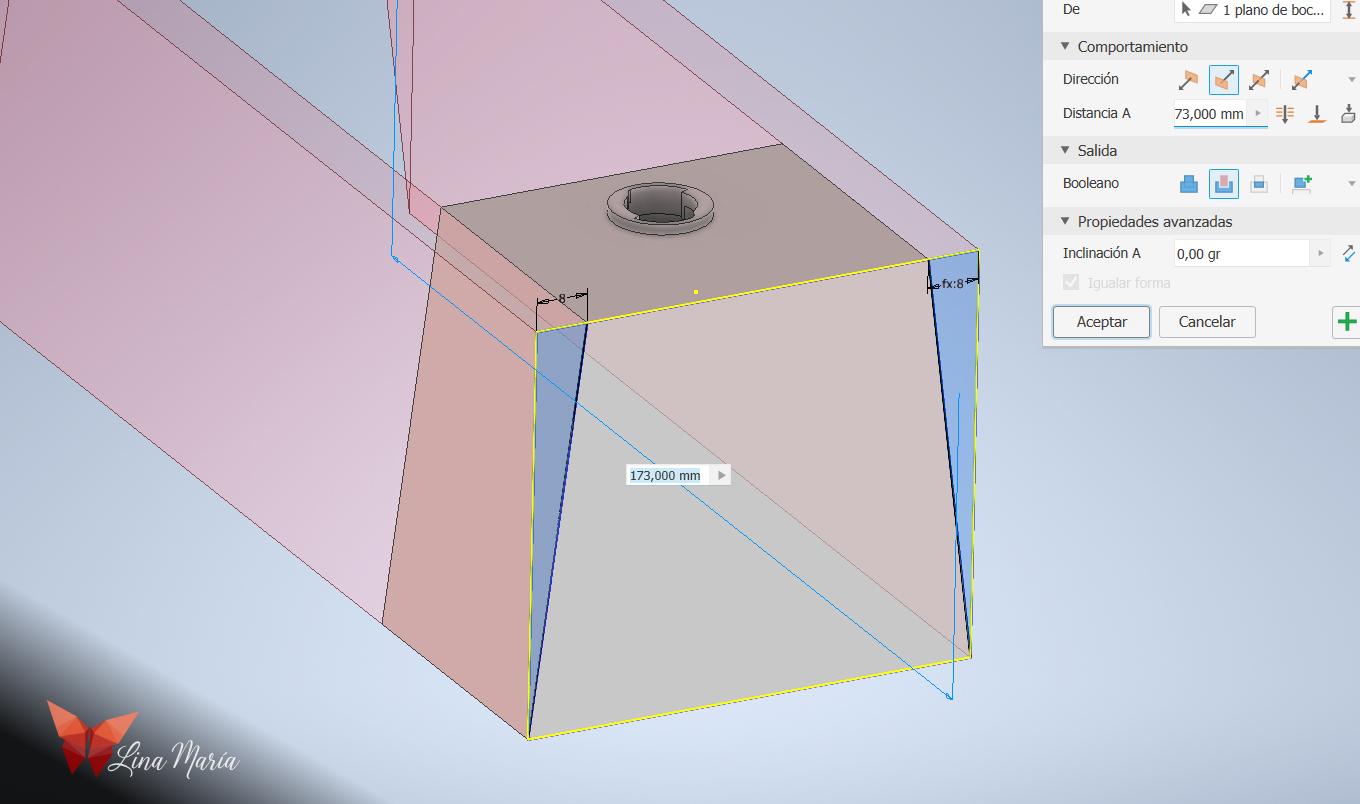
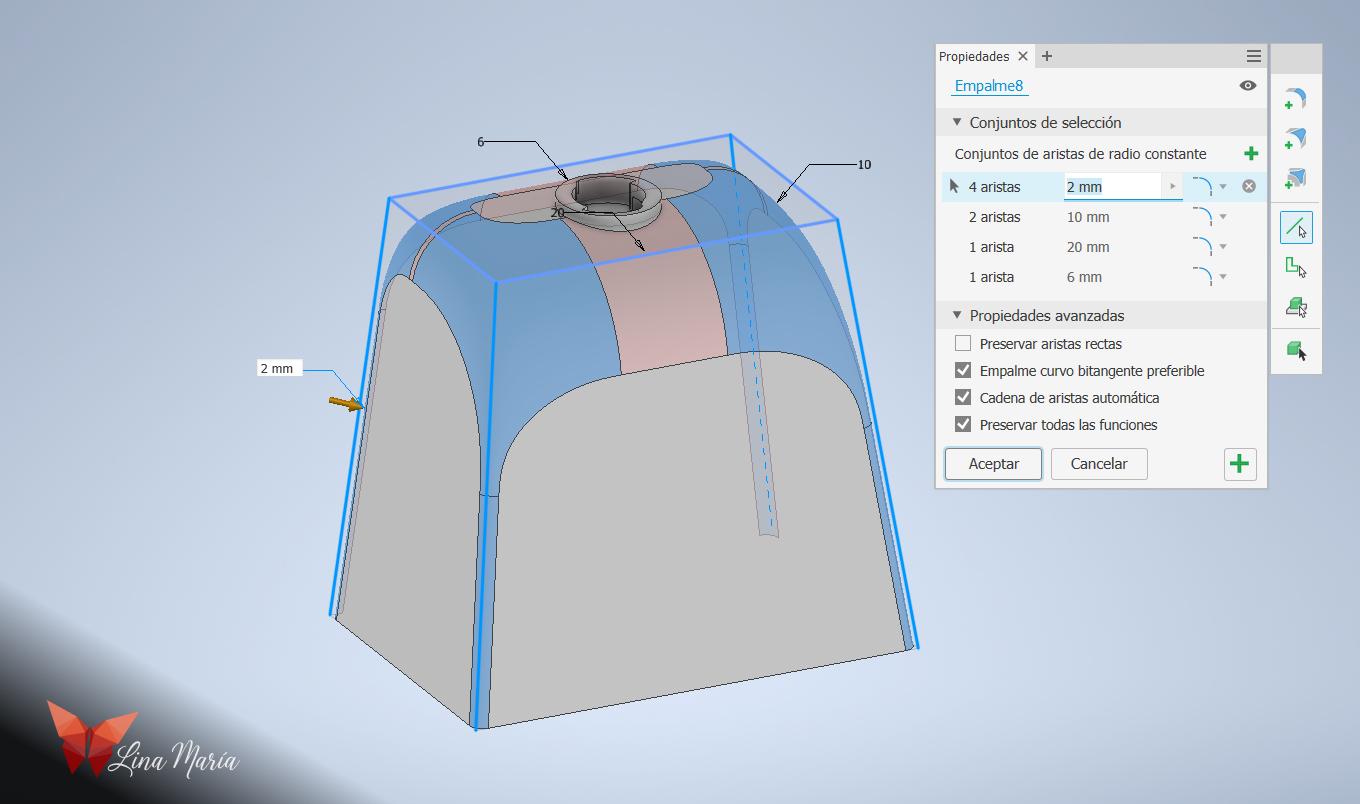
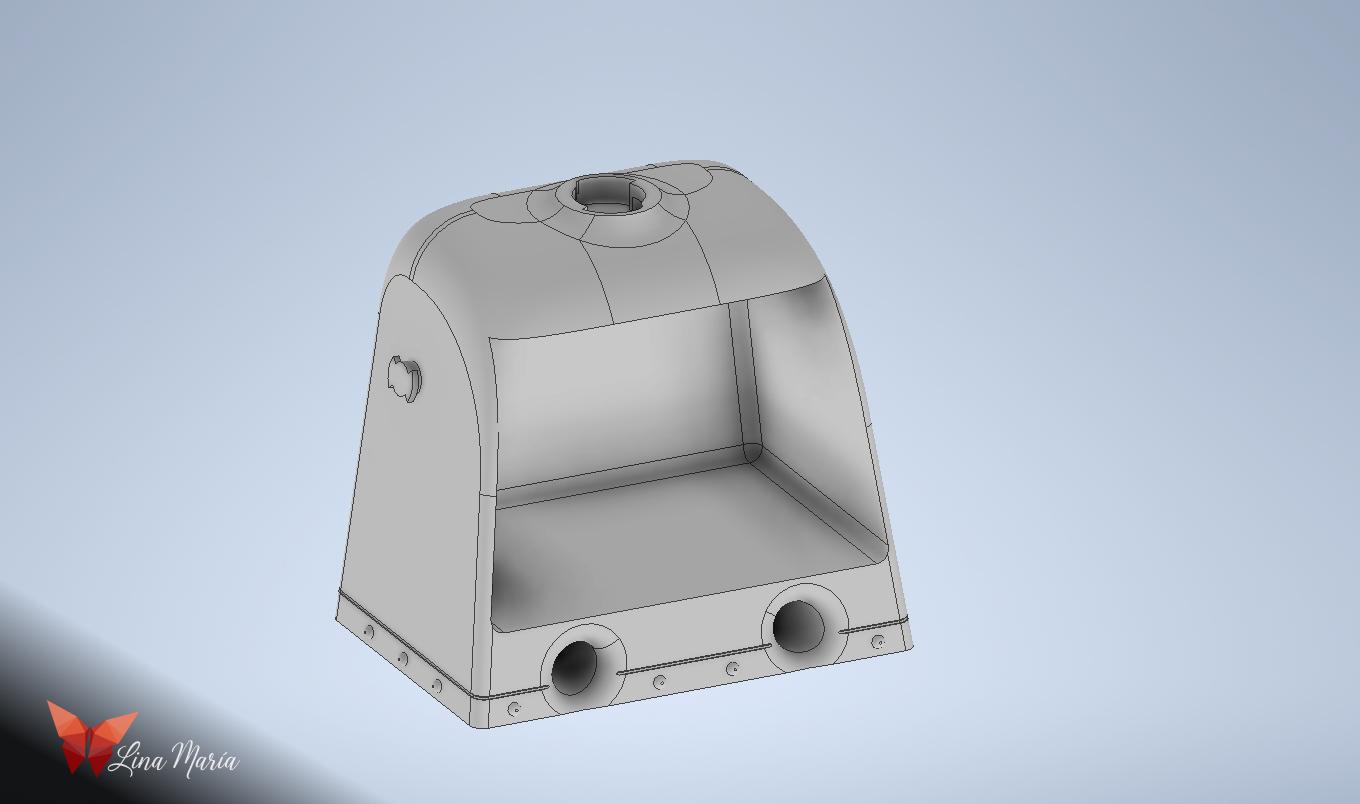
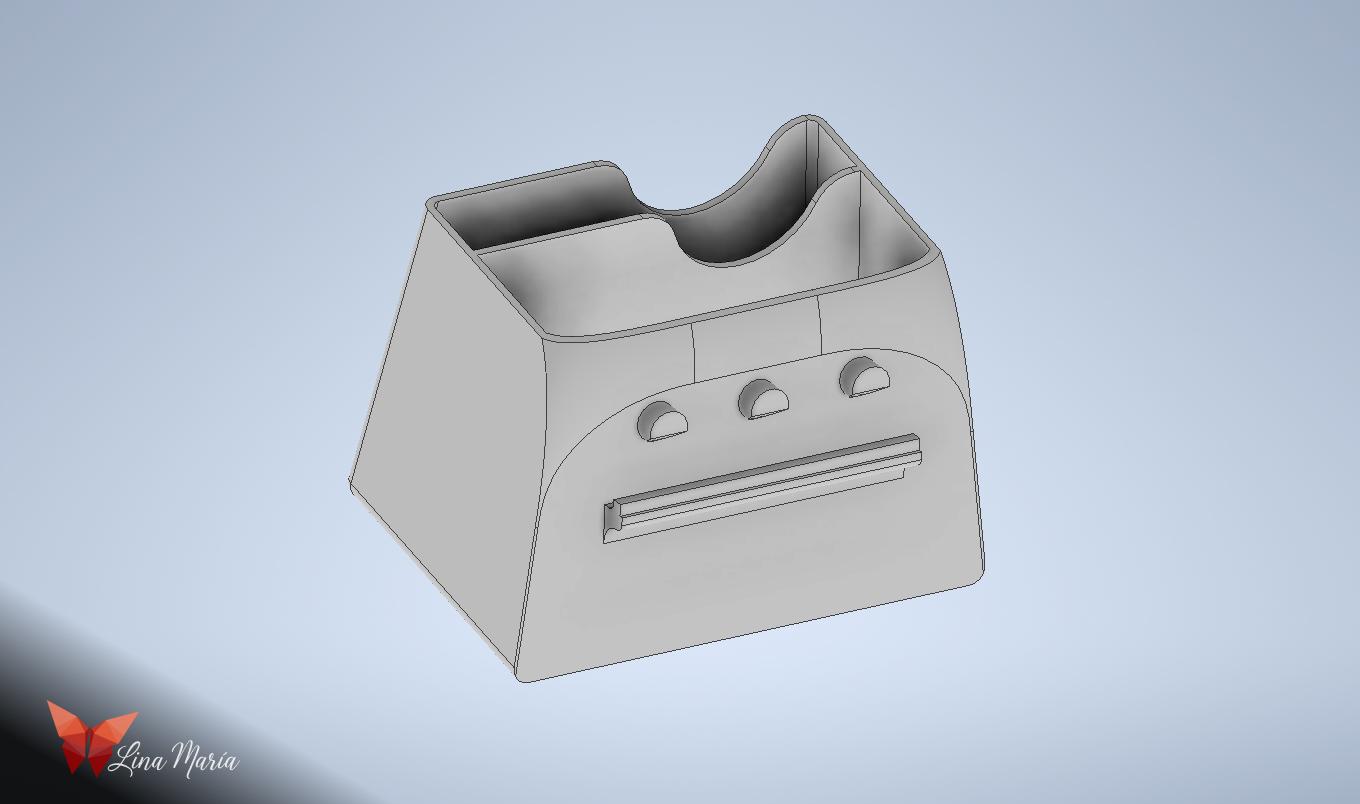
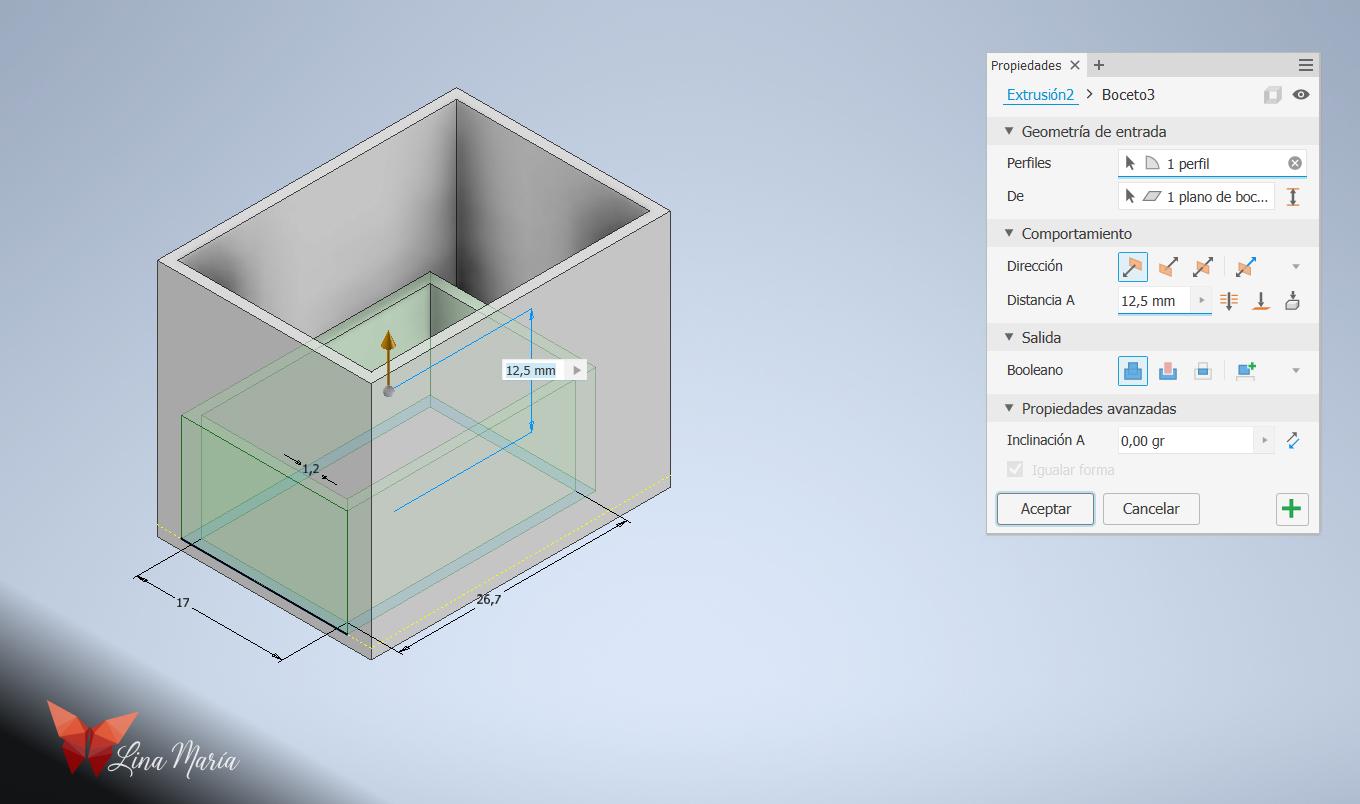
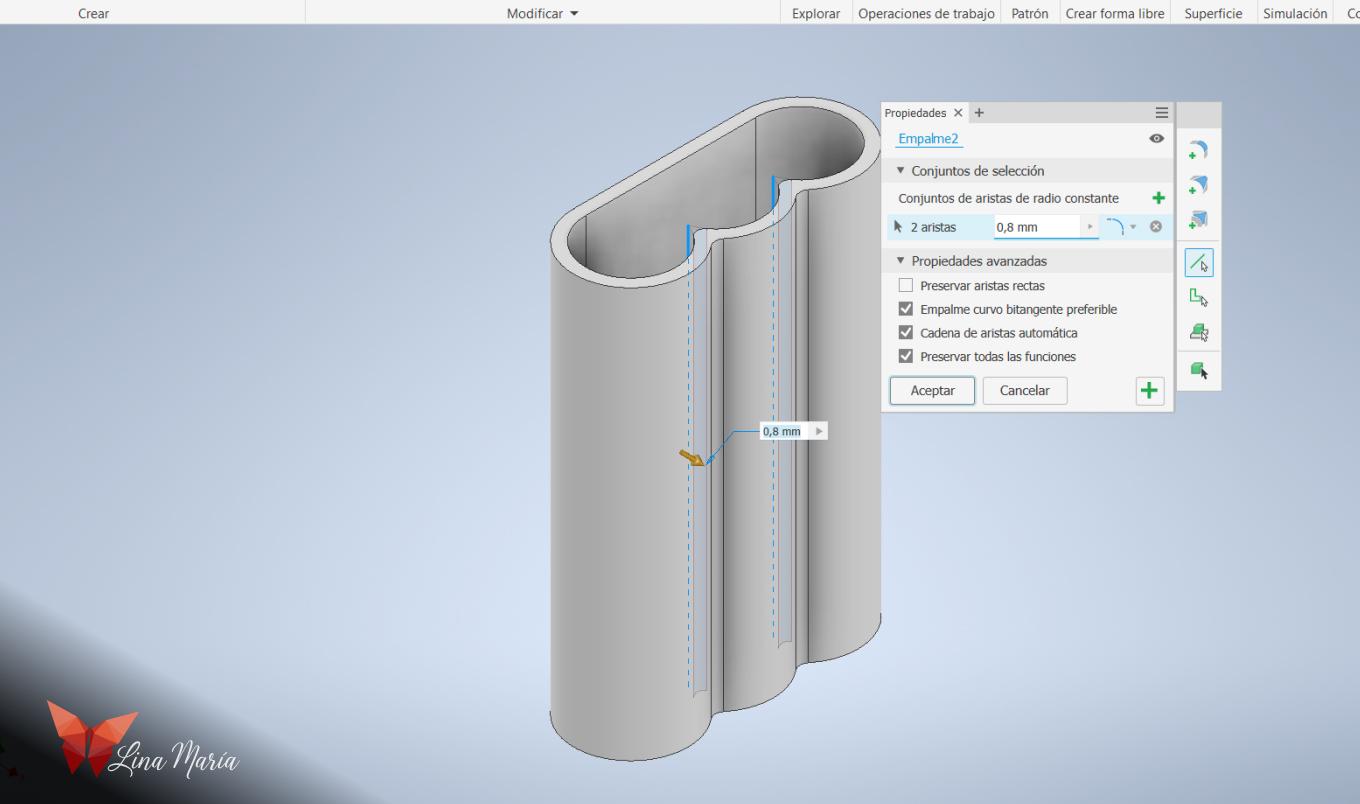
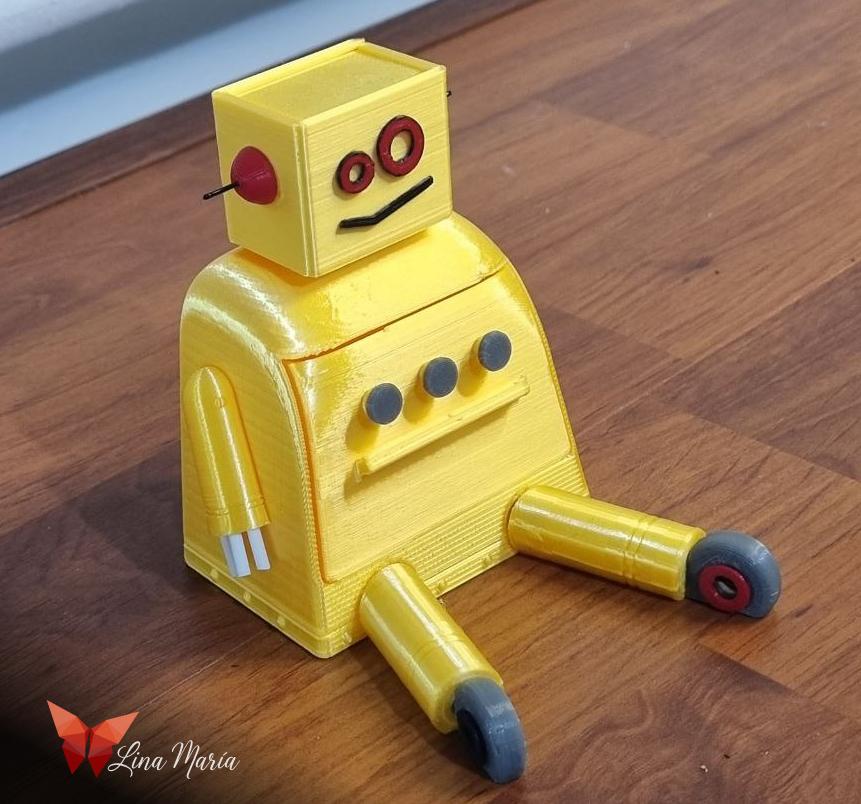
I decided that both the head and arms would attach using a bayonet mount. I started by modeling this joint section, then extruded a rectangle to form the torso. I trimmed the sides, curved the corners until they visually resembled the robot, and added holes at the bottom for the legs. I also included small textures at the base to mimic screws, repeated the bayonet mounts on the sides for the arms, and hollowed the center of the torso to leave space for the drawer.
Modeling the Drawer
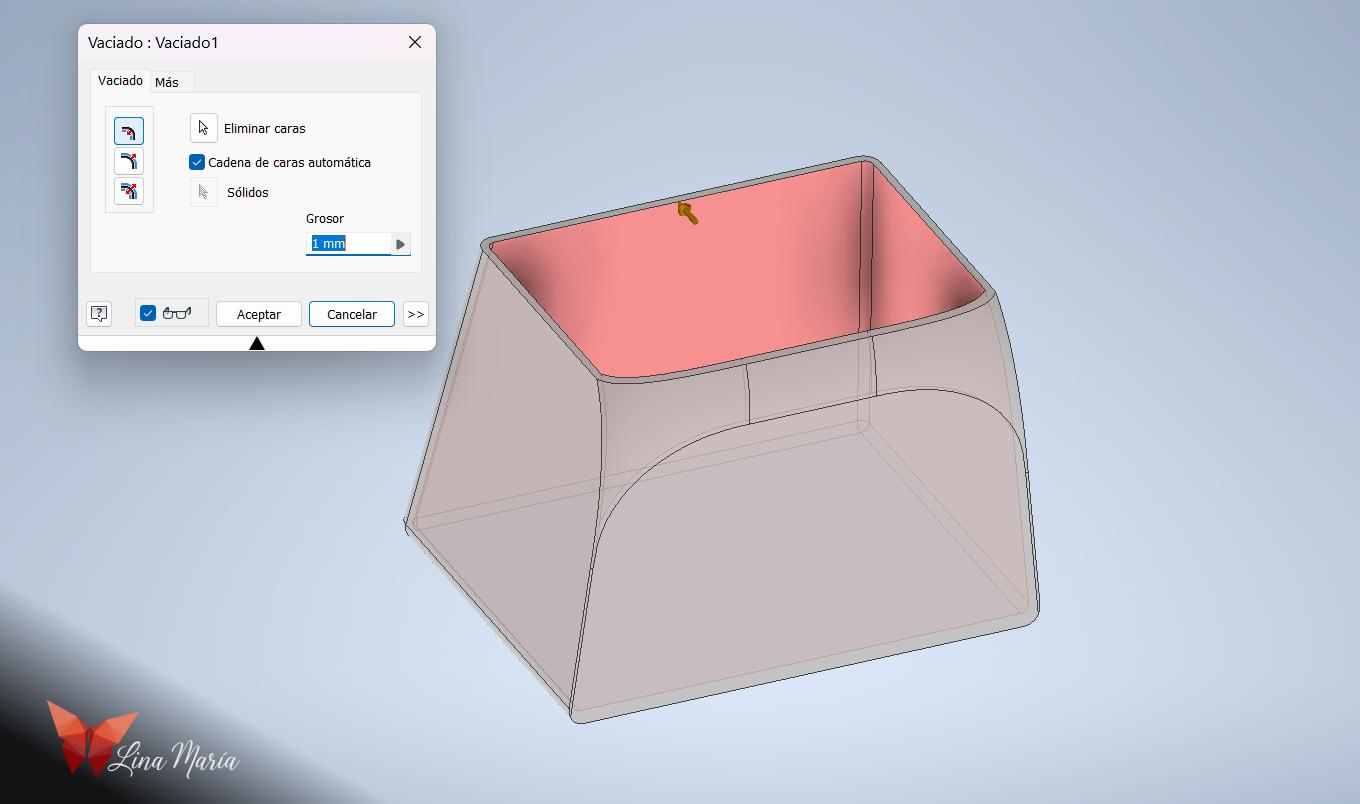
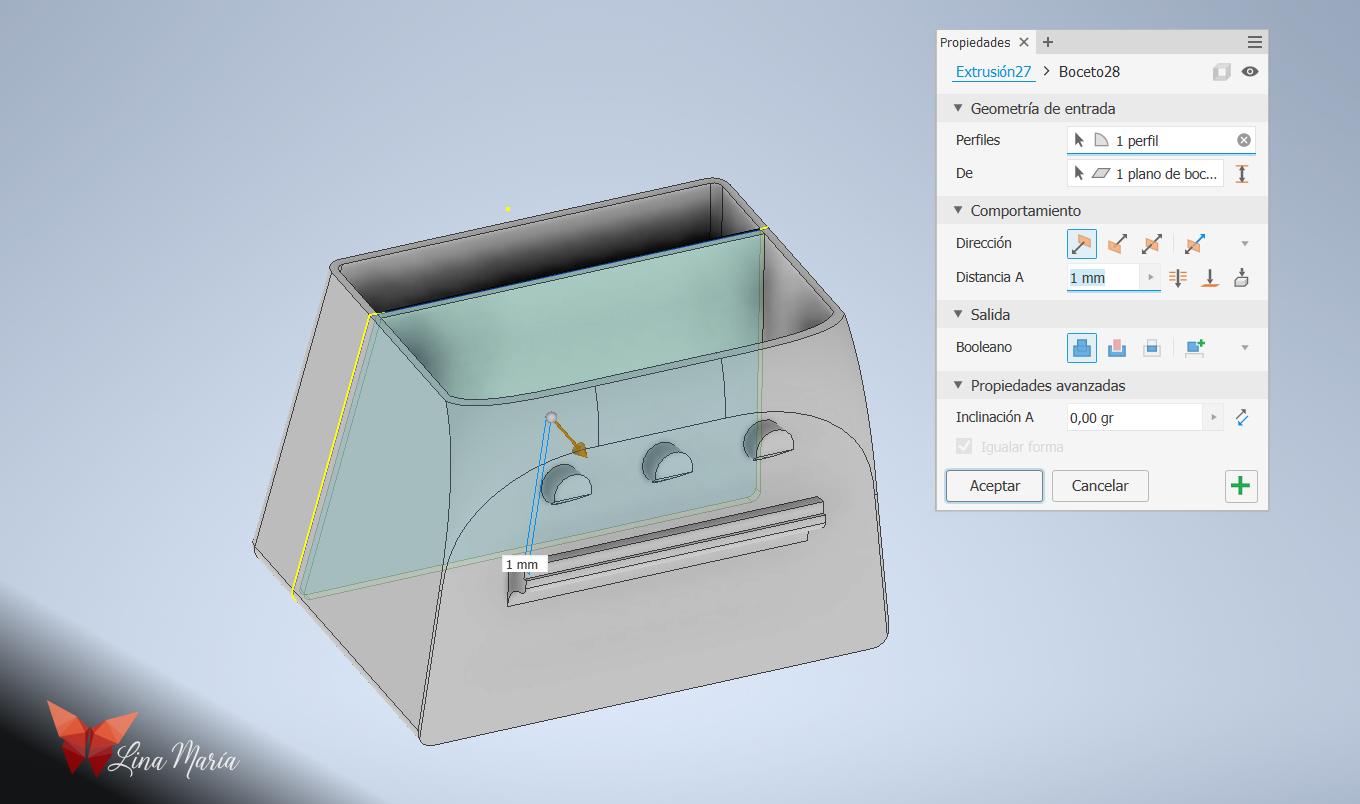
I duplicated the body file and modified the hollow extrusion so that only the intersection between the torso and the extrusion remained—this became the drawer piece.
I hollowed it, added three cylinders for the buttons, and created an inner divider to store post-its. I also modeled the buttons themselves.
(When 3D-printing this drawer, I scaled it to 98% so it could slide in and out smoothly.)
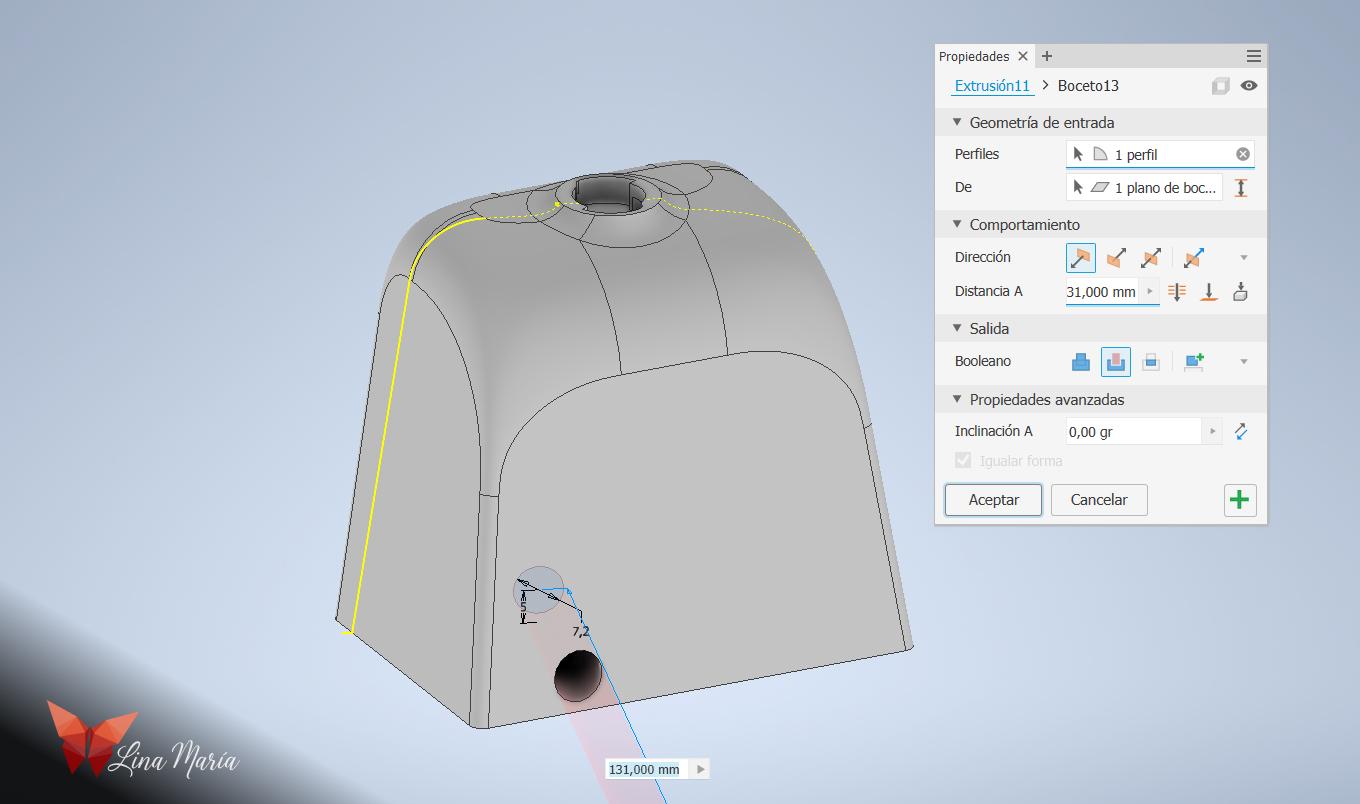
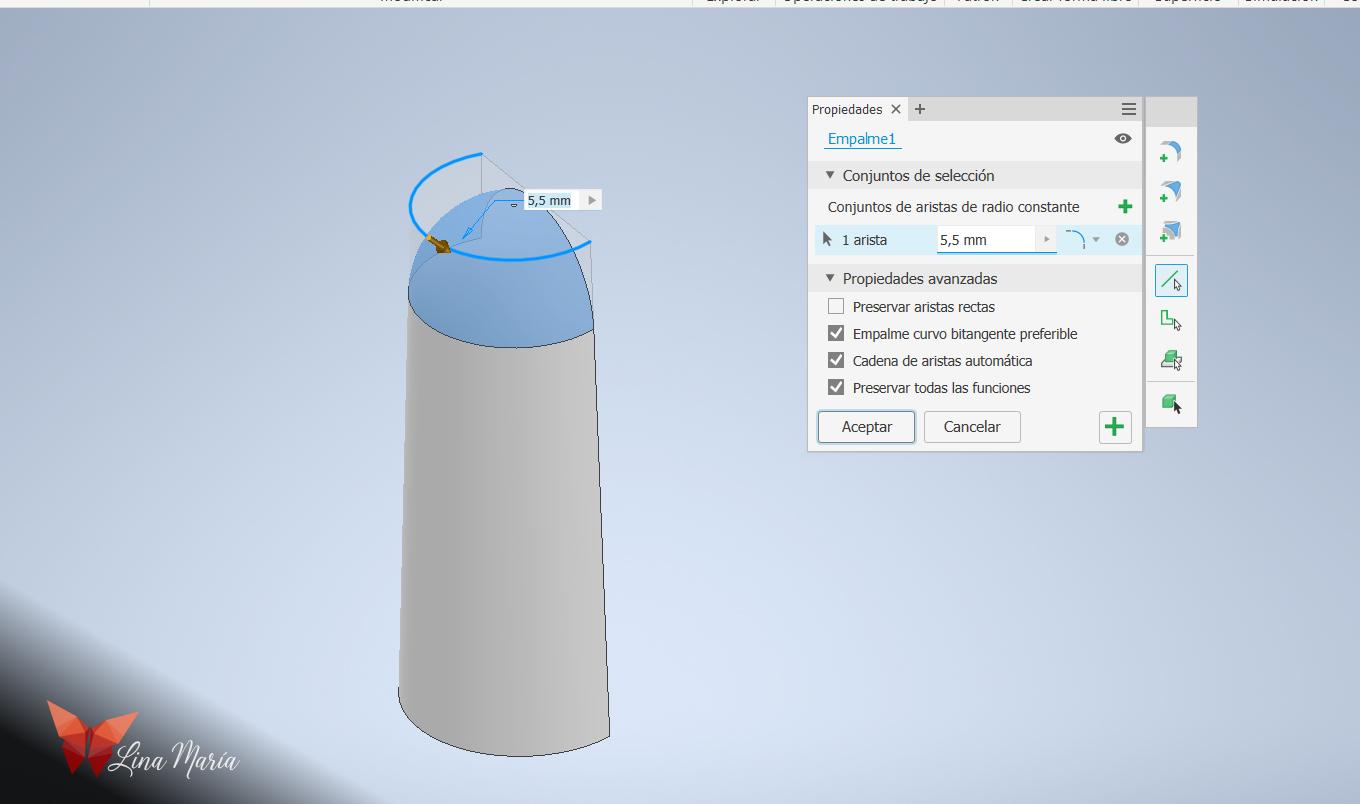
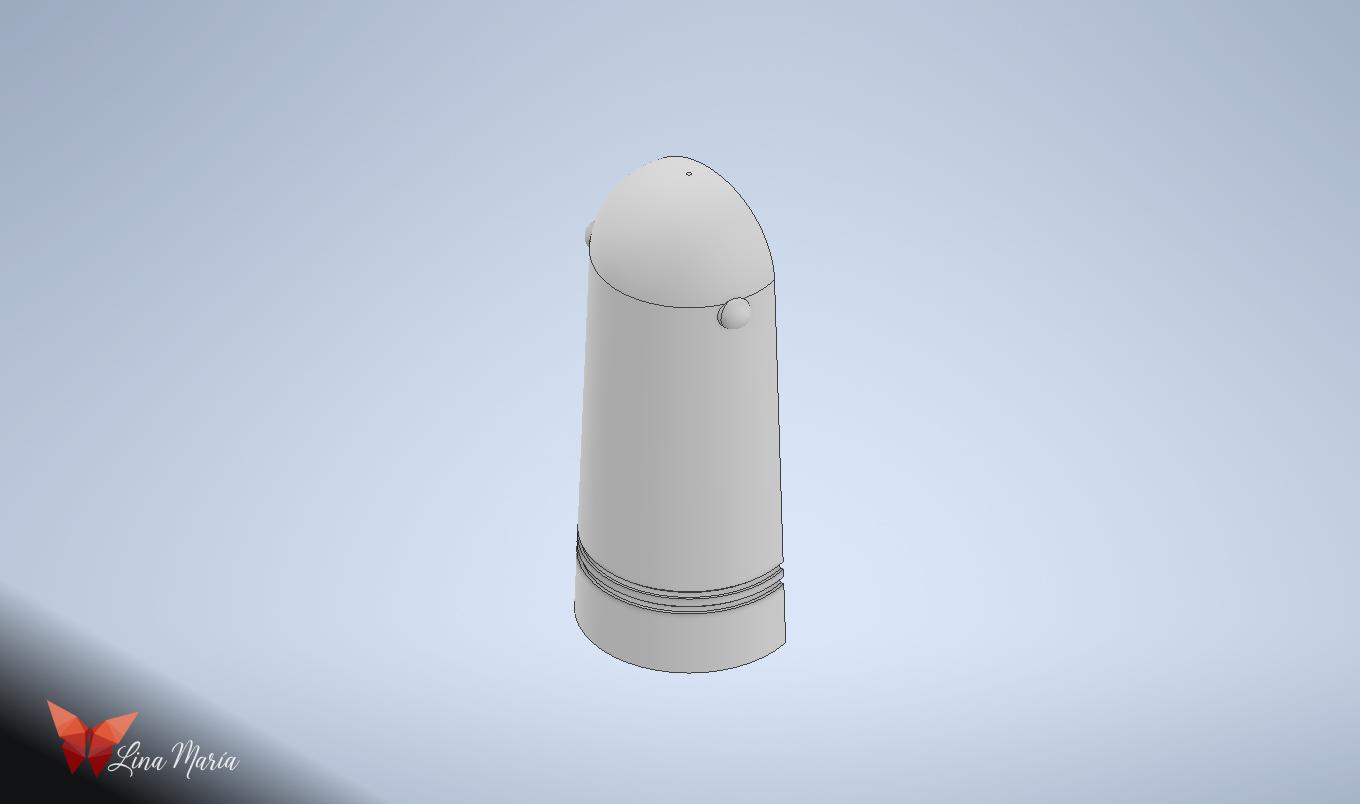
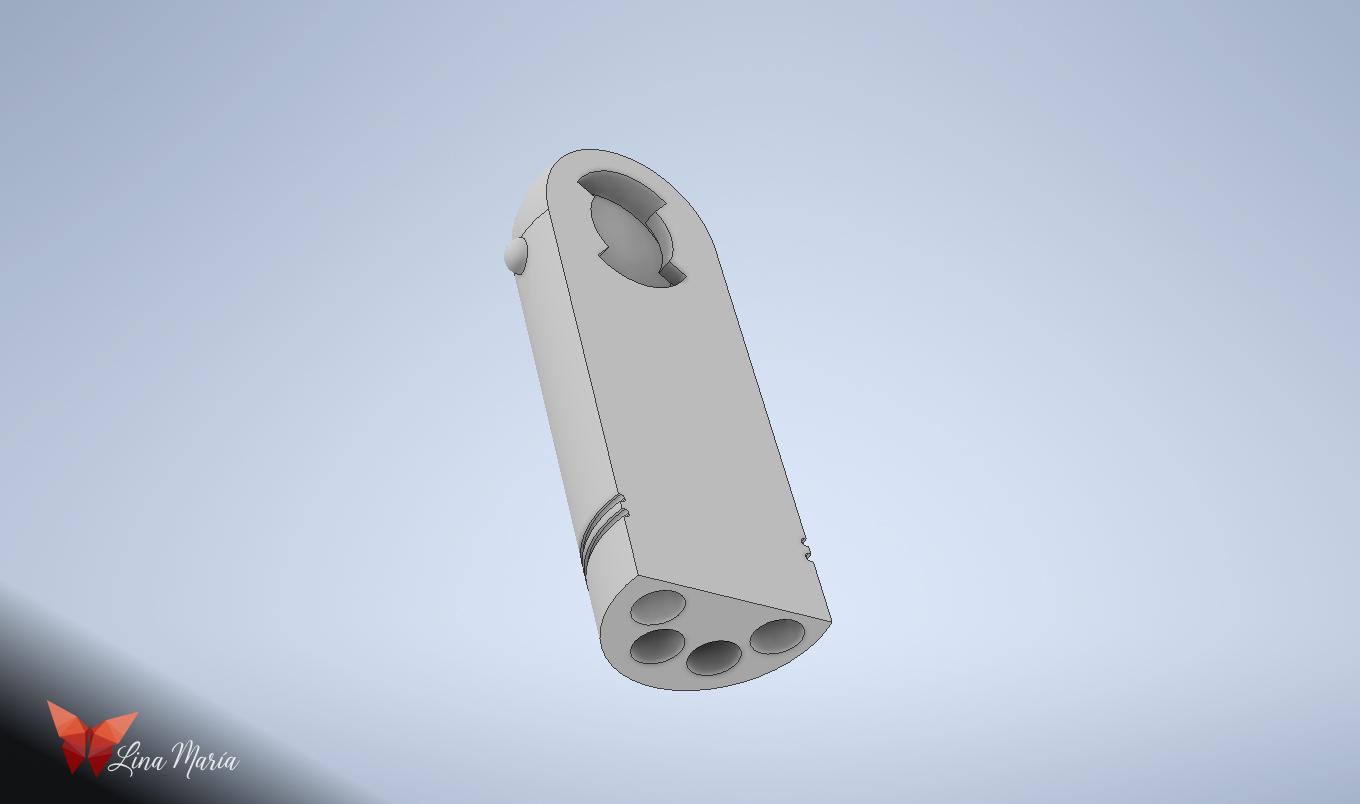
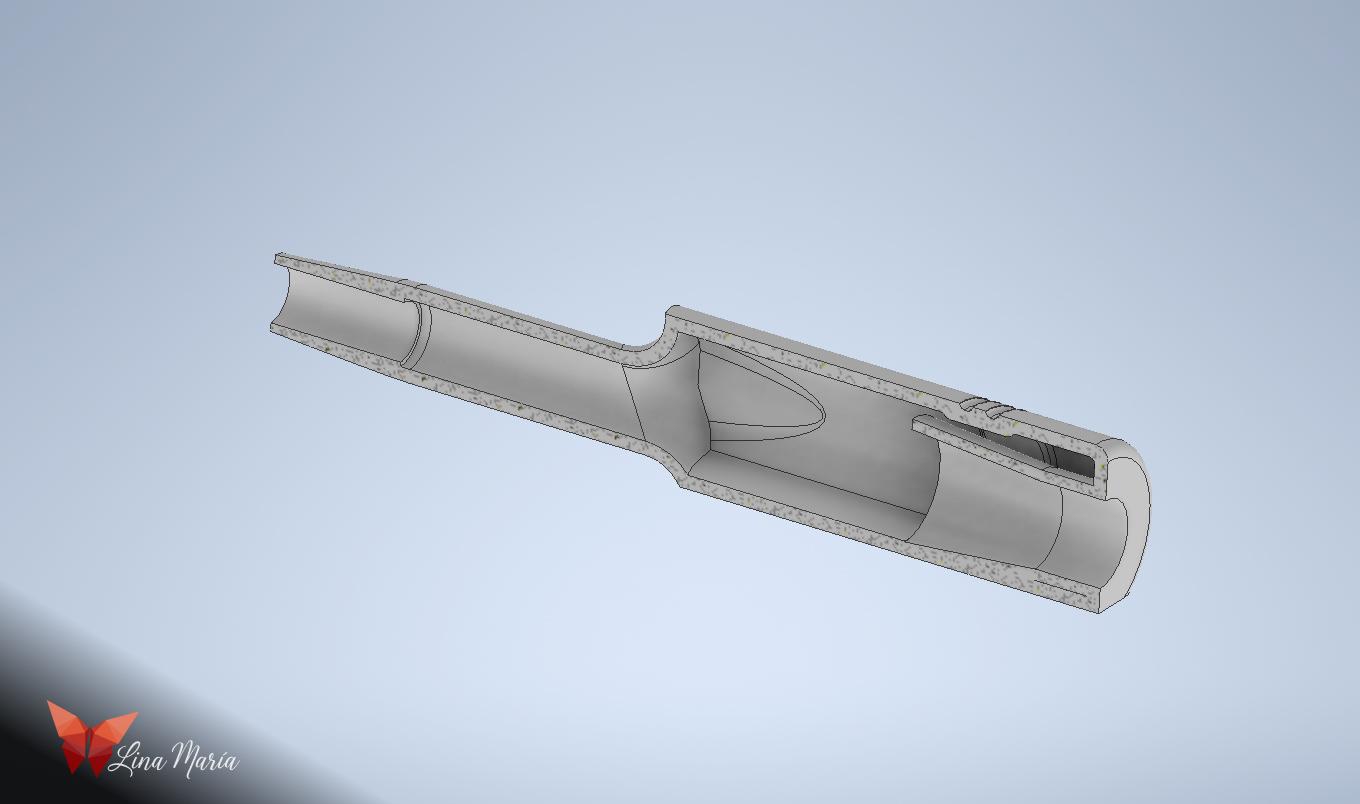
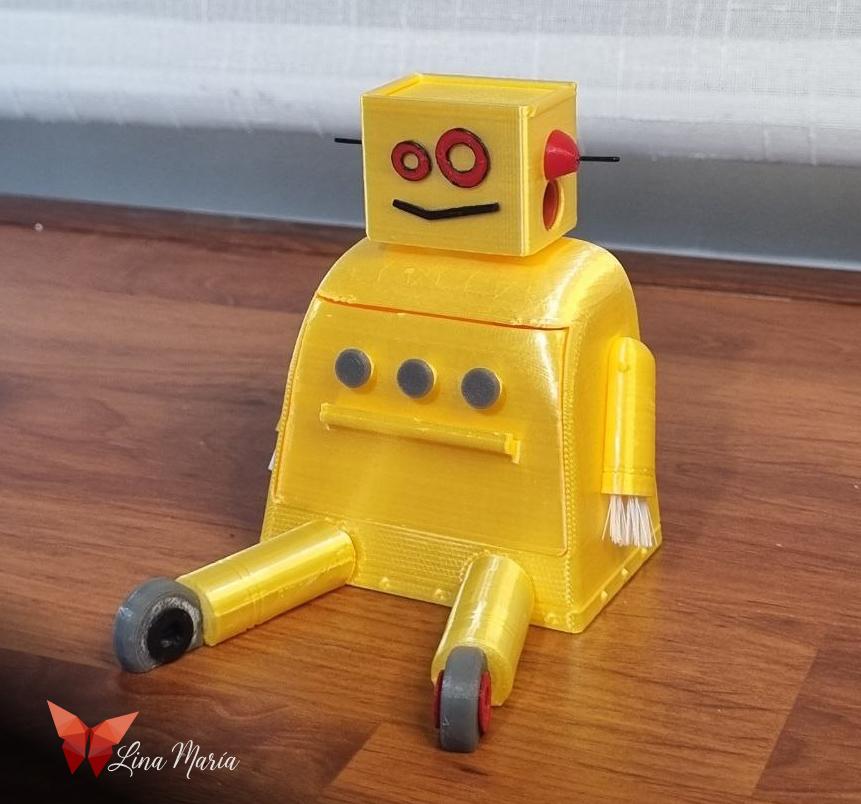
Building the Head

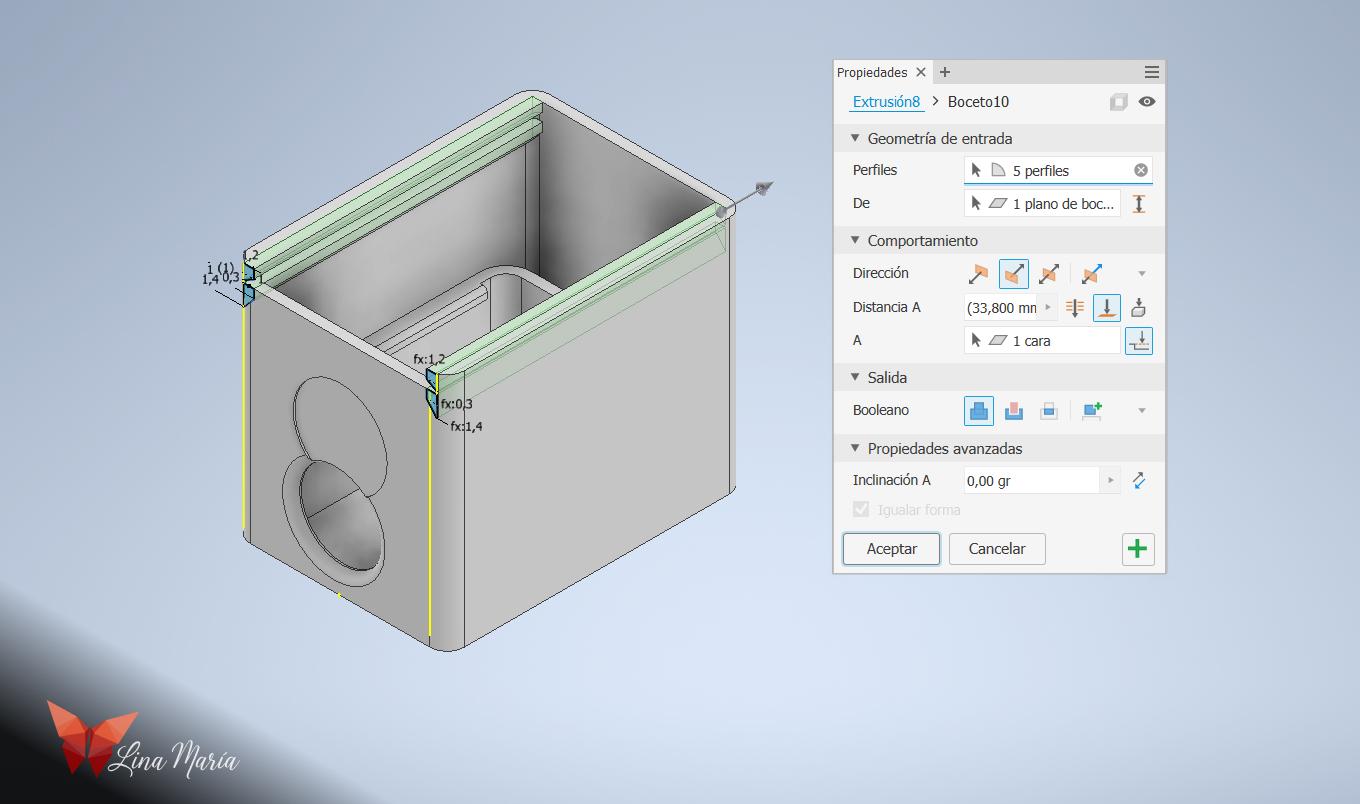
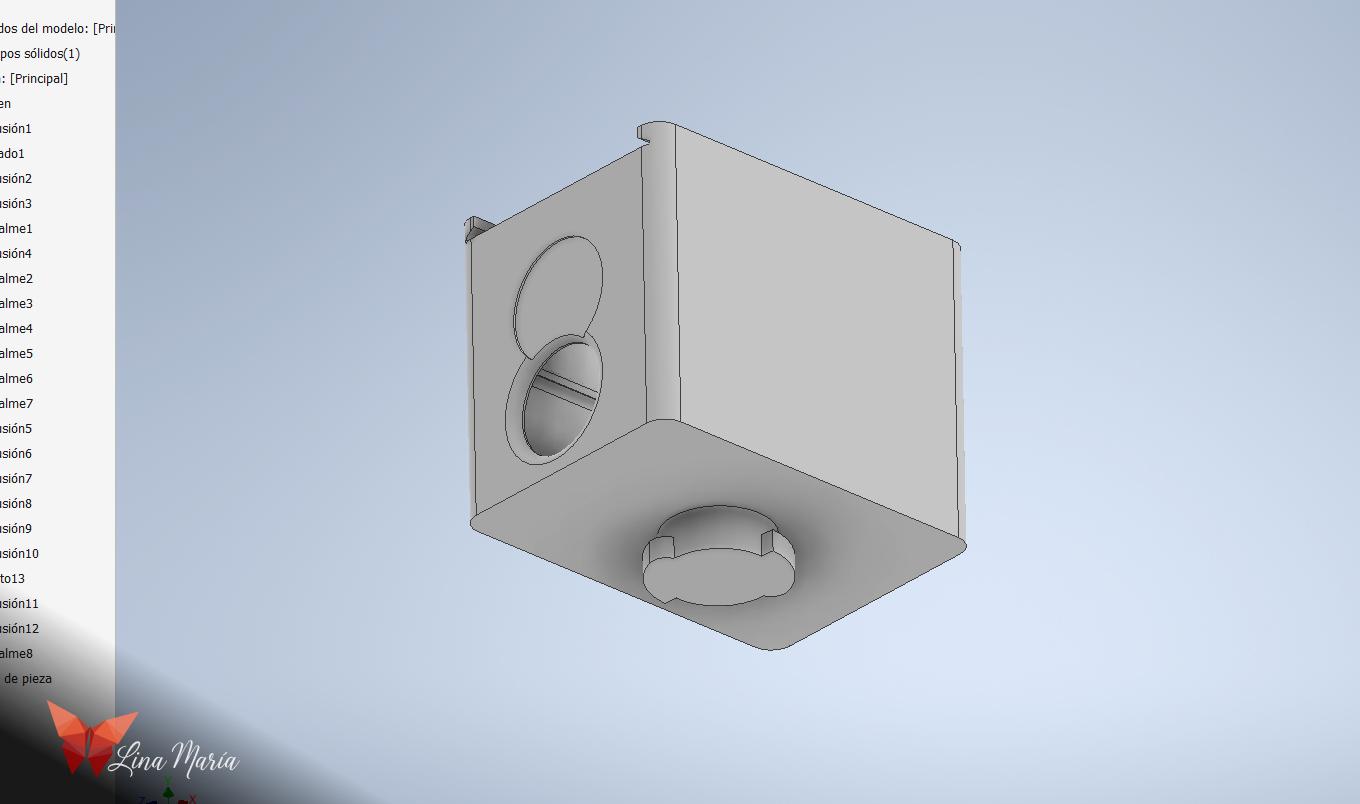
I began with a rectangle extruded to fit the pencil sharpener. I added two small tabs to hold the sharpener in place, then extruded a larger rectangle to form the head. I cut a side hole for the pencil entry, created two guides on top for a sliding lid, and modeled a small neck with the bayonet mount attachment for the body.
Extra Head Pieces
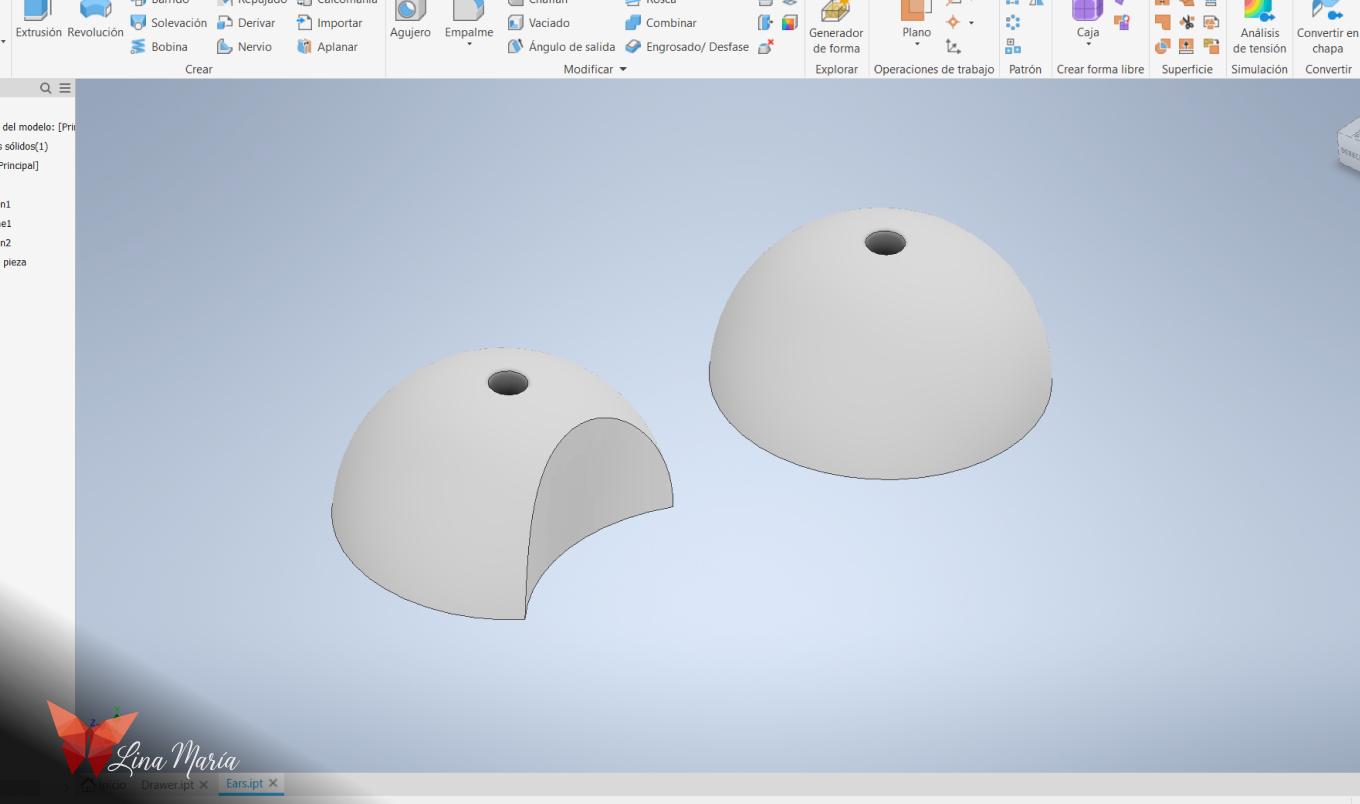
I modeled the sliding top cover, the ears and eyes (to be printed in red), and the mouth (to be printed in black).
Creating the Arms
I started with a cylinder and extruded it at –5°, making it narrower at the top so it resembled a cone. Then I cut off one side to create the flat surface that would sit against the body. After that, I curved one edge to suggest the shoulder.
I added the bayonet mount joint at the top so it could attach to the torso. Finally, I hollowed the bottom with slots for the “fingers.” One arm would later hold eraser bars as fingers, while the other would hold brush bristles.
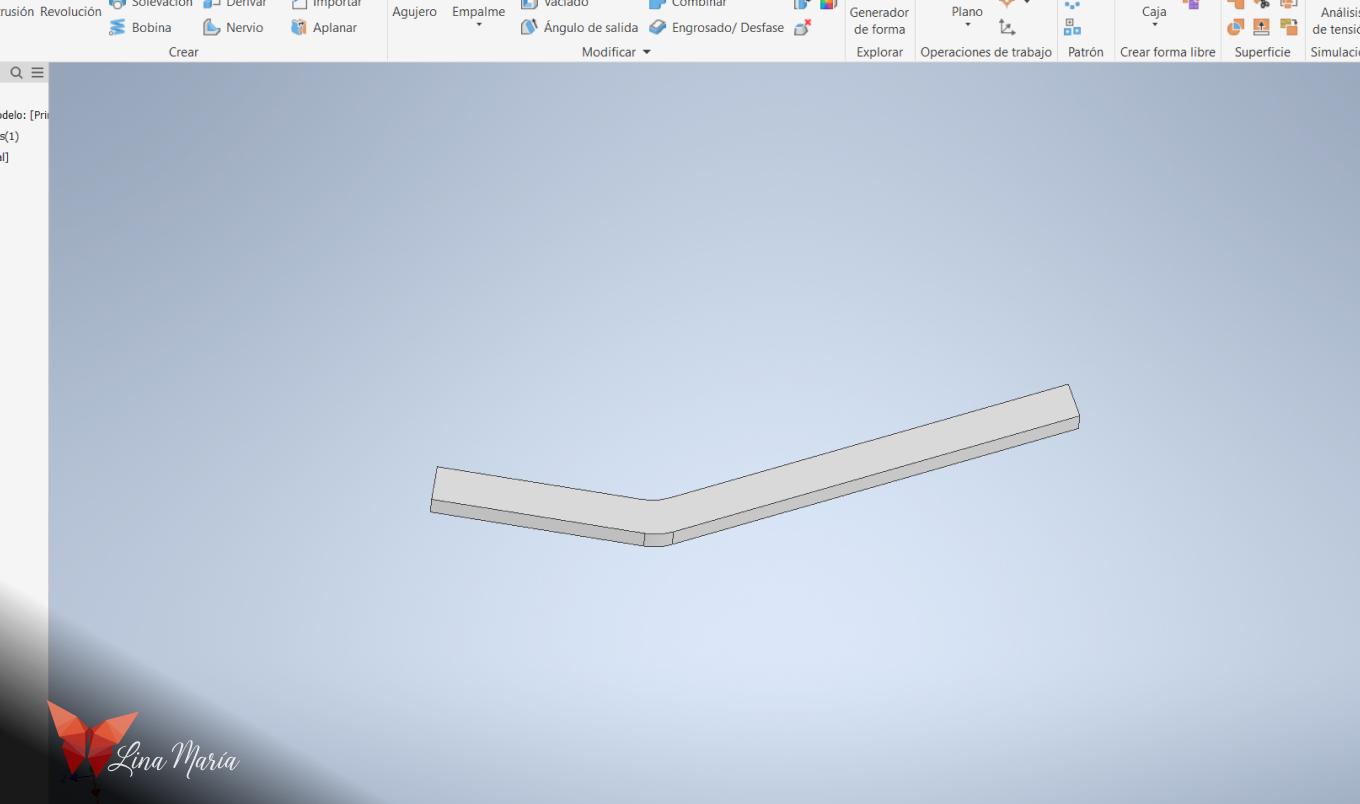
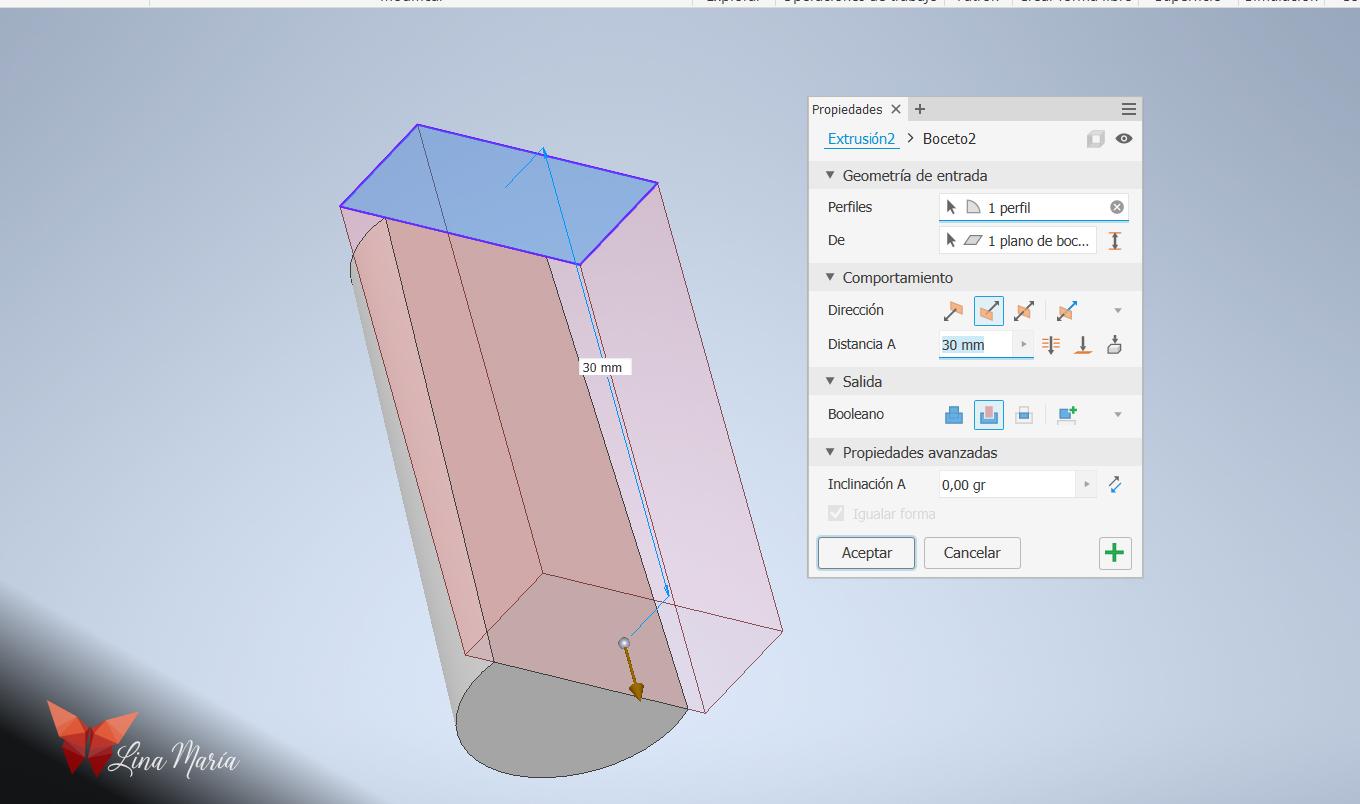
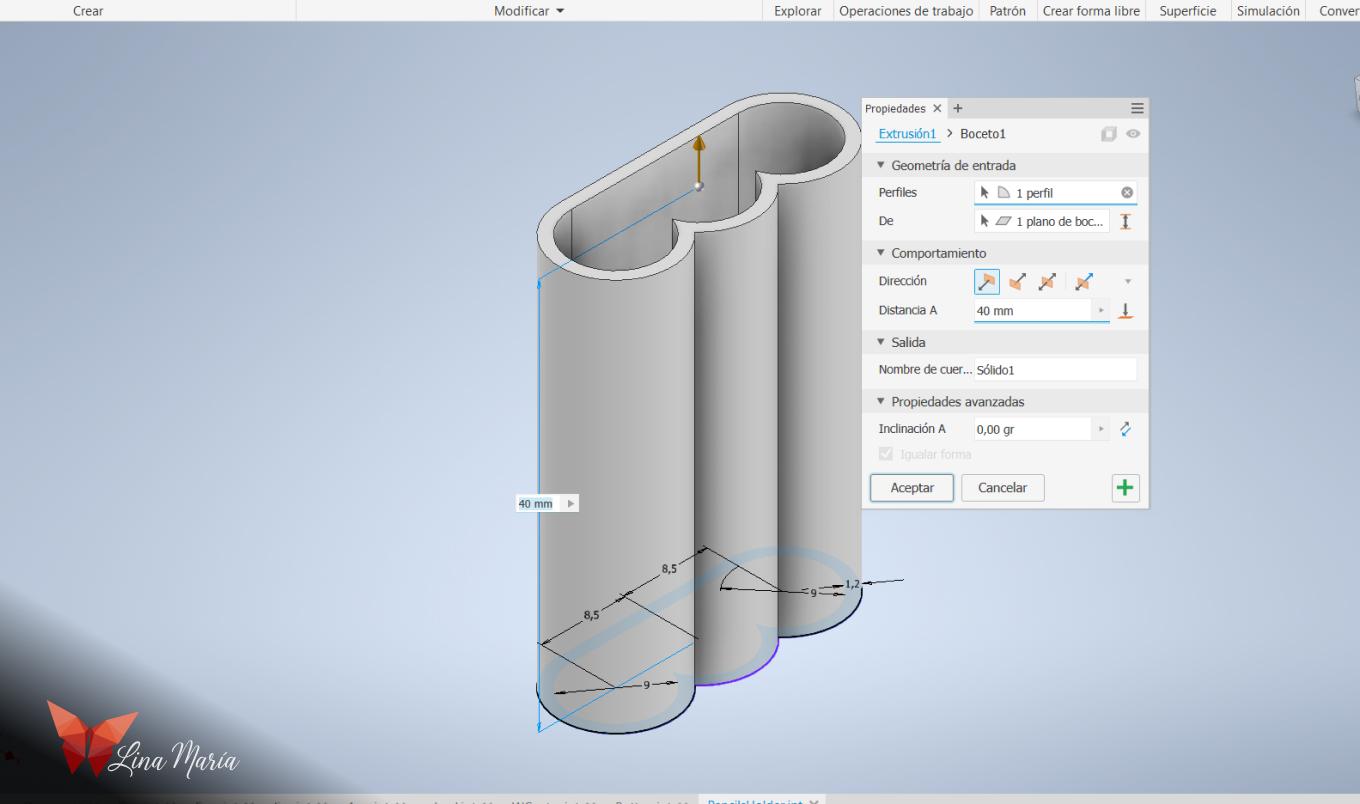
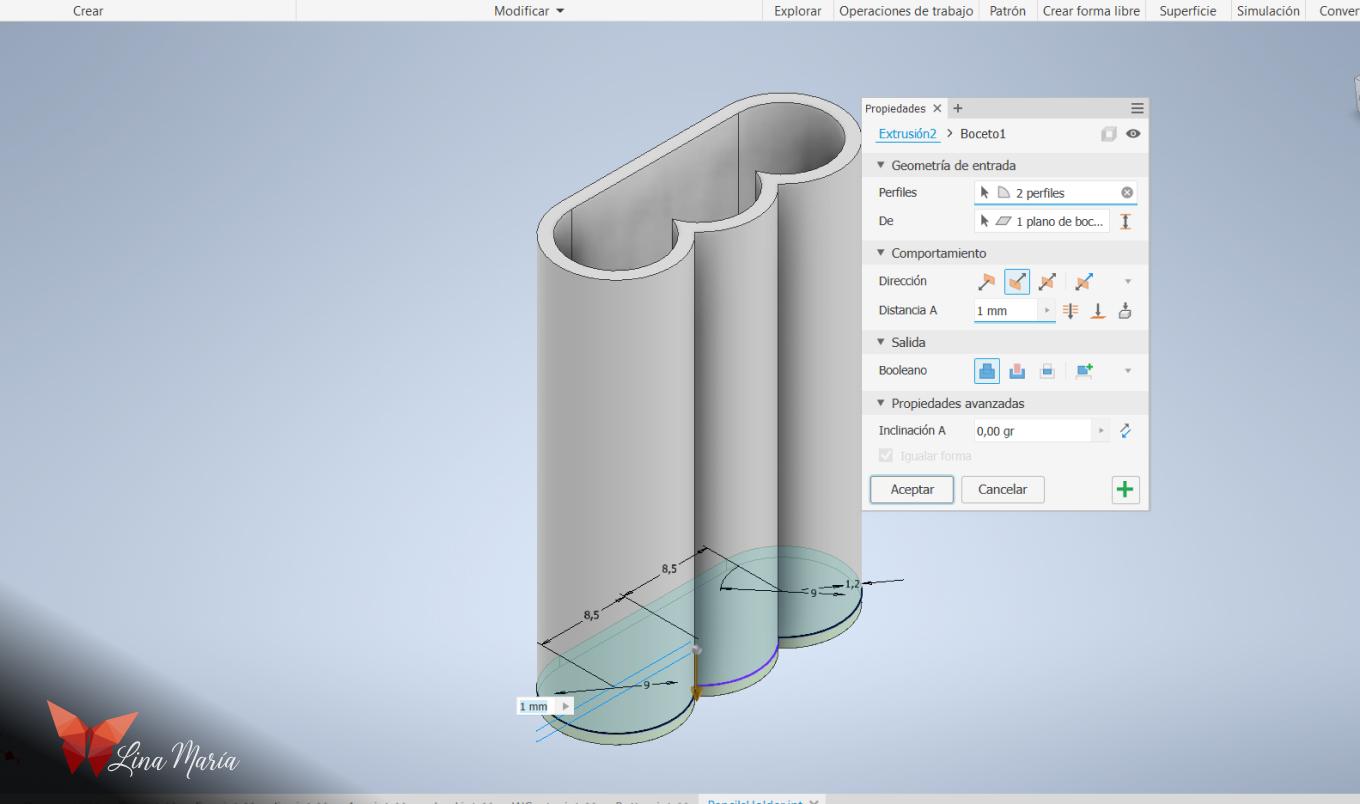
Designing the Legs
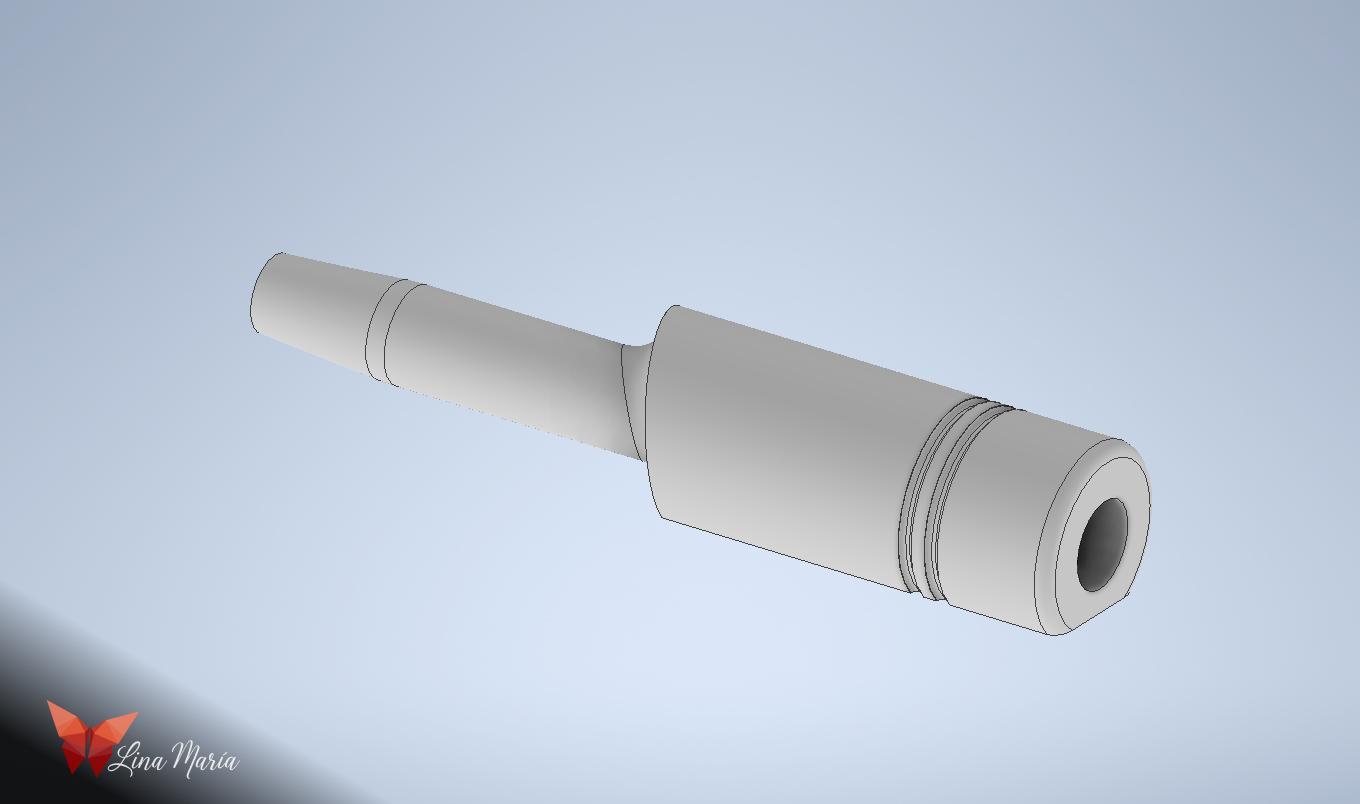

I used the torso file as a reference to match the leg angles. Similar to the drawer process, I first created a copy of the body file. I used an extrusion intersection to form the initial pen tube. Then I added all necessary details.
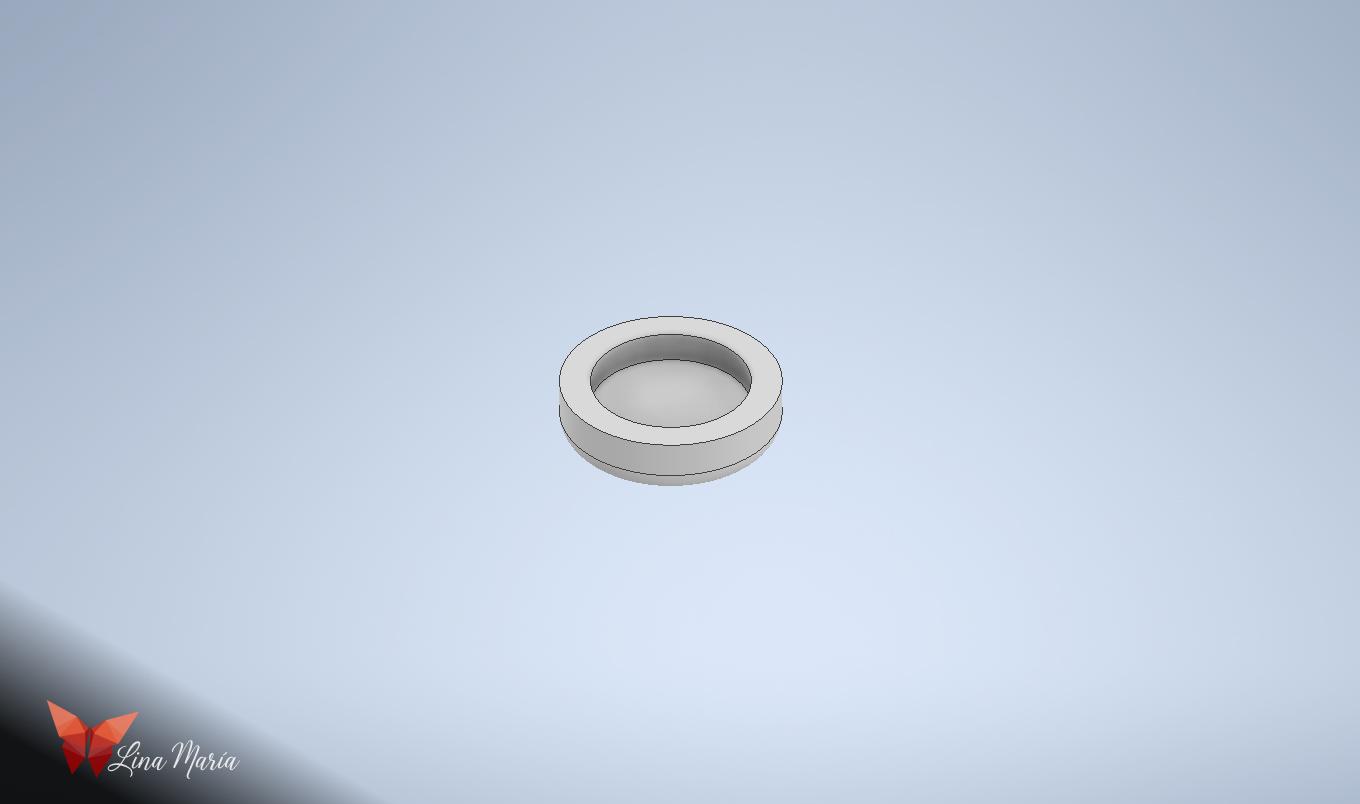
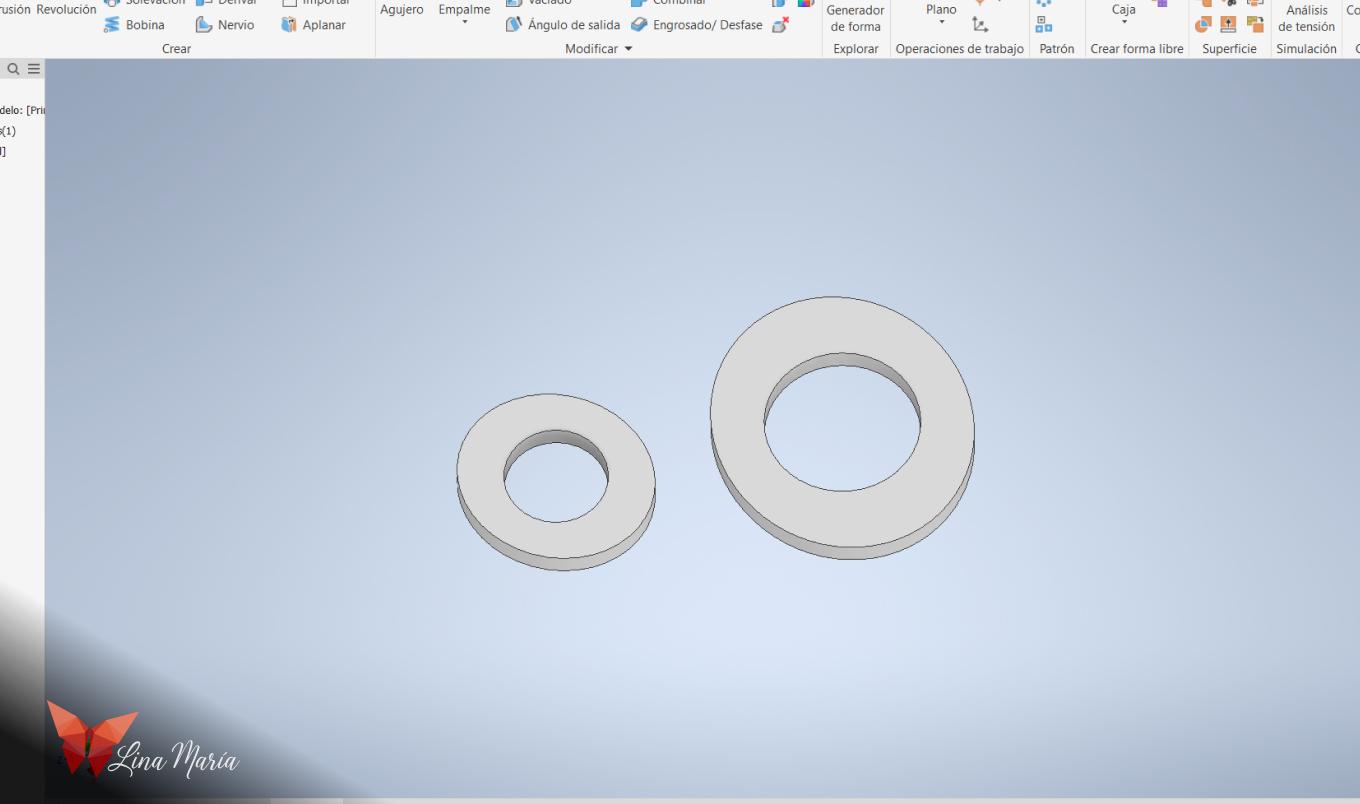
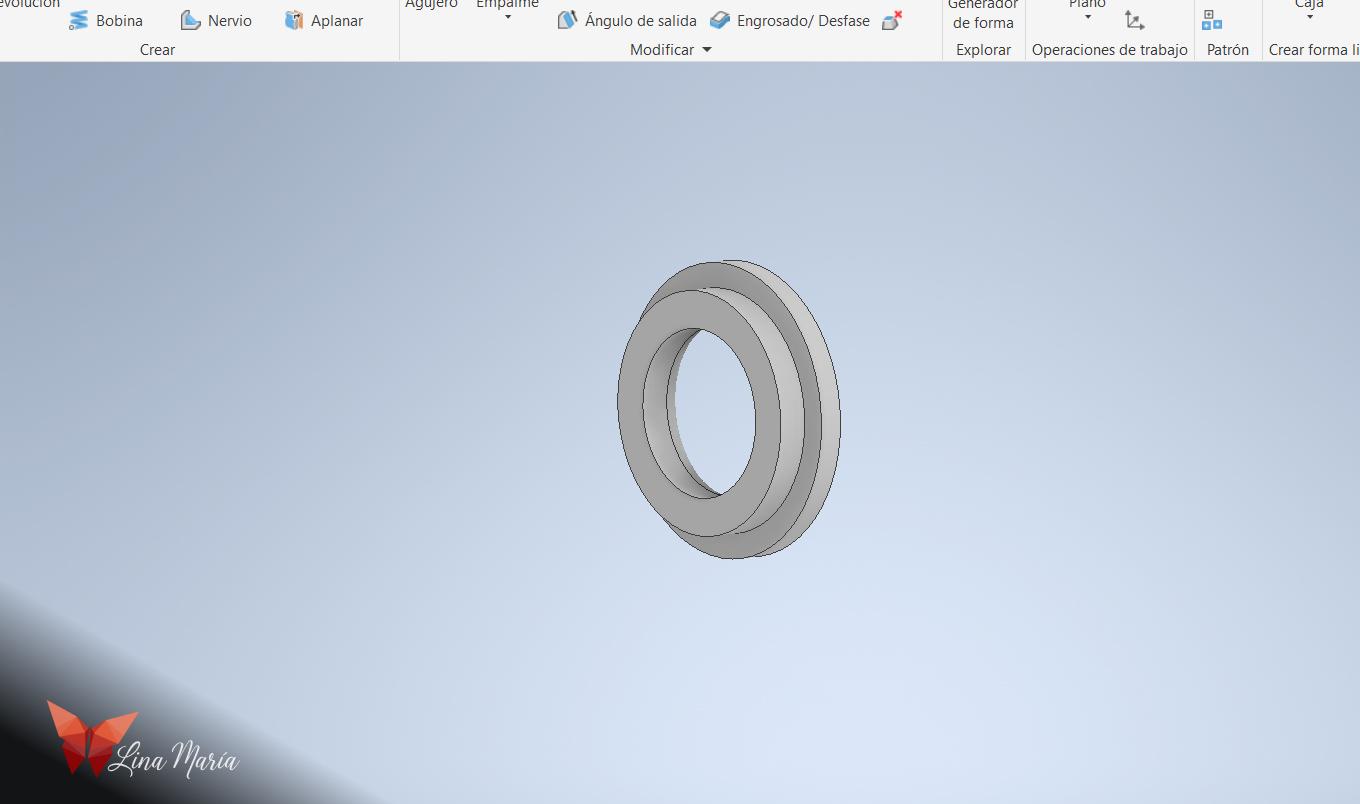
In a separate file, I modeled the wheels to act as feet, plus small rings—two in black for the black pen leg, and two in red for the red pen leg.
(For the second leg, I simply printed the same file mirrored.)
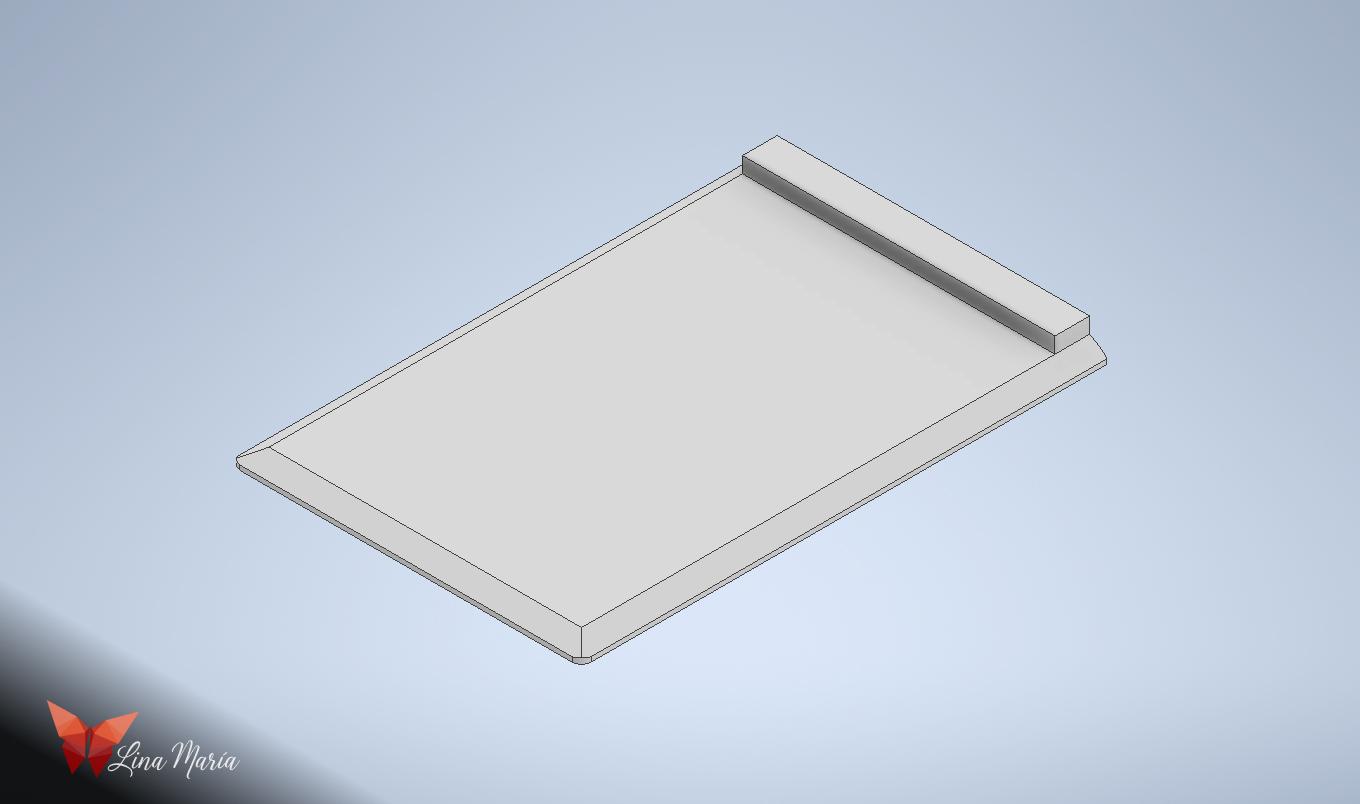
Adding a Pencil Holder
As a final piece, I modeled a pencil holder for the back. Using circles and extrusions, I shaped a form I liked, softened some corners, and prepared it for gluing later to the Bot's back.
Printing the Parts
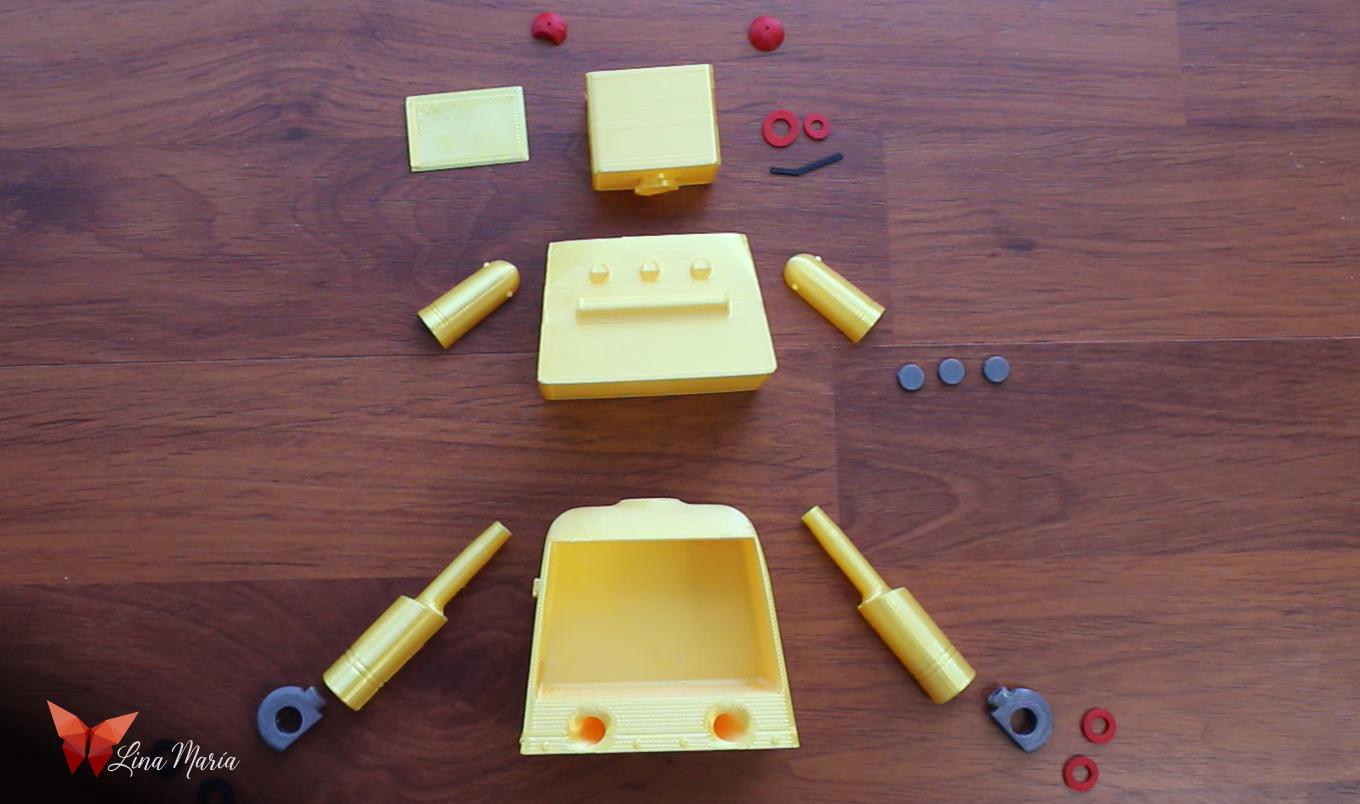
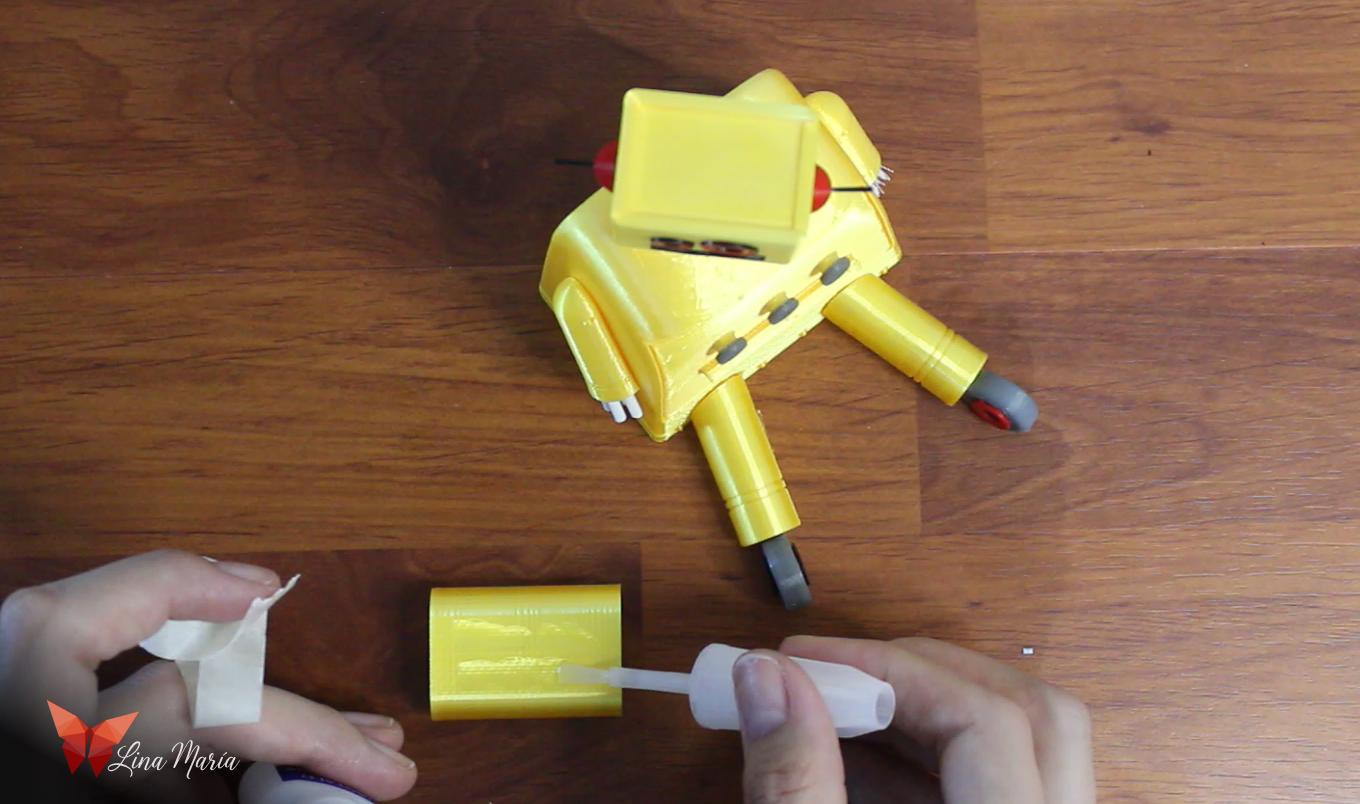
I 3D-printed all the pieces, carefully selecting the colors and quantities. For example, the head was printed once, while the buttons were printed three times.
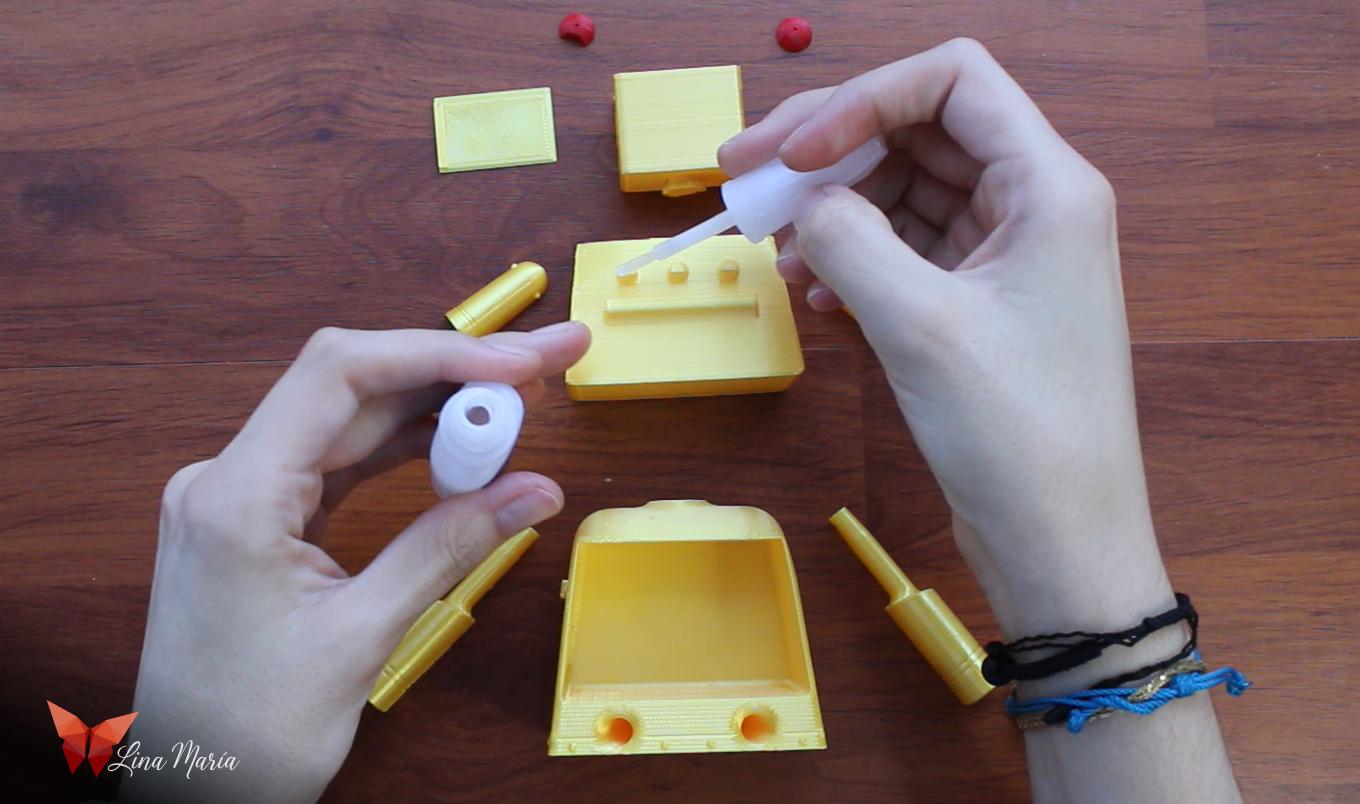
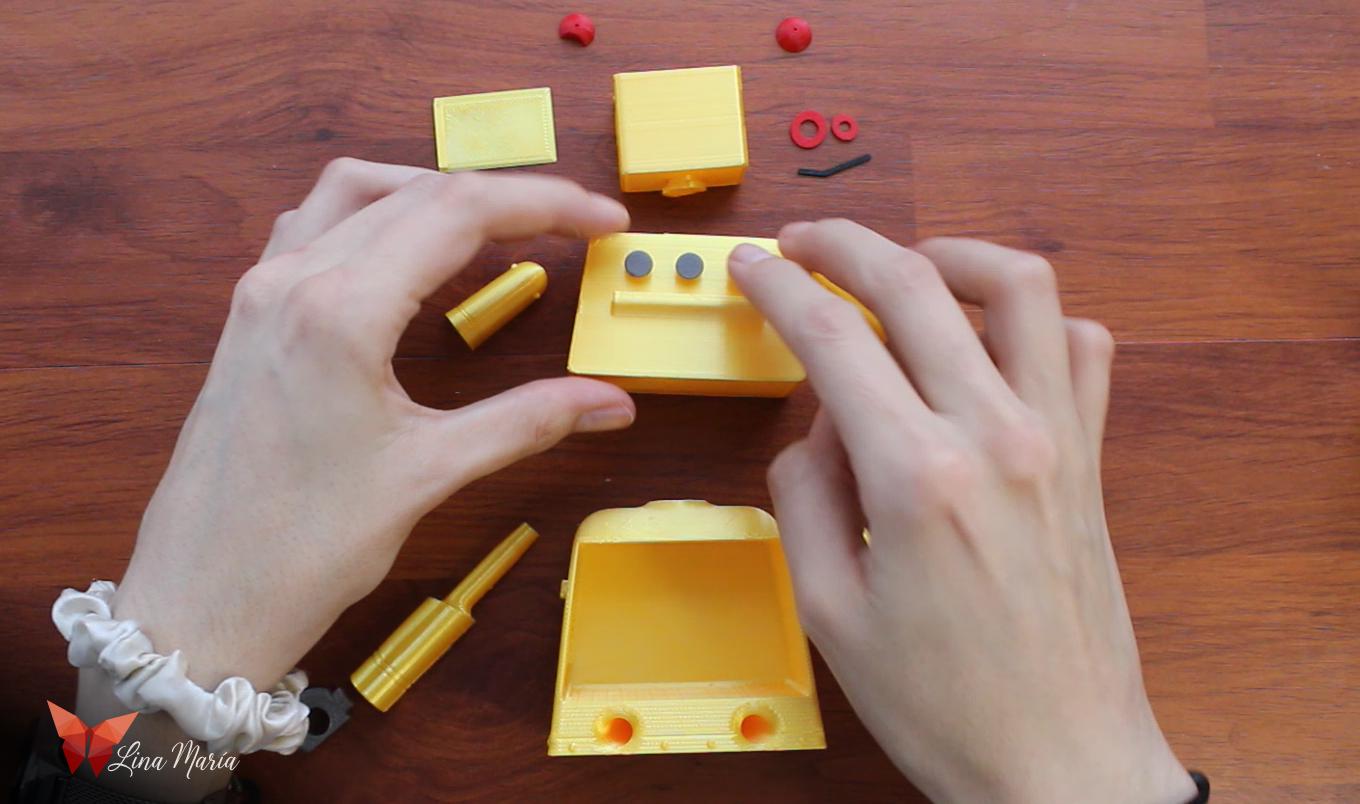
I glued the buttons to the drawer with nail glue.
Assembling the Legs
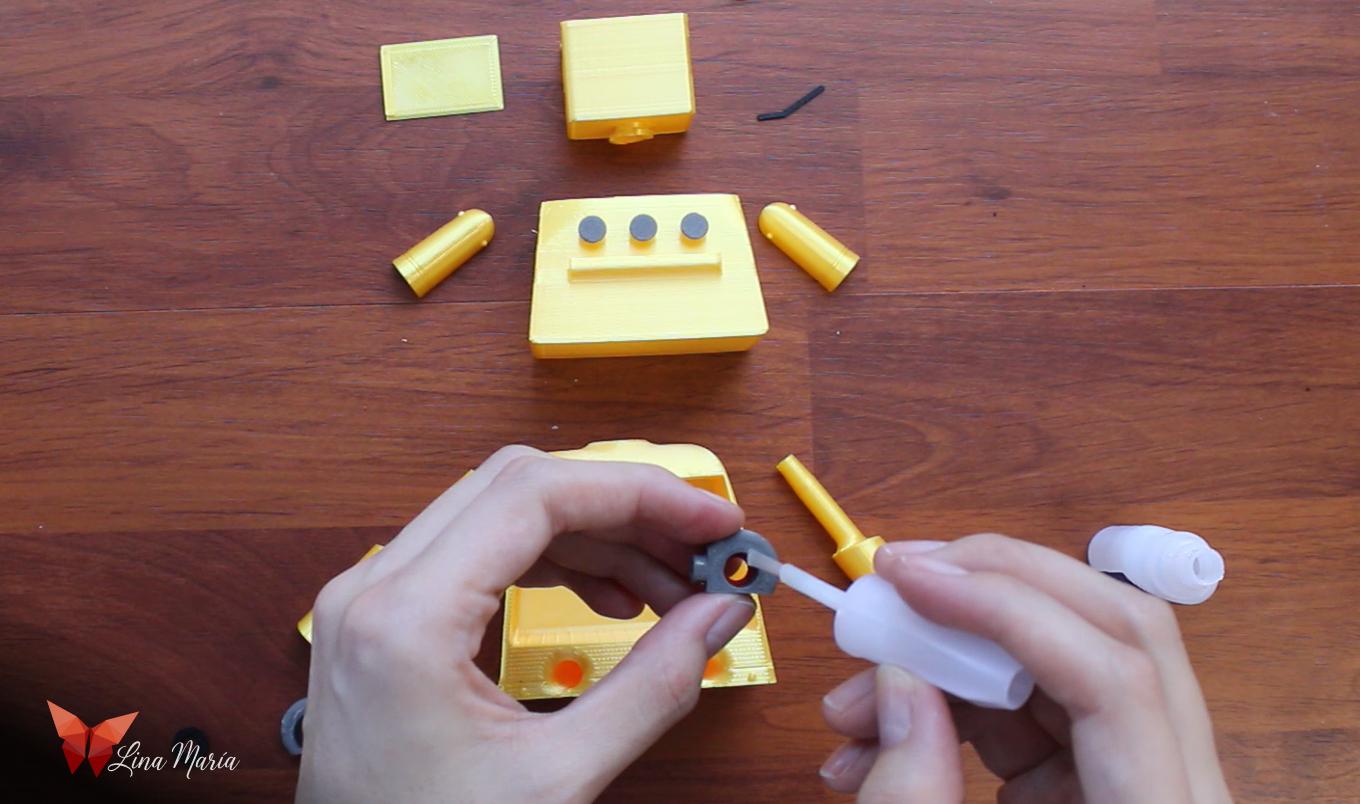
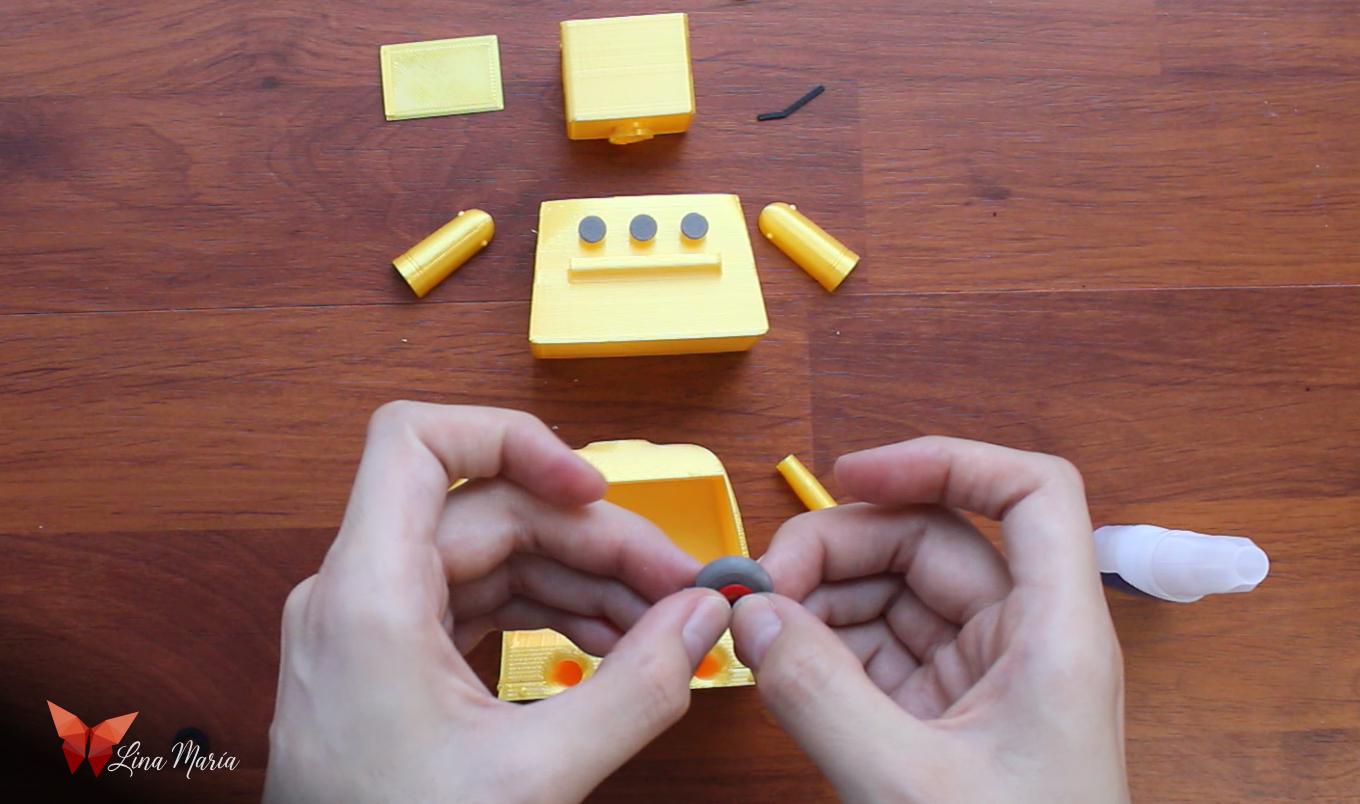
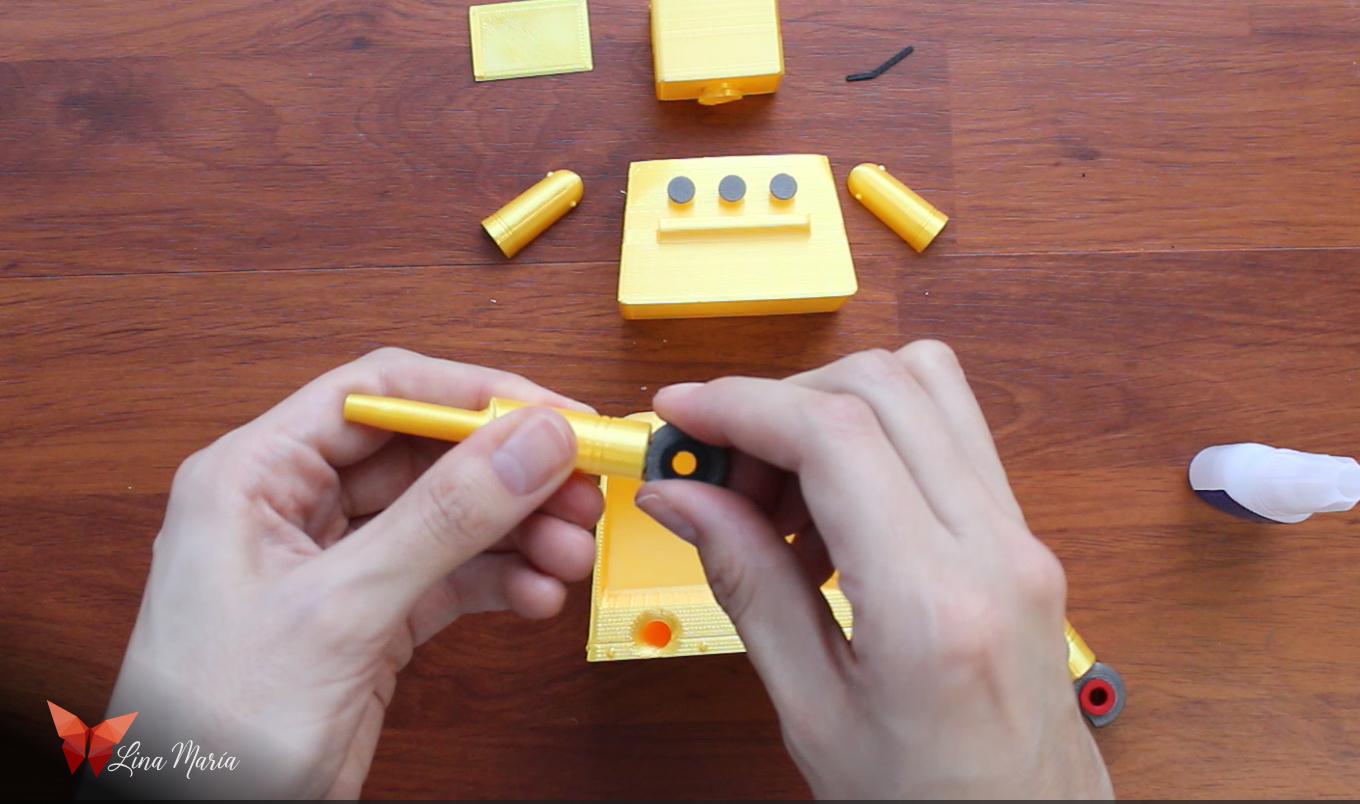
I glued the wheels to the legs and attached the colored rings, black for the black pen and red for the red pen.
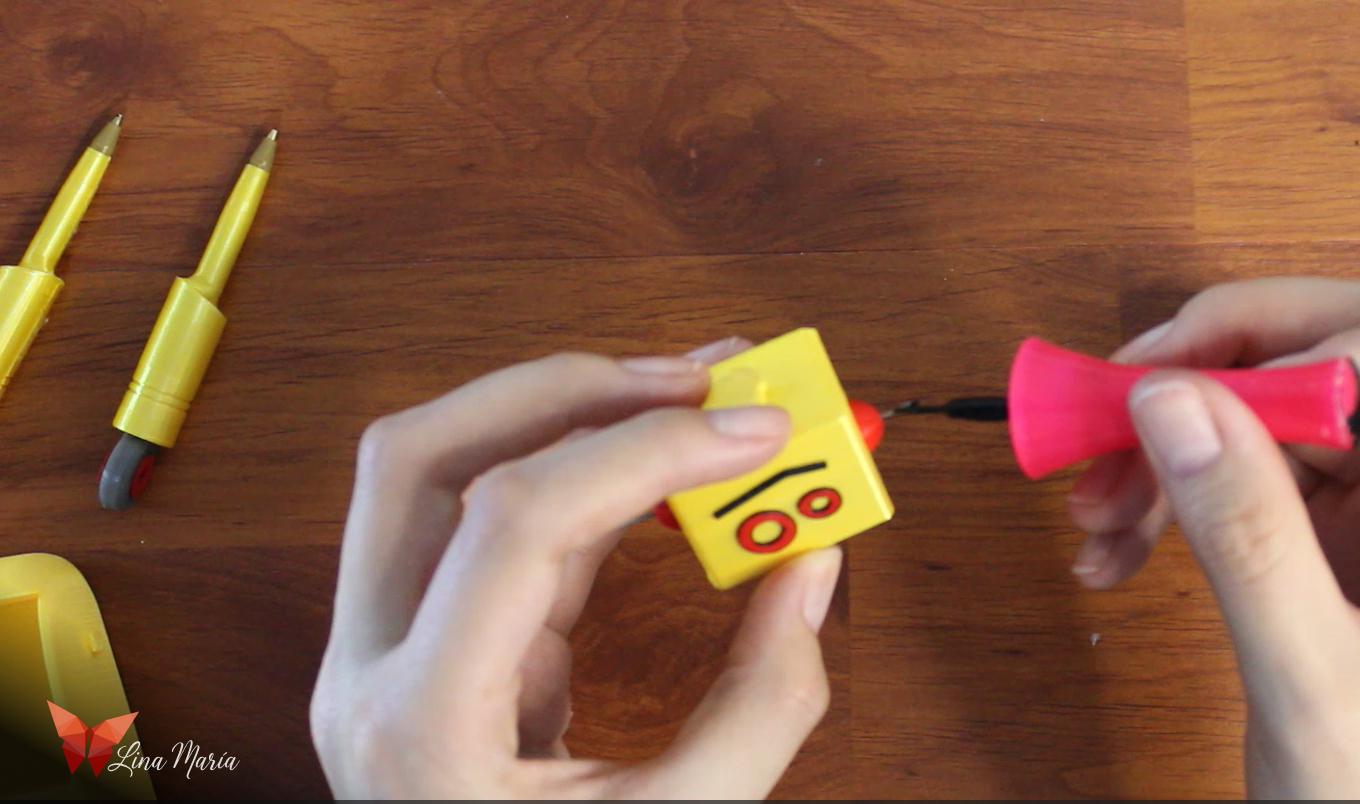
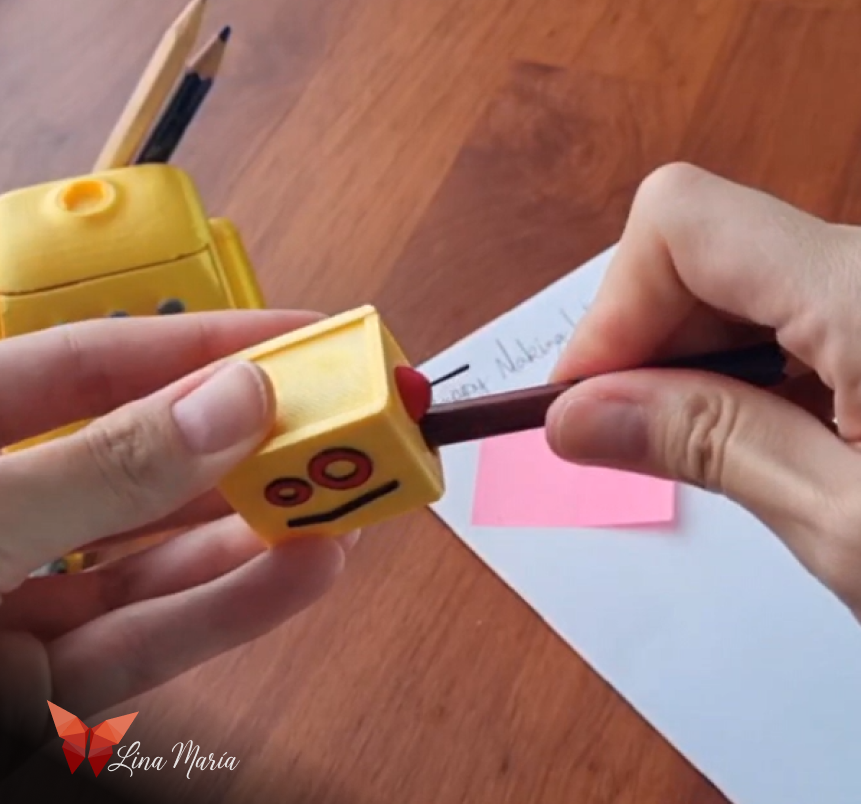
Detailing the Face
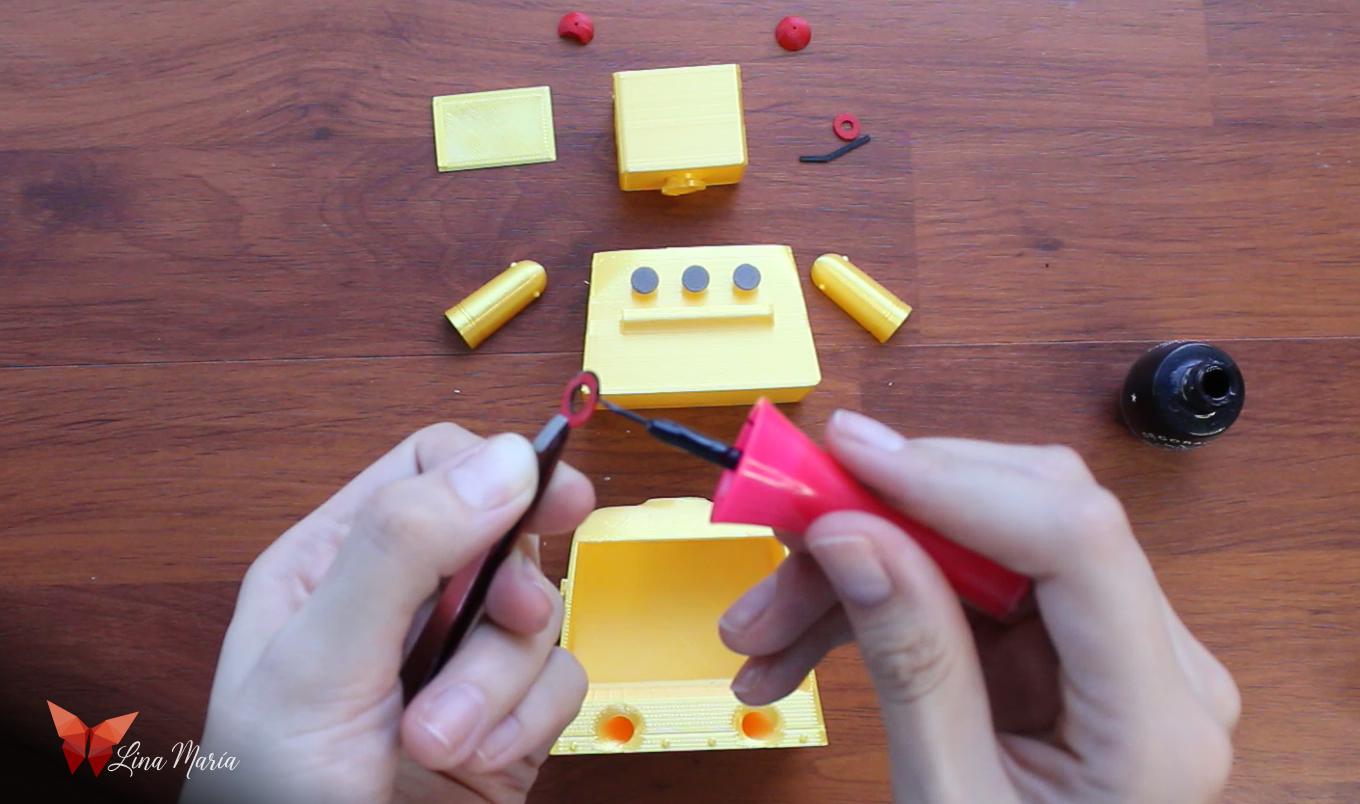
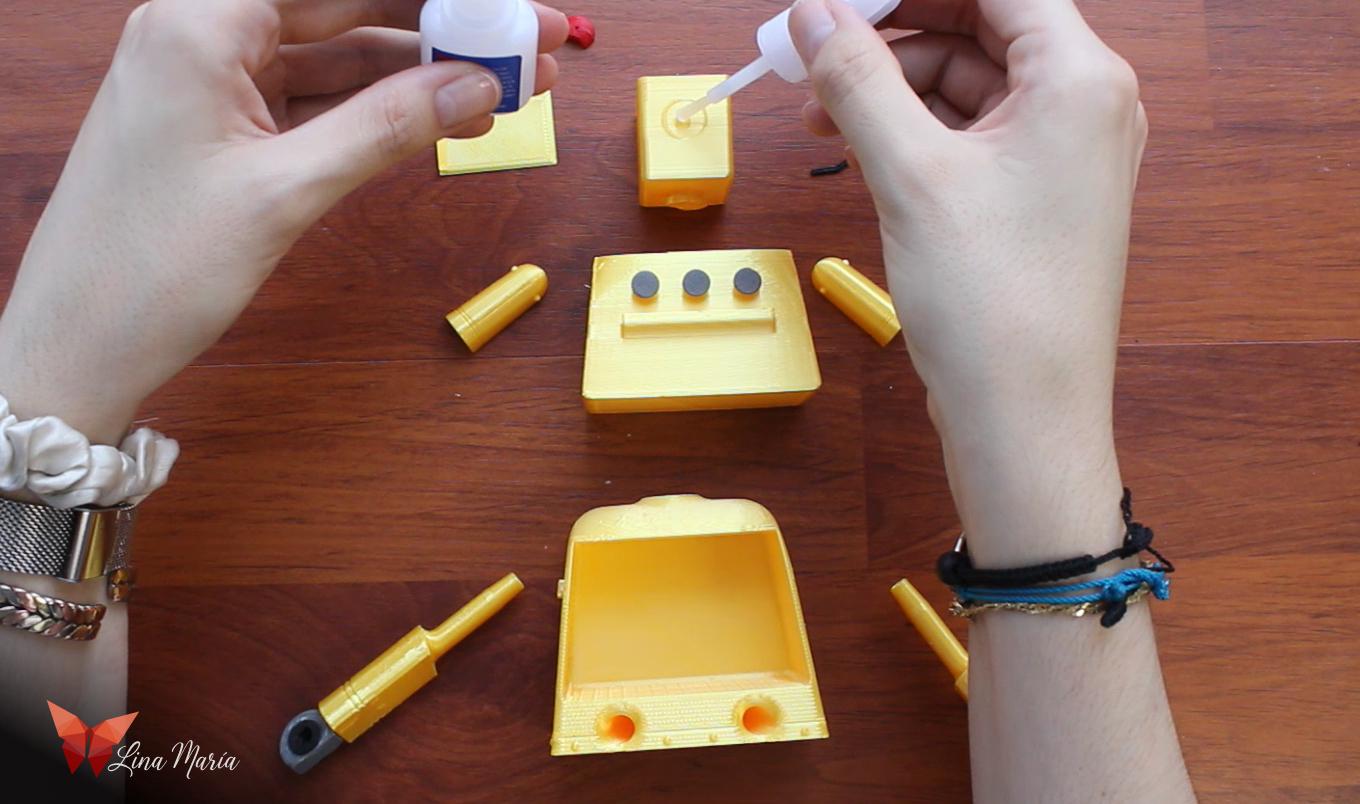
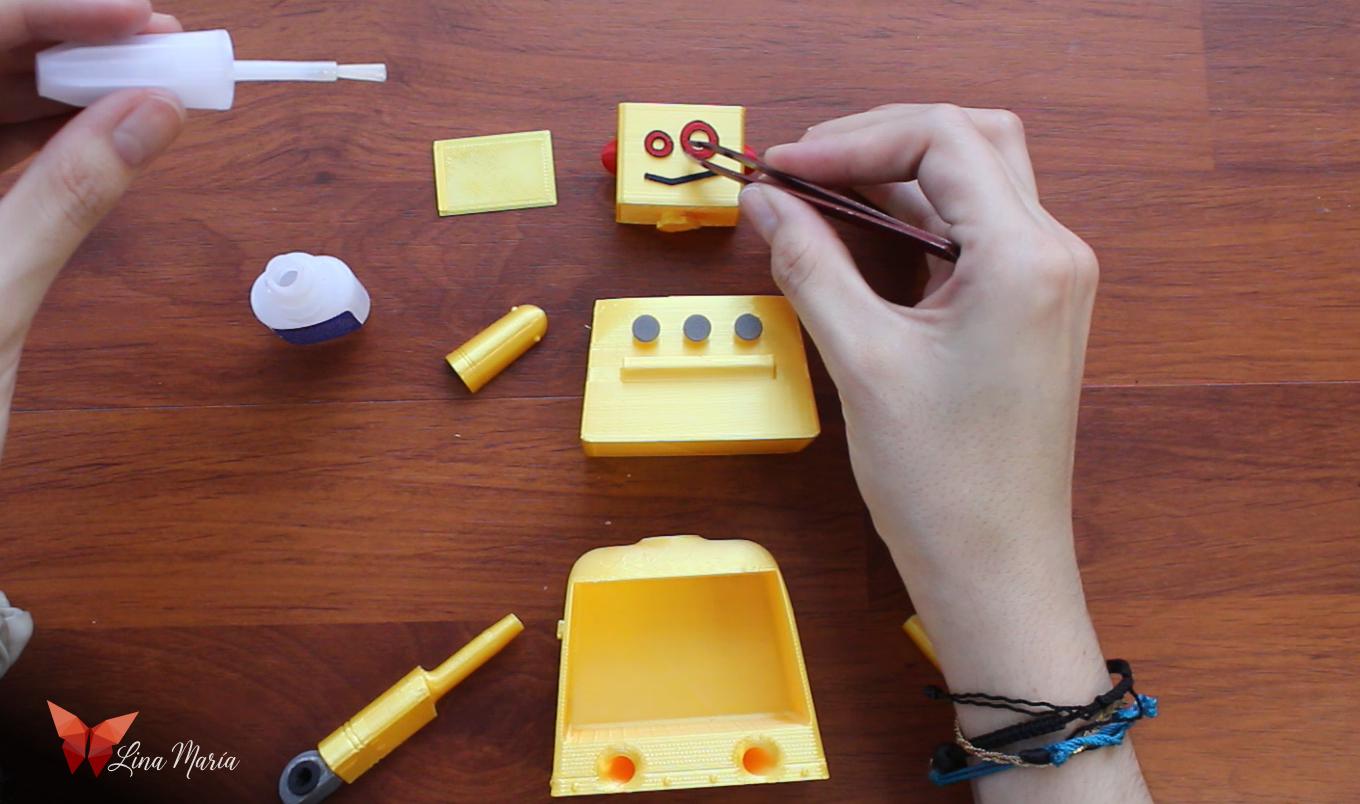
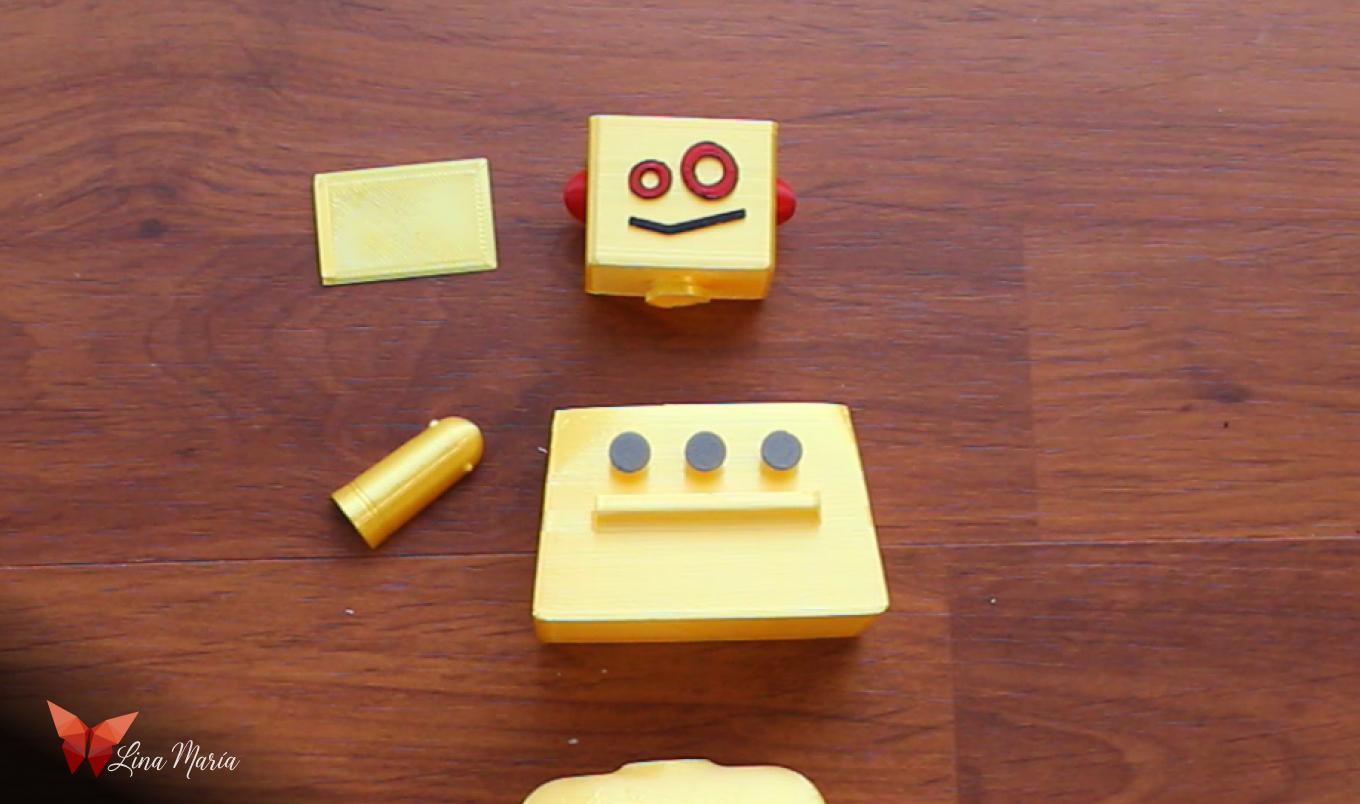
With thin black nail polish, I outlined the eyes. Then I glued the eyes, mouth, and ears onto the head with nail glue.
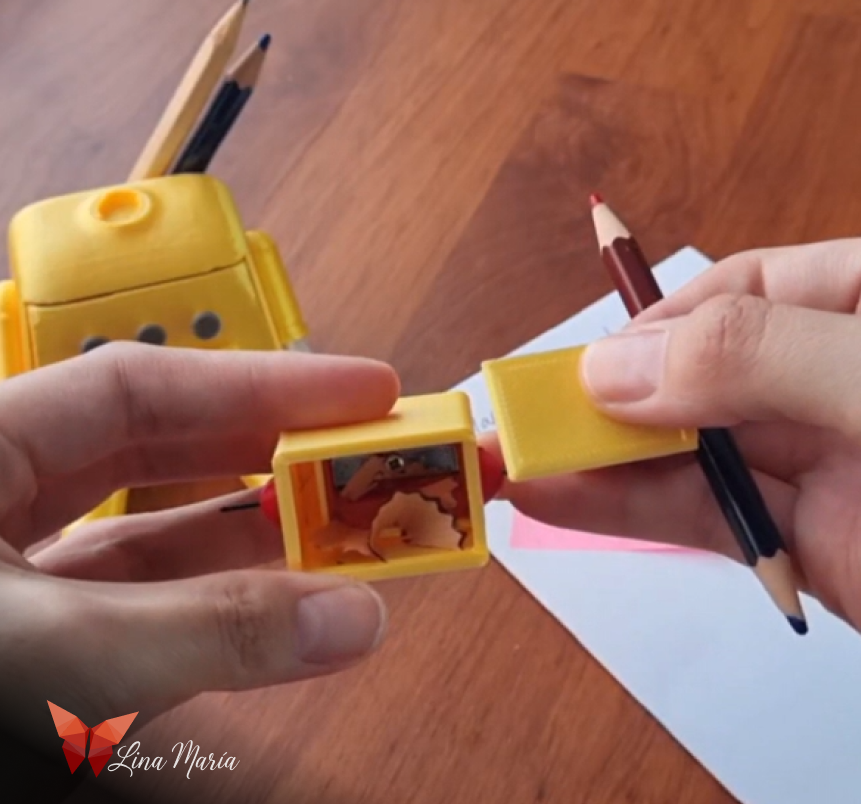
Installing the Sharpener
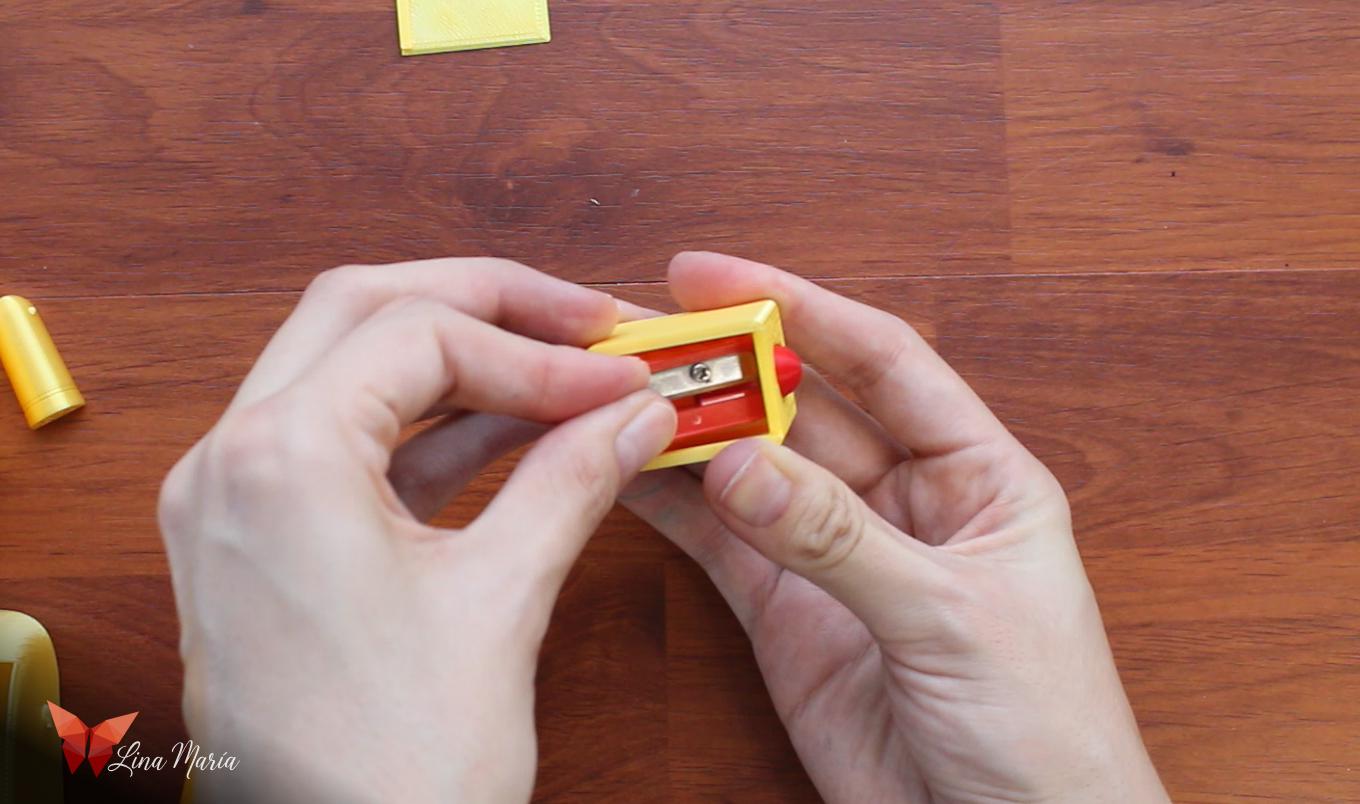

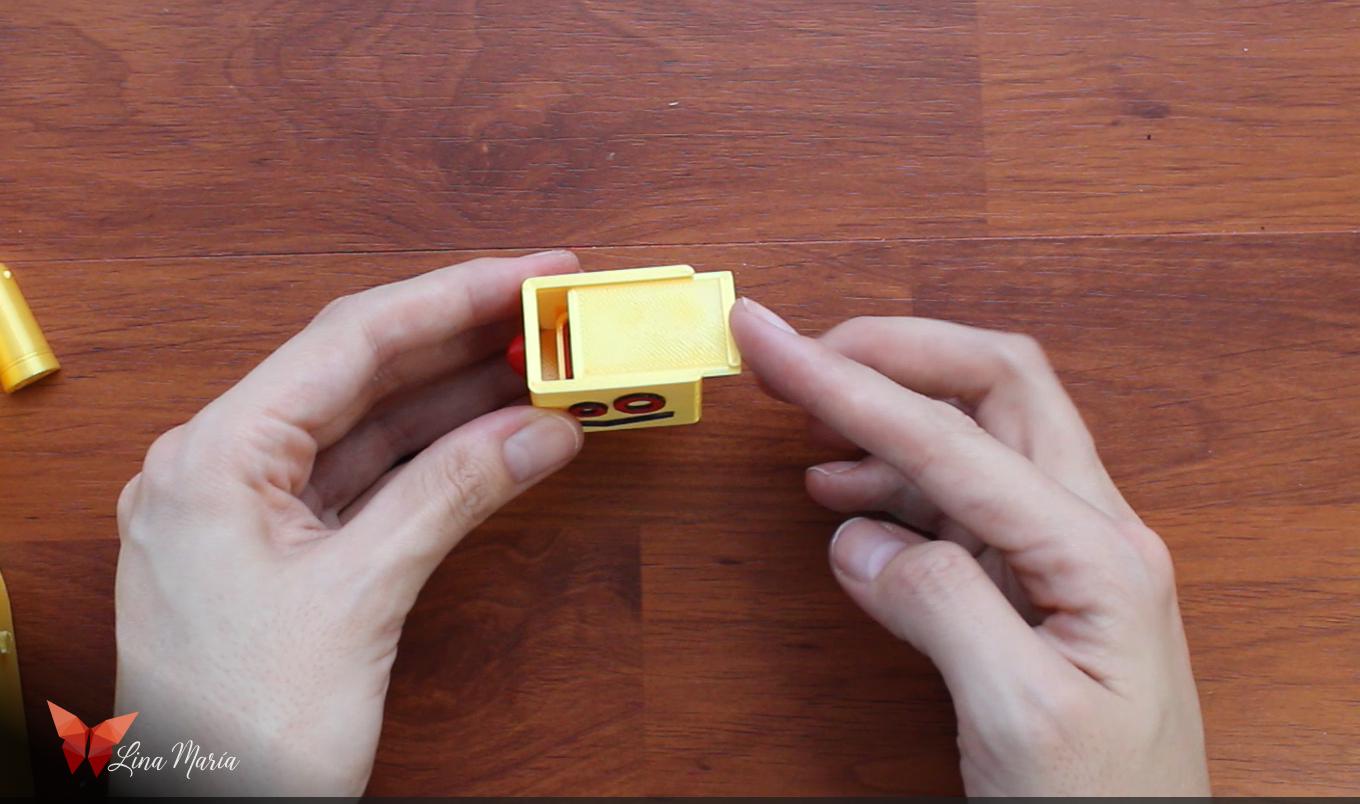
I pressed the sharpener into the head and added the sliding lid.
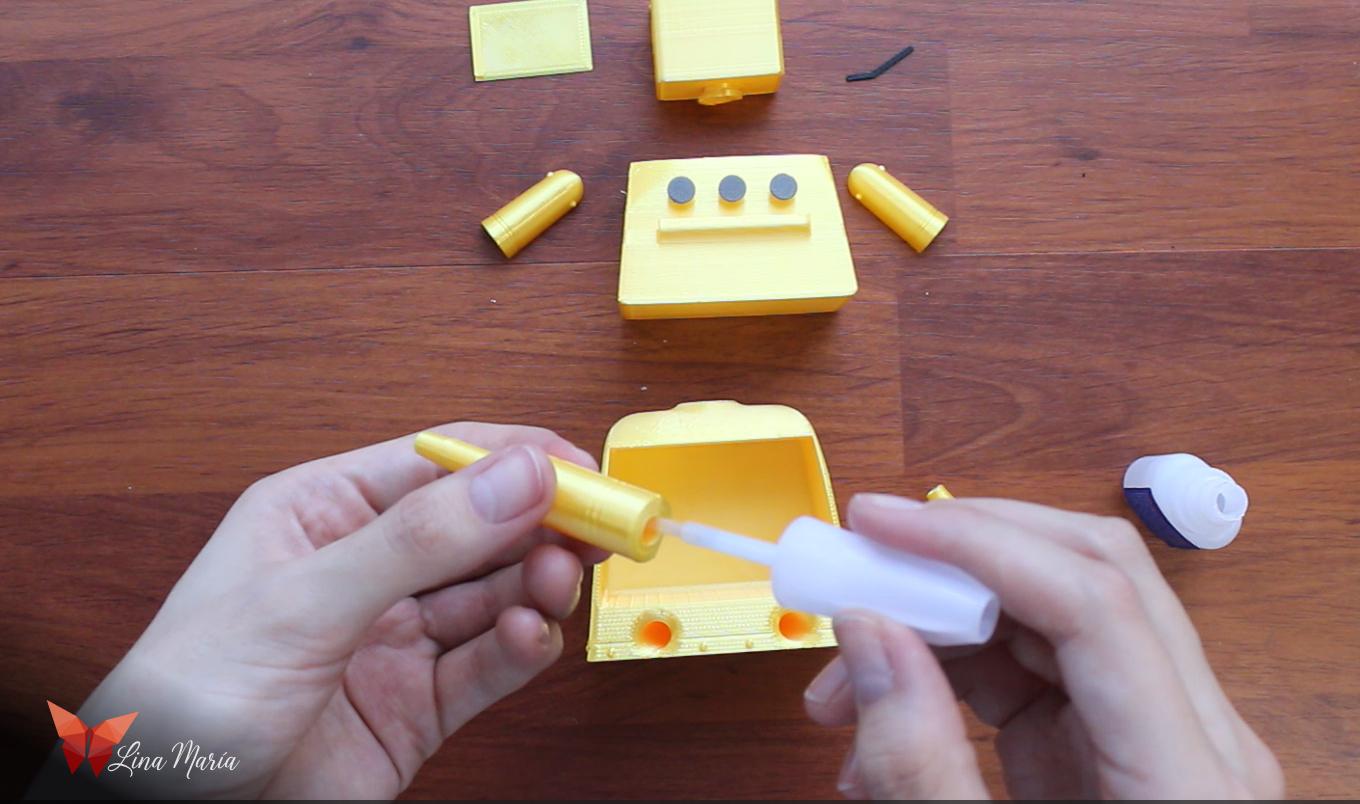
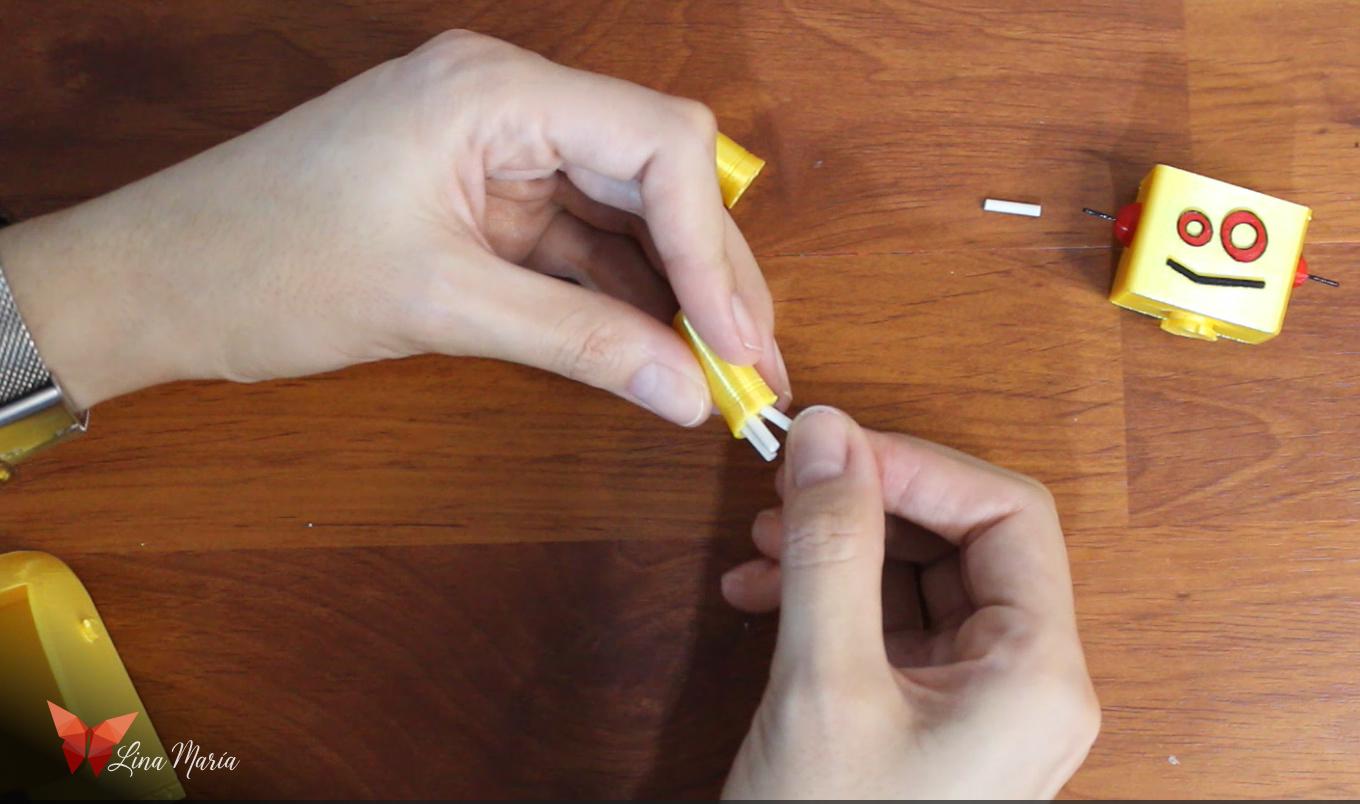
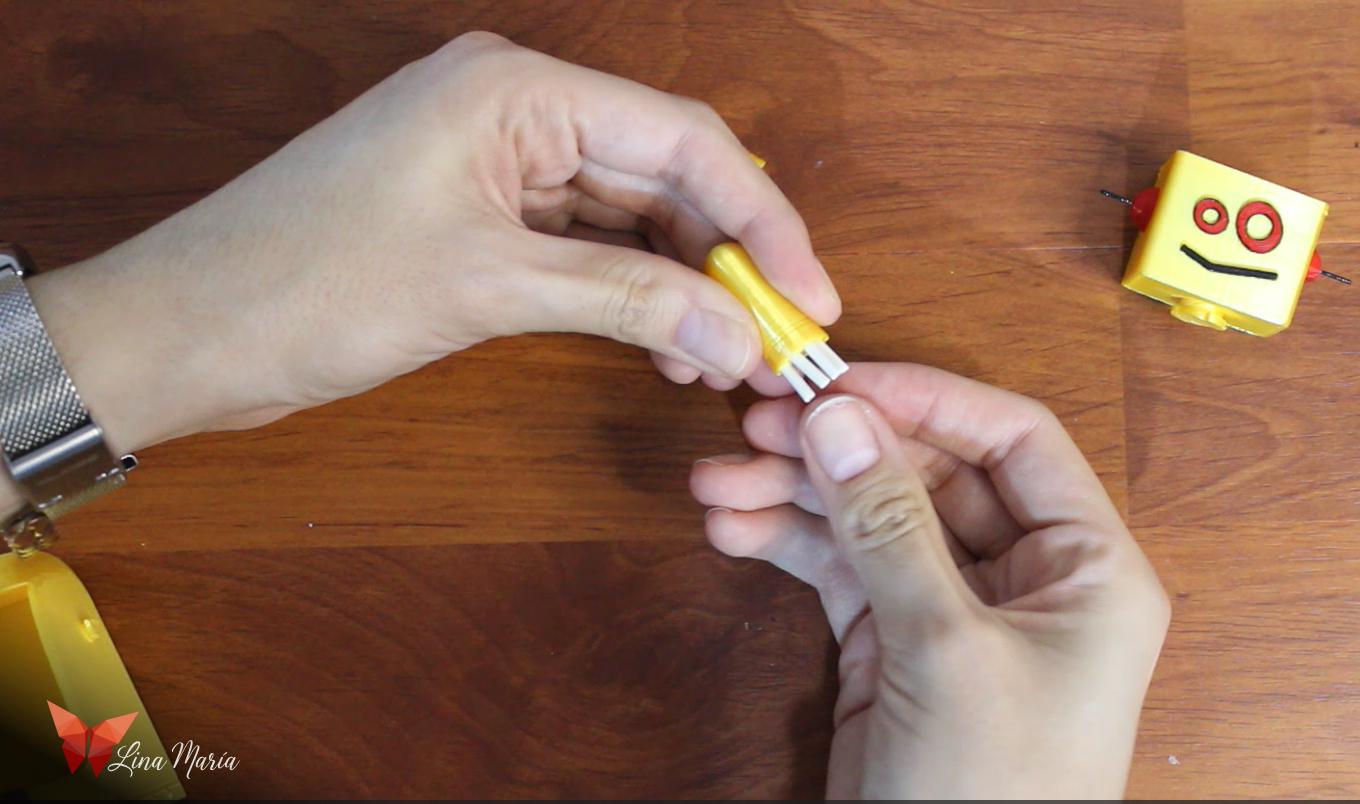
Adding the Pens
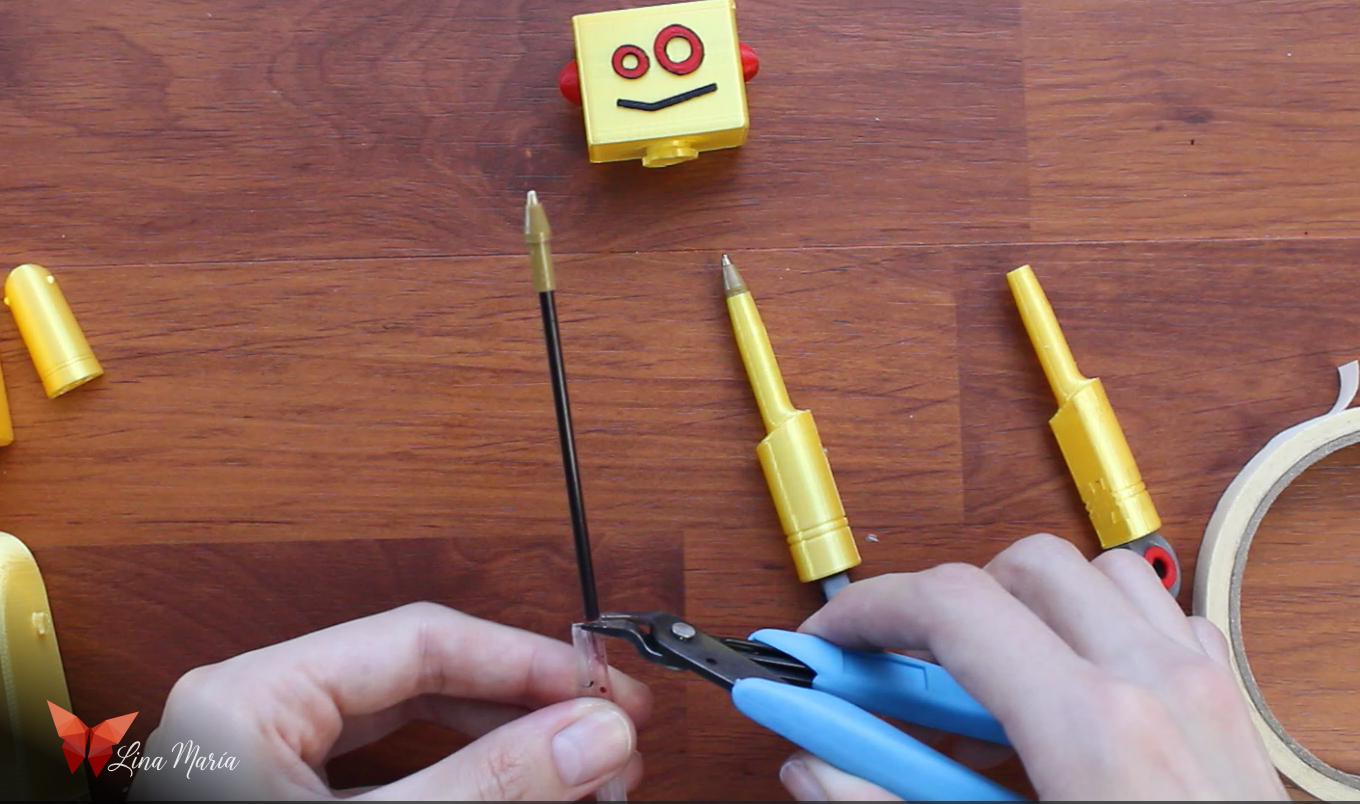
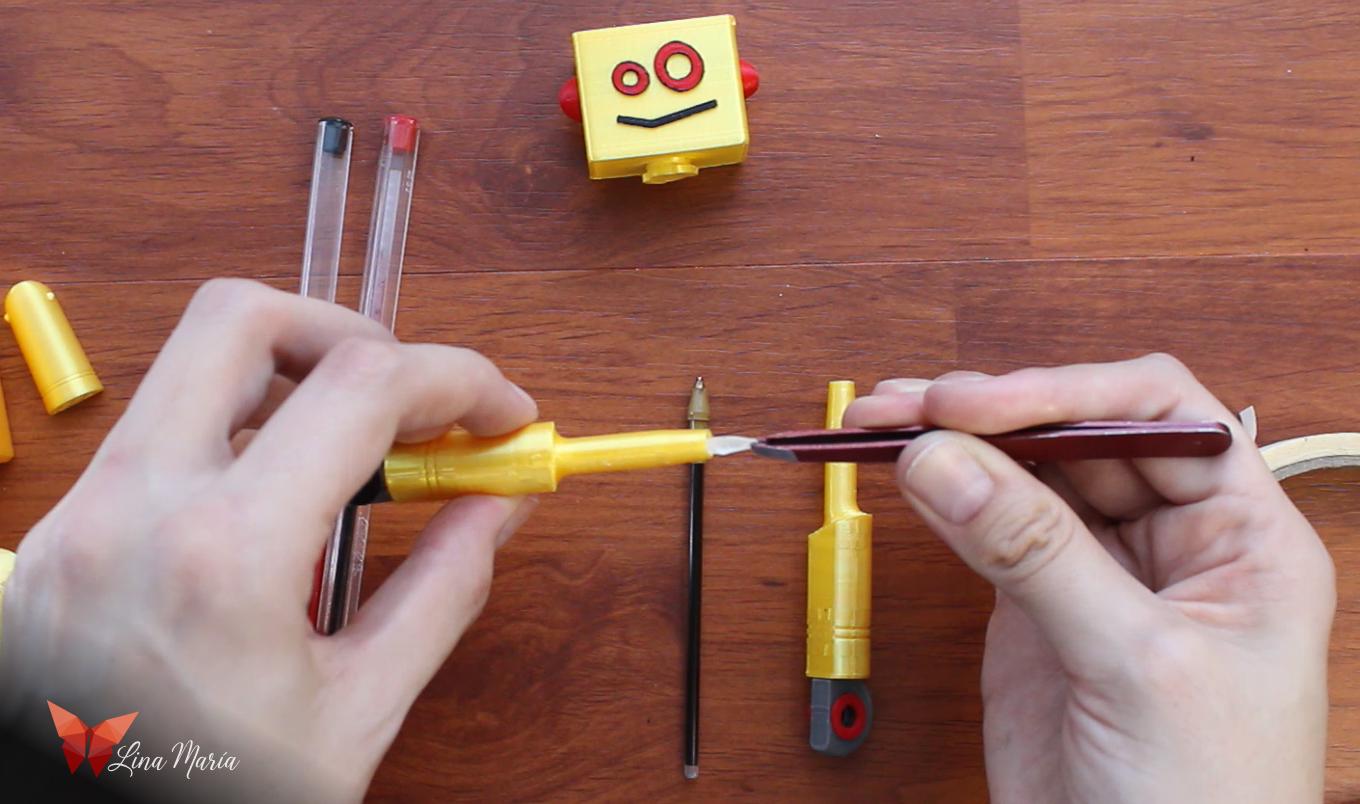
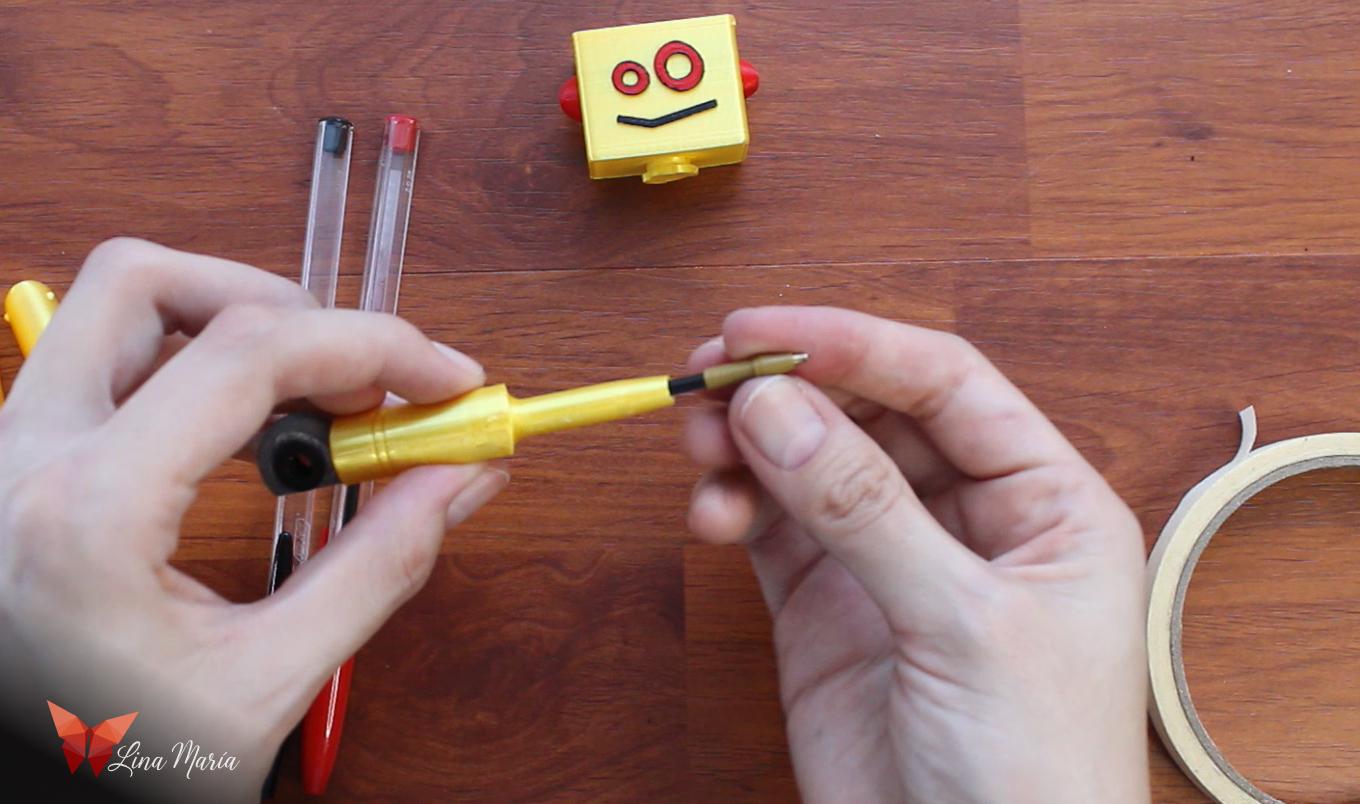
I cut BIC pen refills and secured them by placing a small strip of masking tape inside the 3D-printed leg to tighten the fit. Then I inserted the refill, which stayed firmly in place.
Creating the Antennae
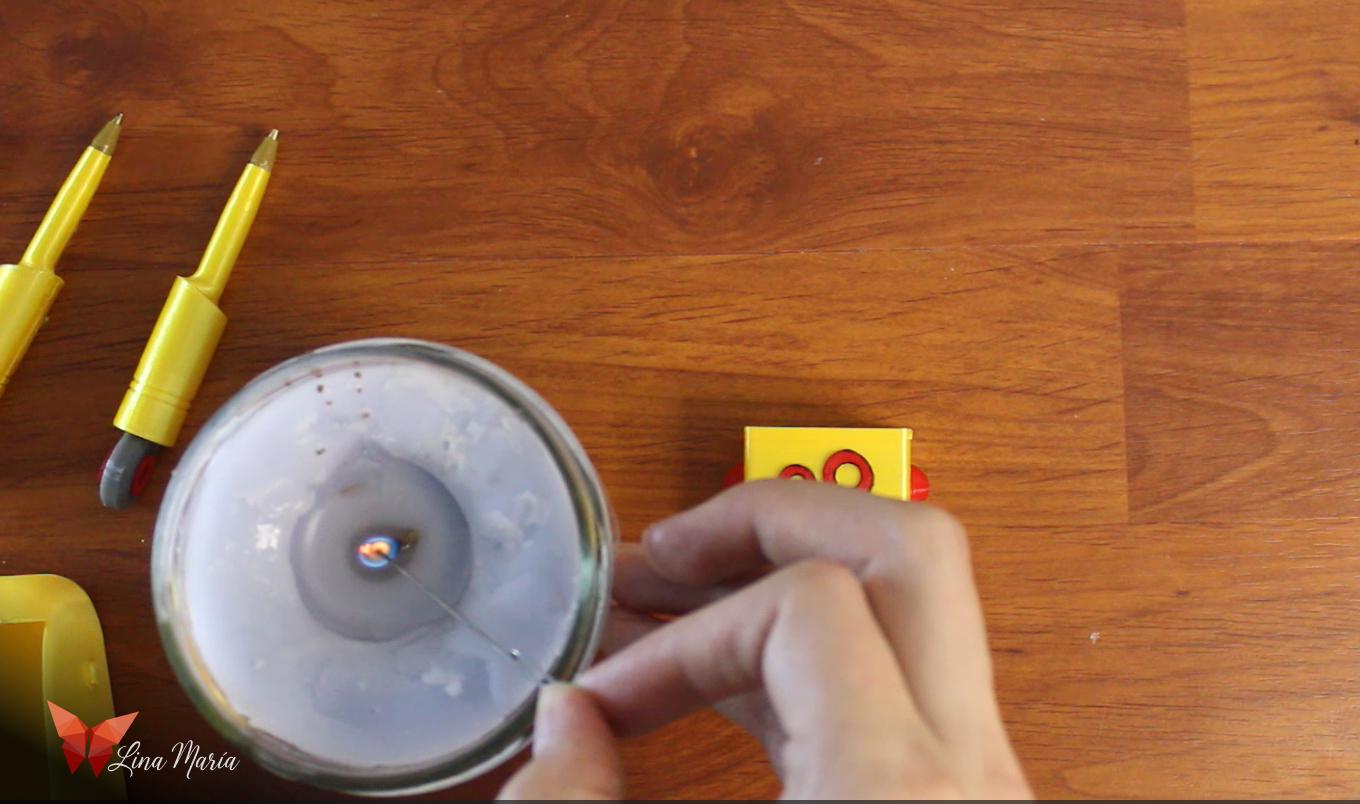
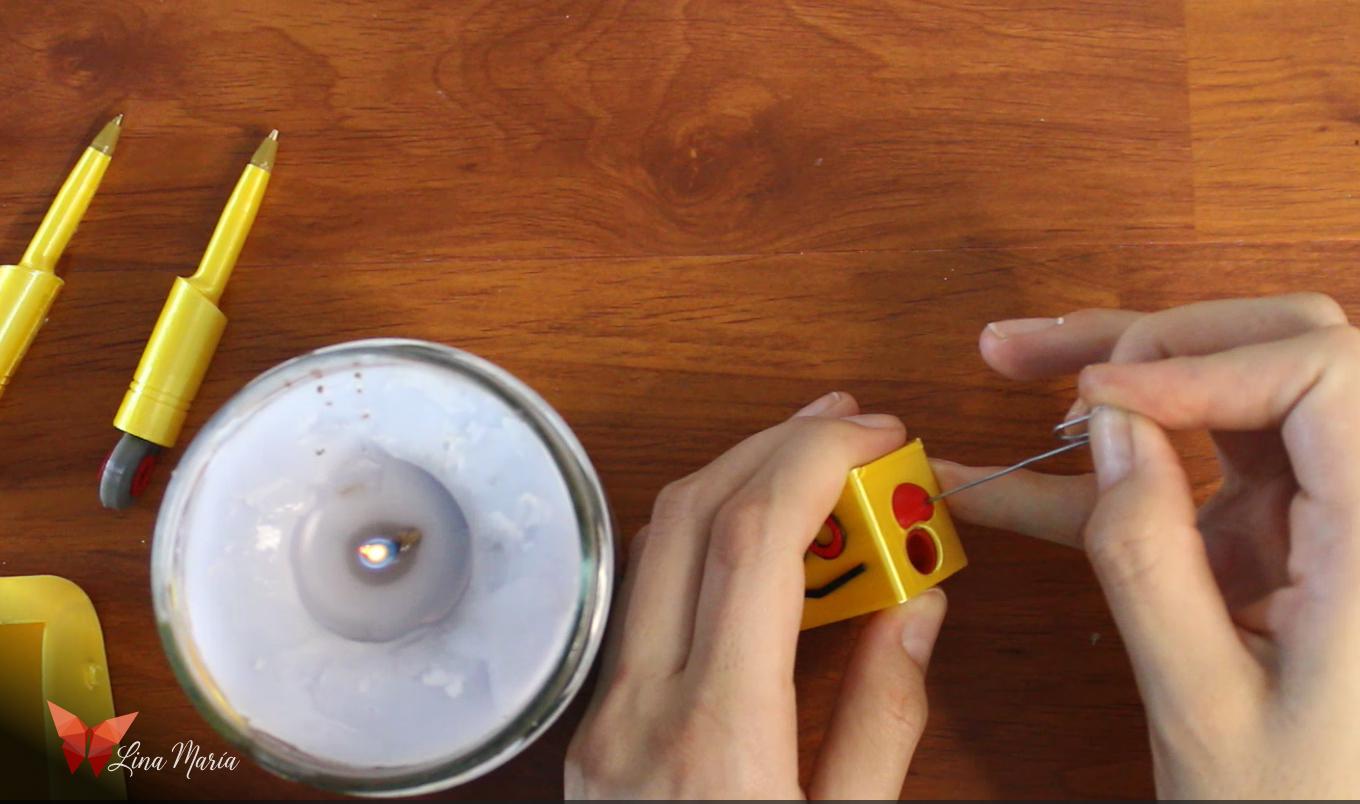
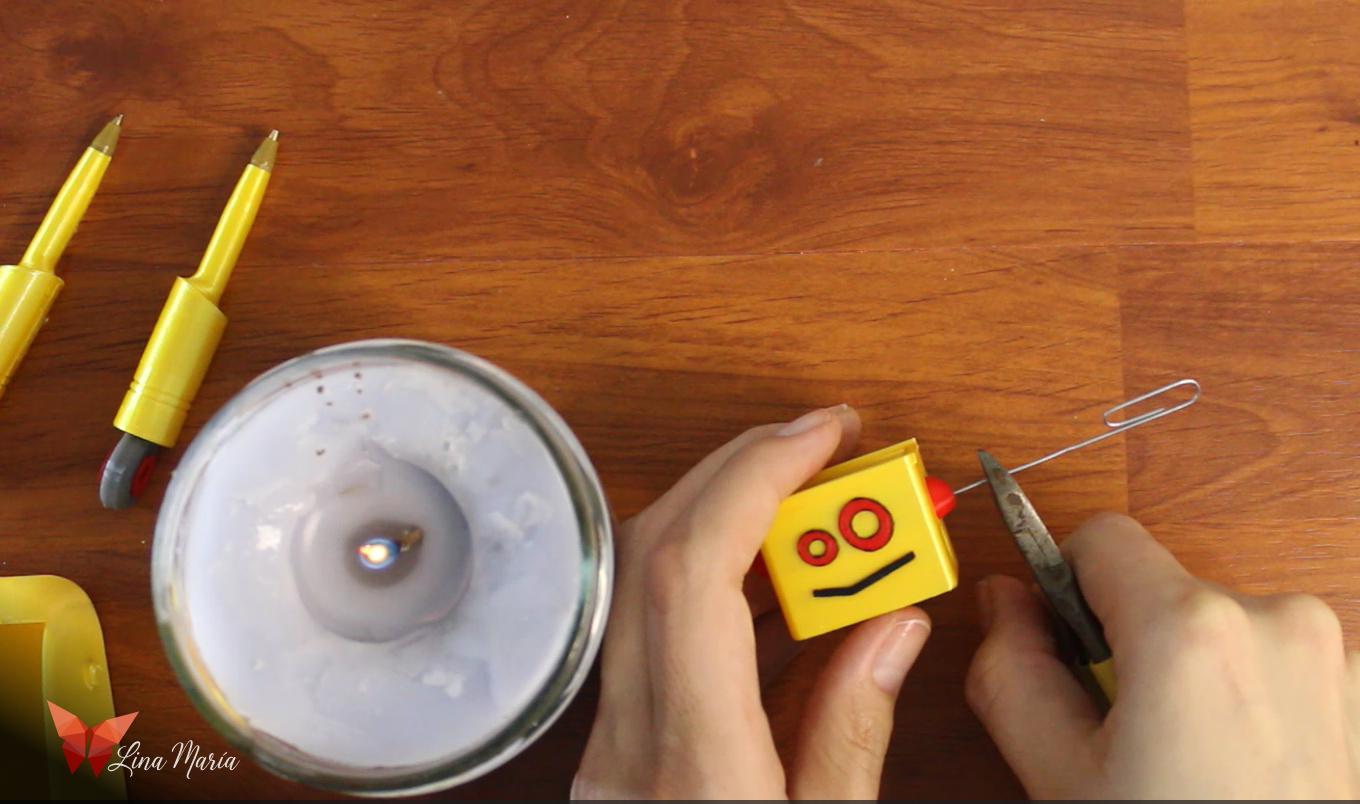
I unfolded a paper clip, heated one tip over a flame, and pushed it into the ear. After cutting it to the desired length, I repeated the process for the other ear and painted both antennae black with nail polish.
Completing the Arms
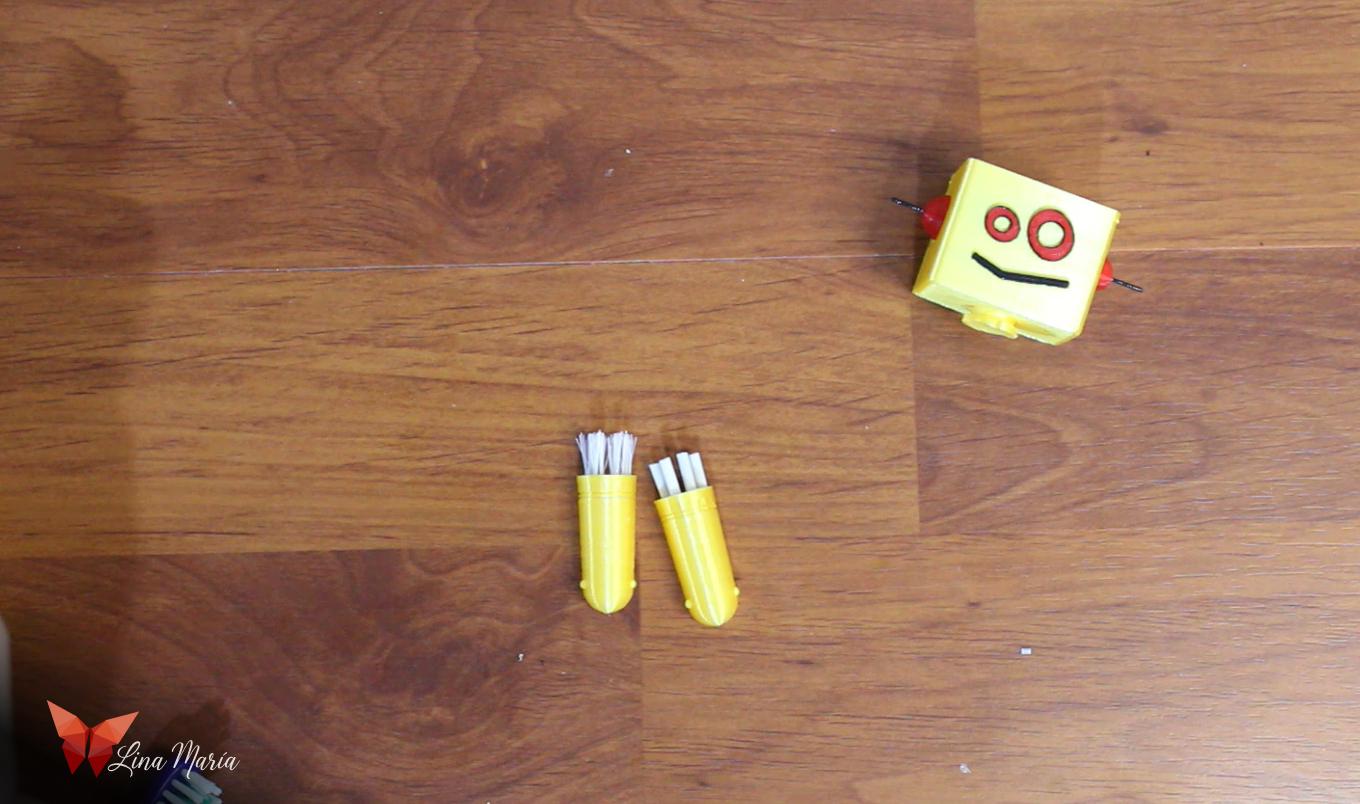
For one arm, I inserted small eraser bars into the finger slots. For the other, I dismantled a soft children’s toothbrush, trimmed bristle sections, and glued them into the finger slots to form the brush hand.
Attaching the Pencil Holder
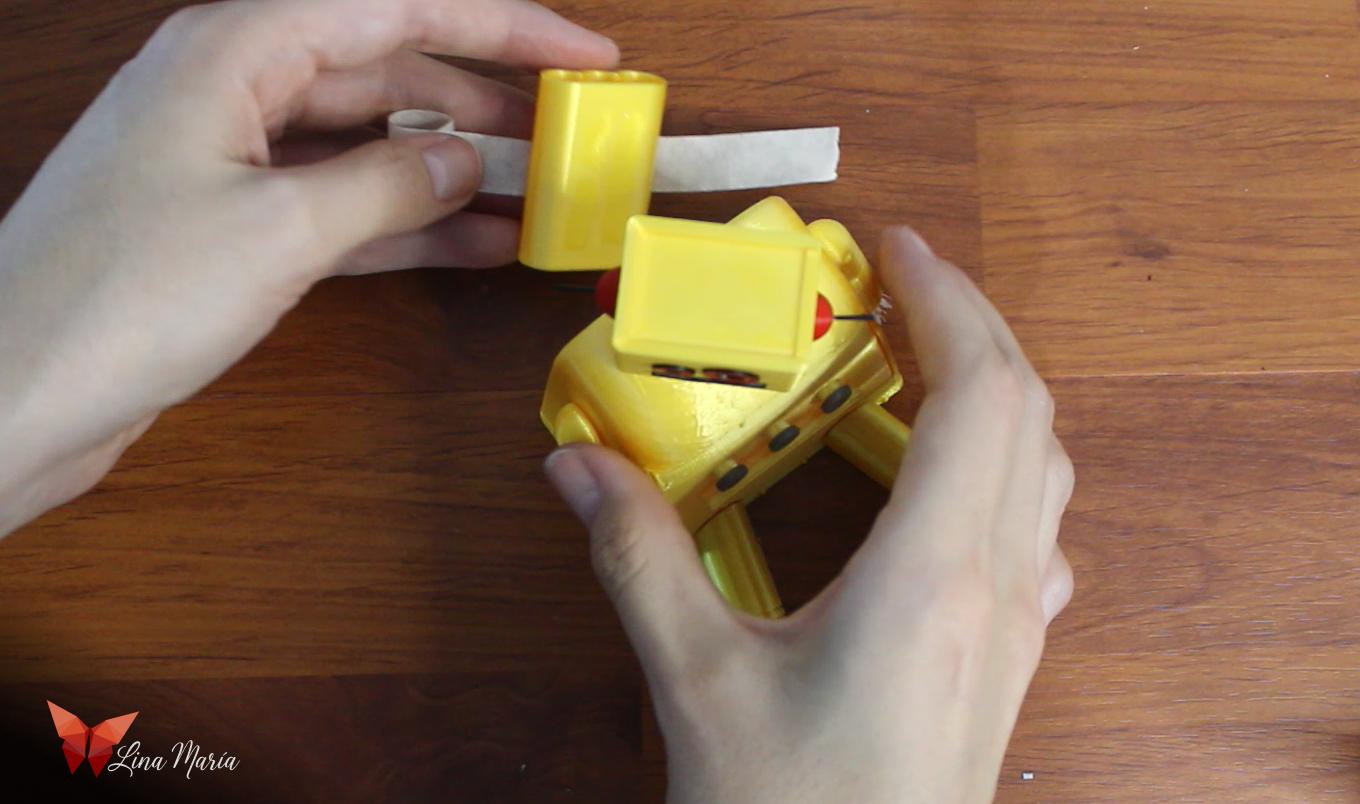
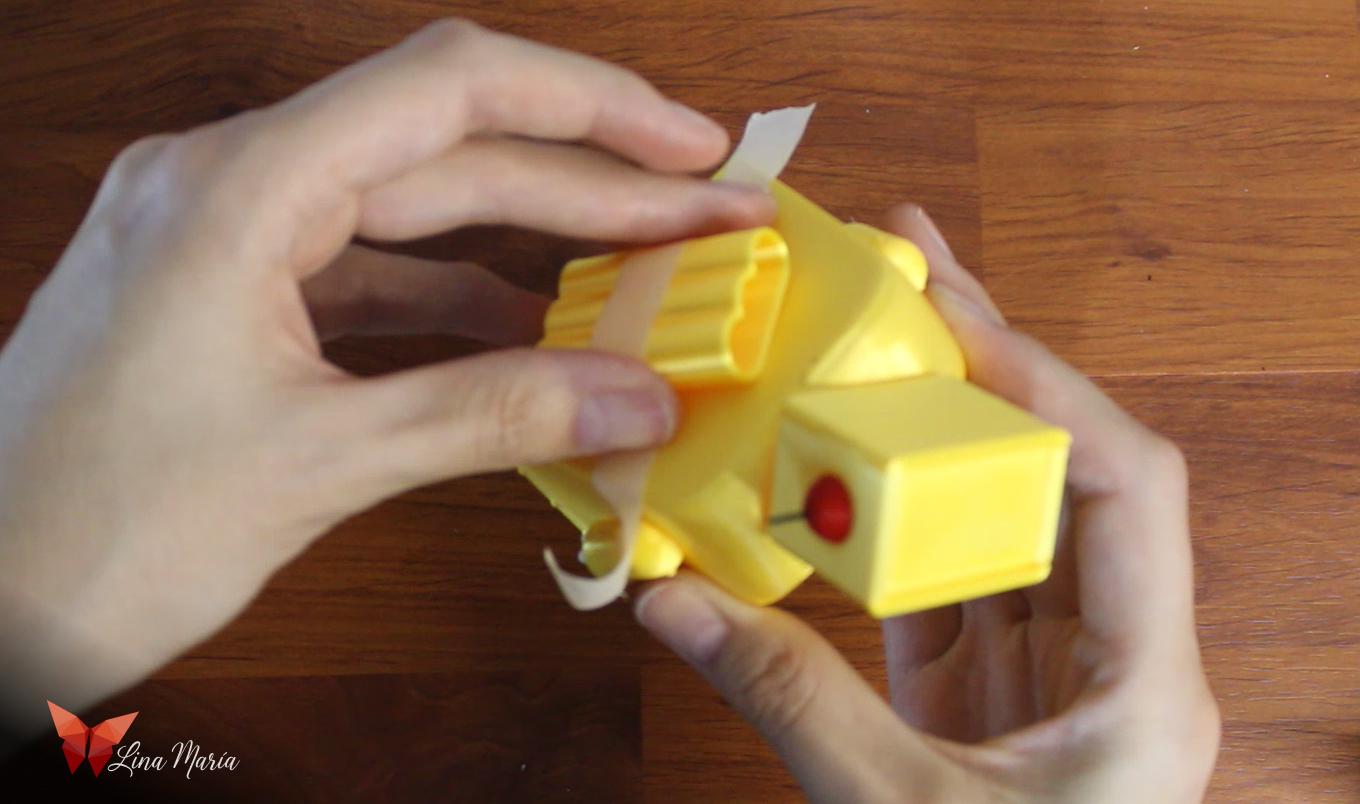
I positioned the pencil holder on the back so it wouldn’t interfere with the head movement. I glued it in place, secured it with masking tape while drying, and left the tape until the glue fully set.
Final Assembly
Now it was time to connect all the pieces and reveal the complete robot!
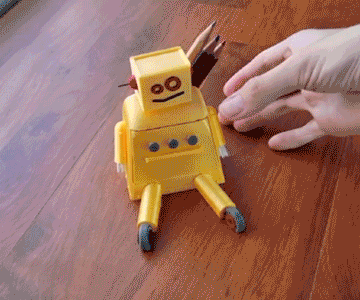
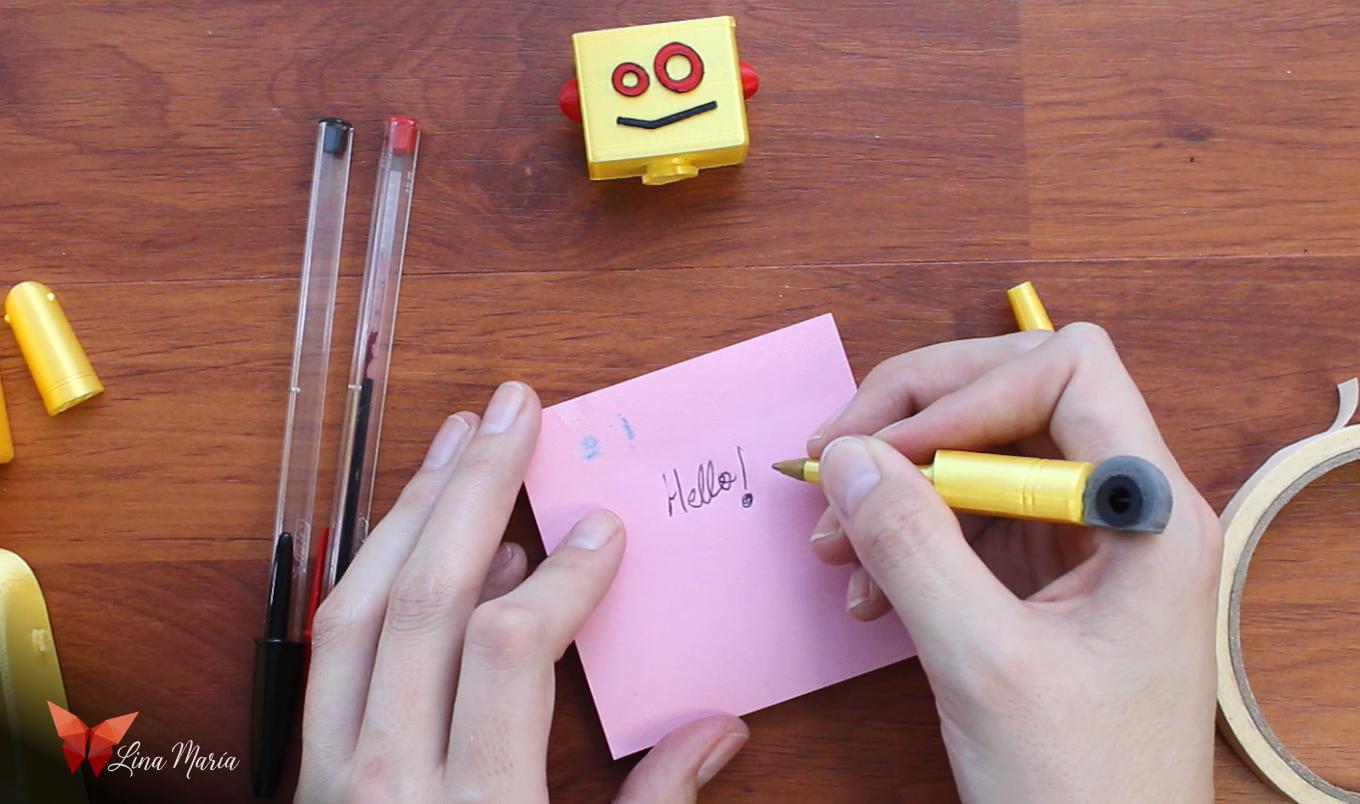
Time to Use It!
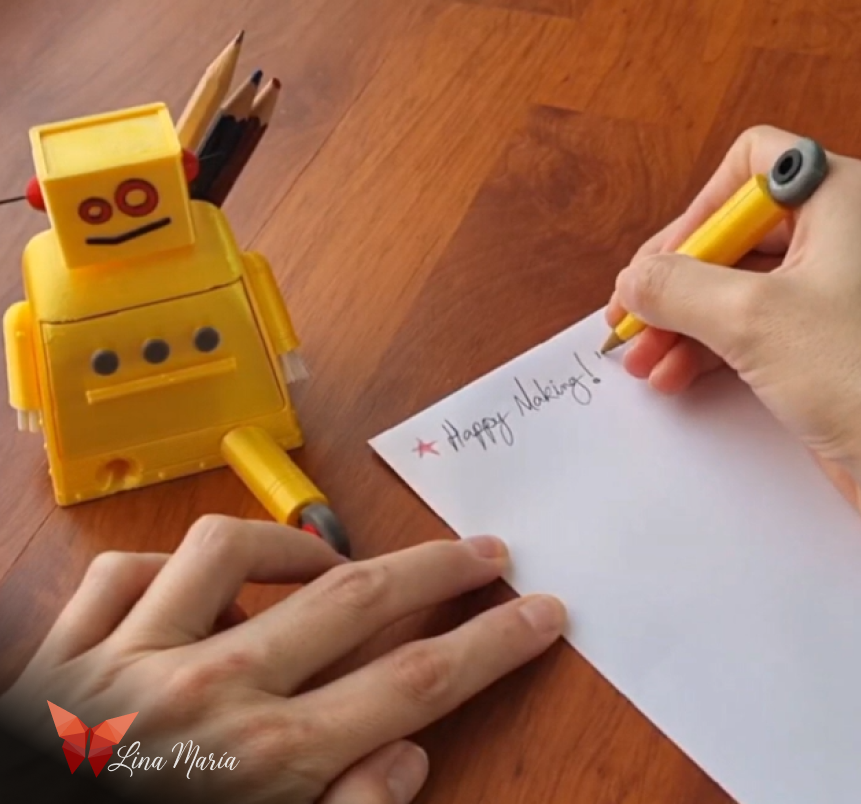

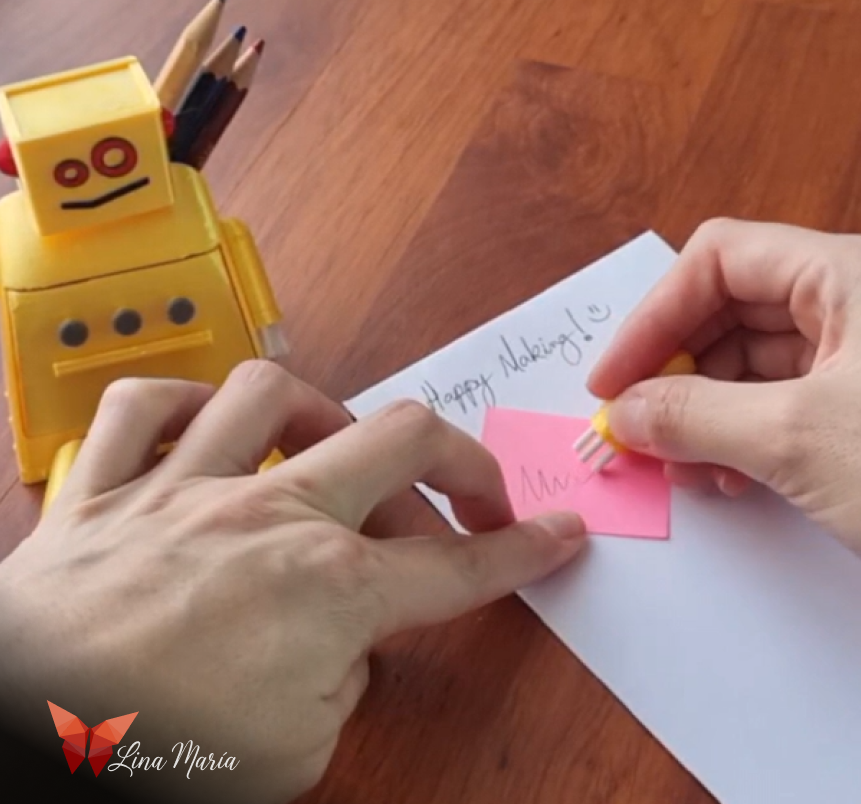
And now the best part: putting the Desk Buddy Bot to work—sharpening pencils, erasing, cleaning, writing, and organizing, while inspiring your next Instructables ideas.
Happy Making!