My First Digital Graffiti


As a kid I used to be watching over the window amazed by the graffities on the walls on highways and such.
(Attached is a photo i took of graffiti
I always wanted to make some. The problem is that what I like about graffities is the design itself and not the vandalism part.
I used to draw graffities in class on my notebook.
Now that I'm familiar with graphic design. I took upon myself to create graffities that are:
- harmless
- editable
- easy to make
At the end of this Instructable you will be able to create easy digital graffities. This can be a creative way to send invites for a fun event.
Follow me on this journey.
Supplies

.jpg)

- Affinity Photo ("photoshop like" software)
- Font Space (free font website)
- Unsplash (free stock photos website)
***Note that affinity is a widely used design software and is mainly a good alternative for photoshop as it only requires a one time payment***
Find a Wall


For simplicity, I uploaded a wall picture, but I advise you to go to Unsplash and type wall in the search bar. You will find beautiful photos of walls to use as graffiti material !
Find a Graffiti Font !

Now comes the second part of the process. We now have a wall, and we need to find cool graffiti to put on this wall!
I listed a website for free fonts, but note that there are many such websites.
Find a free font website and search for a free graffiti font.
I personally chose "K Kosan font".
Enter Affinty Photo


Create a project in affinity photo. it is very simple. Open the software and click on the "File" tab and find the "Open" button. Click on Open and find your wall image downloaded in step 1 to start the journey.
Add Some Text


We now want to add text to our wall.
To do so, we will first navigate to the "artistic text tool" as highlighted in red.
Then, type the text you like in the size that you like. Note that the size can always be updated later.
Next you want to over to the font selector on the upper part of the screen as seen on photo number 2 and select your Graffiti font.
Make It Realistic


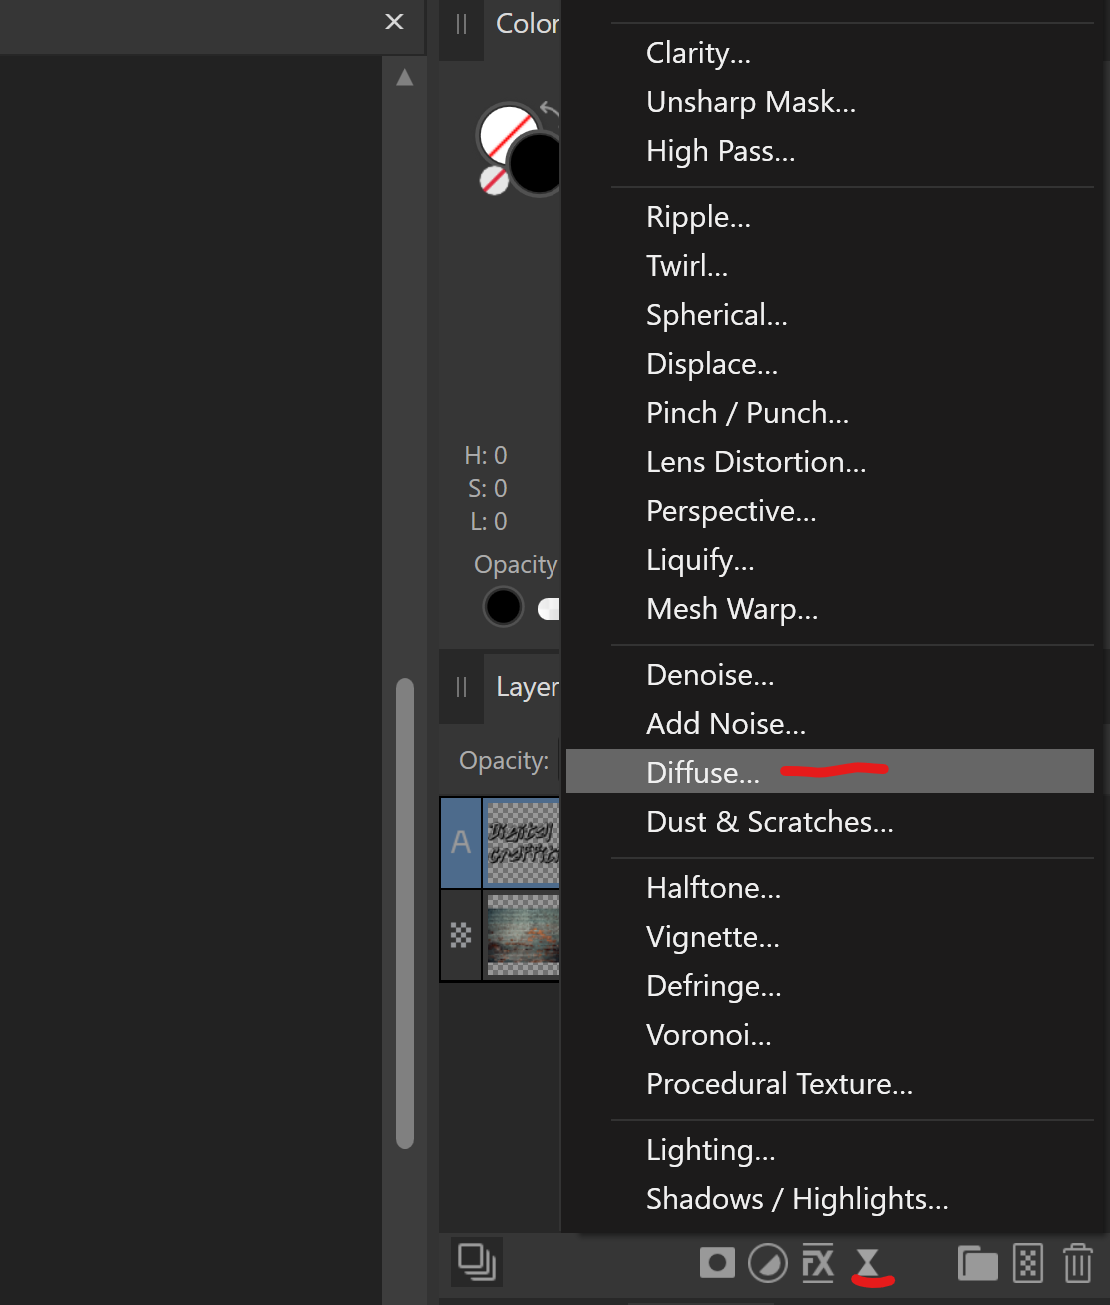
Now navigate to the right part of the screen and find the live filters as highlighted in red.
We will use Two filters to make our graffiti super realistic !
- Diffuse
- Dust & Scratches
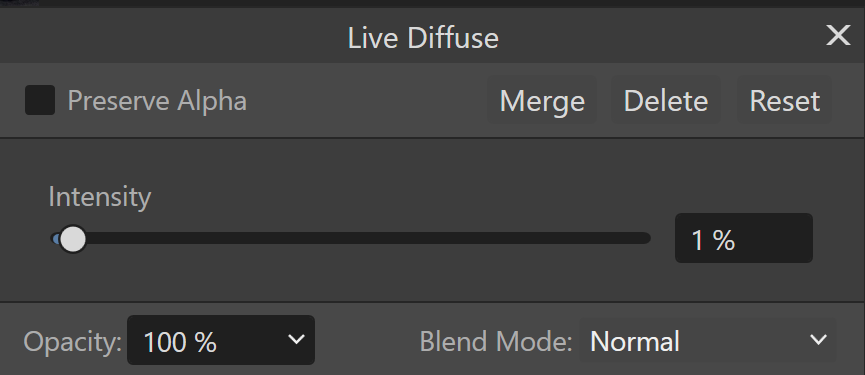
Set the Diffuse to 1% or 2% and Dust to 15px
Make It Super Realistic !

For our final design step, we want to add some power to our graffiti.
Navigate again to the right part of the screen and as in the screenshot you will find the "overlay".
This will efficiently blend your design on the wall.
Note that you think the design is too blended, you can duplicate it and play with the opacity.
Export Your File


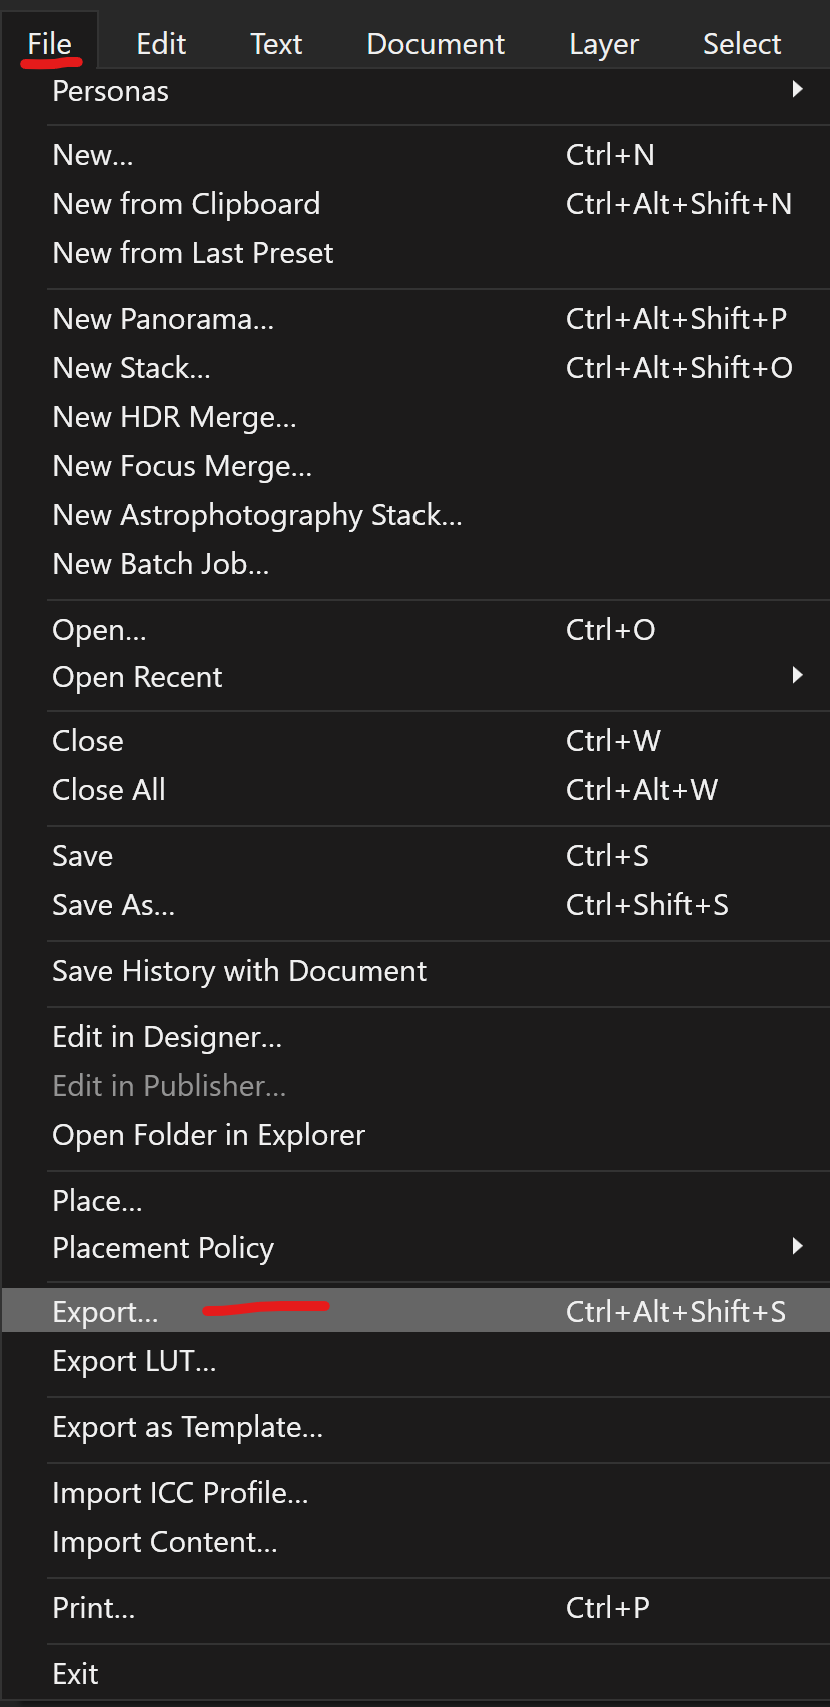
Go to the file tab again and click on export.
Find the JPEG format and click on export.
You are done! You have created your first digital graffiti !
Thank you for coming with me on this design journey, I hope you enjoyed it, and you will find awesome use of this technique.