MyWhoosh Virtual Shifting With ESP32-C3 SuperMini
by gt.grade.alloy in Circuits > Microcontrollers
265 Views, 0 Favorites, 0 Comments
MyWhoosh Virtual Shifting With ESP32-C3 SuperMini
.jpg)
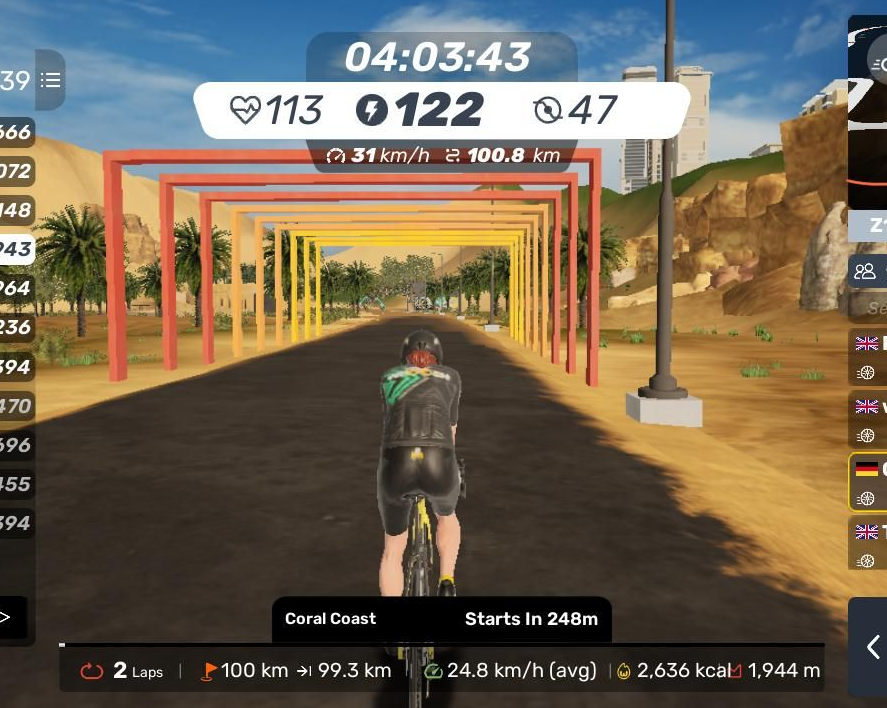
This guide shows you how to build a wireless Bluetooth keyboard that sends the 'i' (upshift) and 'k' (downshift) keys. This is the standard for gear shifting in indoor cycling app MyWhoosh. The system is optimized for use with iPads and Windows PCs.
In 2025, I built a virtual shifter based on an ESP8266. This project is also here on Instructables: "MyWhoosh Virtual Shifting With ESP8266" (https://www.instructables.com/MyWhoosh-Virtual-Shifting-With-ESP8266/). It worked quite well, but only with Windows. However, I treated myself to a new iPad last Christmas, and now I prefer to use it for MyWhoosh. Alongside MyWhoosh, I also use Biketerra for indoor cycling from time to time. The ESP32 SuperMini Shifter works with that as well.
Supplies
1. 1x ESP32-C3 SuperMini (The ultra-compact microcontroller with USB-C)
2. 2x Push-button switches (standard normally open)
3. Thin cable (e.g., stranded wire or bell wire)
4. Soldering iron & solder
5. 1x USB-C cable (for powering the ESP32-C3 SuperMini via a power bank or USB port)
The Wiring Diagram (Y-Configuration)
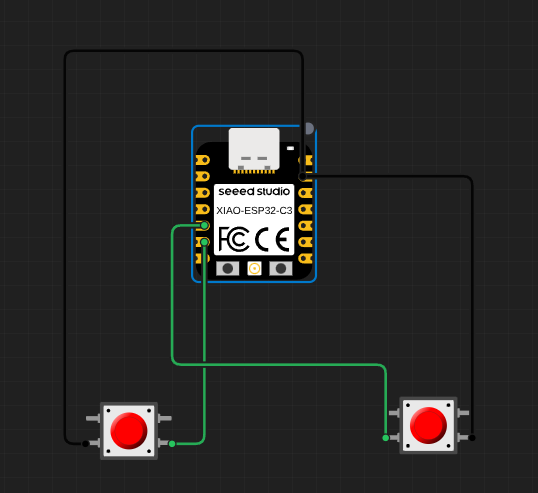
The ESP32-C3 SuperMini is extremely small. To avoid having to solder multiple wires to the single ground pin, we use a busbar (Y-wiring).
We deliberately use GPIO 4 and 5, as other pins (such as GPIO 8 and 9) have internal boot functions and could block the chip from starting up.
1. Ground (GND): Solder a wire to the GND pin on the ESP32. Run it to the first button, and from there, connect it with a jumper wire to the second button.
2. UP ('i'): Solder a wire from GPIO 4 to the open contact on the "Up" button.
3. Down Shift ('k'): Solder a wire from GPIO 5 to the open contact of the "Down Shift" button.
Setting Up the Software & Arduino IDE (Step by Step)
If you’ve never used the Arduino IDE before, first download the latest version from the official website (arduino.cc) and install it. Then follow these steps:
Step A: Enable the ESP32-C3 for the IDE
By default, the Arduino IDE only recognizes "standard" Arduino boards. We first need to teach it what an ESP32-C3 is.
1. Open the Arduino IDE.
2. In the menu, go to File -> Preferences (on macOS: Arduino IDE -> Settings).
3. Find the "Additional Board Manager URLs" field and paste this exact link there:
4. Click "OK".
5. Now click the "Board Manager" icon on the far left of the toolbar (the second icon from the top; it looks like a small circuit board).
6. Type `esp32` into the search bar at the top.
7. Find the entry "esp32 by Espressif Systems" and click "Install." This may take 1–2 minutes.
Step B: Installing the Bluetooth Libraries
To ensure the code knows how to behave as a Bluetooth keyboard, we will download two extensions.
1. Click the "Library Manager" icon located on the far left of the sidebar (the third icon from the top; it looks like three books).
2. Search for "NimBLE-Arduino" (by *h2zero*). Click "Install." (This library ensures that the Bluetooth code remains compact enough to fit on the chip.)
3. Search for "ESP32-BLE-Keyboard" (by *T-vK*). Click "Install.
Important for the first-time setup: If the IDE asks you whether you would also like to install "Dependencies," always click "Install all.
Step C: Tool Settings (The Critical Part!)
Now, take your USB-C cable and connect the ESP32-C3 SuperMini to your PC. Next, we need to tell the IDE exactly how to interface with the chip.
Go to the "Tools" menu at the top and configure the following settings *exactly* as shown:
"Board:" -> `ESP32` -> `ESP32C3 Dev Module`
"Port:" Select the COM port to which your SuperMini is connected (e.g., `COM3` on Windows or `/dev/cu.usbmodem...` on Mac).
"USB CDC On Boot:" -> `Enabled`
⚠️ "Vital!" If you do not set this to *Enabled*, the chip will lose its USB identity after the initial flashing process. You will then be unable to upload any further updates and will see no output in the Serial Monitor.
"Partition Scheme:" -> `Minimal SPIFFS (Large APPS with OTA)` or `Huge APP`
⚠️ "Also critical!" The Bluetooth functionality is massive. With the default settings, the chip's memory will fill up immediately, and the upload will fail with a red error message. This setting increases the available space for our program.
"Flash Mode:" -> `QIO`
Step D: Copy and Upload the Code
1. Delete everything currently in the white text field of the Arduino IDE.
2. Copy the entire program code (from Step 4) and paste it there.
3. Click the "checkmark icon" (Verify) in the top-left corner. The IDE will now briefly check to ensure everything is error-free.
4. Click the "right-arrow icon" (Upload) located directly next to it.
You will now see the progress displayed in the black bar at the bottom. Once it reads "Upload successful" (or *Done uploading*), the small blue LED on your SuperMini will flash briefly—from this moment on, your Shifter is transmitting!
The Arduino Code
Copy this code into your Arduino IDE and flash it onto the SuperMini:
Setup & Practical Tips
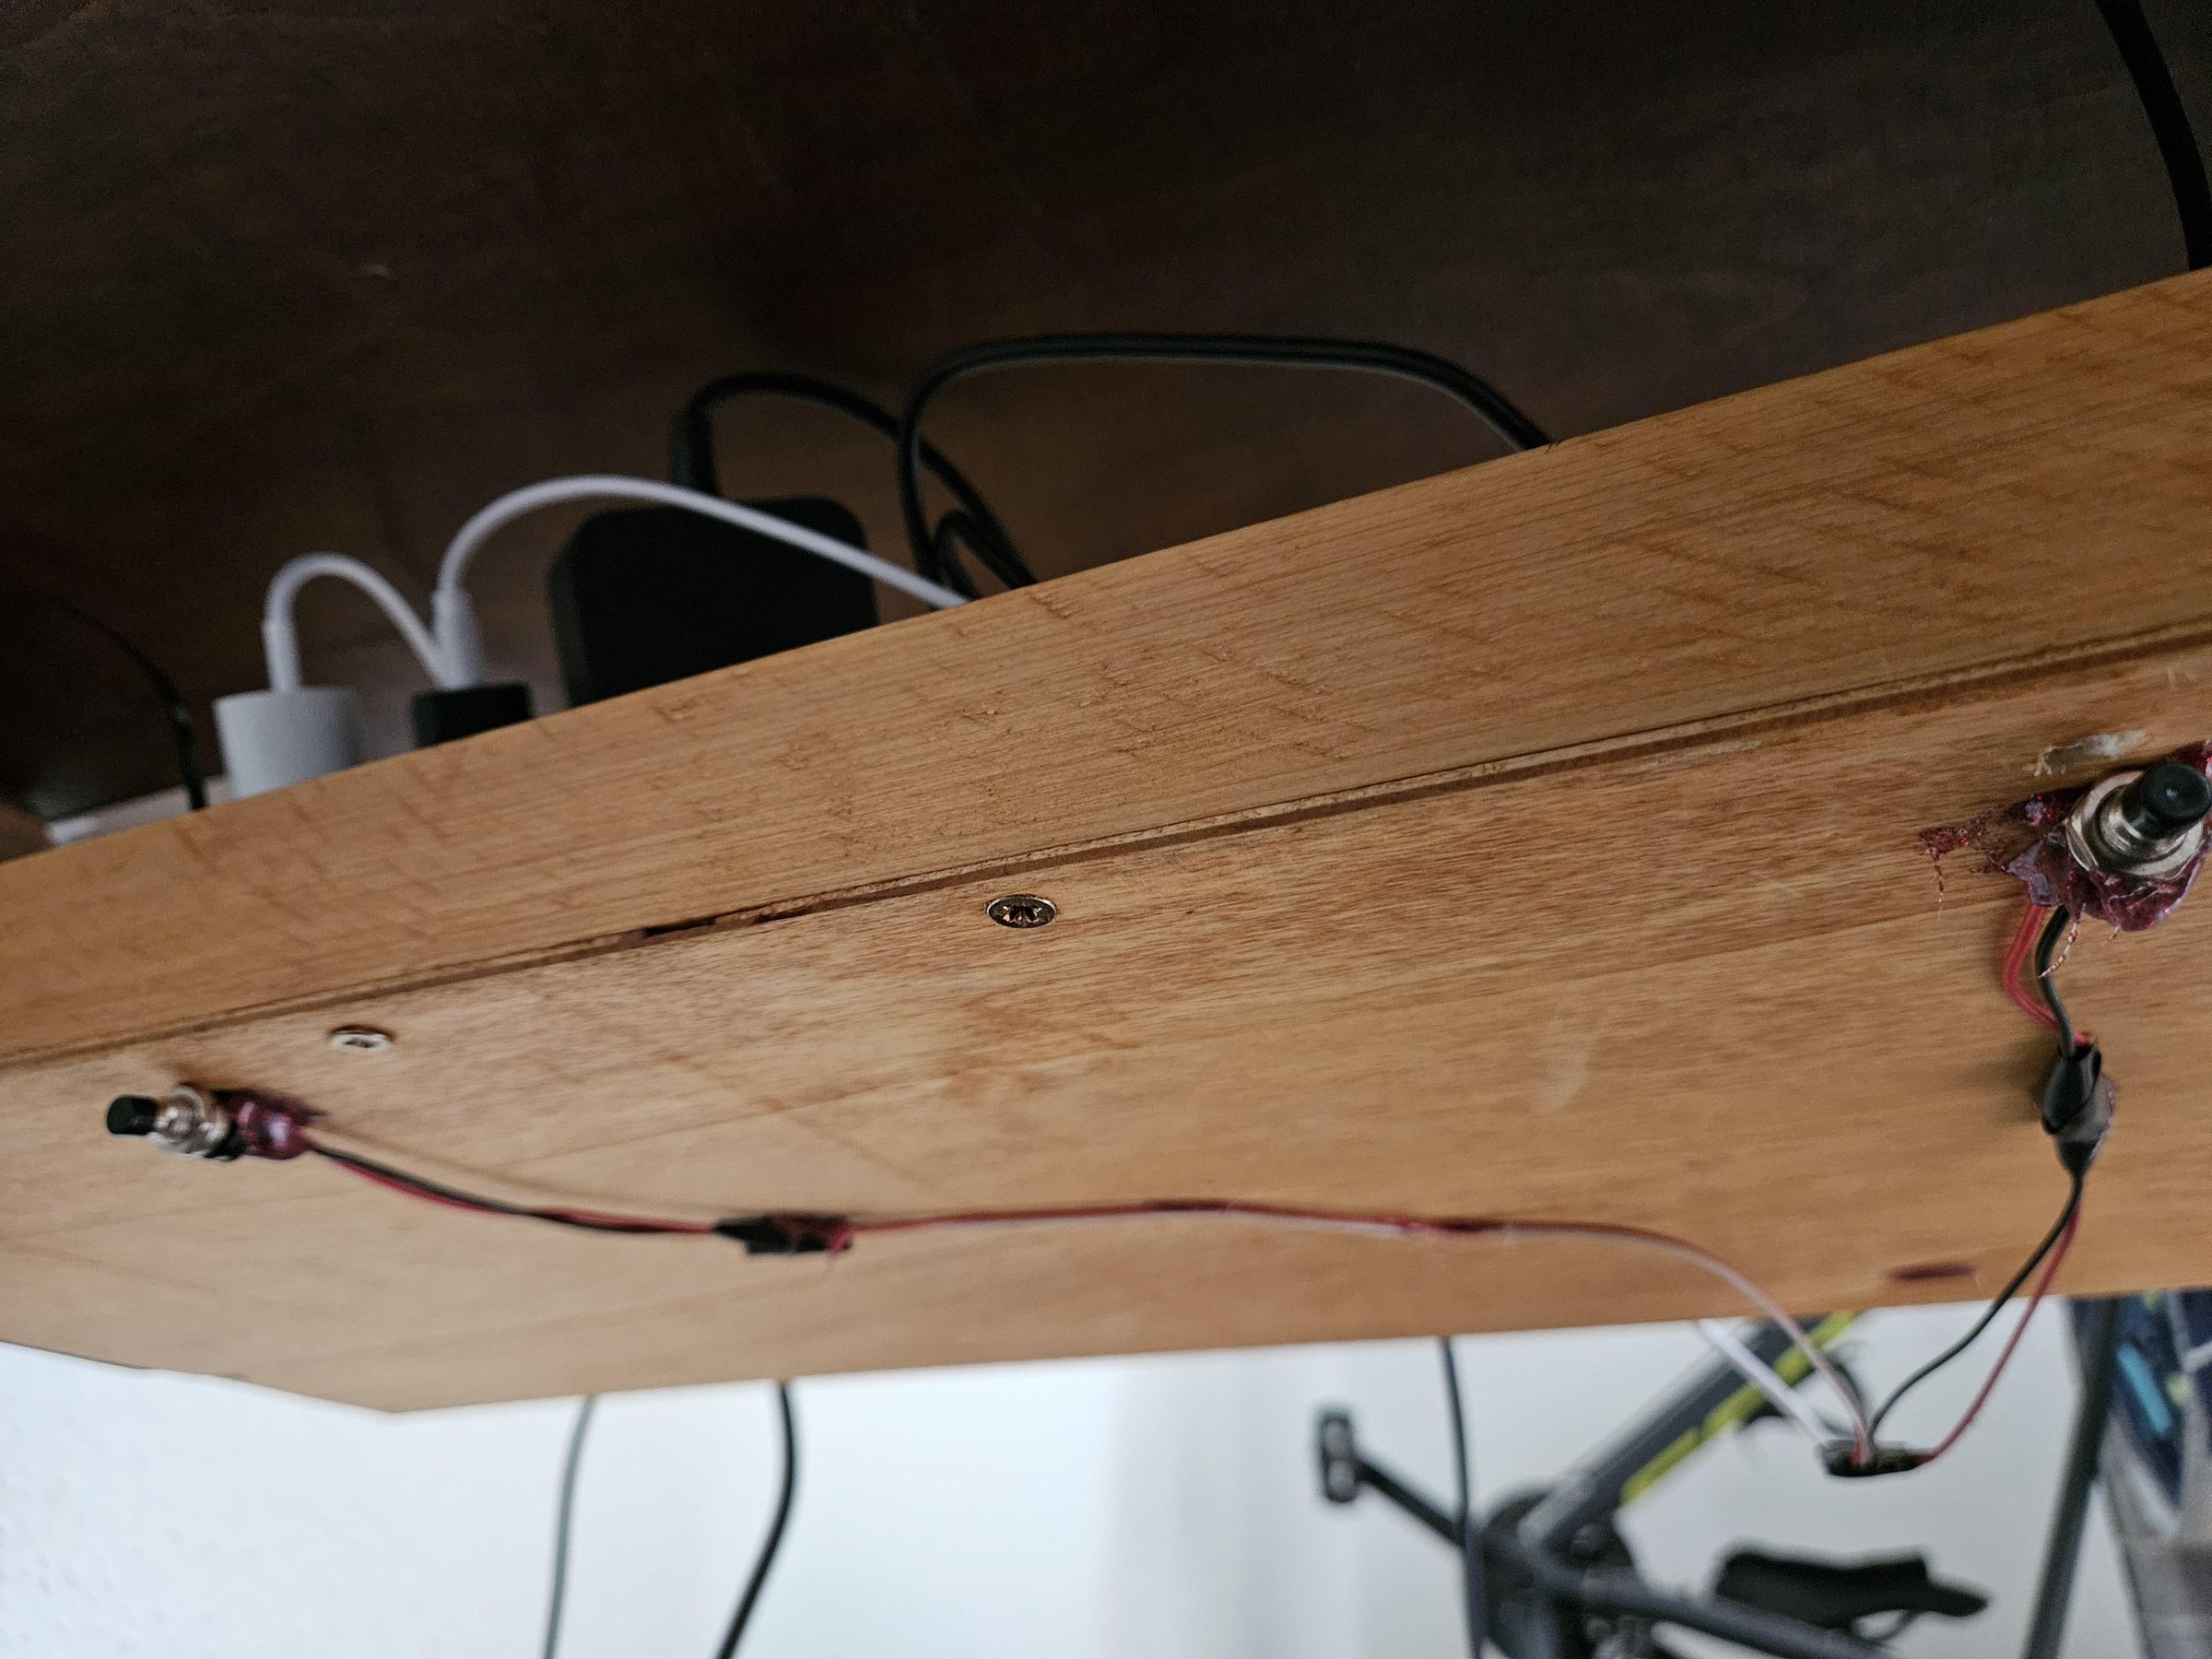
1. Pairing: Open the Bluetooth settings on your iPad or Windows PC. Scan for new devices. The shifter will appear as "MyWhoosh C3" (Type: Keyboard). Pair it once—and you're done.
2: Handlebar Refinement: Protect the delicate solder joints on the SuperMini from corrosive sweat during training by applying a bit of hot glue or heat-shrink tubing (for corrosion protection!).
3. Tuning: If you find the gear shifting too sluggish, or if gears are being skipped unintentionally, you can adjust the value in the `delay(300);` lines within the code (e.g., change it to 200 for faster shifting).
Note for Android users: Android operating systems (such as on the Samsung Galaxy devices) often feature extremely restrictive security caches for BLE keyboards. If your smartphone fails to detect the shifter, the issue lies with the Android Bluetooth stack, not the hardware. On the iPad and Windows, this setup works absolutely flawlessly!
To everyone building their own version: have fun shifting gears virtually in your cockpit!