Nature's Embrace🍃✨ : a Green Inspired Artwork
by Aarohi2220 in Craft > Clay
76 Views, 0 Favorites, 0 Comments
Nature's Embrace🍃✨ : a Green Inspired Artwork
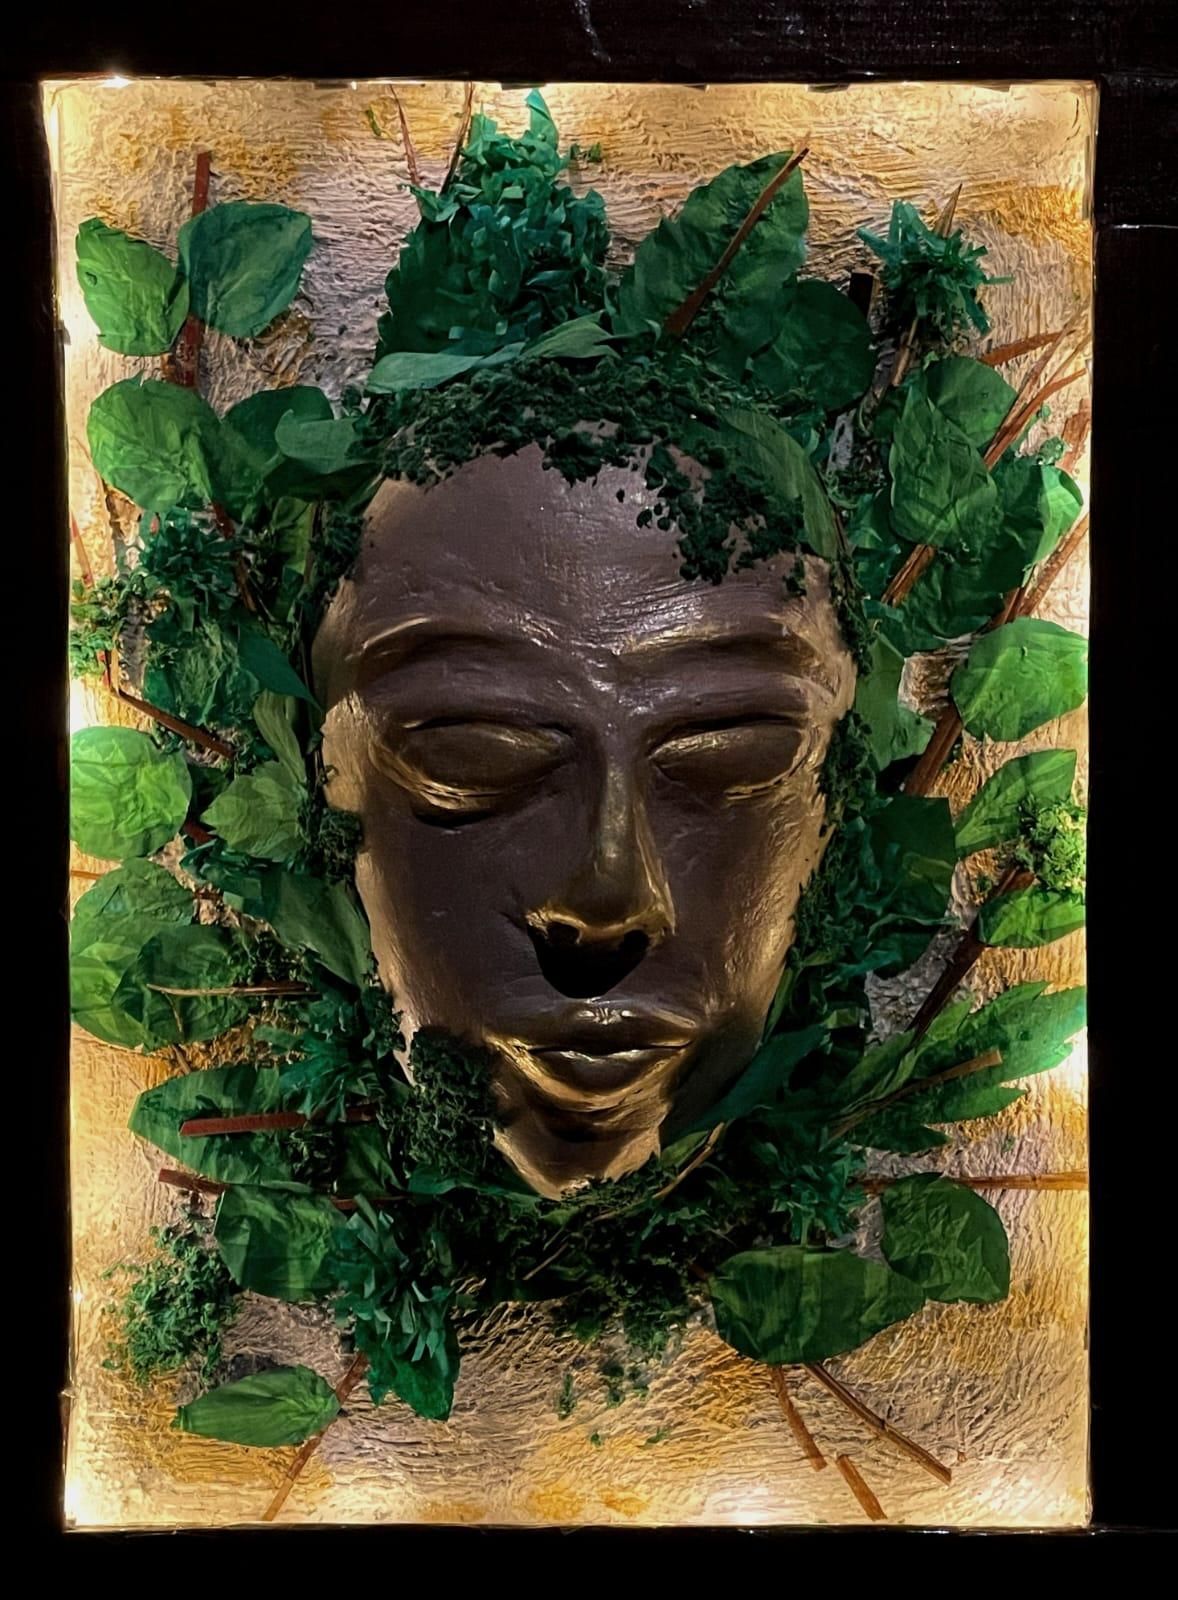
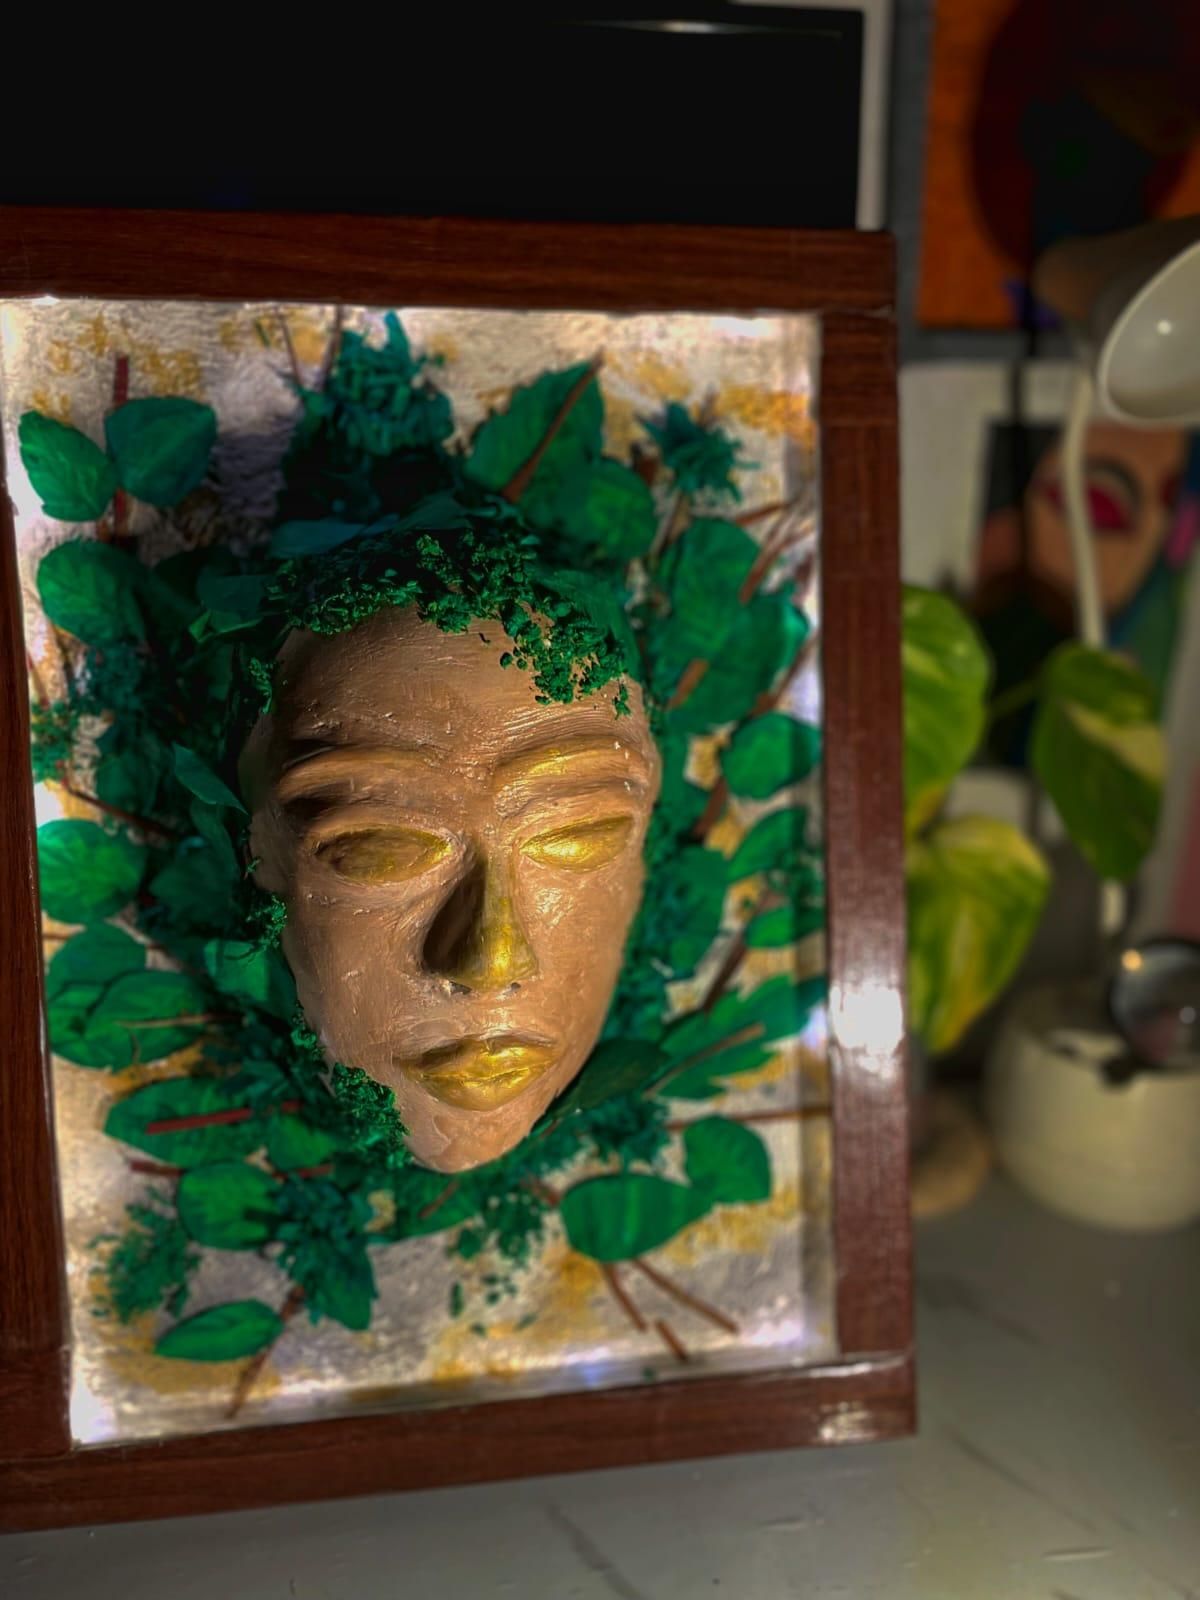
Ever since I came across the theme of the Rainbow Contest, I knew I didn't want to represent a color in a simple or obvious way. I wanted to create something that carried meaning something that could tell a story and evoke emotions rather than just showcase a shade. Among all the colors, I found myself deeply drawn to green.
To me, green has always represented much more than plants or landscapes. It symbolizes life, growth, renewal, balance, and the invisible bond between humanity and nature. It is the color we associate with healing, hope, and the countless forms of life that surround us. I wanted to capture all of these ideas in a single piece of artwork.
While brainstorming concepts, I kept returning to the image of the Earth itself—not as a planet floating in space, but as something living, breathing, and deeply connected to us. I began imagining a calm human face emerging from cracked earth, slowly being embraced by vibrant moss and leaves. The contrast fascinated me. The dry, textured surface represented fragility and the challenges our planet faces, while the lush greenery symbolized nature's incredible ability to recover, adapt, and bring life wherever it is given the chance.
I didn't want this artwork to feel loud or dramatic. Instead, I wanted it to convey a sense of peace and quiet strength. That's why I chose to create a face with closed eyes and a serene expression. To me, it represents harmony a reminder that humans are not separate from nature, but an inseparable part of it.
As the concept developed, I realized that this project had become more than just an entry for a contest. It became my personal interpretation of the color green and everything it stands for. Every texture, every leaf, and every detail was chosen with the intention of celebrating the beauty and resilience of the natural world.
Through this piece, I hope to remind people that green is not simply a color we see around us. It is the color of life itself. It represents growth after hardship, hope after uncertainty, and the incredible ability of nature to heal and flourish. In many ways, this artwork is my tribute to the Earth a visual reminder that when we nurture nature, it embraces us in return.
Supplies
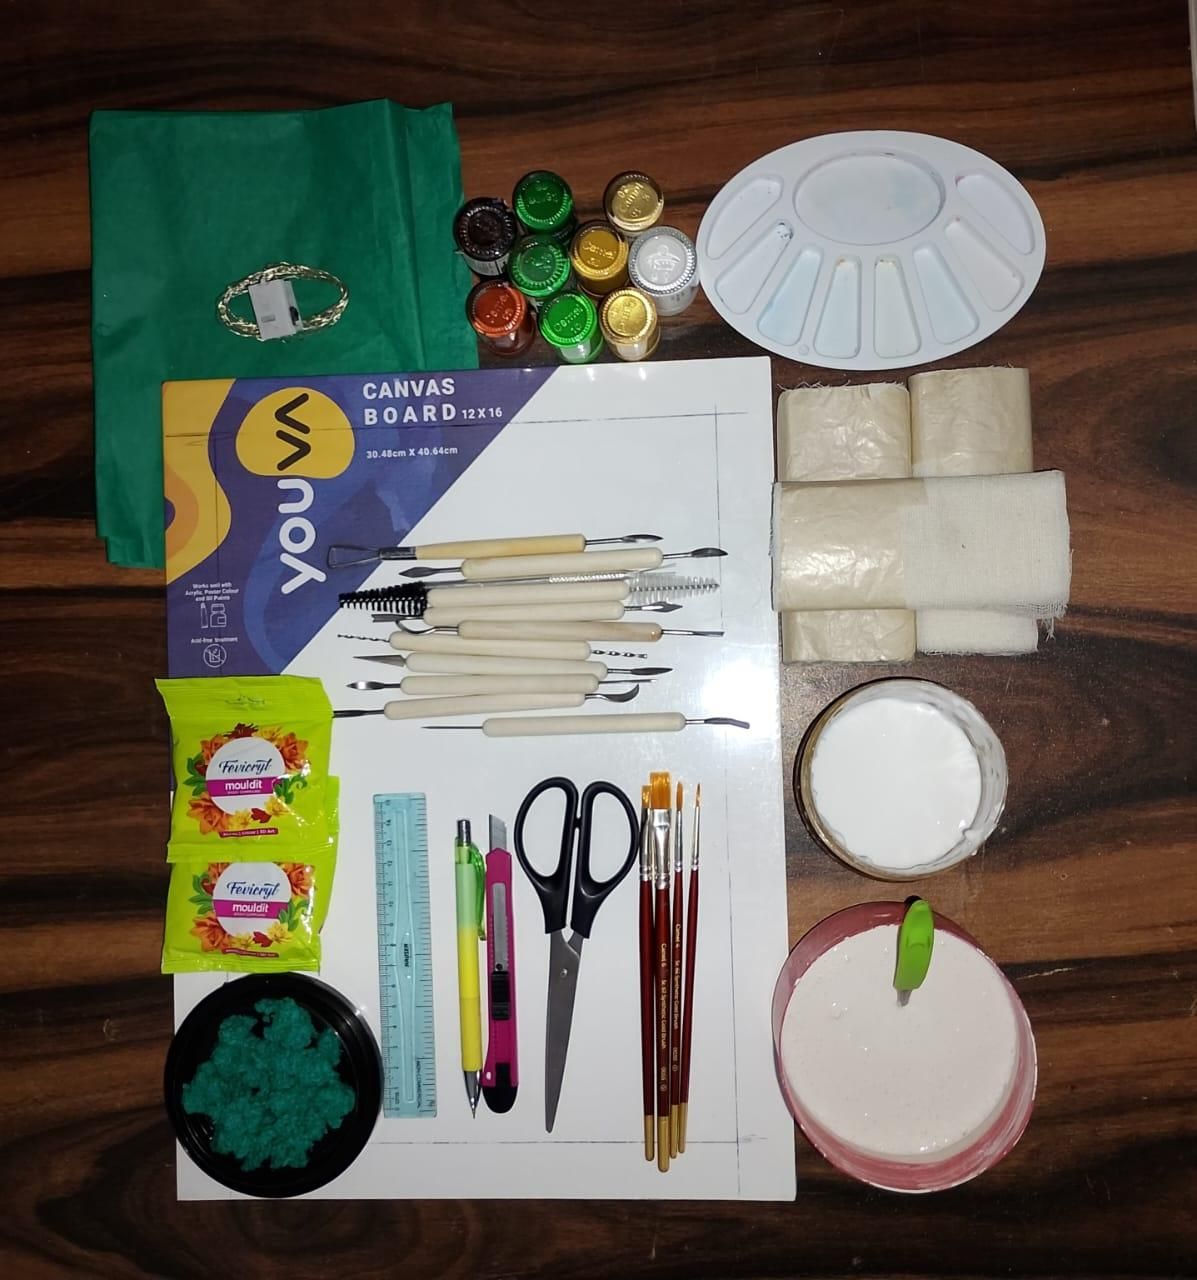
Materials
• Canvas Board 12✖️16 inches [ 30.48 cm✖️ 40.64 cm ]
• Gauze Bandage
• Plaster of Paris (POP)
• White Craft Glue
• Acrylic Paints:
- Various shades of Green
- Brown
• Paper Mache (a mixture of shredded paper, water, with green acrylic paint and glue)
• Fevicryl Mouldit Clay
• Warm White LED Fairy Lights
• Green Tissue Paper
Tools
• Sculpting Tools
• Scissors
• Paper Cutter / Craft Knife
• Mixing Bowl
• Pencil
• Paint Brushes (various sizes)
• Sandpaper (fine grit)
• Paint Palette
• Masking Tape
Finding Inspiration and Sketching the Idea
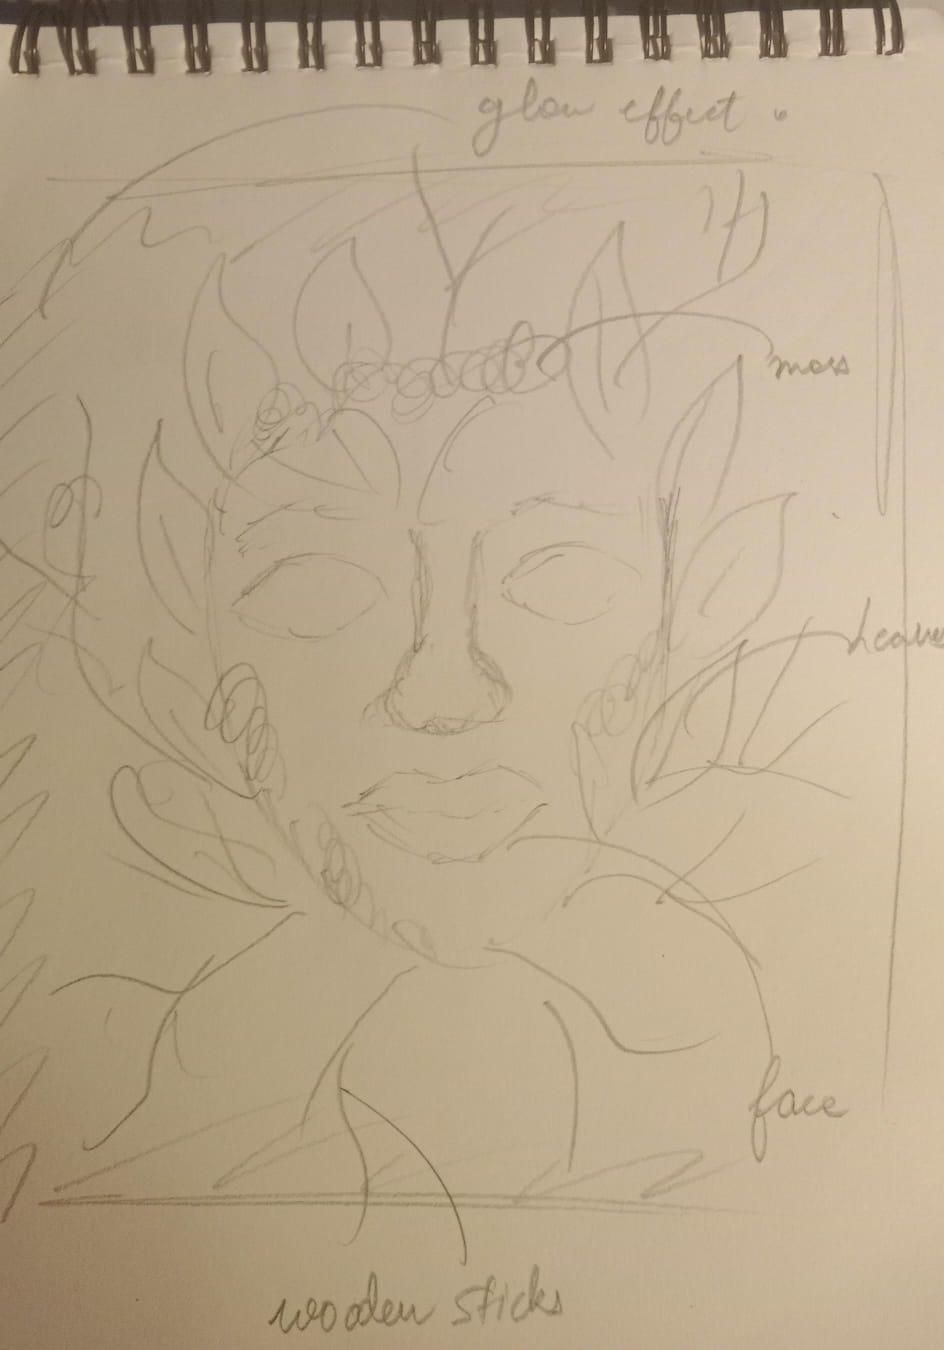
Every meaningful artwork begins with an idea, and for me, this project started with the desire to represent the color Green in a unique and symbolic way for the Rainbow Contest. Instead of focusing only on the color itself, I wanted to create a piece that reflected everything green represents—life, growth, peace, renewal, and the unbreakable bond between humans and nature.
While exploring different artistic concepts, I was inspired by the image of a peaceful human face emerging from lush greenery. I loved how it conveyed the feeling that nature was gently embracing and protecting humanity. That single idea became the foundation of my project, Nature's Embrace.
Before starting the sculpture, I sketched my design on paper to visualize the composition. I planned the placement of the face, the surrounding leaves, grass, and moss, as well as the overall balance of the artwork. This rough sketch acted as a roadmap throughout the project, helping me organize my ideas and make changes before working with the actual materials.
Taking the time to plan the design beforehand made the entire creative process much smoother. It gave me a clear vision of the final artwork and ensured that every element would work together to tell the story I wanted to share.
P.S. My sketching skills may not be the best, but every masterpiece starts with a rough sketch... trust the process! 😅🌿
Tip: Never skip the sketching stage. Even a simple rough sketch can help you plan proportions, improve composition, and avoid mistakes during the building process.
Creating the Face Cast
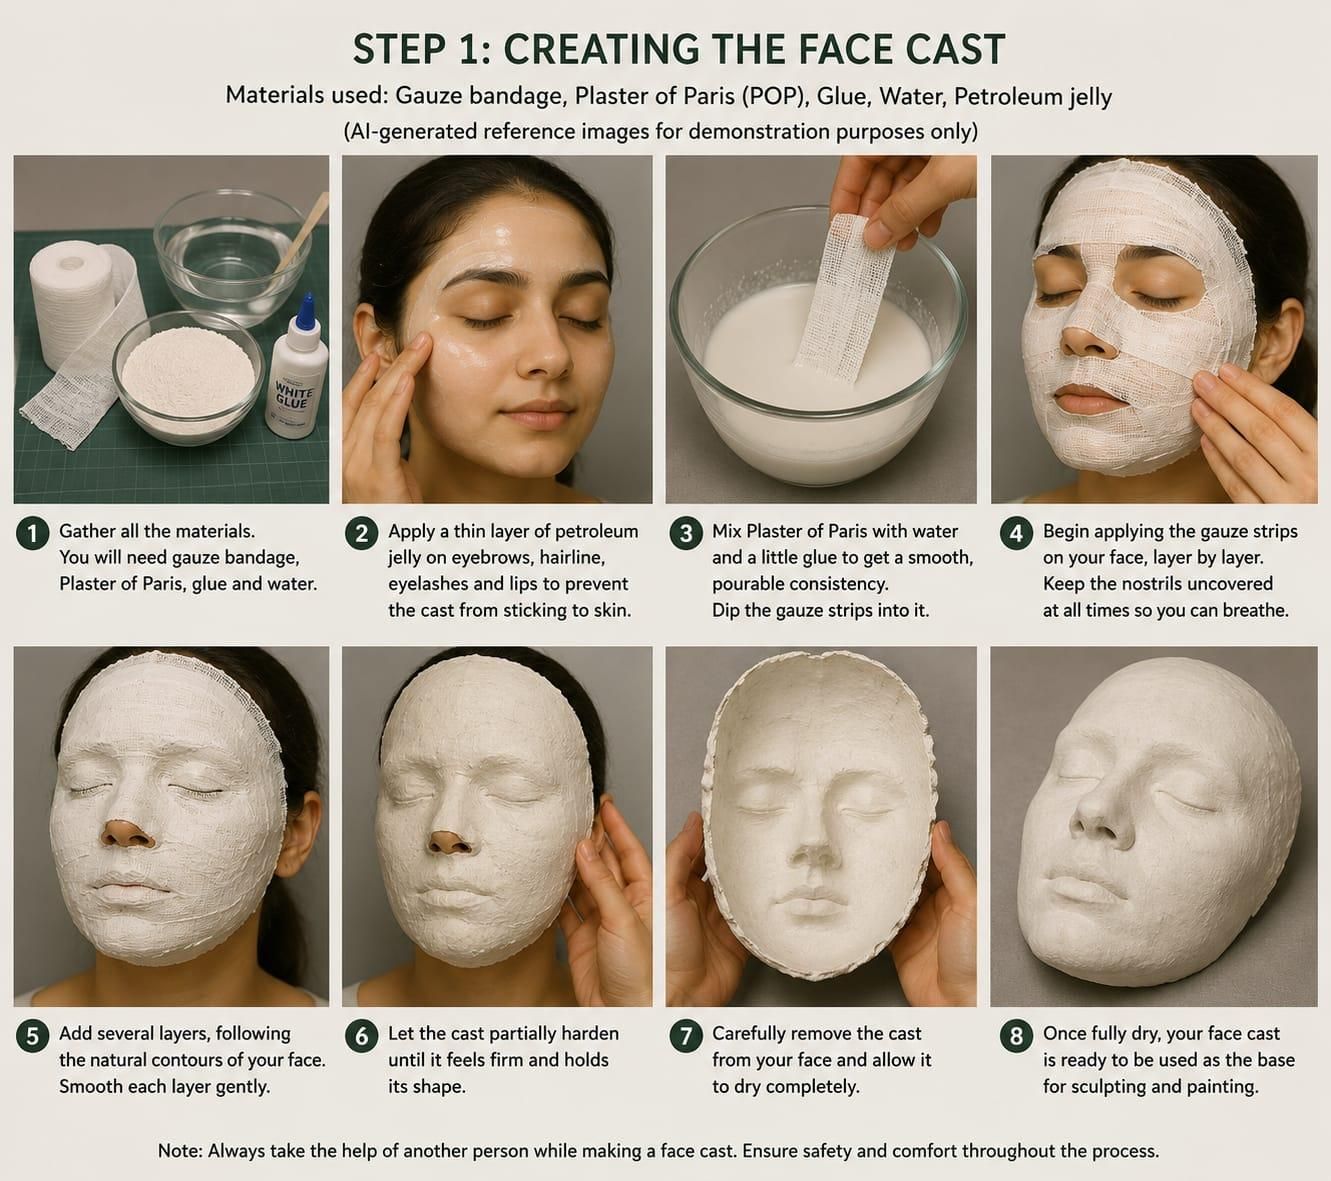
Every sculpture needs a strong foundation, and for this artwork, I wanted the face to have realistic proportions and natural contours. Instead of sculpting the entire face from scratch, I decided to create a face cast, which would serve as the base for the sculpture while making it lightweight and easier to refine.
Before beginning the casting process, I prepared my materials, including gauze bandages, Plaster of Paris (POP), water, and glue. To ensure the cast could be removed safely and comfortably, I first protected my skin by applying a thin layer of petroleum jelly over my eyebrows, hairline, and any areas where the casting material might stick. This simple precaution made the removal process much easier.
I then prepared the Plaster of Paris mixture according to the required consistency. One by one, I dipped strips of gauze bandage into the mixture, ensuring that each strip was evenly coated before carefully placing it over my face. I gently layered the strips, following the natural curves and contours of my face to capture as much detail as possible.
Throughout the entire process, I made sure that my nostrils remained completely uncovered so that I could breathe comfortably and safely. This is the most important precaution when creating a face cast, and I highly recommend having another person assist you rather than attempting the process alone.
After applying several layers, I allowed the cast to partially harden until it was firm enough to hold its shape. Once it reached the right stage, I carefully removed it from my face and left it to dry completely. As the cast cured, it became surprisingly lightweight yet strong, providing the perfect base for the next stage of the project.
Creating the face cast was one of the most exciting parts of this artwork because it transformed the idea from a simple concept into something tangible. With the base now complete, I was ready to sculpt the facial features and begin bringing Nature's Embrace to life.
Note: The images shown in this step are AI-generated reference illustrations created to demonstrate the face-casting process. They are included for visual explanation only and are not actual photographs taken during the making of this project.
Sculpting the Facial Features
.gif)
.gif)
.gif)
.gif)
.gif)
Once the face cast had completely dried, I began sculpting the facial features. To build the basic structure, I prepared a thick Plaster of Paris (POP) mixture with a clay-like consistency. Using this, I carefully sculpted the nose, closed eyes, lips, and one visible ear, gradually shaping each feature while maintaining balanced proportions.
After the POP had fully hardened, I lightly sanded the surface to remove any rough areas. To achieve a smoother and more refined finish, I applied a thin layer of Fevicryl Mouldit clay over the sculpted features. This allowed me to blend the details seamlessly and refine the contours using sculpting tools.
Working in two layers made the sculpture both strong and cost-effective. The POP provided the base structure, while the Mouldit clay created a smooth, realistic finish. By the end of this step, the face had gained its peaceful expression and was ready for the next stage of the project.
Tip: Building the base with pop and finishing with mold it clay is an excellent way to reduce material costs while achieving a clean, professional looking sculpture.
Smoothing and Painting the Face
.gif)
.gif)
.gif)
.gif)
With the sculpting complete, I focused on refining the surface to achieve a clean and polished finish. Once the clay had fully cured, I carefully sanded the entire face using fine-grit sandpaper to remove any uneven areas and smooth out the sculpted details. This step required patience, as a smooth surface would greatly improve the final appearance after painting.
After removing all the dust, I applied an even coat of white acrylic paint over the entire face. This acted as a primer, creating a uniform base that would help the metallic finish appear brighter and more vibrant. I allowed the paint to dry completely before moving on to the next stage.
Once the white base coat had dried, I carefully painted the entire face using golden acrylic paint and enhanced it with a gold chrome highlighter. The metallic finish beautifully highlighted the facial features and added a warm, elegant glow that perfectly complemented the natural theme of the artwork.
By the end of this step, the sculpture had a smooth, refined, and luminous finish, making it ready to be combined with the handmade greenery in the following stages.
Tip: Applying a white base coat before metallic paint helps create a brighter, more even finish and makes the final color stand out beautifully.
Creating the Leaves, Grass and Moss
.gif)
With the face sculpture complete, it was time to create the natural elements that would bring the artwork to life. Instead of relying on ready-made decorations, I wanted to make most of the greenery by hand using simple craft materials.
To create the leaves, I cut different leaf shapes from green tissue paper and attached them to thin cardboard for added strength. I then fixed them onto wooden sticks, making them easy to arrange and giving them a more realistic, three-dimensional appearance.
For the grass, I cut thin strips of green tissue paper and layered them to create the look of fresh blades of grass. This simple technique added texture and depth to the composition.
To make the moss, I prepared green paper mache using shredded paper, water, glue, and green acrylic paint. After mixing everything well, I spread and shaped the mixture into small uneven clusters to imitate the natural texture of real moss. Once it had dried completely, it was ready to be attached around the sculpture.
Making these elements by hand not only gave me complete creative freedom but also made the artwork more unique and environmentally friendly. Each leaf, blade of grass, and patch of moss added another layer of realism, gradually transforming the sculpture into the lush, nature-inspired composition I had envisioned.
Tip: Creating your own leaves and moss is an inexpensive alternative to buying artificial decorations and it allows you to customize the size texture and arrangement to perfectly suit your artwork.
Creating a Textured Background
.gif)
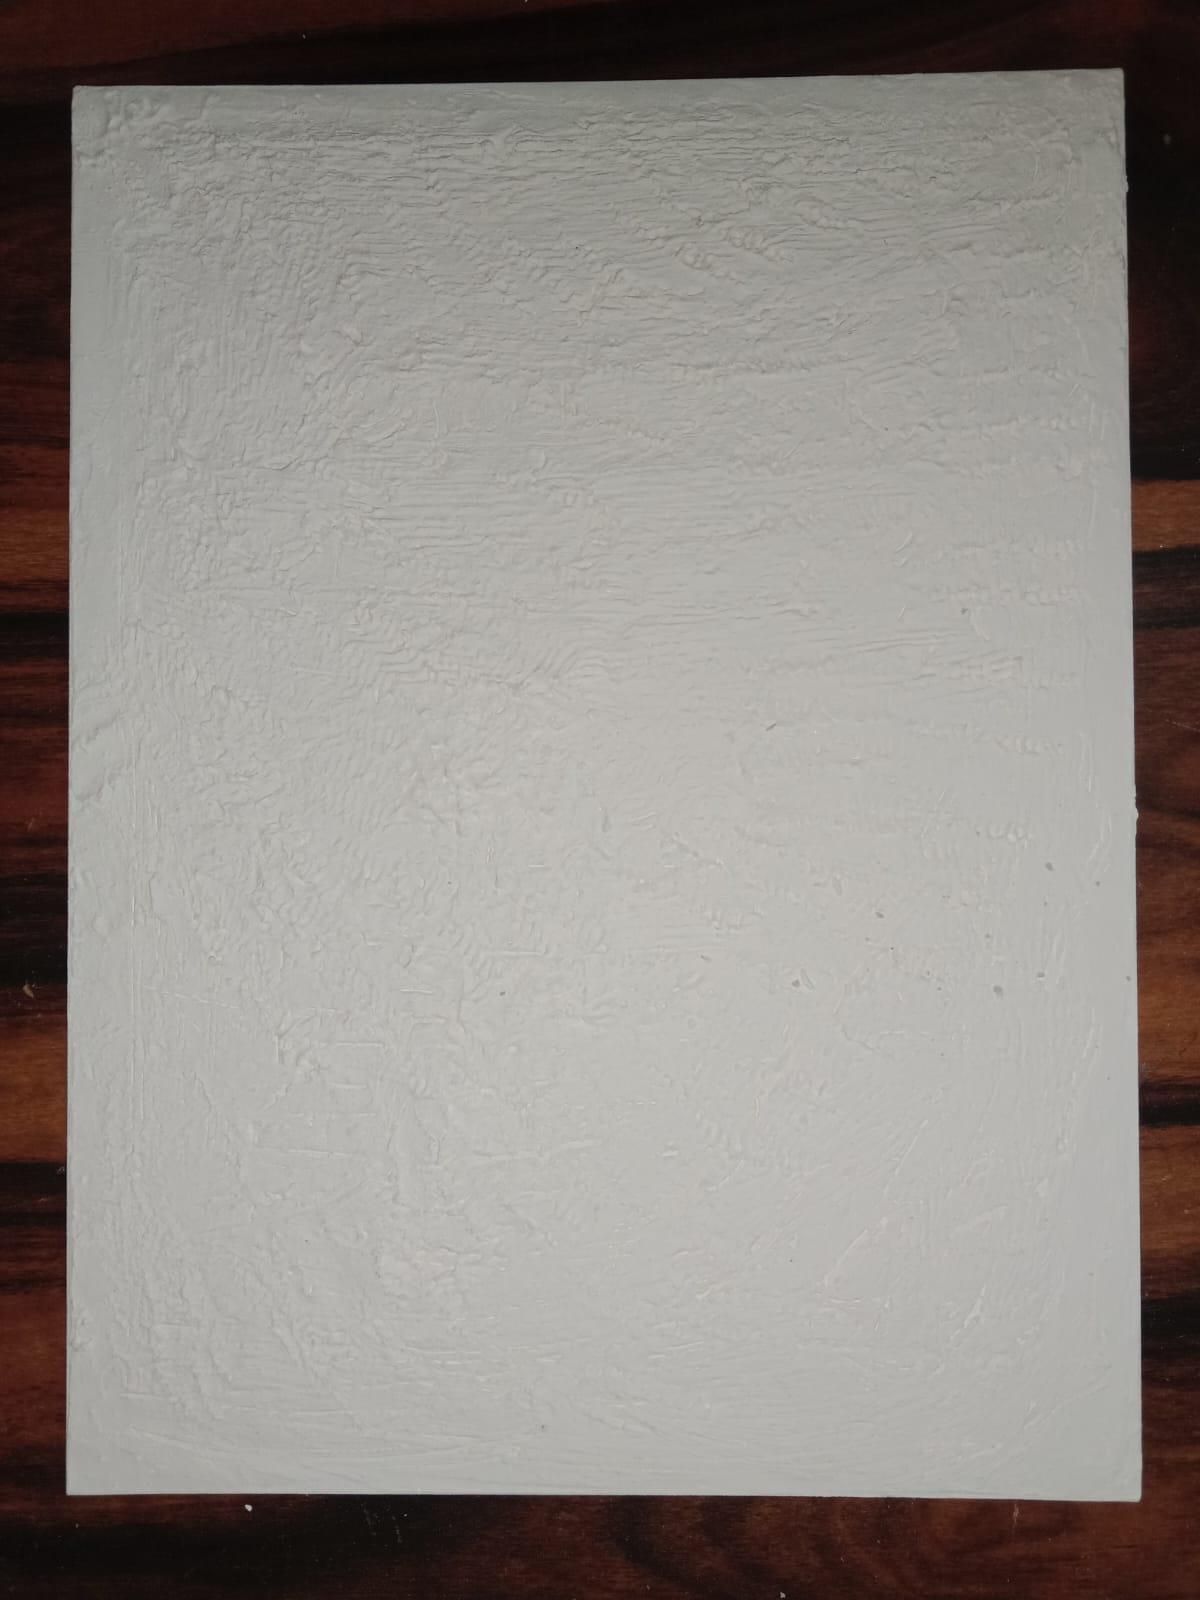
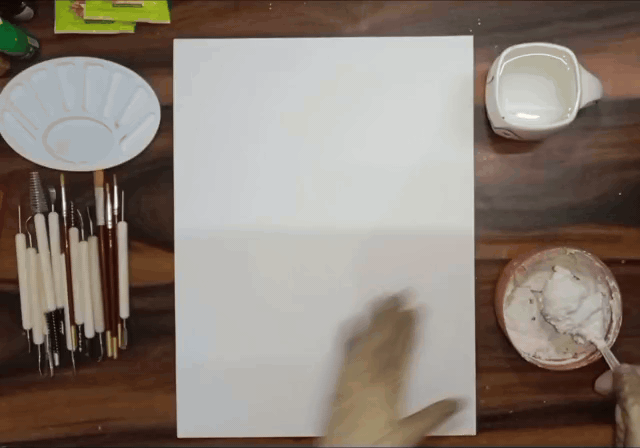
With all the individual elements prepared, I moved on to creating the background that would bring the entire composition together. For the base, I used a 12 × 16-inch canvas board.
Instead of leaving the canvas smooth, I applied a thin layer of Plaster of Paris (POP) over its surface. Using a palette knife and brush, I created an uneven, rough texture to resemble natural rock, tree bark, and earthy surfaces. This textured background added depth and perfectly complemented the organic theme of the artwork.
Assembling the Artwork and Adding the Final Details
.gif)
.gif)
.gif)
Once the POP had dried completely, I painted selected areas with a light grey acrylic paint to enhance the texture and create a subtle stone-like appearance. To add warmth and elegance, I lightly brushed golden acrylic paint over the raised portions of the texture. These delicate highlights caught the light beautifully without overpowering the natural tones of the artwork.
Tip: A textured background adds depth and dimension to your artwork. Dry brushing with light grey and golden acrylic paint is an easy technique to enhance the raised details and create a beautiful natural finish.
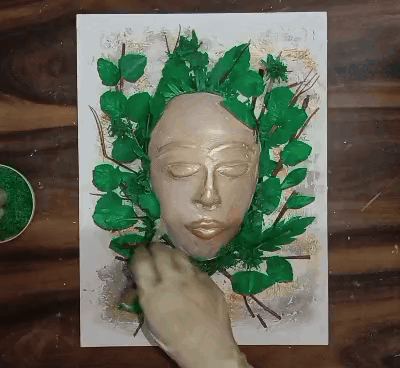
After the background was fully prepared, I carefully arranged the face sculpture, handmade leaves, grass, and moss on the canvas. I experimented with different placements until I achieved a balanced composition that looked natural and visually appealing. Once I was satisfied with the layout, I securely attached each element, bringing my vision of Nature's Embrace to life.
With all the major elements securely attached to the canvas, it was time for my favorite part of the project—adding the final details. I believe that these small finishing touches are what truly bring an artwork to life and give it a polished, professional appearance.
I carefully examined the entire composition and filled any visible gaps using additional moss, grass, and leaves. This helped create a more natural transition between the face and the surrounding greenery, making it appear as though nature was gently embracing the sculpture rather than simply being placed around it.
Next, I used golden acrylic paint to add subtle highlights to selected areas of the leaves and background. I applied the paint sparingly so that it would catch the light without overpowering the natural green tones. These delicate highlights added warmth, depth, and a touch of elegance to the overall composition.
Finally, I cleaned the edges, touched up any uneven paint, and ensured that every element was firmly attached. I stepped back several times to observe the artwork from different angles, making small adjustments until I was completely satisfied with the balance and overall appearance.
With these final refinements complete, Nature's Embrace had finally come together just as I had envisioned. Every detail, from the peaceful expression of the face to the lush greenery surrounding it, worked together to tell the story of harmony, growth, and the beauty of the natural world.
Tip: Don't rush the finishing touches. Sometimes the smallest details make the biggest difference and can transform a good project into a truly eye-catching piece.
Framing the Artwork and Adding Warm LED Lighting
With the artwork complete, the final step was to present it in a way that enhanced its beauty and brought the entire concept to life. Instead of displaying it on its own, I decided to mount it inside a wooden frame, giving it the appearance of a finished piece of wall art.
To create a soft illuminated effect, I fixed warm white LED fairy lights behind the artwork. Rather than placing the canvas directly against the frame, I intentionally left a small gap between the 12 × 16-inch canvas board and the wooden frame. This hidden space allowed the light to spread evenly around the edges, creating a beautiful glowing halo without exposing the LED wires.
Once the lights were securely arranged, I carefully placed the artwork inside the frame and checked that everything was properly aligned. When the LEDs were switched on, the warm golden glow beautifully highlighted the textures of the face, moss, and leaves, making the artwork feel more immersive and bringing the concept of Nature's Embrace to life.
The wooden frame not only protected the artwork but also gave it a clean, gallery-inspired finish, making it ready to be displayed.
Tip: Warm yellow LED lights create a soft, natural glow that complements earthy tones and greenery, adding depth and elegance without distracting from the artwork itself.
Final Reveal🌿✨
.jpeg)
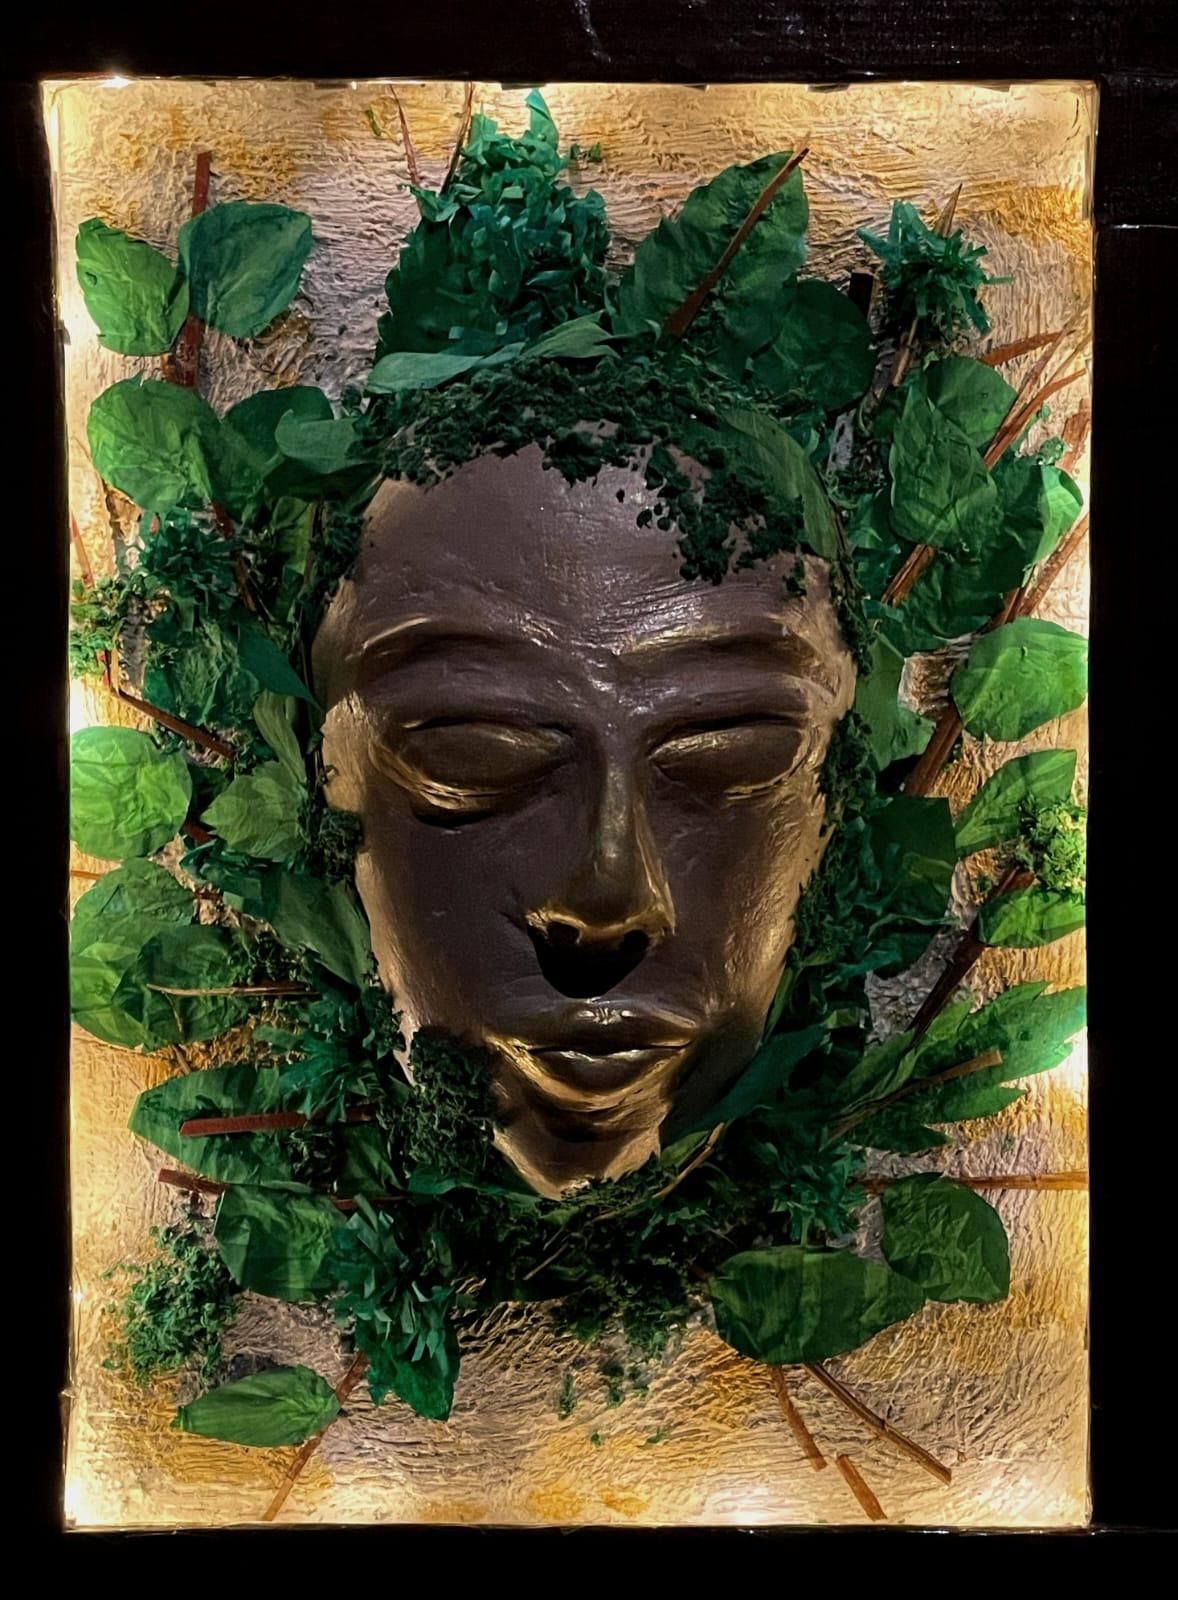
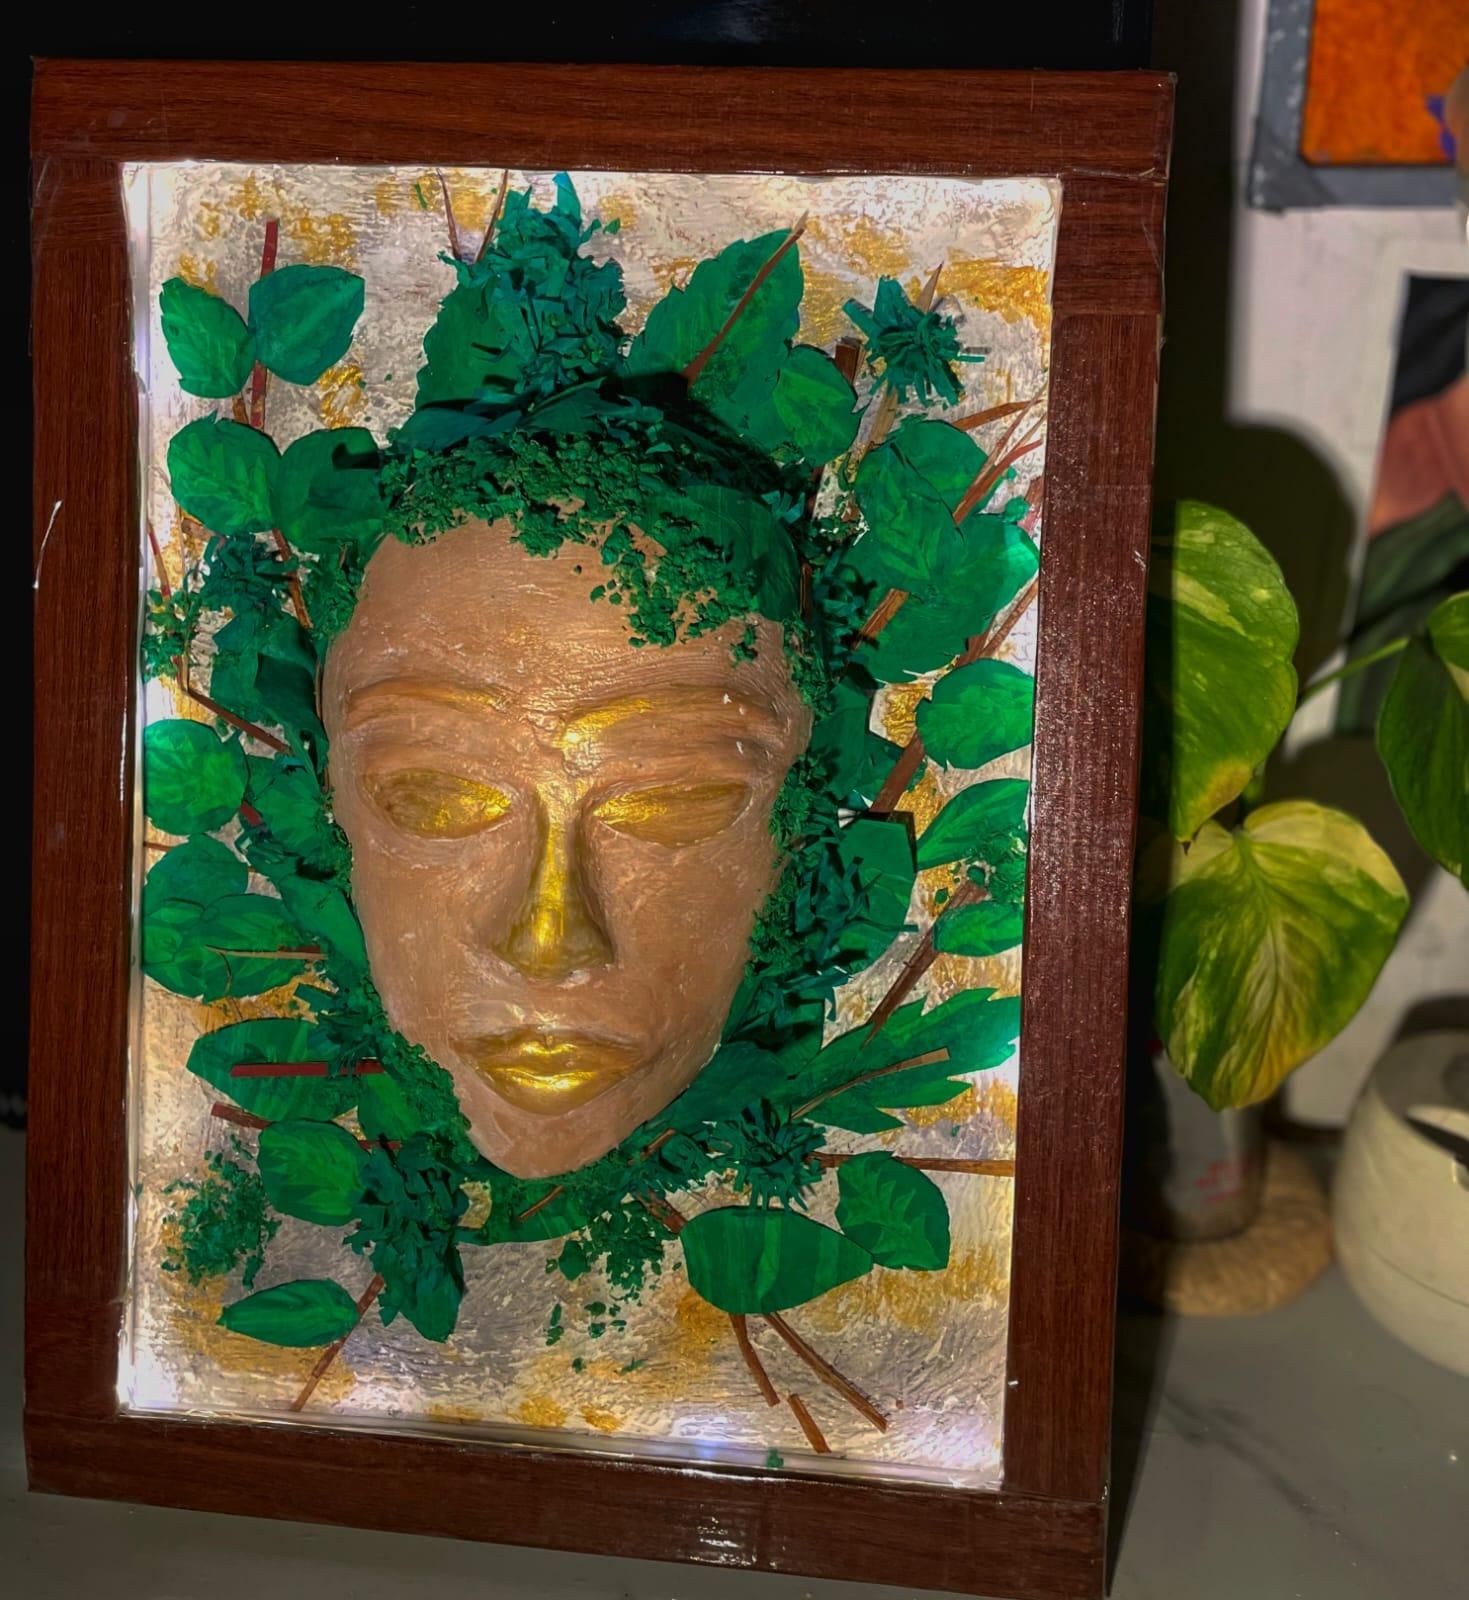
After hours of planning, sculpting, painting, and carefully assembling every element, Nature's Embrace was finally complete. Seeing all the individual pieces come together into one harmonious composition was an incredibly rewarding experience. The peaceful face, surrounded by handmade leaves, grass, and moss, beautifully represents the connection between humanity and nature.
To complete the presentation, I switched on the warm LED lights hidden behind the wooden frame. The soft golden glow highlighted the textures of the sculpture and created a calm, magical atmosphere, making the artwork feel as though it had truly come to life.
This project reminded me that art can be more than just something beautiful—it can tell a meaningful story. Through Nature's Embrace, I wanted to express that nature is not separate from us; it nurtures, protects, and embraces us every day. I hope this artwork inspires others to appreciate the beauty of the natural world and to make small choices that help preserve it for future generations.
Thank you so much for taking the time to follow my creative journey. If you enjoyed this project, I'd love to hear your thoughts in the comments. Happy making! 💚🌿✨