Nerf Paint: Mock-up and Realization
by rogers236 in Outside > Launchers
2384 Views, 20 Favorites, 0 Comments
Nerf Paint: Mock-up and Realization

My roommate and I recently bought Nerf guns, and the first thing we wanted to do was customize them. Here I will show you how I created a mock-up of my final/desired paint job using GIMP, and then I'll show you how it turned out.
Get a Decent Photo

First, you should take a good photo of your nerf gun. Be sure that there are no shadows, and that you end up with a photo for each angle you wish to create a mock-up for. My nerf gun was an N-Strike Elite Roughcut 2x4.
Import Into GIMP


GIMP is wonderful.
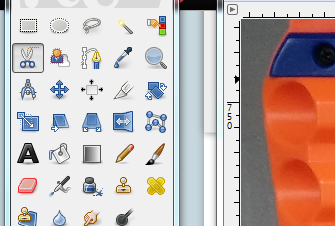
Open your photo with GIMP. Select the "Scissors Select Tool" (which looks like scissors) and begin to outline individual portions of the Nerf blaster. This tool uses "intelligent edge-fitting," so you should click periodically around the perimeter of each section. If it doesn't select as you would like, just lay down the next point and then drag the line to where you want it. To complete the selection, click on the first laid point and hit the enter key.
Once you've selected a section, cut it and paste as a new layer. When you paste the selection, it will show up in the Layers panel as a "Floating Selection (Pasted Layer)". Right click this layer and choose "To new layer." Then hide that layer by clicking the eye button next to the layer in the layer panel.
Repeat for each section that you wish to modify, being sure that you are selecting and cutting from the background layer each time. Afterward, you should have just the background and some stray portions from where your individual selections were less than perfect. Since this is a simple mock-up you should just Select All and Delete whatever remains from the Background Layer.
Optionally, delete the background layer and/or insert a new, blank layer beneath all the others.
Save this as a GIMP project and Save As all other changes so that you can make as many mock-ups as you like with little effort.
Modification Mock-up


This portion is entirely up to you, and GMP has many useful tools to alter each section. I'll give you a quick example (and more if requested) on how I designed each portion.
Hide all layers except that which you are designing. First I will show you the design for what I've labeled "ForwardGrip" (can you guess which part that is?) The design is to be a flat black, with an olive green grip.
First I created two layers from the grip, for the two colors.
For the black portion: Colors>Desaturate>Luminosity (or whichever you like best), then Colors>Hue-Saturation>(+30/-30/-100) (or whatever you like), and finally Colors>Curves and slightly skew the curve until you're pleased with the results.
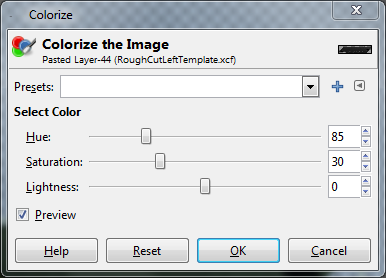
For the green portion: Colors>Desaturate>Luminosity (or whichever you like best), then Colors>Colorize (85/30/0, for the green).
These steps were pretty used on most of the other sections, with the exception being the red stripes (see final image). To achieve these, I selected the correct layer then used the free-form select tool to draw stripes. The stripes were inverted (the sections were black, this changed them to white) and then the Colorize feature was used to change the selected/stripe area in the layer to red without creating a new layer.
Paint

This will be a brief detailing step. You can see the whole step-by-step of the painting here (imgur album).
First, disassemble the Nerf blaster. Don't lose parts. Then tape off anything which should not get any paint at all.
Since green will be the accent color here, I opted to paint the entire casing green first (2 coats). Then any sections which were to remain green were taped over, leaving only sections which would be painted black (2 coats). Finally, the stripes were taped off and painted red (2 coats). I created jagged lines by putting the painters tape on a window and cutting it with a razor to ensure crisp lines.
After some light sanding (I actually used an old toothbrush because even 600 grit seemed too rough) I applied 2 light clear coats to try to seal it all.
Last-but-not-least, reassemble!