Nixie Driver HAT

Hi Makers!
Everyone loves a bit of Retro technology, and in this case I've fallen in love with Nixie Tubes, which are high on the awesome-scale for being old Soviet Russia tech that we can still get our mitts on and make cool retro displays. These alpha-numeric displays use a gas mix consisting mainly of Neon and a small amount of other gases and show the alpha-numeric digits using shaped metal cathodes. They've recently become popular with gadget enthusiasts and commonly come in the form of a 'Nixie Tube Clock'. I decided that just doing a clock was too common and not very flexible. Instead, I thought it would be great to build a 'Display of Things' that could do a lot more. My inspiration and motivation for this project was borne out of an Adafruit Perma-Proto Pi HAT Build Night that was being run by my local Hack Space (makerspace.org.uk) on one of our Open Evenings. This is where the Project Name 'Nixie Driver HAT' came from - a play on the name 'Perma-Proto Pi HAT'.
I eventually see this project being able to access APIs and displaying information such as your Doom frag-count, the current chance of rain, or even the Universe Heat Death For this flexibility, it seemed the Raspberry Pi would fit the bill seeing as it has plenty of grunt and connectivity.
Sanity Warning!!!
This project is not simple and I am going to make a LOT of assumptions about your technical background and abilities. I am making these assumptions because otherwise the extent of detail in the project would become prohibitively large. Here is a concise list of assumptions I am making - that you are experienced in:
- Raspberry Pi setup and imaging
- Safely working with High Voltage circuits
- Software programming in C/C++
- Debugging C/C++
- Fault-finding in electronics
- Researching, where needed, to verify and/or understand aspects of technical hardware/software design
With that warning out of the way, I sincerely hope you find this Instructable helpful and enjoyable, should you wish to undertake this project. Also, if you find any gaps or errors in the information, please please please post a constructive comment and I will update the guide ASAP :)
Happy making!
Gather Your Tools
I certainly hope to have listed the definitive set of tools required here in this project. It has been such a long on-going process, I may have found a tool handy that I've since completely forgotten about. Anyway, here is the list I have recalled so far...
- Soldering Iron
- De-Soldering Tool
(When mistakes happen) - Side Cutters
(Get rid of those long component legs) - Tweezers
(Locate and place wires/components in fiddly locations) - Multi-meter
(Monitor and verify voltage/resistance/continuity) - T-Cobbler Plus
(Test pre-Full Circuit Build) - Breadboard
(Test pre-Full Circuit Build) - Rotary Tool
(Dremel-type to cut copper tracks) - Permanent Sharpie Marker
(Mark where to cut copper tracks) - Saw [Junior Hacksaw]
(Cut strip boards to the correct) - Warding File[s]
(Smooth/finish the ends where Headers have been cut) - Sandpaper
Gather Your Components (and Materials)

I hope this is the definitive list of components you will need in the build. I am building this list from the completed circuit that is on the Strip Board in front of me at this moment, so very little can go wrong - but that does mean there is still 'Fail' potential! :)
General components and Materials
- Strip Board
(25x17 holes, x2 pieces)
(46x13 holes, x1 pieces) - Solder
- MPSA42 x7
(mux) - MPSA92 x7
(mux) - Resistors
- 10M x7
(mux npn base) - 390k
x7 (mux pnp base)
x5 (dummy neon)
x1 (mux neon) - 5.6k x7
(mux pnp pullup) - 15k x6
(mux nixie) - 6.8k x1
(HV adjust) - 1k Multi-Turn Trim Pot x1
(HV adjust) - 100k x1
(HV shut-down potential divider) - 1M x1
(HV shut-down potential divider)
- 10M x7
- Reels of link wire, various colours
(I used single-core insulated copper wire stripped from Ethernet Cable because I've lots of spare offcuts.) - Stacking headers
- 15x1 pins, x2
(3v3, GND, 5v, GPIO) - 5x1 pins, x4
(Cathodes) - 8x1 pins, x1
(HV and Anodes)
- 15x1 pins, x2
- Female Headers
- 15x1 pins, x1
(3v3, GND, 5v, GPIO) - 5x1 pins, x2
(Cathodes) - 8x1 pins, x1
(HV and Anodes) - 6x1 pins, x1
(HV module)
- 15x1 pins, x1
- Male Headers
- 7x1 pins, x1
(Anodes - display board) - 10x1 pins, x1
(Cathodes - display board)
- 7x1 pins, x1
- Raspberry Pi Model B+ or Raspberry Pi 2 Model B
- Adafruit Perma-Proto Pi HAT
- 5v and 12v power supply with Molex plug
(External HDD power supplies are good for supplying both voltages with adequate amps.) - Molex socket
(I nicked one off an old Fan header converter lead.) - Male-Male Jumper Wires (lots)
- Male-Female Jumper Wires (lots and lots)
- Female-Female Jumper Wires (lots and lots and lots!!!)
- Red LEDs x6
- Green LEDs x4
PV Electronics Components and Materials
It is noteworthy that I sourced the 'heart' of my Nixie Project components from PV Electronics. You're not required to do so yourself, but it may make your build easier if you are following this guide to the letter. I must say that the guys at PV Electronics are top-notch for Sales Service. I spent about 3 hours on-and-off chatting to one of their Support Operators (named Pete) via their browser-based Messaging Service (I have the transcript to prove it!), and we went through all the potential components I needed with clear and concise answers to all my questions no matter how technical or dumb.
- IN-14 Nixie Tube x6
- IN-14 Cell PCB x6
(NOTE: The picture on the site is of the 'old' v1 Cell, whereas the one you'll receive is v2 which doesn't accommodate holes for the decimal/comma cathode legs.) - 6x2 pin Female Header x6
- Neon Lamp x5
- HV Module x1
(NOTE: At time of writing, the web shop does not list this item. You will have to request the item via Live Chat from one of their Support Operators.) - K155ID1 Nixie Driver IC x1
Solder the T-Cobbler


In the T-Cobbler kit, you should get the main PCB, a Ribbon Cable, a Ribbon Cable Socket and two long Male Pin Headers.
- Check the number of header pins against the number of holes in each row on the PCB
- Snap off pins so that the pin header size matches the number of holes
- Insert the pin headers into the Breadboard
- Rest the T-Cobbler on the top of the Pin Headers
- Solder the first and last pins on each row
- Check the PCB is level with the headers
- If not, lightly press down on the PCB and re-melt the solder on each of the end pins to level off the PCB with the headers
- Solder in the rest of the pins
- Insert the Ribbon Cable Socket to the PCB
- Solder diagonally opposite corner pins
- Check the PCB is level with the Ribbon Cable Socket
- If not, lightly press the PCB and Ribbon Cable Socket together and re-melt the solder on each corner of the Ribbon Cable Socket
- Solder in the rest of the pins
Solder the HV Module, Nixie Tube 'Cell PCBs' and Nixie Tubes


Follow the same method, as you would for soldering the T-Cobbler, for soldering the Pin Headers of the HV Module and the Nixie Tube Cell PCBs. Soldering the Nixie Tubes requires a different approach:
- Clip a cumulative 2mm length off each of the 13 legs
[NOTE: For example, leg one will be 30mm, leg two will be 28mm, leg three will be 26mm and so on.]
[INFO: This step will help with locating the legs in the Cell PCB holes.] - Insert the legs into the Cell Board
- Solder two legs that are opposite each other
- Check the Nixie is level
- If not, lightly press in the direction the tube needs leveling and re-melt the appropriate soldered leg
- Solder in the rest of the legs
- Clip off the legs with your Side Cutters / Snips
Test the HV Module


NOTE: This is a 170 volt non-isolated DC boost circuit and you MUST be careful with the high voltage. It can at least give you a jolt [shock you], and at most could do severe harm or even cause death. Practice safe testing, such as ensuring you know if - and when - the HV circuit is still 'live' or has a high voltage. In short: Warning - Electric Shock Hazard. With that out of the way, lets get on with testing...
- Plug in the resistor and trim pot to your breadboard
- Connect your multimeter
- Adjust the trim pot to its highest resistance
- Plug in the HV module to your breadboard
- Connect the resistor and trim pot between 'RADJ' and 'GND'
[NOTE1: This will be used to attain the right output voltage]
[NOTE2: I initially didn't have the correct resistor and trimpot at the start, so used equivalents.] - Connect a jumper lead between 'GND' and 'SHDN'
[NOTE1: This will turn on the HV module - SHDN=Shut Down. Logic 'High' shuts down the HV module.]
[NOTE2: I originally used a resistor, but there is no need.] - Connect a jumper lead to 'GND' and the Multimeter Negative lead
- Connect a jumper lead to 'HV' and the Multimeter Positive lead Select the correct voltage range that covers 170 volts
[NOTE: As good practice, you may want to select the maximum permissible voltage first, and work your way down.] - Connect your 12v power supply positive lead to the HV module 'IN'
- Connect your 12v power supply negative lead to the HV module 'GND'
- Stand back and turn on the 12v power supply
[NOTE: You should now see approx 170v displayed on the multimeter.] - Turn off the 12v power supply
- Observe the Multimeter and wait until the voltage has dropped below 50 volts before touching any part of the circuit
Fault-finding
If you get no reading, or get between 0 and 12 volts, firstly DO NOT immediately touch any part of the circuit. Turn off the 12v power supply, and EITHER get an appropriate jumper wire that is OK for 170v and short 'HV' to 'GND', OR wait AT LEAST one minute for the HV capacitors to discharge to a safe energy level. Then, as a suggestion, you can check/try the following...
- Is the 12v power supply healthy?
- Is 'SHDN' connected to 'GND'?
- Is 'RADJ' connected to 'GND'?
- Is the total trim pot resistance between 6.8k and 7.8k ohms?
- Is the multimeter properly connected?
- Is there a short anywhere?
Test the Nixies

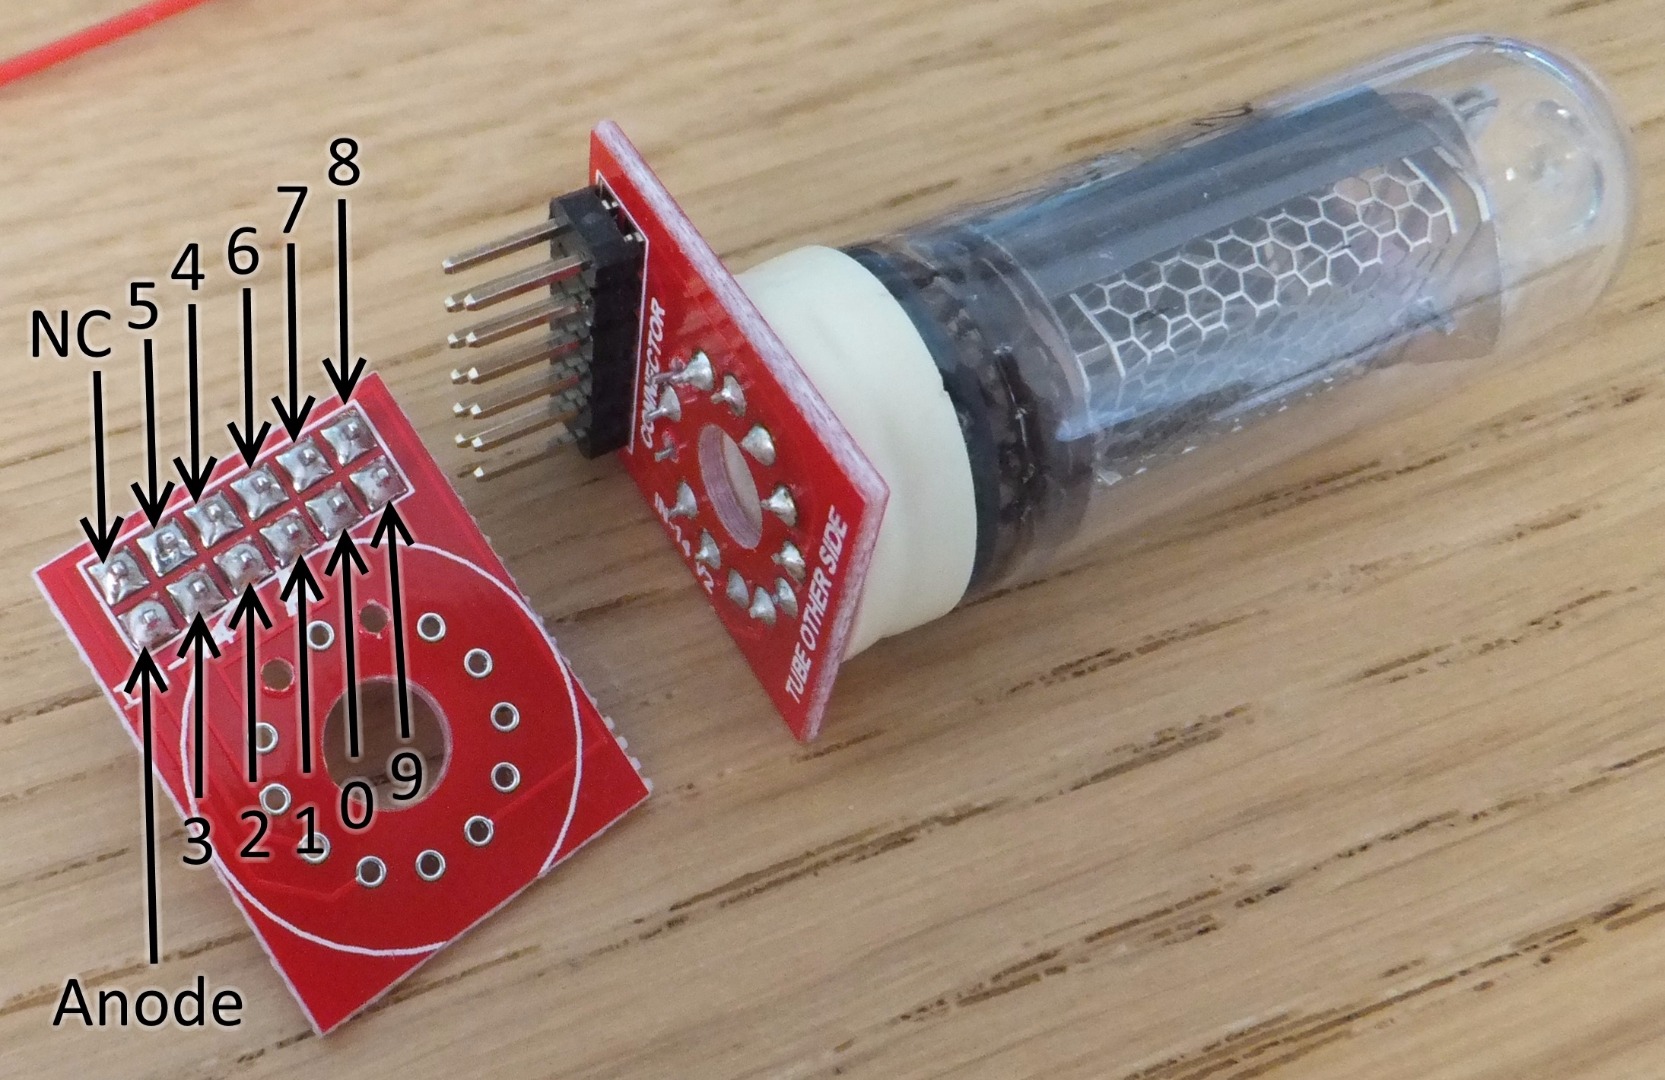


Once you have successfully tested the HV module and confirmed 170v, you can move onto testing the Nixies. Please note that Nixies operate in a similar manner to LEDs in that they have very little resistance once lit, and therefore MUST have a current-limiting resistor in series to control the current flow. Without a resistor, a Nixie will glow brighter than it should, get hot and 'burn out' very quickly.
[NOTE: By definition of fundamentally being a Diode, LEDs have no resistance at all in one direction of current - the direction in which the LED glows. They have an extremely high resistance in the reverse direction. As for Nixies, it is still important that you get the direction of current correct. In the correct direction, the number will glow. In the wrong direction, the grid/mesh surrounding the numbers will glow instead! Not very useful!]
- Connect one side of a 15k resistor to 'HV' on the breadboard
- Connect the other side of the 15k resistor to the Anode using a male-female jumper lead
- Connect Cathode '0' to 'GND' using a male-female jumper lead
- Perform your safety checks
- Turn on the 12v power supply
[NOTE: The Nixie tube '0' should now light up.] - Turn off the 12v power supply
- Wait until the HV circuit is below 50 volts
- Move the male-female jumper to the next numbered Cathode (e.g. 1, 2, 3 etc.)
- Repeat steps four to eight for all Cathode numbers (from zero through to nine)
Fault-finding
As a suggestion, you can check/try the following...
- Check fault-finding steps outlined in 'Testing the HV Module'
...additionally... - Is the HV module trimmed adequately to 'strike' the Neon in the Nixie Tube to glow?
[NOTE: Trimming the HV module to 170v should be adequate as a 'strike' voltage.]
Test the K155ID1 [Nixie Driver IC] and a Multiplexor


This test depends on you having completed the HV module test.
- Wire up the HV module as per the 'Testing the HV Module' section
- Plug the K155ID1 into the breadboard
- Wire up the K155ID1 as per the Fritzing breadboard diagram
- Wire up a Multiplexor as per the Fritzing breadboard diagram
- Set your multimeter to read a range that covers 170v
- Link the HV module's HV output to the Multiplexor input
- Link the Multiplexor HV output to the positive lead of your Multimeter
- Link the negative lead of your Multimeter to Cathode pin '0' [should be pin number 16] of the K155ID1 with a 15k resistor
- Link all the K155ID1's 'BCD' pins to ground [normally labeled 'A', 'D', 'B', 'C' and normally on pins 3, 4, 6 and 7 - make sure you check and get the order correct]
- Turn on the 5v and 12v power supply
- Check your Multimeter reading
[NOTE: There should be a ~170v reading on your Multimeter from Cathode Pin '0', seeing as you have signalled 'binary zero'] - Turn off the 5v and 12v power supply
- Wait for the high voltage to drop to a safe level below 50v
- Move BCD pin 'A' to Vcc [e.g. 5v], keep pins 'B', 'C' and 'D' connected to ground
- Turn on the 5v and 12v power supply
- Check your Multimeter reading
[NOTE: There should be a near-zero reading on your Multimeter, seeing as you have signalled 'binary one'] - Turn off the 5v and 12v power supply
- Wait for the high voltage to drop to a safe level below 50v - in this case it is guess work and I would recommend about a minute. YMMV!
- Move the negative lead of your Multimeter to Cathode pin '1' [should be pin number 15] of the K155ID1 with a 15k resistor
- Turn on the 5v and 12v power supply
- Check your Multimeter reading
[NOTE: There should be a ~170v reading on your Multimeter from Cathode Pin '0', seeing as you have signalled 'binary zero'] - Turn off the 5v and 12v power supply
- Wait for the high voltage to drop to a safe level below 50v
- Repeat steps 14-23 working your way from binary 0 to binary 9 and testing Cathode pins '0' to '9'
Set Up the Raspberry Pi

For this project, I used the 'Minibian' image as the OS, which is a lightweight/stripped-down version of Raspbian. Having lots of previous experience using the Arduino MCU platform, I am comfortable with using the 'Wiring' programming environment, which sits on top of C/C++. As a result, I decided that WiringPi would be a good option, so will show you how to set up this environment.
- Download Minibian image
- Write the image to a Micro SD card
[Guides for Windows, Linux, Mac] - Plug the SD card into your Raspberry Pi
- Connect Network, Monitor, Keyboard and Mouse Power on the Raspberry Pi
- Log in
[user name: root, password: raspberry] - Follow the install guide available at the Nixie-Driver-HAT repository
The install guide will take you through the process of expanding the SD card partition, updating the Raspberry Pi, and installing the WiringPi library.
Test the Raspberry Pi With T-Cobbler and LEDs

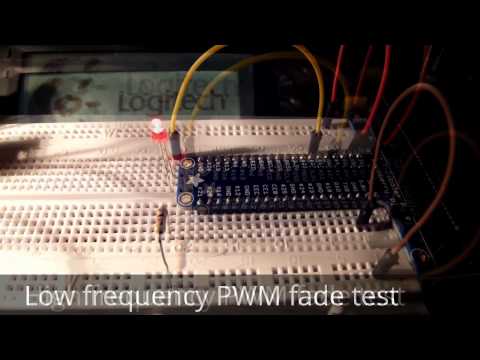

- Plug the T-Cobbler into your breadboard
- Wire up a Red LED with resistor [say 1k ohm] between WiringPi pin '0' and Ground
- Get the LED blinker test source code from the Nixie-Driver-HAT repository
- Compile the LED blinker source code
- Run the LED blinker binary
[NOTE: You should now see the LED blink] - Wire five more Red LEDs, each with a resistor, between WiringPi pins '1', '2', '3', '4' and '5' and Ground
- Wire five Green LEDs, each with a resistor, between WiringPi pins '21', '22', '23' and '24' and Ground
- Get the Nixie DoT library source code from the Nixie-Driver-HAT repository
- Compile the Nixie DoT library source code
- Run the Nixie DoT binary
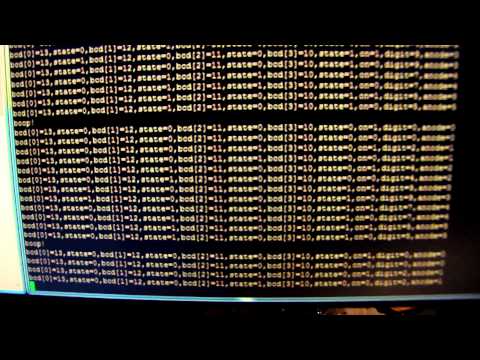
[NOTE: The source code defaults should be set correctly, and you should see the Reds flashing in sequence, whilst the Greens count upwards from binary '0' to binary '5']
Test the Raspberry Pi With T-Cobbler and a Nixie Tube


- Wire up a Nixie Multiplexor next to the T-Cobbler
- Wire up the basics of the K155ID1 next to the Multiplexor [Vcc, Ground, Filter Capacitor]
- Link up WiringPi pin '0' via the 10M ohm resistor to the 'Signal in' of the MPSA42 transistor
- Link up the [output] of the MPSA92 transistor via a 15k ohm resistor to the Anode on a Nixie Tube
- Wire the Nixie Tube Cathode pins to the corresponding numbered Cathode pins on the K155ID1 driver chip
- Link WiringPi pins '10', '11', '12' and '13' to the BCD pins ['A', 'B', 'C, and 'D'] making sure that they are in the correct order
- Plug the HV module into the breadboard next to the K155ID1
- Wire up the HV module same as in the earlier 'Testing the HV Module' section
- Connect an additional Jumper Wire from the HV pin to the 'HV in' of the Multiplexor
- Turn on the 12v and 5v power supply
[NOTE: HV module will be live and Raspberry Pi will boot. Be careful to observe HV on your Multimeter from this point] - Get the Nixie DoT library source code from Git Hub
- Compile the Nixie DoT library source code
- Run the Nixie DoT binary
[NOTE: The source code defaults should be set correctly, and you should see the Nixie Tube flashing a '0'] - Stop the code running by pressing Ctrl-C
- Type 'poweroff' to shut down the Raspberyy Pi
- Turn of the 12v and 5v power supply
- Wait for HV to drop to a safe level, typically below 50 volts
- Move the Multiplexor signal pin from WiringPi '0' to WiringPi '1'
- Repeat steps 10, 13...18 observing the Nixie displaying subsequent numbers 1...5 and then moving the Multiplexor signal pin to 2...5.
Test the Neon Bulbs


- Wire up a Neon Multiplexor next to the T-Cobbler
- Link up WiringPi pin '0' via the 10M ohm resistor to the 'Signal in' of the MPSA42 transistor
- Wire up the 'Anode' side of five Neons from the Multiplexor via a 390k ohm resistor
- Wire up the K155ID1 next to the Multiplexor
- Wire up the 'Cathode' side of the five Neons to the corresponding numbered Cathode pins on the K155ID1 driver chip
- Link WiringPi pins '10', '11', '12' and '13' to the BCD pins ['A', 'B', 'C, and 'D'] making sure that they are in the correct order
- Plug the HV module into the breadboard next to the K155ID1
- Wire up the HV module same as in the earlier 'Testing the HV Module' section
- Connect an additional Jumper Wire from the HV pin to the 'HV in' of the Multiplexor
- Turn on the 12v and 5v power supply
[NOTE: HV module will be live and Raspberry Pi will boot. Be careful to observe HV on your Multimeter from this point] - Get the Nixie DoT library source code from Git Hub
- Compile the Nixie DoT library source code
- Run the Nixie DoT binary
[NOTE: The source code defaults should be set correctly, and you should see the first Neon flashing] - Stop the code running by pressing Ctrl-C
- Type 'poweroff' to shut down the Raspberry Pi
- Turn of the 12v and 5v power supply
- Wait for HV to drop to a safe level, typically below 50 volts
- Move the Multiplexor signal pin from WiringPi '0' to WiringPi '1'
- Repeat steps 10, 13...18 observing the subsequent Neons flashing, and then moving the Multiplexor signal pin to 2...5.
Cut Headers to Size


I had to do this a quite a few times during this build, so thought I would write a quick guide on how I went about making Headers the right length. For Male headers, this is easy - you just snap the Header strip to the desired length. For Female headers, it is a bit more involved...
- Saw down the middle of the n+1th pinhole
[E.g. if you need a row of 4 pins, cut down the middle of the fifth pinhole. This sacrifice is necessary/unavoidable.] - Lay down sandpaper on a flat surface
- Hold the header with the rough edge square on to the sandpaper
- Firmly sand the header around in circles
- Frequently check progress
- Stop when all ridges have been sanded out
- Finish off/square the surface with light strokes of a Warding File
NOTE: You may need to sand off more if this header is going to be soldered adjacent to another header, if the intention is to extent a header.
Solder the Logic Board


To get easy access to the GPIO, I am using an Adafruit Perma-Proto Pi HAT (and this hardware was provided as part of the Build Night). Seeing as it is not big enough to accommodate all of the electronics I am using in my project, I have ended up stacking boards in layers, where each board is dedicated to a specific purpose. In this (base) 'layer 1' we have the K155ID1 Nixie Driver IC, which takes input logic from the Raspberry Pi and in turn switches on the appropriate Cathode.
- Solder the GPIO Pin Header onto the underside of the Perma-Proto PCB
[NOTE: Initially solder only top-left and bottom-right corner pins of the Header] - Whilst applying gentle pressure to the Pin Header, re-melt the solder on each corner
[This will bring the Pin Header neatly flush and level with the PCB] - Add in and solder the wires
[I find bending the wire-ends on the underside helps to keep them in place whilst adding all the wires and soldering. Ensure you bend them in a direction that doesn't cause a short-circuit.] - Solder the 16-pin DIP socket using the same method as for the GPIO Pin Header
- Solder the 15-way and 2x 5-way Female Headers also using the same method as for the GPIO Pin Header
- Insert the K155ID1 to the DIP socket
- Solder in the 'decoupling' capacitor accross Vcc and Ground
[NOTE: I intended to solder this capacitor underneath the DIP socket, but forgot! You may try this and see if it will fit - and should look a lot neater.]
Solder the Multiplexer Board

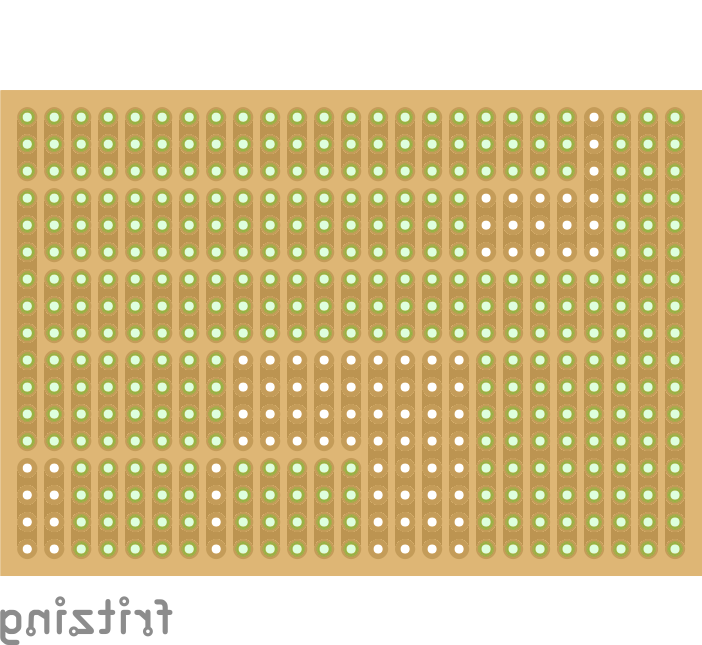


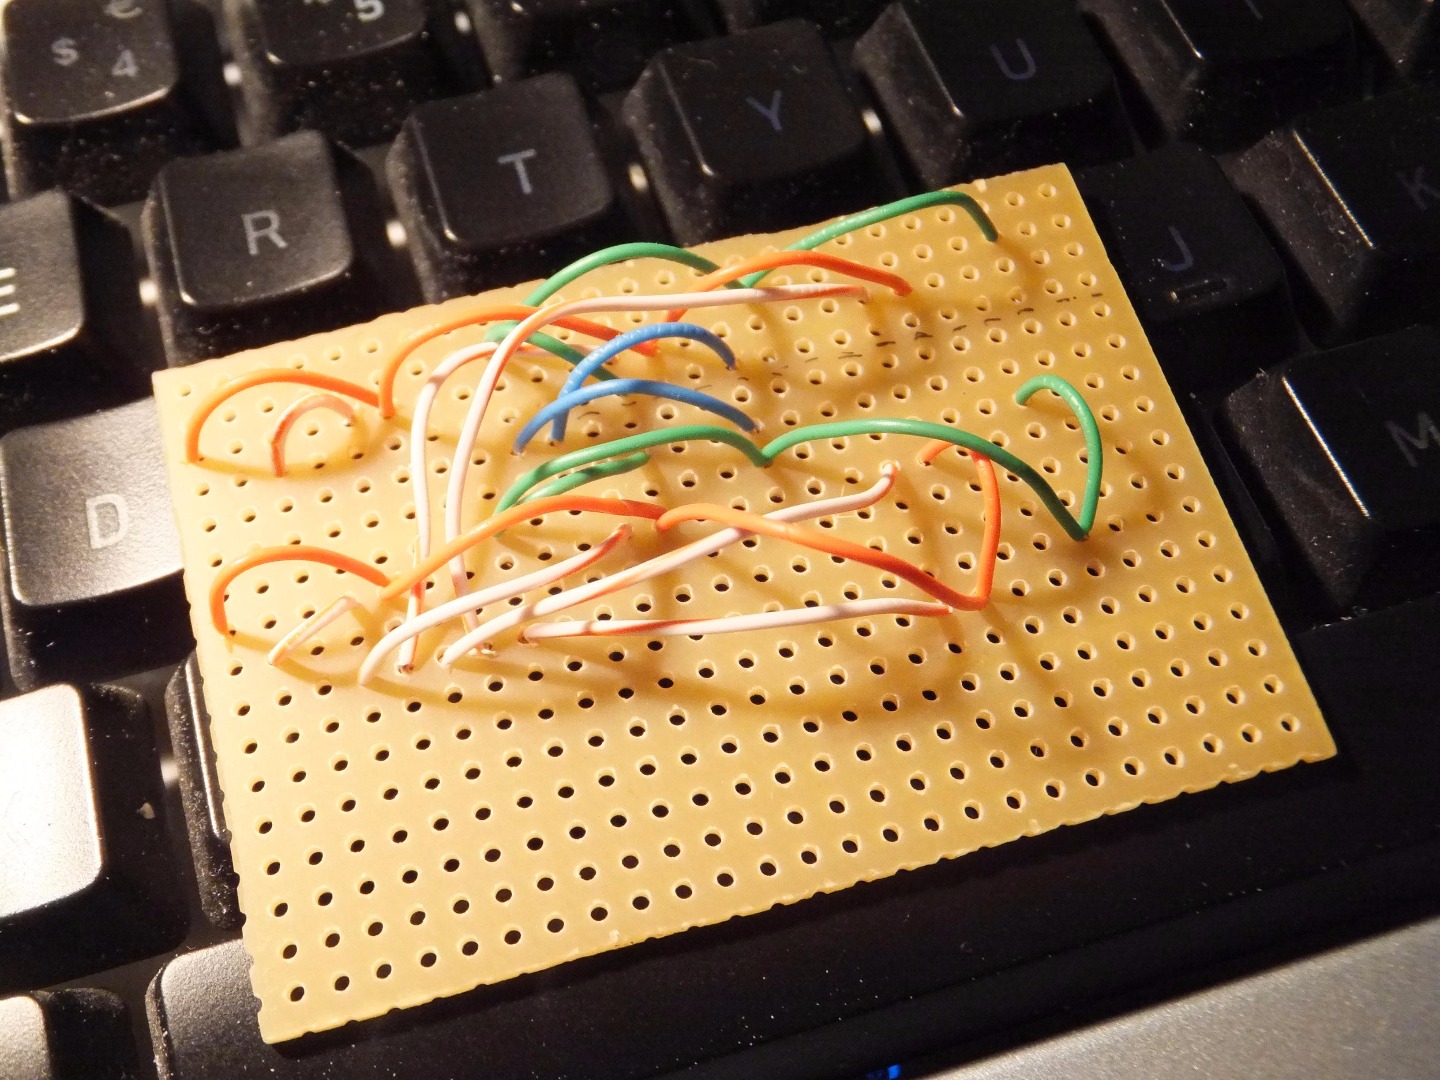


This board is 'layer 2' of the stack, where each Nixie (and Neon) is 'addressed' via the Anode, in turn, with its appropriate Cathode selected to display a digit/symbol/character. Here you will need to do a bit of sawing and engraving/scraping to prepare the strip-board for soldering the wires and components.
HEALTH NOTE: I strongly recomment you wear PPE [Personal Protective Equipment] such as Goggles and Face Mask when cutting and engraving Strip Board. The dust that comes off this material is definitely NOT compatible with your lungs. You have one set of lungs and it would be nice that they last you one whole lifetime :)
- Mark out your strip board for cutting to the correct size
- Cut your strip board to size
- Mark where you need to cut the copper tracks using a Permanent Sharpie Marker
- Use a rotary tool with a small engraving bit to cut the copper tracks
- Give the copper side of the strip board a light sanding to remove the top layer of copper oxidisation
[This will help the solder flow onto the copper strip a little better.] - Add all the wires
[Again, I recommend bending the wire-ends to help keep them in place. Avoid bending the ends in a direction that would cause a short-circuit.] - Solder all the wires
- Snip off the excess wire-ends to neaten the underside and prevent future potential short-circuits
- Add all the headers
- Solder one pin at each end of each header
- Apply gentle pressure and re-melt these initial solder joints to straighten-up the headers
- Solder the rest of the header pins
- Continuity-test all parts of the circuit for short-circuits and open-loops
- Add in the rest of the components [transistors and resistors], re-melting solder joints where necessary to straighten and reseat
- Continuity-test all parts of the circuit one more time for short-circuits and open-loops
Continuity Testing
I personally can't stress enough how important it is to perform a continuity test at various stages of circuit soldering. I have recently blown-up a Teensy v3.1 by an over-sight in continuity testing after adding a 12v power supply header near to the chip on a strip board. There was a small Solder Bridge from the +12v line over to a signalling pin on the Teensy, which resulted in instant Teensy death. A £25 oversight and mistake that is a lesson learned!
Solder the Power Board
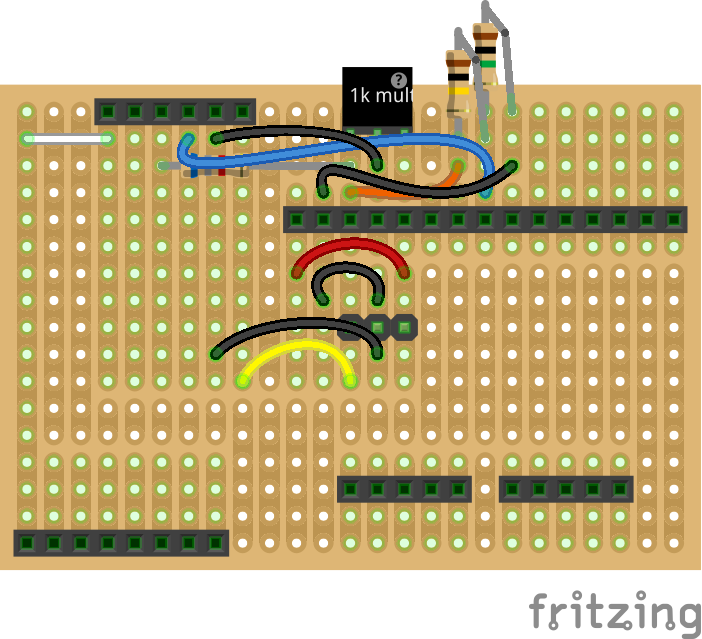


This board is 'layer 3' of the stack, where 5v and 12v power supplies are connected and 12v is boosted up to 170v via the DC-DC HV boost module. As you did in soldering the Multiplexer Board, you will need to do a bit of sawing and engraving/scraping to prepare the strip-board for soldering the wires and components.
HEALTH NOTE: As in the previous step [Solder the Multiplexer Board], I recommend you wear PPE when preparing strip board.
Same instructions here too, as detailed in the previous step [Solder the Multiplexer Board]...
- Mark out your strip board for cutting to the correct size
- Cut your strip board to size
- Mark where you need to cut the copper tracks using a Permanent Sharpie Marker
- Use a rotary tool with a small engraving bit to cut the copper tracks
- Give the copper side of the strip board a light sanding to remove the top layer of copper oxidisation
[This will help the solder flow onto the copper strip a little better.] - Add all the wires
[Again, I recommend bending the wire-ends to help keep them in place. Avoid bending the ends in a direction that would cause a short-circuit.] - Solder all the wires
- Snip off the excess wire-ends to neaten the underside and prevent future potential short-circuits
- Add all the headers
- Solder one pin at each end of each header
- Apply gentle pressure and re-melt these initial solder joints to straighten-up the headers
- Solder the rest of the header pins
- Continuity-test all parts of the circuit for short-circuits and open-loops
- Add in the rest of the components [transistors and resistors], re-melting solder joints where necessary to straighten and reseat
- Continuity-test all parts of the circuit one more time for short-circuits and open-loops
Solder the Display Board


Next is the Display Board, which is a separate circuit board that is not part of the stack. Connections will be made from the headers on the Power Board over to the Display Board via either Male-Female jumper leads OR perhaps using modified Ribbon Connectors. As you did in soldering the Multiplexer Board and Power Boards, you will need to do a bit of sawing and engraving/scraping to prepare the strip-board for soldering the wires and components.
HEALTH NOTE: As in the previous steps ['Solder the Multiplexer Board' and 'Solder the Power Board'], I recommend you wear PPE when preparing strip board.
Pretty much the same instructions here too, as detailed in the previous steps ['Solder the Multiplexer Board' and 'Solder the Power Board']...
- Mark out your strip board for cutting to the correct size
- Cut your strip board to size
- Mark where you need to cut the copper tracks using a Permanent Sharpie Marker
- Use a rotary tool with a small engraving bit to cut the copper tracks
- Give the copper side of the strip board a light sanding to remove the top layer of copper oxidisation
[This will help the solder flow onto the copper strip a little better.] - Add all the wires
[Again, I recommend bending the wire-ends to help keep them in place. Avoid bending the ends in a direction that would cause a short-circuit.] - Solder all the wires
- Snip off the excess wire-ends to neaten the underside and prevent future potential short-circuits
- Add all the headers
- Solder one pin at each end of each header
- Apply gentle pressure and re-melt these initial solder joints to straighten-up the headers
- Solder the rest of the header pins
- Continuity-test all parts of the circuit for short-circuits and open-loops
- Add in the rest of the components [Neon bulbs], re-melting solder joints where necessary to straighten and reseat
- Continuity-test all parts of the circuit one more time for short-circuits and open-loops
Summary


That's Not All Folks!
This is really just the start of this project; I'm yet to write other bits of software and one or more web pages for configuration. I also plan on making a nice laser-cut box to house all the components. I had to keep the goal realistic in order to meet a deadline for the Adafruit Perma-Proto Pi HAT build night. I think I might even be outside of that deadline now, but I need to throttle it back a bit and maybe even take a break from this project to keep my mind fresh.
Anyway, I certainly hope you have enjoyed reading this Instructable and consider making a Nixie Display based either partly or wholly on this guide. I've certainly had a lot of fun in the process and have enjoyed seeing all the sections - research, software, testing, hardware - all coming together and working mostly how I wanted.
Thanks and bye for now :)
PS...
If you want to keep a closer eye on my prgress, please head on over to my Nixie Display of Things Project Log.