NutriSense - Automated Food Diary
by _Marcel_ in Circuits > Arduino
1471 Views, 10 Favorites, 0 Comments
NutriSense - Automated Food Diary

People who watch their diet may keep a food diary. They write down what they eat throughout the day to gain insight into things like their calorie intake. But that's a lot of work. Even with a "handy" app, it's a cumbersome administrative chore.
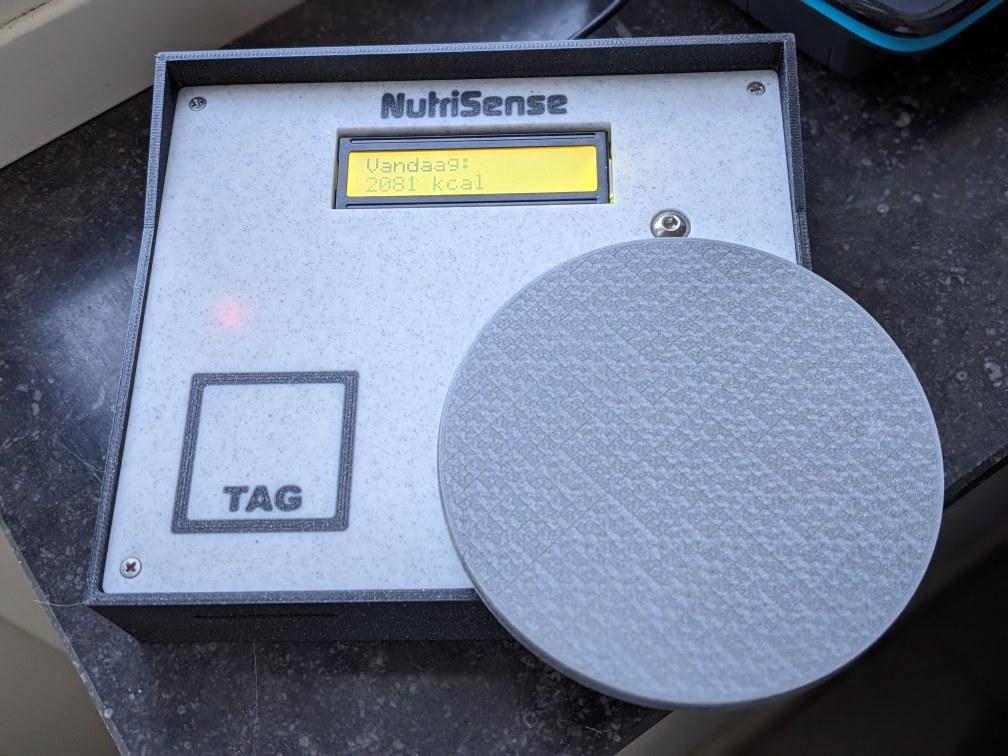
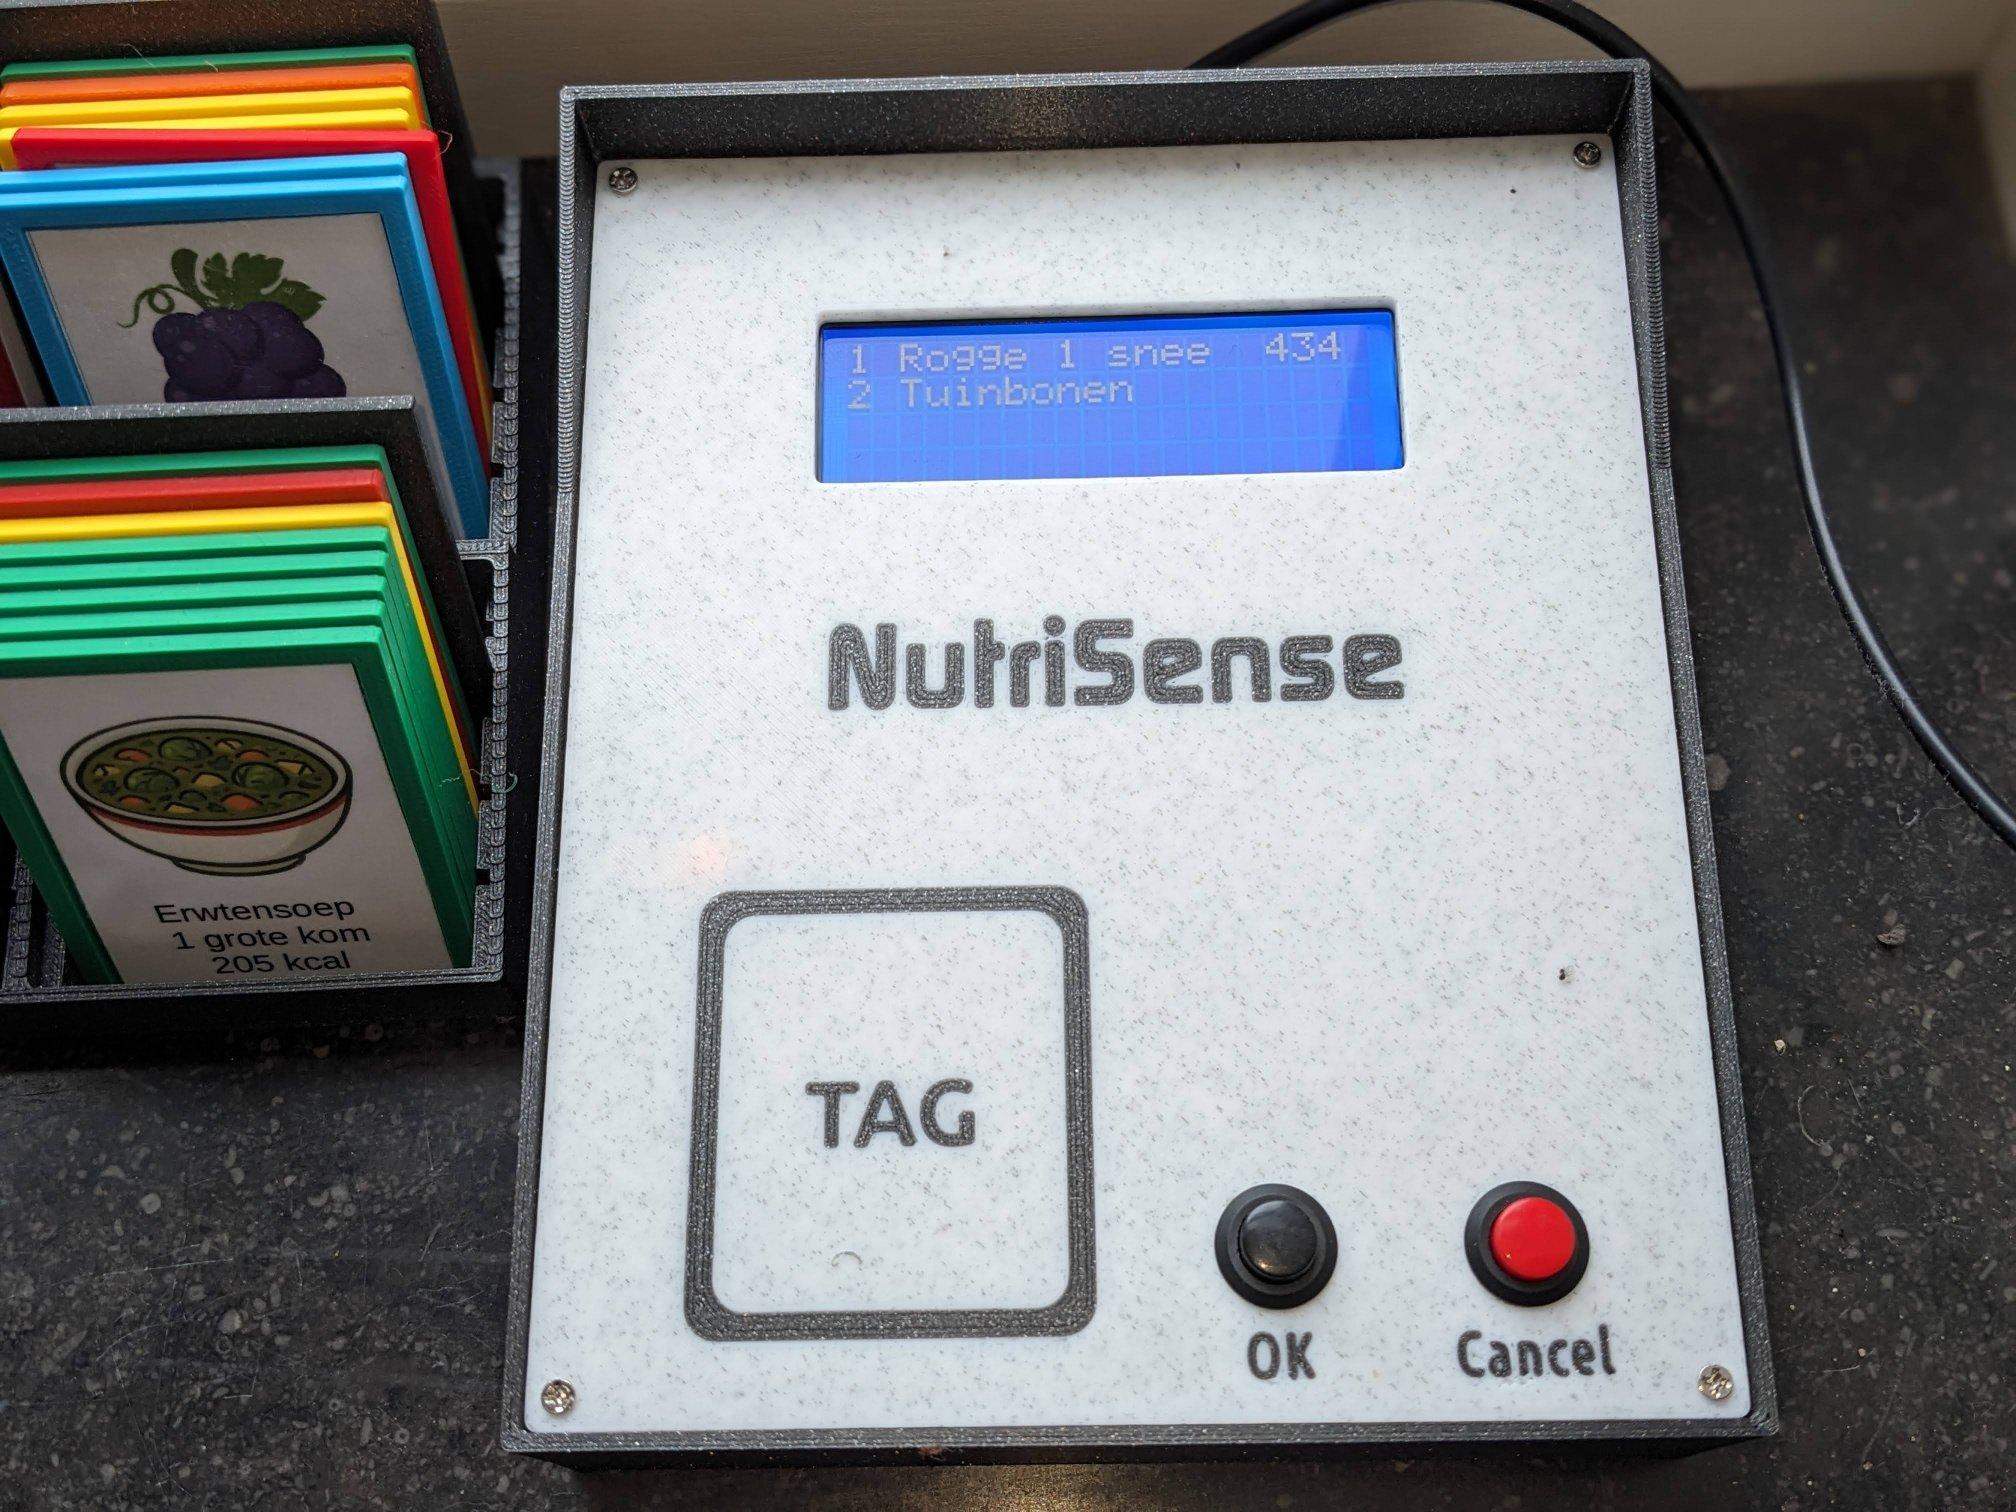
The NutriSense is a fully automated calory tracker. All you have to do is hold an RFID tag in front of the NutriSense reader and it will record the food including calories, proteins, etc.
Example scenario
Prepare your meal. For example: some vegetables and boiled potatoes. Place your plate on the NutriSense weighing platform, then scan the "Vegetables and Potato" tag. Bleep! Done. Everything is logged instantly, and you can enjoy your healthy meal without delay.
Supplies
Electronics and Software
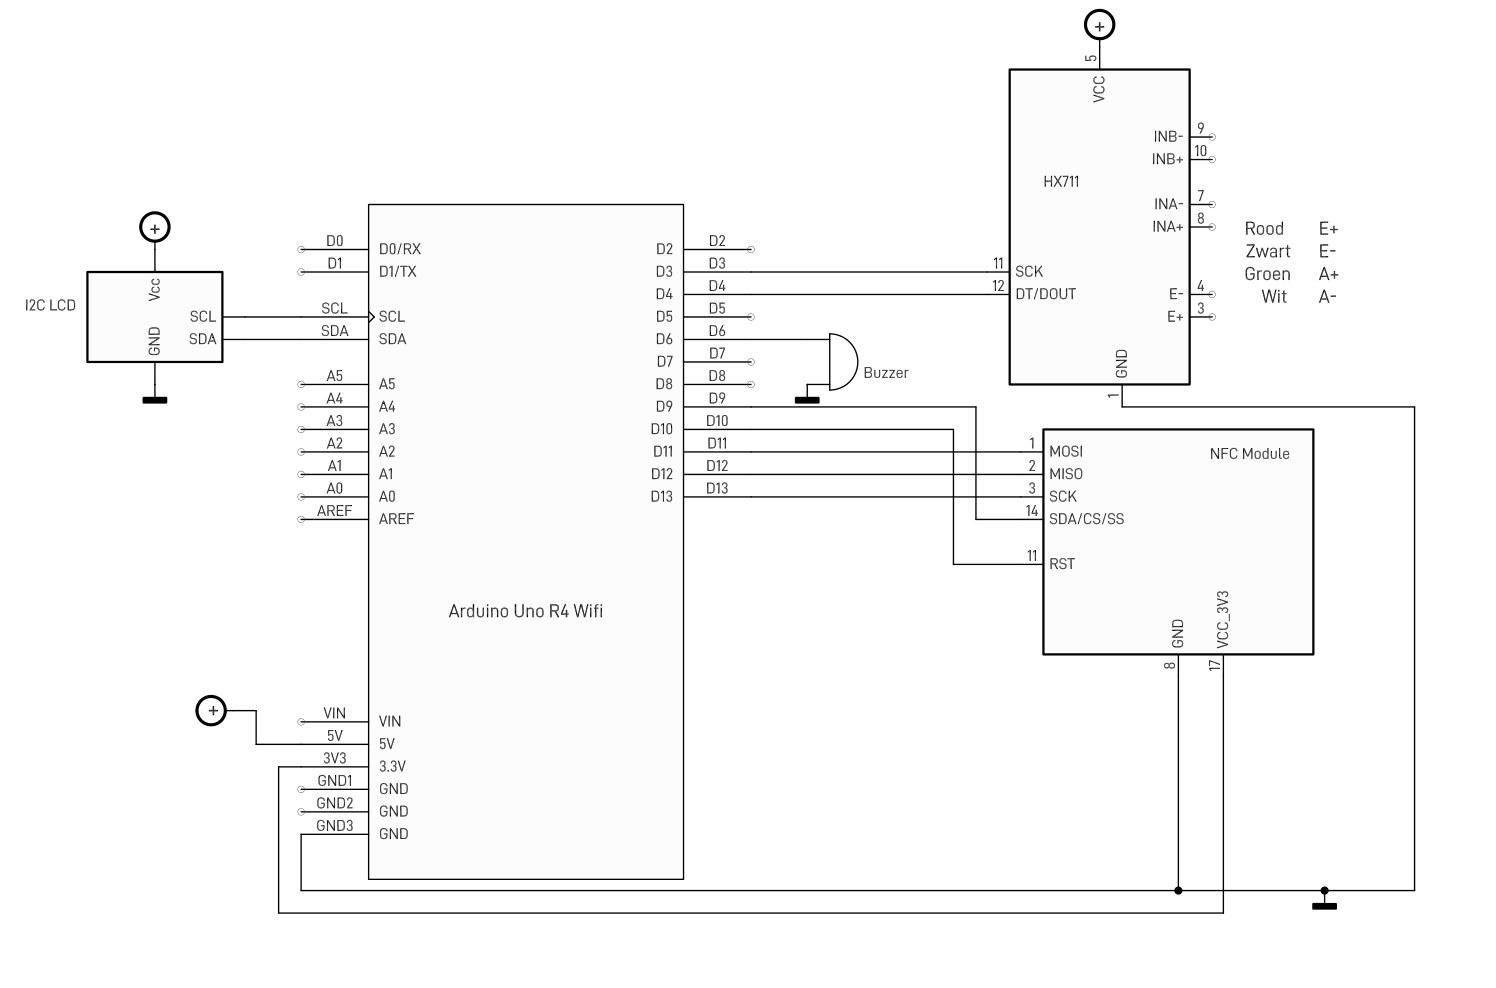

Connect all modules together with wires, see the schematic diagram! The schematic shows that both the display and the RFID tag reader use pins D11 and D13 on the Arduino. This solution isn't often seen online, even though it's the standard approach for devices with SPI control. It works perfectly!
The firmware for the Arduino can be downloaded here. Make sure you enter the credentials from your Wifi before uploadint the sketch. You will need to host a webserver somewhere in your netwerk and put the PHP website and the SQLite database on it. This zipfile contains the PHP files (webserver) and an example SQLite database.
Database
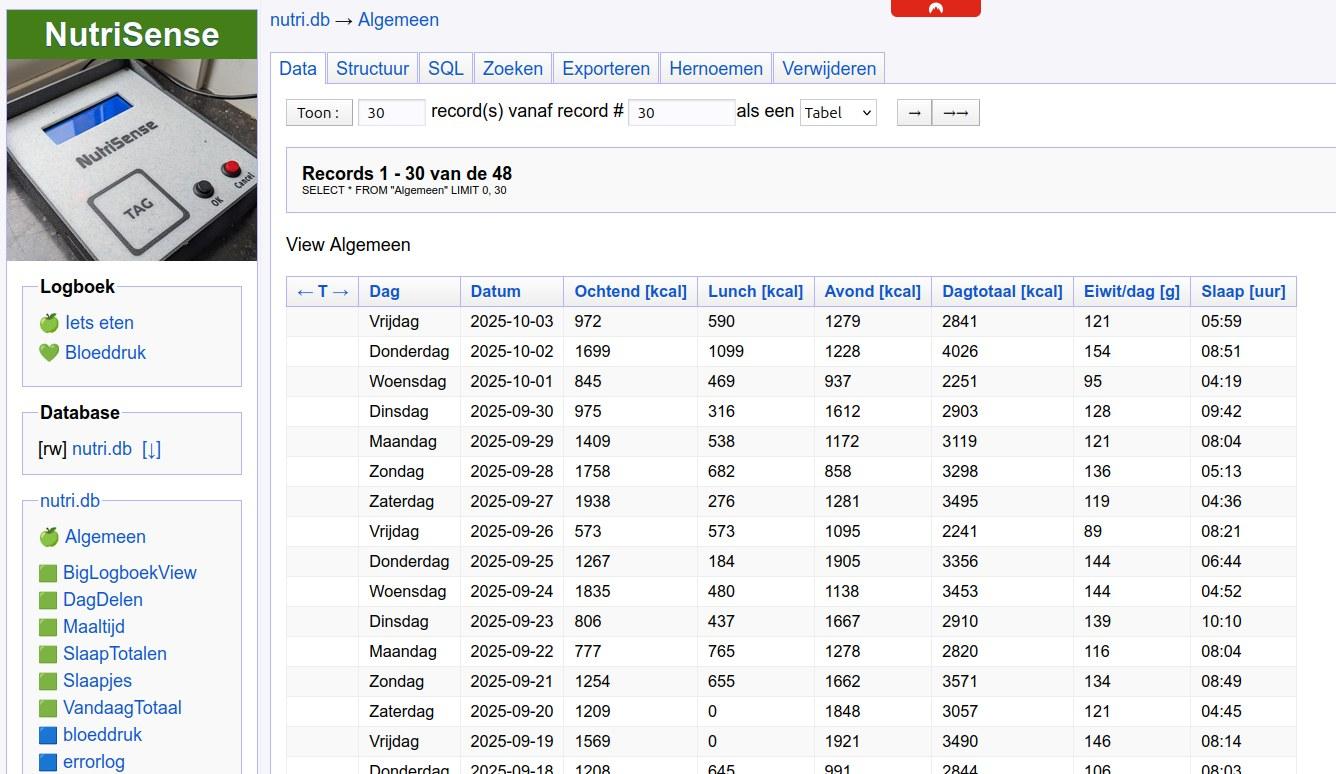
Both the product list (tags) and the food log are stored in a SQLite database. On a locally hosted server at home, I run an Apache web server with a PHP application that handles everything. I also added the phpliteAdmin app so you can view, edit, and analyze the data in the database. My database has been translated into Dutch but you can download the tools in English here: https://www.phpliteadmin.org/
The database shows various analytics like daily calory intake, calory intake per part of the day, protein, the food of your last meal, etc.
Mechanics
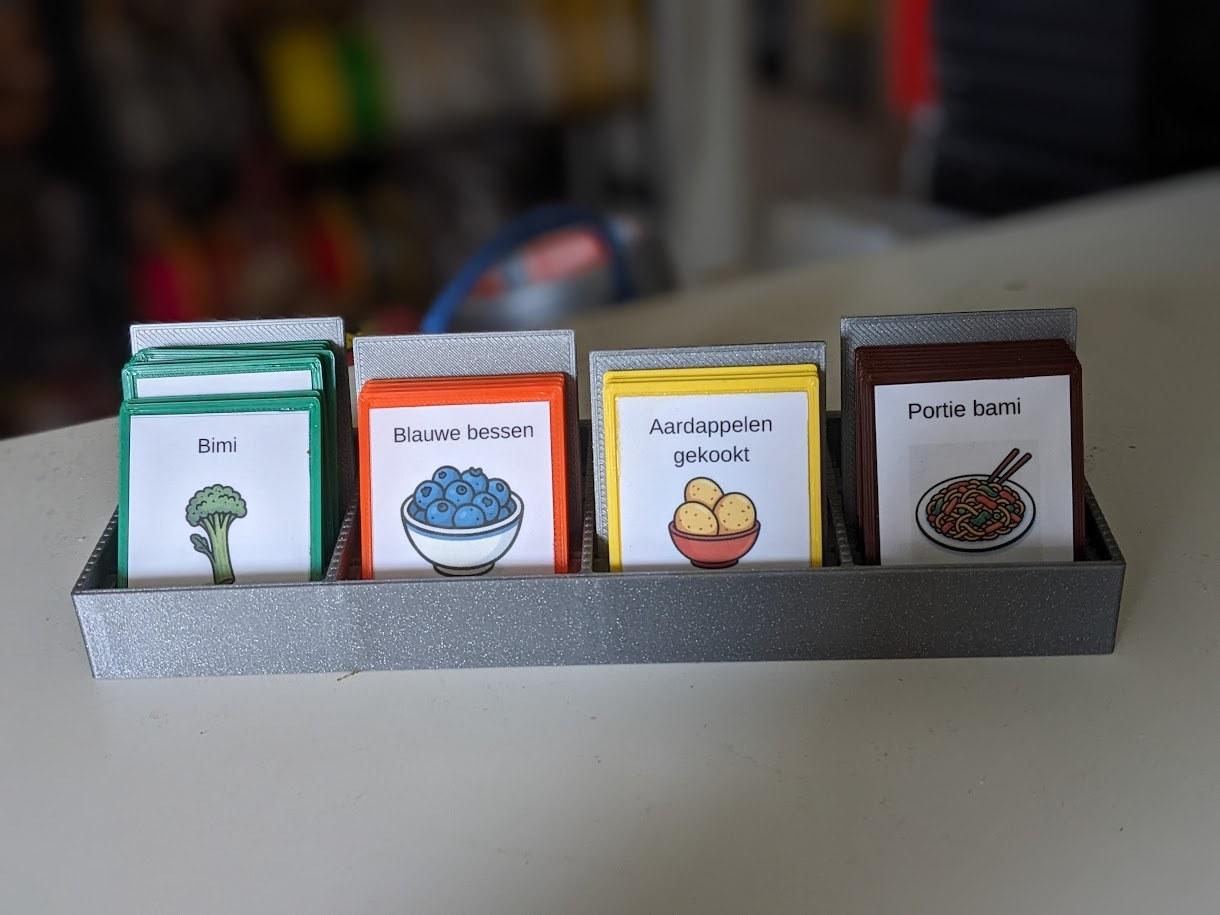
The 3d print file (case) are in the zip file. The tags are equipped with RFID stickers. There's no need to write data in the stickers because they all already have a tag ID from the factory.
Print the tags with the 3D printer, put a sticker on it and provide the tag with an image.
All electronics go in a 3D printed case. The load cell is attached to the lid with two M4 screws.
Conclusion
It was a fun project, especially because of the large number of different modules, all controlled by a single Arduino sketch. It did take a few iterations, though. Also, everything got quite warm inside, which has been resolved by adding simple ventilation holes. All the electronics are mounted on the lid, eliminating the need to run wires from the panel to the case.
The NutriSense has been evolved quite a lot. For example, while using it, I discovered that my portion sizes are always the same. So the scale was no longer necessary. You can find newer versions of the NutriSense on my website (translation).
Enjoy your meal! And with more pleasure, because you never have to watch your calories again: it happens automatically.