Oak and Walnut Trestle Table
by olliepgh in Workshop > Furniture
10995 Views, 179 Favorites, 0 Comments
Oak and Walnut Trestle Table

How we built an oak and walnut trestle table.
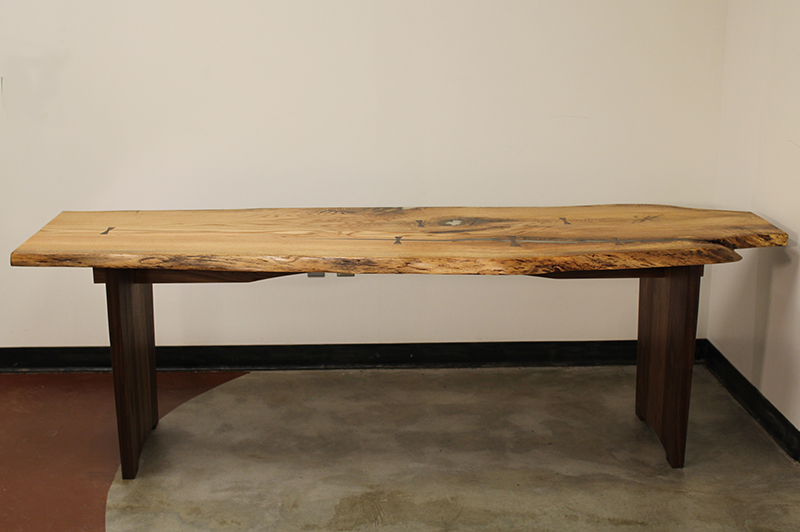
Here's the finished piece first so you know what you're making. This kind of woodworking is beginner-to-intermediate. I know that doesn't look like it's true, but there's really nothing tricky here. We did use specialized equipment because we have access to it, but it could be done with simpler tools.
Start With a Snowy Day in Pittsburgh, Choose Your Slab


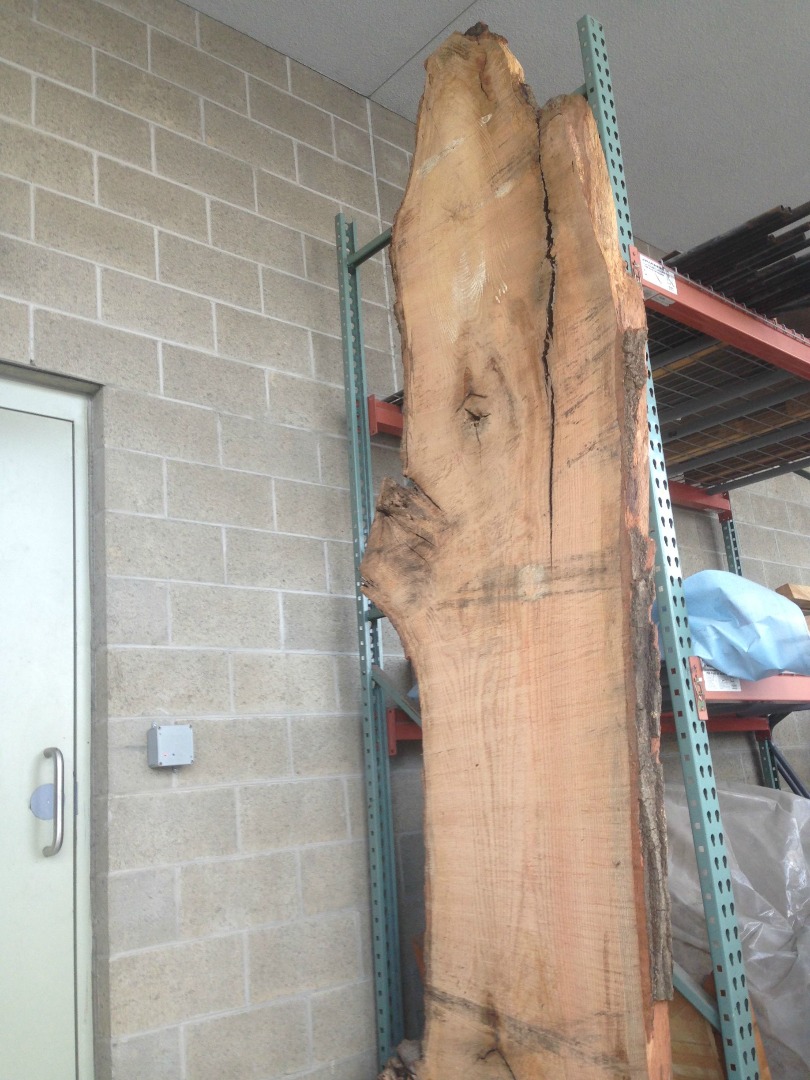
We went to Urban Tree to get the oak slab. We didn't really know what we were getting, but we dug through the stacks with Nate, the co-owner, until we found the right piece for us. This step may not be so easy for you, we essentially have a "slab store" here. But, if you rummage through Craigslist and maybe nearby lumber mills you can find a similar piece.
Our pin oak slab was 11 feet long when we got it and 3 inches thick. It was probably around 350 pounds just by bicep estimation. It will eventually be cut down to around 8 feet and 2 inches thick.
Rough Cutting Ends and Pieces and CNC Planing


The slab comes pretty rough. It's been cut down, milled, and kiln dried and then left to sit in the stacks for a few months or a year when we finally pulled it out. This meant cutting the rough ends and pieces off and planing it on the CNC router table.
A circular saw wouldn't make it all the way through the thickness of the whole thing so we had to use a saw-zall in some places. We got it down to around eight and a half feet long at this stage. At that length it will fit on the CNC table router to be planed with just a little finesse.
We CNC routed it using a 2" planing bit similar to this one, only a bit smaller. The best finish we found while varying feeds and speeds was 14,500 RPM, 250 ipm, with a 20% stepover, and a 1/16th DOC. This could be made a little more or less aggressive depending on your router table or personal preferences.
After planing it down, we stood it up in the warm shop for a week and a half to let the fibers settle, flex, cup, and twist before taking a final pass on both sides. The slab ended up at around 2" after all this.
Acquire Walnut, Joint, and Plane

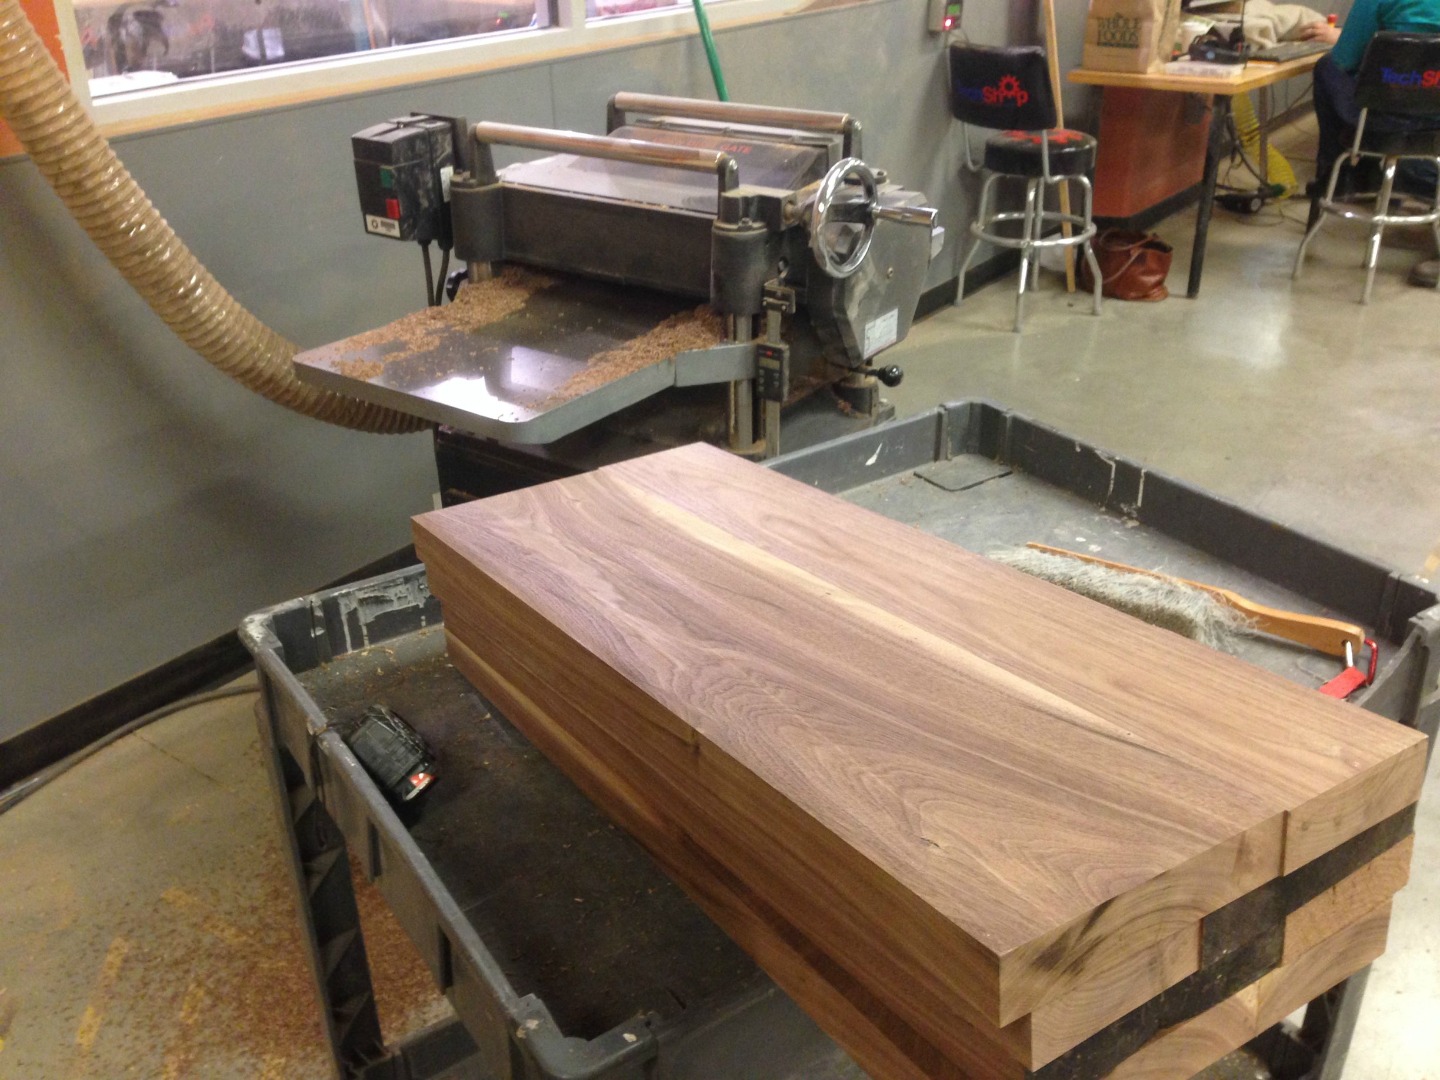

We got about 40 board feet of walnut at about $7 a board foot from Mars Lumber in Mars, PA. After that we set about jointing, planing, and cutting the pieces down to size. We got enough walnut to make 25" by 28" inch legs at 8/4. It planed down to about 1 5/8" final thickness. We also got a six-foot runner that we planed down from 8/4 to 1 5/8" by 4" tall.
Once everything is jointed and planed, you can look to see what interesting patterns arrive in the grain structure before gluing up. The gluing up is not incredibly hard. If you've not glued any wood up before, I suggest starting with an endgrain cutting board. Before this, I did some endgrain cutting boards to get comfortable with the equipment and process. Lots of tutorials exist for that project (1, 2, 3).
We glued the legs up in halves. So, by the end of this step we had 4 halves of two large legs. Which we'll see in a minute.
CNC Cut Bowites, Epoxy Cracks


Once the slab was settled we put it back on the CNC router table to cut in the bowties. There are two bowtie sizes ins this table, 4-inch and 6-inch. We cut 10 bowties total into the slab. Then in the scrap walnut we cut the bowtie insert profiles using the same software file on the CNC again. We cut 12 walnut bowtie inserts just in case we busted two. We actually busted one so that was a good piece of planning on our part.
The second photo here you can see Kip gluing the walnut into the slab bowtie holes. And in the final pictures you can see we started filling all the cracks with epoxy.
To fill the cracks with epoxy, you tape one whole side of the table and dribble epoxy in. After it sets overnight you can flip the table, tape the other side and glue the cracks on the bottom. In total we had three flips and five nights of filling cracks with epoxy. This is a long step. Don't plan to get this done in one night. You don't want to fill each crack with epoxy all the way up because you'll miss a lot of cracks and it'll bubble and might split or not cure well. Fill each crack in three layers --bottom layer, let stand one night, middle layer, let stand one night, fill up to the top let stand one night. More of that can be found in this Instructable. (And yes,we used glow-in-the-dark powder for one of the layers.)
Back on the Router Table for a Finishing Pass

After the slab settled, we inserted the bowties and epoxied the cracks, we put it back on the CNC to take a finishing pass on both sides. This left the slab at its final thickness of just over 1 3/4", about 1 7/8" or so.
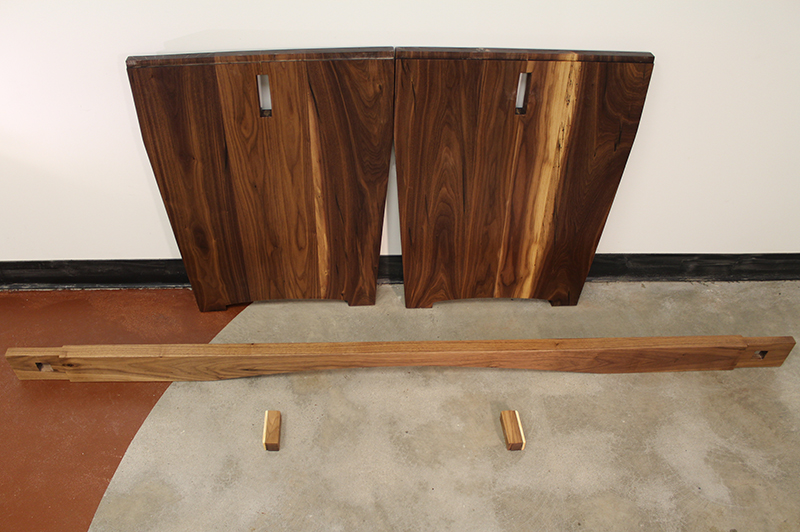
Dimension Walnut and Cut to Shape


We then cut an arch into the runner with the bandsaw and cut mortises into the leg halves. The runner was arched so no one would bang their knees on it when they scooted in.
The legs were cut using a dado stack on a table saw and the jig system you see in photo two above. The system consists of two stops (one stop at the top edge, and one at the bottom) and the crosscut sled. We dado cut the halves of the legs, lined them up, and glued them once again. While we had the dado in the saw, we cut the tenons along the top of the legs to fit into mortises beneath the tabletop.
Cut in Mortises for the Legs to Fit In

We flipped the top upside down and placed the assembled base on it upside down as well. When we got it straight (as straight as you can on a live-edge slab) and even, we marked the spots for the leg tenons to fit into the underside of the top. Then we put the slab back on the CNC router table (upside down) and cut the slots in.
Start to Finish


We initially tried using hand planes to smooth the top, legs, and runner. The grain was a bit to wild and woolly on each of the pieces for that to be effective. I eventually gave up the hand planes for a scraper, then sanded to 220. Along the way, I splashed some mineral spirits on the pieces to see how the grain would pop.
For the finish I used General Finishes Seal-a-Cell and General Finishes Arm-R-Seal. Follow instructions on the can for best results.
Assemble
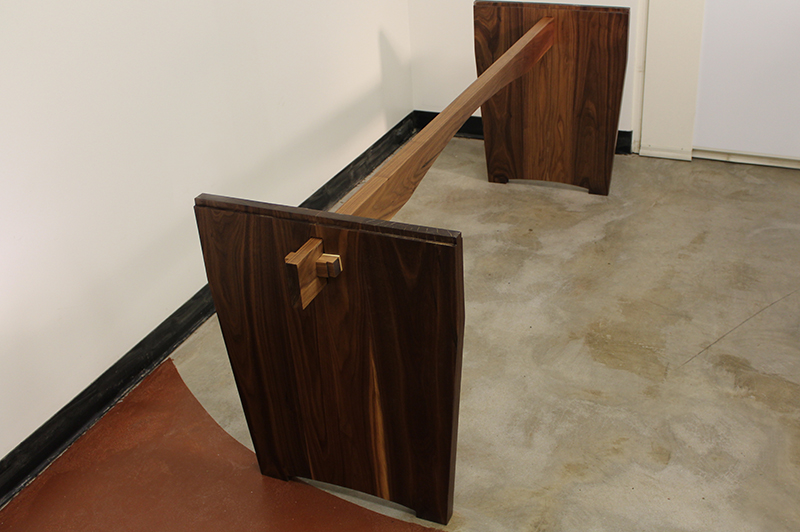


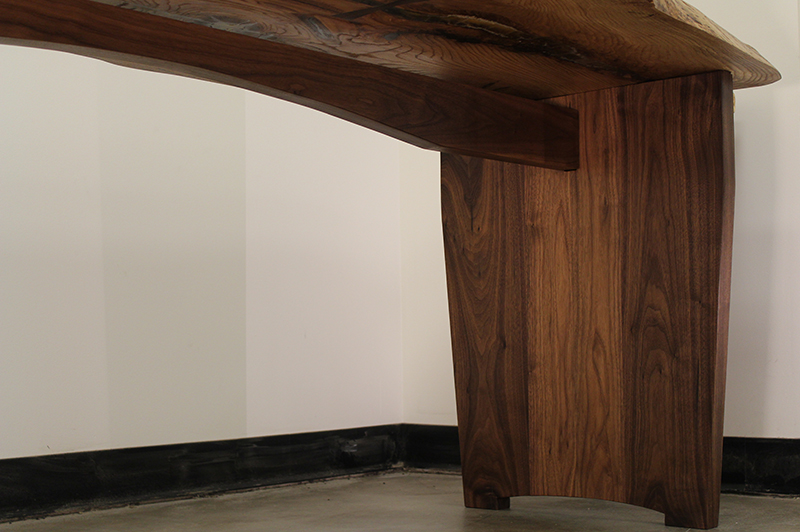

You can see assembly here. The wedges hold everything together with tension. The slab sits on the leg and the leg tenons sit in the mortis slots on the underneath.
Take Glamour Shots


We got really lucky with this slab and really the pieces of walnut as well. When you get rough lumber, there's no way to tell what the grain and features will look like when done. We got some burl and spalting in the oak. And we got some nice creamy streaks of sapwood in the walnut.
Thanks for reading my Instructable.