Obstacle Detection Using 4Duino
by 4D Makers in Circuits > Arduino
592 Views, 8 Favorites, 0 Comments
Obstacle Detection Using 4Duino
In this project, we will use several ultrasonic sensors to create a robot car with obstacle detection feature. The sensors will help us estimate the distance of the car from the nearby obstacles. Thus allowing us to create routines that we can execute when the car is about to hit the obstacle while moving. If you want to know more on how an ultrasonic sensor work, please refer to 4Duino Ultrasonic Sensor project documentation.
This project makes a robot car move in a straight line unless it detects an obstacle. If an obstacle have been detected, the robot car will simply try to avoid it by turning left or right. In case, there are obstacle present in the left and right, the robot will instead move back. If it detects an object in all four directions, it will stop.
How It Works

The ultrasonic sensors will help evaluate the distances of nearby obstacles from all 4 directions. 4Duino will compute for estimated distance from the data provided by the ultrasonic sensor and control the motors such that the car will avoid the obstacle. Motors will move the car accordingly.
Build

Get the following components
- 4Duino
- 2 DC Motors
- Motor Driver
- 4 Ultrasonic Sensors
- µUSB cable
- 5 Volts Power Supply
Build the circuit as shown in the diagram.
Program


Workshop 4 – 4Duino Extended Graphics environment is used to program this project.
This project requires the Arduino IDE to be installed as Workshop calls the Arduino IDE for compiling the Arduino sketches. The Arduino IDE however is not required to be opened or modified to program the 4Duino.
- Open this file using Workshop 4. Note: Download the project here.
- Connect the 4Duino to the PC using µUSB cable. Then navigate to the Comms tab and select the Comms port to which the 4Duino connected.
- Finally, go back to “Home” tab and now click on the “Comp’nLoad” button.
- The Workshop 4 IDE will prompt you to insert a µSD card to the PC in order to save the widget images. Insert µSD card, select the appropriate drive and press button “OK”. If the µSD card has the widget images you can click button “No Thanks”.After uploading the program in to the 4Duino, it will try to mount the µSD card. If the µSD card is not present it will prints an error message. Once µSD card is mounted, you will see the screen displayed in the image on the right. All you need to do is insert the µSD card you saved the image files to into the 4Duino.
- Finally, connect a 5 Volts power supply via µUSB.
Demo


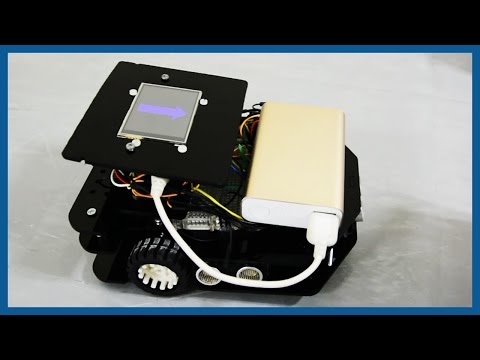
The chassis for the robot car was made from acrylic using laser cutting technology. However, you can easily make your own with other materials or buy from the market.
If you want more projects, you can visit 4duino.com.
Enjoy!!!