OneSignal Micropython Library
by Pius in Circuits > Microcontrollers
434 Views, 0 Favorites, 0 Comments
OneSignal Micropython Library

I learnt python a few years back, I just couldn’t find anything to do with it. Funny right? There are a lot of things you can do with python, but I am especially particular about python in hardware and I do not have a raspberry pi computer laying around (their prices have been increasing lately). Then I found out about micropython, which allows me to write python code for low-memory devices such as Espressif ESP8266 and ESP32 (they are my favourite boards, leave your favourite board in the comment section so I can check them out). Then boom! my micropython journey started, after some months of polishing my python skills, I decided to put it to the test by building a library for Onesignal services, which I use a lot. A noob as I am, I desperately searched for a OneSignal library for the Arduino framework but couldn’t find one, so I had to learn to make requests with Arduino, which gave me a lot of experience in making requests, python is relatively easy to write so I decided to create the library for micropython as a way to give back to the embedded community. I plan on writing one for Arduino in nearest future.
Installing the Library
Adding the OneSignal Library to the File System


I am using Thonny ide, so I will be explaining using Thonny.
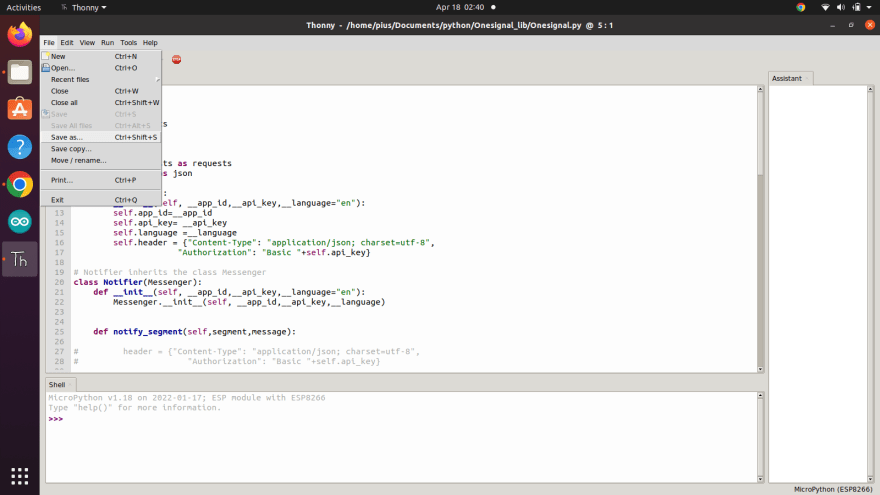
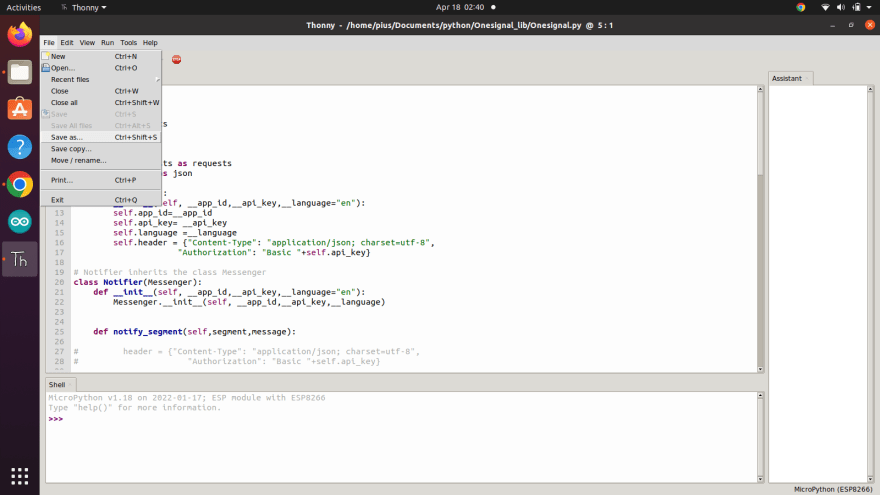
Open the onesignal.py file in Thonny, go to file and click “save as”.
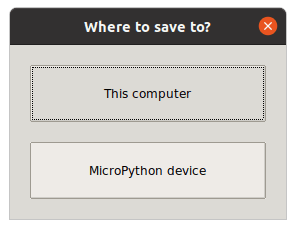
Then click on "micropython device" and type in the name of the library as “Onesignal.py” and click save. (Make sure your esp822 or esp32 is already connected to your PC).
Sending Push Notifications
Firstly we have to import the Notifier object from the library
from Onesignal import Notifier
Then create an object with the class
notifier= Notifier("APP ID","API KEY","en")
OneSignal has a thing called segments, which allows you to group your subscribers into various categories; thereby allowing you to send notifications to a certain group of people.
To send a “hello” message to all your subscribers, the code will look like this.
notifier.notify_segment("Subscribed Users","hello") # send to a particular segment
To read more on Onesignal segments click here.
Let's assume you build a facial recognition device for your home which notifies everyone in your family when there is someone at the door, but you want only you to get notified when your girlfriend is at the door, this can be done using OneSignal “player ids”.
OneSignal attributes to each of your subscribers a specific “player id”, which is unique to each subscriber and can be used to send notifications to a specific subscriber.
notifier.notify_user("your player id", "hi Pius, Jessica is at the door")# send to a specific user
Sending Text Messages

Before sending text messages, you will have to create a Onesignal text message app, I would not be going over that in this article but here is a link on how to set this up.
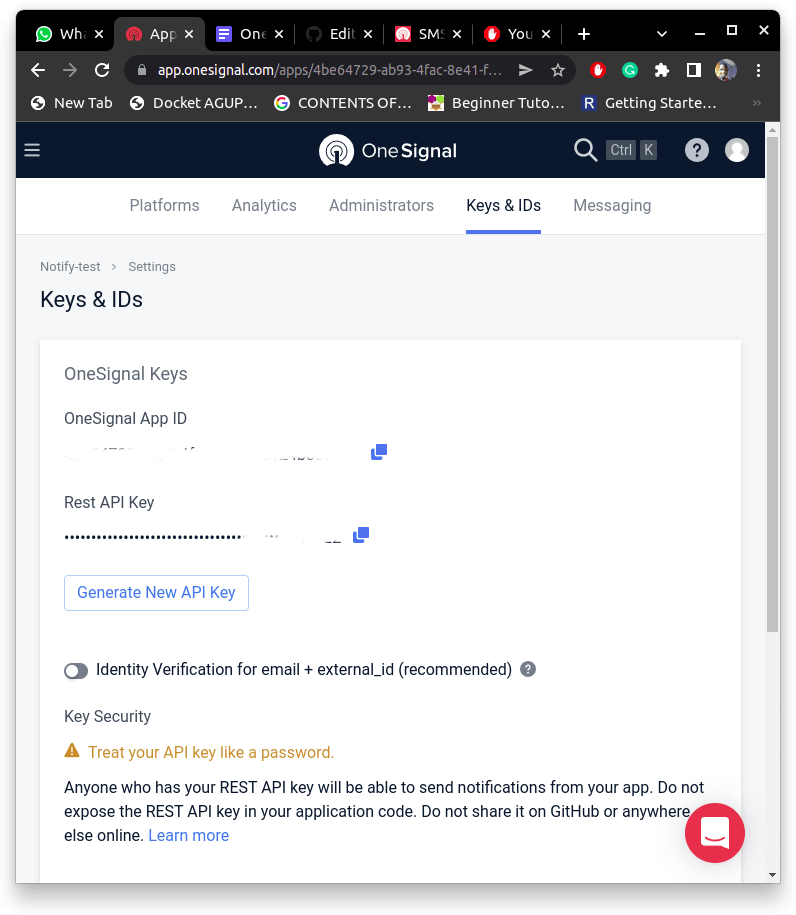
After you have created your app, you will need to find your app ID and API key, you can find this in your messaging app by clicking on settings and then keys & IDs.
Sending a message
First, we need to import the SMS_Messenger class from the library
from Onesignal import SMS_Messenger
Create an object of the class, with your App ID, API key, Twilio phone number, senders name and language.
messenger =SMS_Messenger (
"Zbe1d80b-1234-5678-91f2-f27cc107e112",
"ABCDEFGHIJKLMNOpqrstuvwxyzbjtenarsjcdutavdkats",
["Twilio phone number"],
 "sender's name",
 "en"
  )
Send text message
messenger.send_text("Hello",["recipient phone number"]) # make sure phone number is added to your onesignal subscribers
Sending Mails
First, we import the mailer class
from Onesignal import Mailer
Create an object of class Mailer, with your app ID, API key and language
mailer=Mailer(
"Zbe1d80b-1234-5678-91f2-f27cc107e112",
"ABCDEFGHIJKLMNOpqrstuvwxyzbjtenarsjcdutavdkats",
"en")
Create variables to hold the subject and body of your mail
subject= "cat facts"
body= "<html>
<head>Welcome to Cat Facts</head>
<body>
<h1>Welcome to Cat Facts<h1>
<h4>Learn more about everyone's favorite furry companions!</h4>
<hr/>
<p>Hi Nick,</p>
<p>Thanks for subscribing to Cat Facts! We can't wait to surprise you with funny details about your favorite animal.</p>
<h5>Today's Cat Fact (March 27)</h5>
<p>In tigers and tabbies, the middle of the tongue is covered in backward-pointing spines, used for breaking off and gripping meat.</p>
<a href='https://catfac.ts/welcome'>Show me more Cat Facts</a>
<hr/><p><small>(c) 2018 Cat Facts, inc</small></p><p><small><a href='[unsubscribe_url]'>Unsubscribe</a></small></p></body>
</html>"
Then we send an email using the “send” function in the Mailer class
To send an email using player id, use this line of code
mailer.send_mail(body,subject,"6392d41a-b776-4c7b-as20-cd58t32y3a96")
To send an email to a subscriber via their email address us this line of code
mailer.send_mail(body,subject,emails=["janedoe@gmail.com"])
Thanks for Reading
Thank you for reading my article. If you are interested in the Arduino version of the Onesignal library follow me so you can get notified when I post it. I also recommend you create issues and pull requests on the GitHub repo if you find anything in the code that can be improved. Thanks again.