OpenWebRX - Simplest Rasprberry Pi + RTLSDR Web SDR Radio
by mircemk in Circuits > Raspberry Pi
822 Views, 3 Favorites, 0 Comments
OpenWebRX - Simplest Rasprberry Pi + RTLSDR Web SDR Radio

Raspberry Pi development board with SDR hardware, which functions as a web server, and the radio is accessed via a web browser.
Supplies

- rspberry pi 4 or 5
- RTLSDR USB Dongle
Description

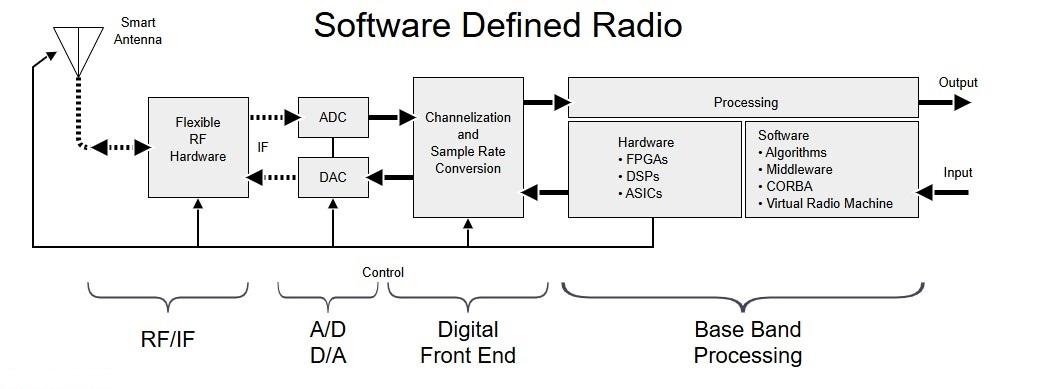
Software-Defined Radio is a radio communication system where components that have traditionally been implemented in hardware (e.g., mixers, filters, amplifiers, modulators/demodulators, detectors, etc.) are instead implemented by means of software on a computer or embedded system. This flexibility allows SDR to be highly versatile and adaptable to different communication standards and frequencies.
In one of my previous videos I described a way to make a simple SDR on Pi Terminal-7” 1024*600 All-In-One Module Raspberry Pi and RTL-SDR V4 Dongle. This time I will present you probably the simplest way to make an SDR Radio on Raspberry Pi with an RTLSDR USB stick or SDR Play which are actually most often used by SW Listeners, due to their relatively low price, and excellent features.
Installation


This project is sponsored by PCBWAY. This year, PCBWay is organizing the 11th badge design contest from March 3rd to April 31st. Follow the design requirements and Submit your designs in one of the given ways, and become the winner of one of the valuable prizes in cash and cupons. This contest is more than a competition—it’s a celebration of 11 years of innovation and a chance to dream about the boundless possibilities ahead with PCBWay.
In fact, the manual installation of drivers and applications on the Raspberry Pi platform (which, by the way, uses a modified Linux distribution) can be very complex, especially for those who are not very familiar with working with Linux operating systems. Fortunately, there is an open source project called OpenWebRX where you can download a complete pre-configured Raspberry Pi image with drivers and the application installed. Specifically, this time I will use the extended version of OpenWebRX+ developed by Stanislav (LZ2SLL), which contains more useful add-ons, and otherwise the method I describe is identical for both versions.
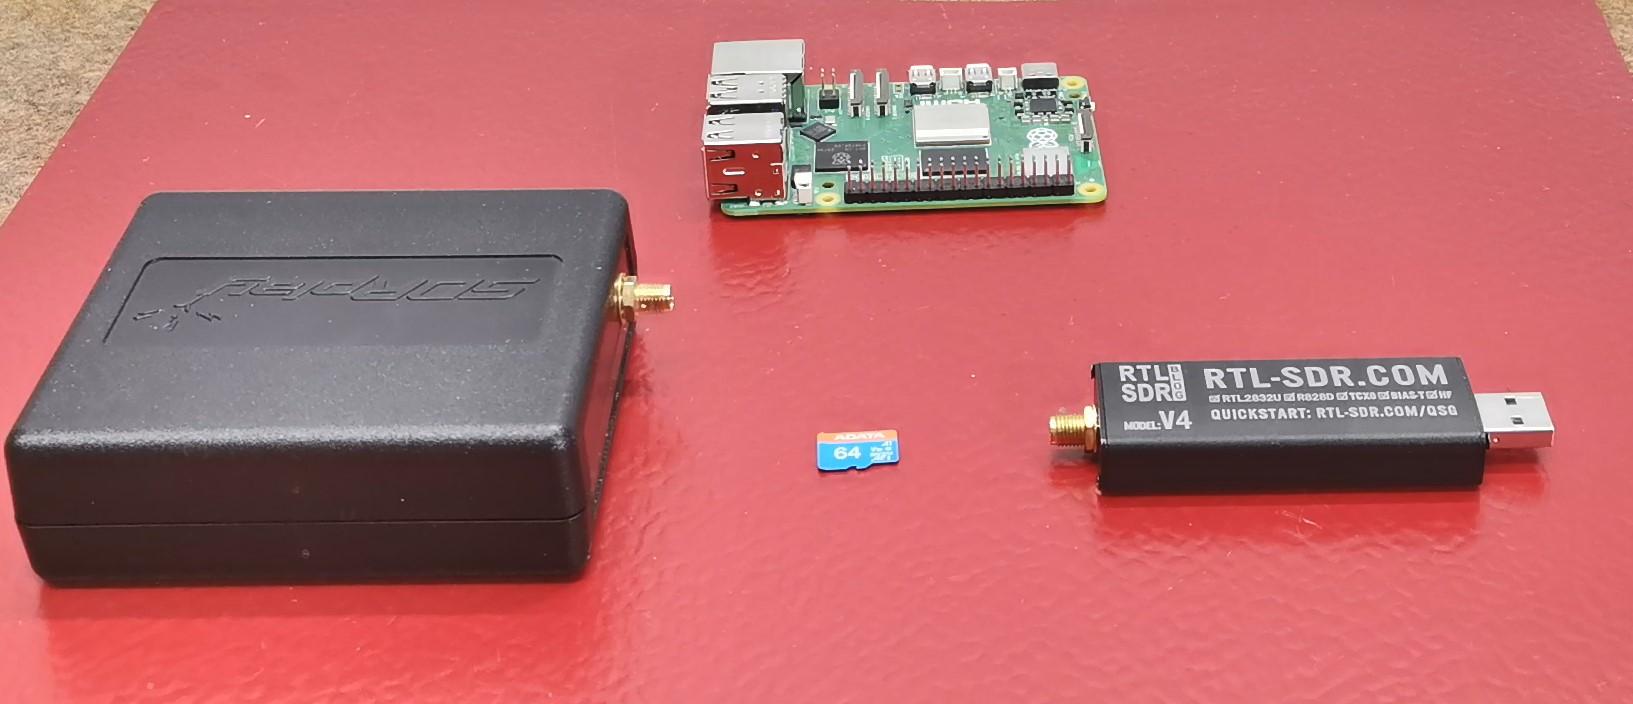
The main difference between the previously described SDR receivers and this one is the fact that now we will be able to use the SDR radio from any PC that is in the local network, via a Web browser. At the same time, it can be used by multiple users on different bands. Even with a simple setup, we can access the receiver from anywhere in the world, but this time it will not be the subject of consideration. The installation process is extremely simple and I will try to describe it in detail below. First of all, about the hardware, for this project we need a Raspberry Pi 4 or 5 development board, a micro SD card with a capacity of 32GB or more, and one of the supported SDR devices: RTLSDR, SDRPlay, or Airspy HF+...
First, we need to download the image from the OpenWebRX+ website. Then, we need to download the Raspberry PI Imager application, which will be used to install the image on an SD card. First we select the device - in my case Raspberry Pi 5, then we select the storage on which the image will be installed, and finally we select the operating system, selecting the Use Custom option, and select the image that we downloaded previously from the given address. Now it is desirable to perform some custom OS settings. Here we enter username and password, wireless LAN credentials and locale settings
. Then we go to Services and check Enable SSH. Now we press Yes and wait for the installation to complete. The installation takes a few minutes after we insert the card into the Raspberry Pi to which the SDR radio hardware is previously connected, in my case the RTLSDR USB stick.
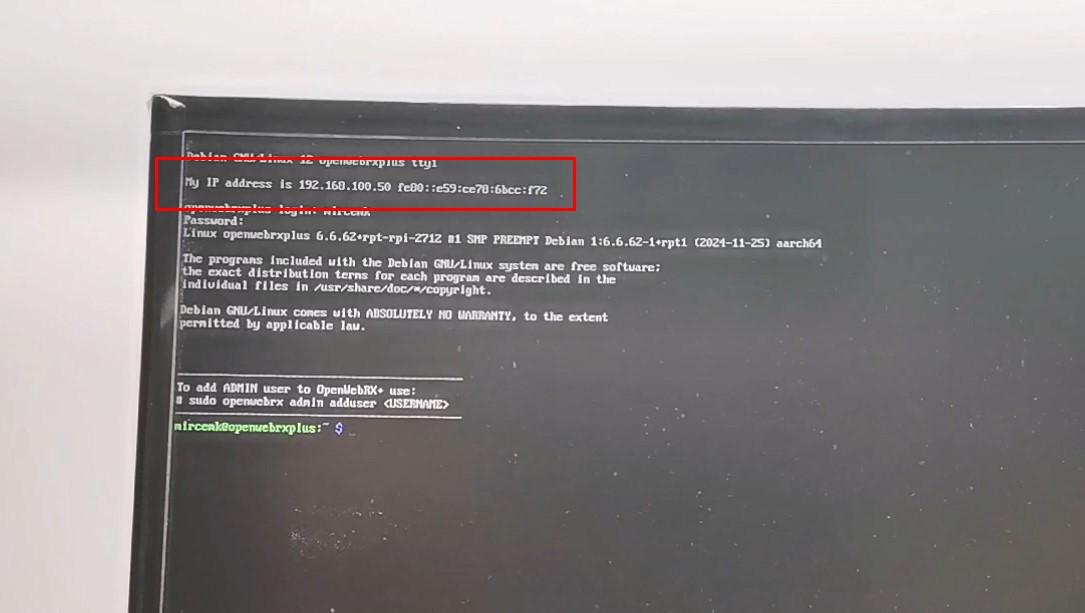
Now we start the operating system for the first time, during which it will reboot several times. We need to log in with the previously defined username and password. Now we need to create an ADMIN user for the OpenWebRX software according to the given instructions. At the top of the screen, you can see the IP address that this device has obtained on the local network.
And this is the complete installation procedure. From this moment we can use the SDR Radio from any computer in the local network via a web browser by entering this address. The next time you turn on the Raspberry Pi, you don't need a monitor because the software starts automatically.
Let's try out the functionality of the SDR radio on a PC in the local network. I just want to briefly show you some of the options of the openwebRX software. This is the main display with a huge waterfall screen, and in the right corner there is a section for setting the radio options. Here we can select one of the many modes for demodulating analog and digital signals. First we need to create multiple profiles for different frequency ranges where we want to receive signals. For this purpose, we go to Settings, then SDR Device Settings, select the device that is currently connected and create a new profile.
Unfortunately, the bandwidth in this case is much smaller compared to the one with locally installed software, but this is the limitation so that the SDR radio can be used by multiple users simultaneously and via the web. And now, at least for me, the biggest advantage of this receiver is the ability to directly decode a huge number of digital signals. Namely, when receiving a certain type of digital signal, for example, SSTV, a section appears on the lower left part of the PC screen where the signal is directly decoded without the use of special software for that purpose.
With SDRPlay

To confirm the claim of simplicity and universality of this project, I will now connect my SDRPlay radio instead of RTLsdr. As you can see, no additional configuration is required and SdrPlay works immediately after the first turn-on.
Demonstration


I present you with several short video sequences of receiving and decoding various radio signals.
Conclusion
And finally a short conclusion: Unlike my previous SDR radio projects, this is a special case where we have a Raspberry Pi development board with SDR hardware, which functions as a web server, and the radio is accessed via a web browser from any PC that is part of the same local network, or with additional settings from anywhere in the world. Just to mention that we can also run this software locally on a Raspberry Pi desktop distribution, but more on that later.