Orbit in Your Hands

In many classrooms, space science is taught through static images and abstract explanations. But what if students could see the Earth orbit the Sun—or feel how the Moon revolves around the Earth?
Orbit in Your Hands bridges that gap by transforming complex astronomical concepts into a simple, 3D-printed model that teachers can use to bring lessons to life. Designed for accessibility, this project empowers educators with a low-cost, interactive tool that inspires curiosity and deepens understanding
Attached is an STL file to slice directly and a Fusion file with joints to simulate the orrery.
Supplies
3D printer + filament
super glue
sandpaper if necessary
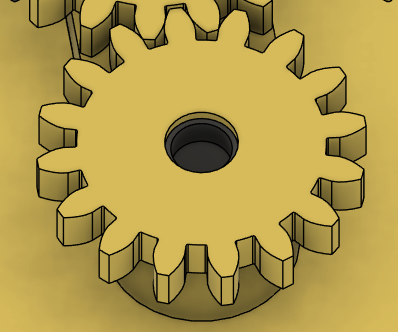
Determine Gear Ratios
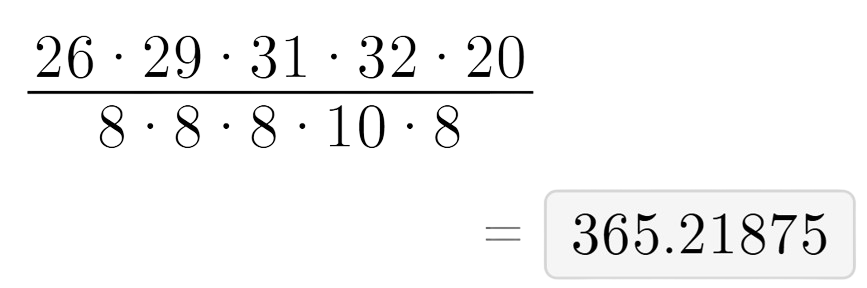
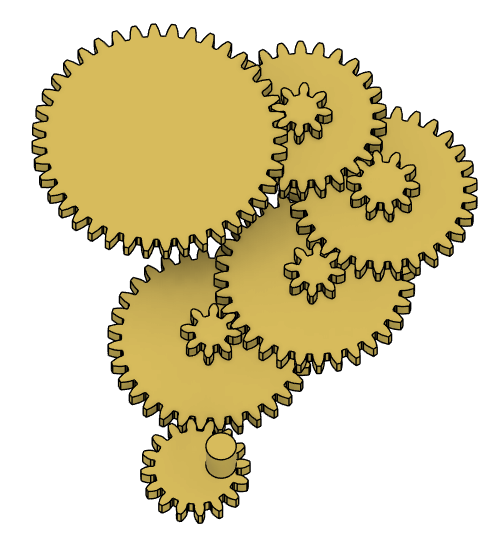
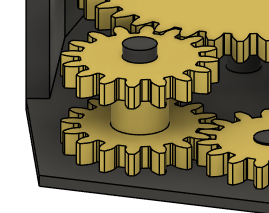
First, we will find a ratio that will equal the orbit of the earth (365.25:1). I wanted the gears to be at least 8 teeth because anything smaller might affect their ability to mesh properly. So, after trial and error, I settled on the gear ratio in the image above, with a ratio of 365.21875.
Design Gears for Revolutions
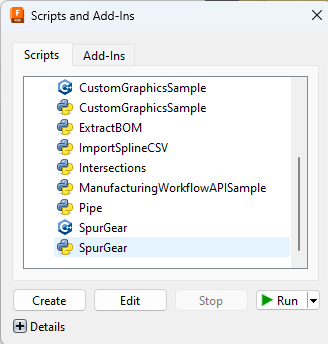
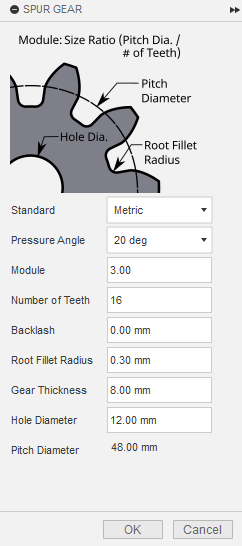
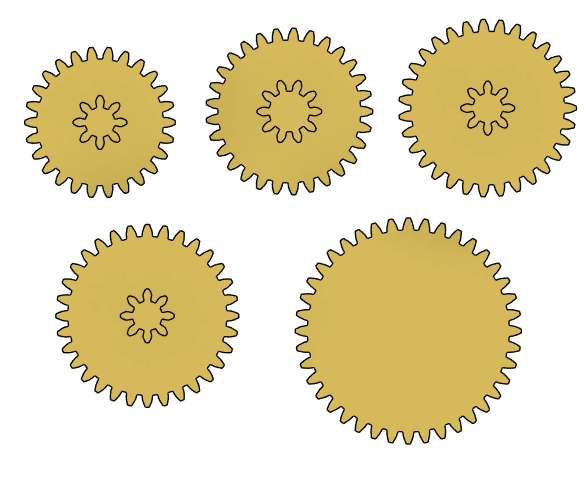
In Fusion 360, use Shift+S to open the Scripts and Add-Ins tab. Scroll to the bottom to find the SpurGear script. Run the script and fill in the details to create a set of gears, changing the # of teeth each time. Attached are the settings I used for my gears. Then, pair the larger set of gears with the smaller set. Also attached is the organization of gears I used.
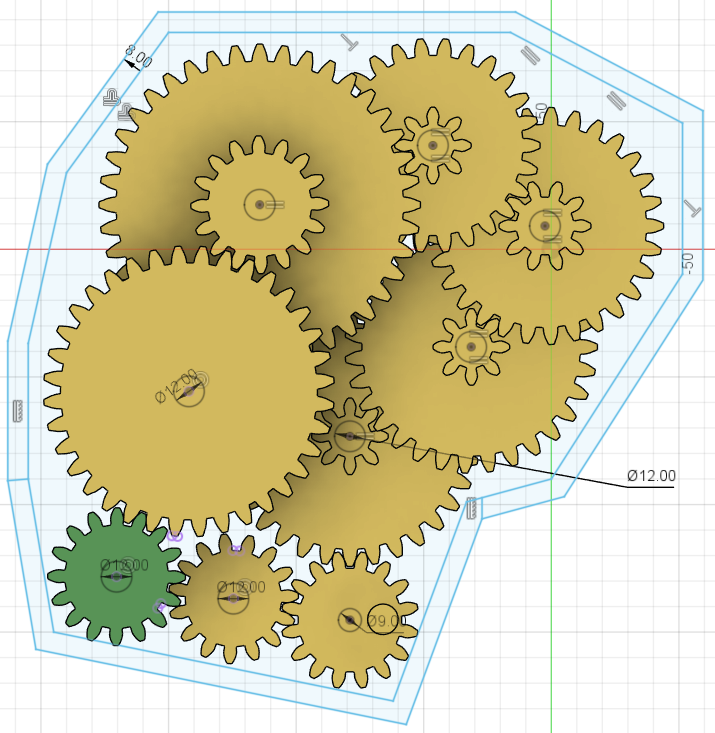
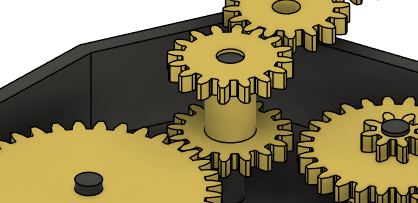
Organize Gear Placement
Organize the gears into a shape you like, with the drive gear being smaller than the driven gear. Since I wanted to use a 16 to 32 tooth at the start of the gear train, I doubled the size of one of the gears to balance the ratio. Attached is the organization I used.
Earth Rotation Gears

Create a new set of gears to transfer the rotation of the drive gear to the rotation of Earth. The # of teeth for the gears doesn't matter except that the gear connected to the planet and the drive gear are the same, so use whatever size best fits.
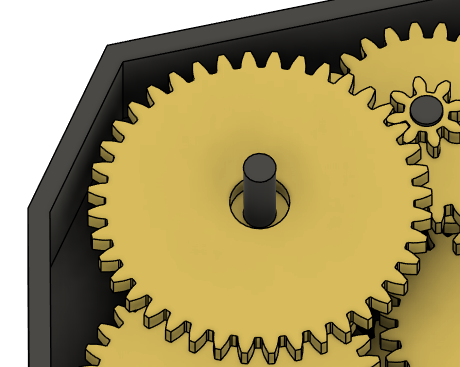
Design Base

Create a sketch for the body of the project, going around all the gears. Offset the border by the width you want (I used 8 mm). This will be the walls. Then, by projecting the gears, draw circles centered on the gears. This will be used later. Attached is a picture after extruding.
Create Axles for Gears

Using the circles created in Step 5, extrude up to cut holes through all the gears. Then, create a new sketch with the same circle but add 0.5 mm to their dimensions to allow tolerance. Extrude the holes up again to create the axles, making sure to extrude each separately so that each has their necessary heights.
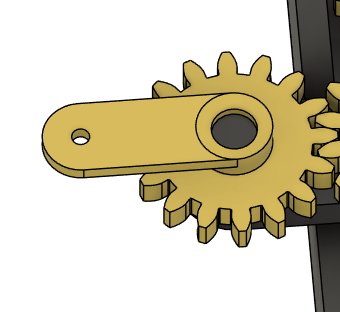
Adjust Gear to Combine Rotation and Revolution
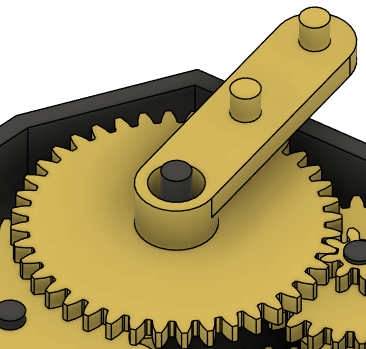

Next, I changed the large gear and added stuff to combine the rotation from one gear train with the revolution of the other gear train coaxially. First, I added a 20 mm hole through the middle. Then, I added an arm with pegs. The pegs will hold more gears, connecting to the Earth and Moon. I then added 3 16-tooth gears (they can be whatever size as long as the gear ratio is 1:1).
Connect Any Applicable Gears
Since I had a change in elevation in my rotation gear train and I didn't connect the gear, I will do that in this step.
Next, an important step, is that I connected the gear below the huge gear with the first gear on the arm. This way, we transfer the rotation without interfering with the revolution's movement. When printing this piece out, it is important that you split the 2 gear by adding a small cut between a gear and the tube. This way, we can attach first part of the gear, put on the huge gear with the arm, then reattach the second part of the gear with superglue.
Joint Gears (optional)
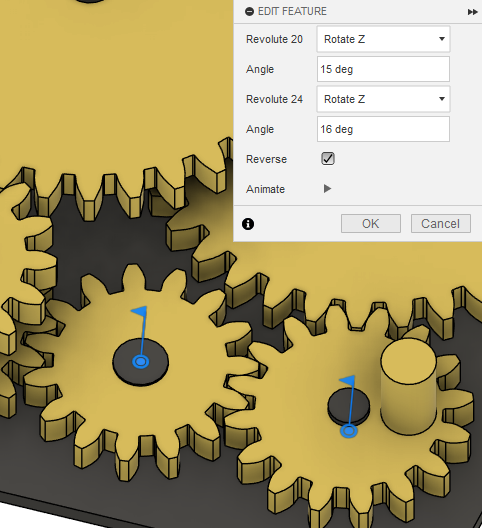
Since Fusion 360 has the option to add joints to the gears, so I can simulate the motion, I jointed the gears and added motion links. For motion links, the first joint should have the degrees equal the teeth of the second gear and the second joint should have the degrees equal the teeth of the first gear. For example, if the first gear has 16 teeth and the second has 15, the motion link should show as joint 1: 15 degrees and joint 2: 16 degrees.
Add Buffers

I added small boxes to go under each gear so that the gears have something to rest on instead of slipping to the ground.
Sun
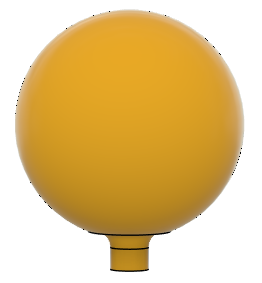
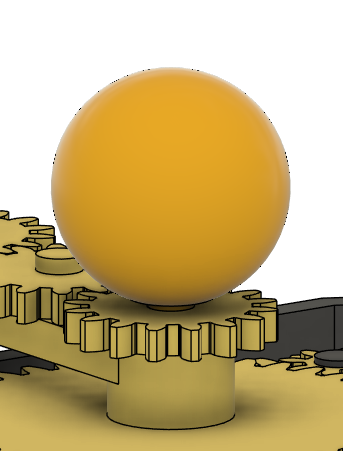
I created the Sun by creating a sphere (diameter 60 mm), extruding a small part off to make it flat, then adding a small stem (diameter 10 mm). Then, in the middle of the axle in the huge gear, I made a 10 mm hole for the Sun to fit.
Earth

I went to Thingiverse and imported a model of the Earth (file: https://www.thingiverse.com/thing:17336; thanks to user bld).
Then, I created another arm on the final gear for the Moon and Earth. I chamfered the middle part of the arm so that the Earth could fit better when supergluing it. The smaller hole is for the Moon, which will be created similarly to the Sun, except the sphere diameter is 12 mm and the peg diameter is 5 mm.
3D Printing
Export the project file and send it to be printed.
Some tips for printing this model: The base is likely way too big for most printer beds, so split the body into 2-4 pieces (depending on the size limitations) and superglue it together after printing it out. Also, as mentioned, for the gear inside the huge gear, make sure to separate them while printing and connect later. Finally, if the slicer has the option to do so, make the seam alignment random. If it is not random, then the printer would create a bulge along the seam, making the gears harder to spin.
Assembly

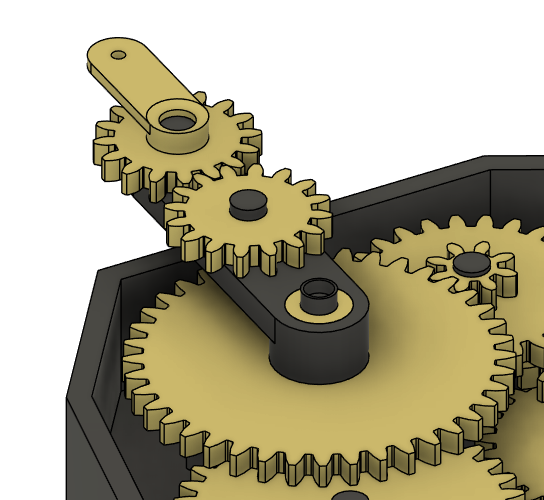


Start by supergluing the base back into 1 piece (if it was split apart to print). Then, put in all the easier gears, as shown in the first picture. Then, place the huge gear & arm, along with the smaller gears that are on it. Very carefully, superglue the second part of the gear on top. Make sure that none of the glue touches the arm, or you will need to reprint all of it. Finally, attach the Earth, Sun, and Moon. The Earth and Moon can/should be superglued on. If you want to access any gears, it would be best to not superglue the Sun into the hole. If you feel that the orrery will move around a lot and you don't want the Sun to fall out, then superglue it in.