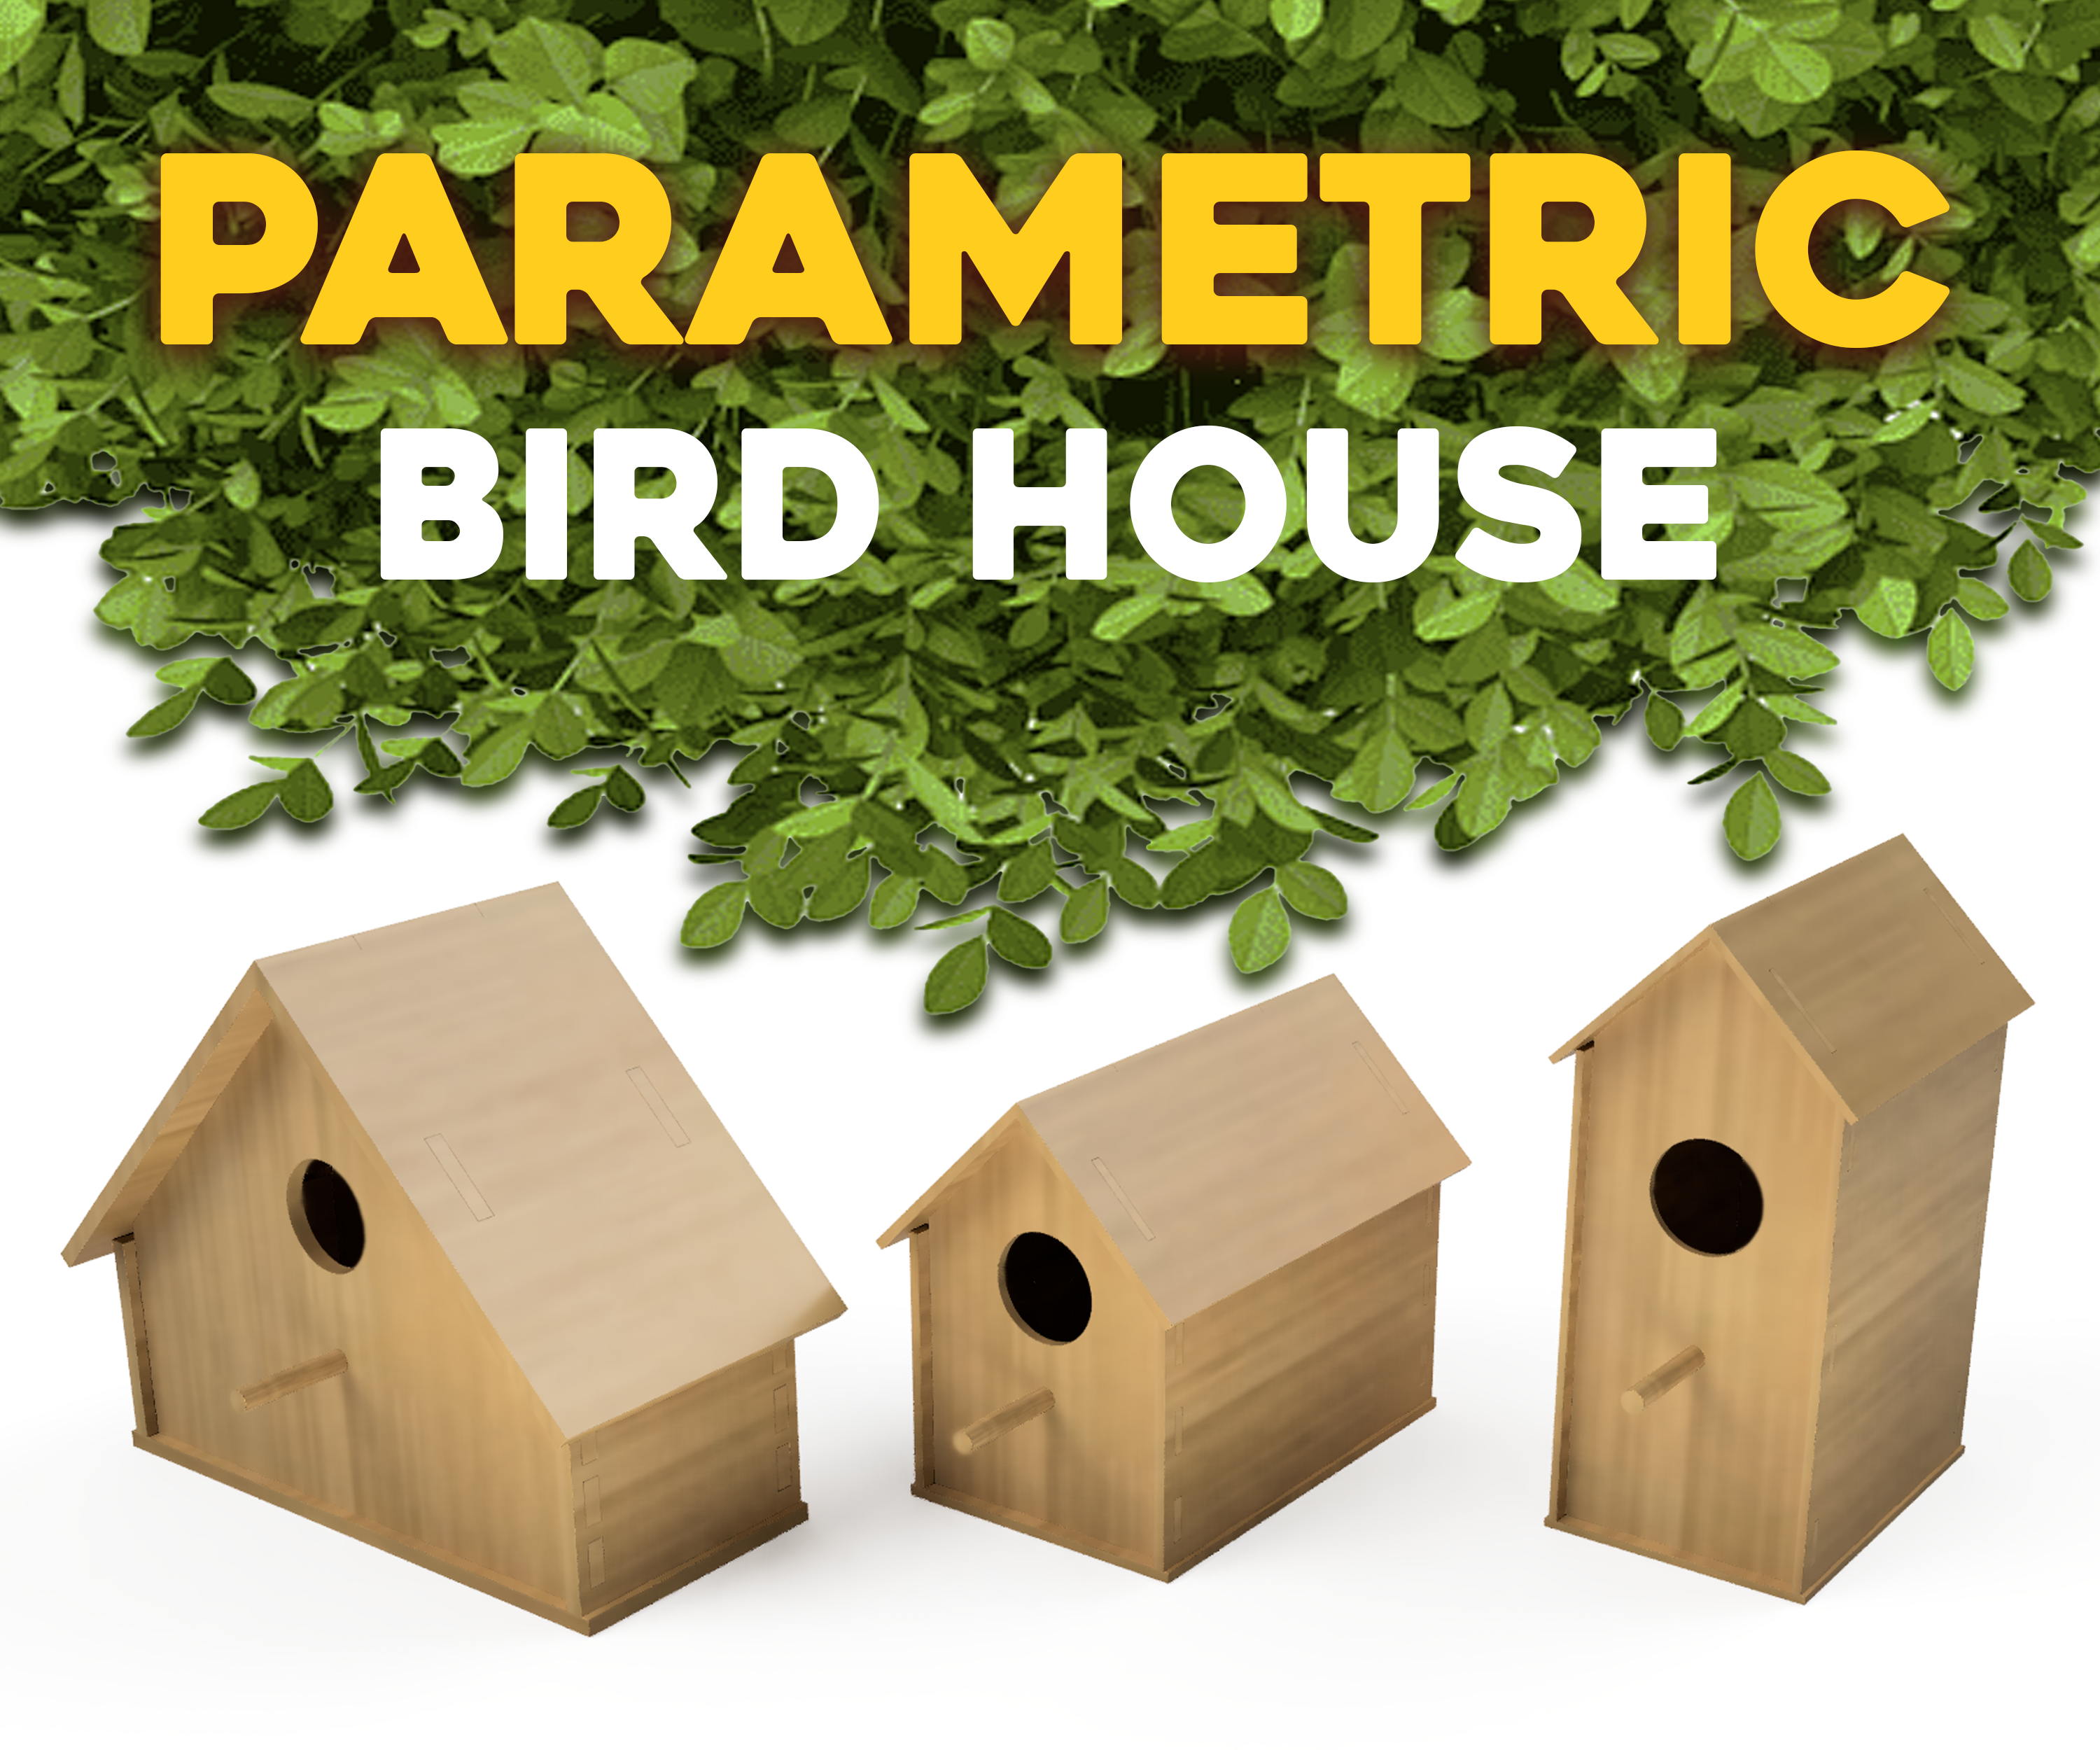
PARAMETRIC BIRD HOUSES: Laser Cut Wood Project
by RichardHuberjohn in Design > 3D Design
567 Views, 5 Favorites, 0 Comments
PARAMETRIC BIRD HOUSES: Laser Cut Wood Project

Good morning everyone, I'm Richard and I’ve always enjoyed building practical projects that make the outdoors more inviting. For this contest, I wanted to create something that blends simple design with flexibility.
Spending time outside is better when we can share it with wildlife. I wanted to make a birdhouse that wasn’t limited to one size or material, but instead could be adapted to whatever someone has available.
Using parametric design, I created a birdhouse where the dimensions can be adjusted with simple variables. This means you can make it large or small, thick or thin, and fit it to your own tools, wood, or space.
It’s a flexible design that makes it easy for anyone to welcome birds into their yard while working with what they already have. By combining simple customization with a classic outdoor project, this birdhouse helps more people connect with nature on their own terms.
Supplies

All you need to design your own birdhouse is a computer and CAD software of your choice.
The only constraint is that your CAD software must allow variables, which will be further detailed later.
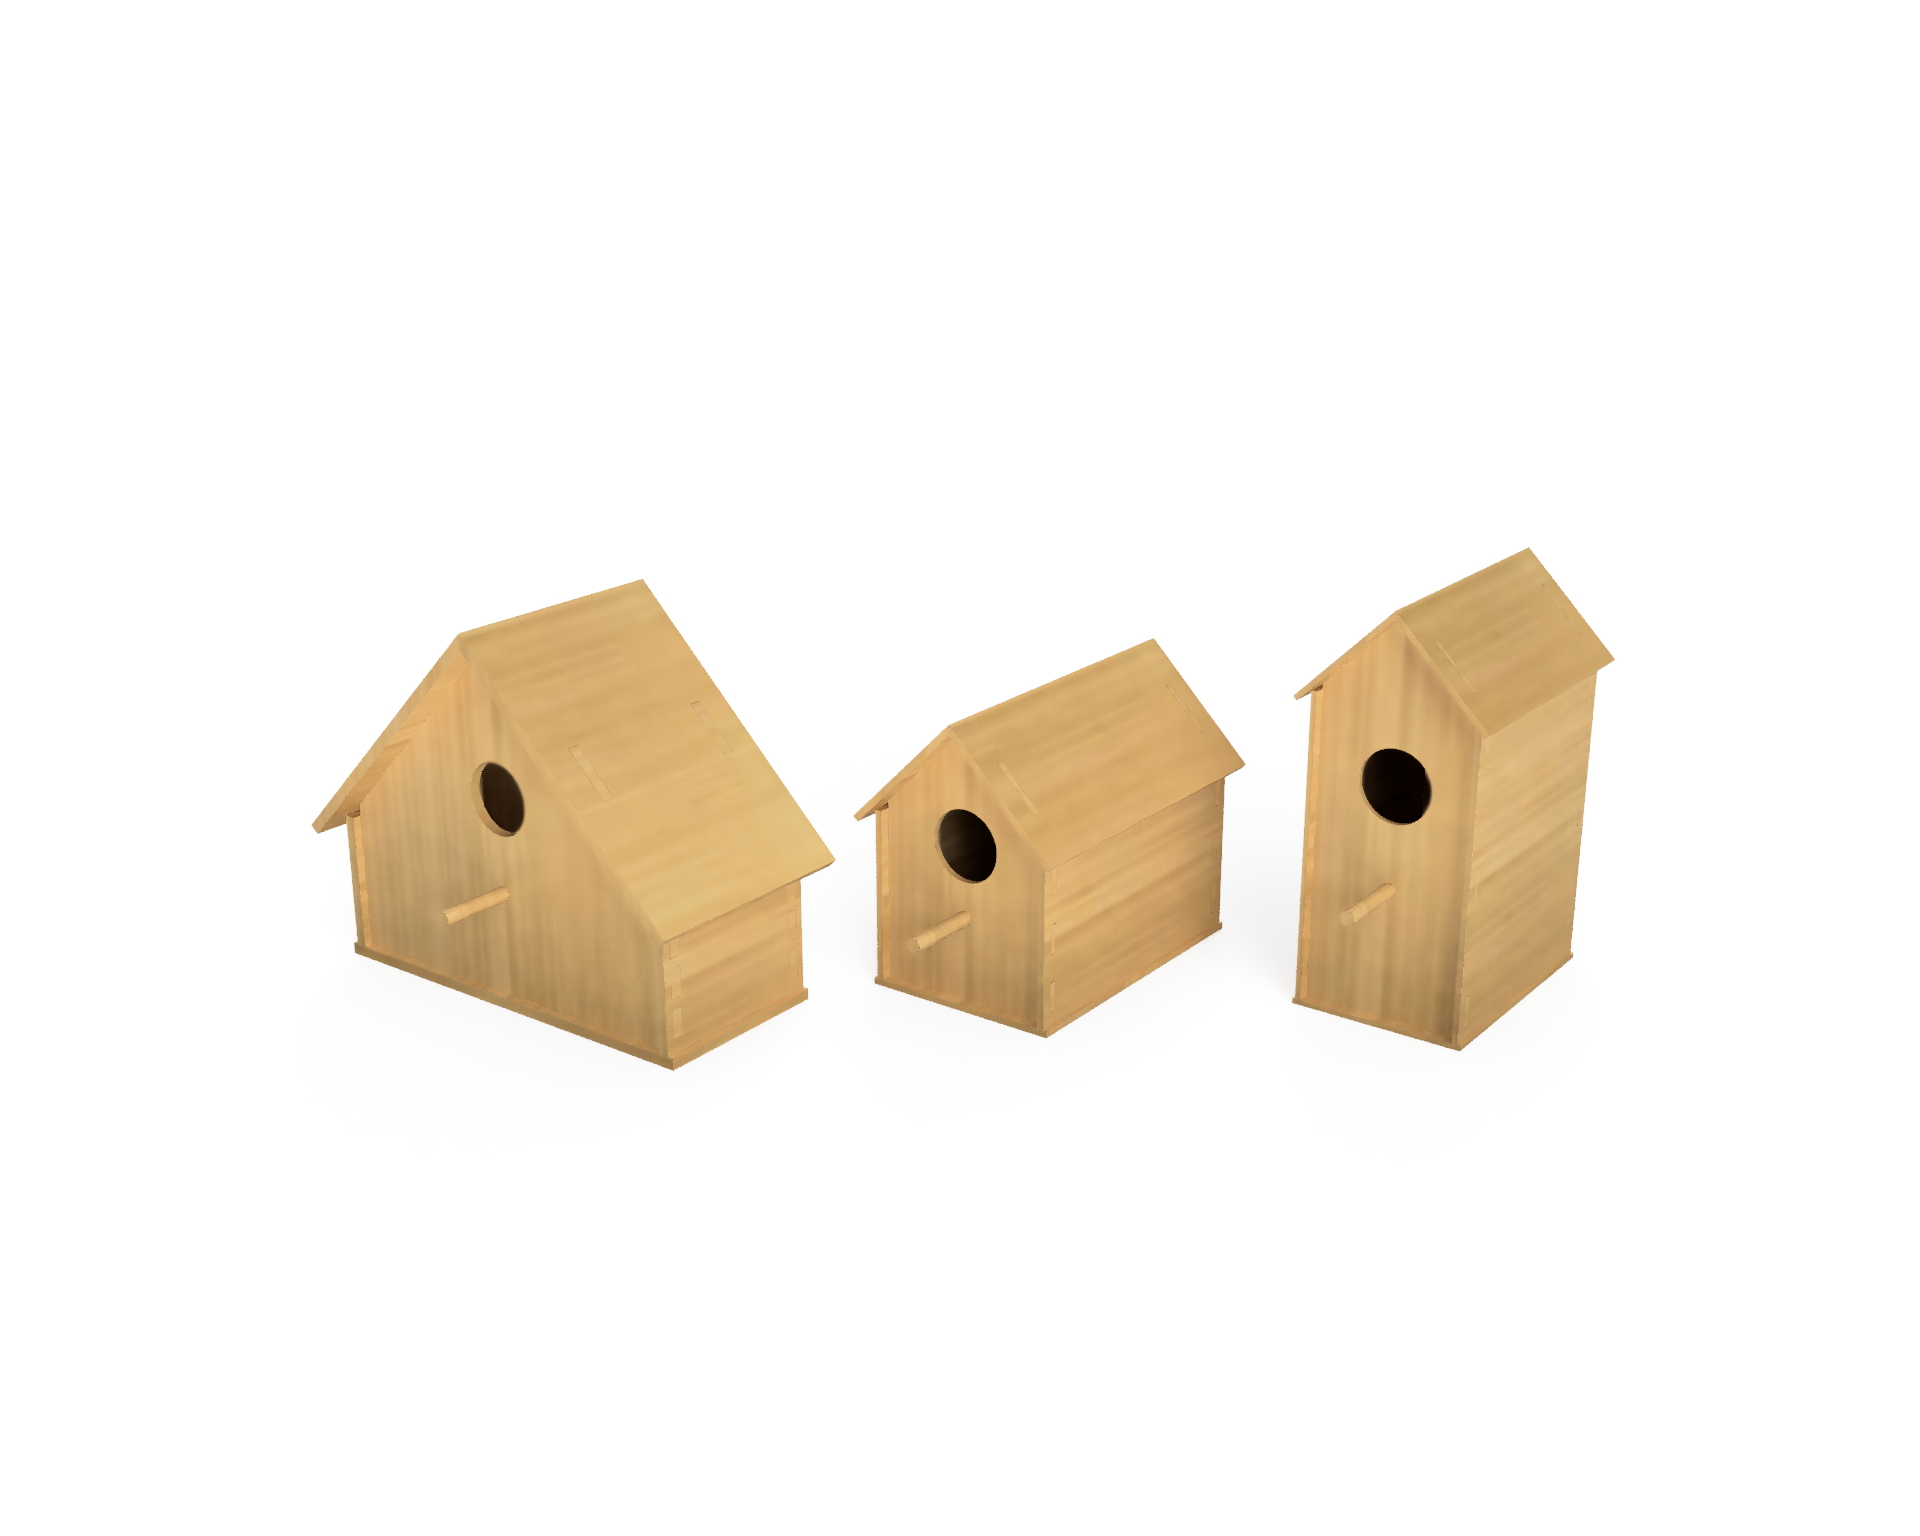
Inspiration
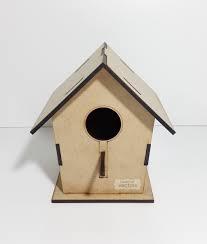
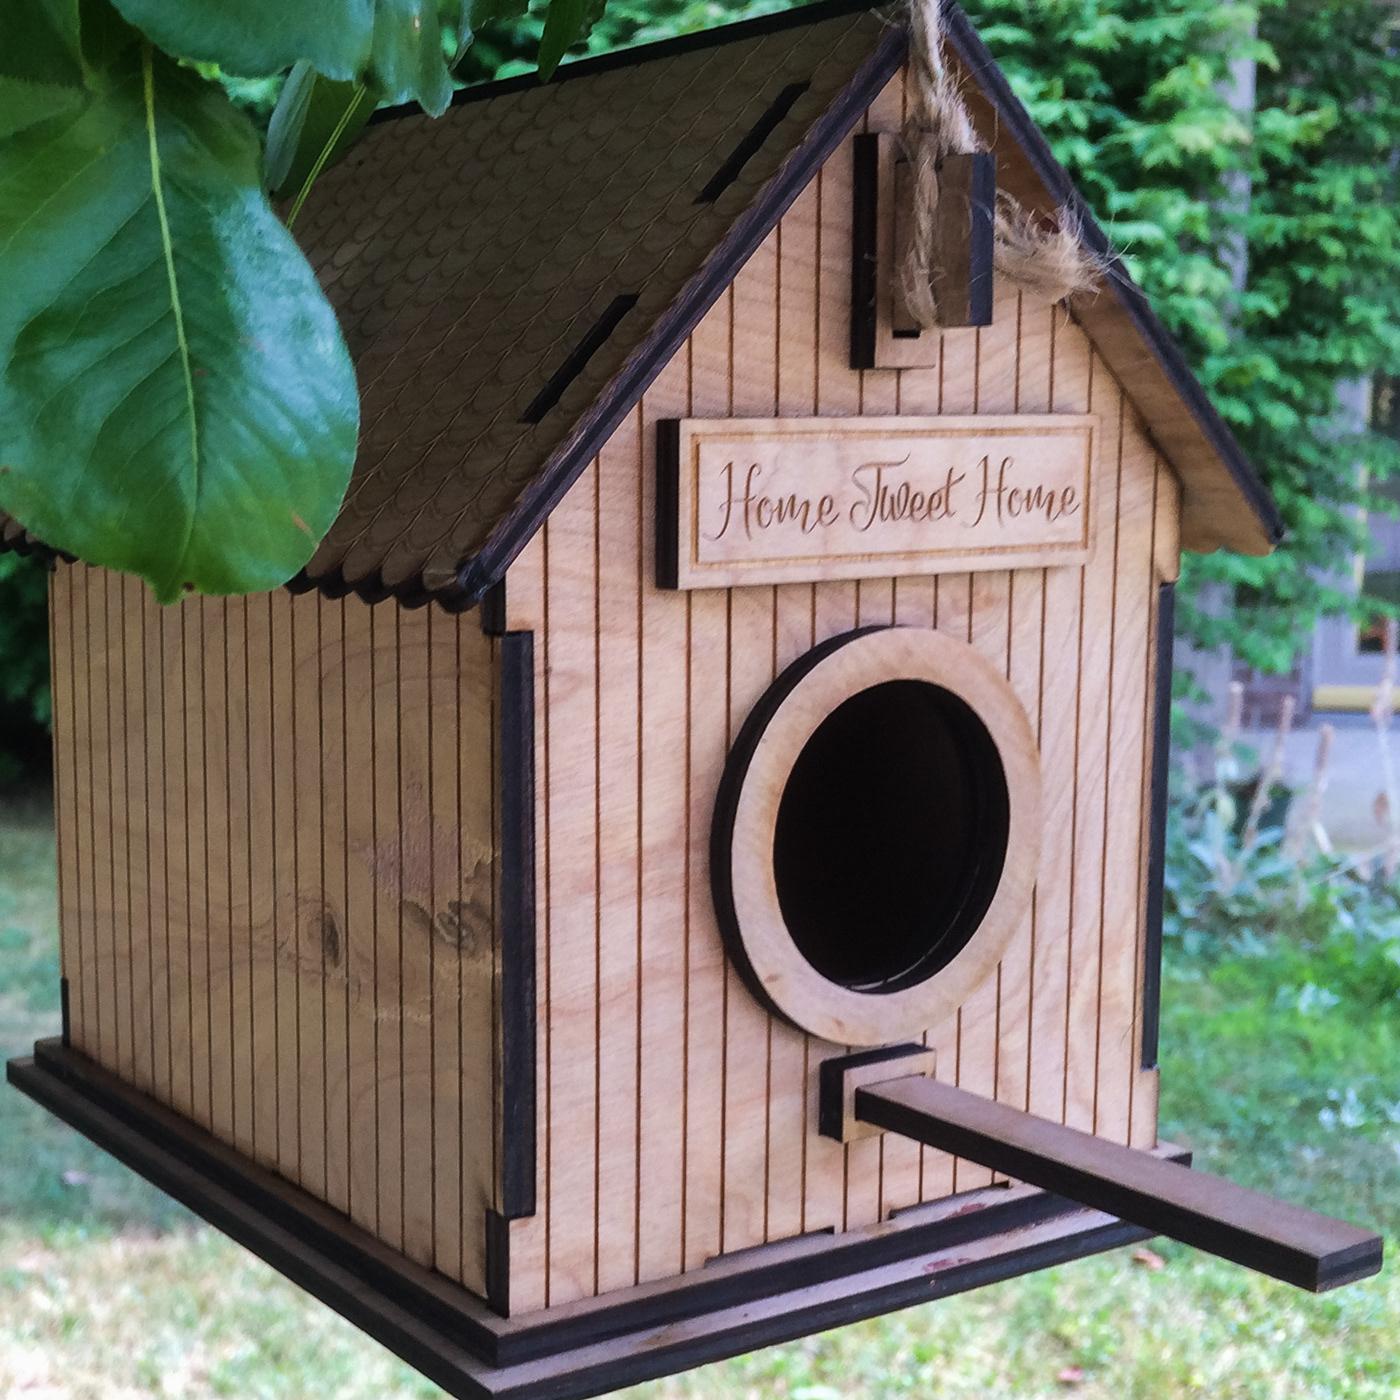
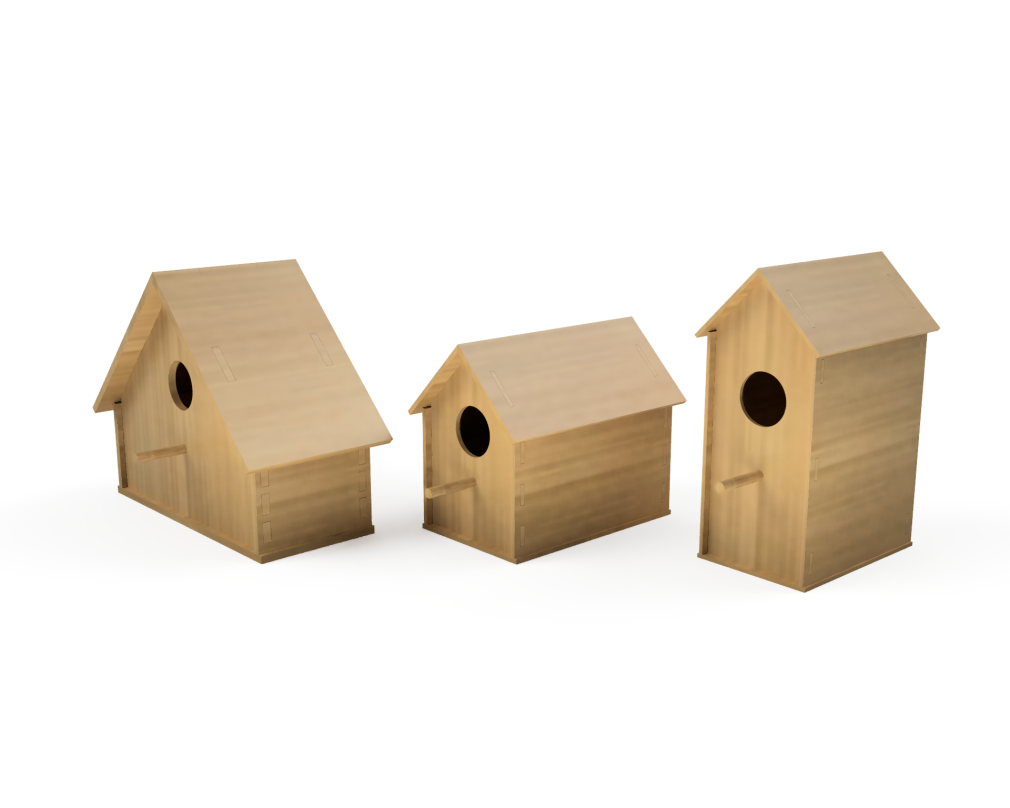
The three birdhouses shown demonstrate some of the techniques and aesthetics I tried to replicate in this project.
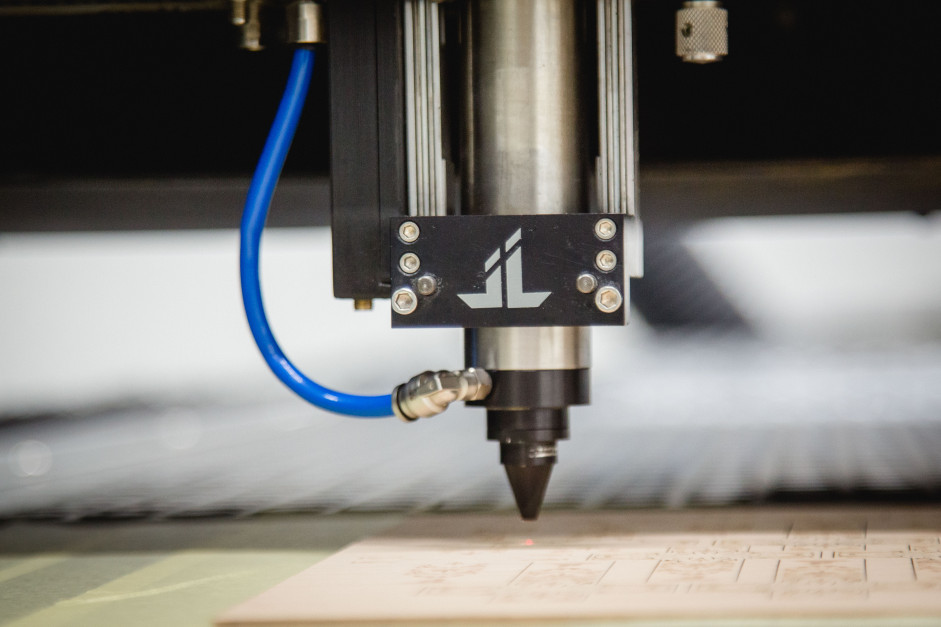
It is very common to use laser cutting to create accurate wood panels for the structure of the birdhouse, so this is the method of manufacturing I designed for.
Another common theme is the use of tabs/slots to help hold the birdhouse together and provide more friction besides just an adhesive or other hardware. I will also be incorporating these tabs into my design.
Defining Parameters

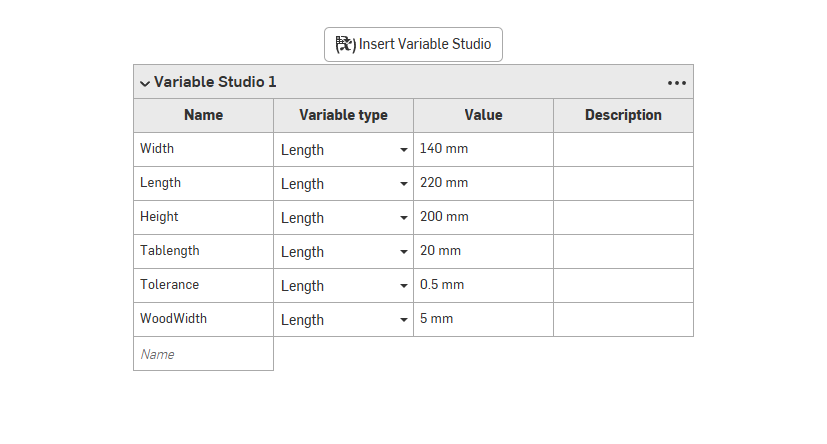
This is a crucial step of parametric design. Basically you need to decide which values can be modified after designing.
In this case, LENGTH, WIDTH, and HEIGHT, are the obvious ones, as they most directly contribute to the look of the treehouse and the amount of material used. However there are some more important factors as well, such as the width of the material, and tolerance to make sure the tabs fit together with no issue.
The process for creating parameters varies from CAD software (In Fusion find the User Parameters section), however the main principles will be consistent.
Sketch the Base
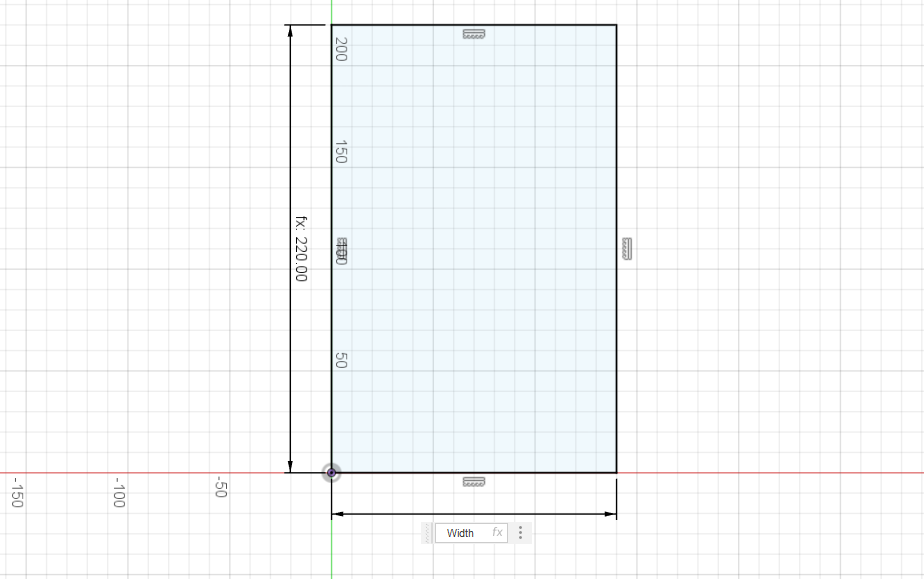
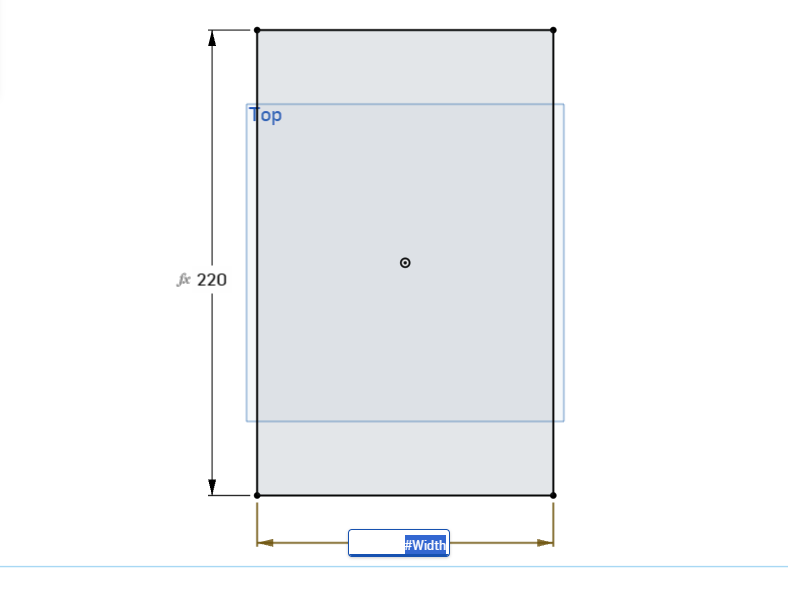
Next we need to create the base for the birdhouse. However we must use the WIDTH and LENGTH values defined in the previous step.
Instead of typing the value directly into the dimension field, enter the parameter name to ensure it can change afterwards.
From this point on, try to base all dimensions off of the parameters you've already listed, as this will ideally result in the least amount of issues as values change.
Creating Slots
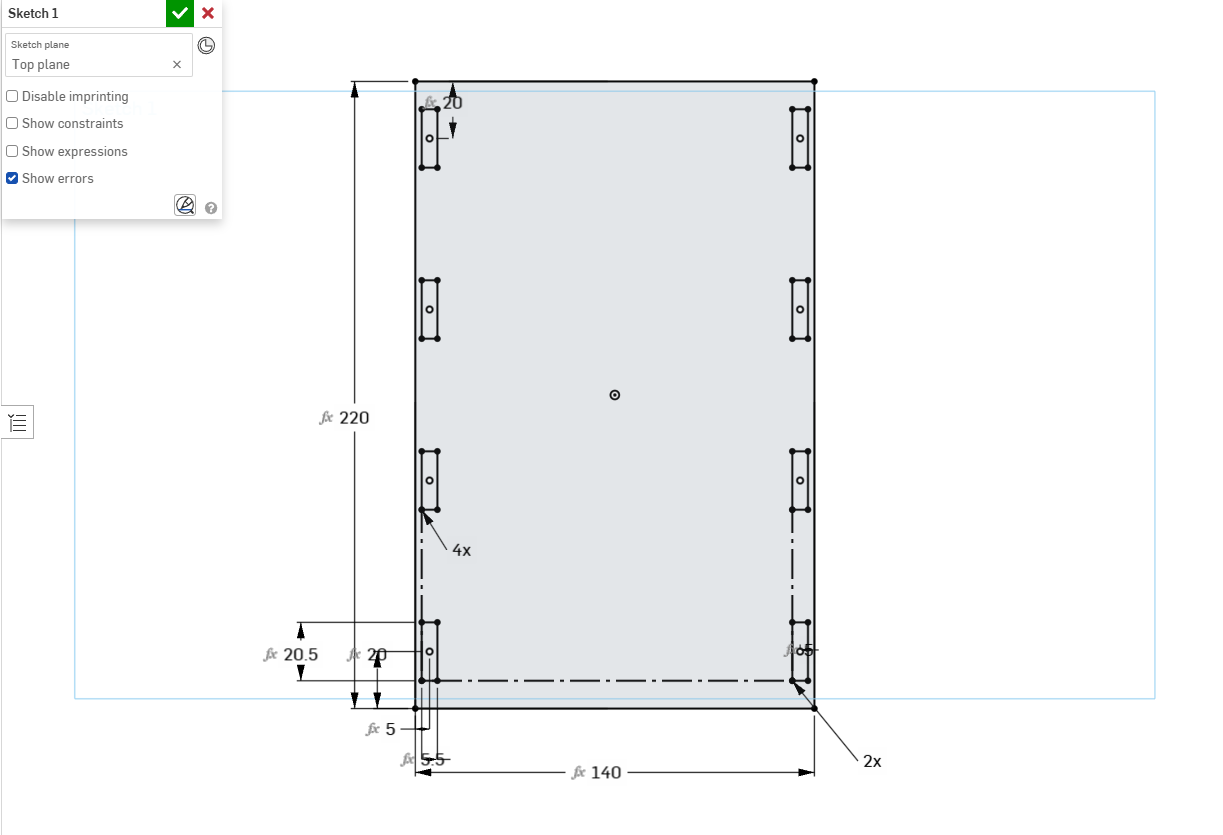
Next you must add the slots where the tabs will eventually interface. Use the TABLENGTH and WOODWIDTH values to create rectangles.
Importantly, remember to add TOLERANCE to each of those dimensions to ensure the fit isn't too tight.
Then use a pattern to recreate the rectangle four times on each side.
Extrude Base
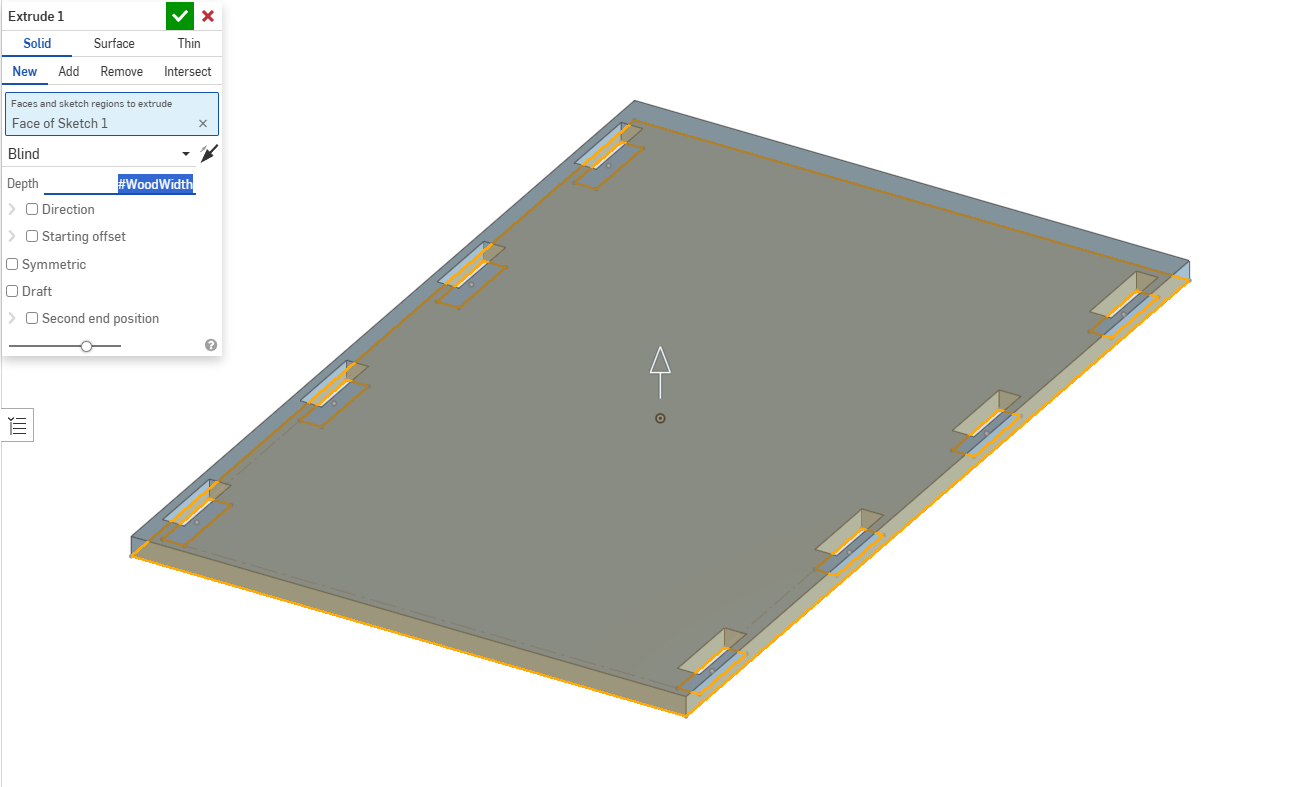
Finally extrude the base, making sure you use the WOODWIDTH parameter.
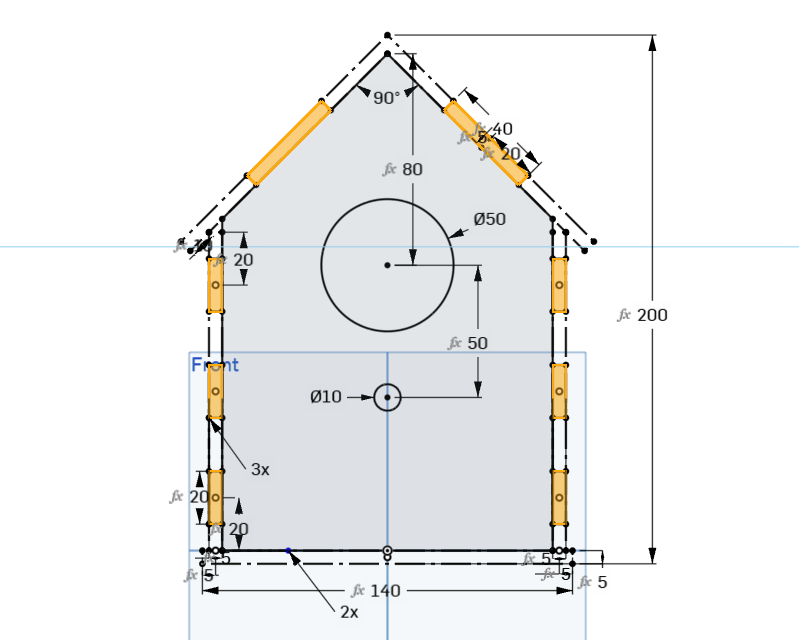
Sketch Front Profile
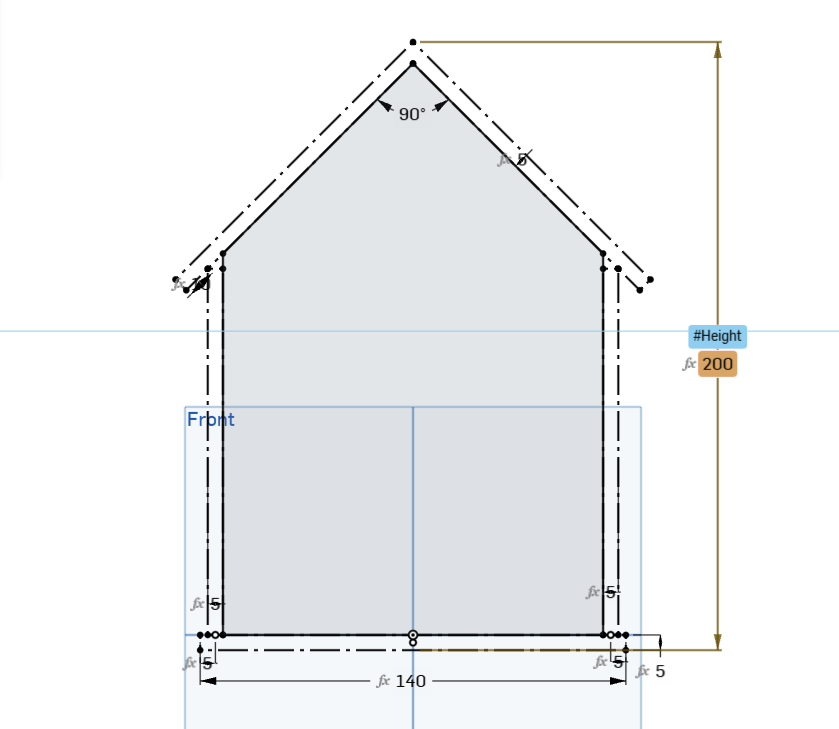
In a new sketch, you can create the general profile of the birdhouse, referencing the width of the base, and keeping a few critical things in mind.
Define the height of the birdhouse using your HEIGHT parameter.
Ensure you include the walls (Of course using the WOODWIDTH parameter)
Add the roof boards, also using the WOODWIDTH variable, and keeping their angle and 90 degrees.
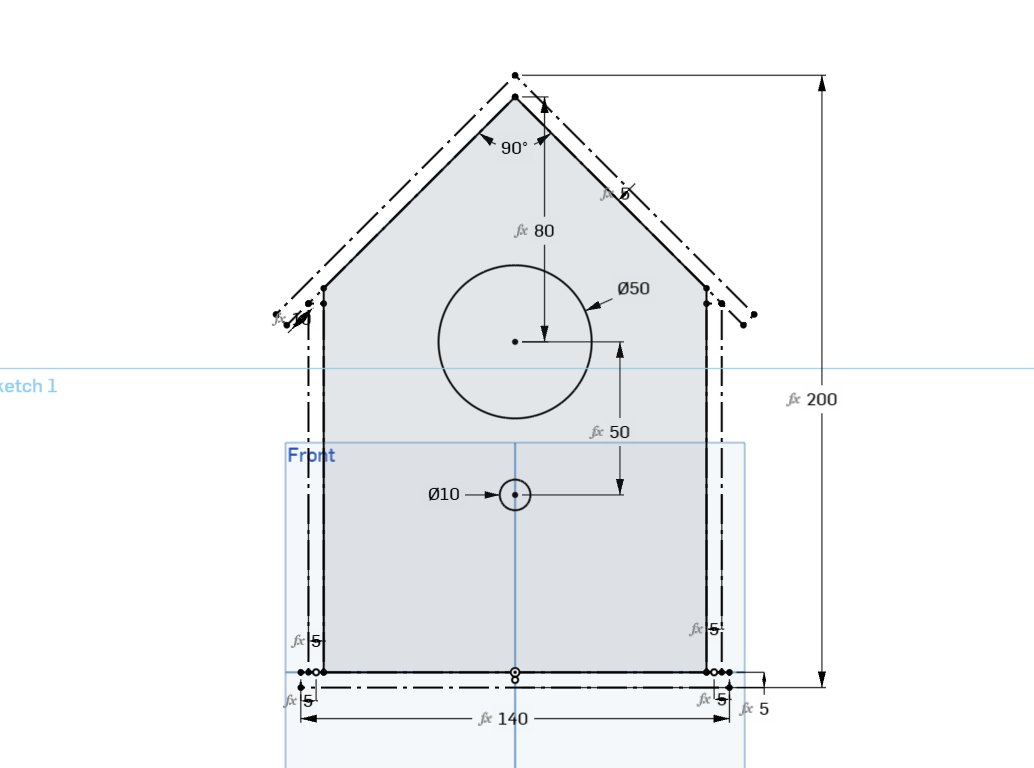
Include a hole for an entrance and one for a wooden dowel. (These do not HAVE to be constrained to parameters)
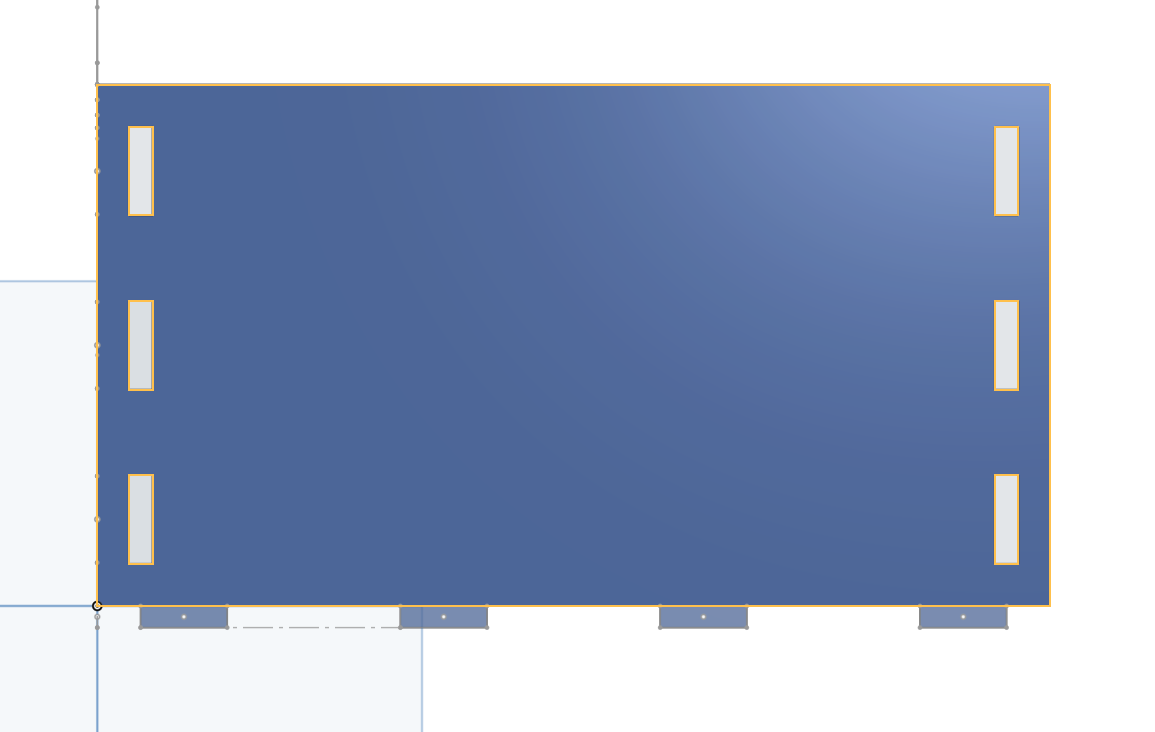
Create Front and Back
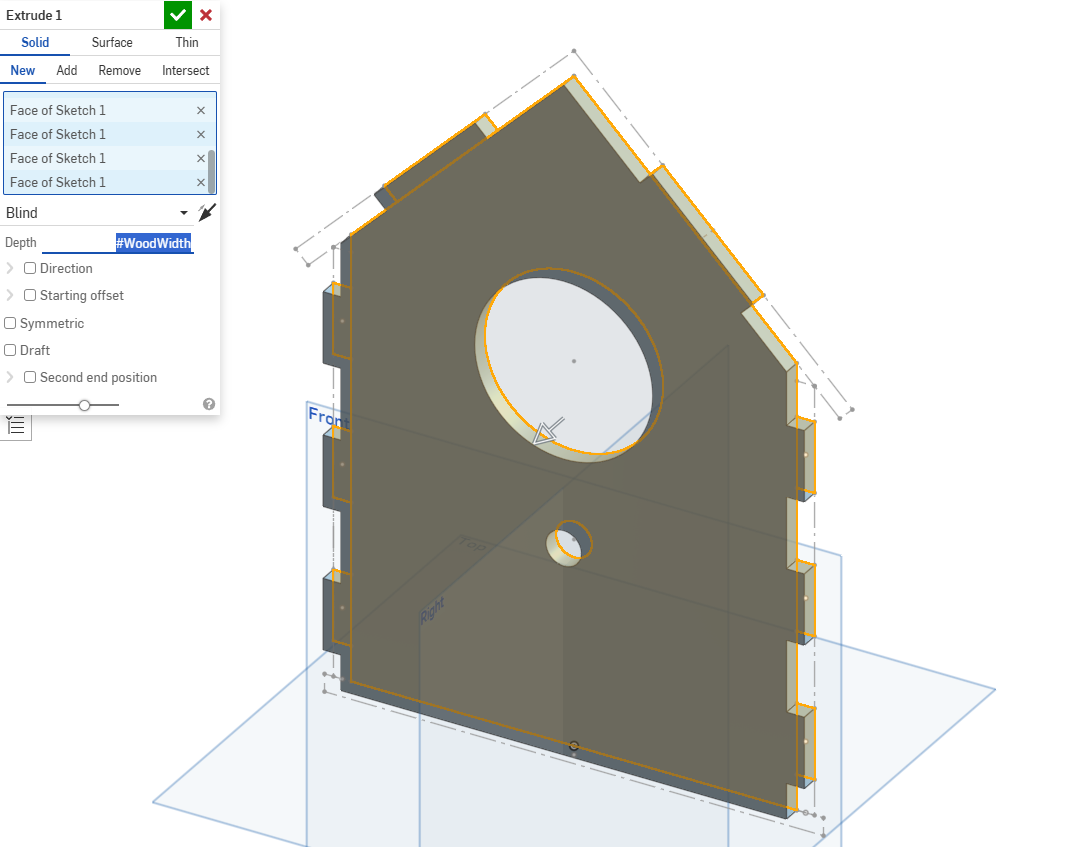
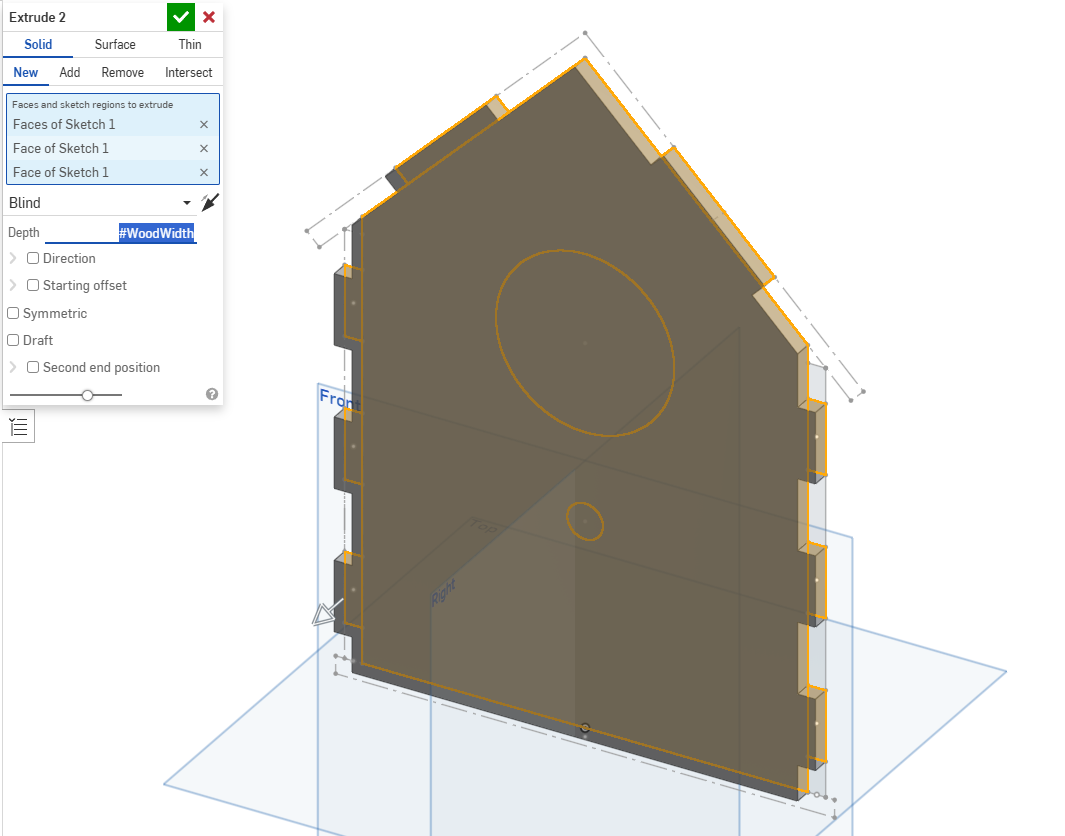
Next create tabs using TABLENGTH once again, using a linear pattern to create 3 on each side.
Create two tabs on top for the roof boards, these are dimensioned as TABLENGTH * 2
Finally extrude a board with both holes and one without.
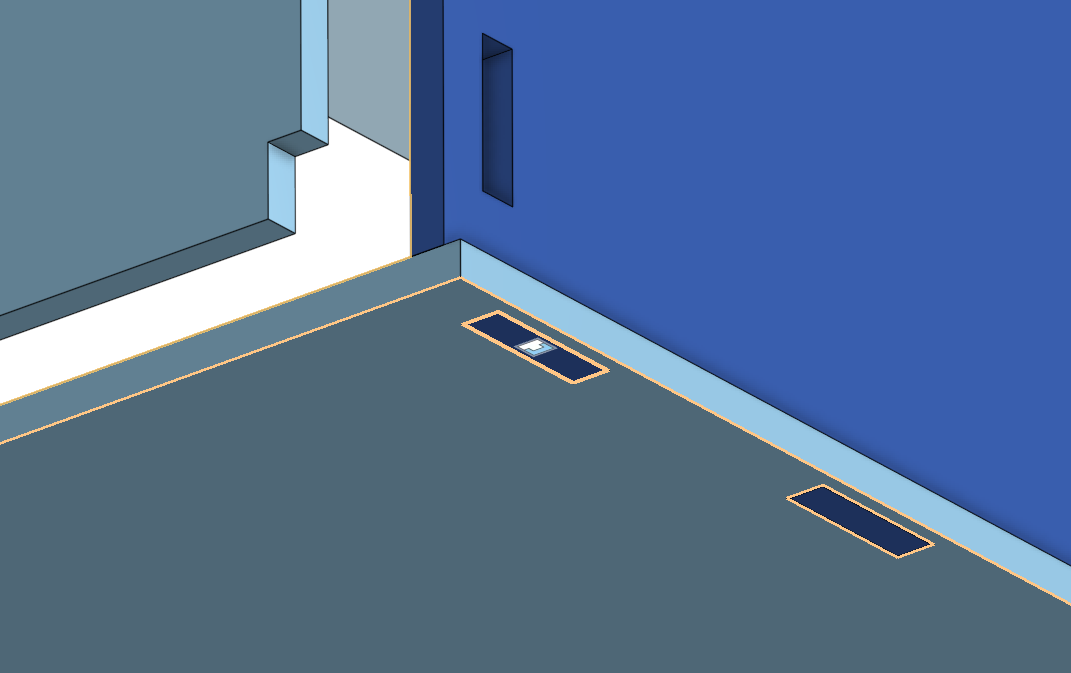
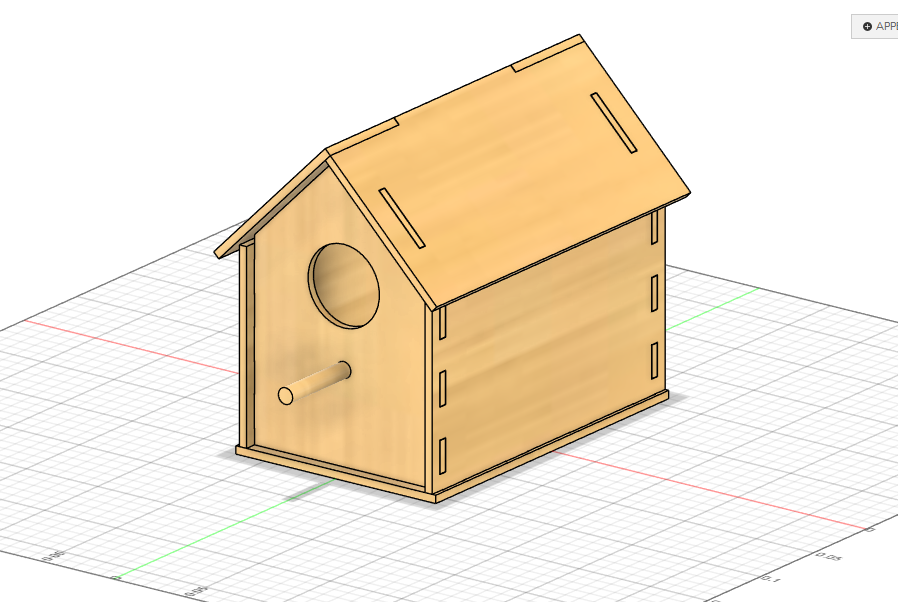
Create Sides
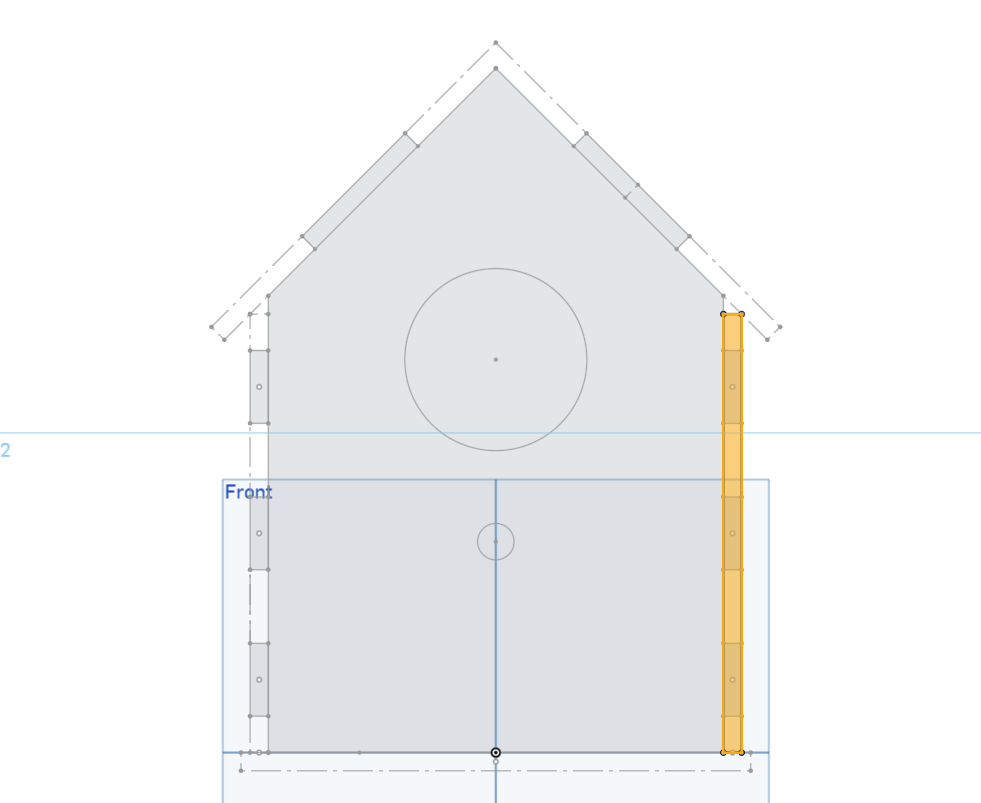
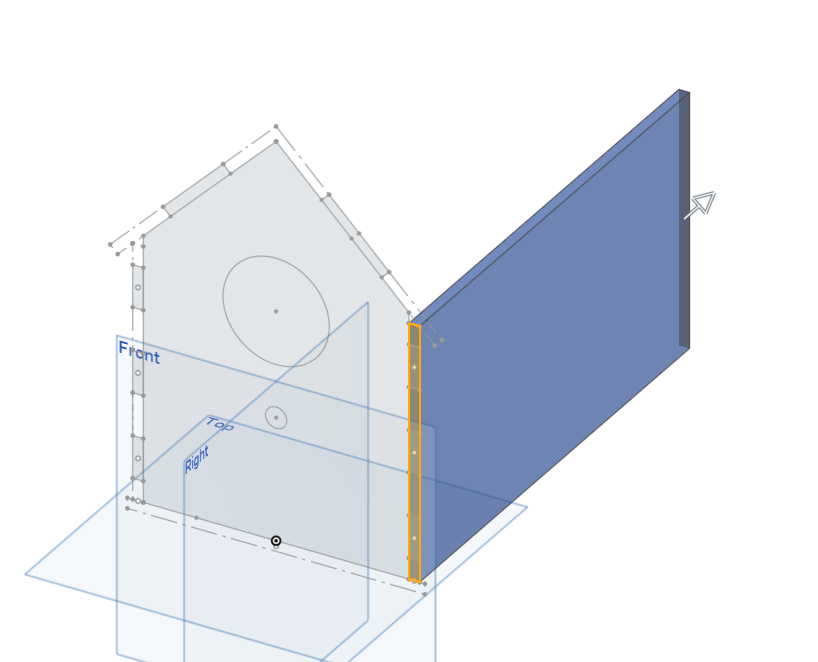

Create another sketch on top of the front profile outlining the area of the wall. Then extrude this area to LENGTH.
Again, create a sketch, this time on the wall profile to create slots to interface with the tabs on the front and back boards. (Remember to add TOLERANCE).
Don't forget to add tabs on the bottom to interface with the slots on the base.
You only need to do this for one side as they are identical.
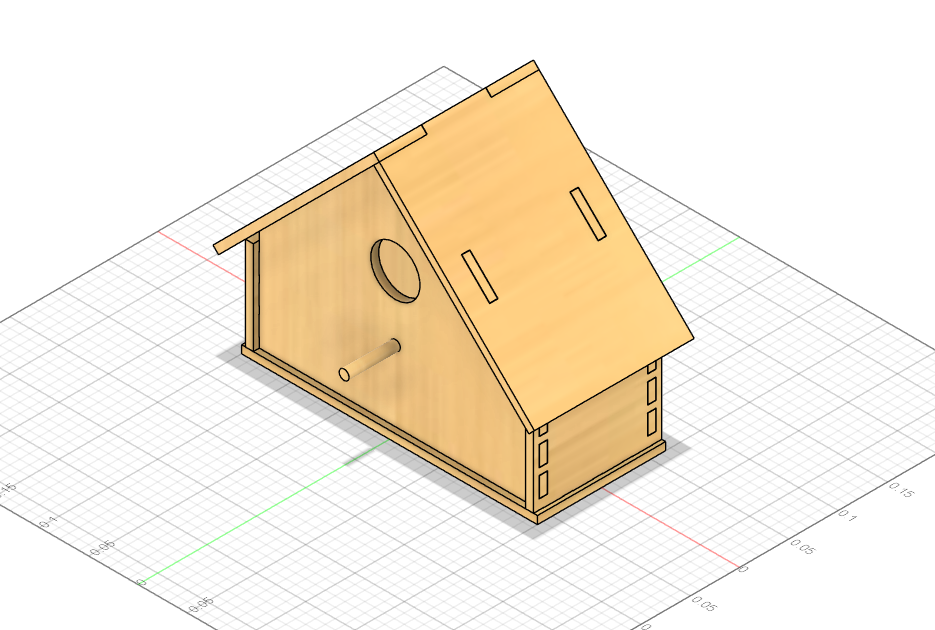
Create Roof Boards
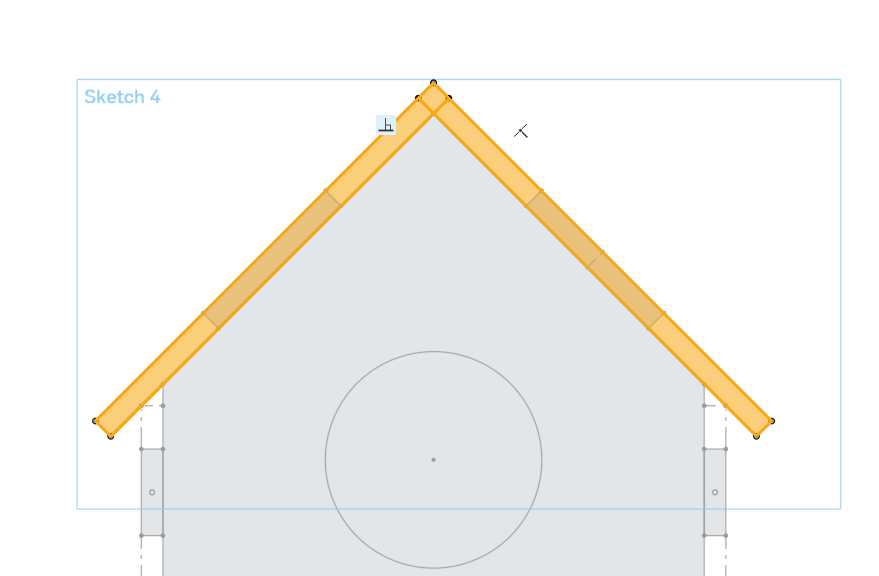
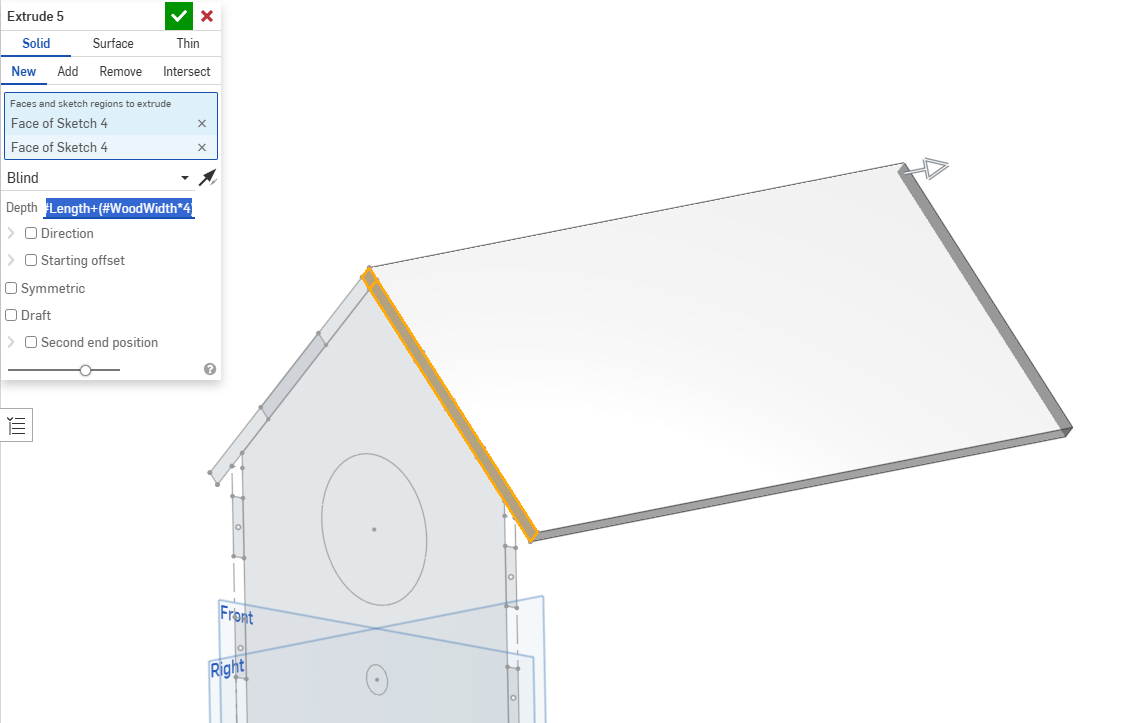
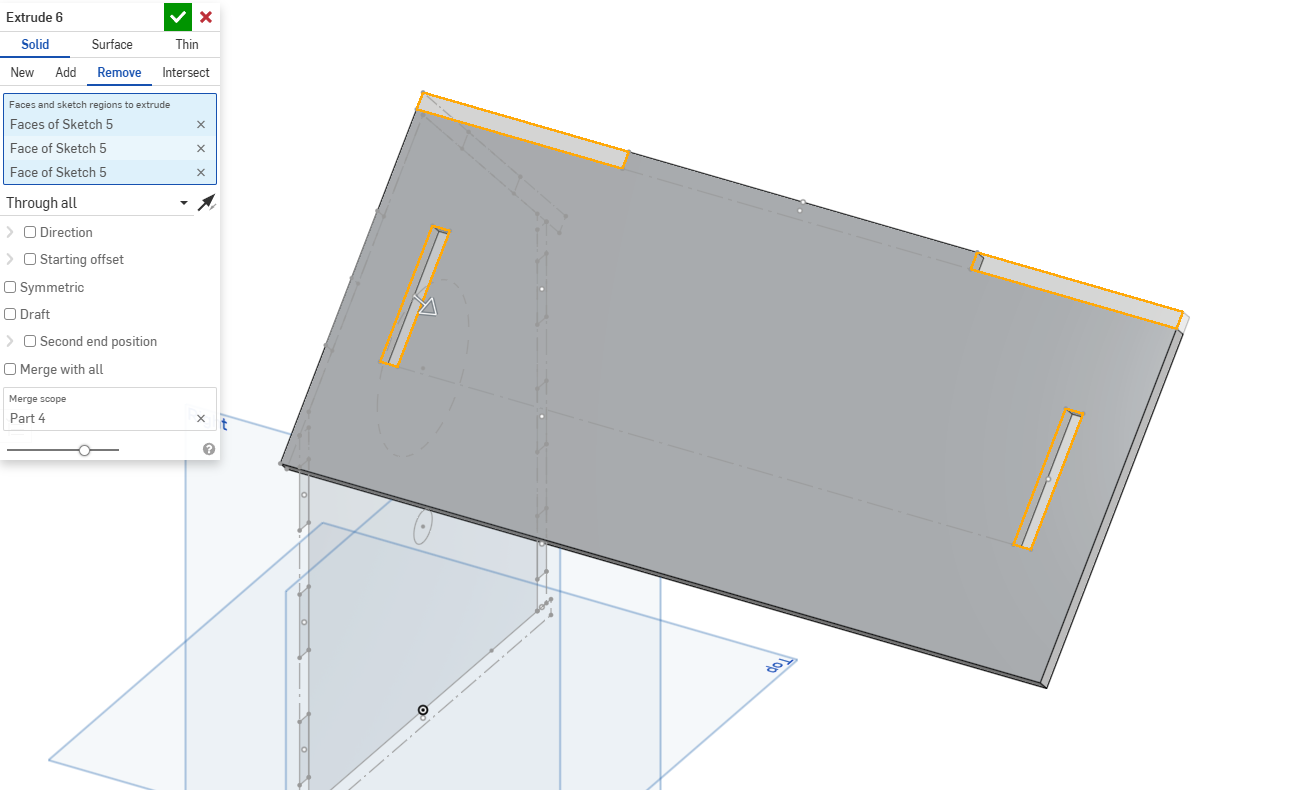

Similarly to the walls, create a sketch on the front profile and extrude each side of the roof boards.
Then create the slots for the modified tabs on top of the front and back boards (These should be located vertically in the middle of the roof boards).
Finally create a large tab on one of the boards that interlocks with the adjacent one.
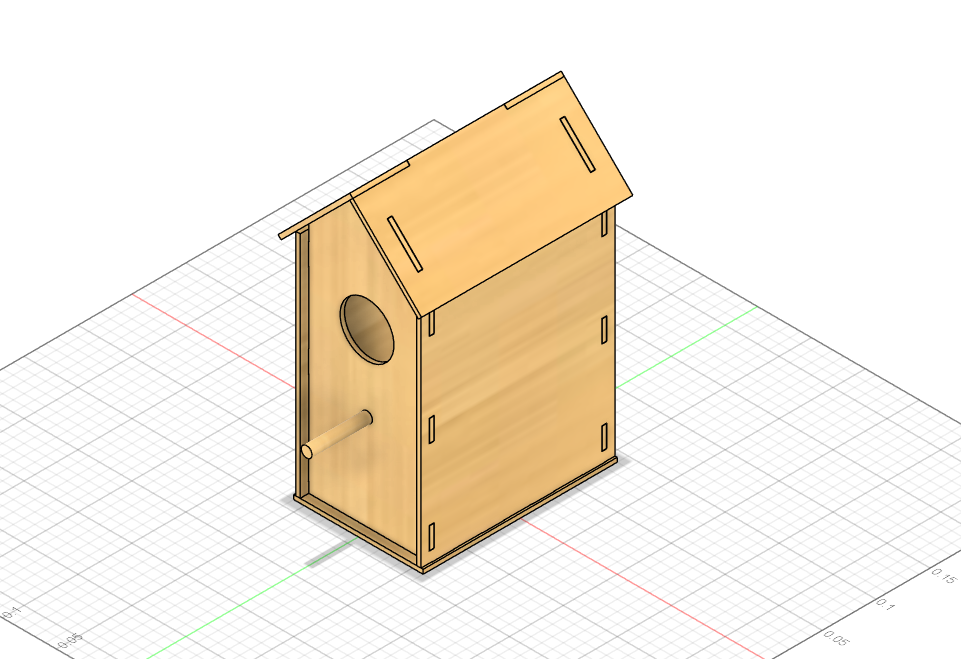
Import All Parts and Assemble
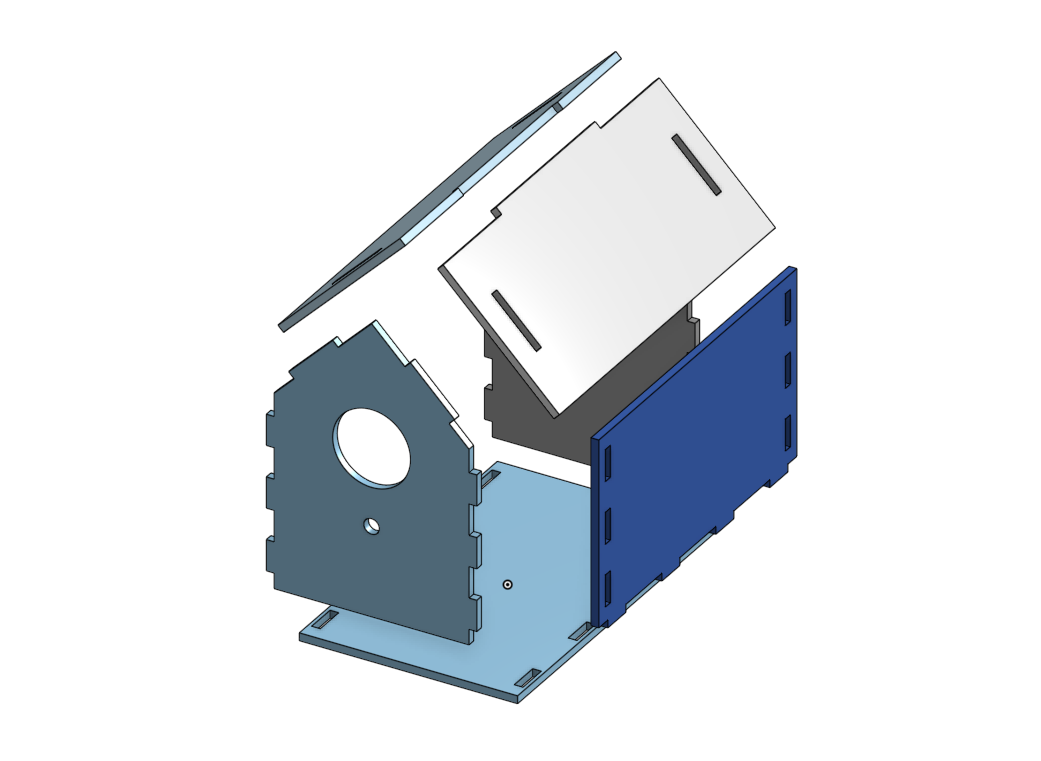

You have completed the majority of the parts required, however the assembly also requires technique and precision.
After gathering all the parts needed, you must create joints from the center of the tabs to the center of the slots (As shown in picture 2). This ensures there is even tolerance on all sides and everything lines up perfectly.
After everything is assembled, it finally resembles a full birdhouse, however there is still one thing missing.
Final Touches
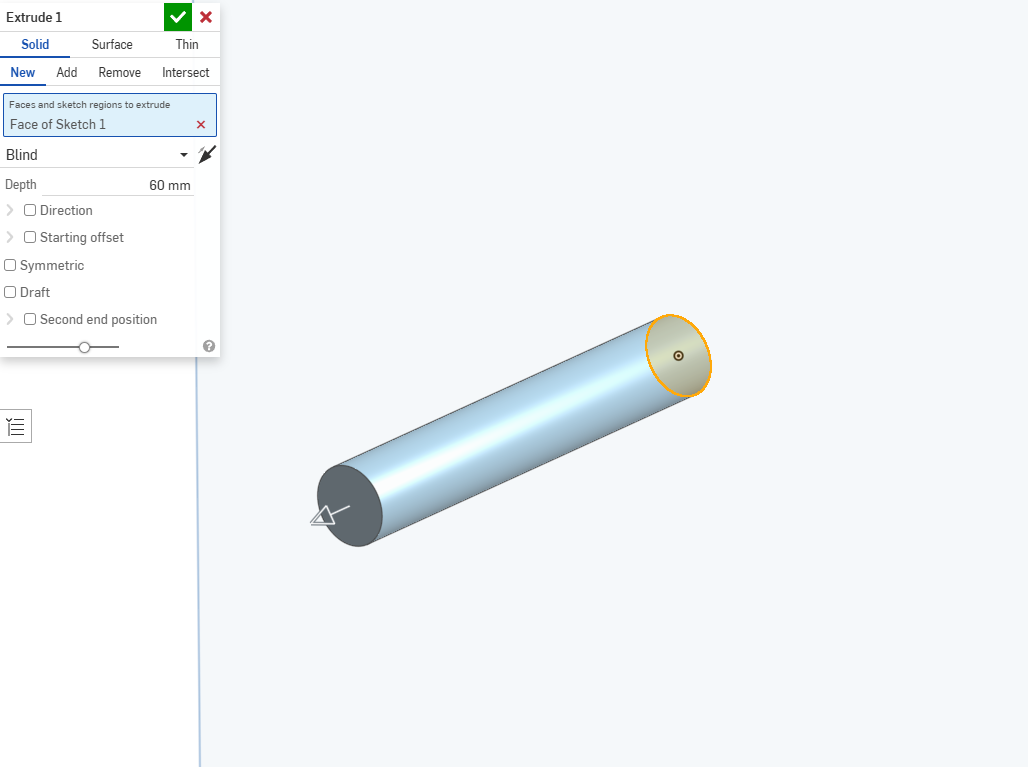

The wooden dowel is the only part of the project that is not designed to be laser cut. However it is a very simple part and is only a simple extrude.
And after adding it to the house, the project is complete.
Test Parameters
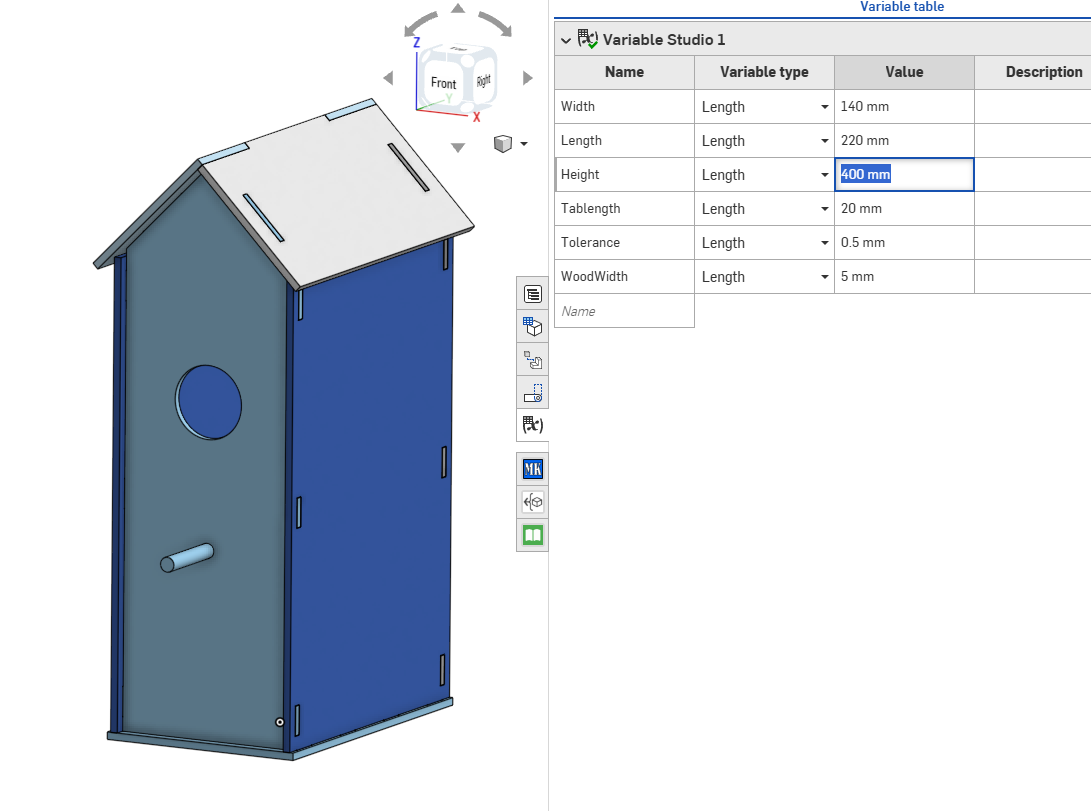
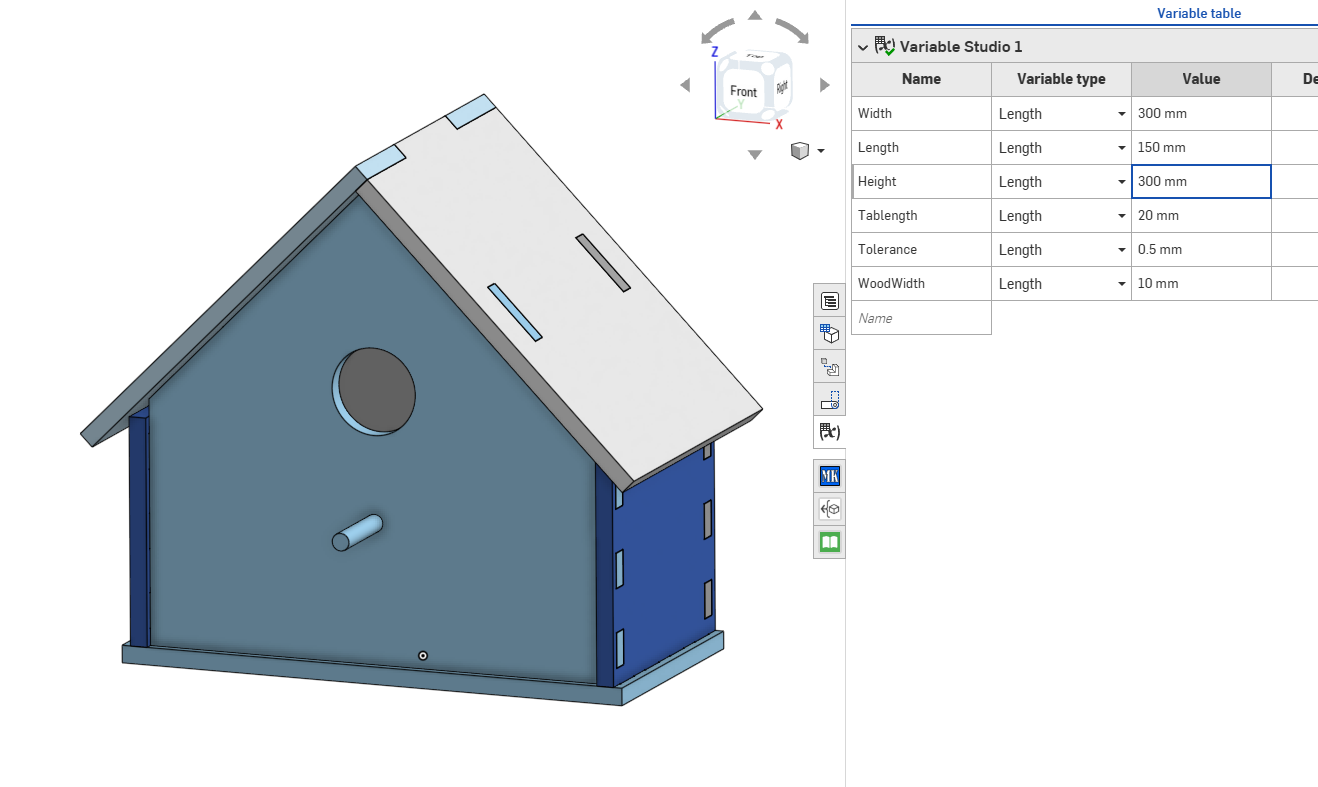
Next, change the parameters you specified at the beginning to see your model update in real time.
Ensure nothing immediately breaks and everything works as intended. However, note that extreme values may be too large or small and may break the assembly due to overlapping issues.
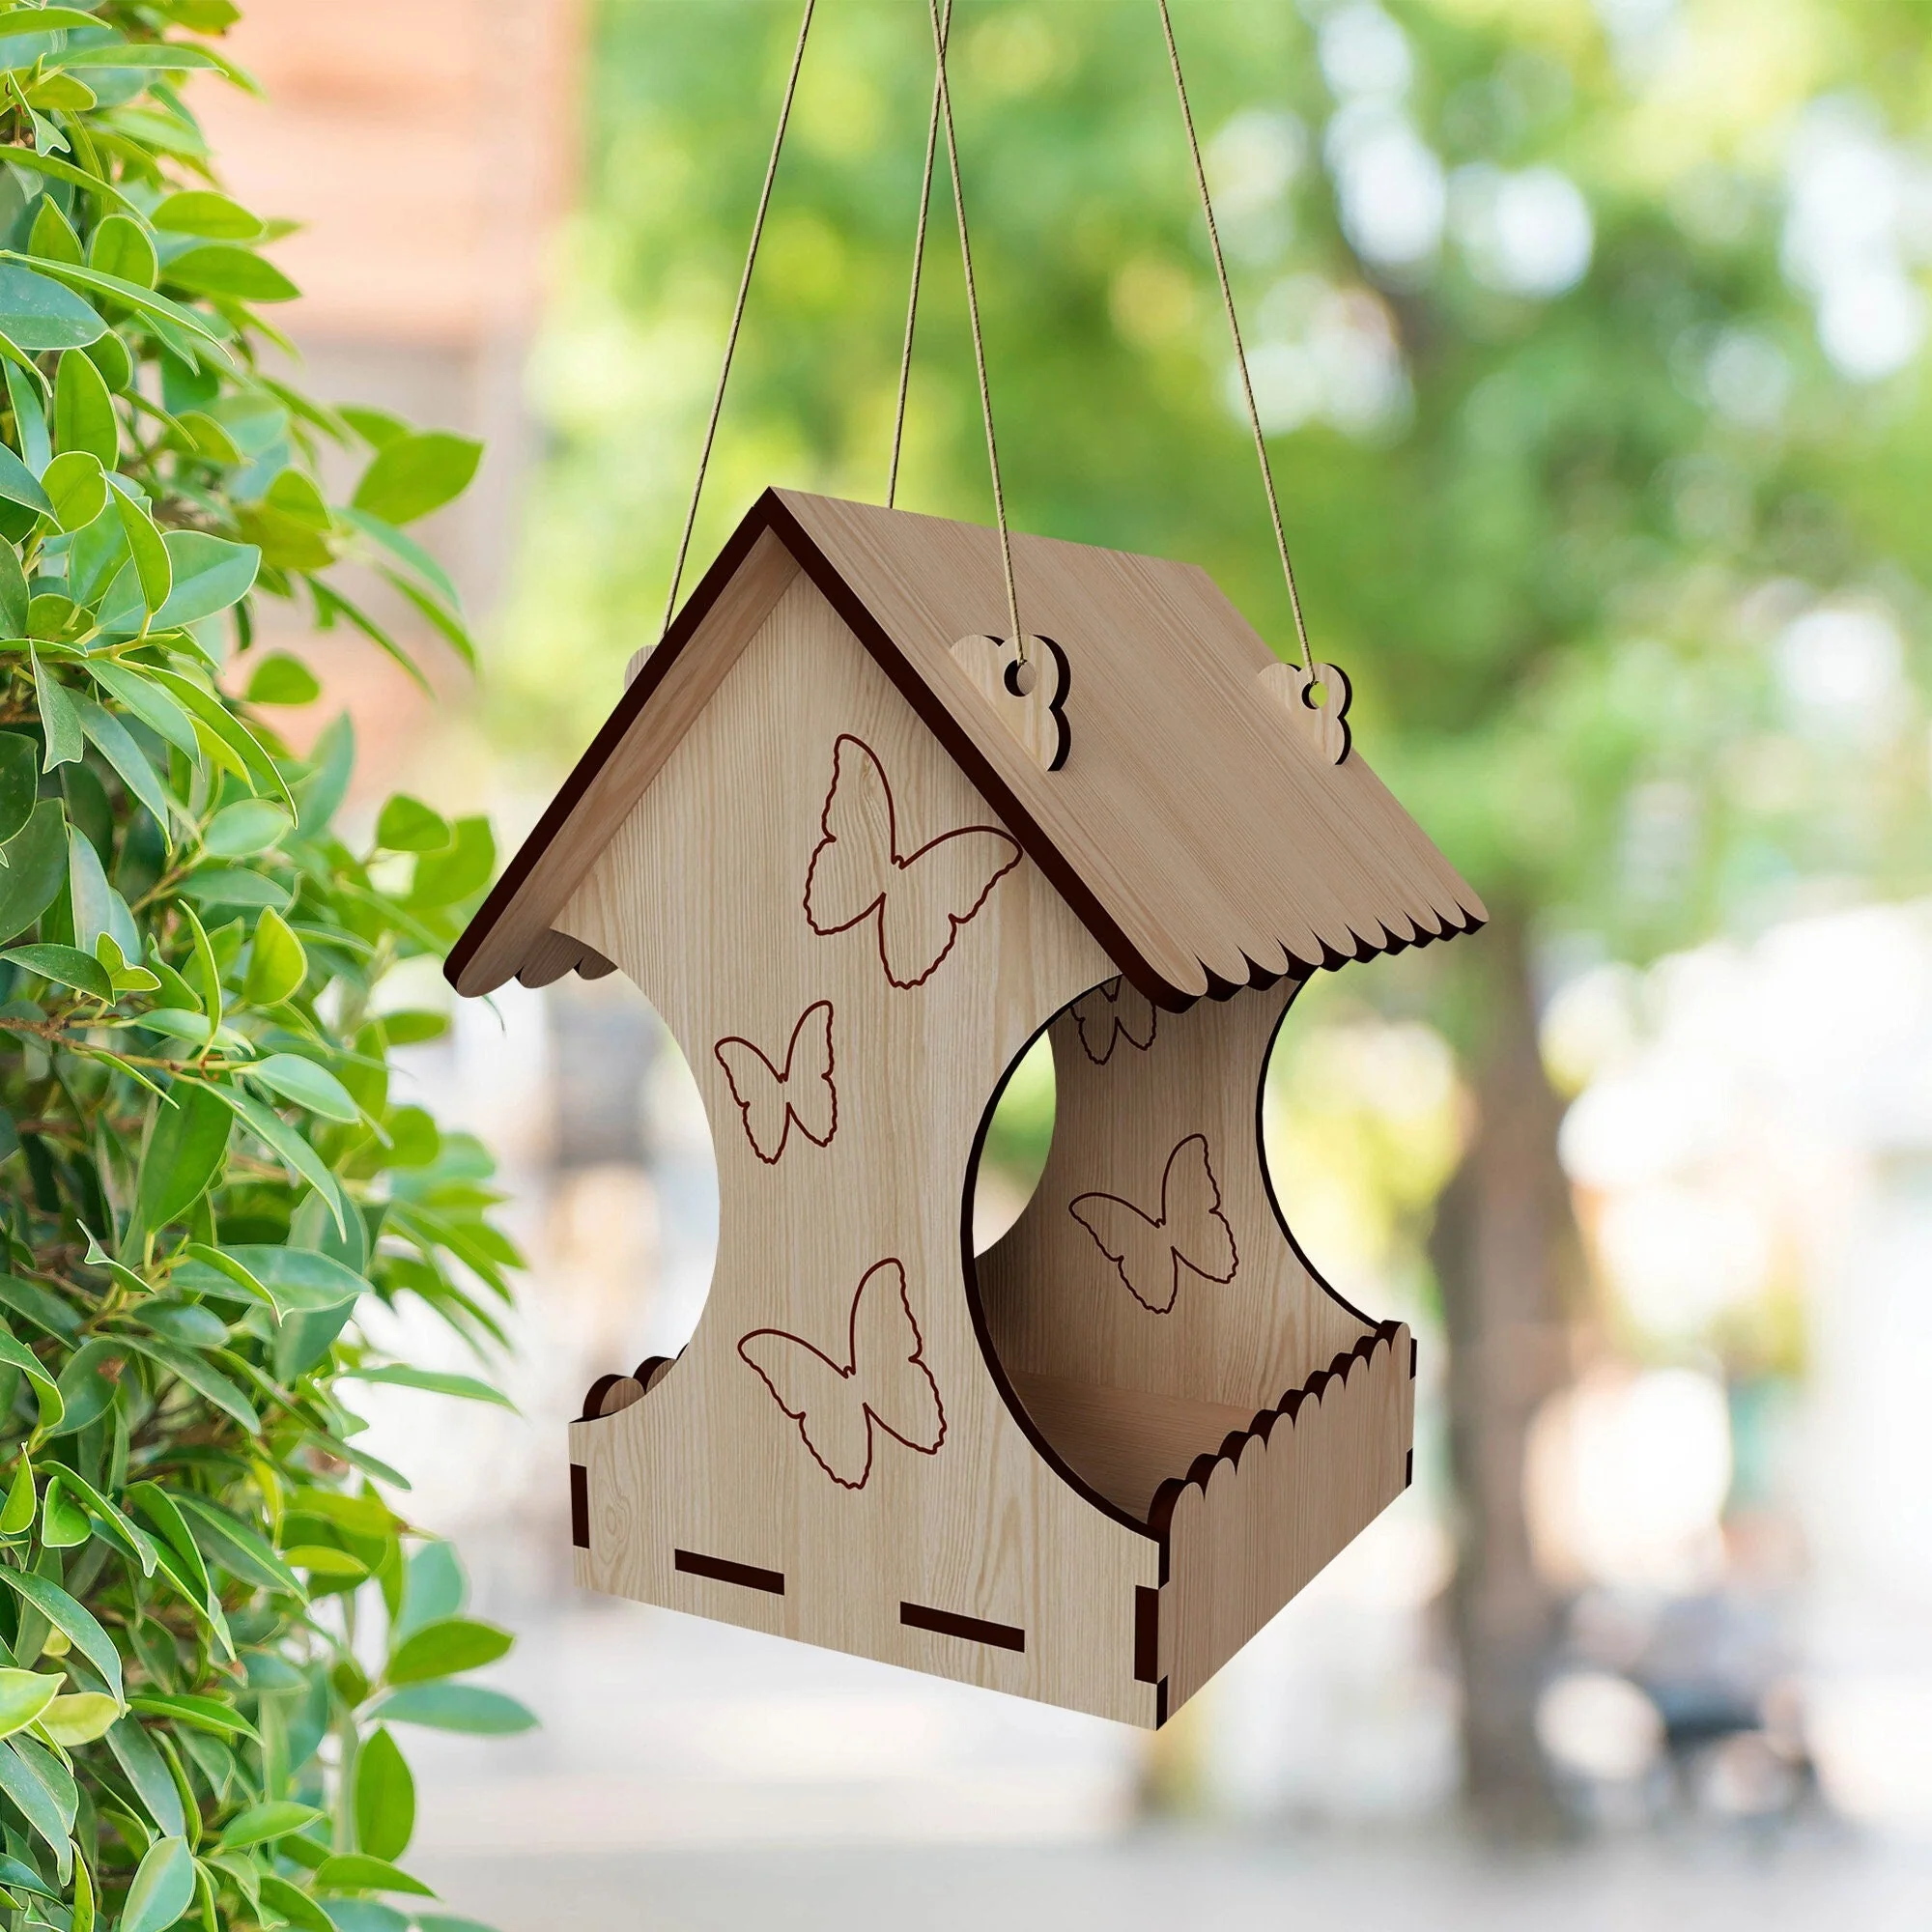
Manufacture
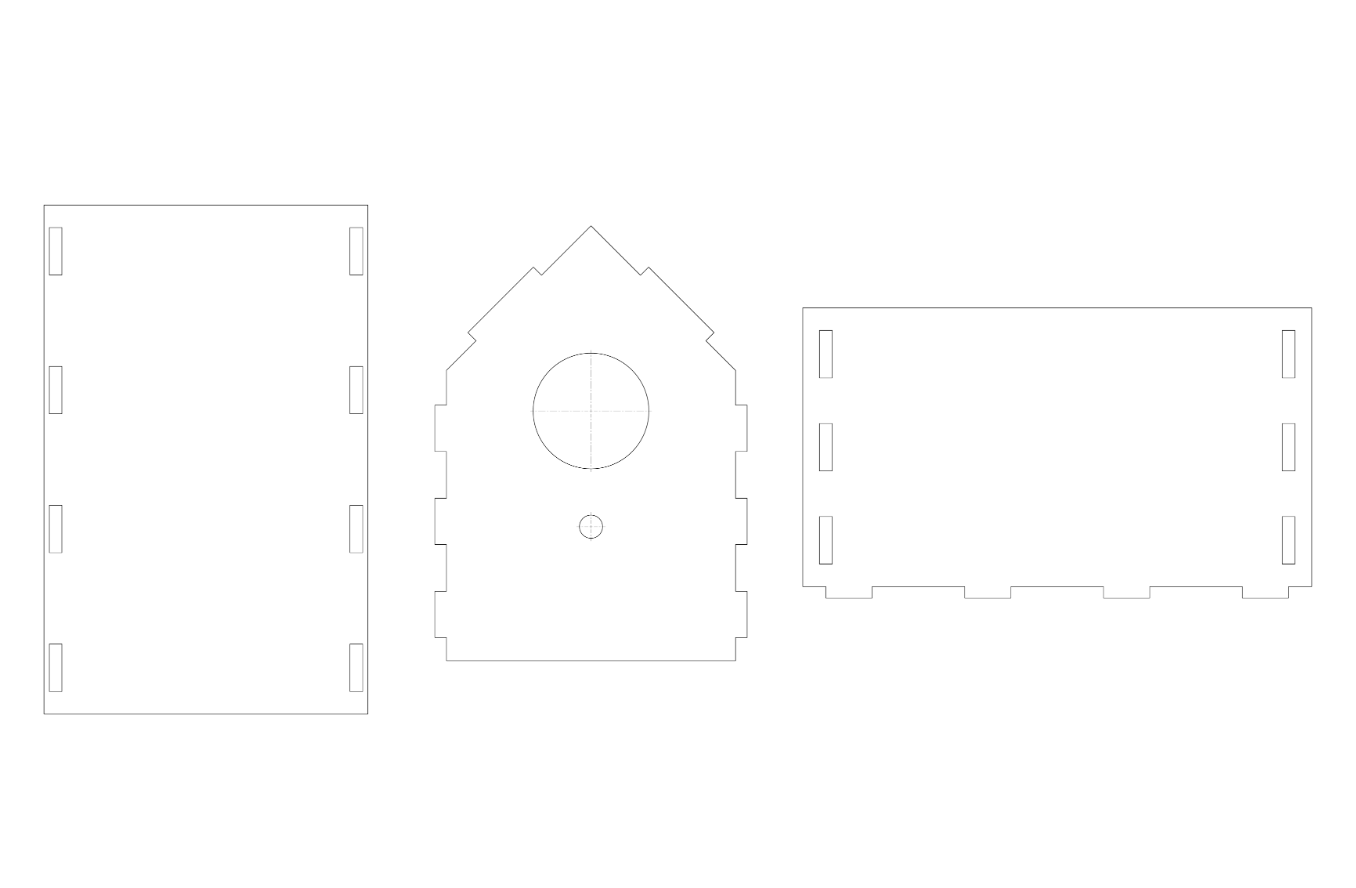
In theory, once you are happy with the dimensions and configuration of the birdhouse, you can export the designs as DXF or DWG, load them into a laser cutting software, or create a detailed design drawings similar to the one pictured above.
The goal is to make the design as accessible as possible, and for that reason I have provided the CAD link for you to copy and modify as you wish.
Edit Appearances
In Fusion, you can use the appearances tab to apply a wood texture to all surfaces.
This will be crucial for the next step in bringing this design to life.
Render
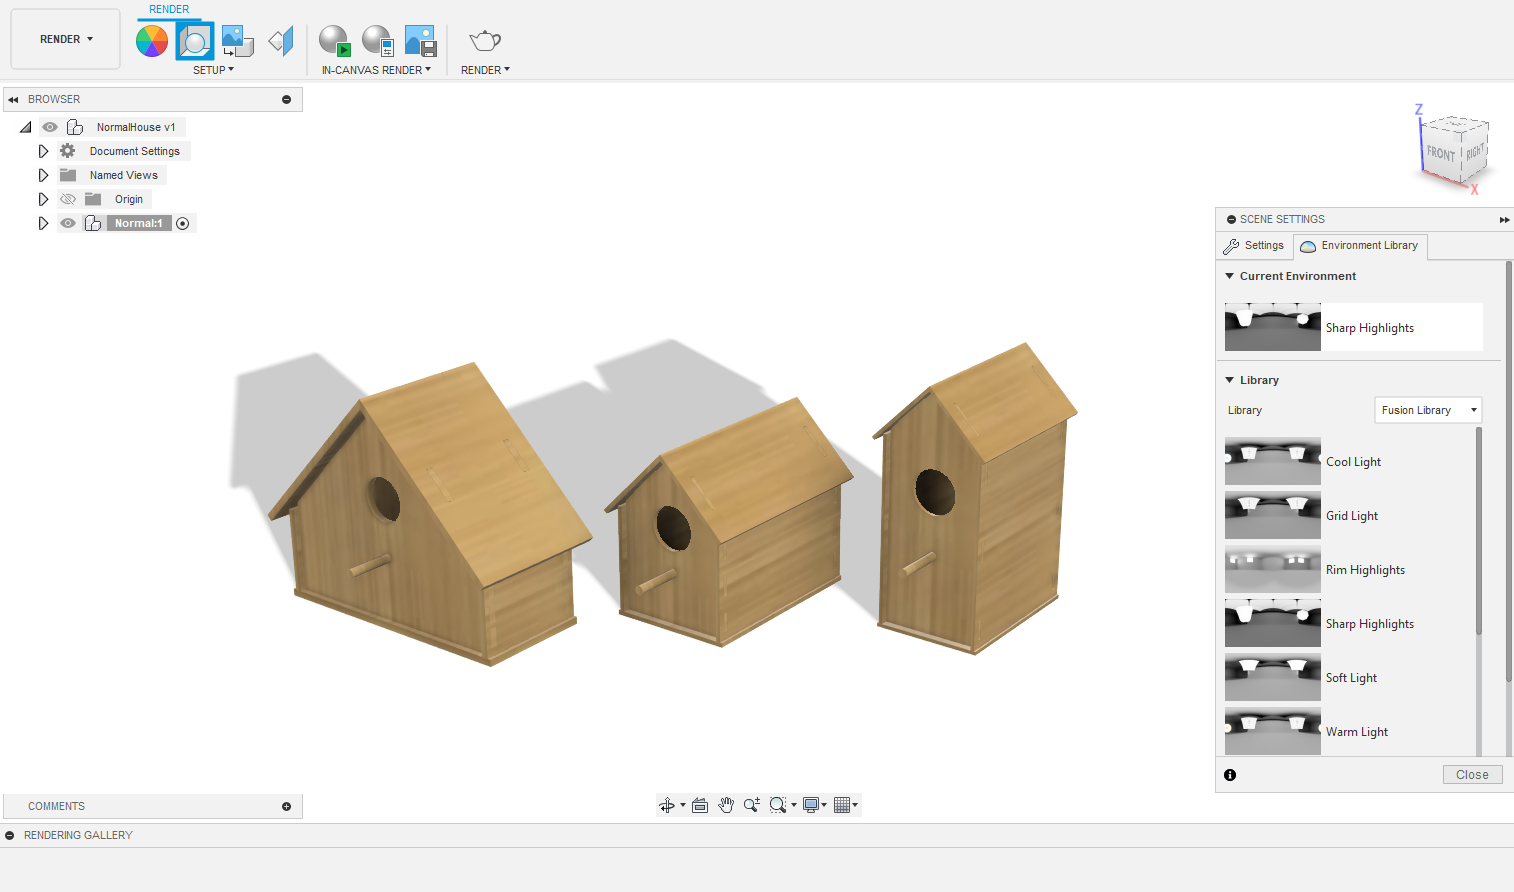
After importing each house into one design, use the "Render" section from the dropdown to create a realistic visualization of each birdhouse.
After adjusting lighting and composition, press the teapot button to render the final image.
Final Fusion Renders


Conclusion

Through this project I learned how useful parametric design can be when building for the outdoors. It pushed me to think about how small changes in size or material affect the way something works in nature.
This was also my first time rendering using Autodesk Fusion, which was very intuitive and critical in bringing this project to the next level.
By making the birdhouse customizable, more people can build one that fits their own yard and resources, which means more safe spaces for birds and more chances to enjoy wildlife up close.
This project proved that even simple designs can strengthen our connection to nature when they are flexible and easy to share.