PBL: Design Accessible Playgrounds With Hi-tech or Low-tech Activities
2036 Views, 11 Favorites, 0 Comments
PBL: Design Accessible Playgrounds With Hi-tech or Low-tech Activities
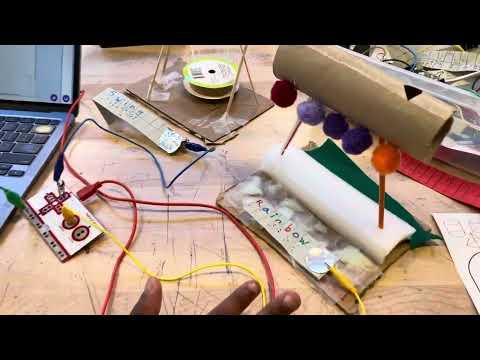

OVERVIEW: Designing Accessible Playgrounds is a fun and meaningful Project Based Learning unit that checks every box: 1. relevant, 2. flexible, 3. not messy, 4. suitable for ALL grades/maker levels!!!
Choose hi-tech or low-tech activities: 2-9 sessions, average 45 minutes each.
Guided by the question "How can we design a playground that is accessible to all," students investigate play structures from the Magical Bridge Foundation: bucket and group disc swings, ladder-less slides, creative playtime, Braille maps and more!
Go the distance and teach students to 3D Model in Tinkercad, then record audio descriptions of their playground models using a few simple Scratch code blocks which connect to Makey Makey key/controller clips and Braille signs.
OR, design entirely offline and have students research and create their designs from recycles, making handmade Braille signs with paper and push pins.
You CAN do this all-even if you're not techy and even with just one device and Makey Makey! I will walk you through it! Since I am a full time school makerspace teacher I split up the activities like this:
- Grades 1,2, and 3 built the cardboard models and designed signs on Tinkercad.
- Grades 2 and 3 also learned to use Scratch
- Grades 4 and 5 made Braille signs on paper and Tinkercad and used Scratch to record audio "welcome" signs.
- Grades 6-8 designed Braille toys and prosthetic solutions on Tinkercad.
P.S. the Rainbow Harp shown in the video is one of the attractions at Magical Bridge Playground!
Supplies


Materials and tools: Cardboard, scratch paper, pencil, scissors, tape, markers, hot glue guns (optional), small "recycles": plastic caps and lids, TP tubes, egg cartons, empty ribbon or tape spools, straws, foam chunks, wire, string or yarn...
Optional: colored construction paper, pipe cleaners, pom pons, craft sticks, pushpins, paper clips, play-dough Also, using a projector for this unit is very helpful!
Devices: Each student or group would ideally have a device to access the free Tinkercad and Scratch websites. MakeyMakey controller devices let kids make interactive inventions like keyboards with audio recordings and DIY game controllers: https://makeymakey.com/. MakeyMakey costs around $45 and is amazing!
Note that MakeyMakey has a USB cable which will not work with iPads. And, some Chromebooks have USB and some don't. Plan on getting USB adaptors.
Explore the Meanings of "Accessible" and "Inclusive" Playgrounds (30 Min.)
PREP: scratch paper and tape for partners, books or other objects to 'feel'
ACTIVITY:
- Post or project the big question: How can we design an accessible playground?
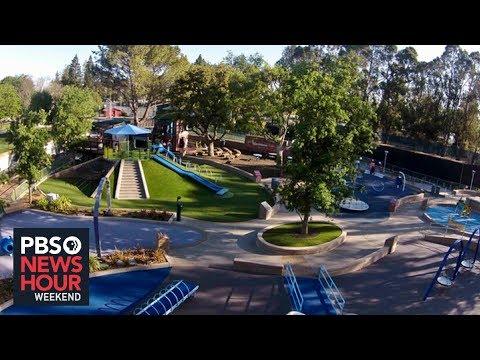
- Show a Magical Bridge Foundation video.
- Hands-On activities: have students tape their fingers together or make a paper mitten and imagine what it might feel like to hold on to a swing or climb a ladder. Have them do other things like , turning a book page, taring a sheet of paper or getting a piece of tape. Ask students to close their eyes and imagine being at a playground.
- Discuss the challenges some people have: physical, visual, emotional...and discuss ideas and solutions that could help.
Make a Paper Braille Sign (45 Min.)


Consider reading to students the Six Dots book/video about the origination of Braille Alphabet. You will need to project the Braille alphabet. One is shown in the second video, minute 3:00.
Students will create a small one word Braille sign for their structure, ie. slide, swing, seesaw...or an action word like play, climb, sway, spin, bounce, dance...Many students love the Rainbow Harp from the Magical Bridge playground!
PREP: half sheet of construction paper, pencil, ruler, scissors, pushpin* per student (*wait until very end).
ACTIVITY:
- Using a strip of construction paper the size of a ruler, have students use a ruler to then mark lines across the strip every one inch, creating boxes. Our strips were bigger so I had students use the straight edge to draw a long line lengthwise to create boxes for 5-7 letters.
- Have students write a letter into each box and then the evenly spaced dots pertaining to the letters.
- From behind the paper and each dot, students will use a push pin to poke through the paper making a raised little area that you can feel from the front.
- Older students may be able to write the Braille dots in reverse on the back using a projected alphabet in "mirror" view.
- If you plan to teach students Tinkercad, let them know they will get to 3D model a sign there too.
Alternate activity: same but with just play dough!
Brainstorm and Plan Your Design (20-30 Min.)
PREP: 2 sheets paper or plan outline and pencil per student, project a kid-friendly Design Process.
ACTIVITY:
- On a blank sheet of paper, have students draw and label some of the accessible play structures they saw in the video and the features that made them accessible.
- Have each student choose one structure that they will design, sketching first, and listing materials.
- Constraints: each student's design must fit on a 7x7" piece of cardboard. Teams of 3-5 will be useful if you are planning to use a Makey Makey for their audio signs.
Explore 3D Designing on Tinkercad, Part 1 of 2 (45 Min.)


PREP well before class: If you don't already have a Tinkercad Classroom set up, watch my video for the shortcut and it will take you just minutes-it's automatic! If you have more than one class (I have ten), it's still easy!
Print out two copies of the generated class roster and cut one into strips to be passed out to students, and use the other list to handwrite student's real names next to generated Nicknames for your records.
ACTIVITY:
Tell students that their goal is to explore Tinkercad 3D to see what parts of their structure they might design using the "basic shapes and the scribble" tools. We will use recycle materials but what can be designed in Tinekrcad to help us??? (Surrender to the fact that getting started, regardless of the grade (1st-8th), can be a bit chaotic. Lower grades need the typing practice!)
- Students should go to Tinkercad.com and click LOG IN. Show the Welcome screen and tell them to CLICK the green "STUDENTS WITH CLASS CODE" and begin typing the class code and their designated nickname.
- Discuss cyber security: not to change nicknames or save projects with last names etc.
- Challenge students to figure out how to "get started tinkering" by looking for words like 'Tinker" "3D," or "+, Create." Let them experiment and if time, invite them to click/drag common "playground" shapes onto the work plane.
- Play Shapes First Timers video.
3D Model Braille Signs With Scribble Tool, Part 2,(45 Min.)


PREP: devices and Braille alphabet
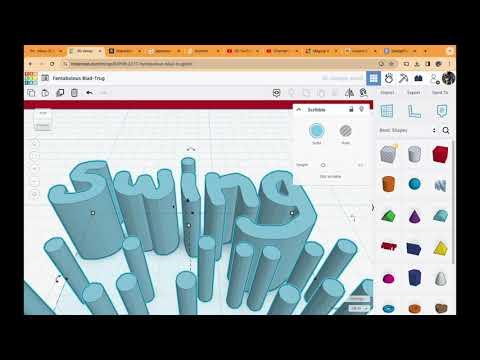
ACTIVITY Goal: Explore the basic Scribble tool in Tinkercad to further explore what works for our project, what doesn't, and why! Hint: the scribble tool works kind of like a 3D printer by first adding designs to the 'floor" of the work plane only.
- Repeat the Part 1 process of getting everyone signed into Tinkercad and explain the scribble goal.
- Let students play with the Scribble tool, (located under Basic Shapes and opens a temporary workplane.) It is soooo fun, especially using the preview option!
- Next, project the Braille Alphabet and challenge students to create a one-word sign using the Scribble tool to make the dots.
- Show instructional video if needed.
3D Printing reality check: At this point students will be excited to discover many possibilities for their project and will want to quickly print things that will likely fail or take way too long to print. What has worked for me is this two-fold strategy: First, keep them practicing design skills for weeks, checking for very common potential print problems: shapes floating above or below the work plane, accidental spaces between shapes, busy scenery designs with too many objects .
Second, explain how slow 3D printing can be and why, that all of our practice and work must be done before printing. Hold up examples of simple designs that take HOURS...and some crazy print fails!
This is why I love teaching students to make 3D signs or flat 3D designs like wheels, wings, simple parts like a spool or "L" bracket. Definitely plan on either checking every student's design for all these possible issues or, choose a few simple designs that you will print for every group.
Printing signs: the Swing sign pictured above took only 30 minutes to print! (Or email files to a printing service.)
Time to Tinker and Build a Structure (45 Min.)
PREP: cut enough 7x7" approx. pieces of cardboard for each student (flaps from boxes work well).
Supplies: trays of recycles at each table or stations, tape, scissors, glue guns
ACTIVITY:
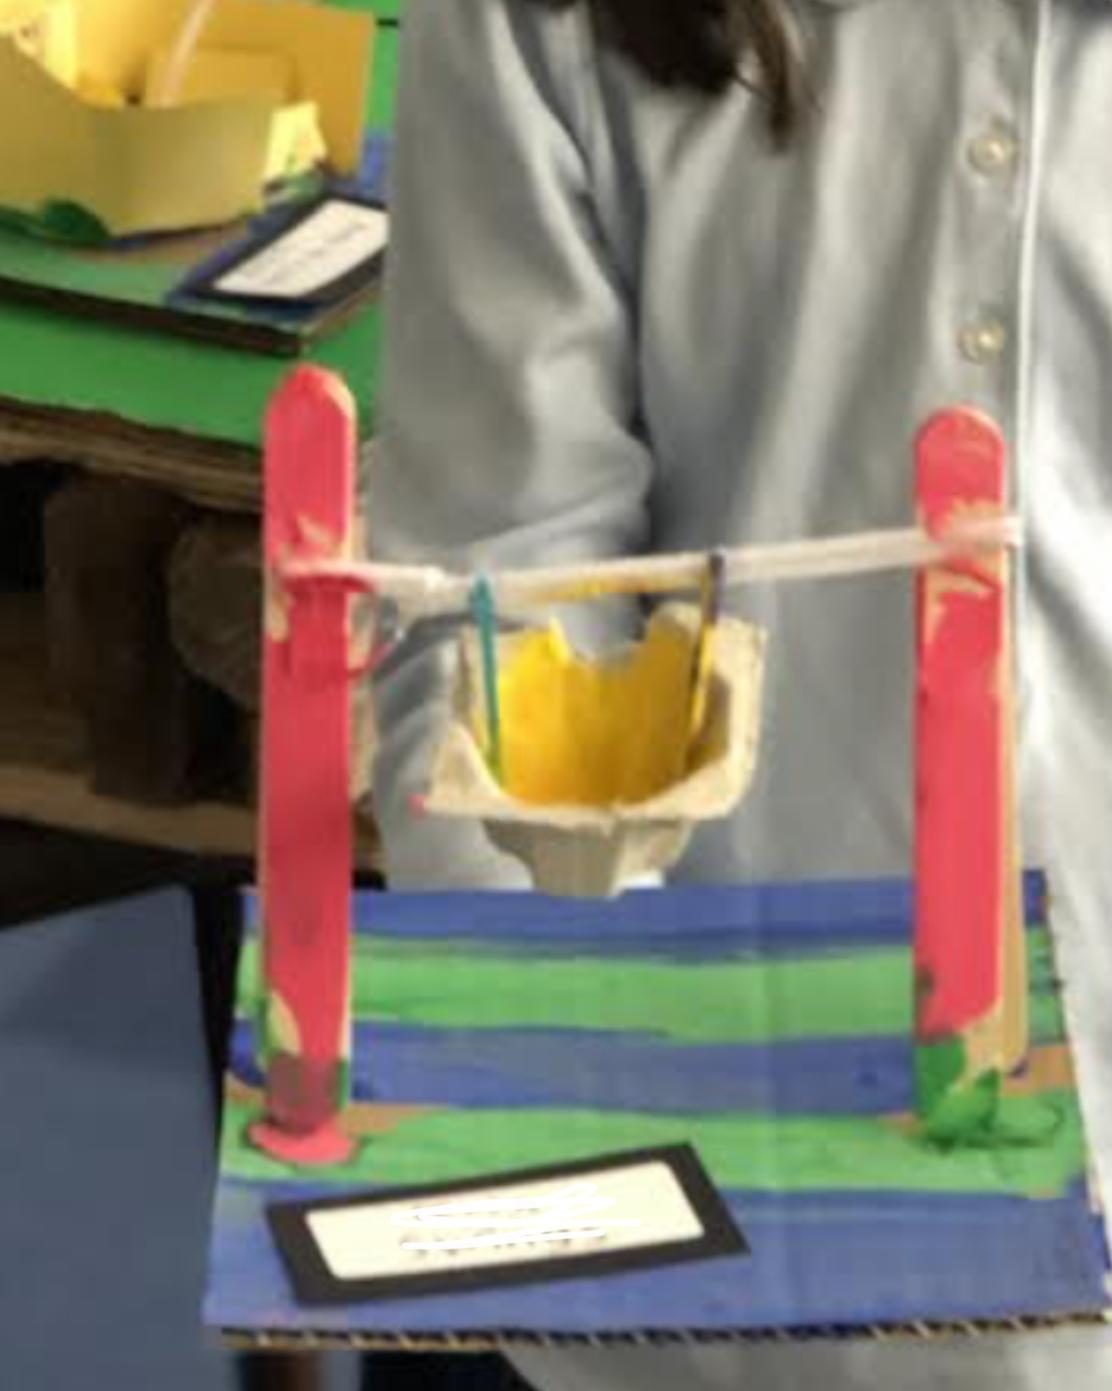
Remind students to build with small parts and to fit their structure on their cardboard piece which represents the ground.
Many students will be able to finish their designs in this one time slot. You can use a second session for students to make improvements and name tags, or add color with paint sticks or markers. Play-dough could be introduced on day two in order to help secure designs to cardboard.
Encourage your designers to take the Playground Engineering Skill challenge:
- Build a "triangle" or "L" support at the base of any tall poles.
- Hang a swing with evenly cut string.
- Fold a paper spring/fan for a bouncy feature.
- Connect a spool or lid with a straw or old marker cap to make something spin (wheel and axle).
- Try to use wire or string instead of hot glue and tape.
Quick Scratch Lesson to Record Audio Signs (45 Min.)


You can do this in just FIVE quick steps!
PREP Note: Although Tinkercad has a coding option and other fun features like the simulator, circuits and LEGO and Minecraft views, Scratch is the free coding website that works with Makey Makey controllers. Depending on the size and computer experience of your class, this is for grades three and up, but doable for younger. I like every student to learn Scratch on their own device but in the end only one device/MM set up is needed per group.
The MM controllers (and others like it), simply replace the keyboard and allow for lots of offline creativity when you touch the metal end of the alligator clips* (or something else conductive like, foil, fruit etc.). With even just one MM for the class, students can add audio descriptions for play zones! Access to the Internet is needed. 100% safe and no electrical concerns whatsoever...just the alligator clips can be hard to pinch and that can be avoided by attaching them to the MM board ahead of time.
Note: School devices often have microphones opted out and this is easily changed by "allowing" in settings.
ACTIVITY:
On their devices, students can search "Scratch coding" OR go right to scratch.mit.edu. and click "start creating." Great news: There is no need to sign up and projects can still be saved to their devices and imported each time they work. (A little tutorial window pops up and is helpful but easily closed.)
5 EASY STEPS to "CREATE:"
- After clicking "create," ignore cat/sprite designs on the right and just stay in the CODE tab.
- On the bottom left is the purple Extensions button which everyone should click to access MakeyMakey .
- Drag the newly appeared top MM code block (green) and then the top pink Meow Sound block; then make more of these sets depending on the number of recordings the group will make.
- Use the drop-downs under each green block to select which "hole" (up arrow, down arrow, space etc.) your wires will clip to. And from pink Meow blocks click to record an audio-welcome.
- After testing with computer keys, plug in the MM as shown in photo, using one hand to hold the "Earth" wire metal end and the other hand to touch each end of other wires (or foil or paperclip) to hear audio!
Set Up the Playground to Showcase Your Designs!


Depending on your table space and distance from structure signs to devices and Makey Makey, you may need to add length to the alligator clips by connecting long strips of foil or paper clips (which are the keys/buttons).
To help visitors testing the audio signs, you may want to create a foil ring like we did and make signs that say "Press Here." Or, have a student stand by to demonstrate.
Optional Signage and decor: I LOVE paint sticks instead of paint - or neither. Maybe you can find something to put under the cardboard squares: fabric, green, grey and brown paper, artificial turf, reusable table cloths...
Congratulations on exploring and sharing this wonderfully meaningful topic!
3D Modeling for Good - Prosthetics Extension


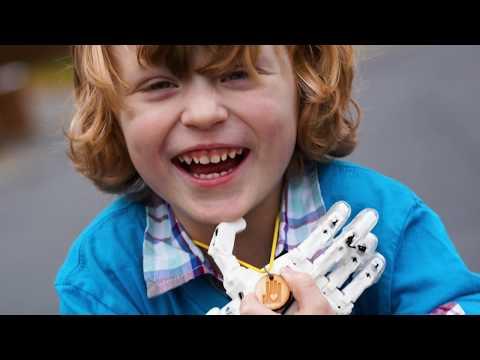
When students discover how wonderful it feels to design solutions for others, they should keep it going!
Prosthetics for people and animals: An amazing organization of global volunteers called E-Nable provides files and information for prosthetic hands! Our middle schoolers got valuable experience printing and assembling a hand for one of our students in need! www.e-nable.org
Other solutions: Students can use their imagination to design solutions using Tinkercad: Braille toys, dice or Pokemon cards, classroom tools, animal prosthetics...With the option to import professional 3D files into Tinkercad, students can remix designs like my students did! They invented a hockey stick attachment and a ukulele and xylophone attachment for a fellow music student born with out fingers on one hand.
These projects and activities made me fall in love with 3D modeling in a very heartfelt way. I hope they did for you! : )