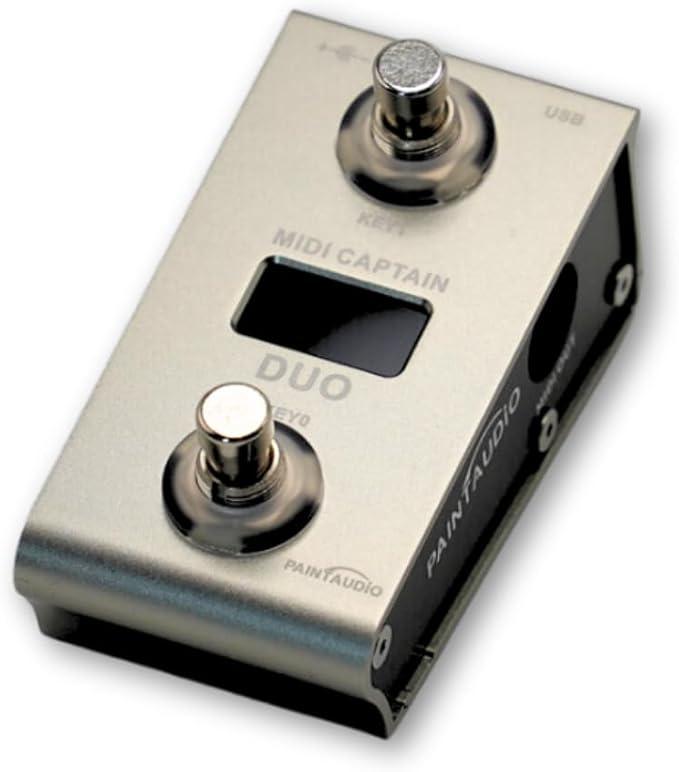
Paint Audio MIDI Captain DUO Foot Controller Setup
by Palframanl in Circuits > Gadgets
1104 Views, 1 Favorites, 0 Comments
Paint Audio MIDI Captain DUO Foot Controller Setup

Intro:
The midi captain duo is a powerful tool for musicians but many who own one will tell you that the setup is really hard because you have to know how to code and I'm only a musician not a programmer! Well this is a musicians guide to setting up the midi captain duo.(Many of the concepts are similar between models).
About:
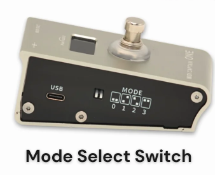
The midi captain Duo comes with a USB A to USB C cable (1 m / 3 ft) and a 1.5m / 5ft MIDI cable in the box. The Duo can be powered using either the USB port or the DC power port. The unit can send MIDI over USB or over a midi cable. Alternatively, the unit can also be programmed to function as a HID device (Mouse or Keyboard) and can trigger Keyboard shortcuts. The DUO has 2 momentary footswitches which are used to trigger the pre-programmed actions. Each footswitch has a 3 segment multicolor LED indicator. LED indicators can be programmed to display different button "states" and each in each state the individual LED segments can have a unique color. Each Button has 4 modes which are set using dip switches on the side of the unit.
* DISCLAIMER *
I am in no way affiliated with Paint Audio. This instructable is based solely on what I have learnt from reading the documentation and experience with using the footswitch.
Supplies
You will need:
- USB A to USB C cable (provided in the box)
- A Computer
- Midi Captain Duo / One
Enter USB Setup Mode

Hold down the "Key 0" switch while powering on / connecting the device to your computer.
Copy / Backup the Default File Structure

Copy / backup the default file structure from the midi captain duo. If you ever accidently delete any files / folders you can recover them.
The documentation is a bit vague when it comes to the layout of the file structure.
- Open the setup folder
- Open the Key0 or Key1 files.
Key / Button Program Files

The Key 0 file is used to program all the actions associated with that button. The Key 0 file also contains comments (a hashtag # followed by text) which are used to describe what each action does. For clarity lookup "comments in programming". Key 1 file is used to program all the actions associated with that button.
Programming Concepts


Basic Concepts:
Please note that all code is case sensitive.
The pedal has two switches, each switch has a total of 4 modes (mode0 - mode3). The modes are changed using a combination of dipswitch positions, labeled on the side of the unit. Each mode controls the LED colors, and midi / HID actions.
Find programming manual:
https://cdn.shopify.com/s/files/1/0656/8312/8548/files/Super_Mode_V1.2.en.pdf?v=1706882731
Code Summary:
short_dw1 =[][][] - Short down press 1st in sequence/loop - Short down presses are always executed regardless of how long the button is pressed. Rather use short_up# =[][][] to execute commands based on button press length.
short_up1 = [][][] Short up depress - only executes the command (s) if a short press is detected.
long1 = [][][] - Long press - executes command as soon as long press is detected, before button is released.
long_up1 = [][][] Long press up - only executes command when long press is released.
[mode0] - preceding code will only be run when button is in mode0.
[][][] - commands to be executed when button is pressed. Multiple commands can be executed with a single button press. E.g. [1][NT][2][127] [3][PC][5][-] The first 4 brackets are for the note change command: First bracket is for the midi channel, the next brackets denote the Midi command to be executed, the next set of brackets denote the note to be sent (2 represents D-1) see note table. The 127 represents the velocity of the note. [3] is the start of the next command. [3] represents midi channel 3, and [PC] is a program change. [5] is the value of the program change. [-] is blank but necessary to include.
Sample Code [KEY0 file]:
[mode0] # Code below contains actions for mode 0 (first mode)
keytimes = [1] # Number of actions the button can loop through
ledmode = [select]
ledcolor1 = [0x00ff00][0x00ff00][0x00ff00]
# inc1 to inc5 and dec1 to dec5 are supported. Ex. dec5 means PC -5
short_dw1 = [1][PC][inc1][-]
[mode1] # Mode 1 (second mode)
keytimes = [6] # 6 different actions will be executed / each action will be executed after each button press
ledmode = [normal] # LED Mode follows button loop
ledcolor1 = [0x00ffff][0x000000][0x000000] # Sets button LED colors (3 LEDs can be controlled independently)
ledcolor2 = [0x000000][0x00ffff][0x000000] # See color chart in manual to select colors.
ledcolor3 = [0x000000][0x000000][0x00ffff]
ledcolor4 = [0xff0000][0x000000][0x000000]
ledcolor5 = [0x000000][0xff0000][0x000000]
ledcolor6 = [0x000000][0x000000][0xff0000]
short_up1 = [1][PC][0][-] # Sends Program change command on channel 1, Program change zero.
short_up2 = [1][NT][1][127] # [Channel] [Command] [value 1] [value 2]
short_up3 = [1][NT][2][127] # [Channel 1] [Note] [note 2] [ velocity 127]
short_up4 = [1][PC][inc1][-] # inc / dec can only be used for program changes
short_up5 = [1][PC][dec1][-] # inc1-5 can be used to increment a number / decrement a number
short_up6 = [1][PC][5][-]
long1 = [1][PC][6][-]
long2 = [1][PC][7][-]
long3 = [1][PC][8][-]
long4 = [1][PC][9][-]
long5 = [1][PC][10][-]
long6 = [1][PC][11][-]
[mode0]
keytimes = [1]
ledmode = [select]
ledcolor1 = [0x00ff00][0x00ff00][0x00ff00]


# inc1 to inc5 and dec1 to dec5 are supported. Ex. dec5 means PC -5
short_dw1 = [1][PC][inc1][-]