PaperDine: Touch-Free Restaurant Management System
by Ameya Angadi in Circuits > Gadgets
53 Views, 2 Favorites, 0 Comments
PaperDine: Touch-Free Restaurant Management System
.png)
The Problem (The Kitchen Bottleneck): The modern commercial kitchen is a masterpiece of timing and precision, but the order management system is fundamentally broken. Chefs are forced to juggle lost paper receipts or tap on greasy, unhygienic touchscreens. Every physical interaction with a screen introduces cross-contamination risks and requires a workflow-breaking handwash. Furthermore, updating front-of-house customer signage like daily specials still relies on static menus or dusty chalkboards, completely disconnected from the digital workflow.
The Solution: PaperDine reimagines the restaurant workflow as a seamless, intelligent, and completely touch-free ecosystem. By combining low-glare e-ink displays, edge-based Seeed Studio XIAO Vision AI, and a real-time cloud database, PaperDine eliminates screen-tapping, maximizes productivity, and ensures peak hygiene.
The ecosystem is divided into three distinct, synchronized components:
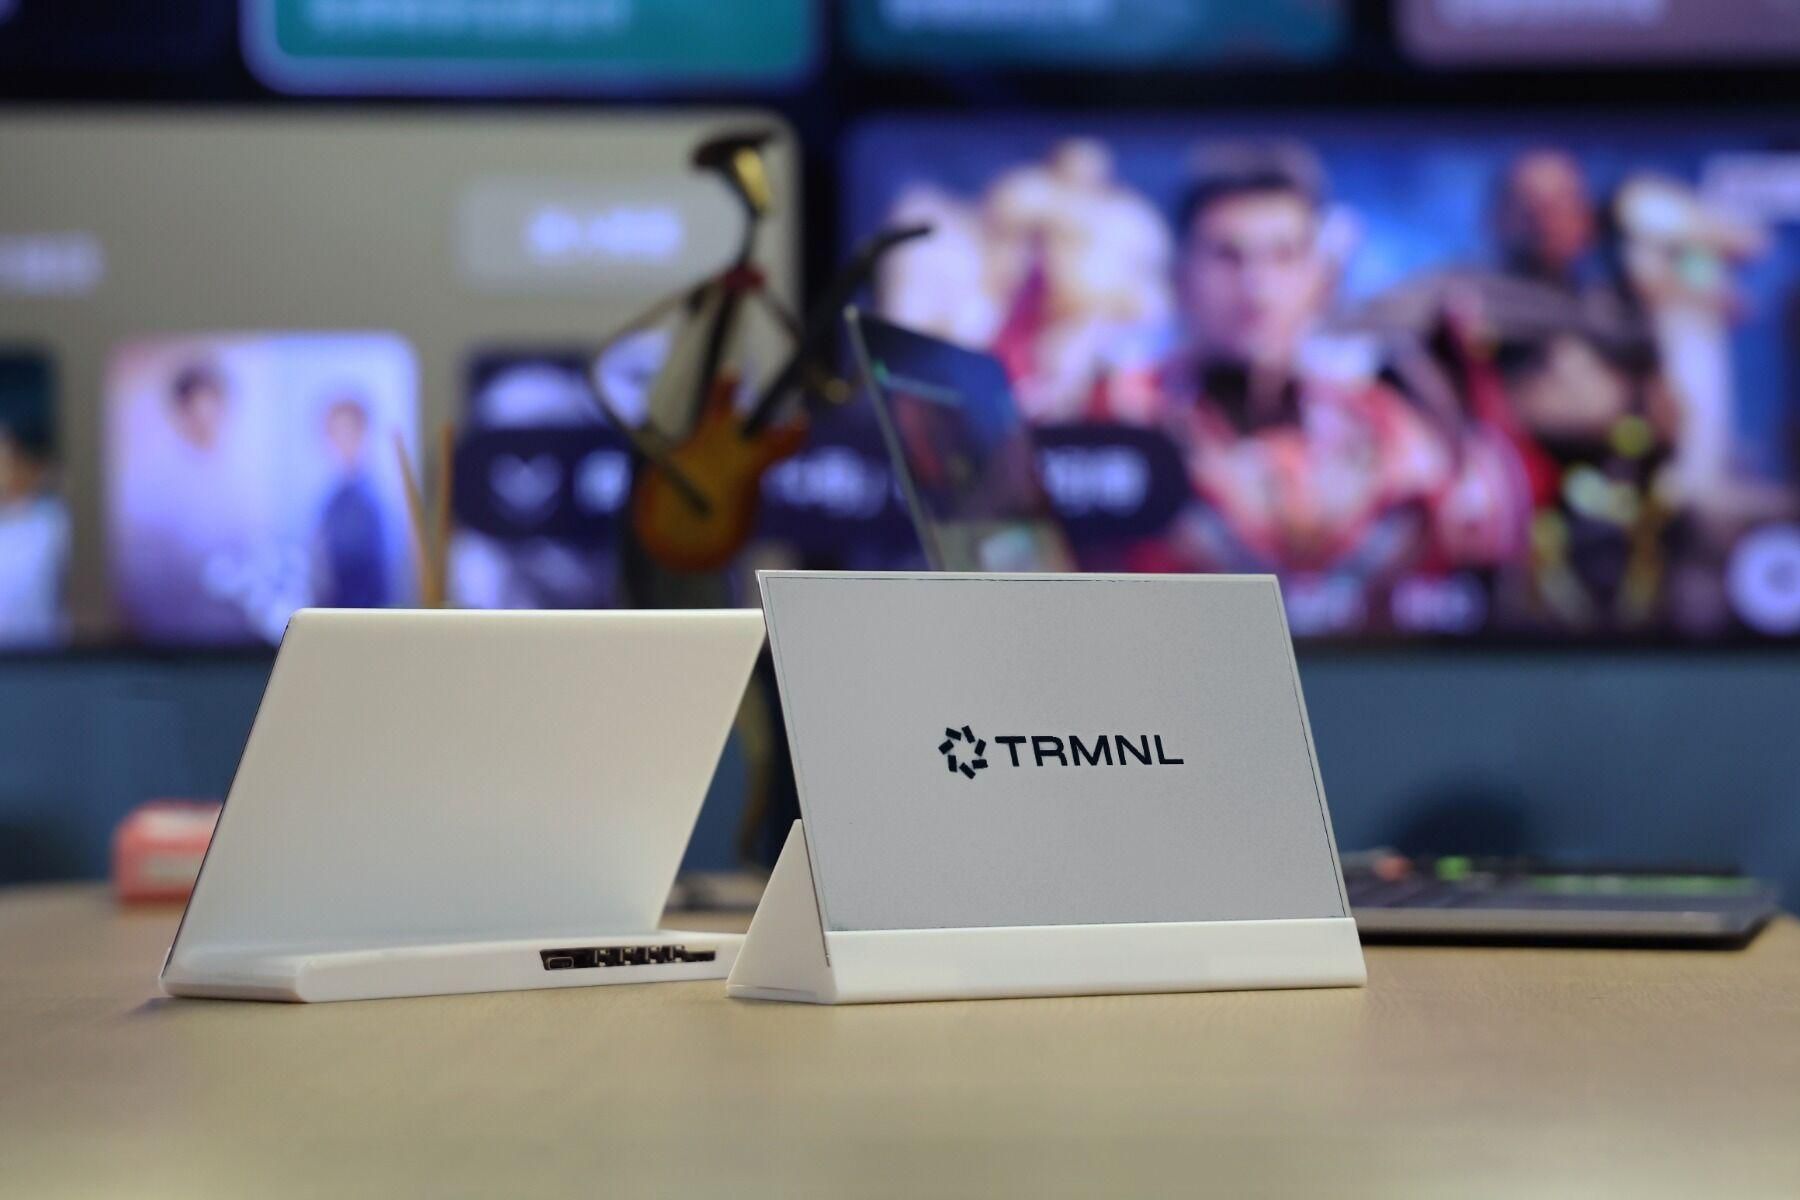
1. PaperDine TableSpot (Interactive Customer Signage): Built on the TRMNL e-ink kit, TableSpot acts as a dynamic customer information panel on the dining table. It features a persistent QR code for digital ordering. Restaurant owners can effortlessly update advertisements, daily specials, and promotions via SenseCraft Seeedash (they can use Canva for designing too) completely code-free, bridging the gap between digital marketing and the physical table.
2. PaperDine Web (Frictionless Cloud Ordering): Customers who scan the TableSpot QR code are instantly taken to a sleek, lightning-fast web app. Diners can browse the menu, view offers, and place payments. Under the hood, orders are instantly pushed to a Firebase Realtime Database. For restaurant owners, the backend acts as a powerful analytical tool, allowing them to export all sales data directly to JSON and then convert it to a spreadsheet.
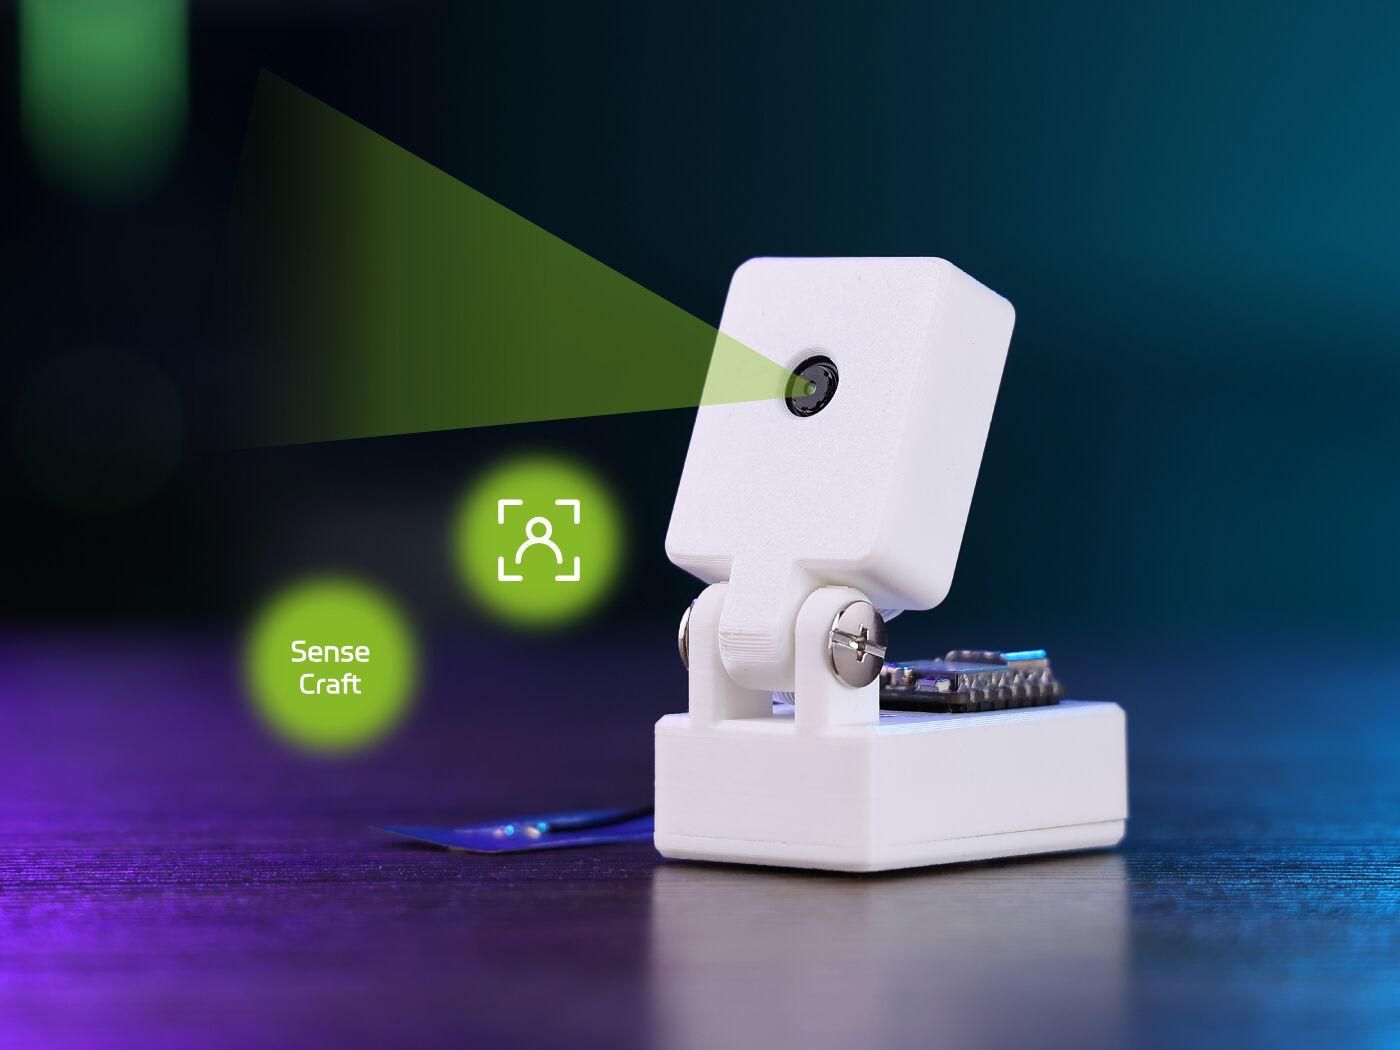
3. PaperDine ChefAssist (Zero-Touch Kitchen Display): The heart of the kitchen workflow. This touchless Kitchen Display System (KDS) pairs a TRMNL e-ink screen with a Seeed Studio Vision AI camera (powered by an ESP32). Incoming cloud orders are automatically segregated into "Fast Prep" and "Slow Prep" columns for maximum efficiency. Instead of touching the screen, chefs use simple hand gestures (Rock, Paper, Scissors) tracked by local edge AI to clear tickets or undo mistakes. With a system latency of under two seconds and custom partial update logic to prevent e-ink ghosting, chefs stay in their rhythm without ever breaking hygiene protocols.
Project Overview & Feature Video
Before diving into the technical wiring and code, the best way to understand the magic of PaperDine is to see it in action.
Supplies
3D Printed Frame & Print Settings:
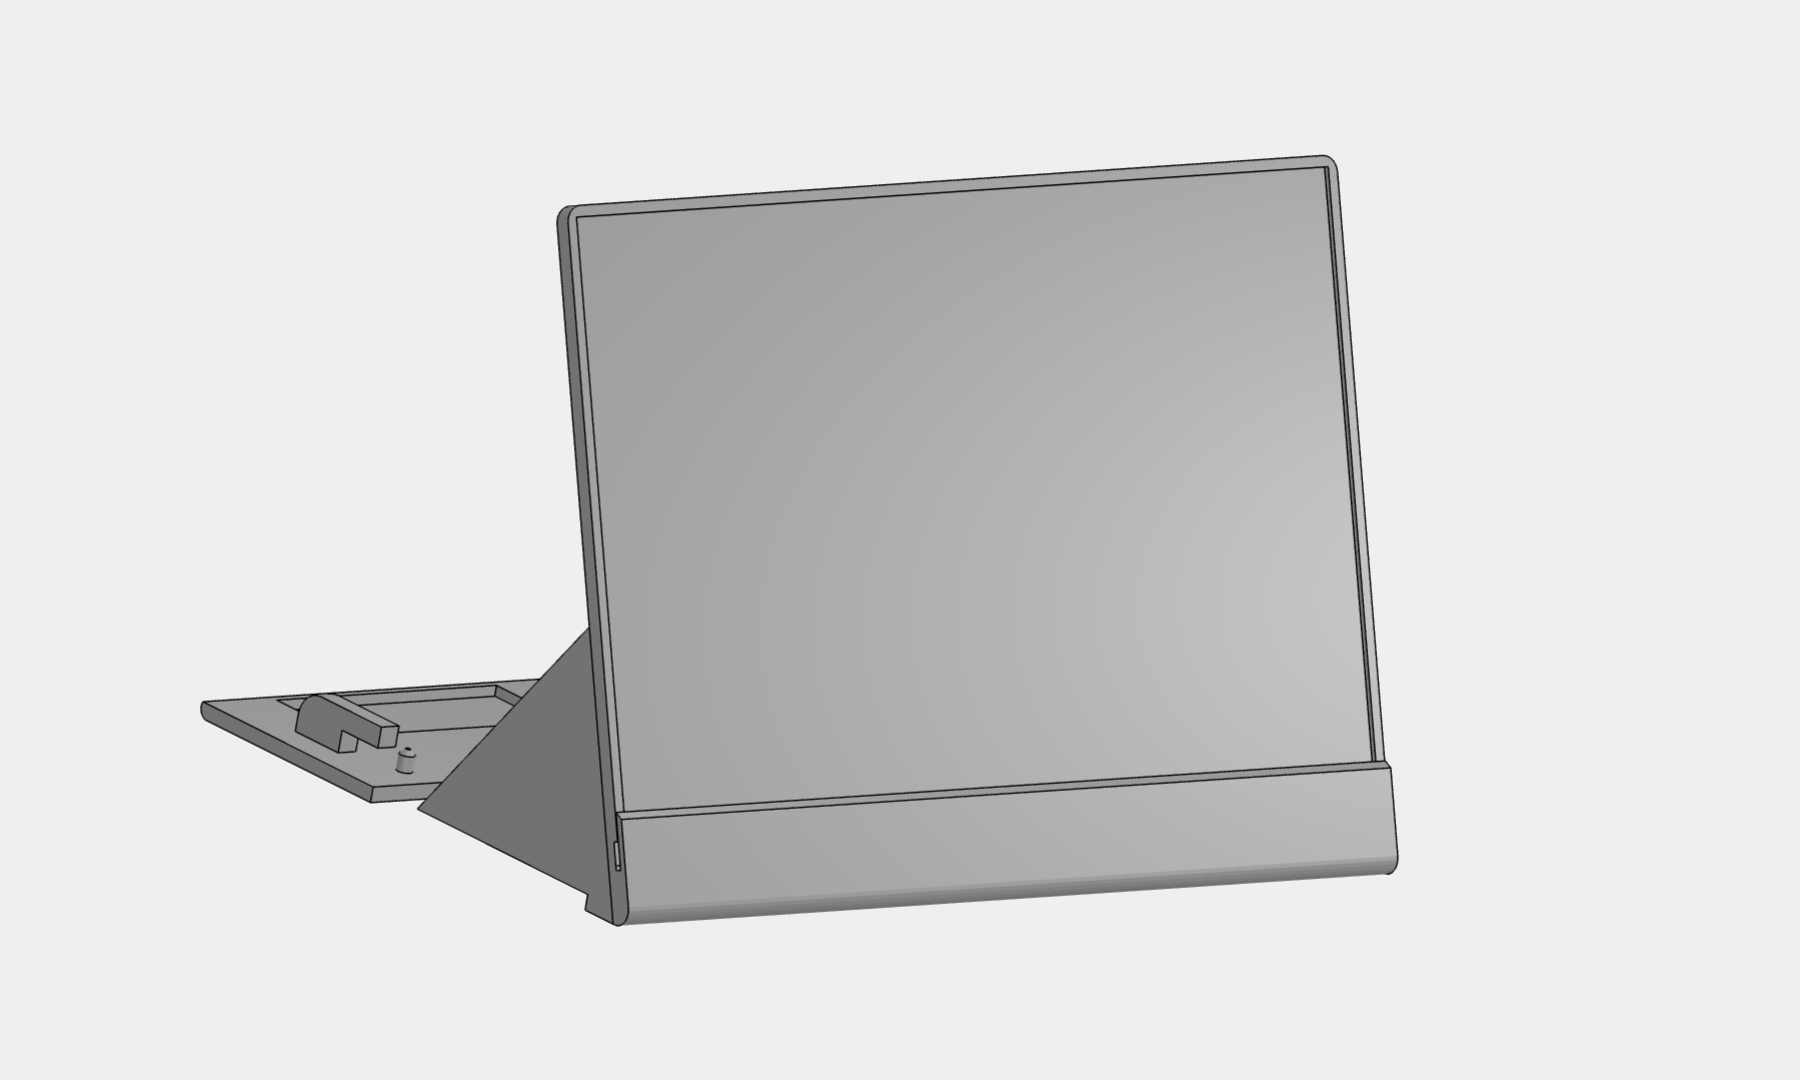
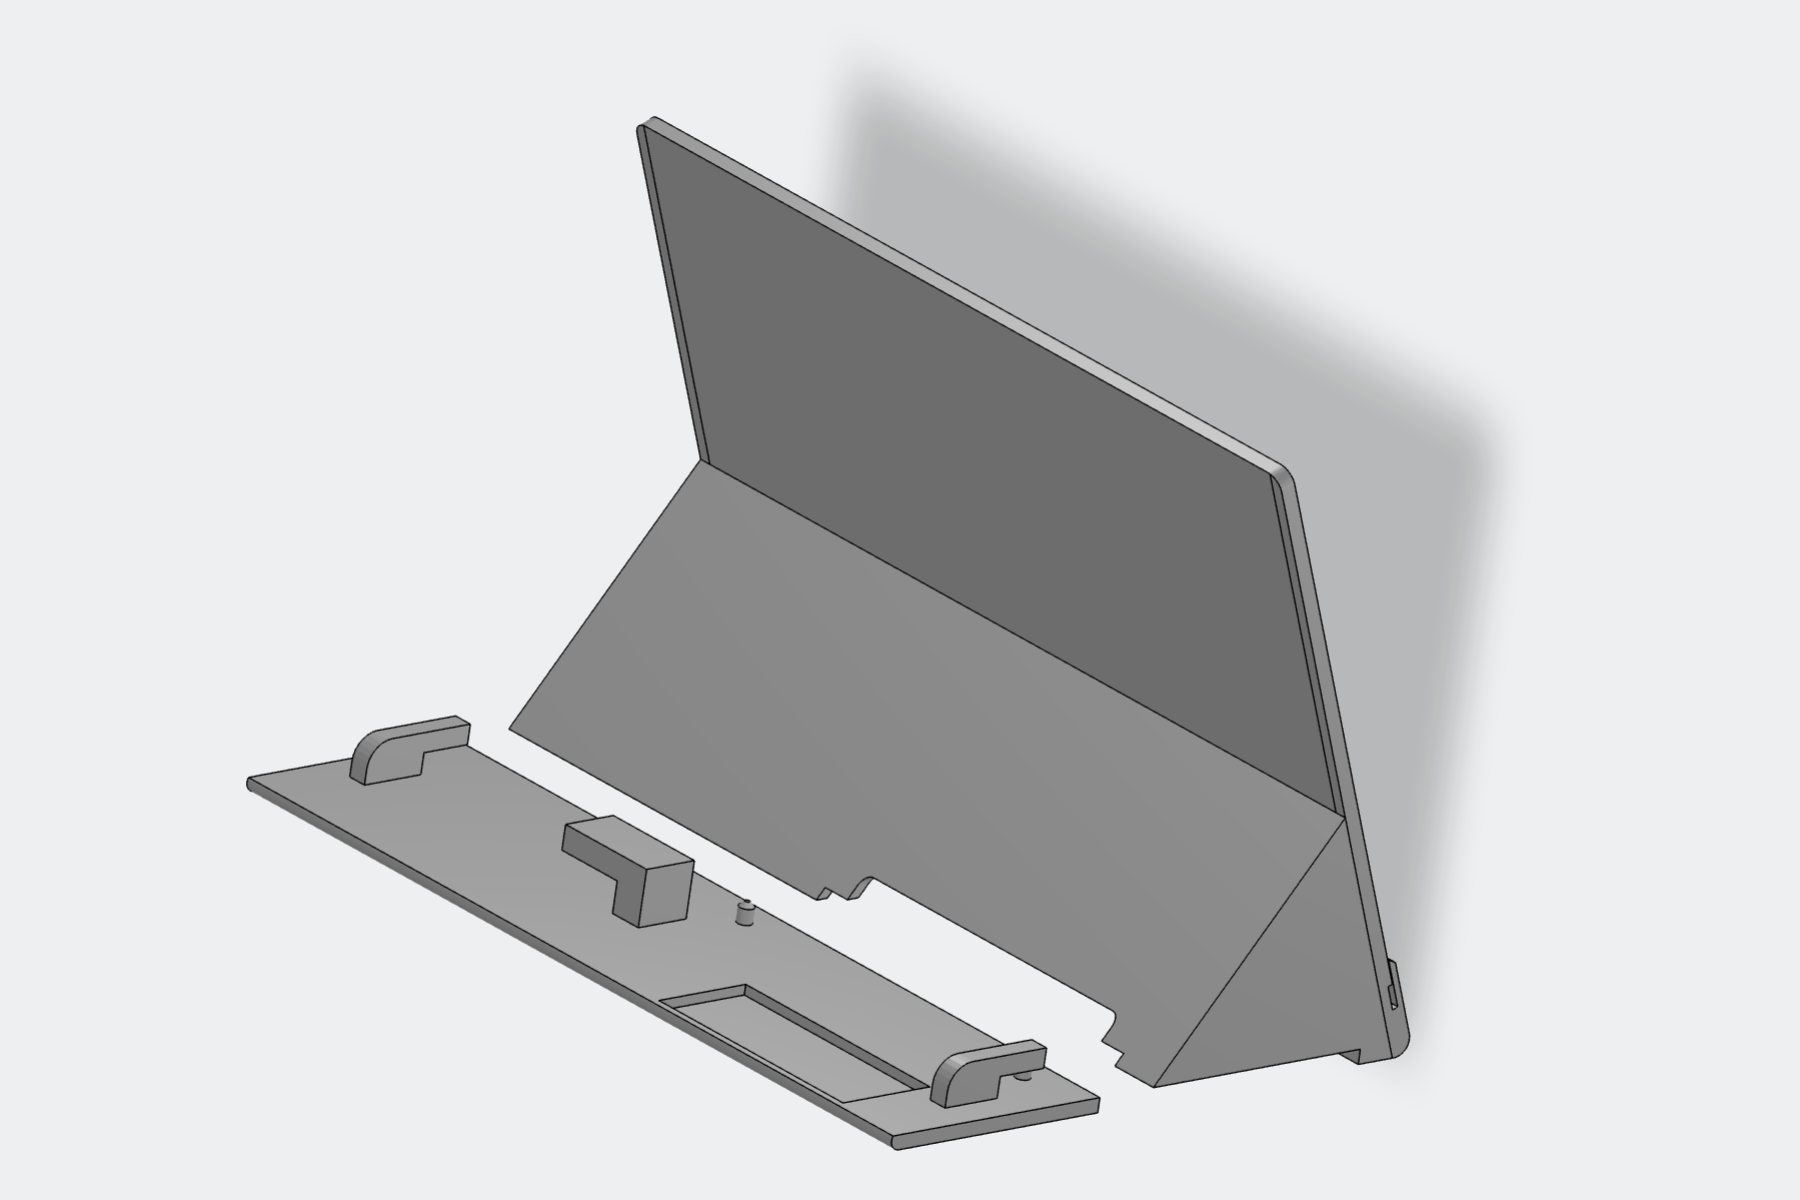
The PaperDine chassis utilizes a sleek, 3D-printed body. For optimal results, print the main body in appropriate orientation. Use PLA with a 0.1 - 0.2 mm layer height and 20% grid infill. Ensure your slicer orientation provides clean overhangs for the internal display tracks. (Design By Seeed Studio - Link)
Downloads
Surface Finishing:
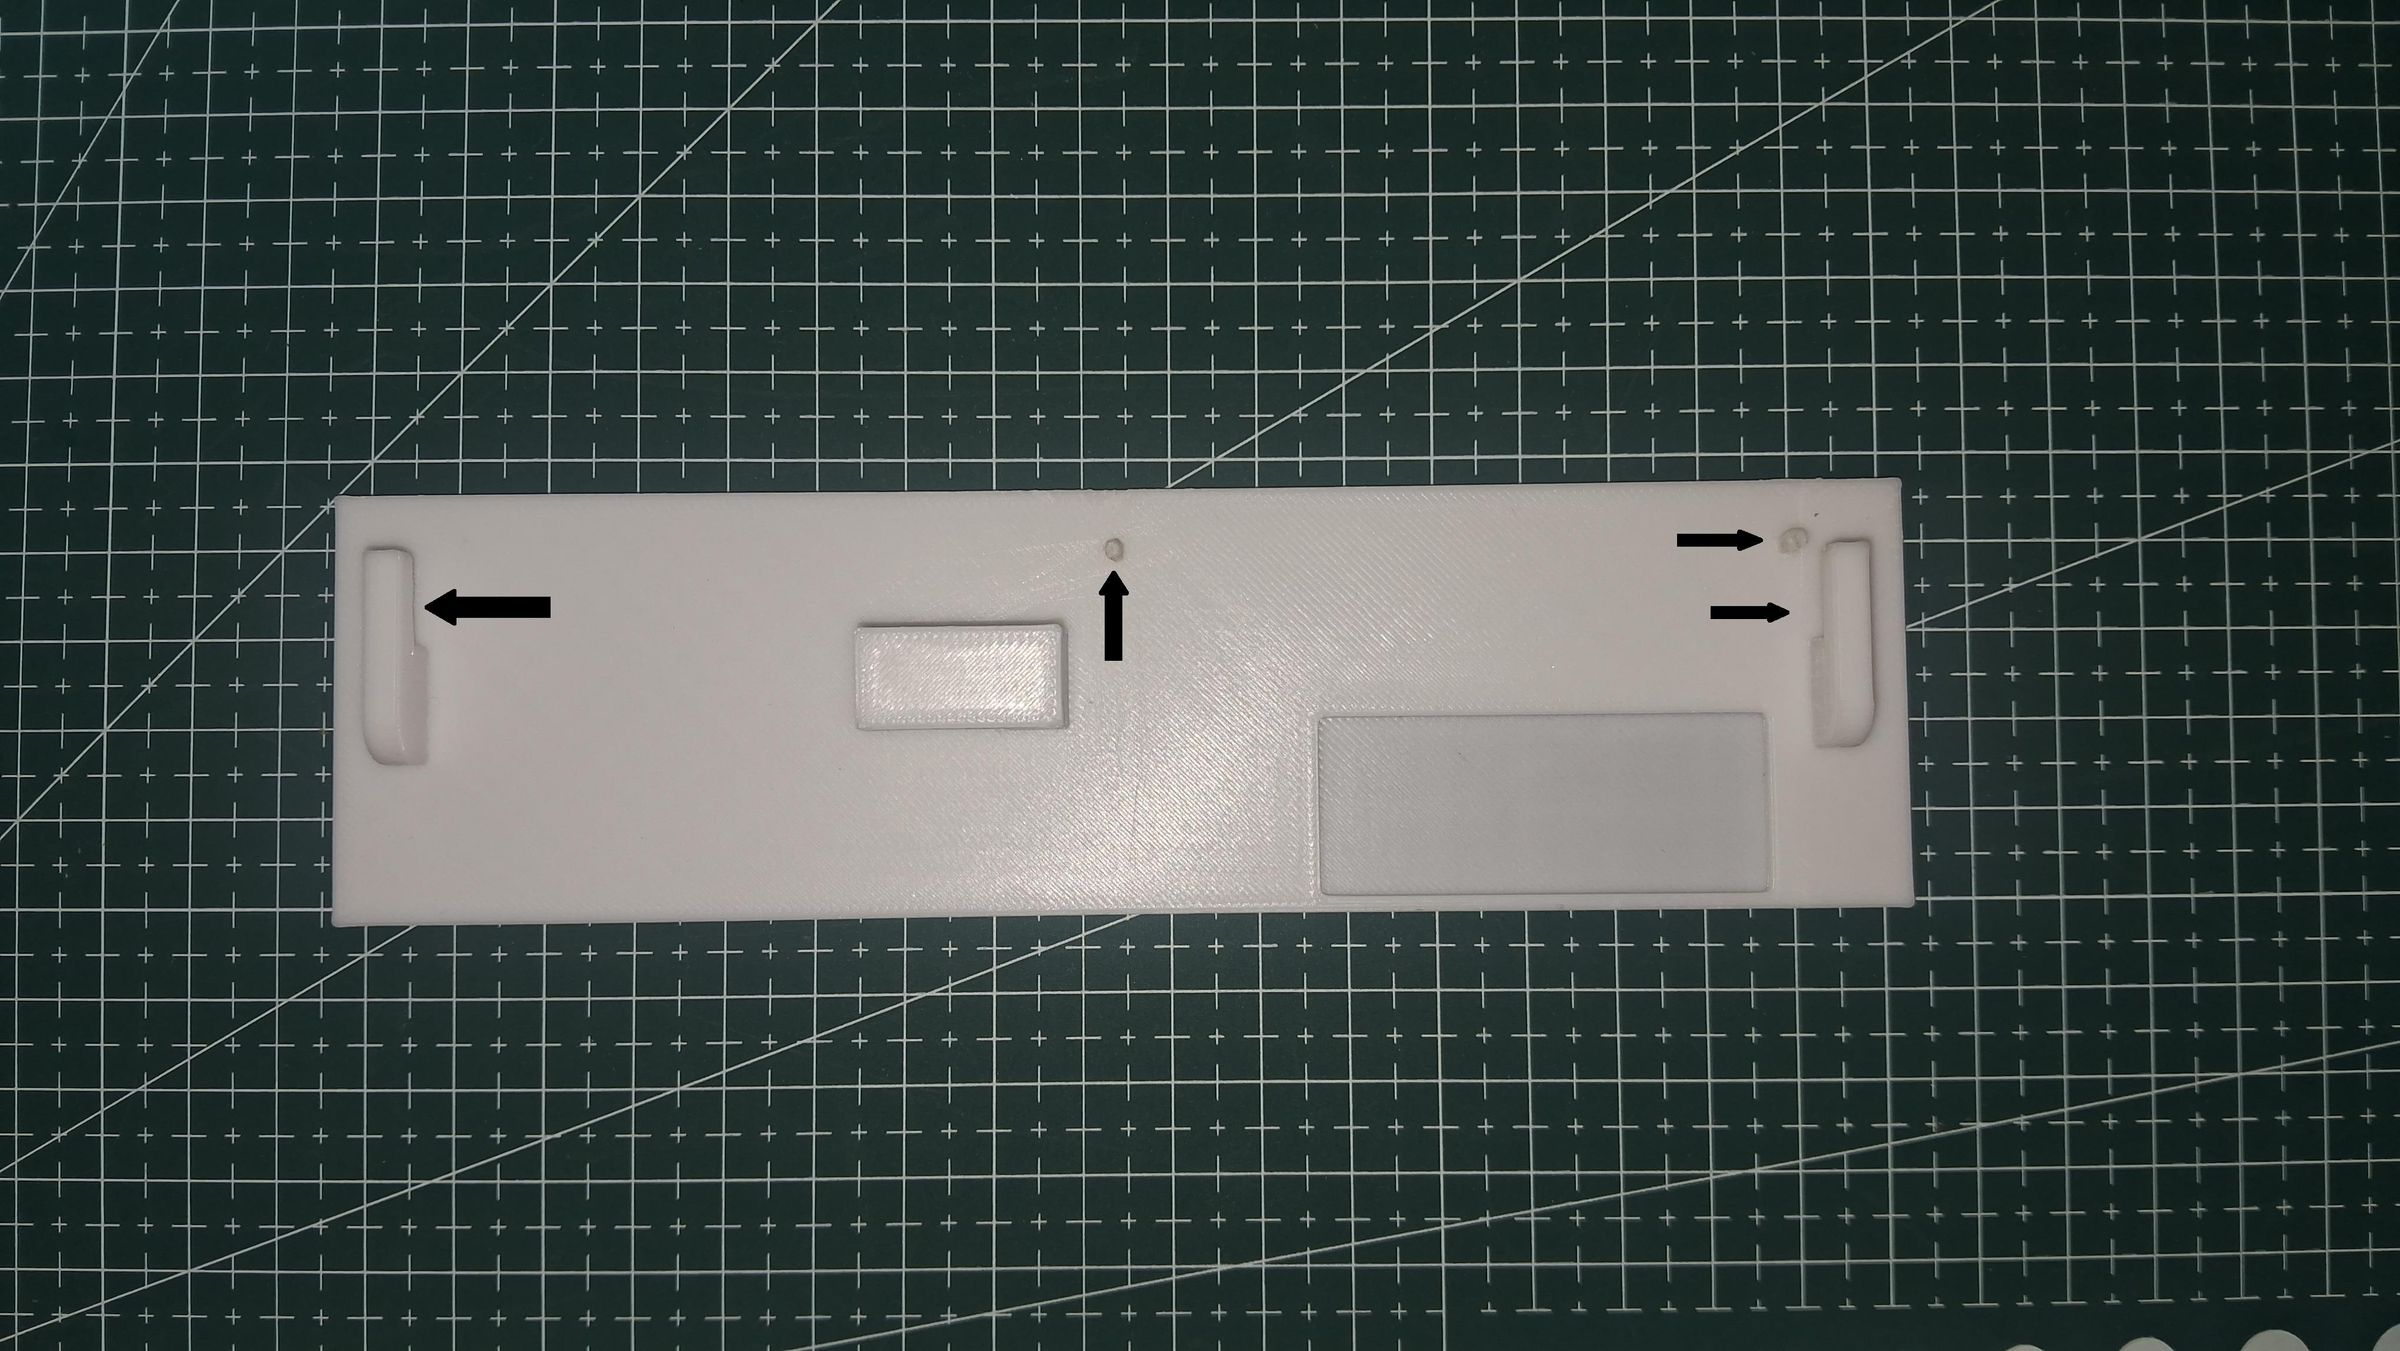
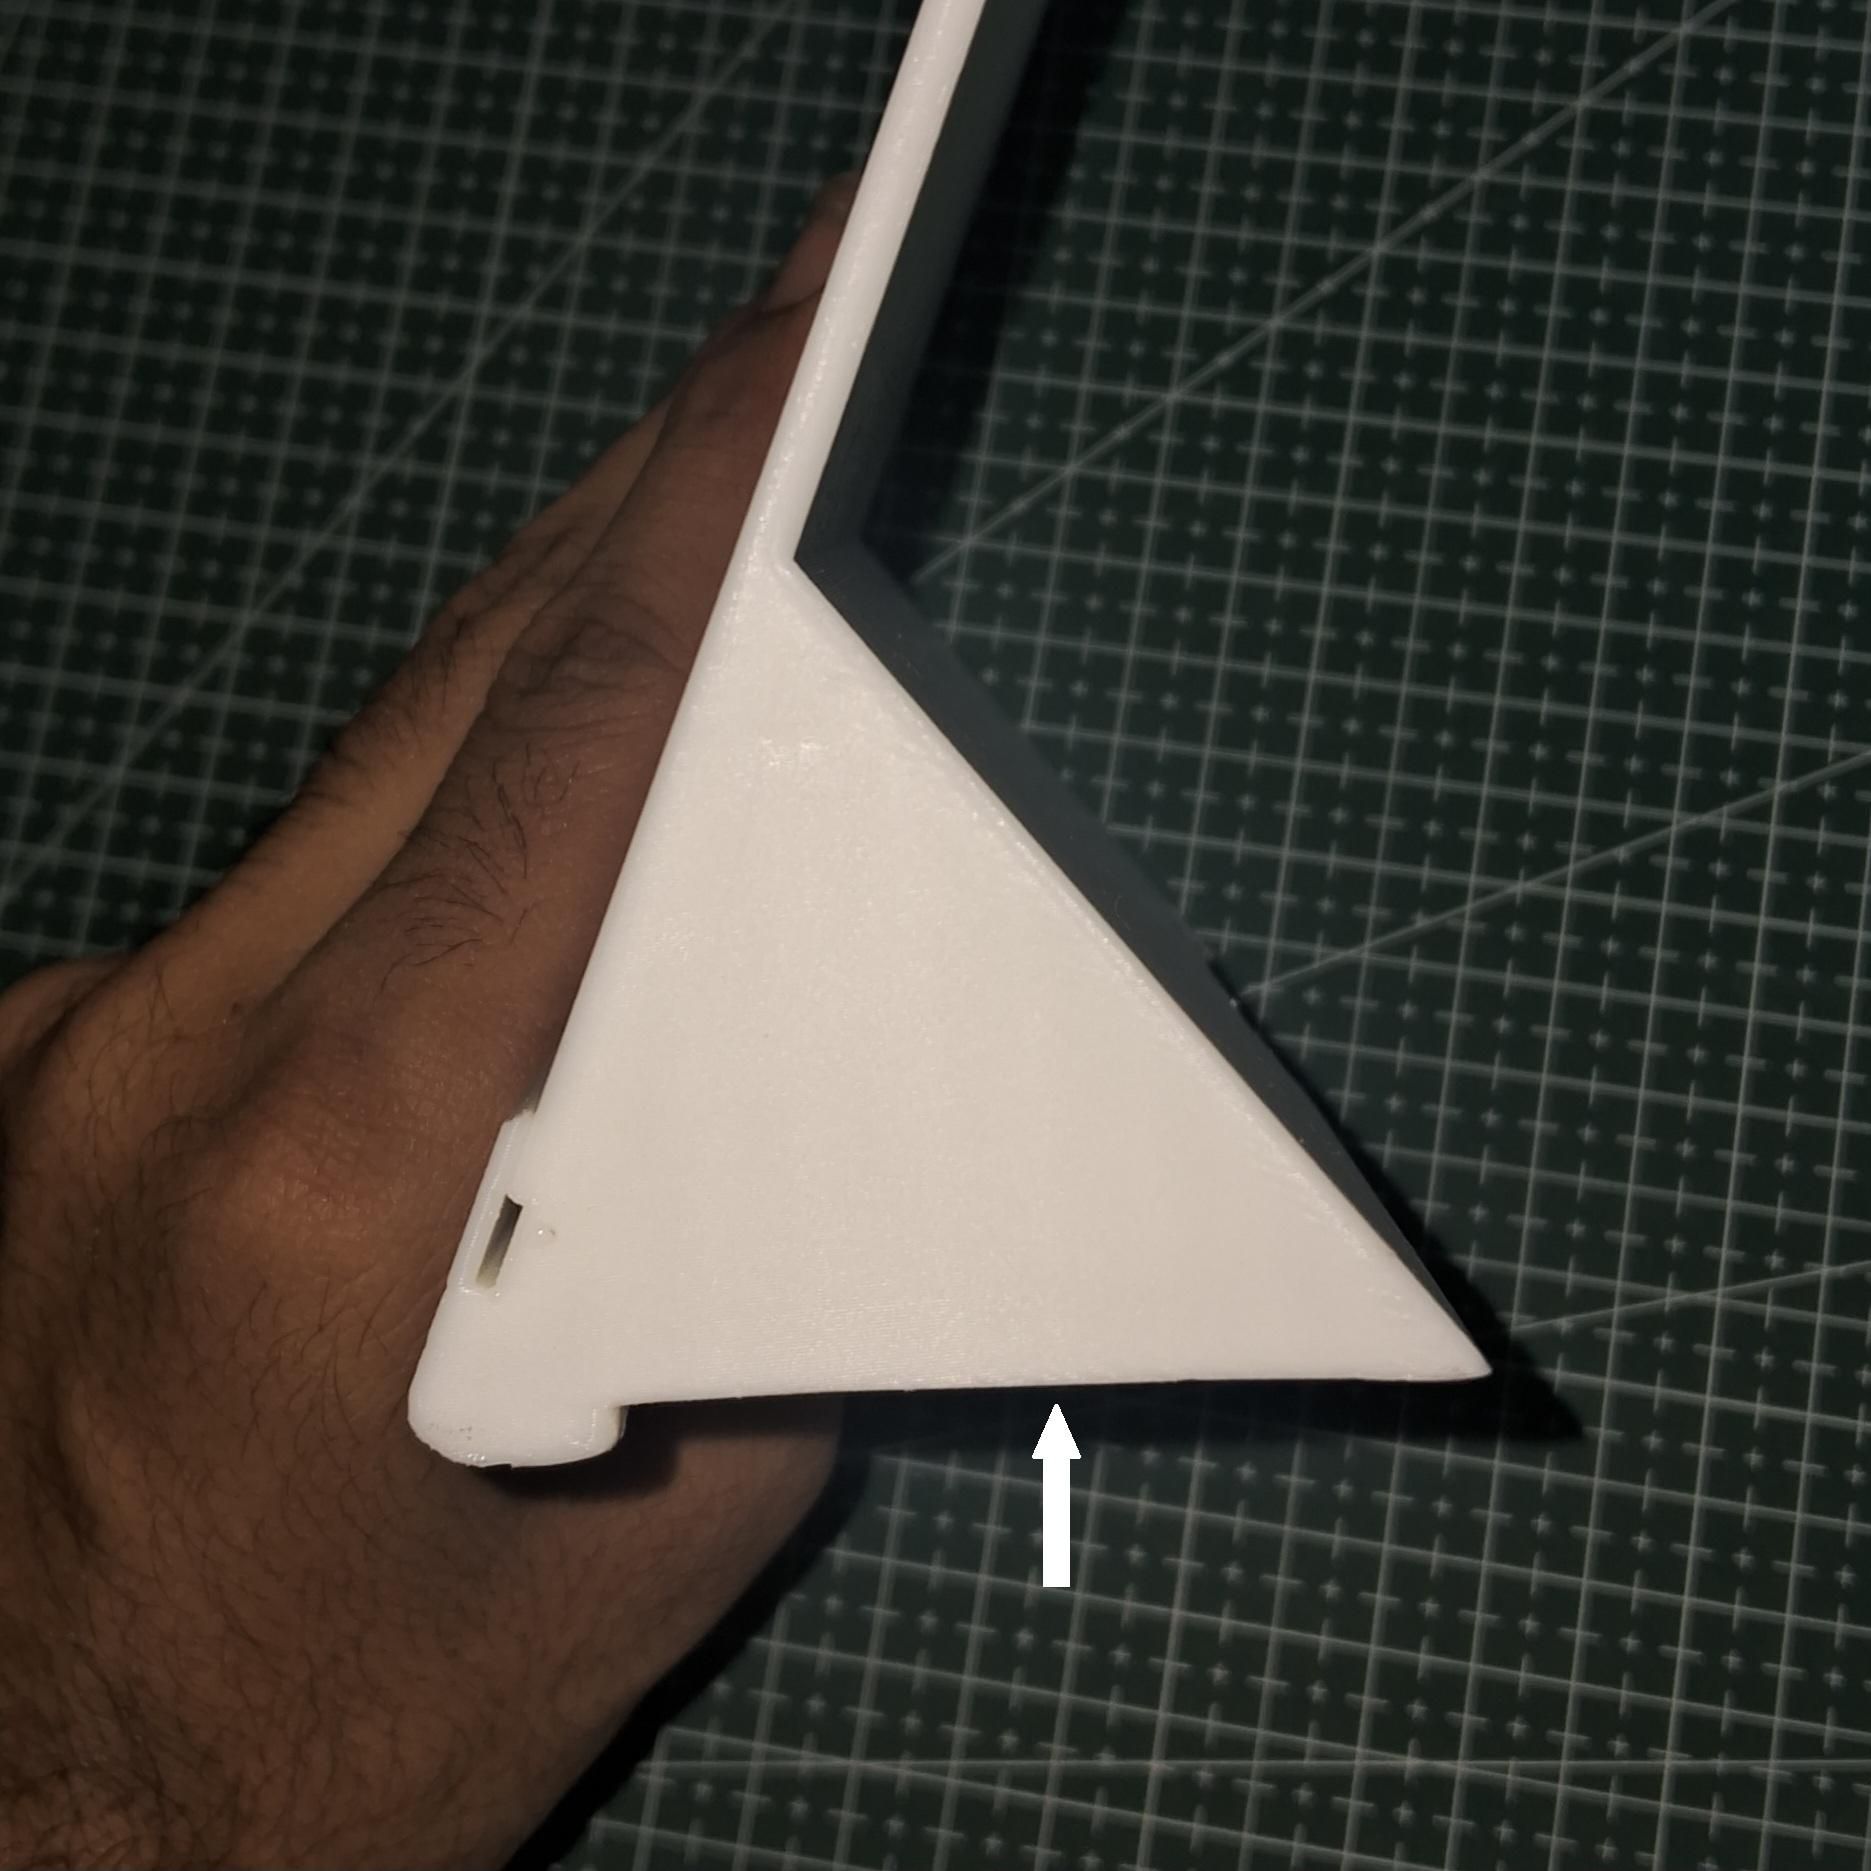
A clean finishing process is critical. Remove any stringing or burrs from the print. Carefully edge-sand the inner locking mechanism using fine-grit sandpaper to ensure tight mechanical tolerances for a seamless snap-fit assembly. Sand the required surfaces as needed. The areas I sanded are shown above.
Display Insertion:
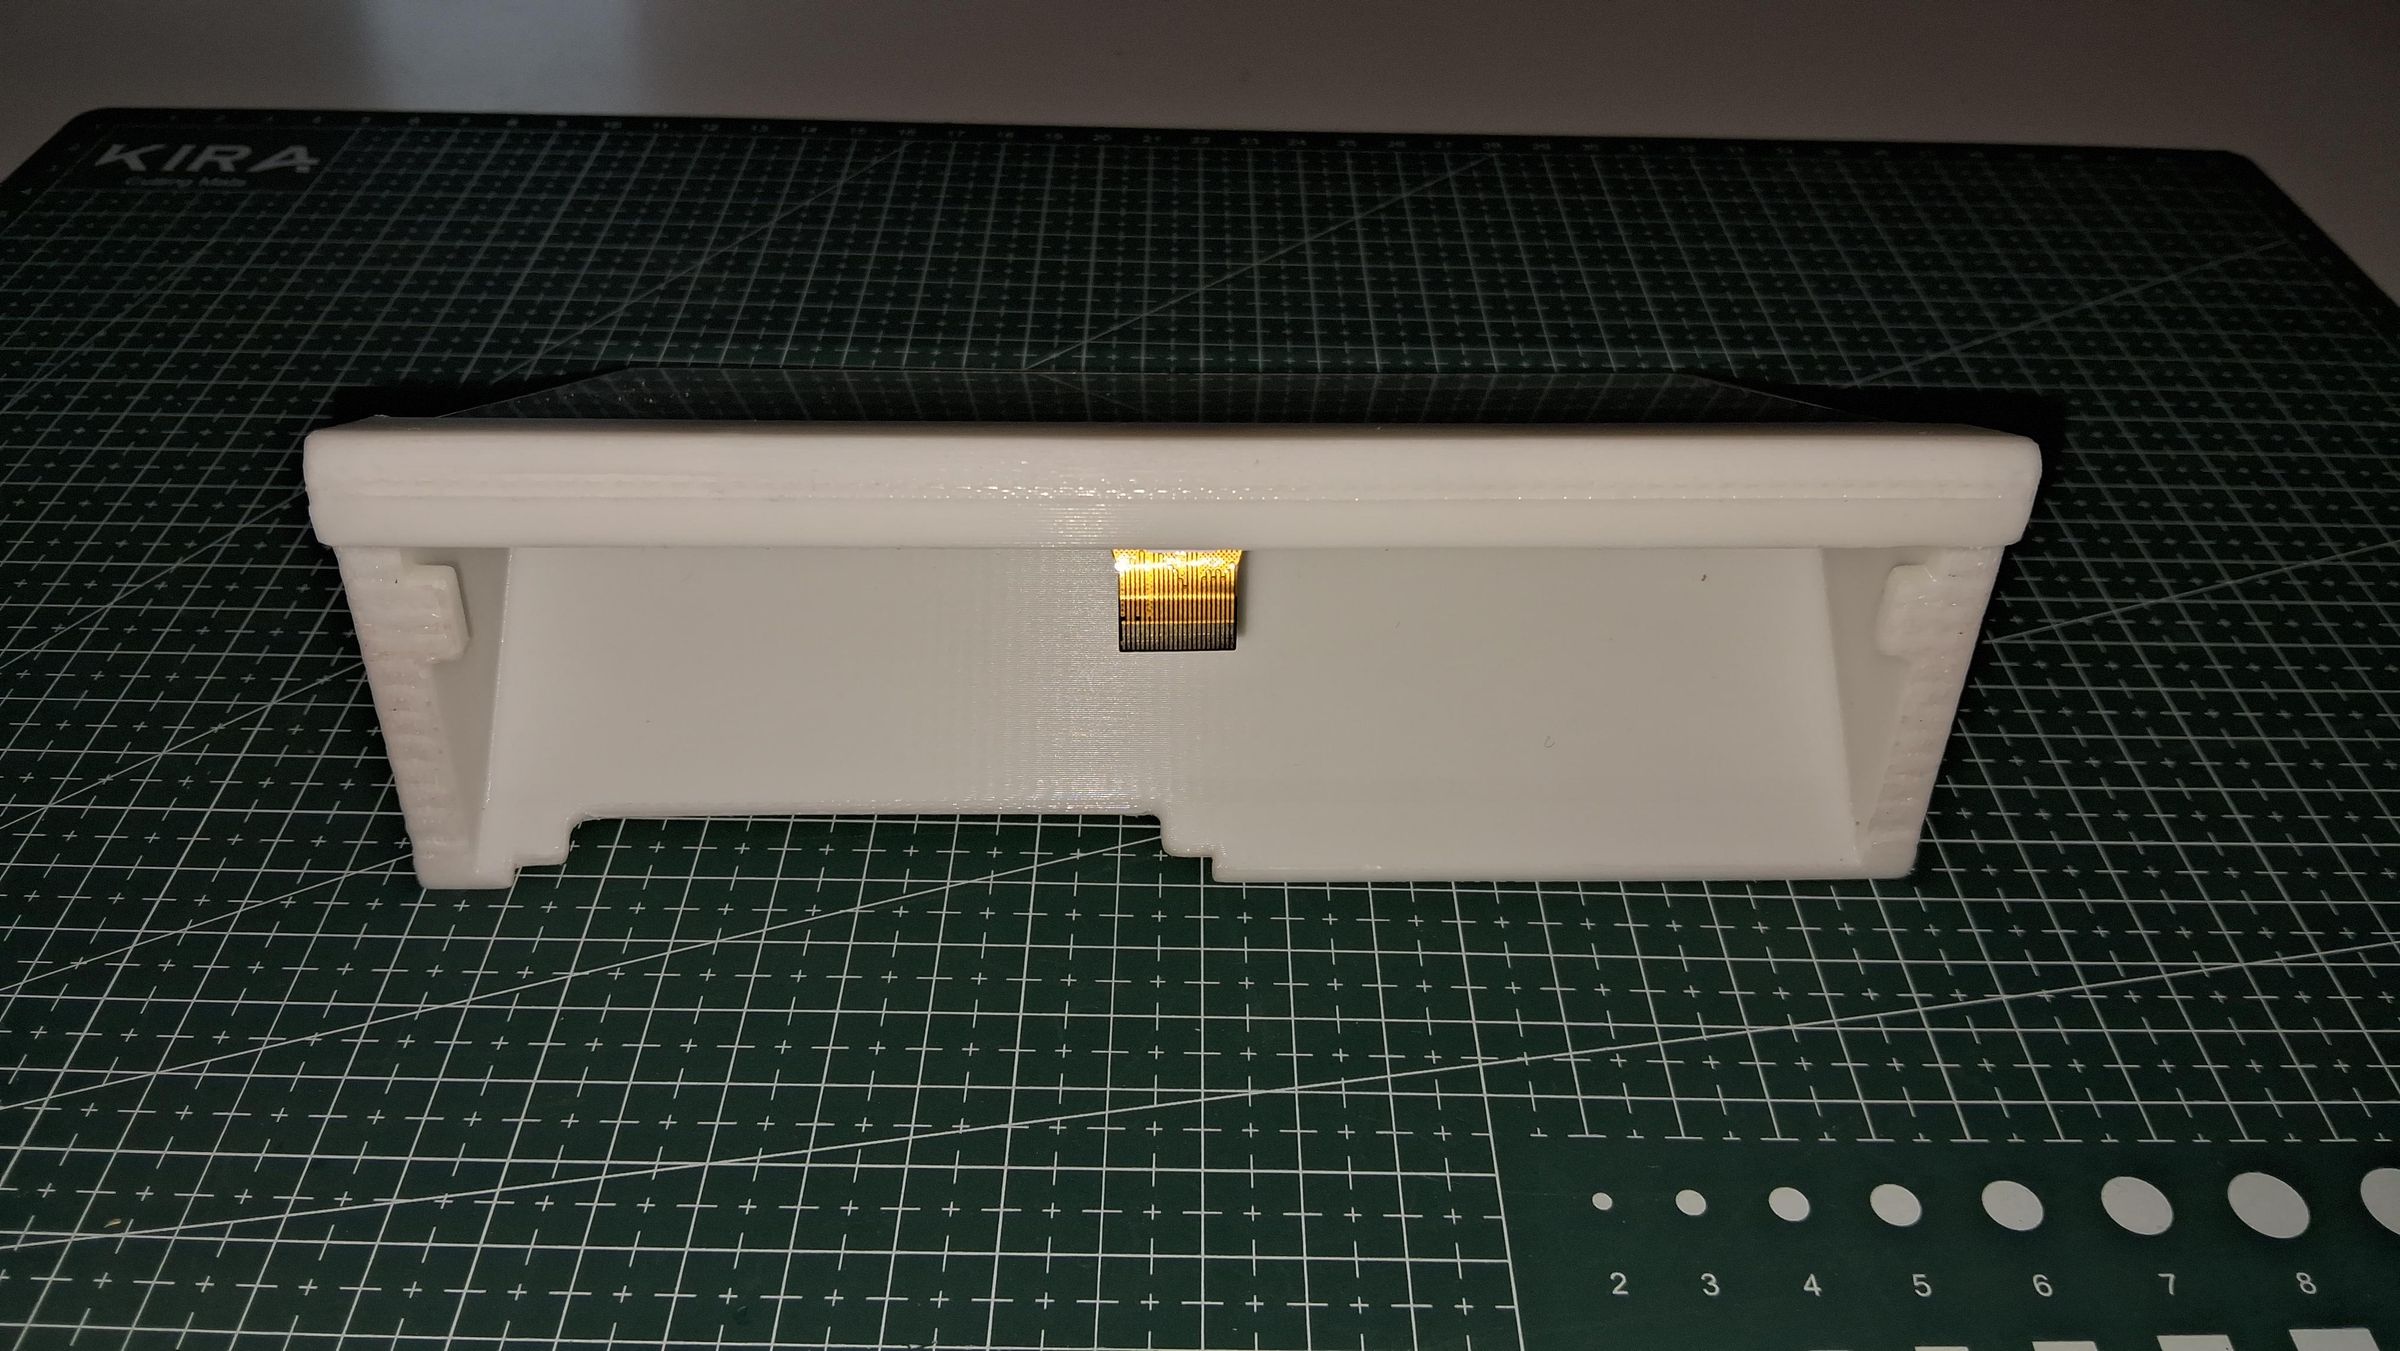
Gently take the delicate 7.5" glass ePaper panel and slide it into the main frame tracks. Ensure you apply even, gentle pressure from the edges to avoid cracking the fragile display. If needed use thin double sided tape to keep the display held in place. The image above shows that the display has been inserted in the frame, and the FPC Cable is gently pulled through the slit in the frame with the help of tweezers.
Ribbon Cable Extension:
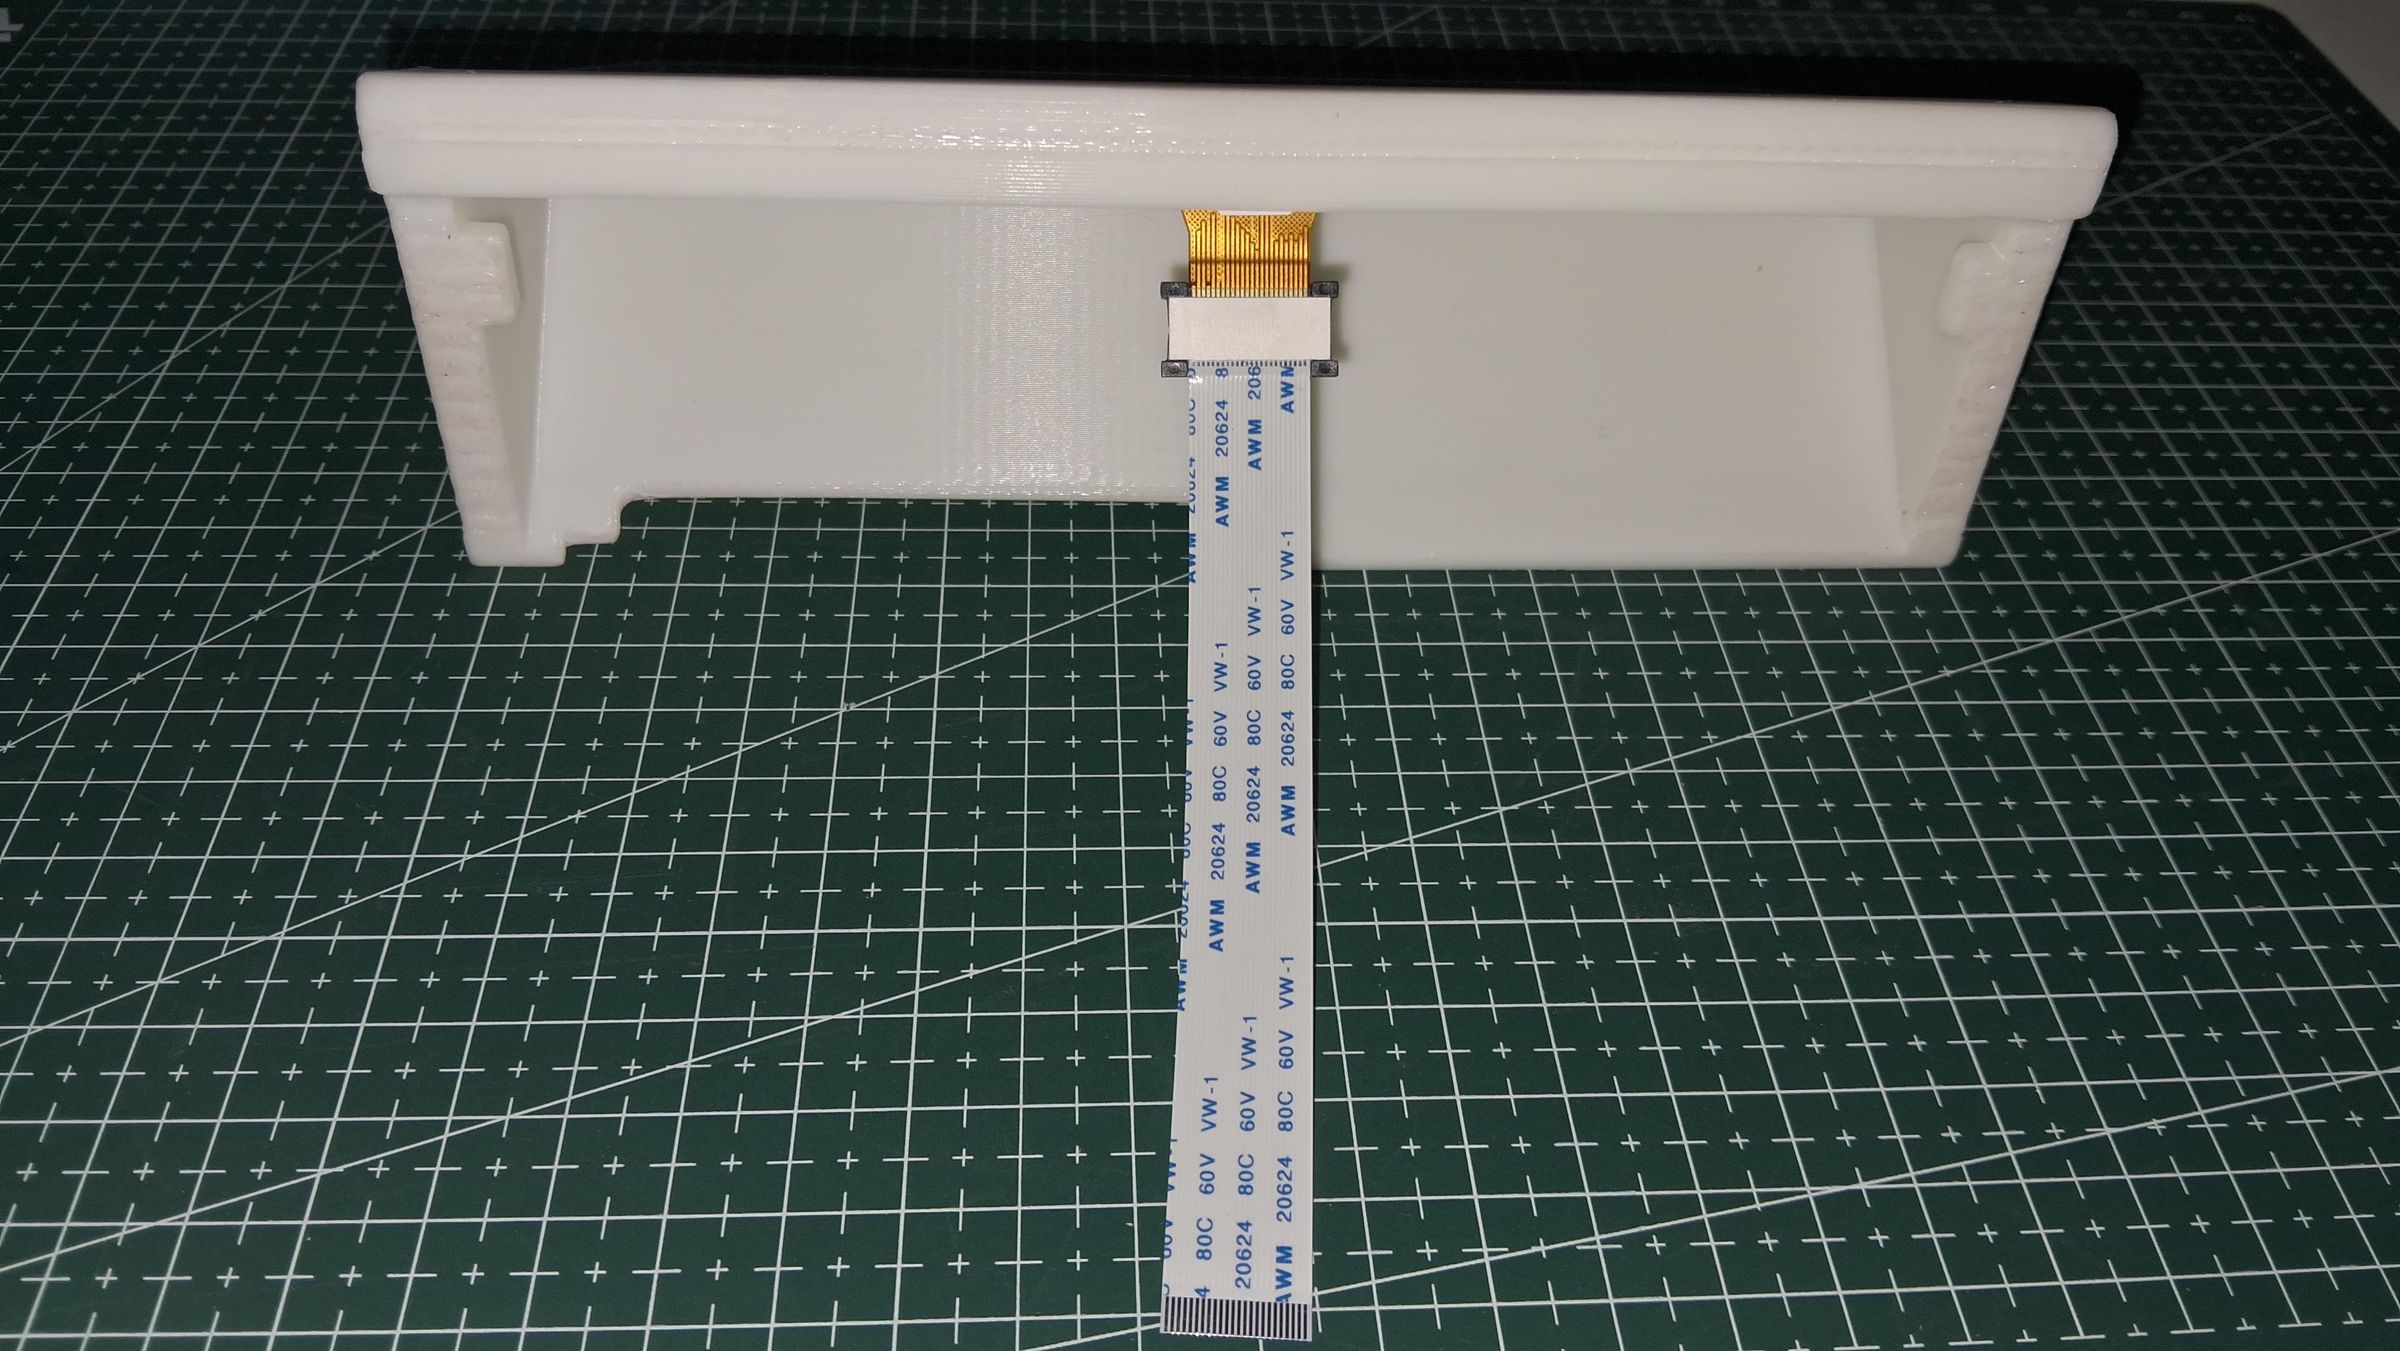
Locate the small FPC connector on the ePaper display. Carefully pop open the black retaining latch, slide in the flat flexible ribbon extension cable, and press the latch down securely to lock the pins in place. The image above shows the ribbon cable being attached to the display's FPC Cable.
Place the Battery:
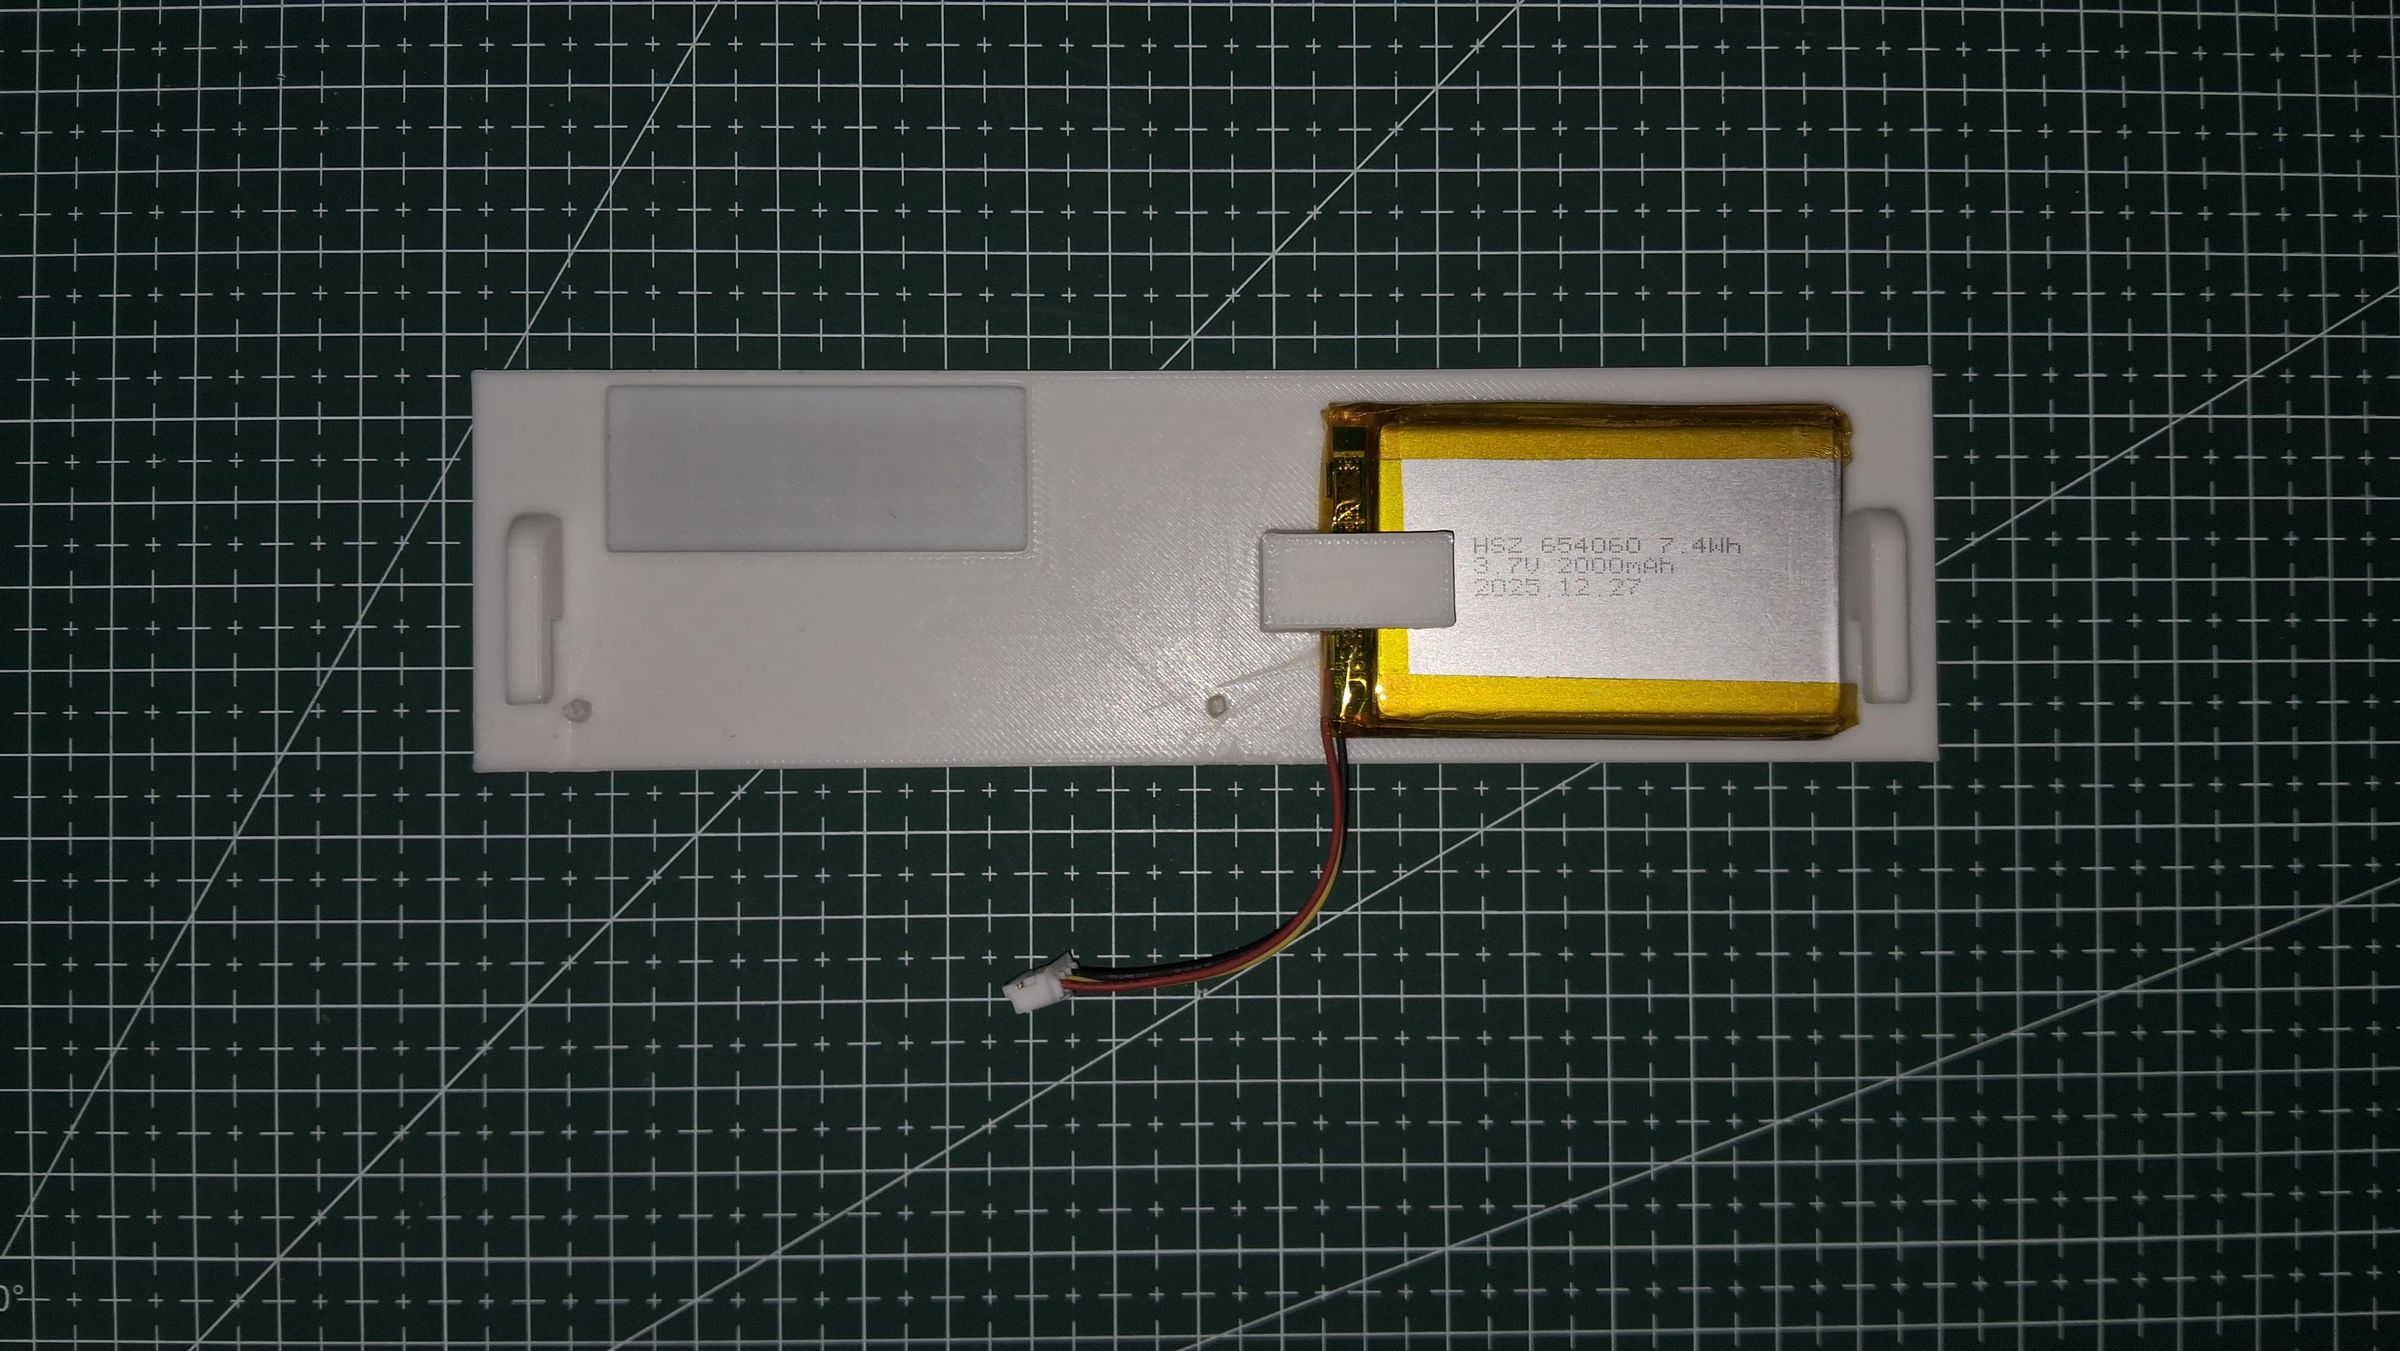
Gently slide the rechargable battery in the slot as shown above. Ensure that the slot is not too tight nor too loose, if needed sand the surface. Do not apply excessive pressure to push the battery in the slot, avoid puncturing the battery in the process.
Driver Board Hookup
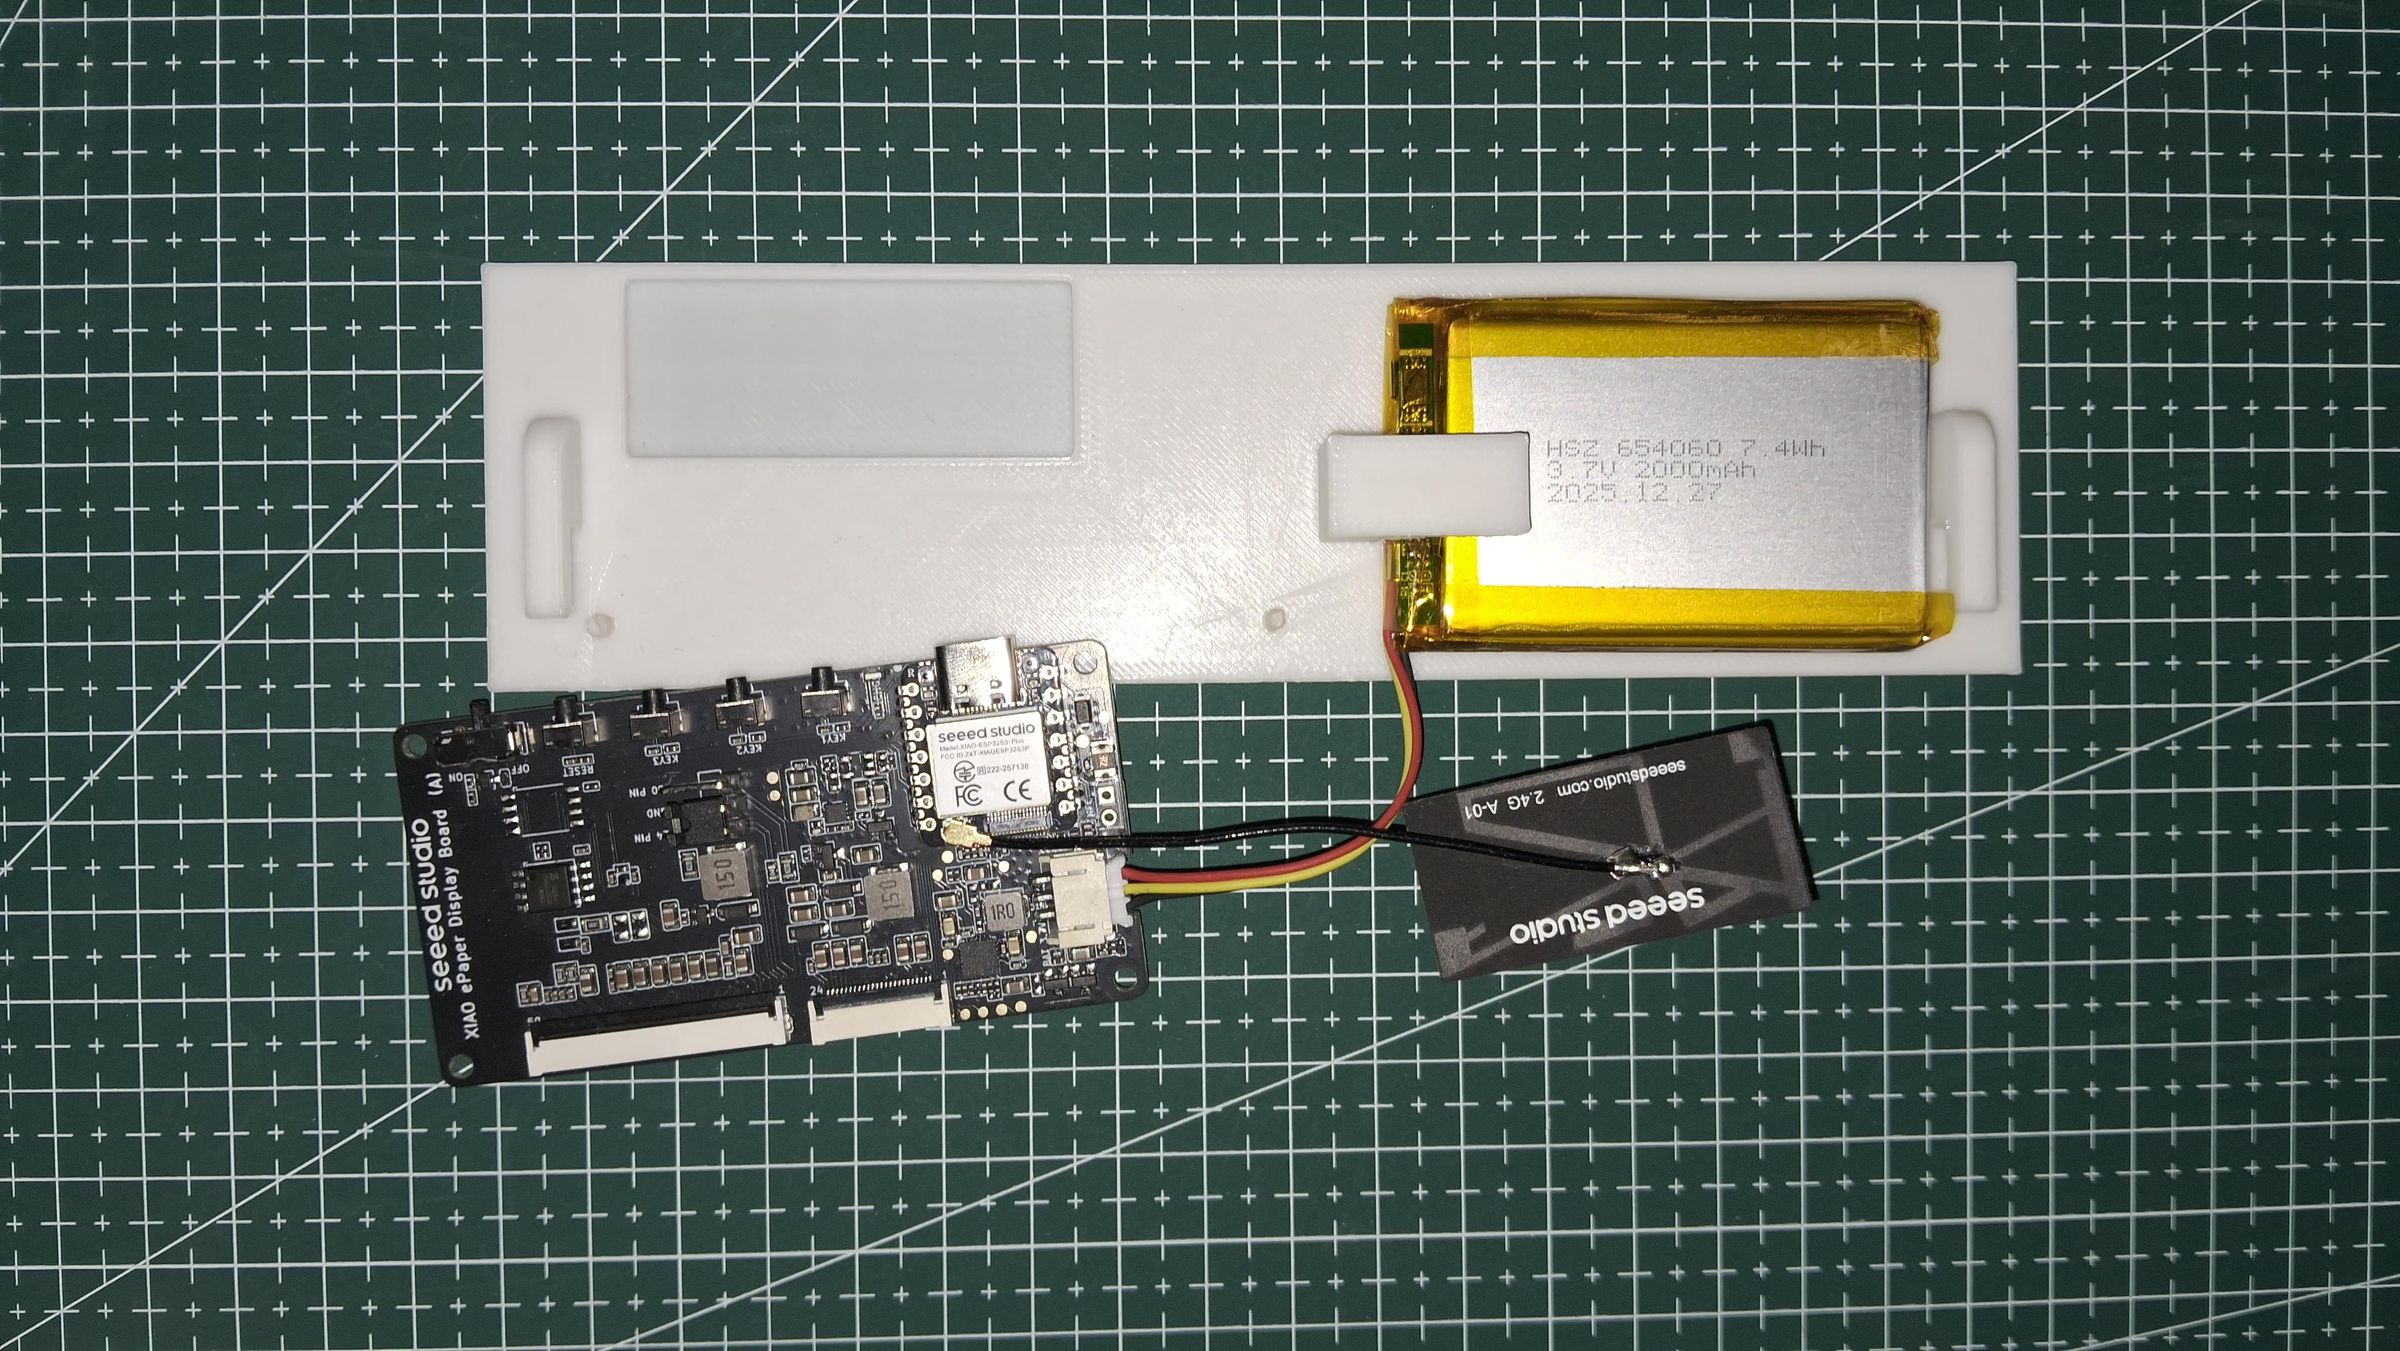
Map the other end of the display ribbon cable to the FPC port on the main control board. Next, plug the 3.7V LiPo battery pack into the corresponding JST power port on the driver board.
Component Packaging
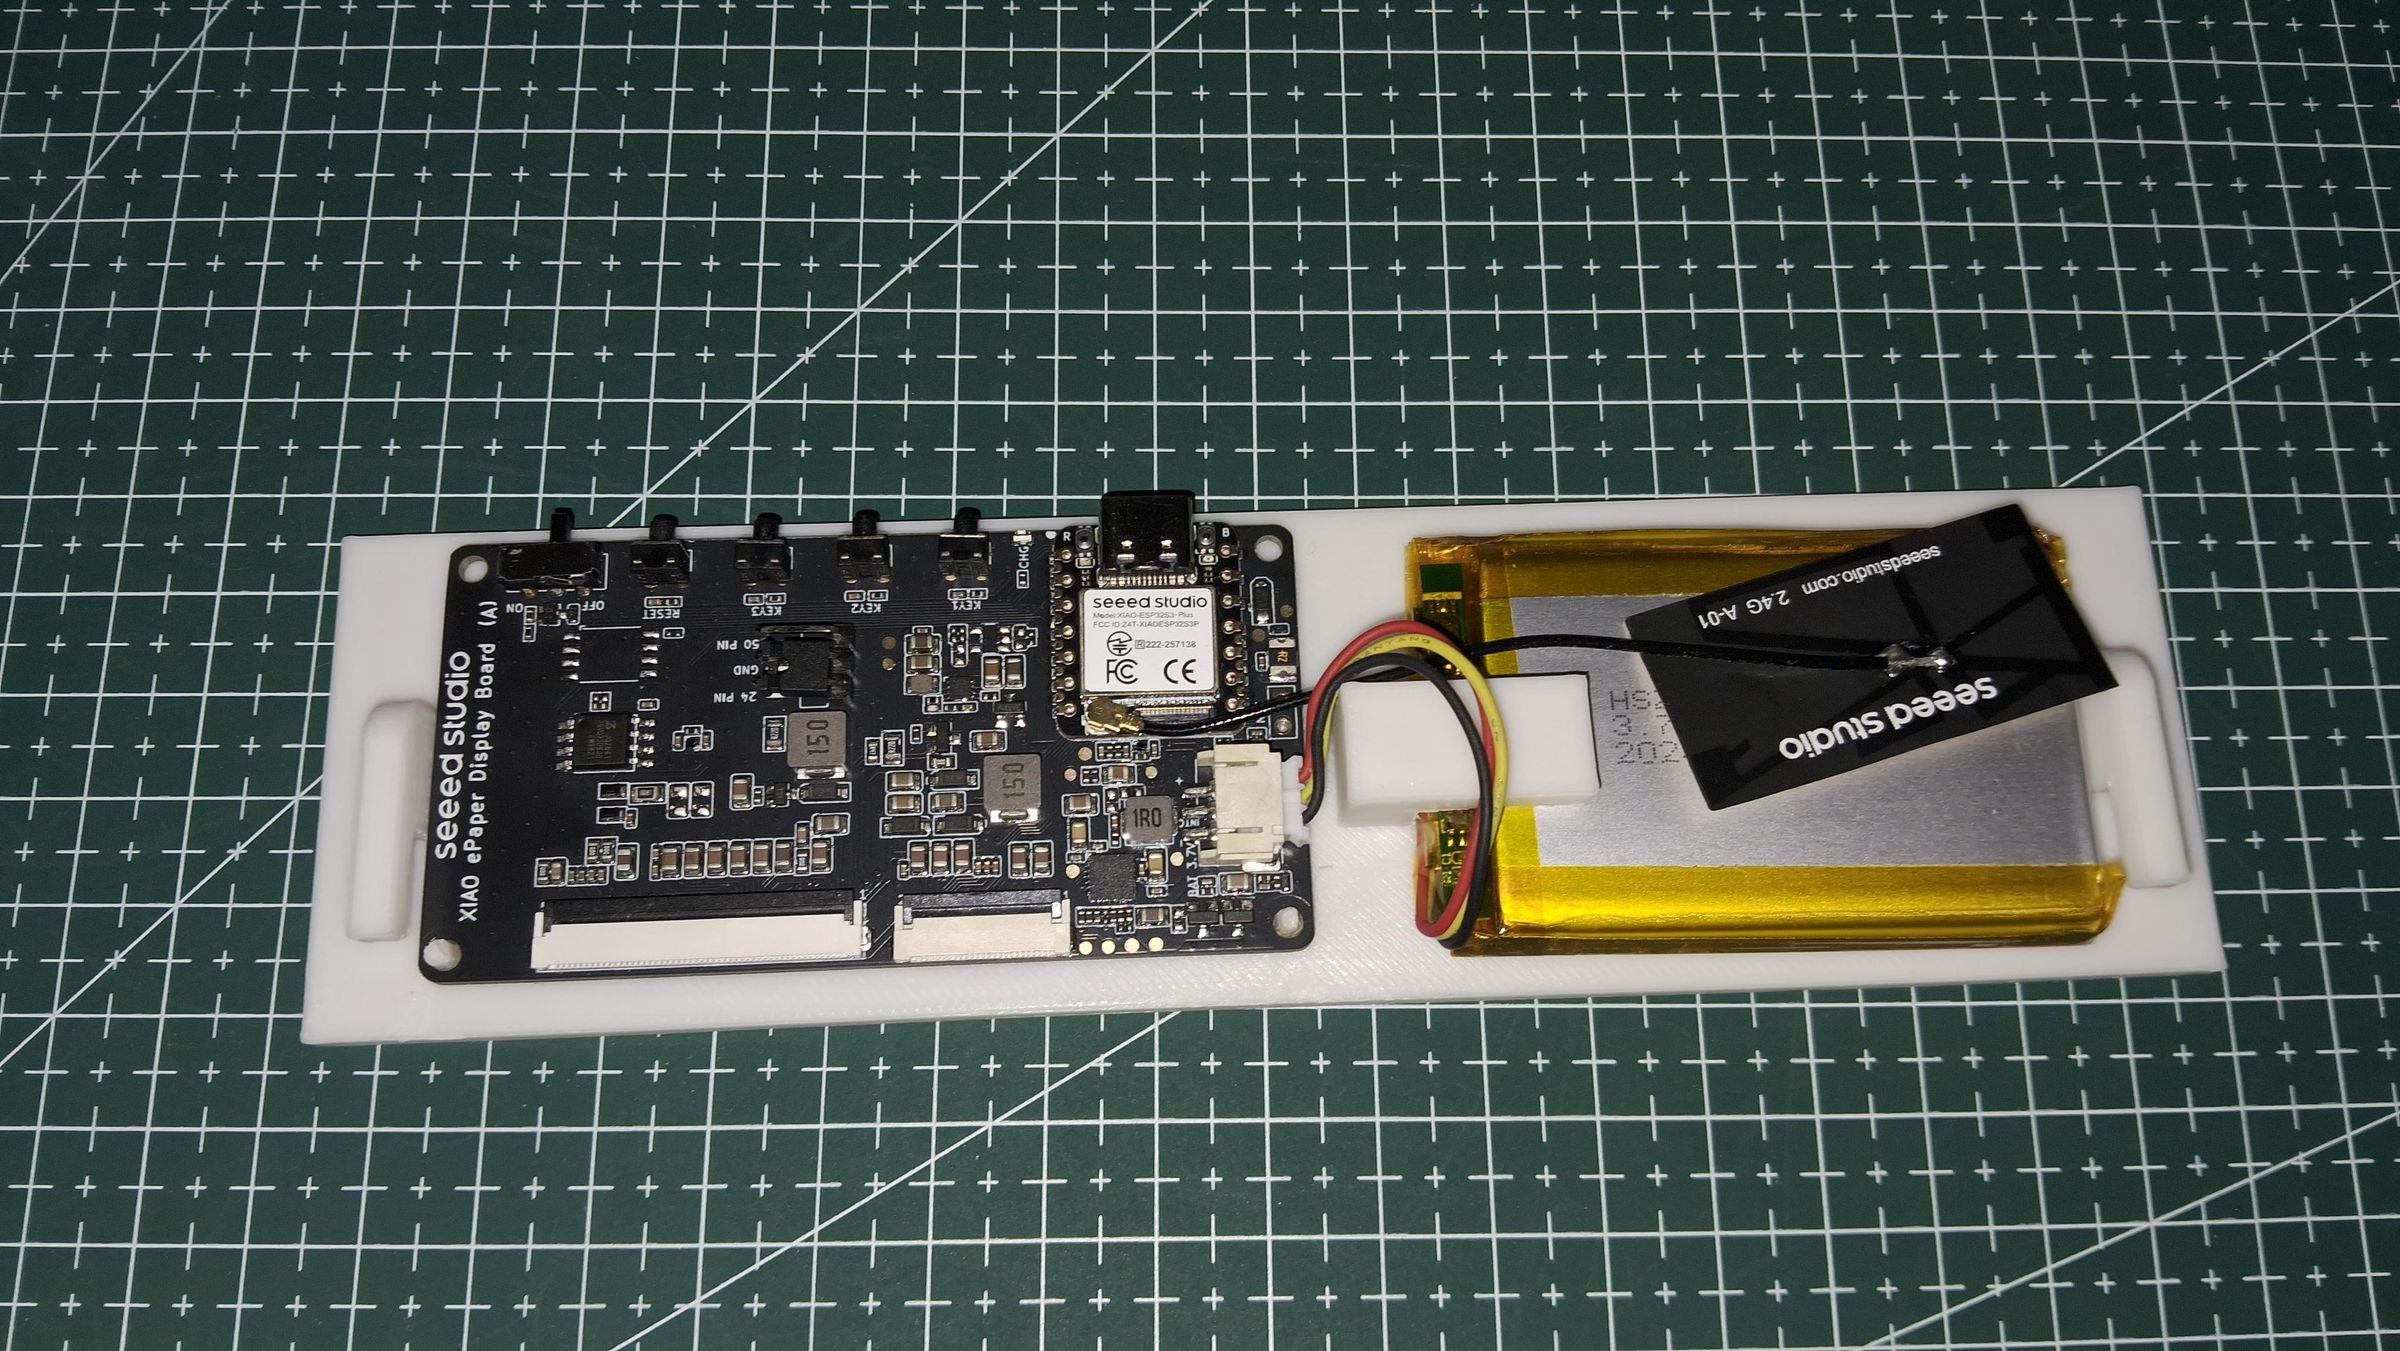
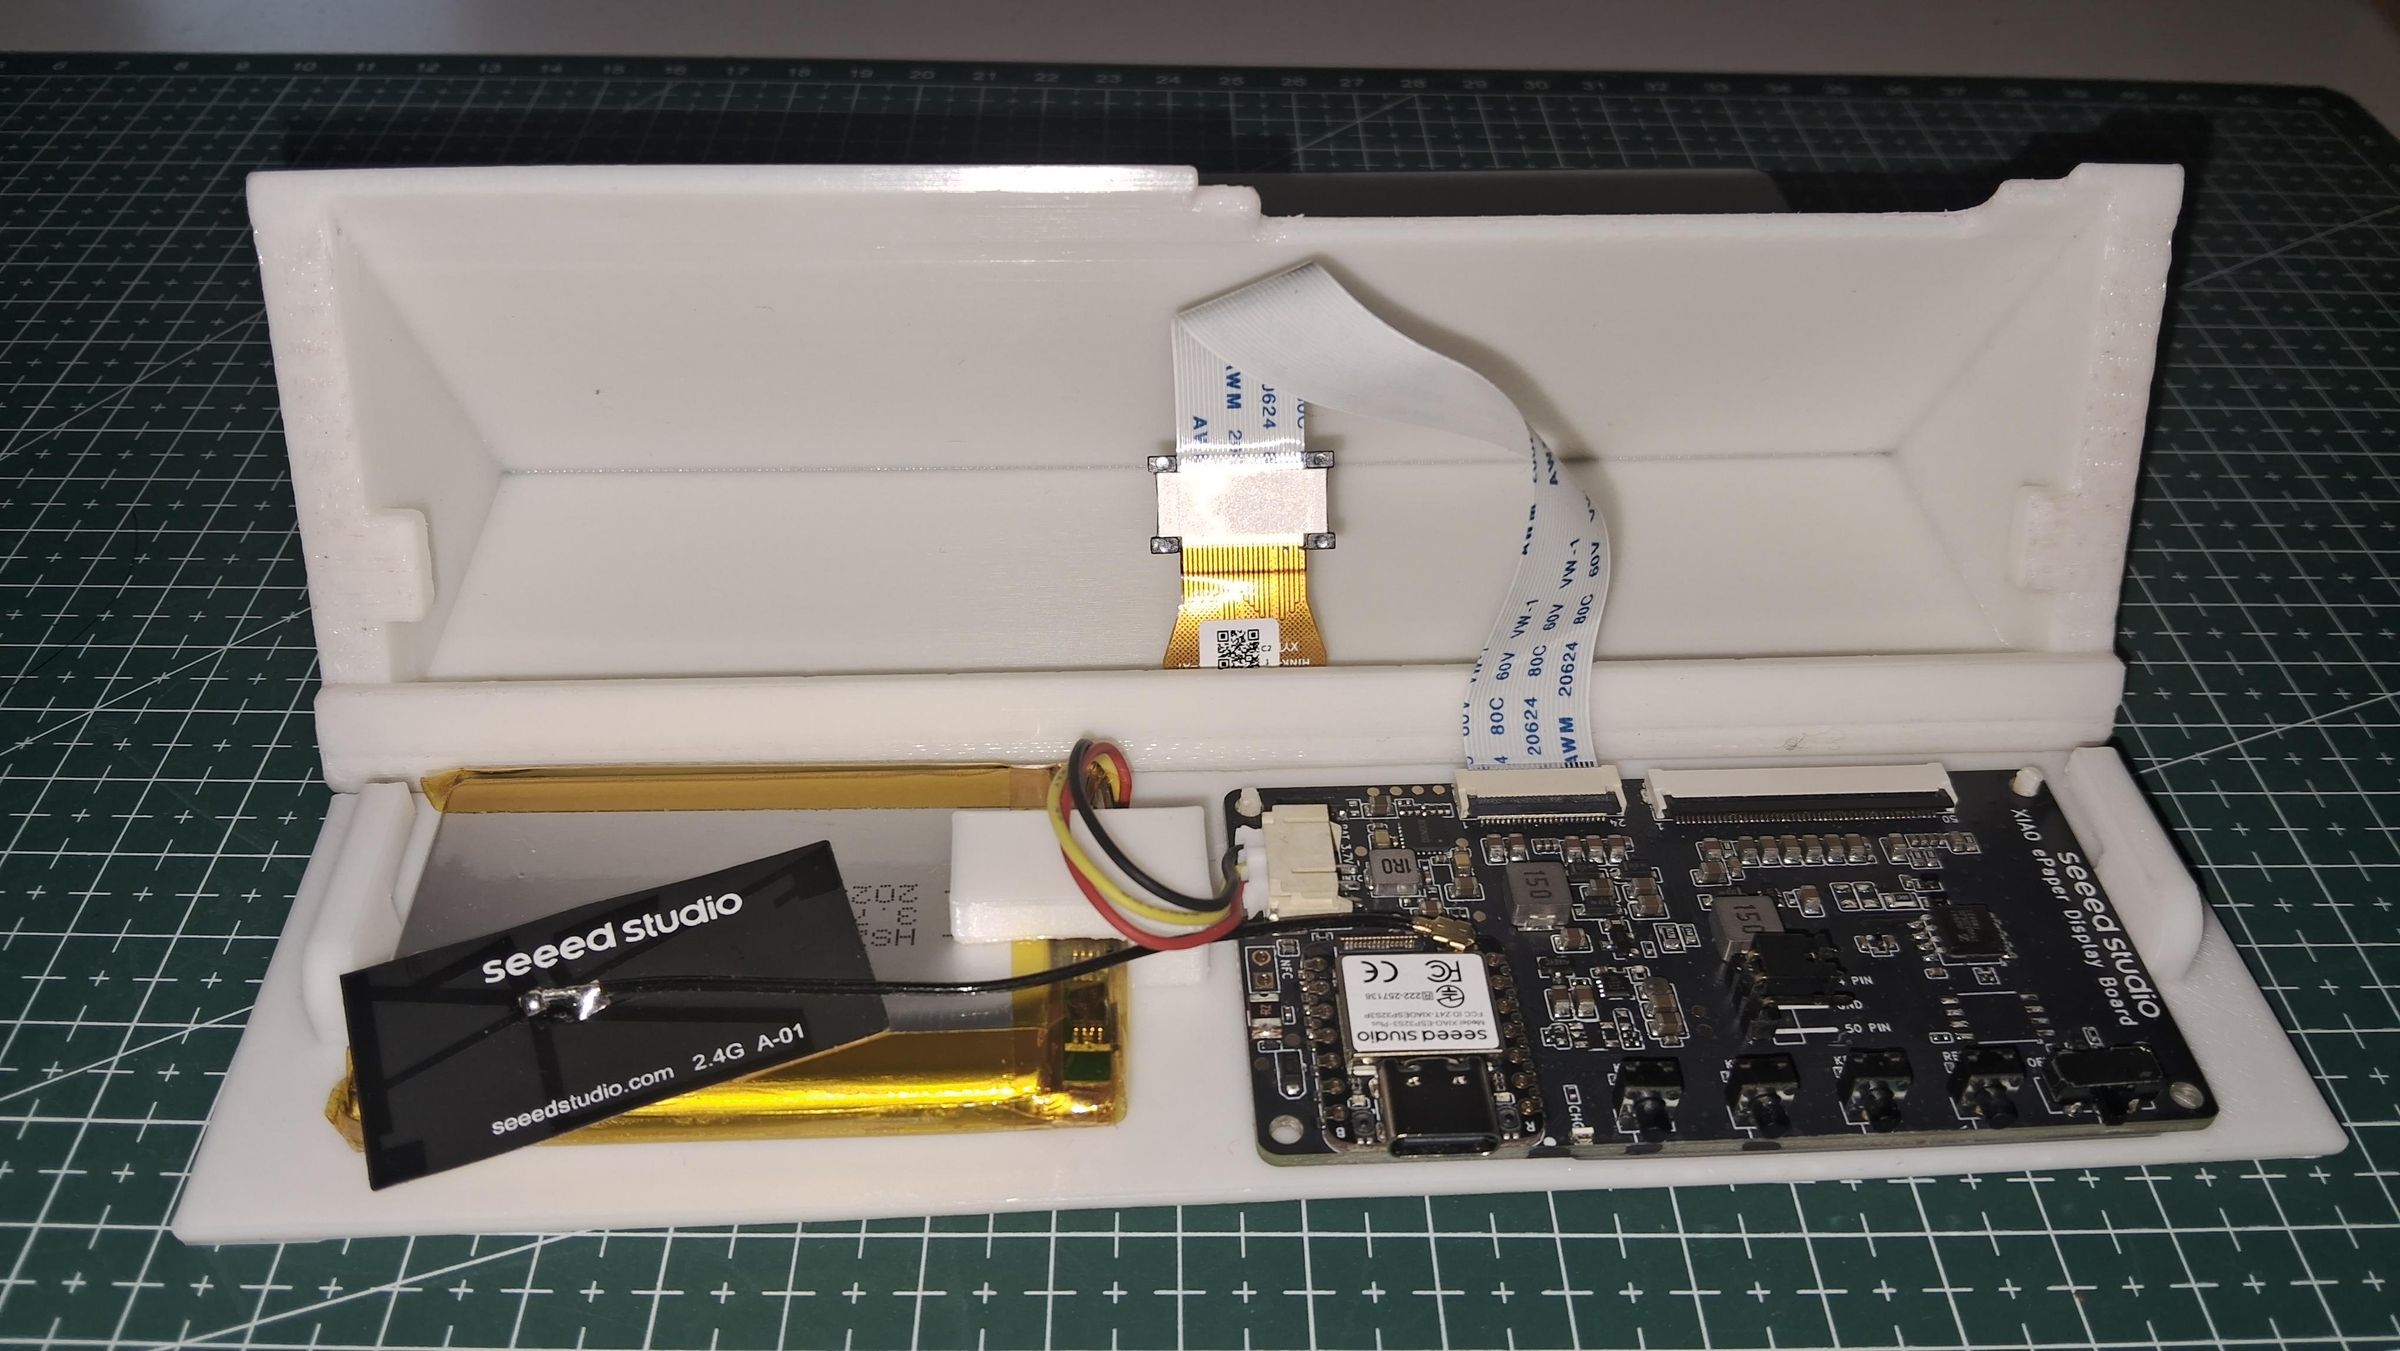
Tuck the connected the driver board, and the managed wire bundles neatly within the main frame cavity. Ensure no cables/antenna are pinched near the outer areas. Gently fold the FPC cable without making sharp turns or tight folds as that could damage the FPC cable. Ensure that the display select jumper is set to 24 Pin Mode.
Back Plate Installation
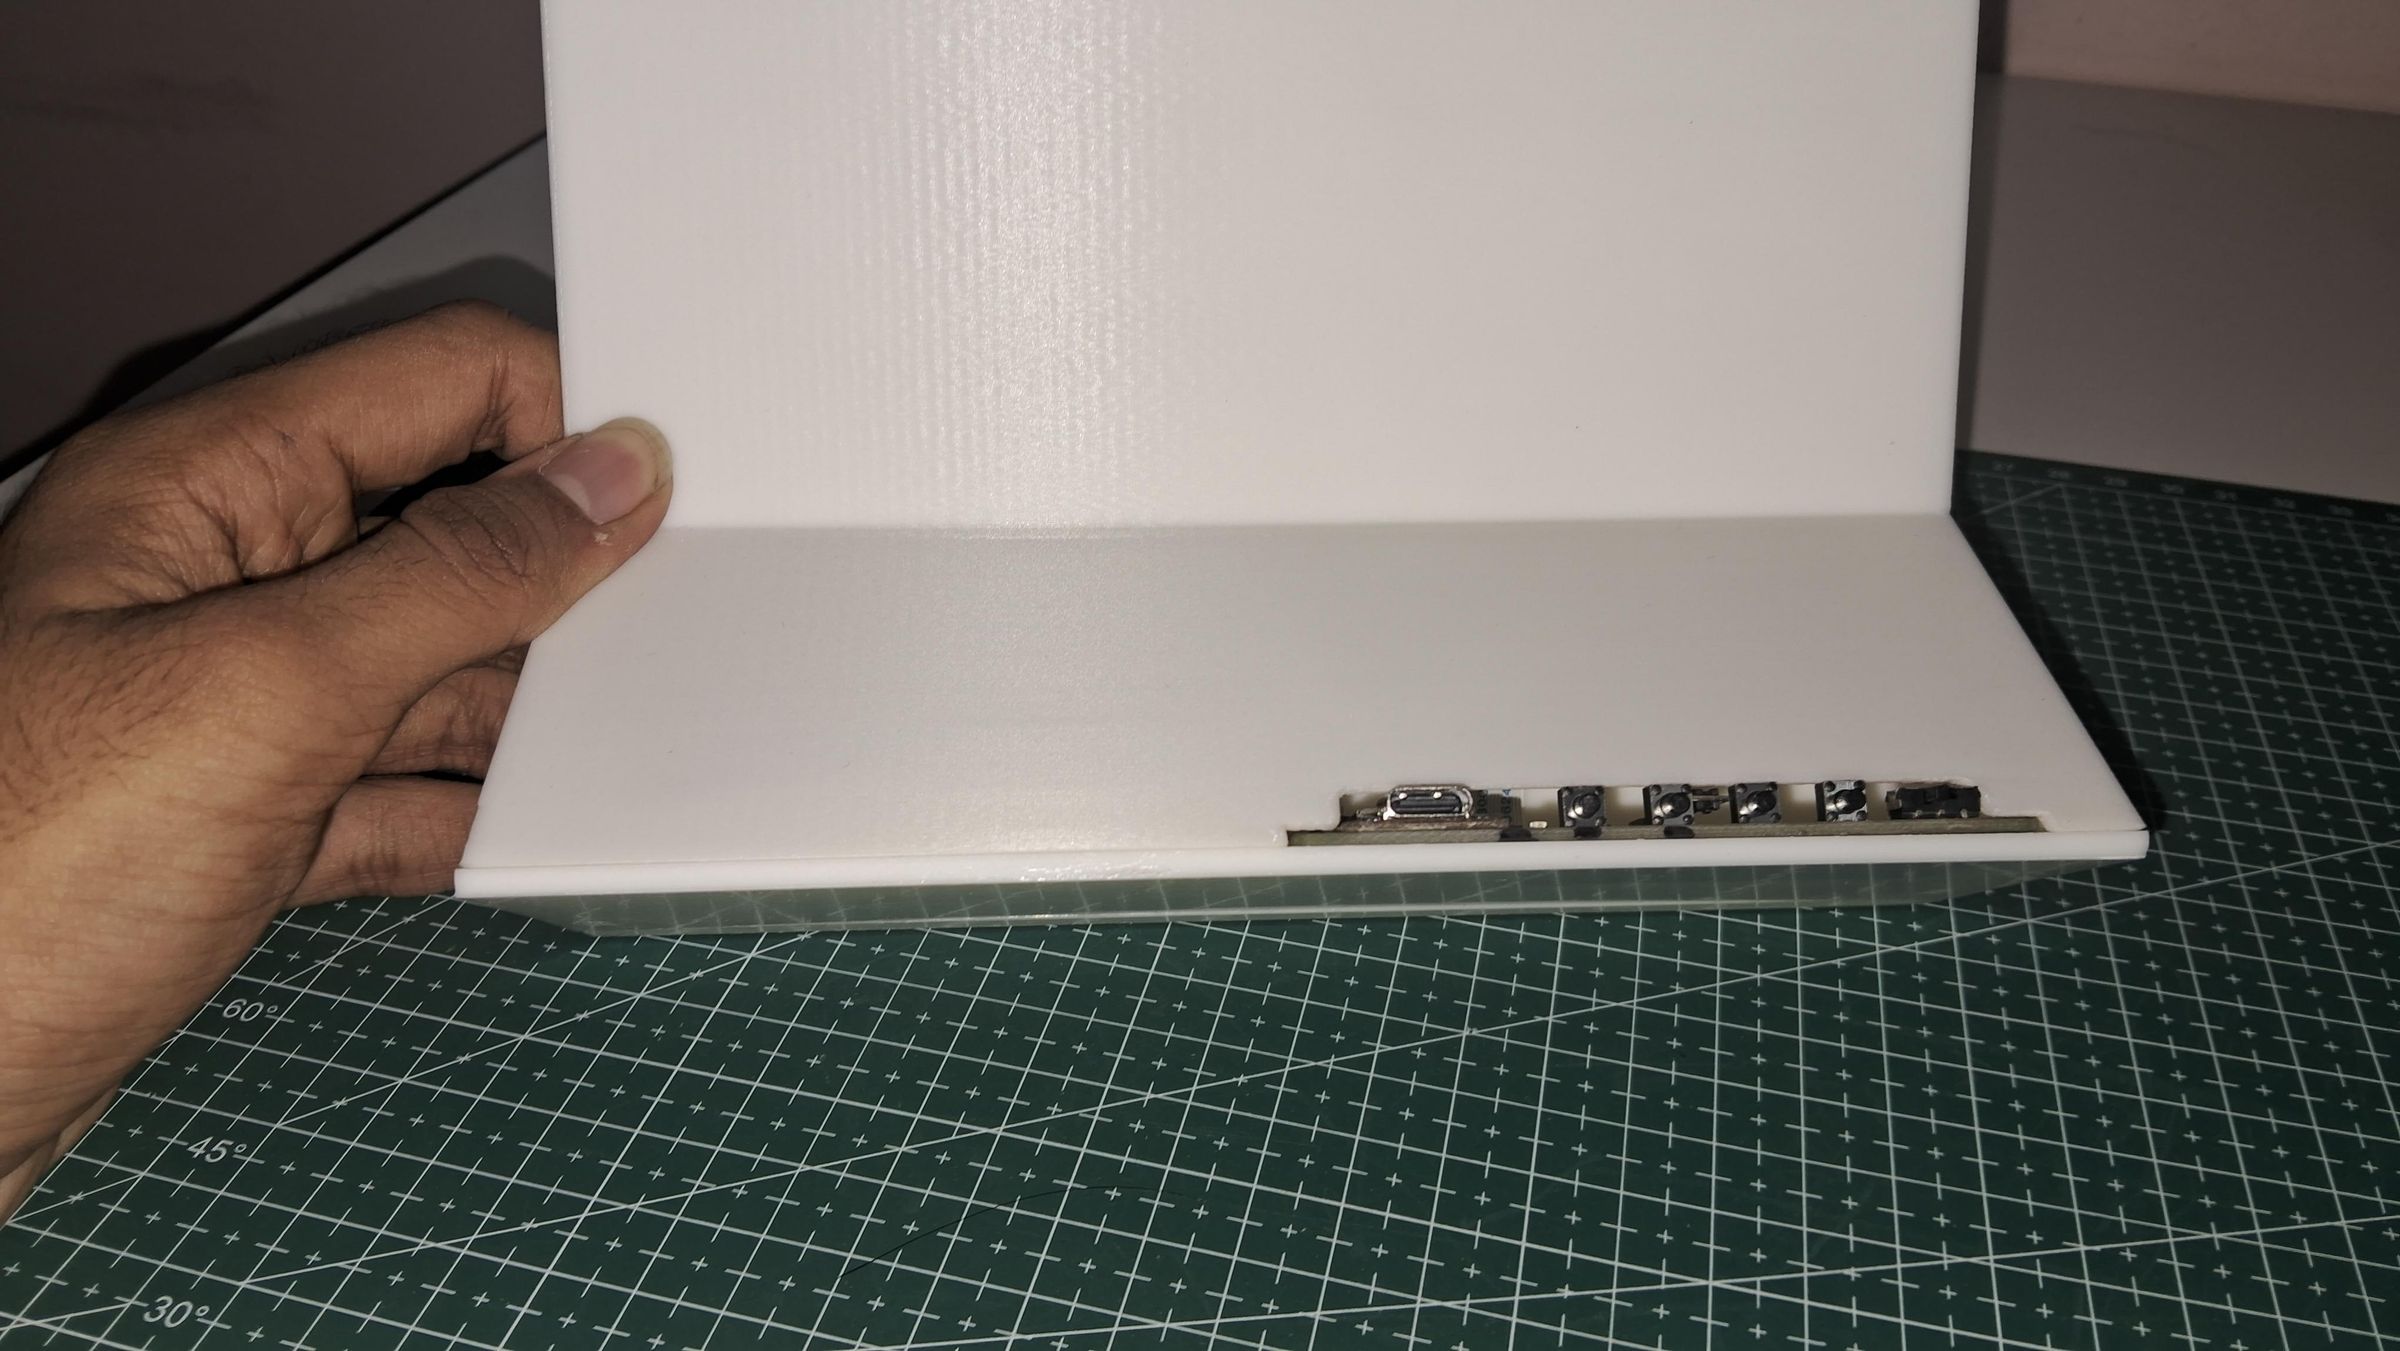
Align the final base plate with the main frame. Slide the lock cleanly into place, closing up the device flush.
Assembling the ChefAssist Seeed Studio XIAO Vision AI Camera Module
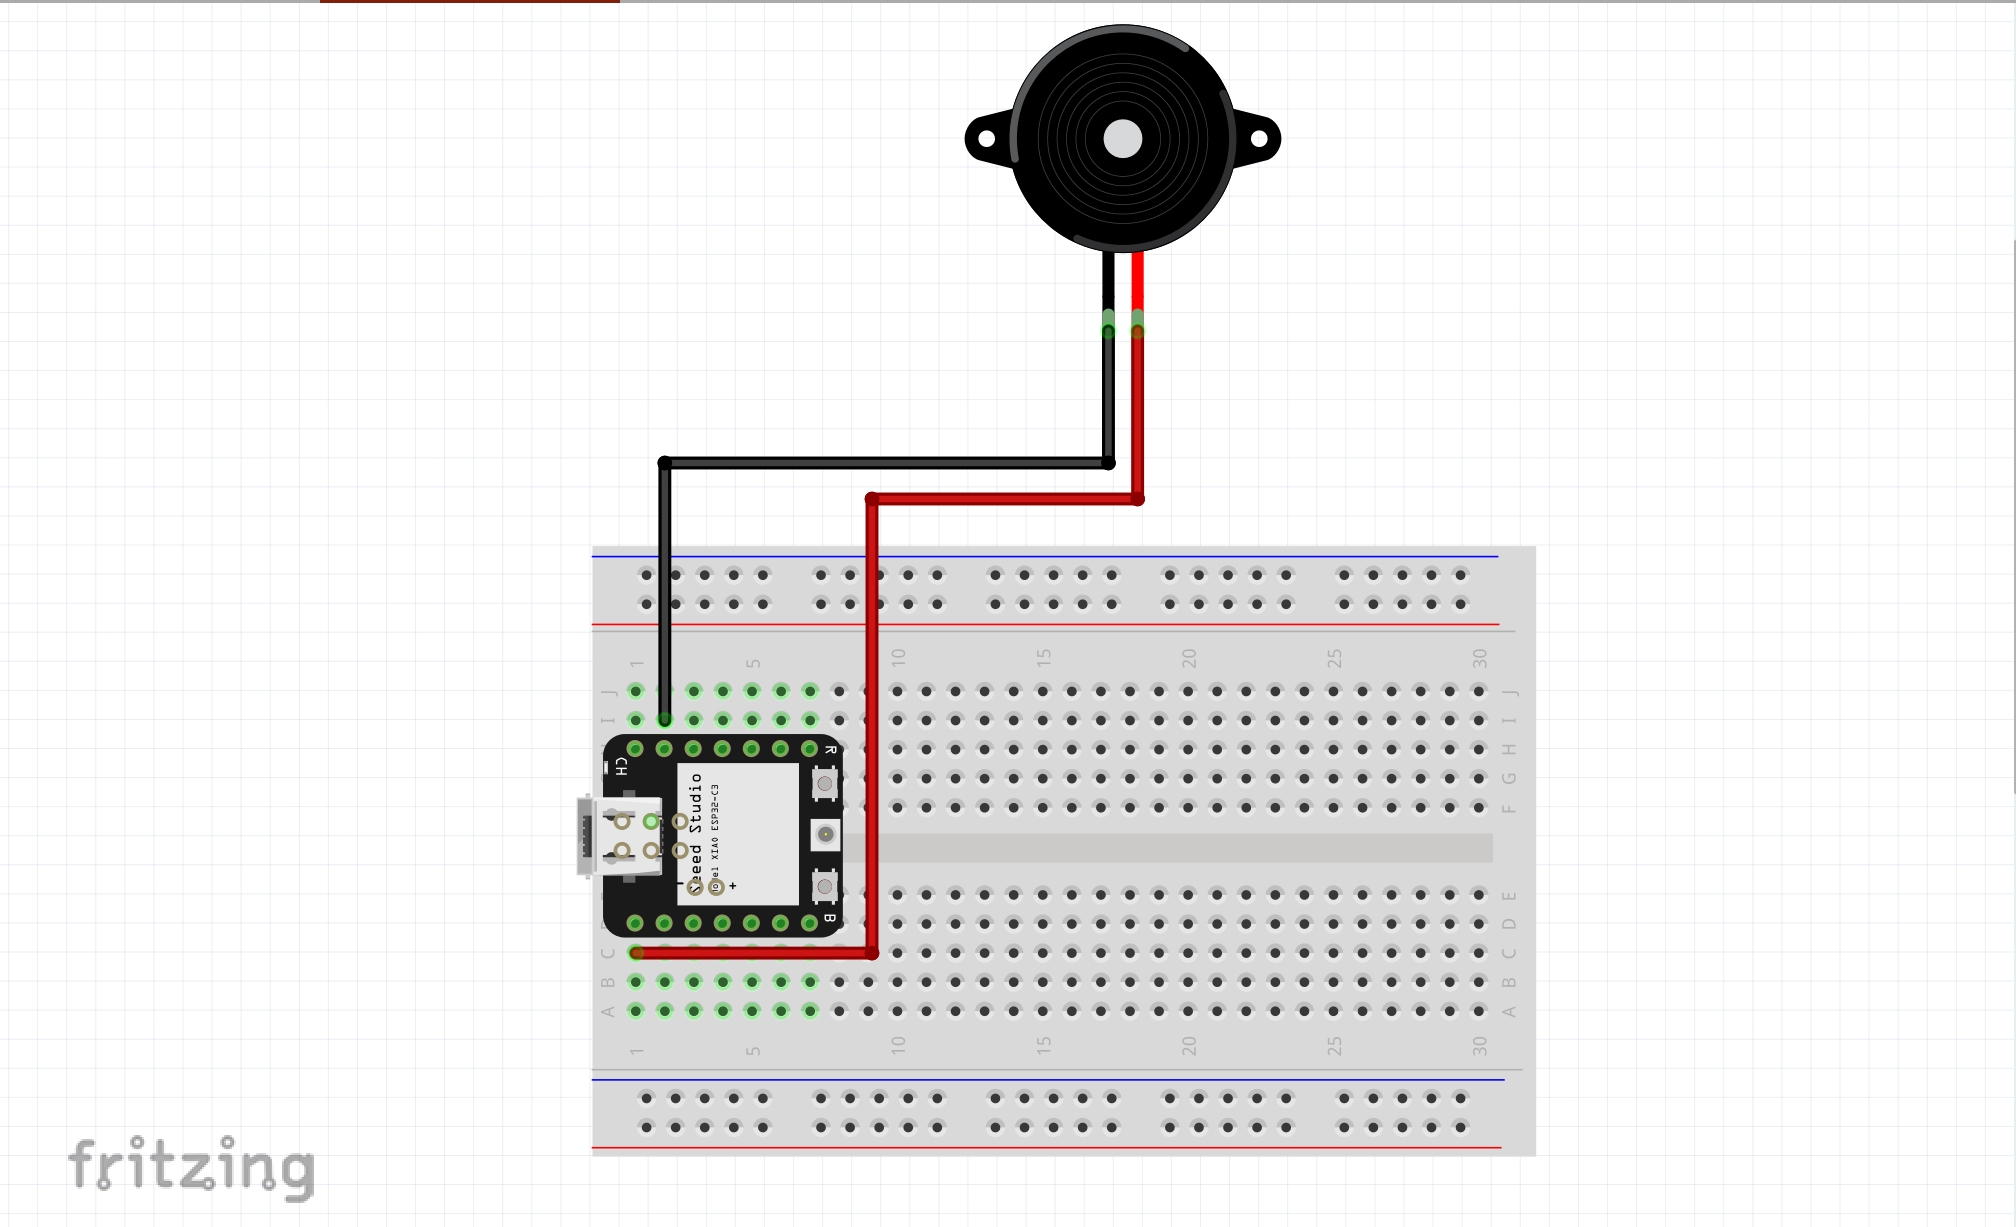
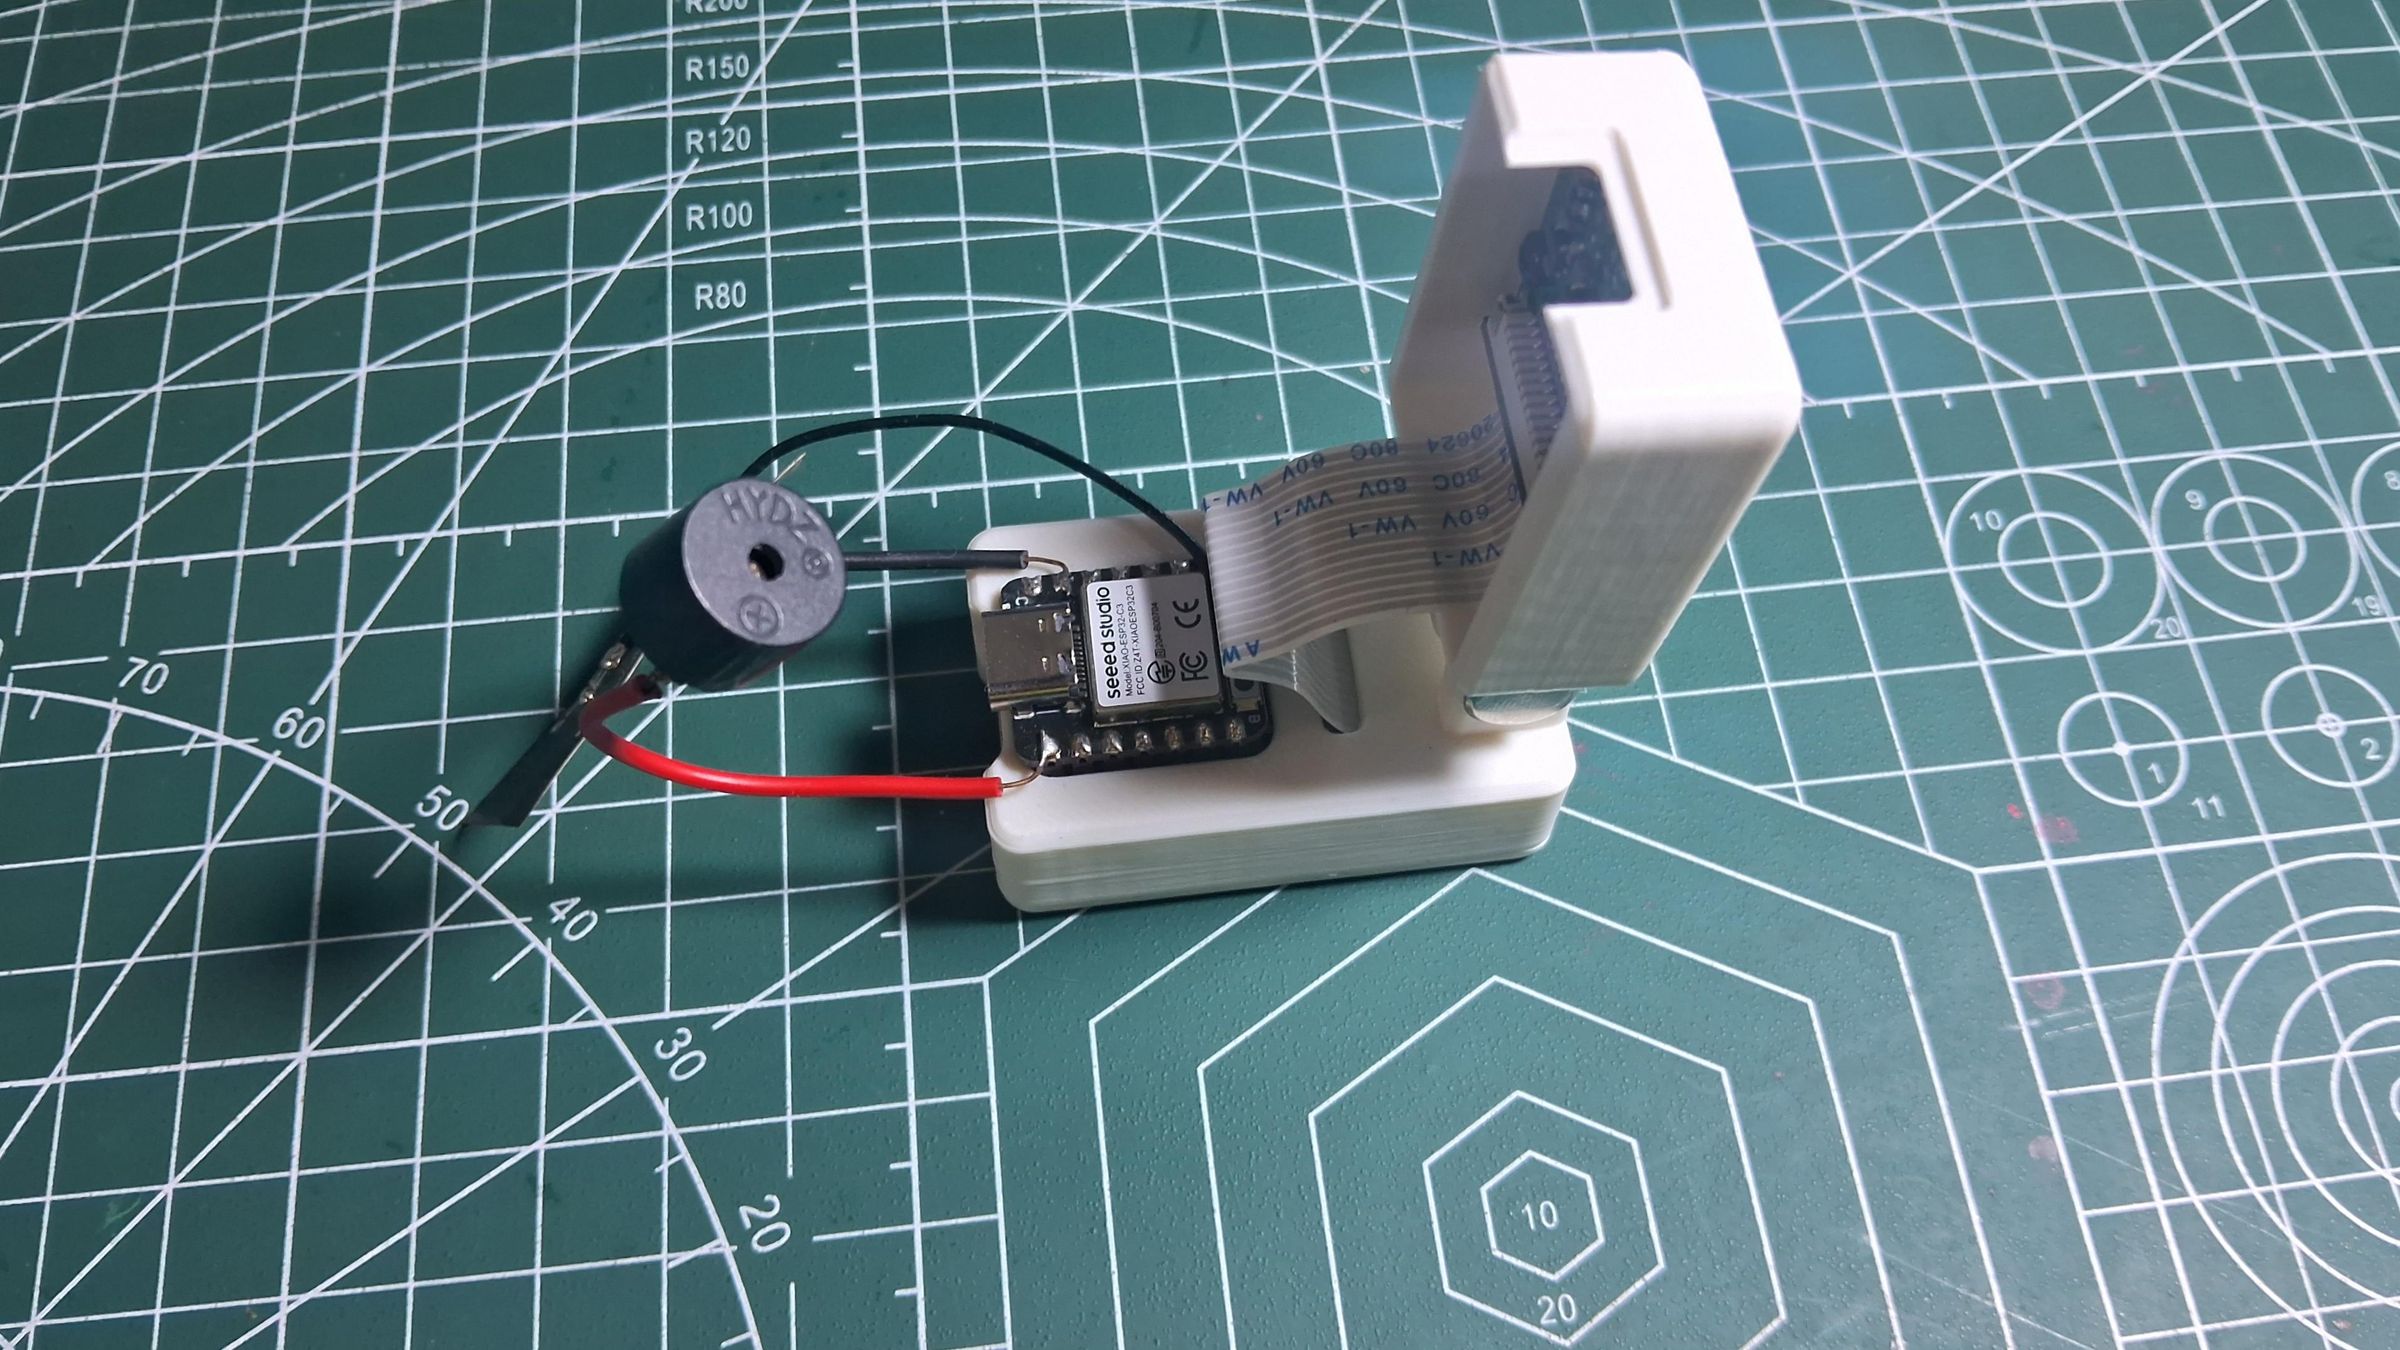
With the TRMNL screen ready, it's time to build the "eyes and ears" of the ChefAssist system. For this, we are using the Seeed StudioXIAO Vision AI CameraModule paired with the Seeed Studio XIAO ESP32-C3.
The core of the ChefAssist's touch-free system is built by seamlessly pairing the Grove Vision AI V2 module with the Seeed Studio XIAO ESP32-C3. It is equipped with the OV5647 Camera. In this modular architecture, the camera module handles the heavy lifting of running machine learning models locally on the edge. Meanwhile, the XIAO ESP32-C3 acts as the primary controller board, managing external hardware like the audio buzzer and instantly routing the AI gesture triggers to our cloud database over Wi-Fi.
To provide the chefs with audio feedback, we need to add a simple 2-pin buzzer to the XIAO before mounting it.
1. Soldering the Buzzer
- Take your 2-pin buzzer and identify the polarity. The longer leg is the positive (+) terminal, and the shorter leg is the ground (-) terminal.
- Locate pin D0 and GND on your Seeed Studio XIAO ESP32-C3.
- Carefully solder a jumper wire from the positive leg of the buzzer to the D0 pin on the XIAO.
- Solder a jumper wire from the negative leg of the buzzer to the GND pin on the XIAO.
Tip: Use a small piece of heat shrink tubing over the buzzer legs to prevent any accidental short circuits when the hardware is tucked into a case
Please refer to the attached images to see the exact solder points and wire routing
2. Mounting the SeeedStudio XIAO ESP32-C3
- Once the buzzer is securely soldered, you need to mount the Seeed Studio XIAO ESP32-C3 onto the Seeed studio Vision AI Camera Module.
CRITICAL ORIENTATION WARNING: Do not plug the XIAO in backward! Look at the silkscreen printing on both the XIAO and the Vision AI board. Ensure the USB-C port of the XIAO aligns correctly with the designated outline on the Vision AI module. Connecting this backward can short the board and let the "magic smoke" out.
- Gently but firmly press the XIAO down into the female headers of the Vision AI board until it is fully seated.
3. Final Inspection
- Ensure the camera lens on the Seeed Studio Vision AI Camera module is clean and the ribbon cable (if applicable) is seated properly in its connector.
- Plug a USB-C cable into the Seeed Studio XIAO ESP32-C3 (not the Vision AI board's port, if it has a secondary one) to power it up and prepare for flashing the firmware.
Software & Deployment
This project looks incredibly complex from the outside, but it is actually built using a mix of "No-Code" tools and straightforward Arduino programming. We will break this down into three easy phases: setting up the Customer TableSpot, configuring the Cloud Database, and programming the Kitchen ChefAssist system.
TableSpot (No-Code E-Ink Signage)
.png)
.png)
.png)
.png)
The front-of-house customer display (PaperDine TableSpot) requires absolutely zero coding, thanks to SenseCraft Seeedash.
1. Design in Canva: Open Canva and create a new custom design with a resolution of exactly 800 x 480 pixels (the exact resolution of our TRMNL e-ink screen). Design your restaurant posters, daily specials, or advertisements. Pro Tip: Use high-contrast Black and White designs, as e-ink displays render pure black text and graphics beautifully. Export these designs as PNG or JPG images.
2. Add the QR Code: Be sure to include a QR Code that links to your ordering website. (For this project, our fully functional PaperDine web app is hosted on GitHub Pages for demonstration purposes. It handles the cart logic, dummy payments, and database syncing!)
3. Flash the Firmware: Connect your first TRMNL e-ink device to your computer via USB-C. Go to the web-based SenseCraft Seeedash Firmware Flasher Tool. Follow the simple on-screen instructions to select your device and flash the base firmware. During this process, a prompt will appear asking you to enter your local Wi-Fi credentials so the screen can connect to the internet.
Setting Up Firebase (The Cloud Backend)
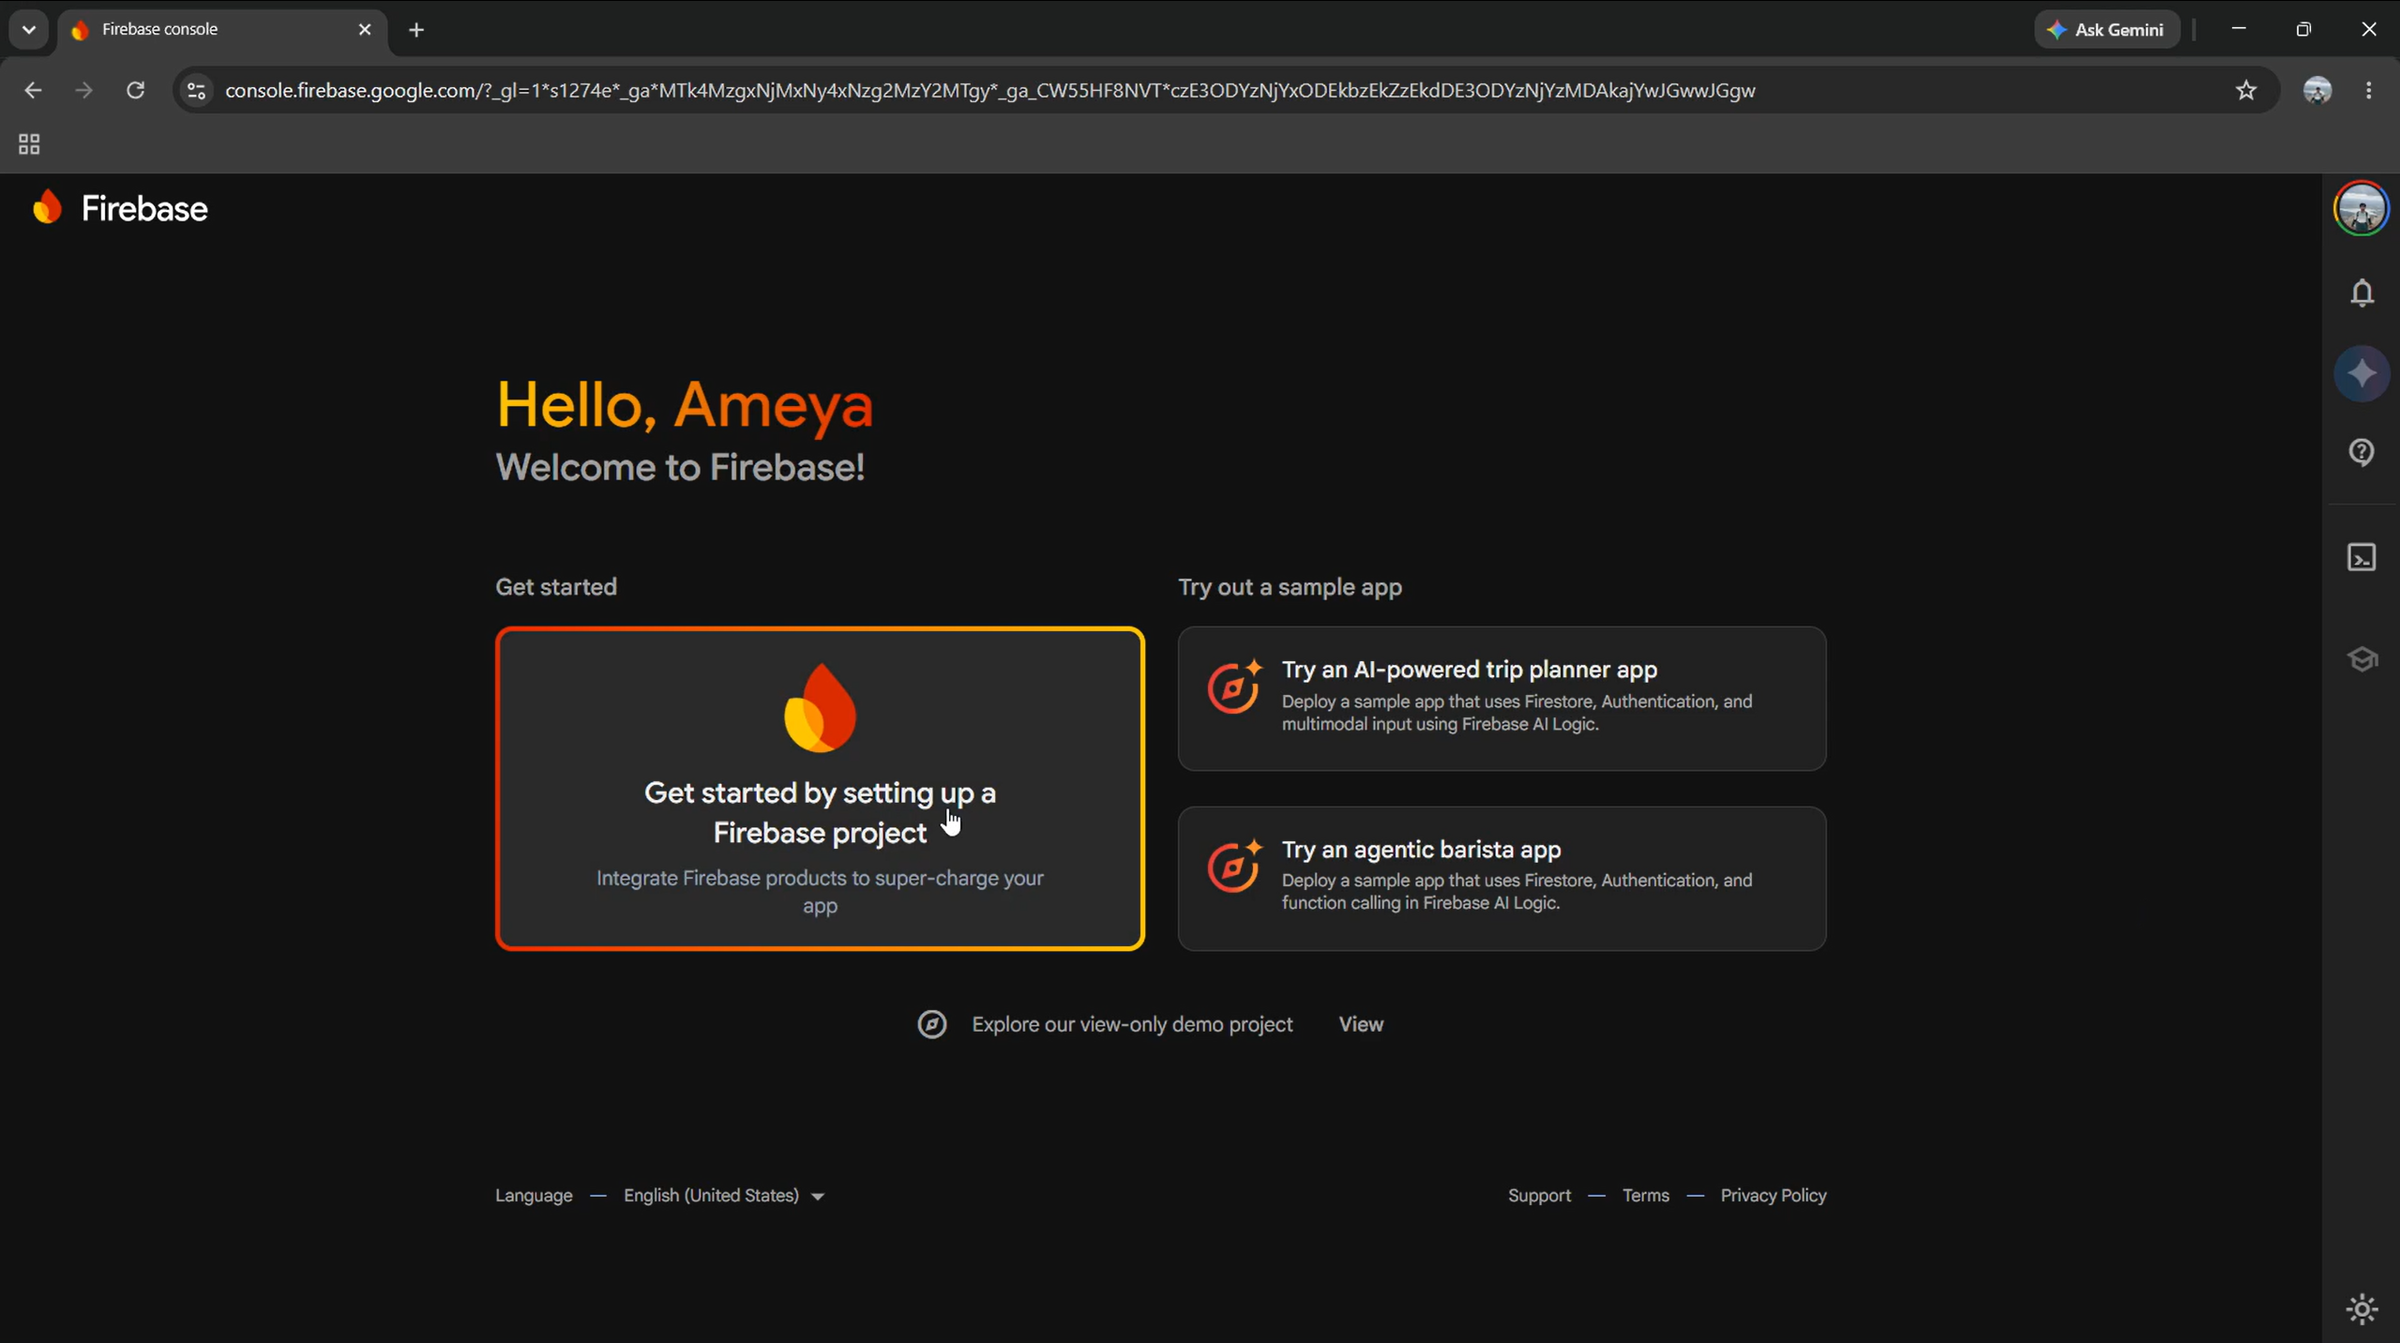
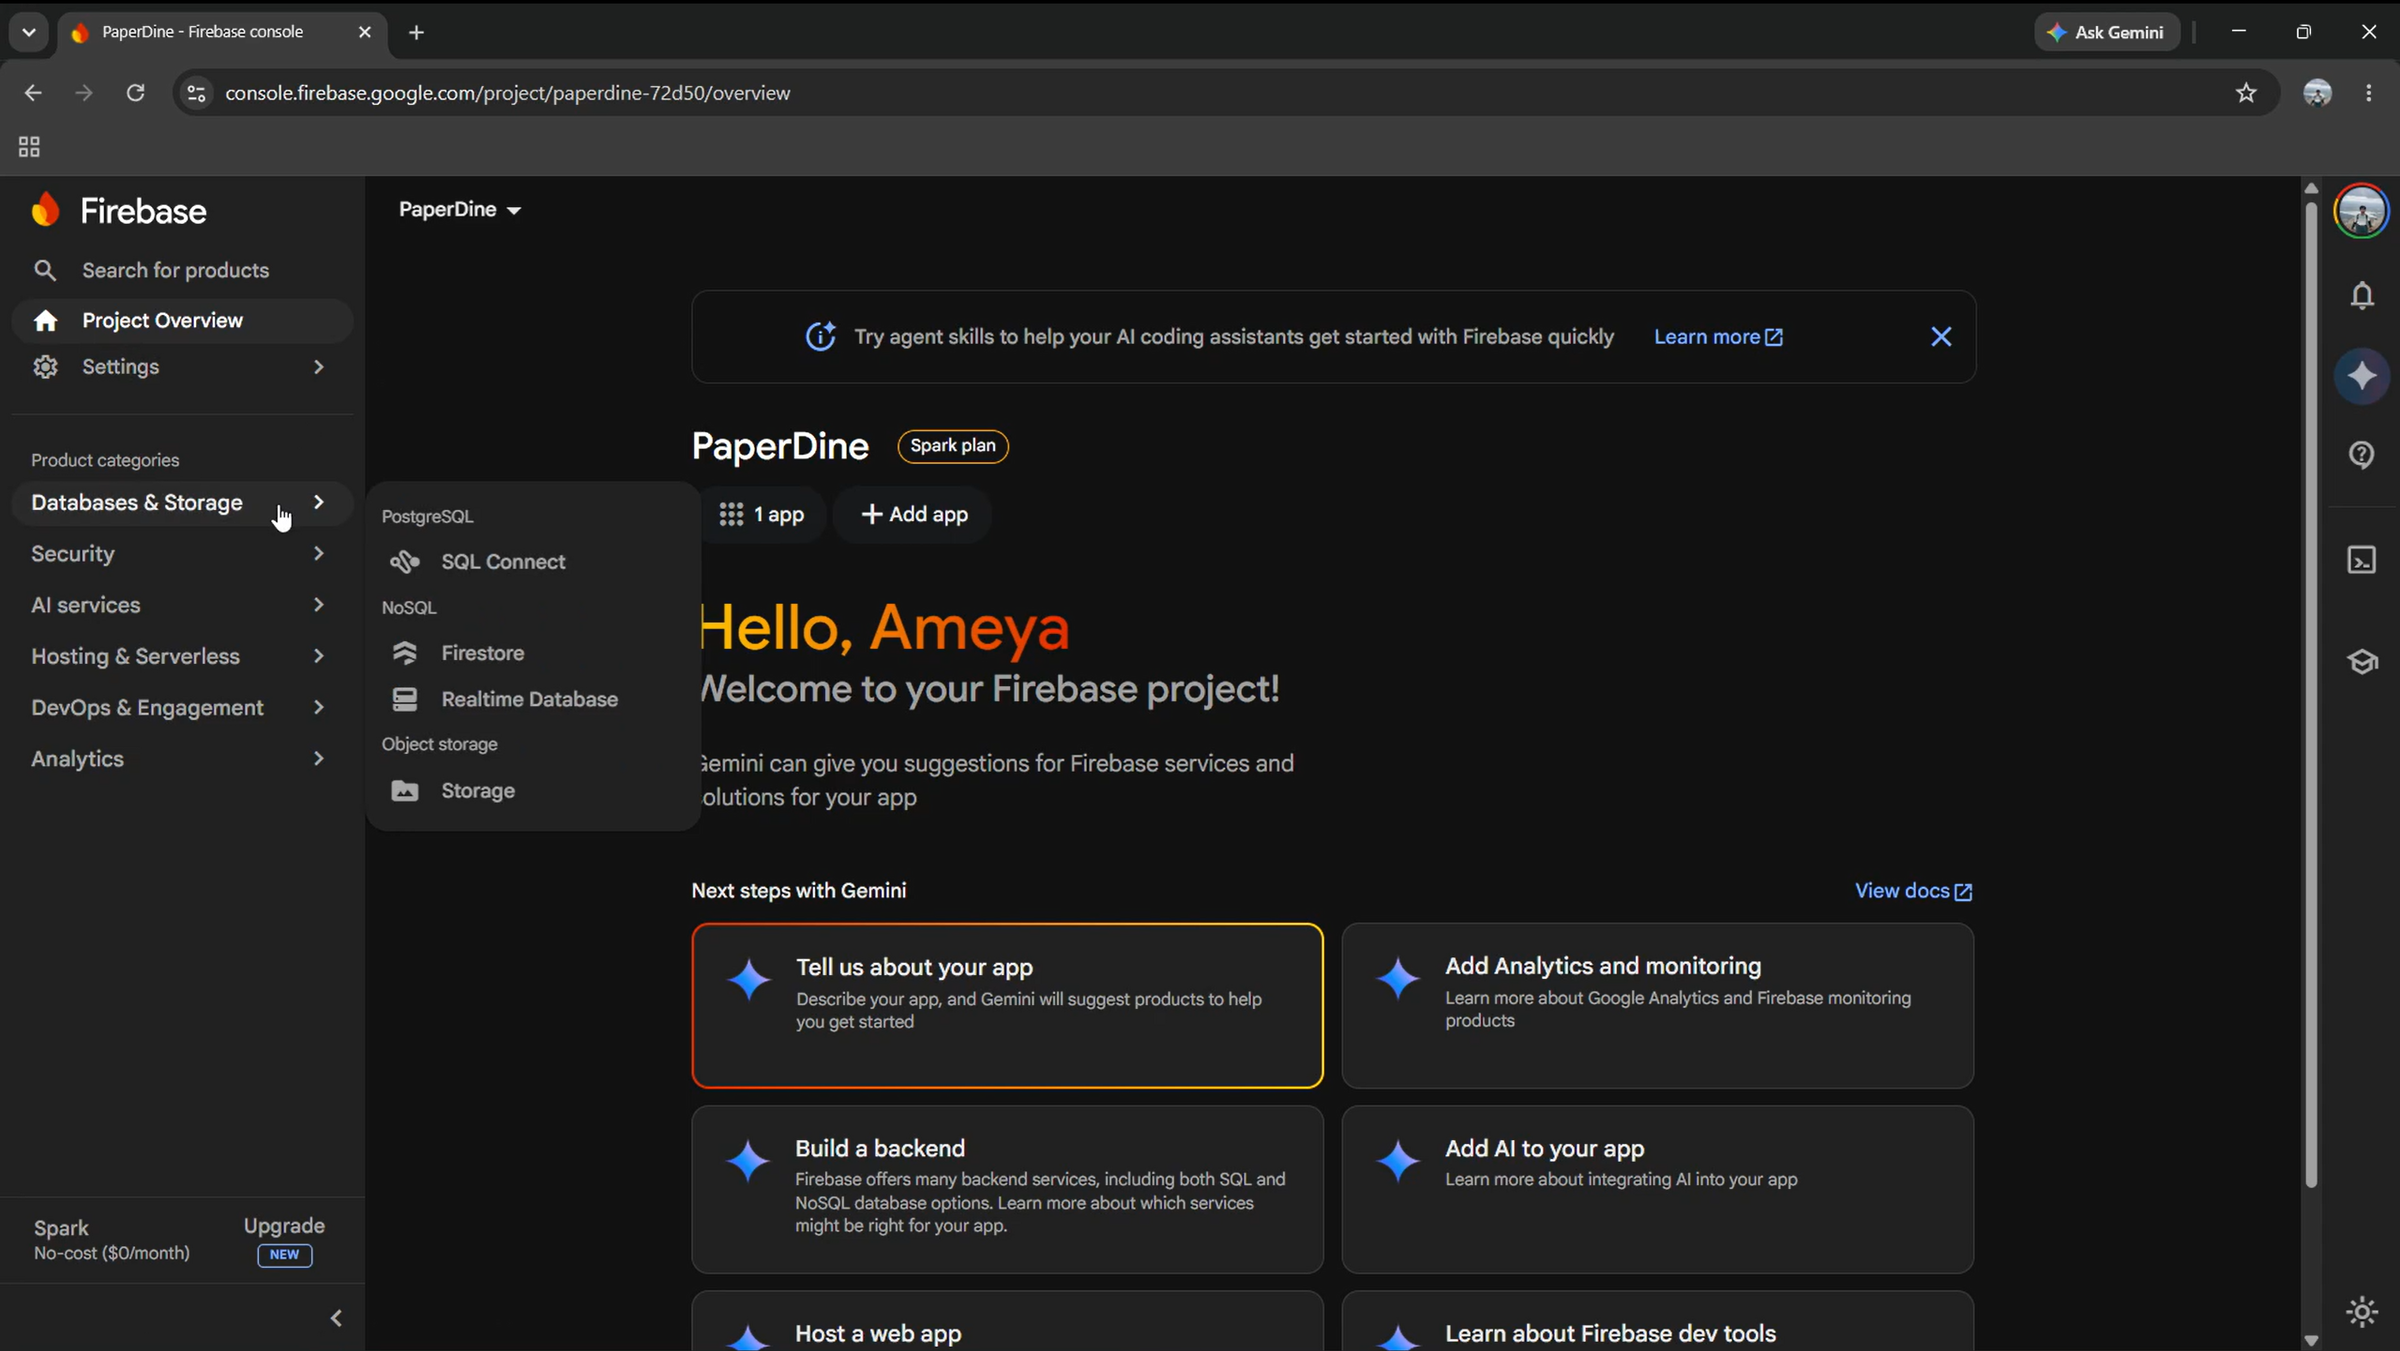
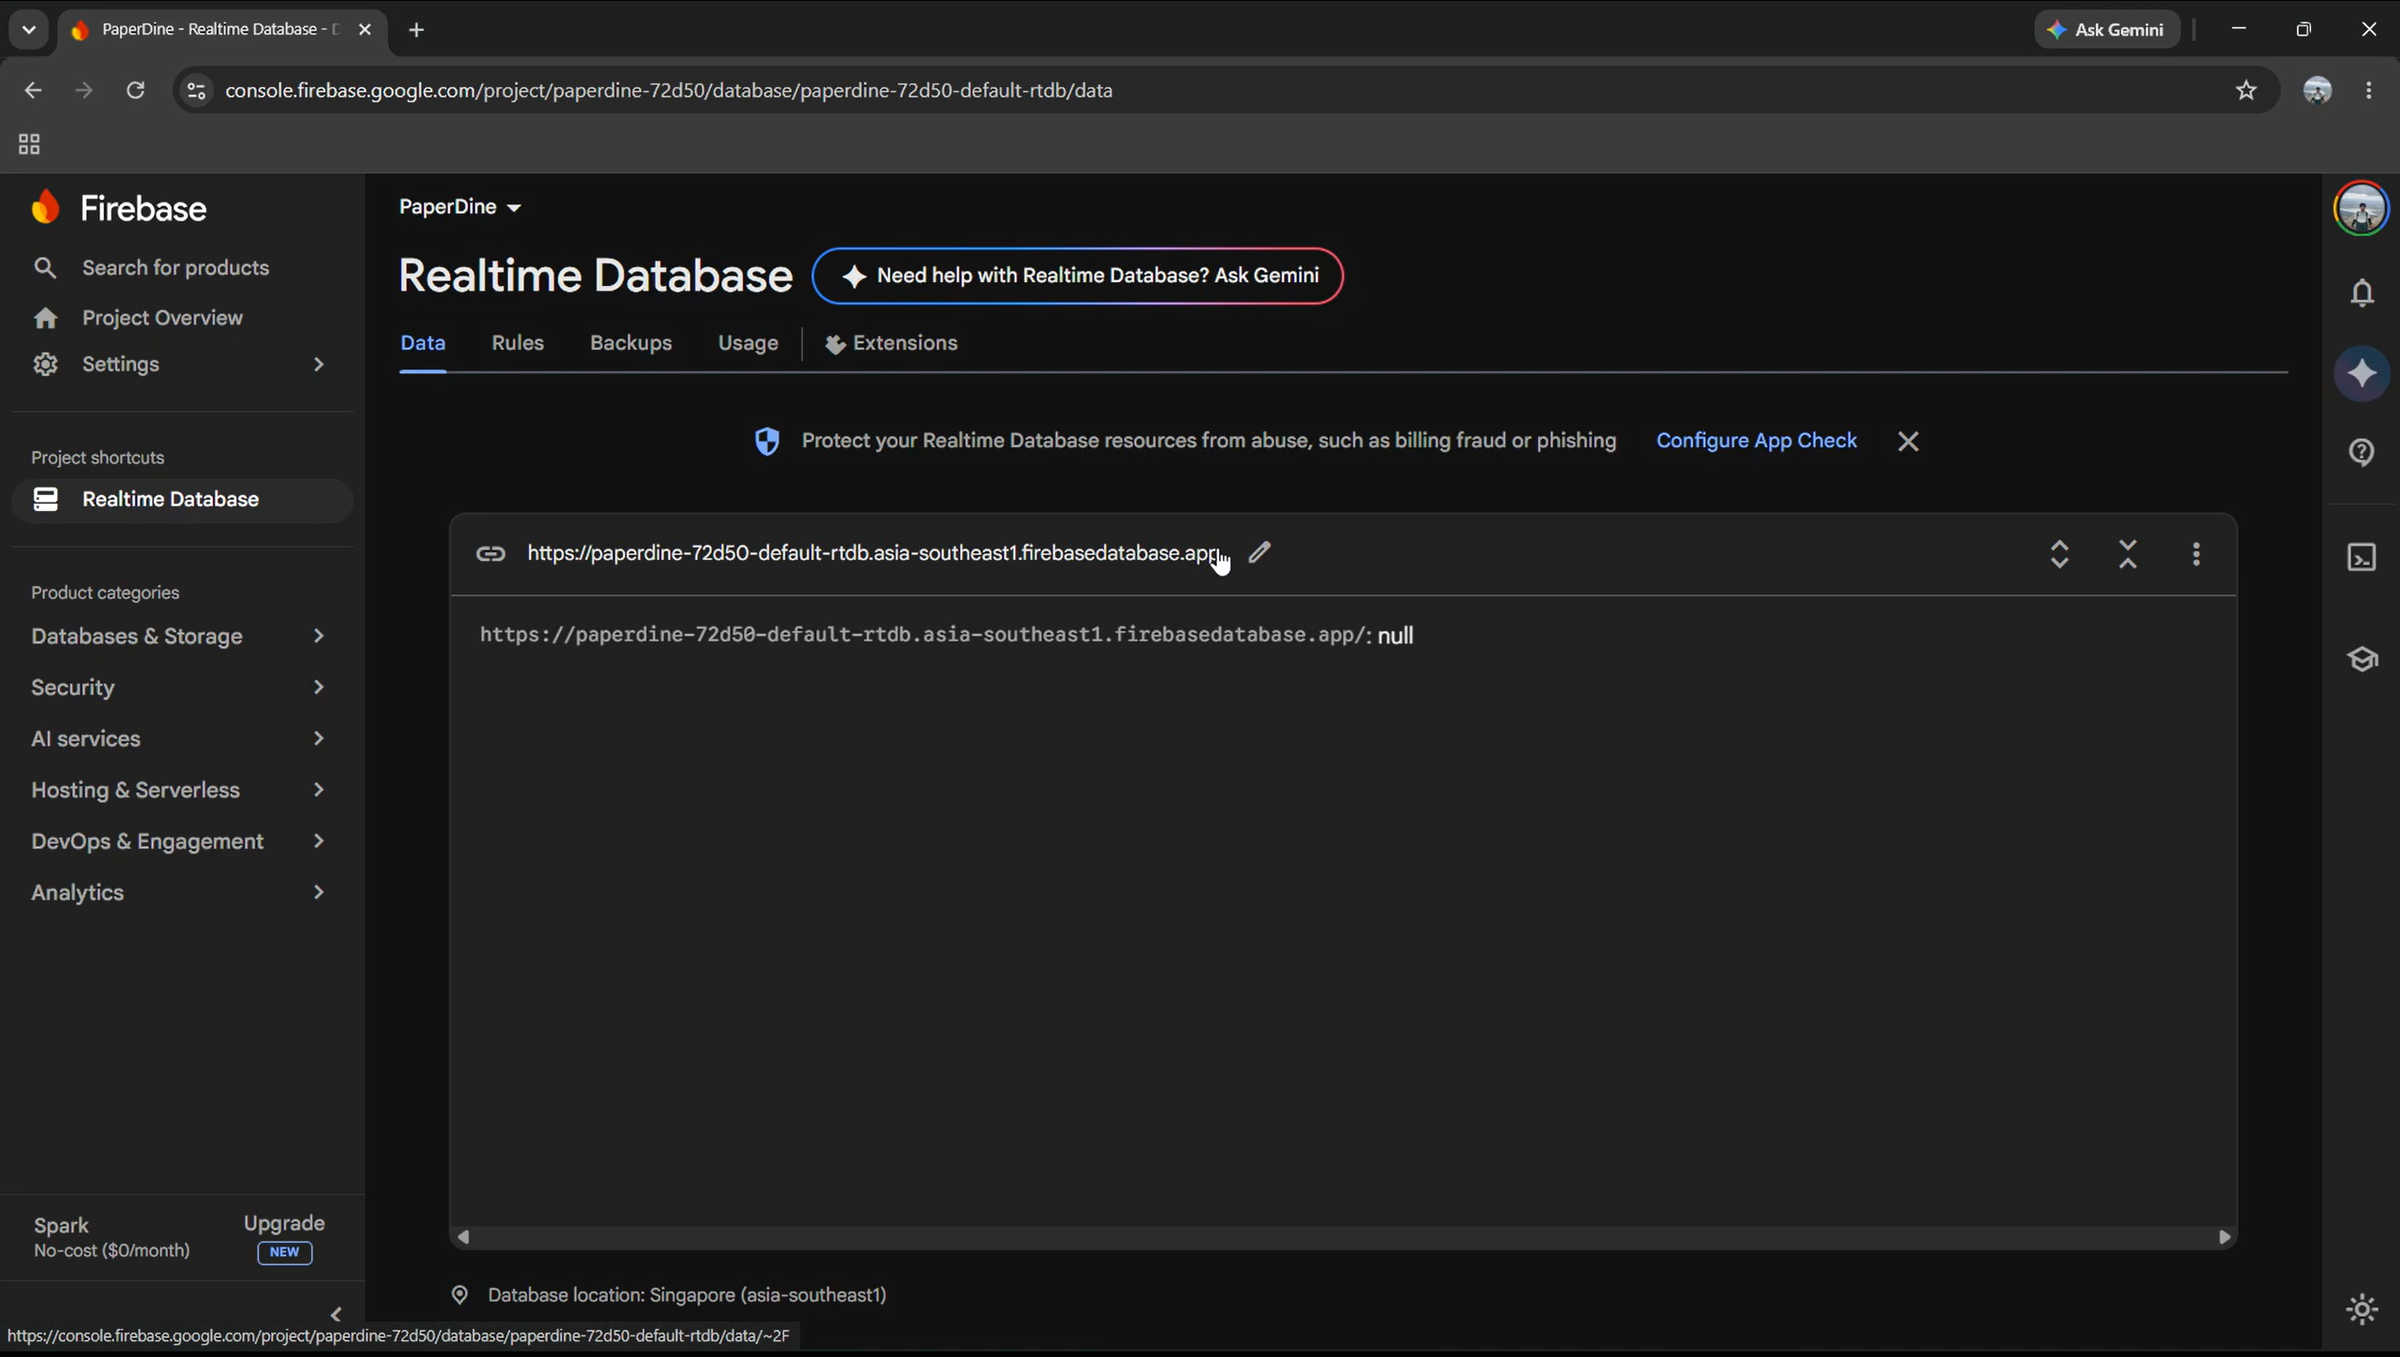
To make the customer website and the kitchen display talk to each other in real-time, we need a database.
1. Create a Project: Go to the Firebase Console (firebase.google.com), log in with your Google account, and click "Add Project." Name it "PaperDine". Disable Google Analytics, we won't need it.
2. Build a Realtime Database: In the left-hand menu, navigate to Build > Realtime Database and click "Create Database."
3. Set Rules: For this prototype to work seamlessly, go to the "Rules" tab in your database and set both read and write to true. (Note: For a commercial production app, you would want to secure these rules later!)
4. Copy Your URL: Go back to the "Data" tab and copy the database URL (it usually ends in firebasedatabase.app). Save this link; we will need it for the Arduino code!
Seeed Studio Vision AI Camera Setup (No-Code Machine Learning)
.png)
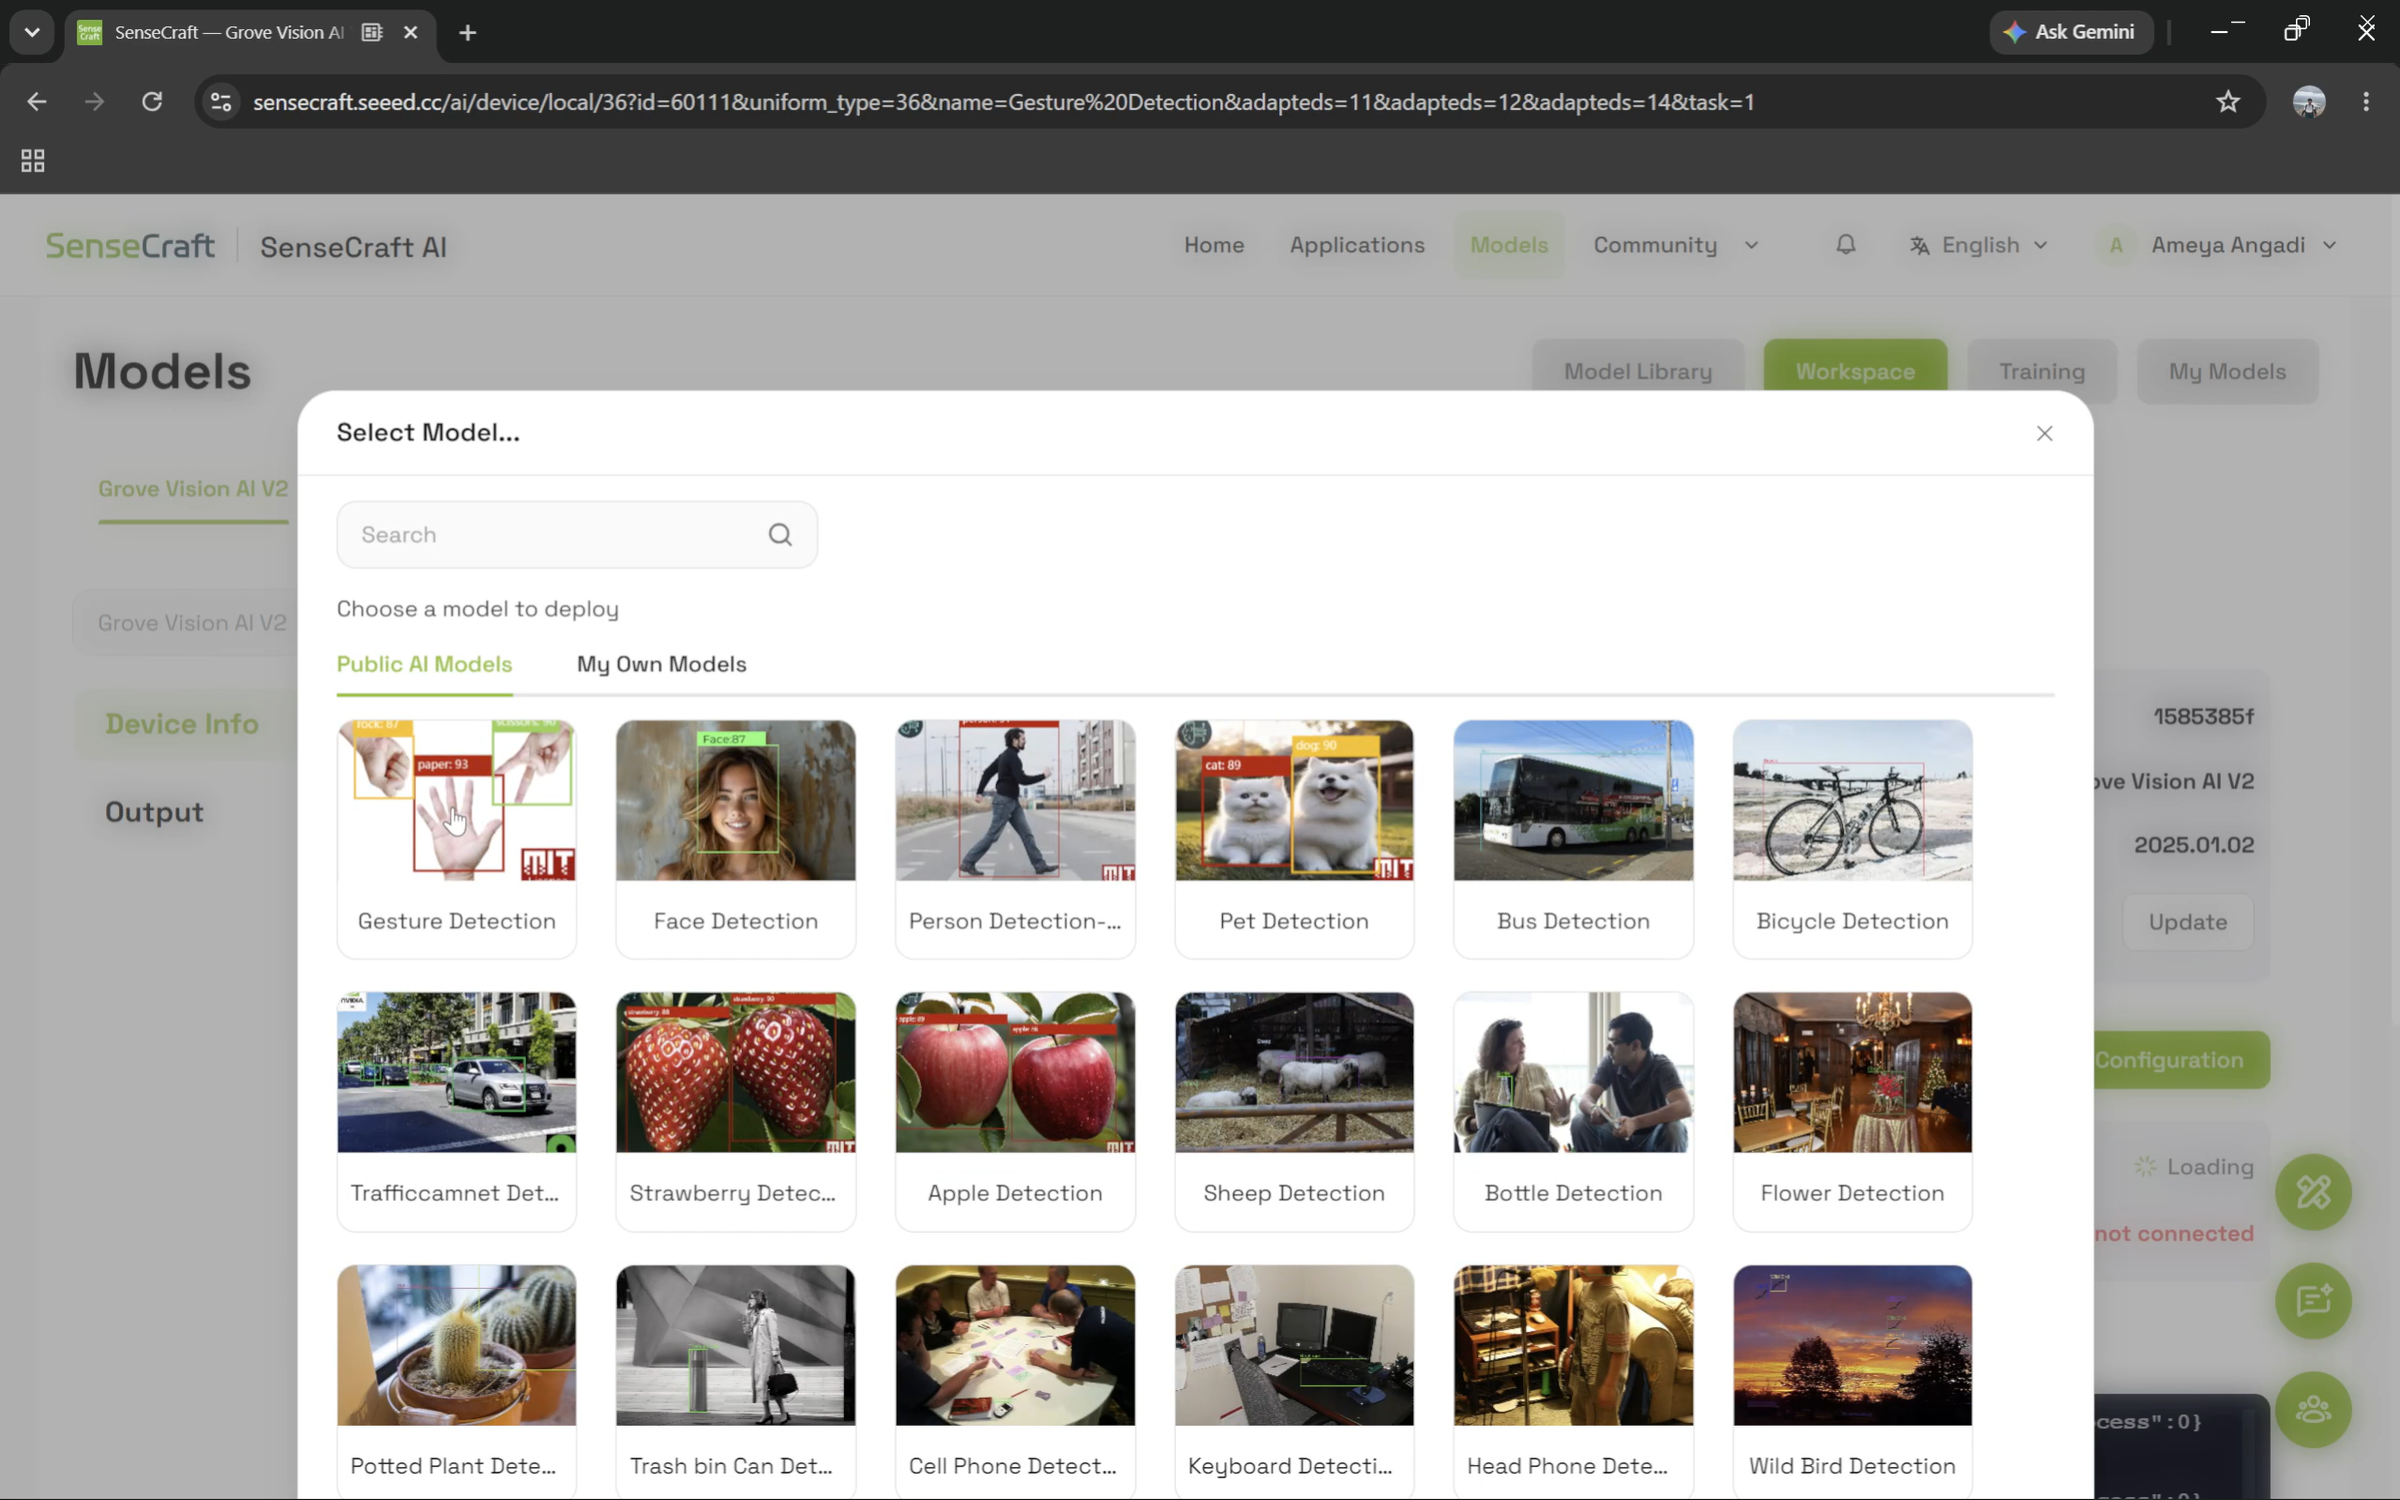
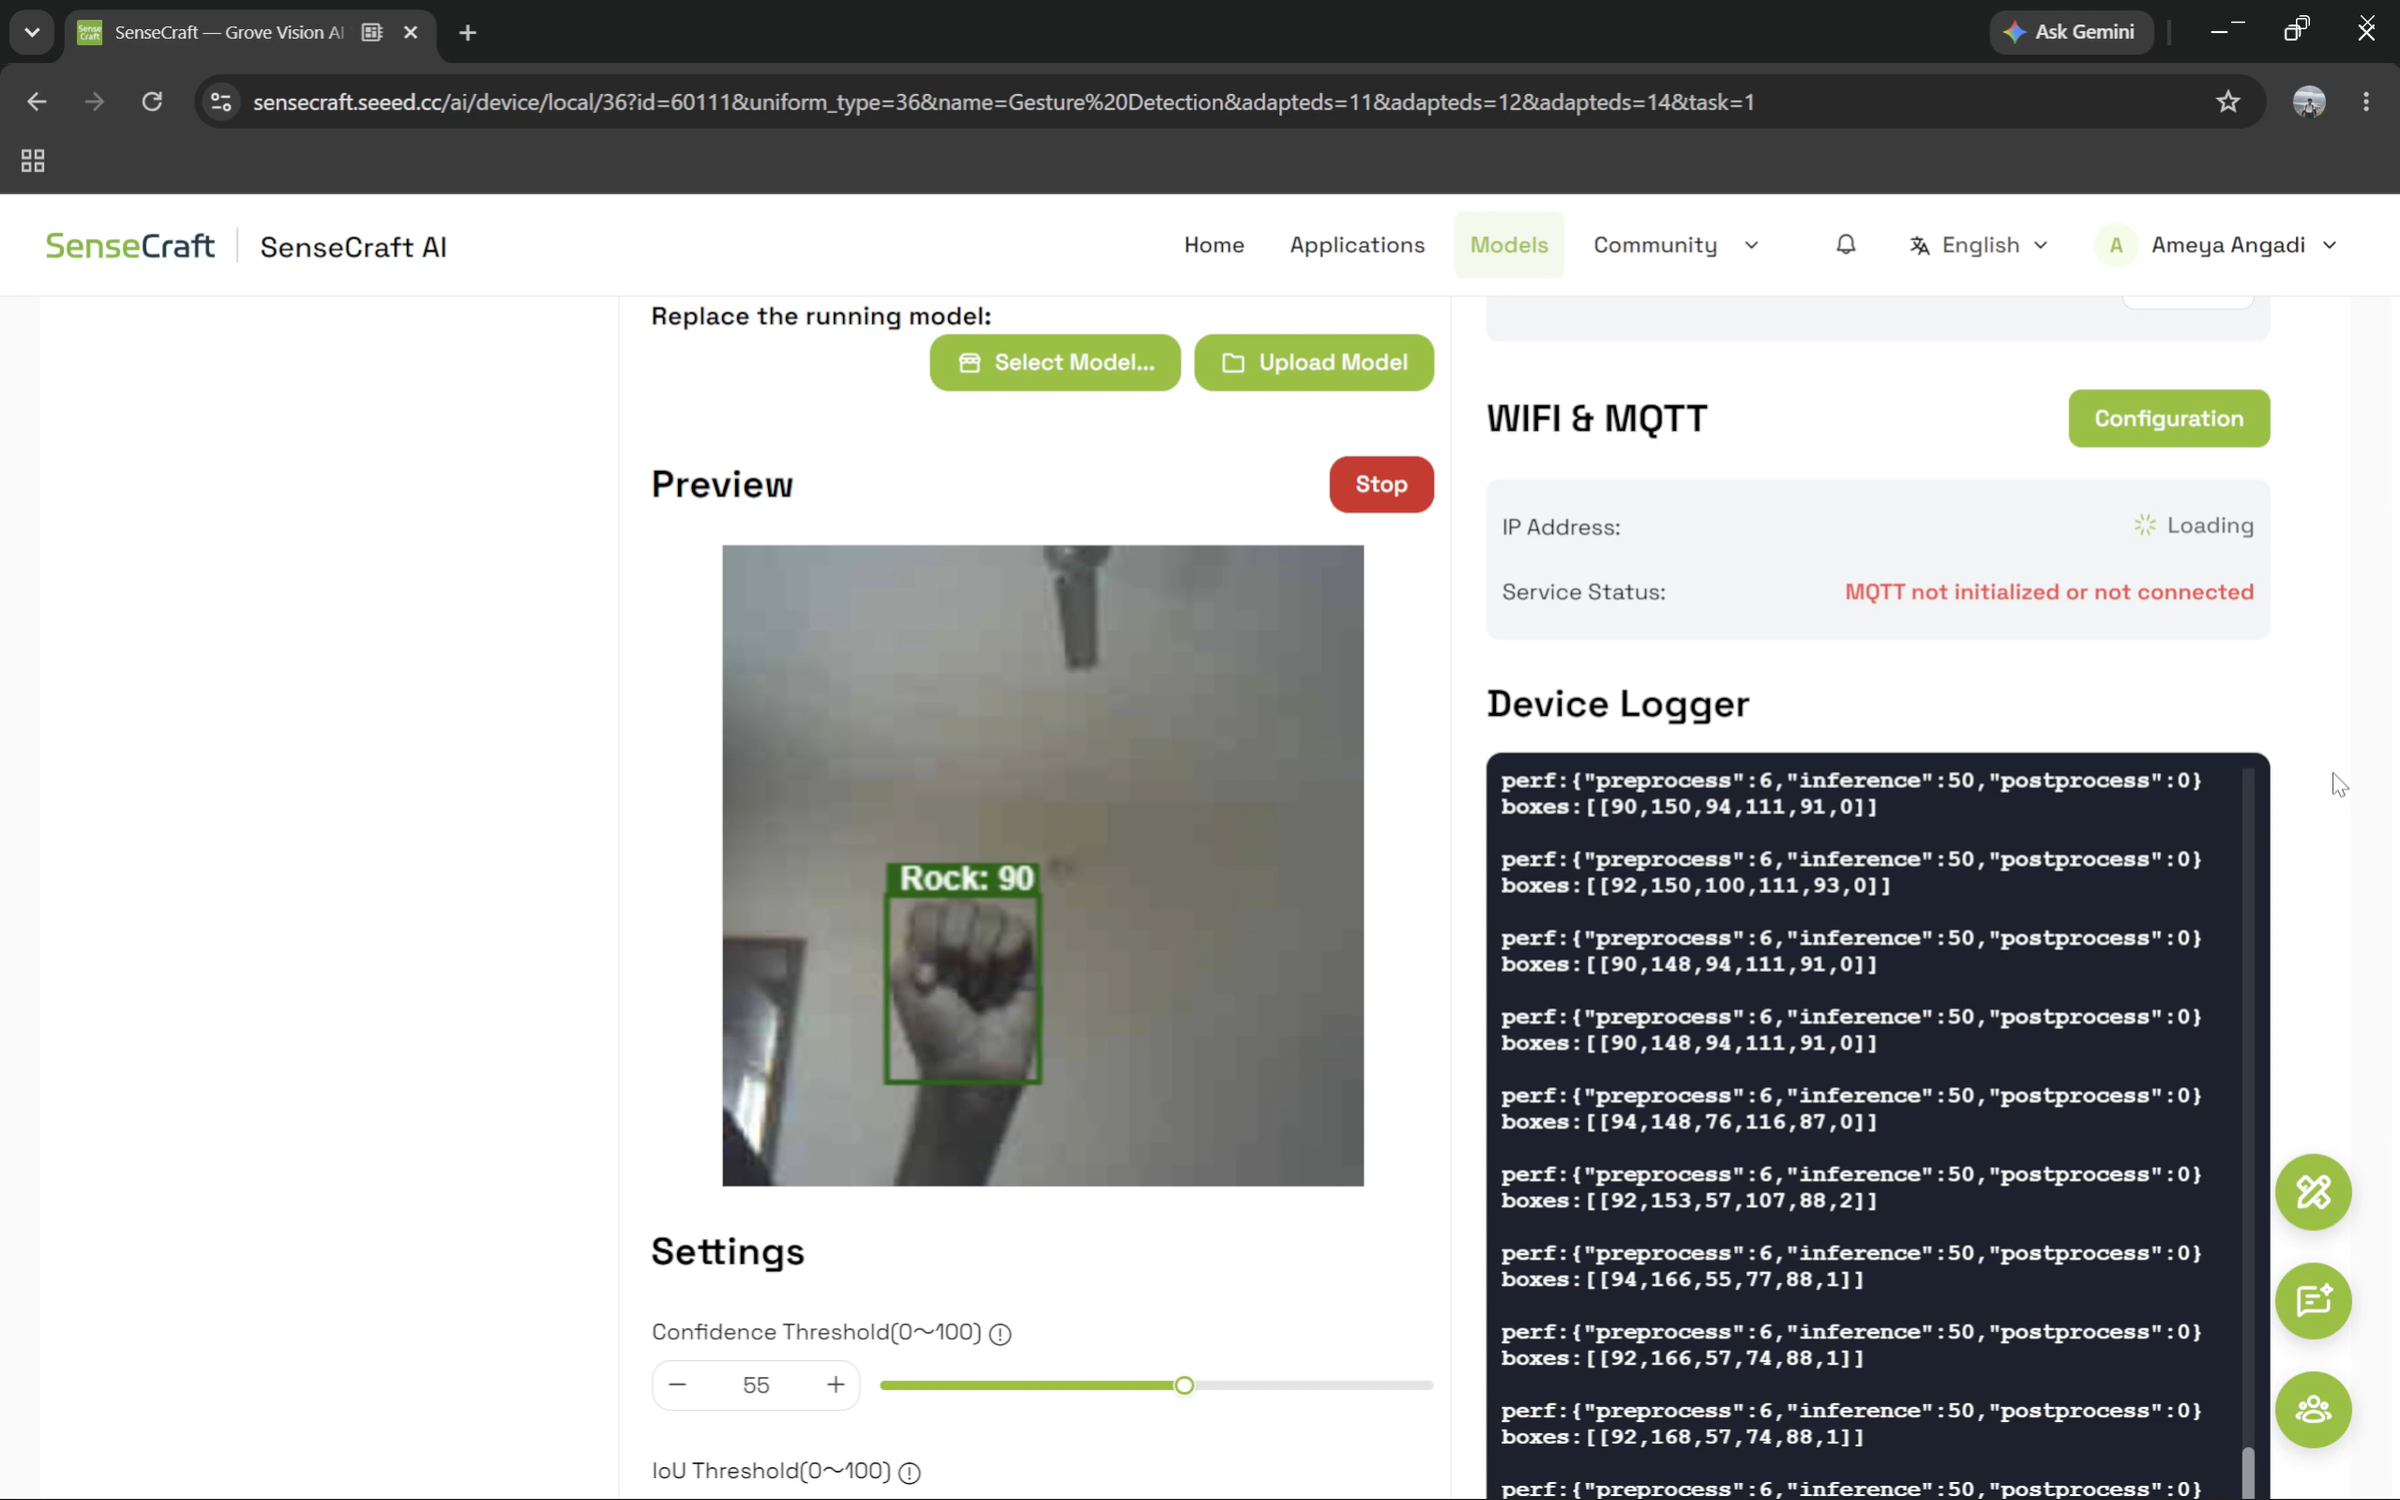
Before we program the camera to talk to our database, we need to load the AI gesture-recognition model onto the Seeed Studio Vision AI Camera module.
1. Connect the Vision AI Board: Plug a USB-C cable directly into the port on the Vision AI Board (not the XIAO microcontroller) and connect it to your computer.
2. SenseCraft AI Platform: Go to the web-based SenseCraft AI platform. This tool allows you to deploy complex machine-learning models directly to edge devices from your browser.
3. Upload the Model: Search for a hand gesture recognition model (Rock, Paper, Scissors) and click deploy. Follow the on-screen instructions to flash the model to your board.
4. Live Preview: Once the upload completes, you can view a live camera feed directly on the website! Test it out by making a rock, paper, or scissors gesture in front of the lens. You will see bounding boxes and confidence scores appear on the screen. Again, zero coding required!
Programming the ChefAssist Camera (Seeed Studio XIAO ESP32-C3)
.png)
Now we jump into the Arduino IDE to tell the XIAO microcontroller how to read the AI gestures and send them to Firebase.
1. Board Setup: Connect your computer's USB-C cable to the Seeed Studio XIAO ESP32-C3 port. In the Arduino IDE, go to Tools > Board > Boards Manager, search for "ESP32", and install the package. Select the "XIAO ESP32C3" as your active board.
2. Install Dependencies: Go to Sketch > Include Library > Manage Libraries. Search for and install the following libraries:
- Seeed_Arduino_SSCMA (To read the Vision AI data)
- ArduinoJson (To format our data for the cloud)
3. Update Credentials: Open the provided ChefAssist_VisionAI_Camera.ino file. Scroll to the Configuration Zone and replace the dummy Wi-Fi name and password with your own network details. Paste your Firebase database link into the URL variables.
4. Upload: Click the Upload button. The XIAO is now a fully functional edge-AI database manager that detects gestures using AI!
Refer to GitHub Repository for Code - Link
Programming the ChefAssist KDS (TRMNL E-Ink Screen)
.png)
Finally, we need to program the kitchen display to pull those orders from Firebase and draw them beautifully on the e-ink screen.
1. Folder Structure is Critical: Download the provided ChefAssist_ePaper project folder. Crucial Step for Beginners: Ensure that the main.ino sketch file is inside a folder with the exact same name. Inside that same folder, you MUST include all the dependency files provided in the repository:
- The e-ink driver files (driver.h, etc.)
- The background layout images converted to.h arrays (ChefAssist_BG.h, PaperDine_Loading_Screen.h)
- The custom font files (JetBrainsMono10.h, JetBrainsMono16.h)
2. Connect the 2nd TRMNL: Plug your second TRMNL board into your computer.
3. Update Credentials: Open ChefAssist_ePaper.ino in the Arduino IDE. Just like the camera, update your Wi-Fi SSID, Password, and your Firebase Database URL in the Configuration Zone. (Don't forget to keep the.json at the end of your Firebase URL!)
4. Upload: Hit upload! Because we are rendering complex graphics, compilation might take a minute. Once it finishes, the screen will reboot, connect to Wi-Fi, and draw your kitchen layout in realtime!
Refer to GitHub Repository for Code - Link
Open Source & Licensing
I believe in empowering the maker community to learn, build, and innovate. That is why the entire PaperDine project, including the hardware schematics, UI layouts, background assets, and the source code is entirely open-source and released under the GNU General Public License v3.0 (GPLv3).
You are free to view, modify, and distribute this work, ensuring this project remains open and accessible for everyone! You can find the complete repository link - PaperDine GitHub Repo
Conclusion & Real-World Impact
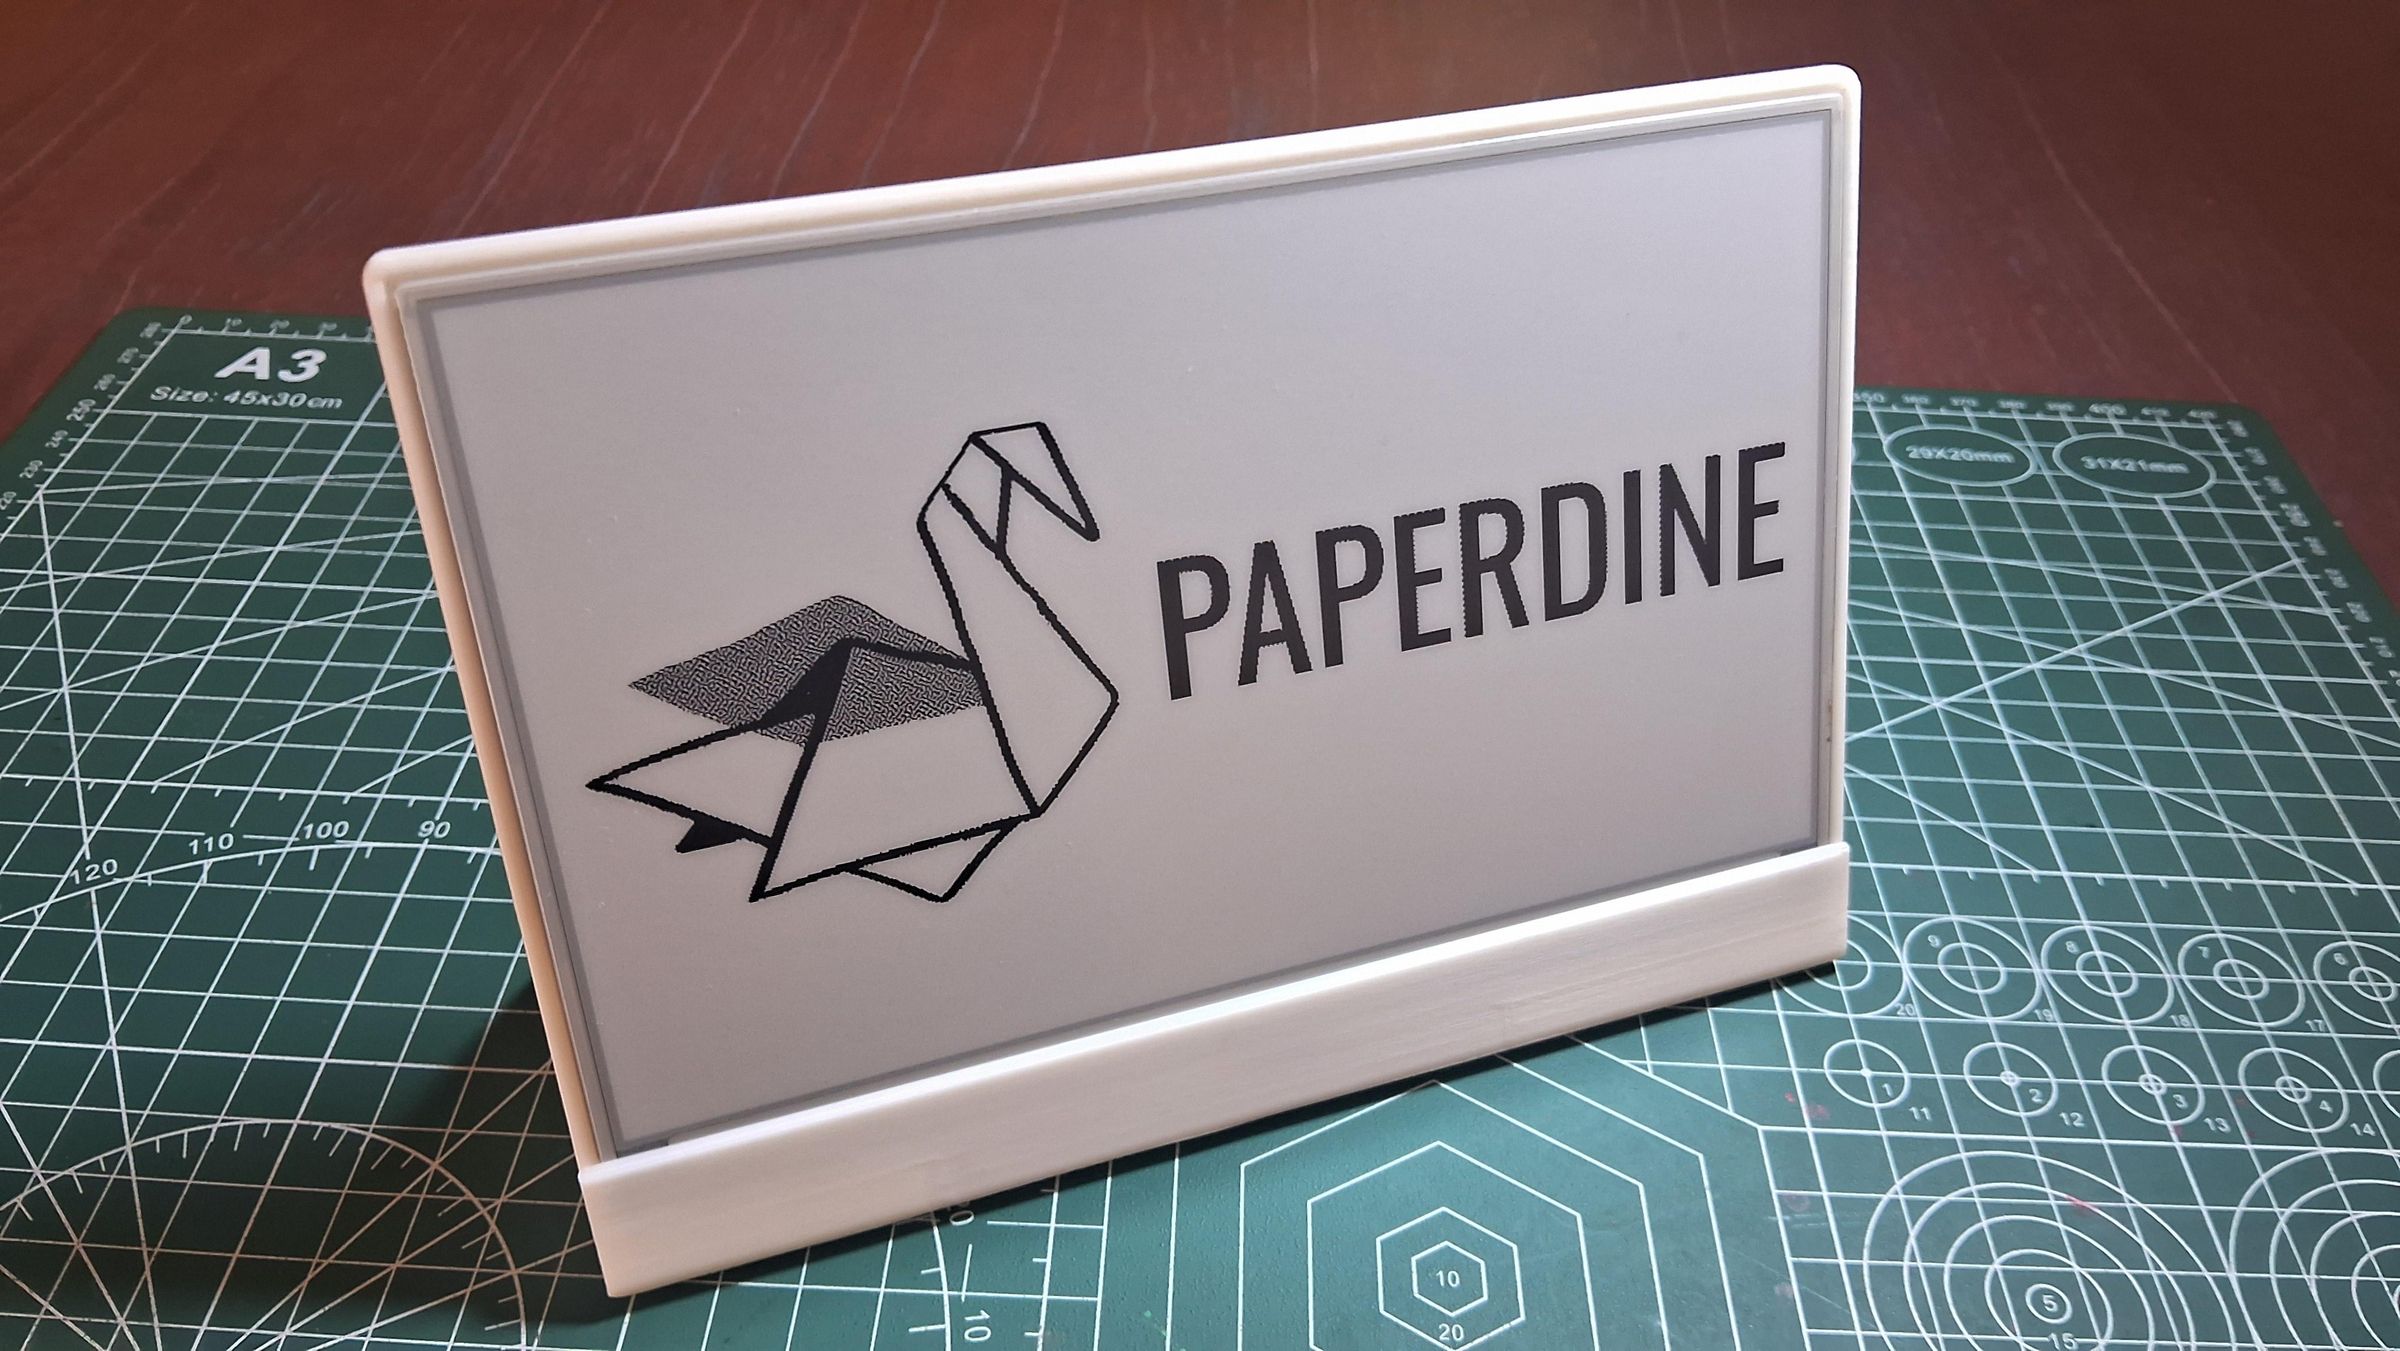
The commercial kitchen is a high-pressure environment where every second and every physical touch matters. With PaperDine, we set out to prove that restaurant order management doesn’t have to be limited to lost paper tickets or unhygienic touchscreens.
By integrating these specialized technologies, the PaperDine ecosystem delivers a massive real-world impact:
- Interactive TableSpot Signage: Replaces static menus with dynamic, zero-code e-ink displays that seamlessly connect diners to promotions and QR ordering.
- Frictionless Web Ecosystem: A complete, lightning-fast cloud platform that processes orders in real-time while allowing owners to export valuable sales analytics.
- Zero-Touch ChefAssist: An AI-powered, touch-free Kitchen Display System (KDS). By utilizing edge-AI gesture recognition and custom memory-buffering to prevent e-ink ghosting, chefs can manage their ticket queues with unprecedented speed and ultimate hygiene.
PaperDine bridges the gap between the physical restaurant and the digital cloud, proving that the future of the culinary workflow is intelligent, seamless, and completely touch-free.
If you want to explore more, check out my profile for related projects, and don’t forget to follow me for updates on new tutorials and advanced projects!