Peltier Beverage Cooler
by Saitejapulavarthi in Design > 3D Design
231 Views, 1 Favorites, 0 Comments
Peltier Beverage Cooler
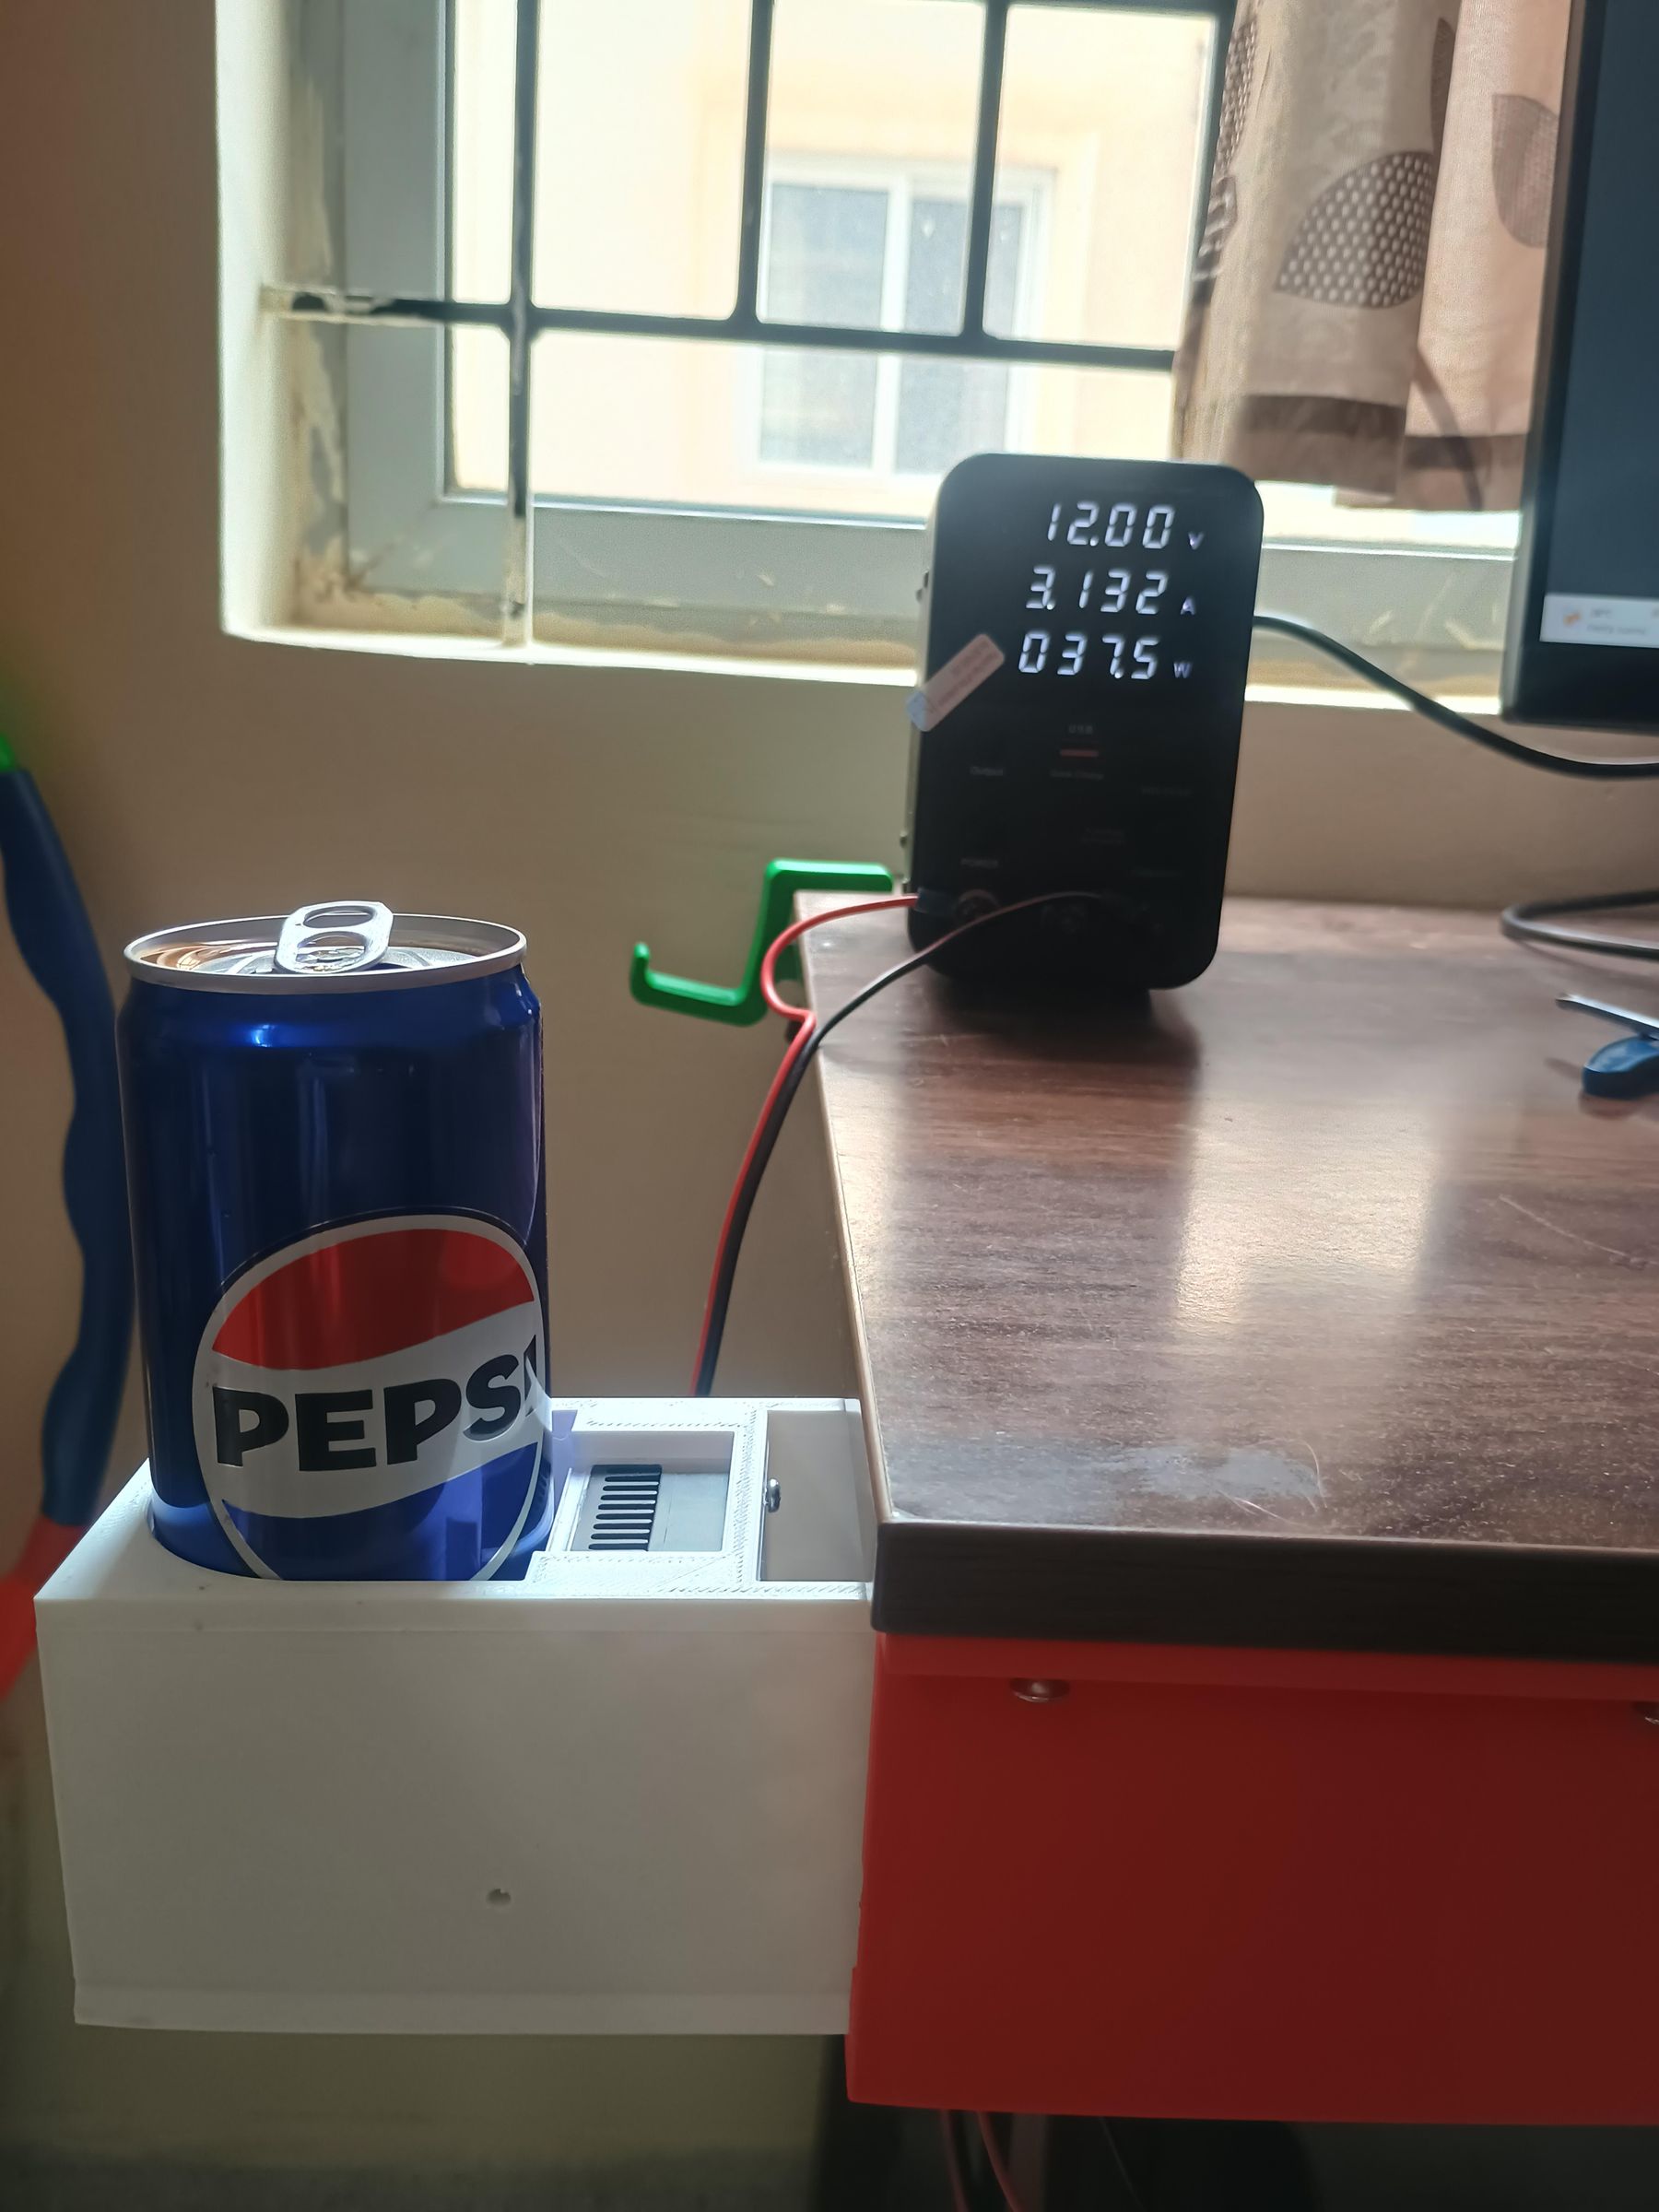
We all love having a cold beverage at our desk while working - especially in summer. But once you open it and set it on the desk, it starts sweating (leaving water rings everywhere) and slowly loses its chill. The only real fix is walking back and forth to the fridge just to keep it cold, which kills the whole point of having a quick sip while working.
This project solves that problem. It's a simple, compact beverage holder with a push-latch mechanism, built around a Peltier module. Just turn on the Peltier module, push the holder to pop it open, place your beverage inside, and it stays cold for as long as you need - right at your desk.
Supplies
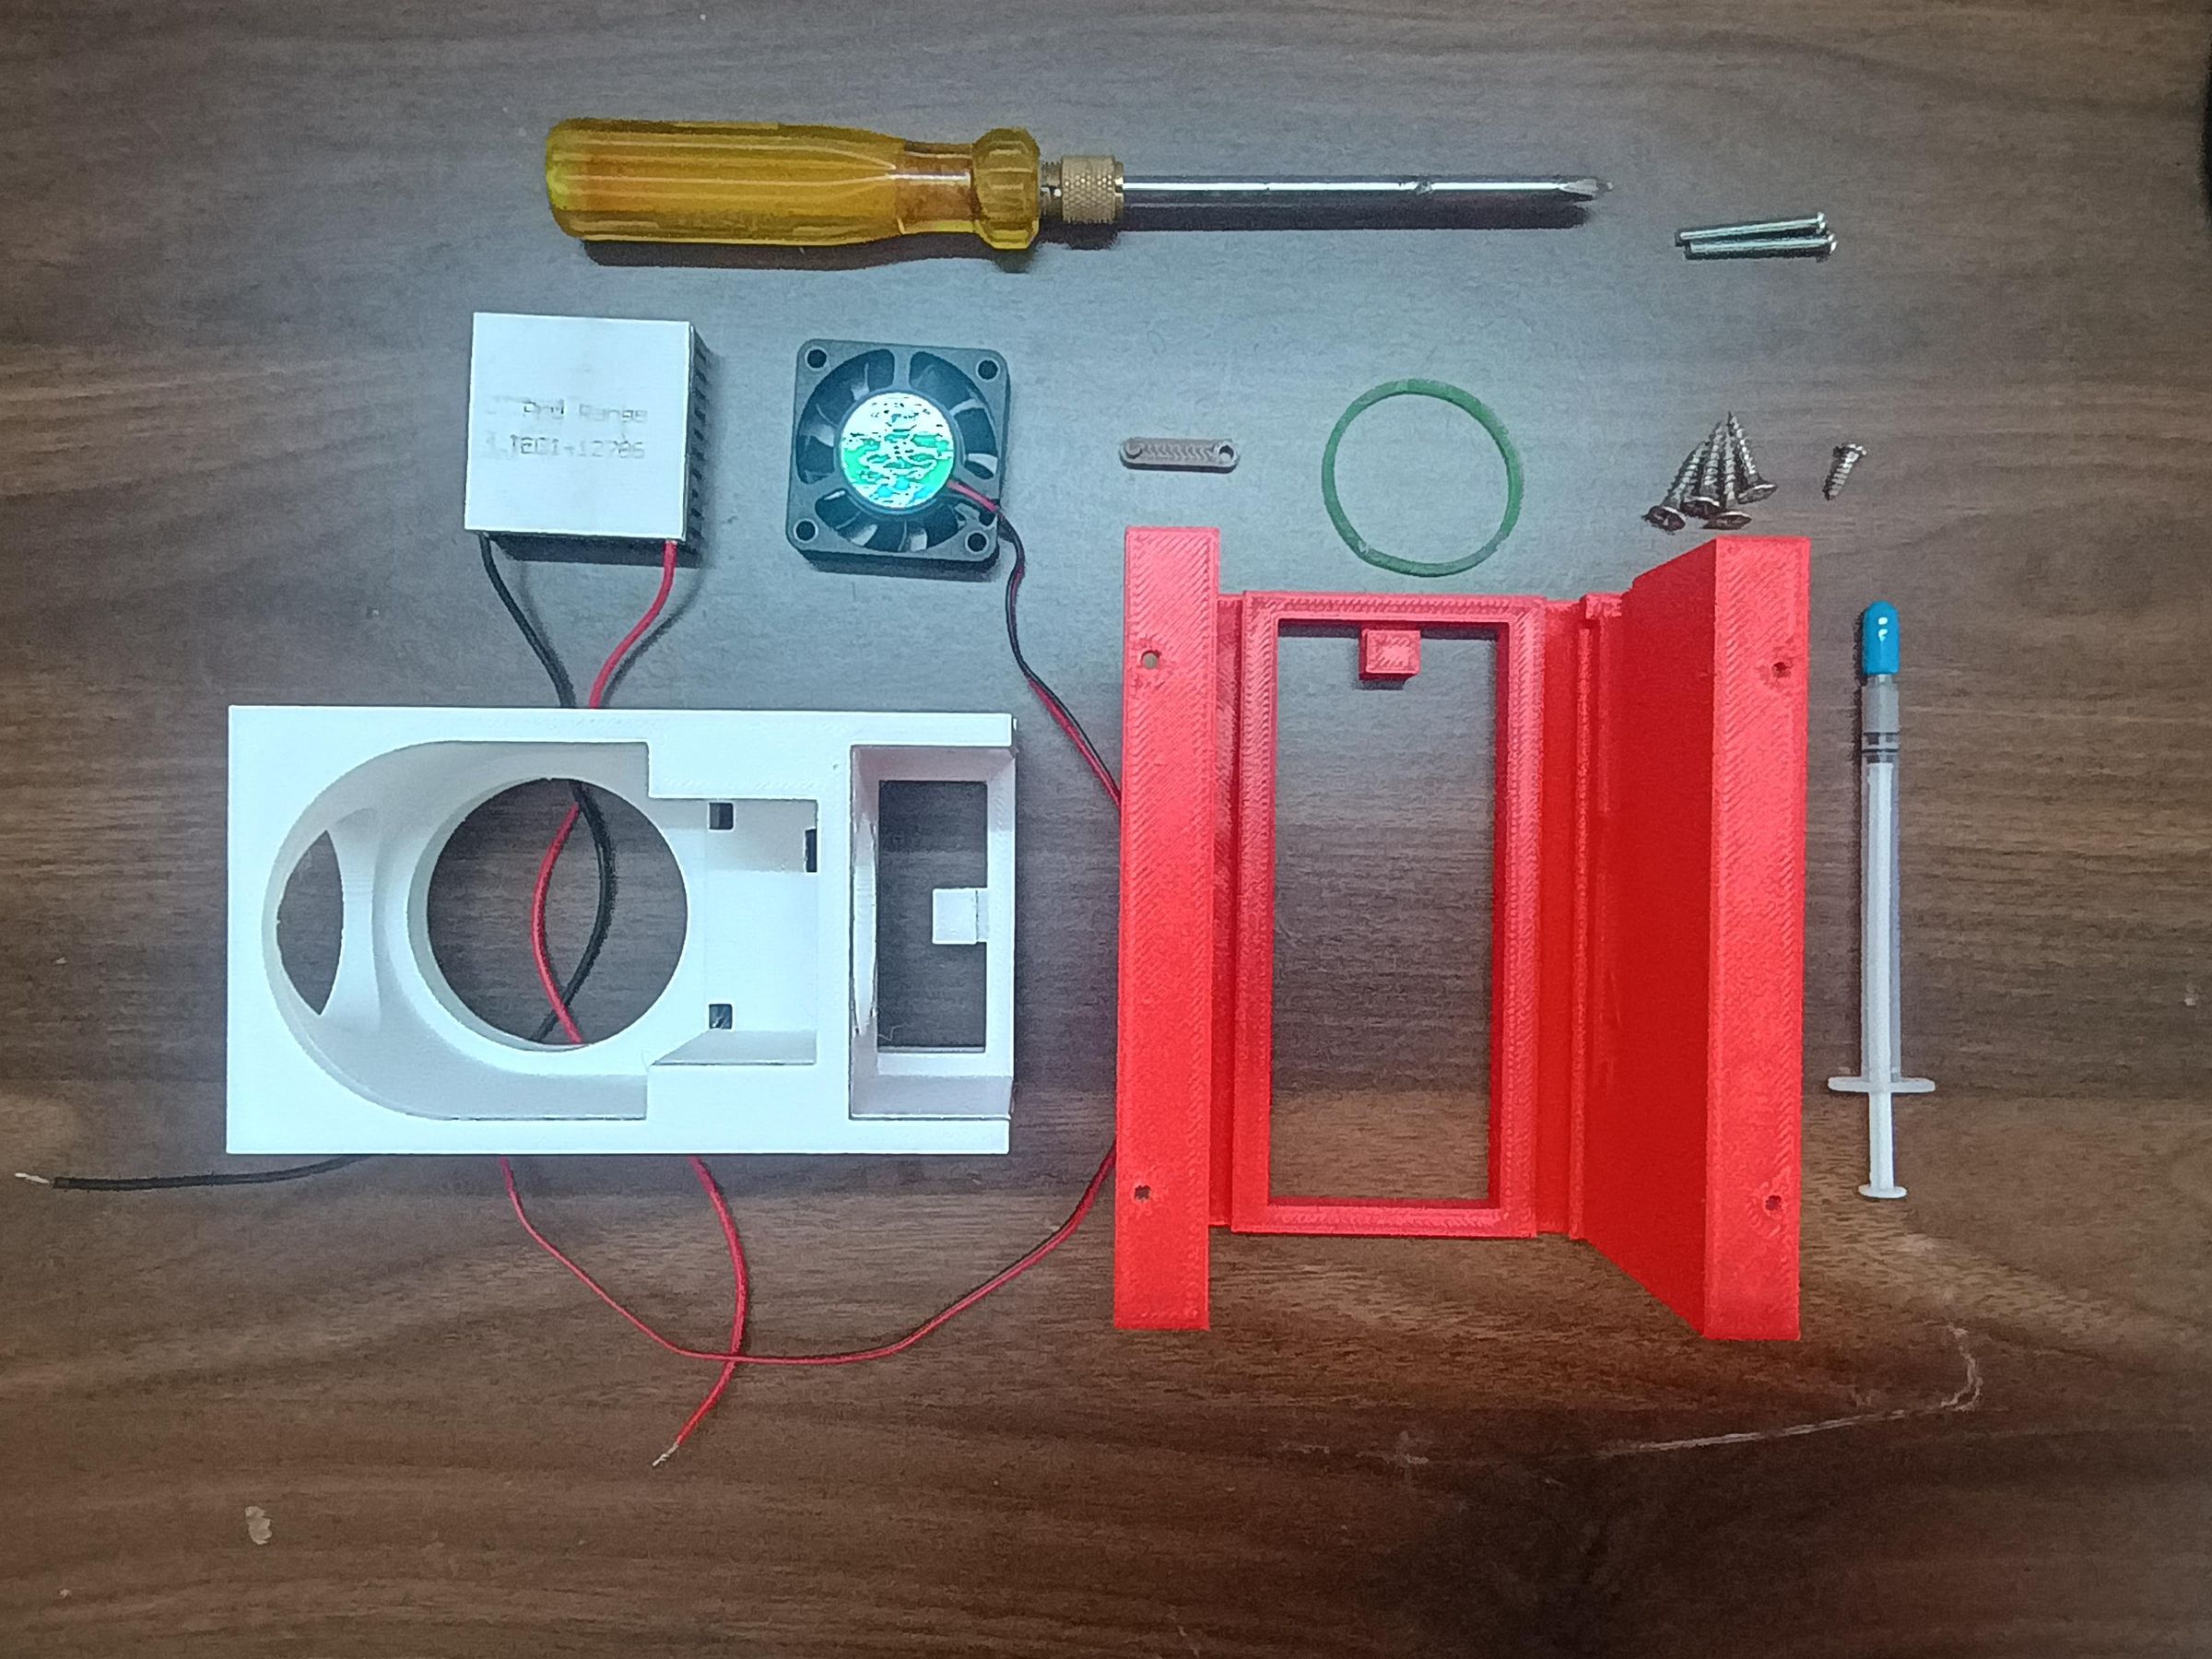
- 1x TEC1 -12706 Peltier Module
- 1x 40*40*10 Aluminum Heatsink
- 1x 12V Brushless DC Fan 4010
- 1x Thermal Paste
- 1x Rubber Band
- 1x 3mm x 10mm pointed screw
- 2x M3 x 28mm Screw
- 4x 3mm x 19mm pointed screw
- 1x Screw Driver
- 3D Printing:
- 3D Printer - To print the Housing, Ejector & Latch Pin
- PLA Filament
- 12V Supply
3D Print the Parts
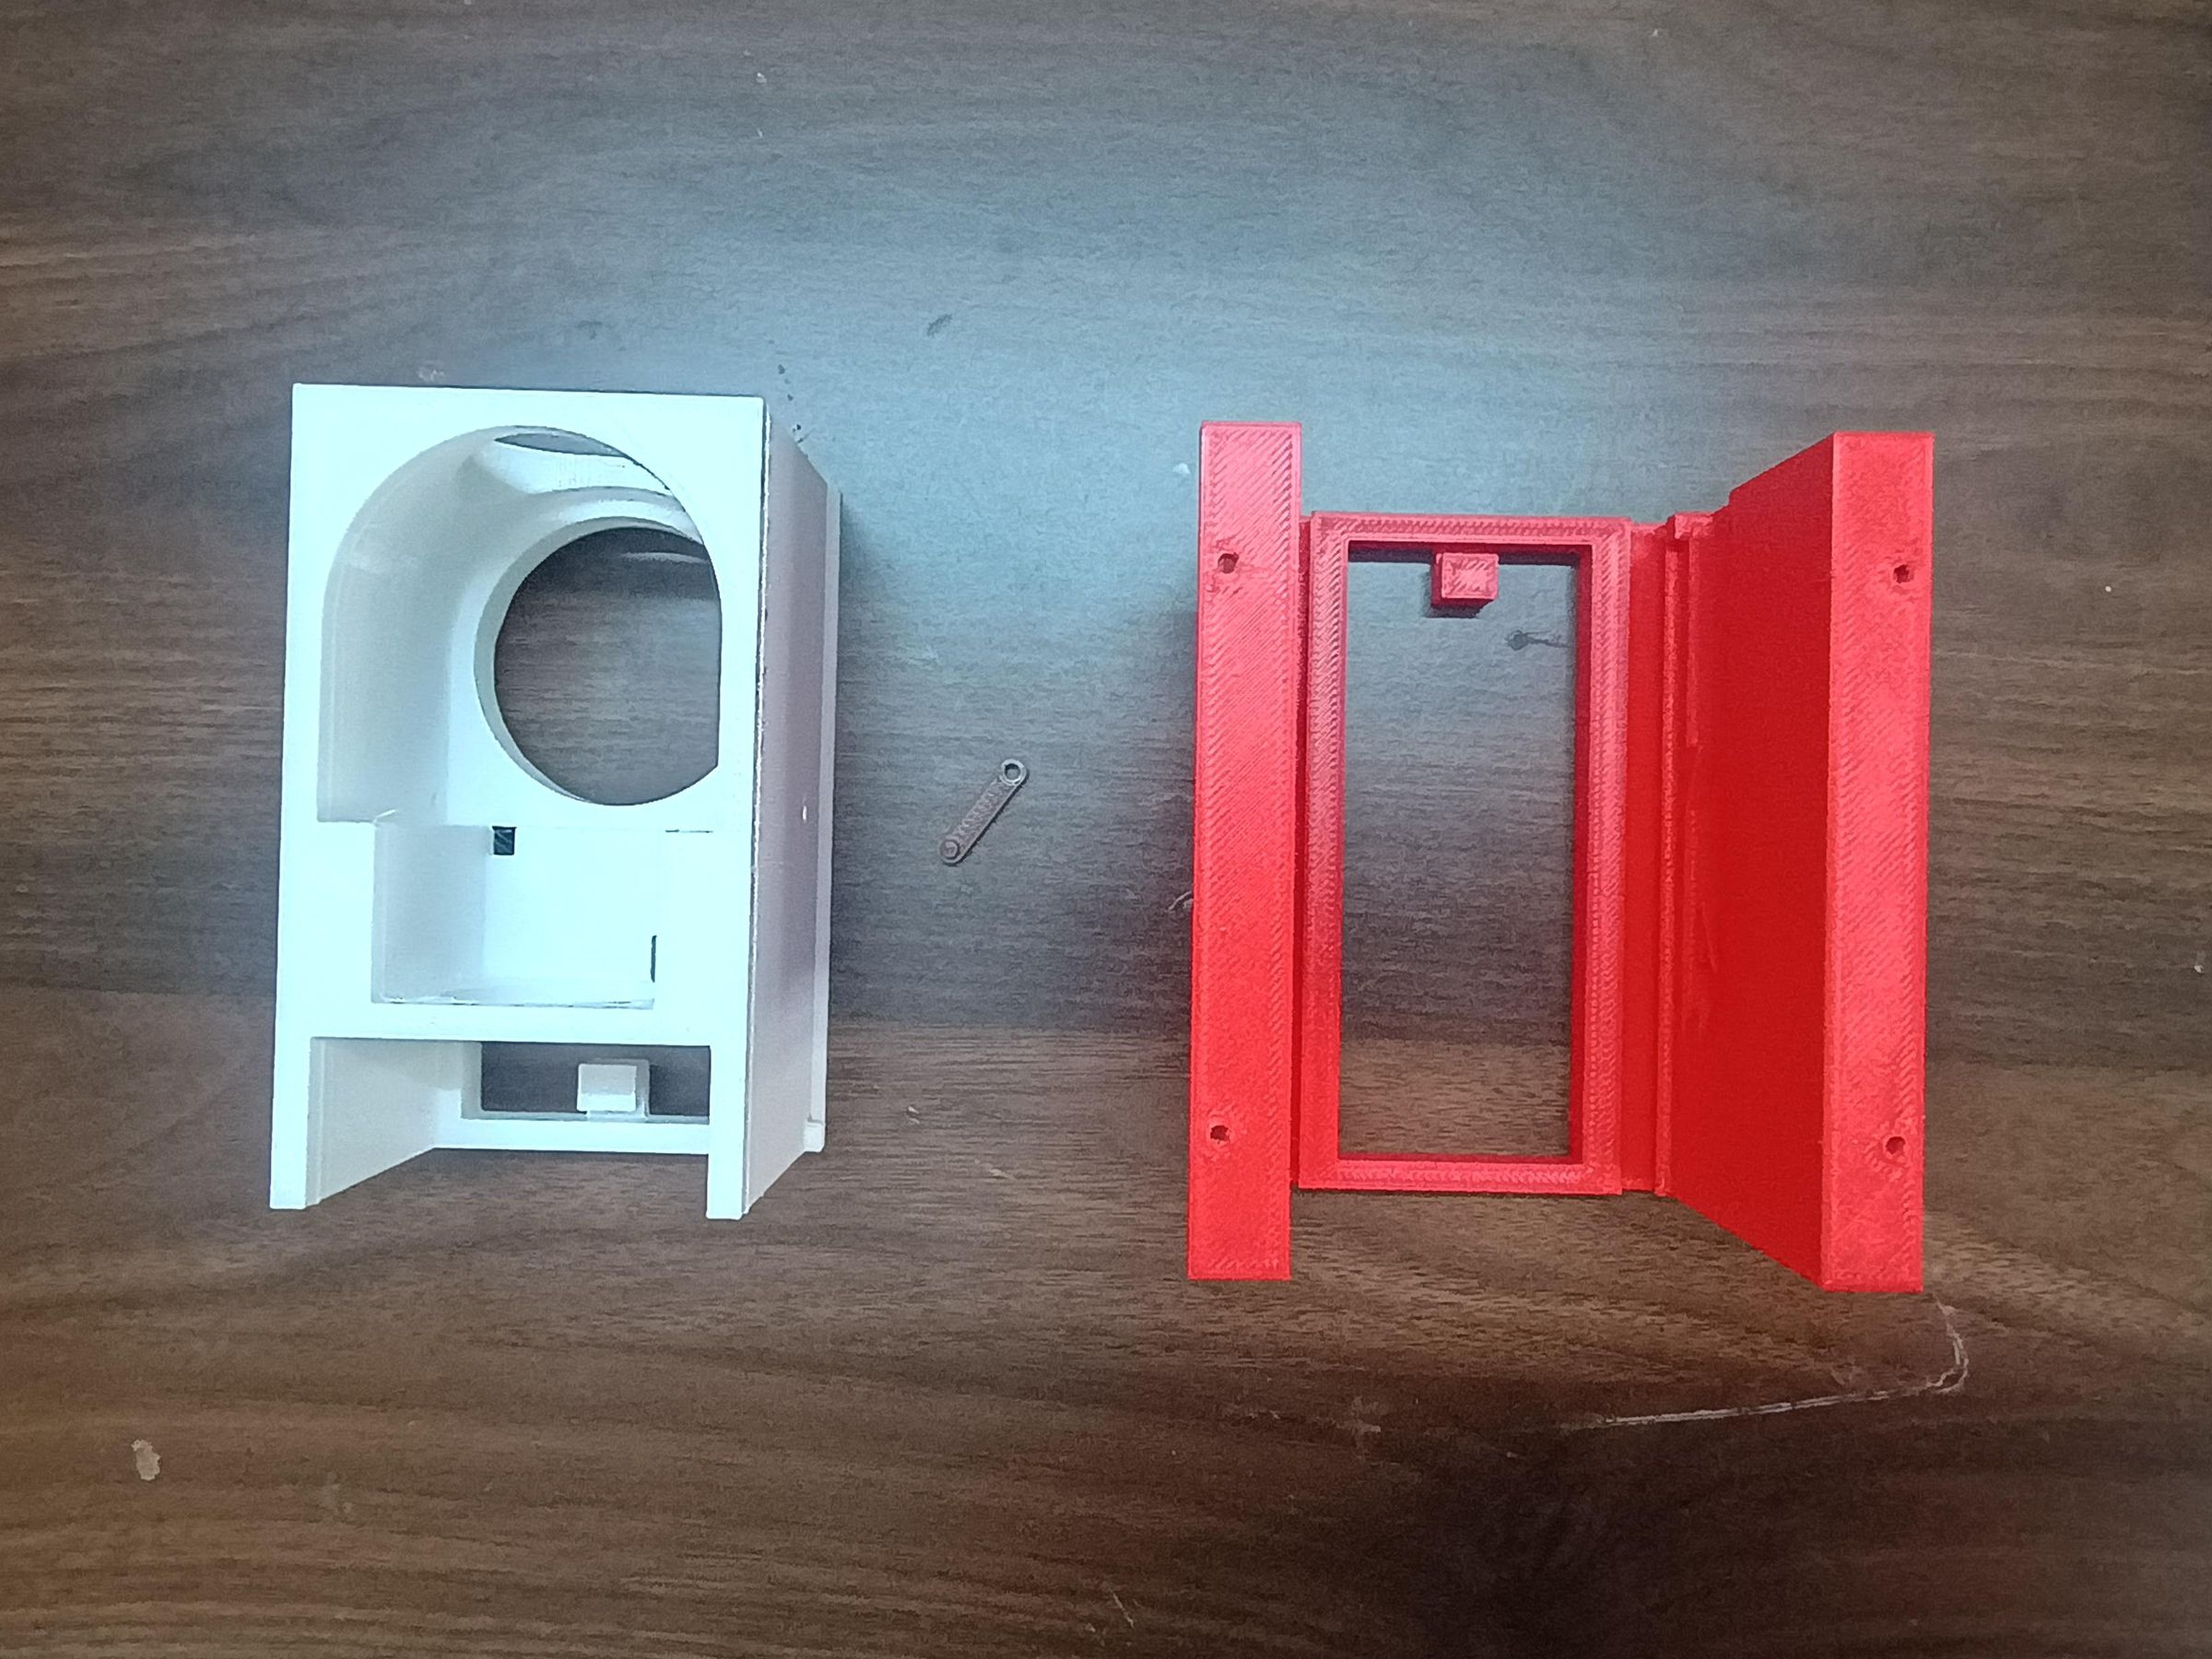
Print the housing, ejector and latch pin. PETG or ABS is recommended over PLA, as it offers better heat resistance near the Peltier module. I am using PLA due to the unavailability of other materials right now.
All the 3D-printable files are attached below, along with my Cura slicer settings for reference.
Once printing is complete, carefully remove all support structures and clean up each part (sand down rough edges, clear out any leftover strands or stringing) before moving on to assembly.
Installing the 3D Components
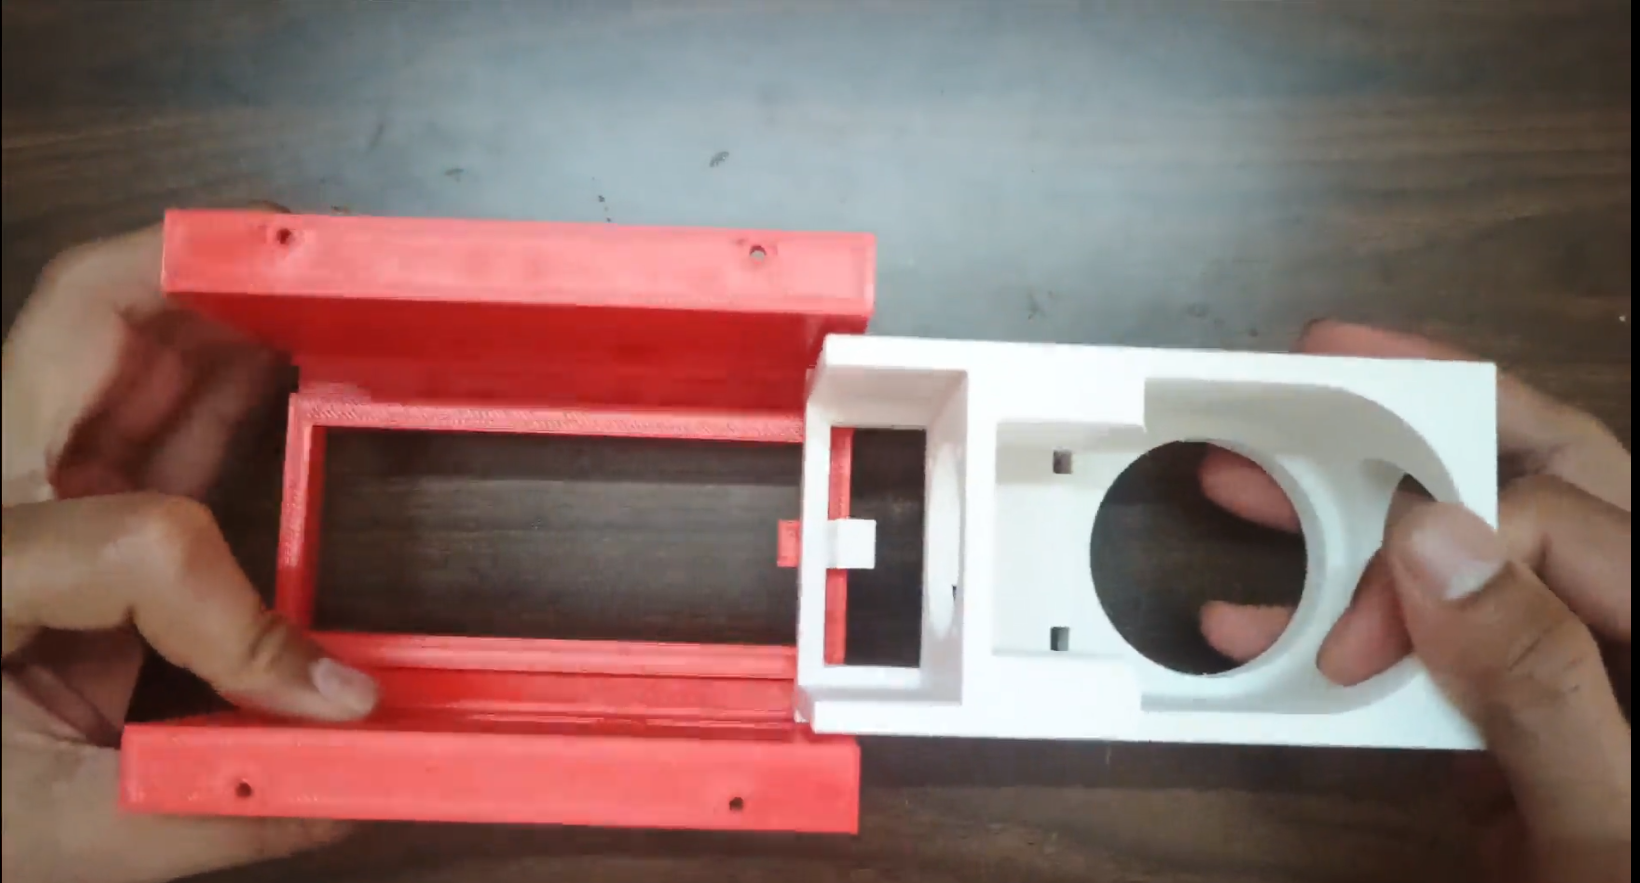
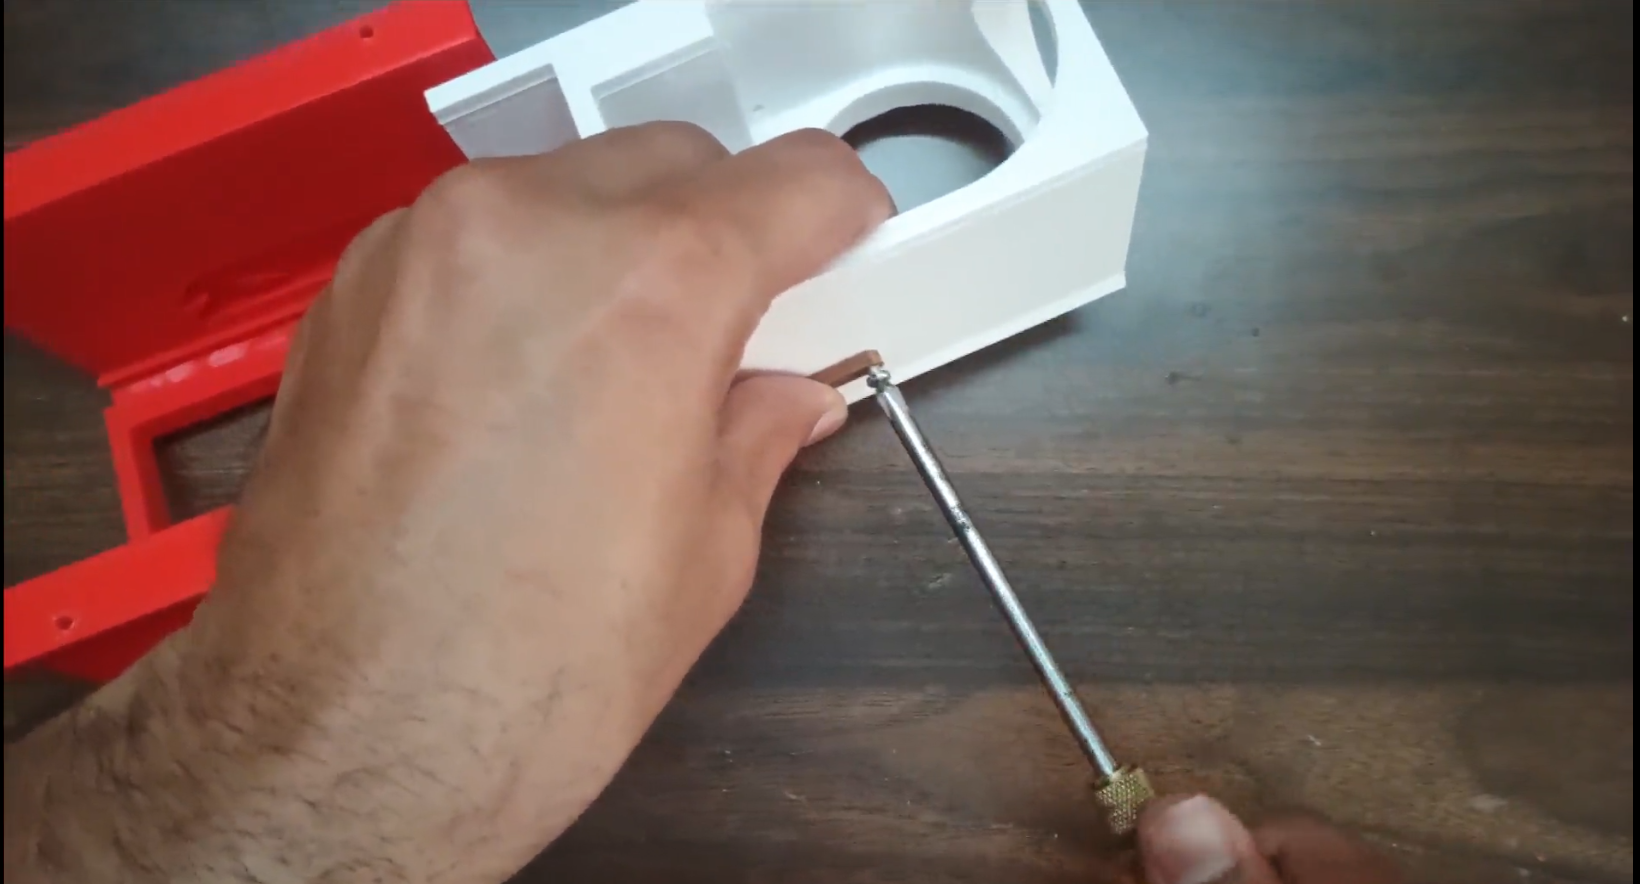
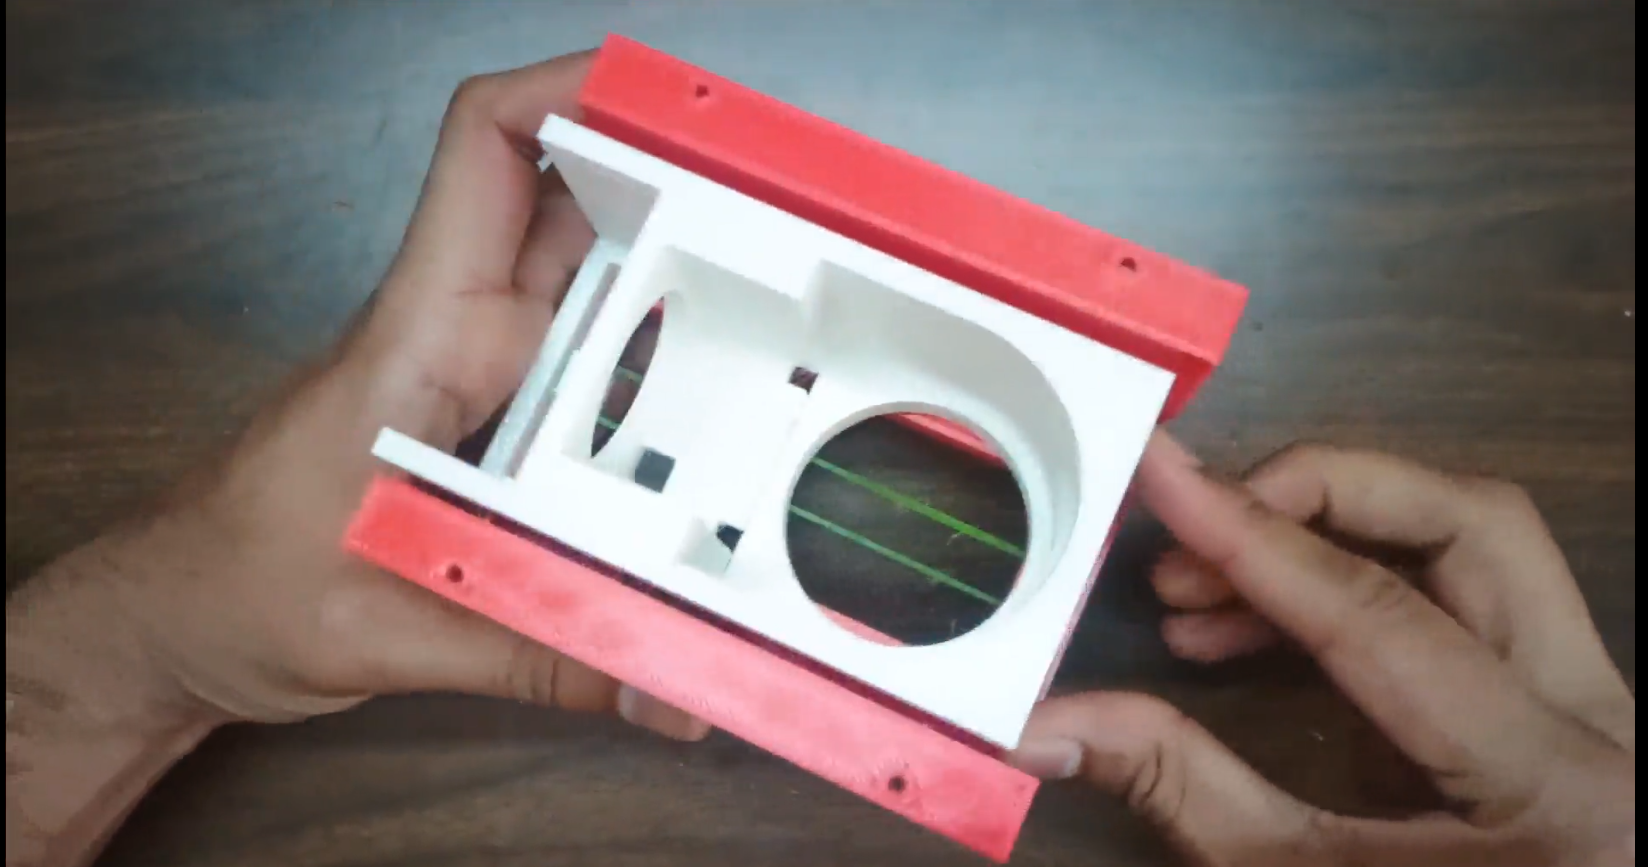
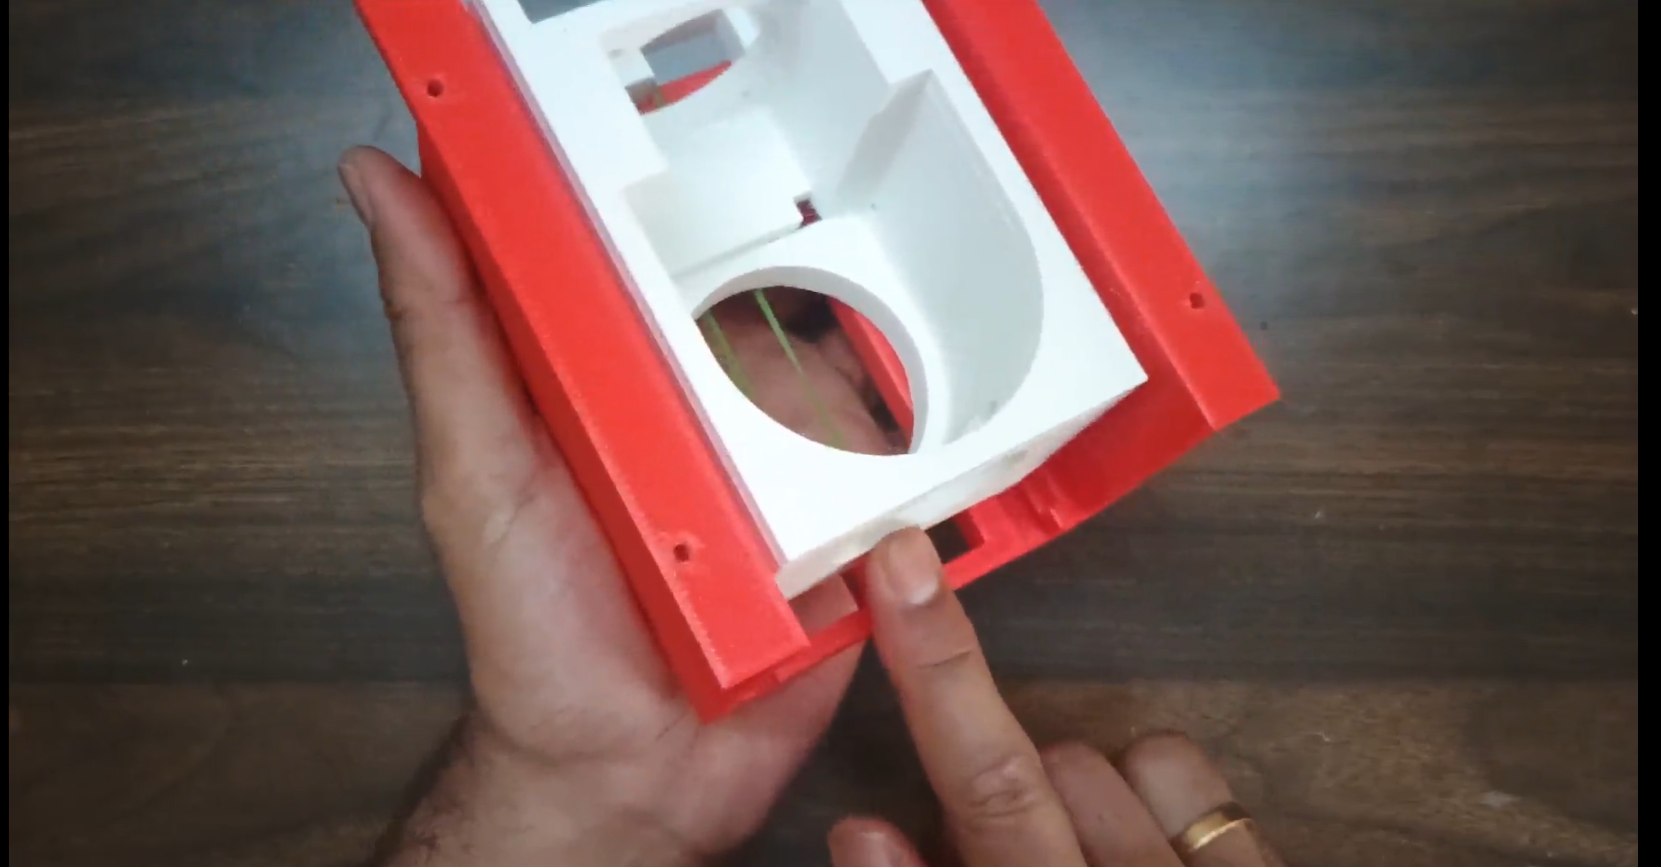
Insert the Ejector:
As shown in the video, insert the ejector from the back side of the housing. You cannot insert it from the front, as the housing rail blocks the ejector. Once the ejector is inserted from the back, you also won't be able to pull it completely out from the front, the housing rail blocks it from coming out, which is essential for the push-latch mechanism.
Screw in the Latch Pin:
Pull the ejector fully out from the front side, then screw the latch pin into the hole using a 3mm x 10mm pointed screw. Don't tighten it too much, leave enough room for the latch pin to move freely.
Place the Rubber Band:
Place a rubber band on the hooks — both on the housing and the ejector — as shown in the video. Make sure the tension is high enough. If it isn't, cut the rubber band, tie a knot to shorten it, and place it back on the hooks. Adjust the tension as needed, since both the ejector's outward force and its travel distance depend on it.
Testing:
Once all the 3D-printed components are installed, test the push-latch mechanism by holding the housing at the base and pushing the ejector - it will lock in place. Push the ejector again, and it will release and come back out.
Downloads
Installing the Peltier Module
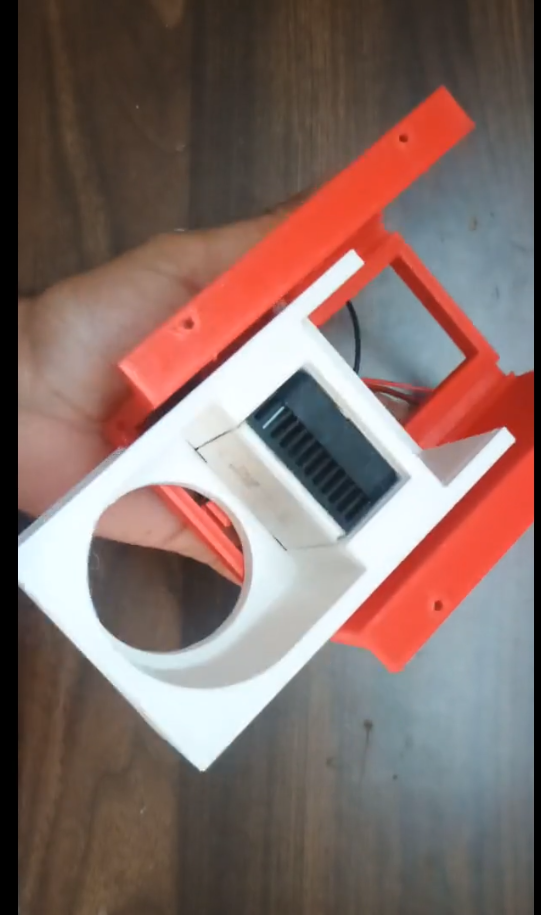
Check for the cold side and hot side of the TEC1-12706 Peltier module. Add thermal paste to the 40x40x10mm aluminum heatsink and attach the hot side of the module to the heatsink. I used plaster to stick both together, but you can use thermal adhesive if you have it. Now place the 12V brushless DC fan (4010) in the slot of the ejector, make sure the fan pushes air inside. Place the Peltier module beside the DC fan and screw the complete module together using two M3 x 28mm screws diagonally. Test the push-latch mechanism again and check whether the rubber band can withstand the weight of the ejector with the Peltier module attached.
Installation & Use of the Peltier Beverage Cooler
Installation:
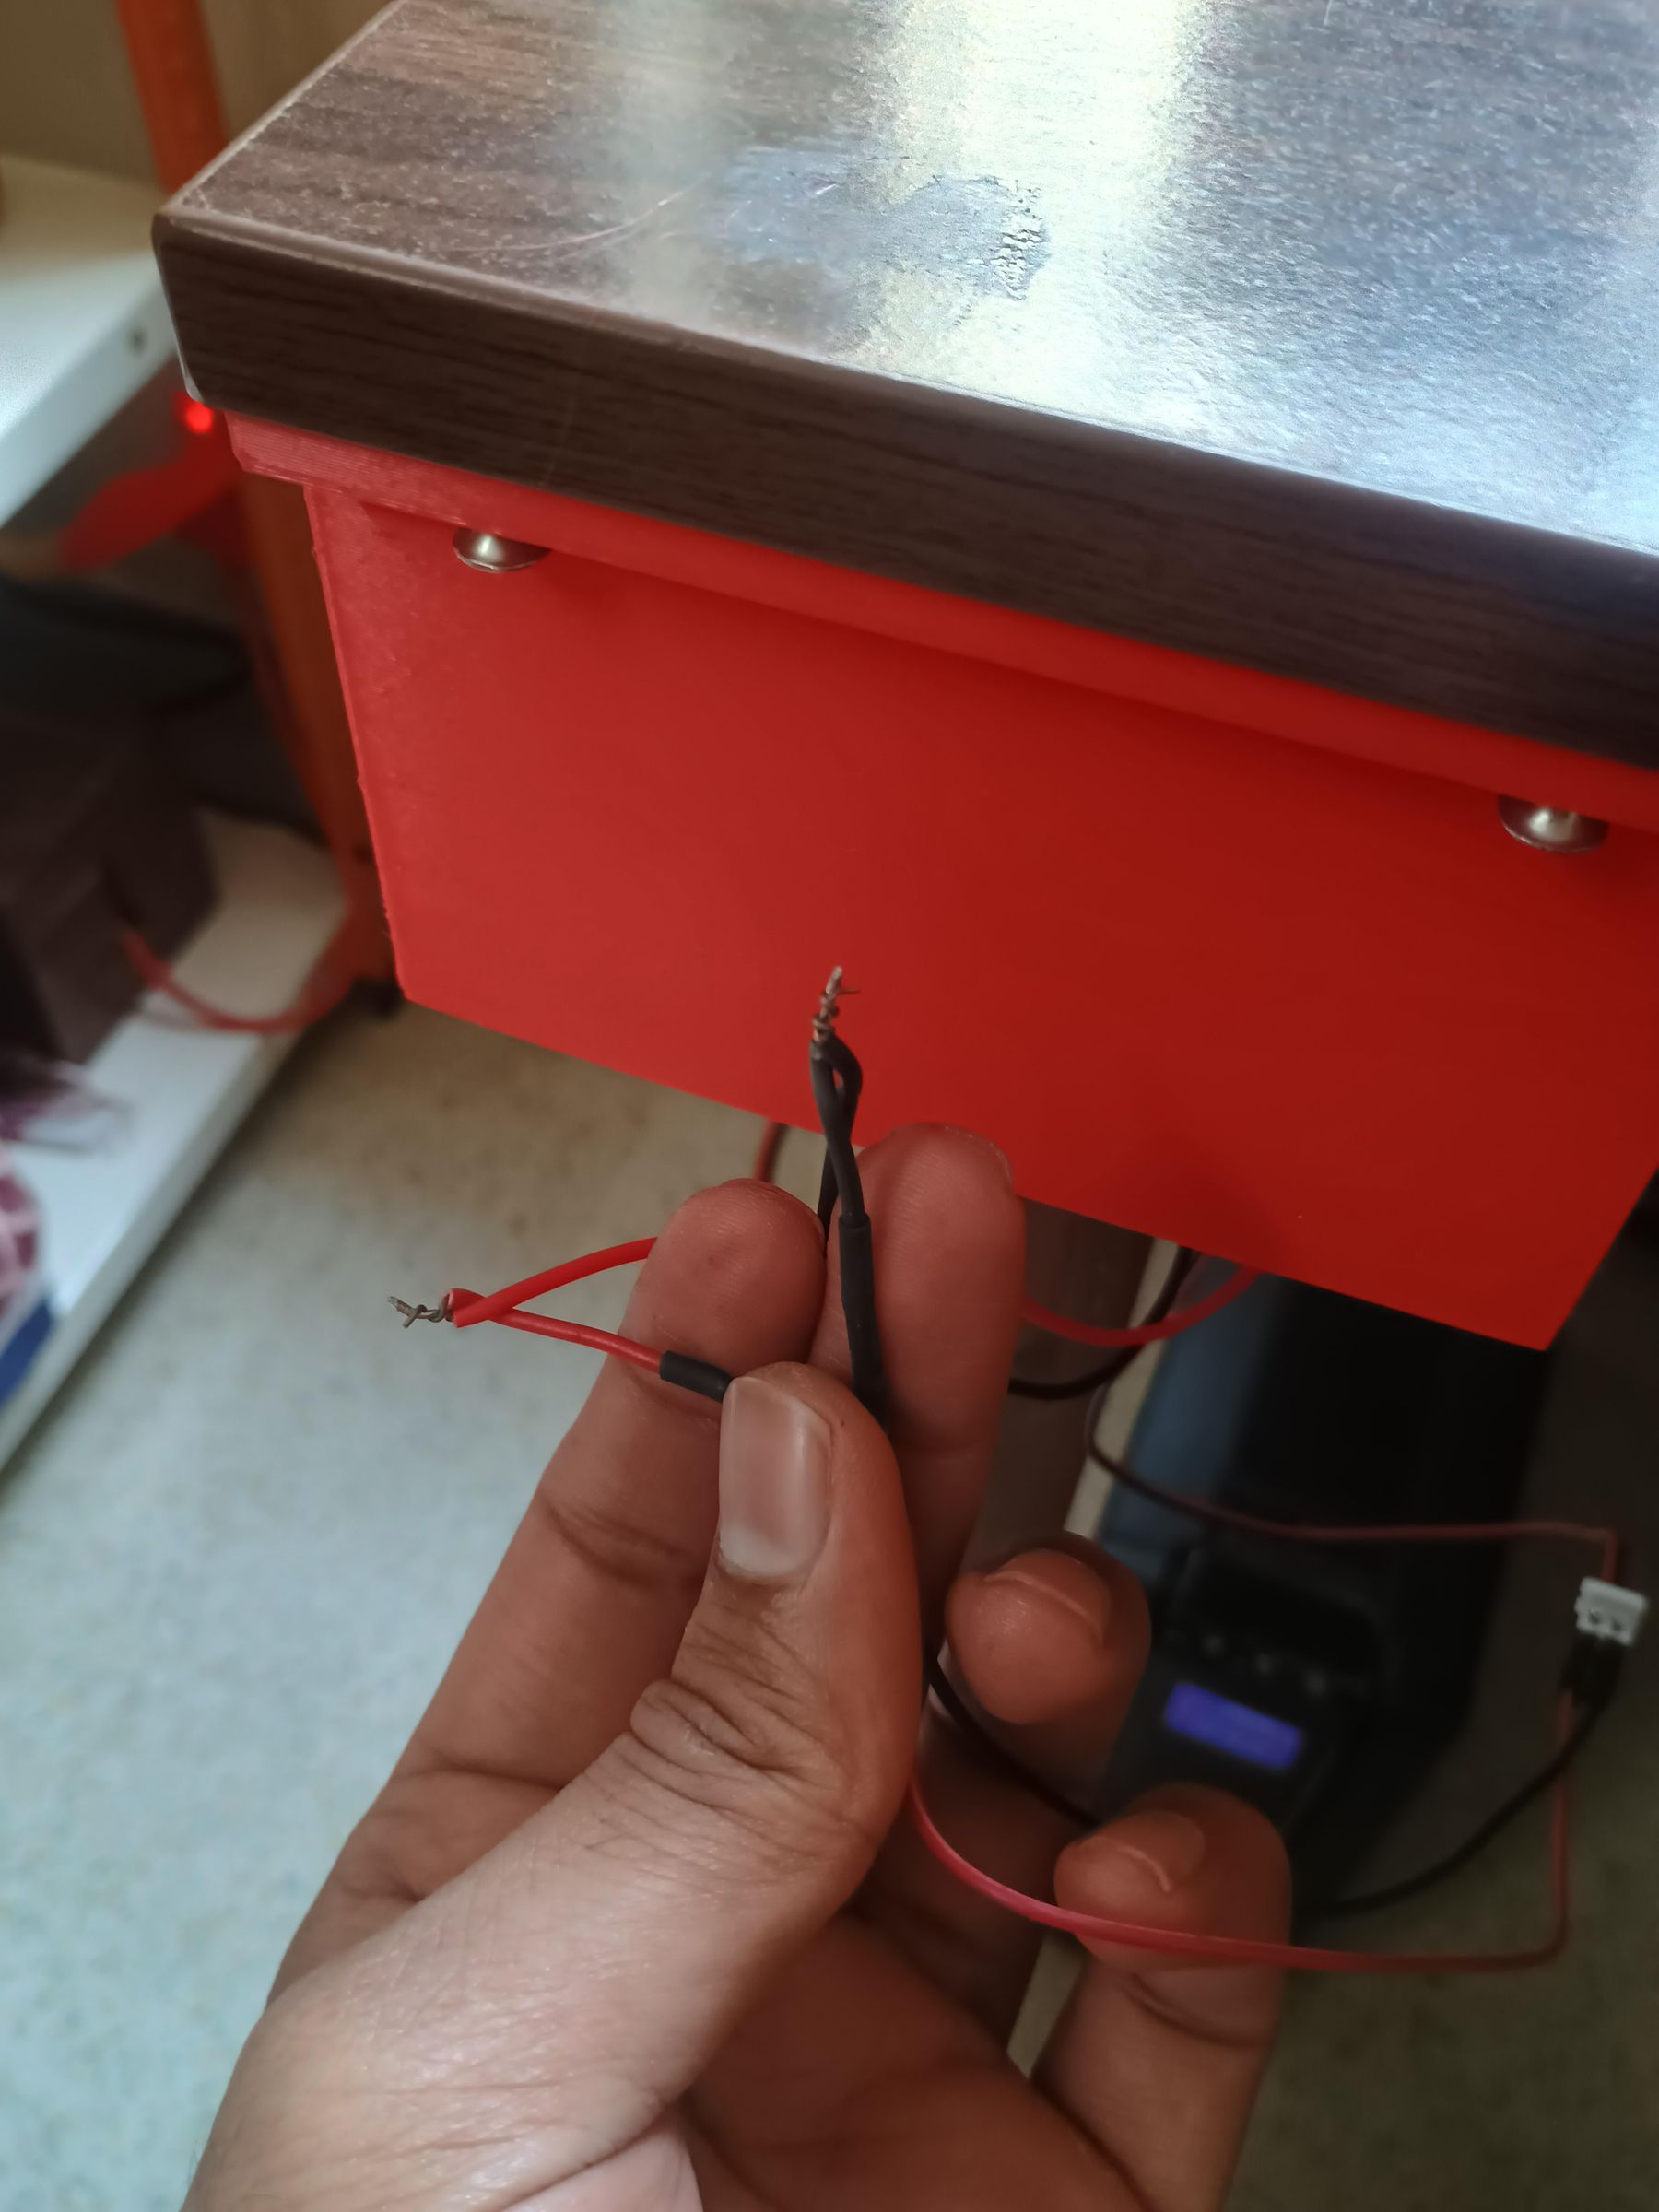
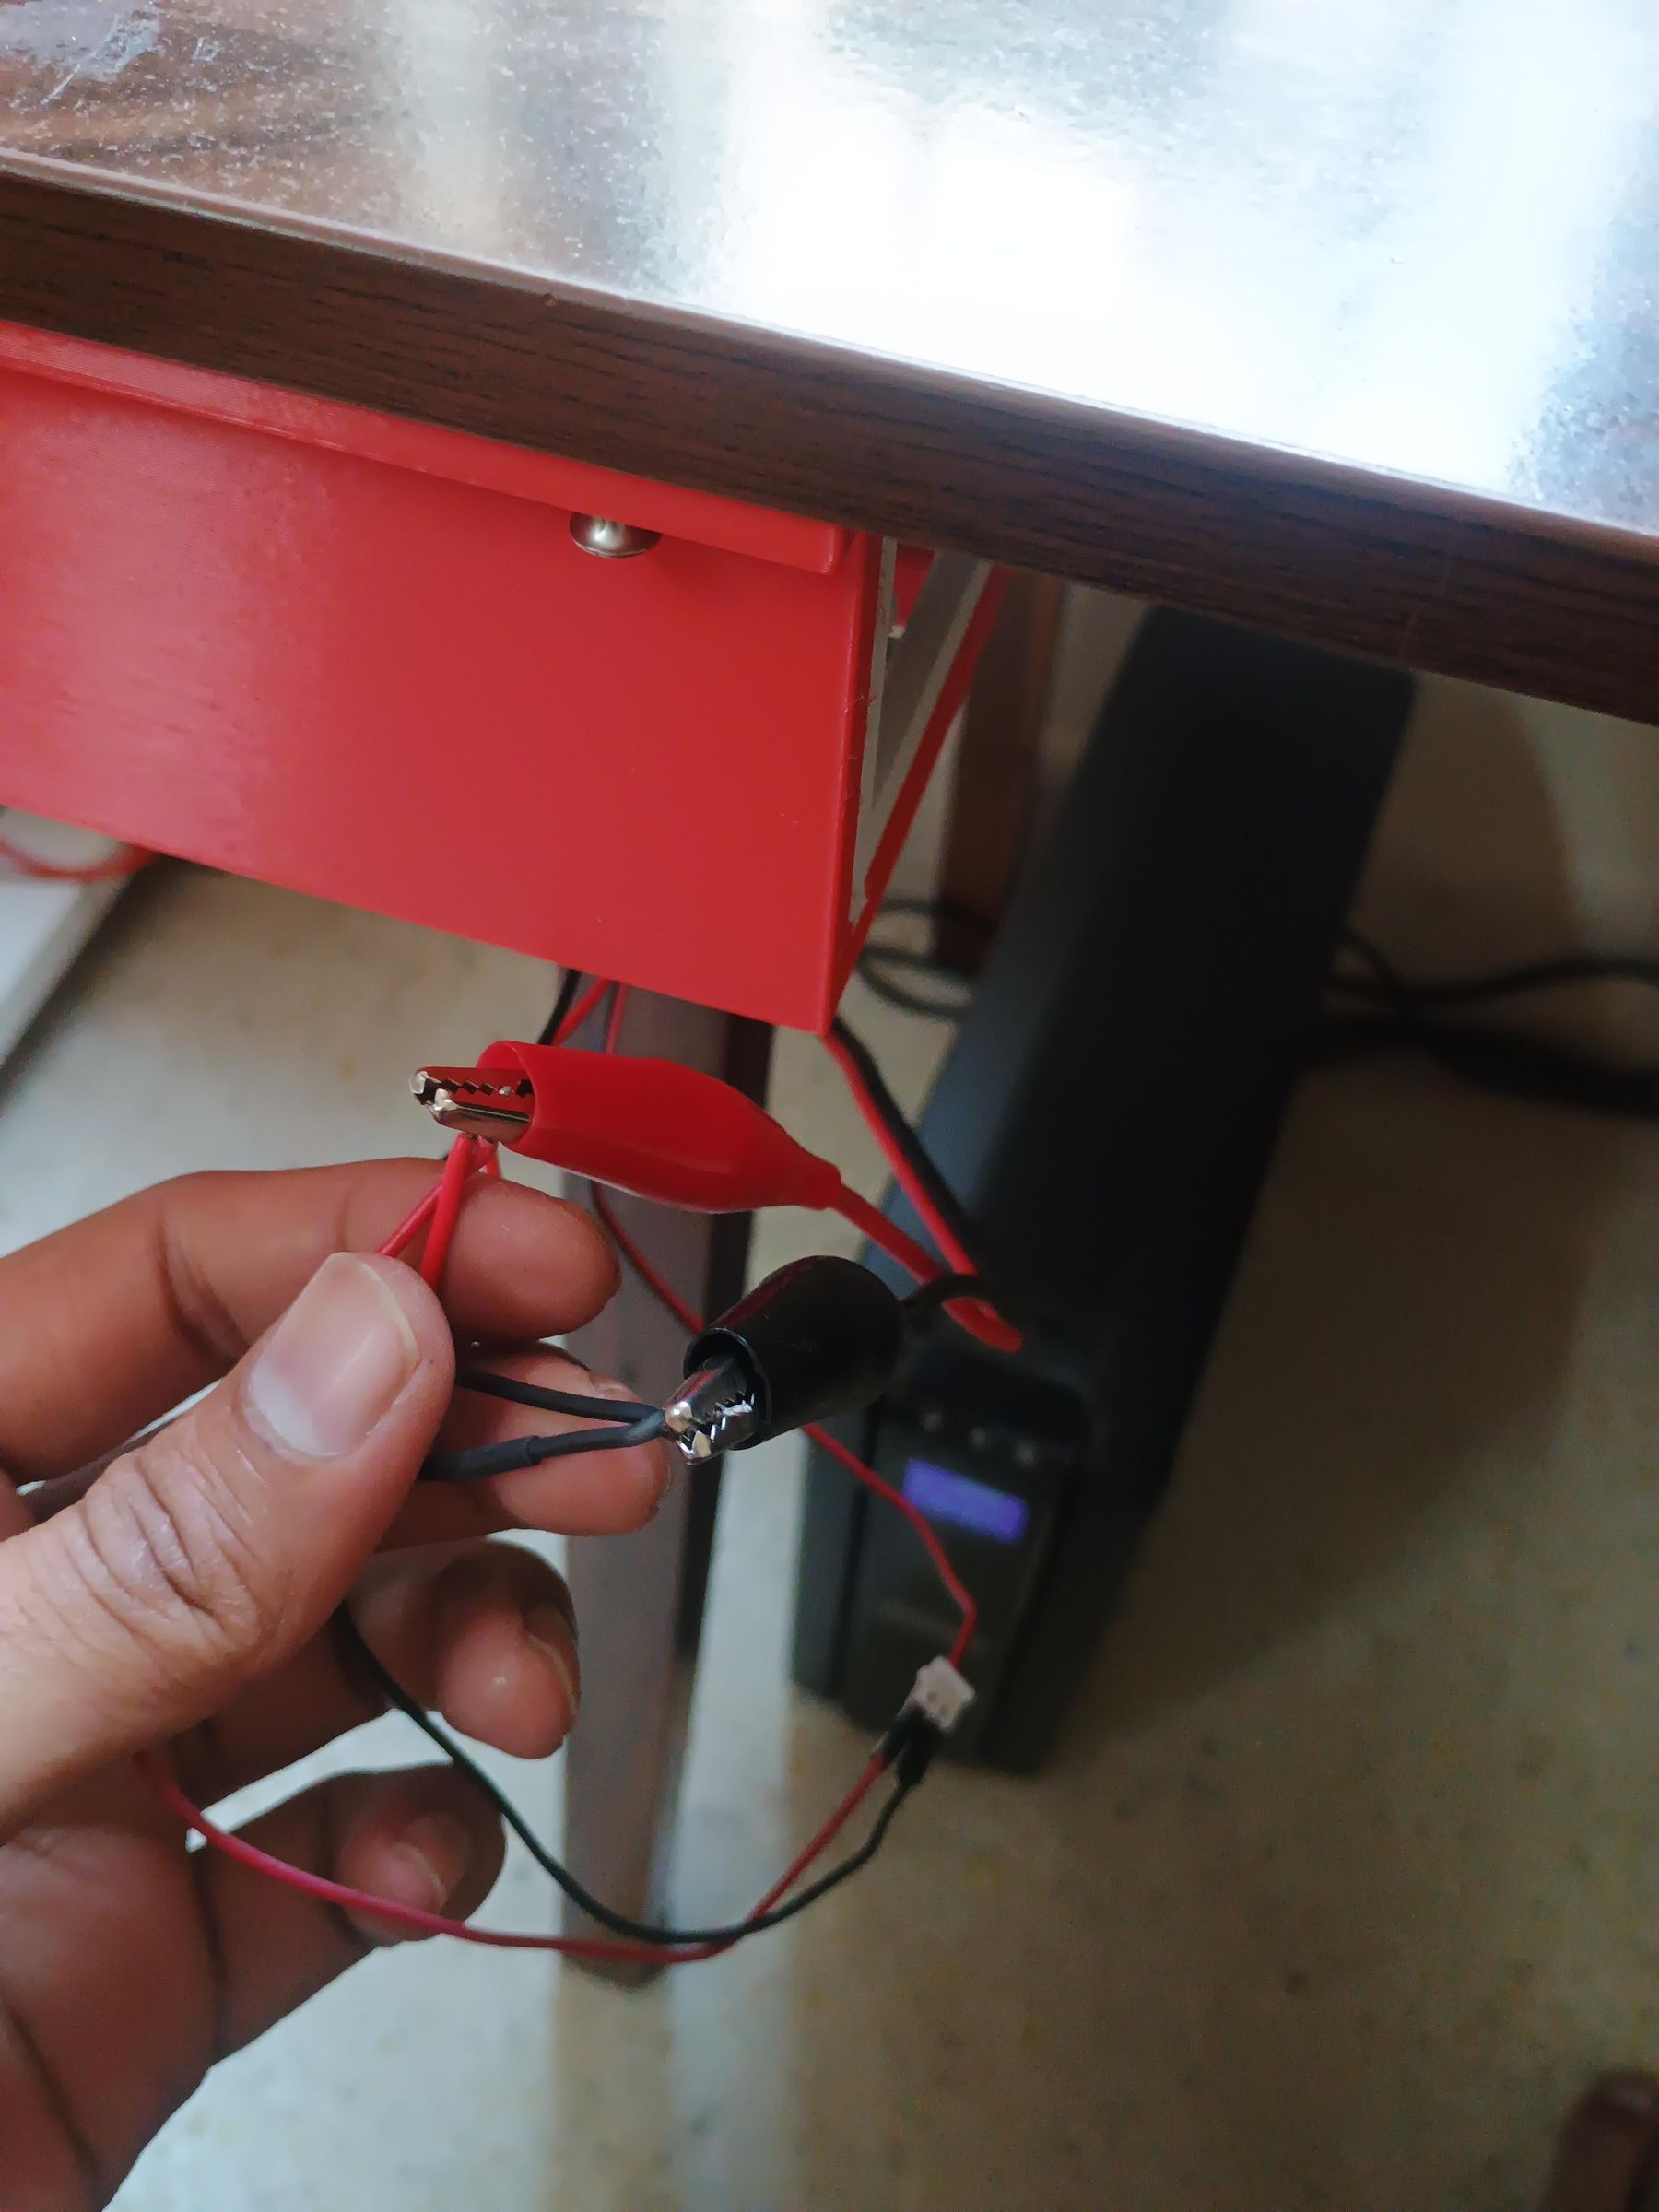
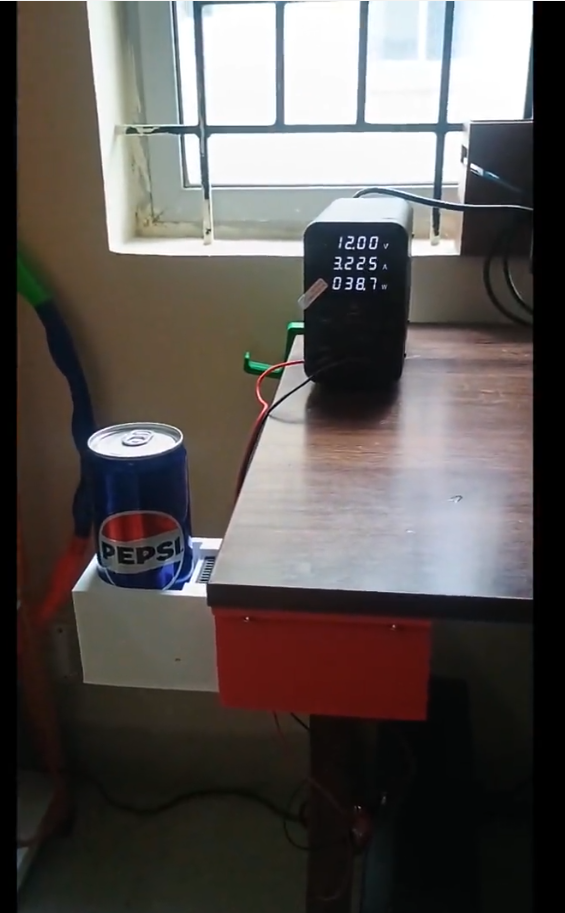
Hold the base of the Peltier Beverage Cooler and screw it to the table using four 3mm x 19mm pointed screws through the holes on top of the housing. Connect the black wire of the fan to the black wire of the Peltier module, and the red wire of the fan to the red wire of the Peltier module — then connect the joined positive and negative wires to the supply's positive and negative terminals, respectively.
Testing:
Once the cooler is installed, test the push-latch mechanism by pushing the ejector — it will lock in place. Push the ejector again, and it will release and come back out.
Usage:
Turn on the 12V supply and push the ejector to release it. Place your beverage on it, and it will stay cool.
Note:
A Peltier module cools better when the hot (back) side has a strong fan and a large heatsink. The hot side must dissipate both the heat moved from the cold side and its own electrical waste heat. If the back side stays cool, the front side can reach a much lower temperature.