Personal English Trainer - AI Voice Assistant
by thelonelyprogrammer in Circuits > Raspberry Pi
2277 Views, 13 Favorites, 0 Comments
Personal English Trainer - AI Voice Assistant
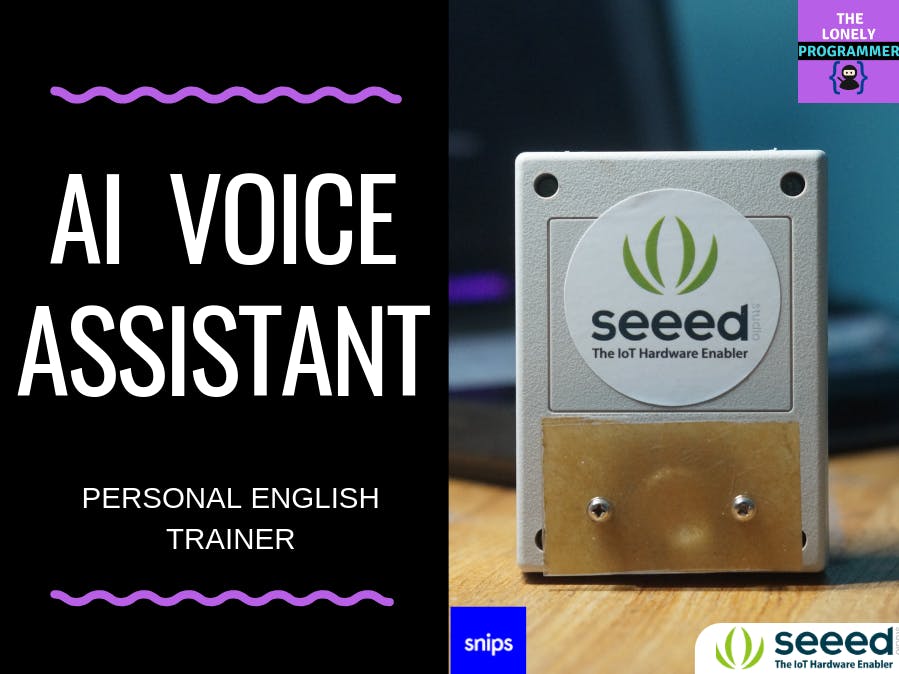
This project will help the students who are preparing for any linguistic exam, where they can be trained by interacting with Snips AI.
Story


Why Did We Build This?
From my personal experience, I've seen many people preparing for the various linguistic test such as GRE, TOEFL, IELTS. They need a person to help them in memorizing and understanding the words.
Generally, when a person prepares for any such exams, they are in need of a person to check and correct if they make a mistake. With this solution, we can reduce manpower by employing a voice assistant.
Hardware Build


First of all, I would like to thank SNIPS and SEEED for supporting this project with the amazing Snips Voice Interaction Development Kit (Base Kit), I really felt informative using this board and able to achieve some of the complex projects integrated within a PCB.
You can purchase the Snips Voice Interaction Base Kit for $115 and Snips Voice Interaction Satellite Kit for $85
Getting Started With SNIPS

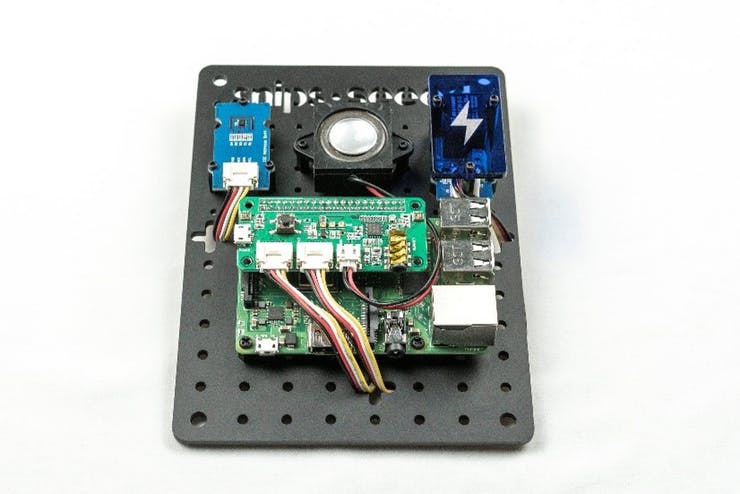


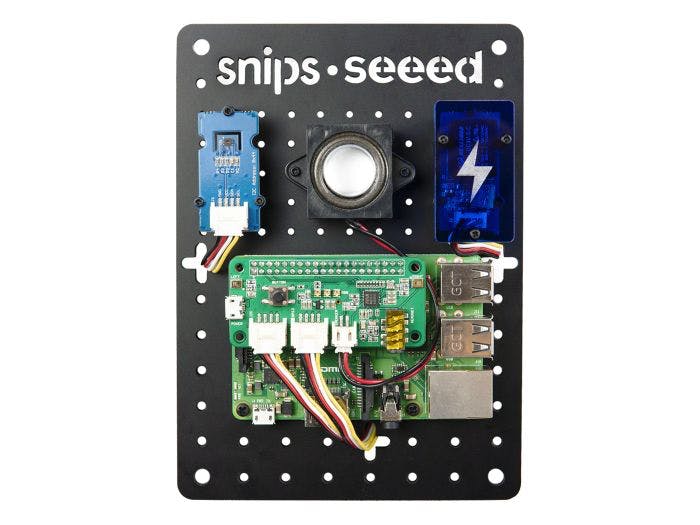


Before getting started, let's review what you'll need.
- Raspberry Pi 3B/B+ (Recommended) or Pi 2 Model B (Supported).
- Micro-USB Cable & Micro-USB power adapter for Raspberry Pi.
- Micro SD Card (Minimum 8 GB) - An operating system is required to get started. You can download Raspbian Stretch and use the guides for Mac OS, Linux, and Windows In the Raspberry Pi website.
- A USB Keyboard & Mouse, and an external HDMI Monitor - we also recommend having a USB keyboard and mouse as well as an HDMI monitor handy.
- Internet connection (Ethernet or WiFi)
Snips Voice Interaction Base Kit
The Snips Voice Interaction Development Kits empowers users to jump-start their development of voice interfaces and easily integrate the Snips AI Voice Platform with hardware. Snips run on the device, meaning all of your voice commands and data are processed locally rather than being sent to the cloud. This on-device processing results in a completely secure offline voice assistant that keeps your personal data private, as it should be.
The Voice Interaction Base Kit allows you to run the entire Snips AI Voice Platform. Powered by a Raspberry Pi 3 Model B+ and the ReSpeaker 2-Mics Pi HAT, it is capable of acting as your home smart speaker. Along with the kit comes a speaker, a Grove - Temperature & Humidity Sensor (SHT31), a Grove - Relay, and a pegboard to hang it on a wall or create a nifty stand.
But that's not all! The Voice Interaction Satellite Kit will extend your base station to reach each room of your house and allow you to interact with the hardware based on where you issue your commands!
This kit contains a Raspberry Pi3 B+ board, ReSpeaker 2-Mics Pi HAT, Grove – Relay, Grove - Temperature&Humidity Sensor (SHT31), Speaker 6 Ohm 2W, MicroSD Card, Power adapter with Micro USB connector, Grove cable x 2, Acrylic Base panel.
Assembly Steps: (Content from SNIPS)
The following picture is the overview of the assembly parts.
Here the assembly parts are mounted on the base panel.
Then, all the electronic parts are mounted on the board.
After that mount the Acrylic Protective cover on top of the Grove -Relay.
These 2 parts are used to make the Kit into a table stand.
Finally, you are ready to play with Snips.
The kit provides two ways of placement. It can either be placed on a horizontal surface like a stand or can be hung on a wall using wires or thread. Please be careful with the Relay when the kit is powered on since the working voltage will be high.
NOTE: We also have a Snips Voice Interaction Satellite Kit which has a Raspberry Pi zero in place of Raspberry Pi 3B+
Interfacing With Snips AI (Basic Project)


- Power the kit by the default power adapter in the kit or use a 5V-2A DC adapter with a Micro USB connector.
- The next step is installing the Snips assistant into the Raspberry Pi. To save your setup time, the MicroSD card in the kit has been flashed with the full functional system image, which means the Snips assistant is ready for your trigger words.
- We strongly suggest you to study the step by step installation guide by visiting: https://docs.snips.ai/getting-started/quick-start... and learn the sam tool in command line.
- Trigger the assistant by saying “Hey-snips”, and follow the command:
You can find the video of the example pre-installed in the Snips Voice Interaction base kit below.
Interfacing With Snips AI (Project AI)
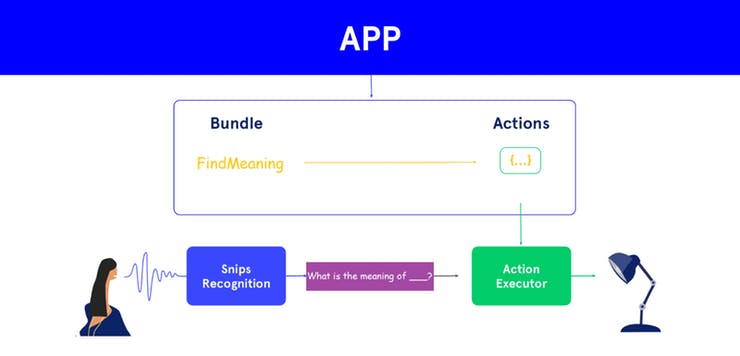
So this is how it works. First, we use the hotword to initiate Snips recognition. It understands the sentence using Snips NLU and determines the intent. Next using the intent, extract the slots respectively. With the action code, we program the AI response with respective to the slots.
Creating App and Intends

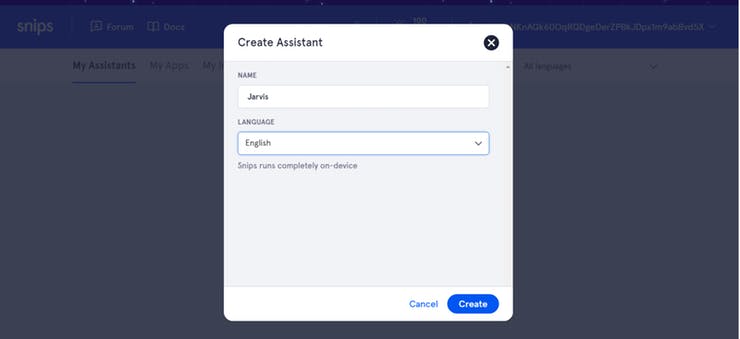


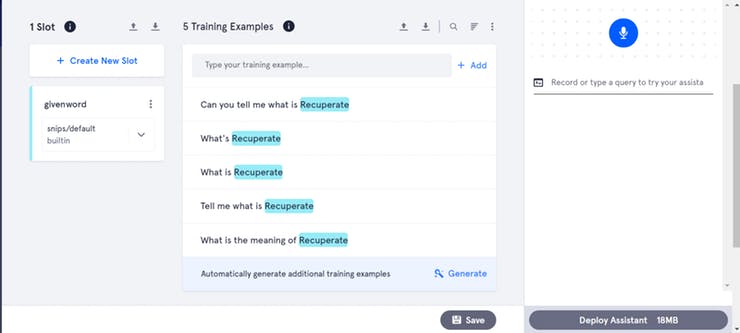
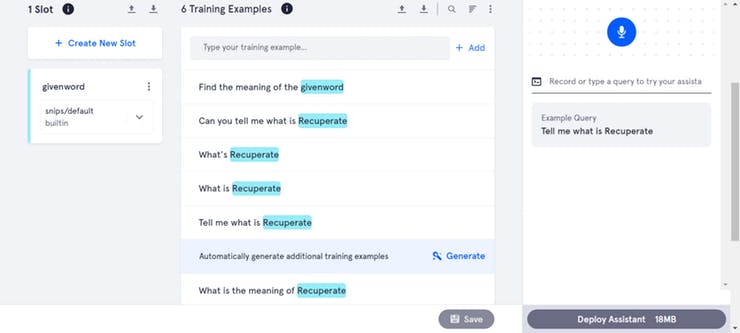

- Create an Assistant. In my case, I had created an assistant with a name JARVIS and with a hotword JARVIS.
- Create a Custom Application or for beginners, use the Application from the library.
- I had created an Application with the name Words
- Create an Intent and start training the AI. This plays a major role in making your AI robust. Train it with all the possible inputs.
- Create a slot to identify the words. Place the slot at the expected phrase of the sentence. For my example, givenword is the slot name and it is highlighted with blue.
- Once it is done, your custom ASR will be ready. Try with the inputs. We can find the response at your right, below the assistant. This gives you the extraction of raw value, intent name, and the slot.
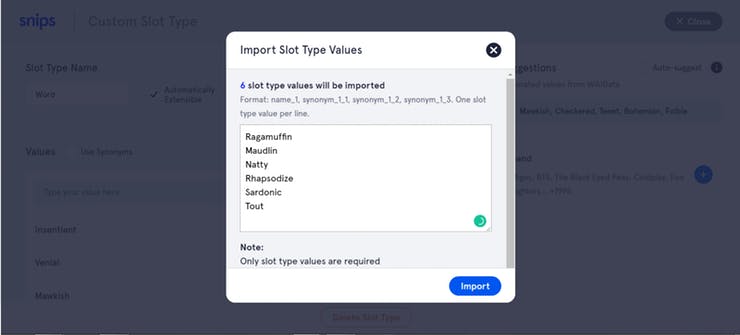
Define slots with more examples as given below
Finally, Deploy your assistant to experience your personalized AI.
Burn Raspbian to the SD Card
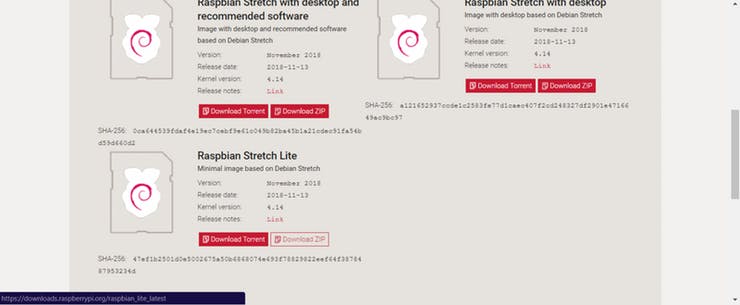

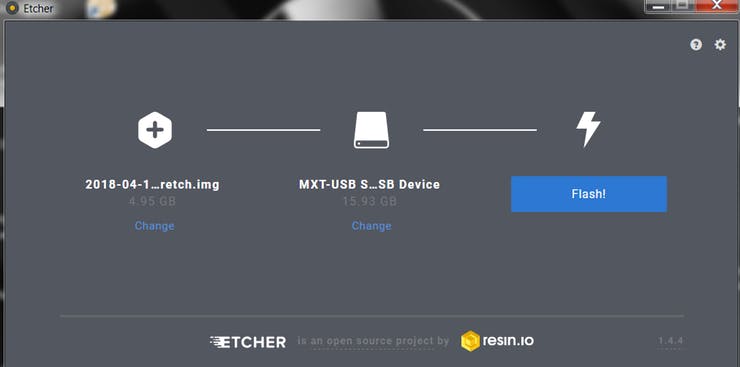

Raspbian is the Linux distribution of choice running on the Raspberry Pi. In this guide, we will be using the Lite version, but the Desktop version (which comes with a graphical environment) can be used as well.
- Download Etcher and install it.
- Connect an SD card reader with the SD card inside.
- Open Etcher and select from your hard drive the Raspberry Pi .img or .zip file you wish to write to the SD card
- Select the SD card you wish to write your image to.
- Review your selections and click 'Flash!' to begin writing data to the SD card
Connect the device to your network
- Enable SSH access by adding empty file ssh, again placed at the root of the boot volume on your SD card.
- Insert the SD card into the Raspberry Pi. It will boot in roughly 20 seconds. You should now have SSH access to your Raspberry Pi. By default, its hostname will be raspberrypi.local. On your computer, open a terminal window and type the following:
ssh pi@raspberrypi.local
The default password is raspberry
Install the Snips Platform
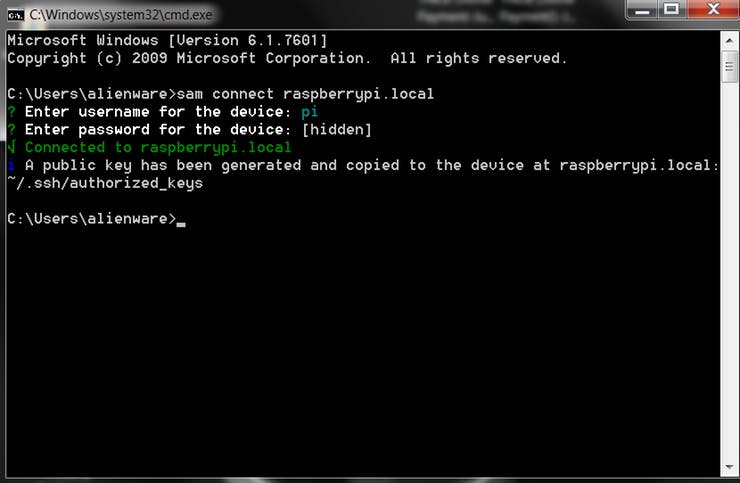
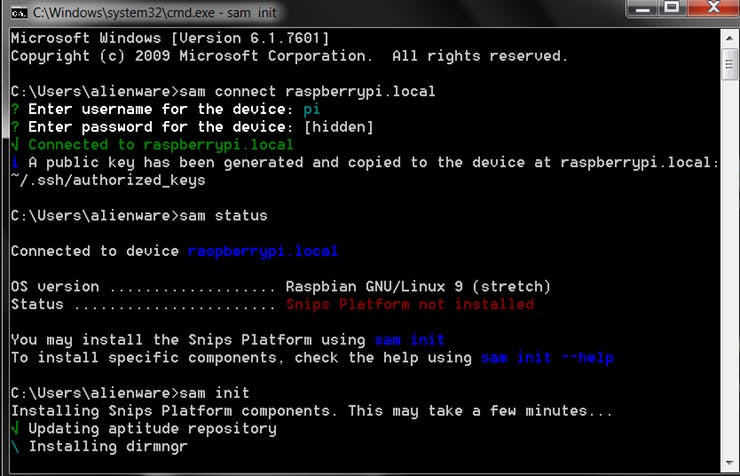
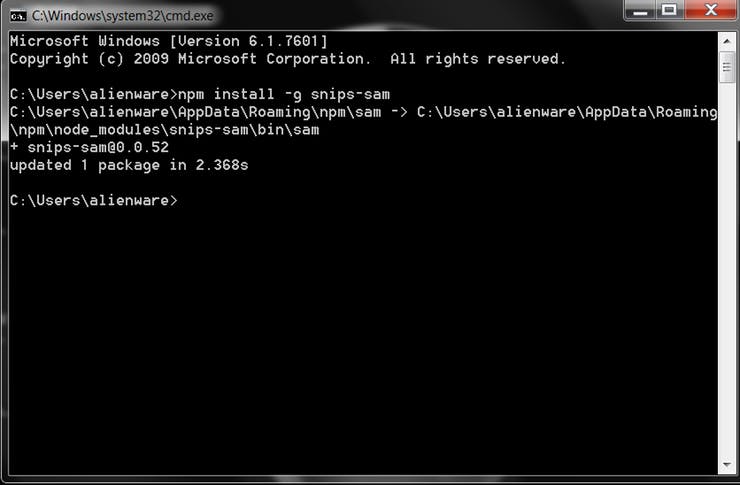
If you haven't already, install the Sam Command Line Interface on your computer. Open a terminal window, and enter:
sudo npm install -g snips-sam
or
npm install -g snips-sam //Windows
Find your Raspberry Pi on the network by running:
sam devices
Next, establish a connection to the device. You will be prompted for the device username and password (default is pi and raspberry, respectively):
sam connect <HOSTNAME>
We are now ready to install the Snips platform on the Raspberry Pi. Enter the command:
sam init
Configure the Hardware

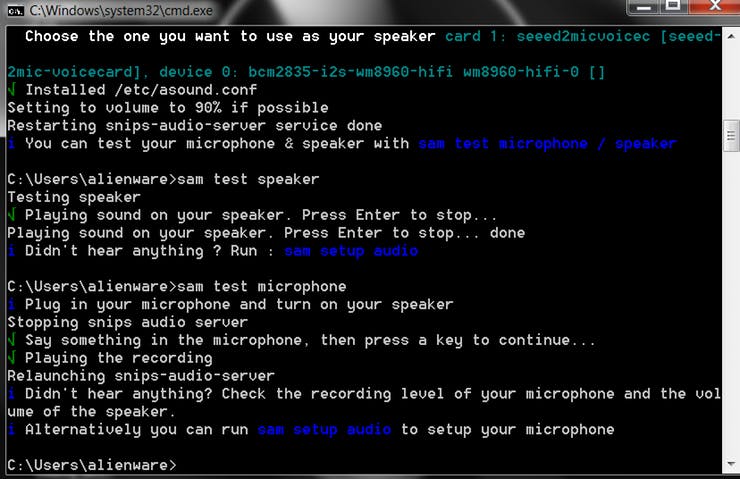
Sam provides some commands to easily set up and configure hardware components. In this section, we will set up a speaker and a microphone. Depending on your set up, some custom configuration needs to be done.
sam setup audio
Test the speaker
To check the speaker is working, run
sam test speaker
If everything works fine, you should hear on your speaker a voice saying a few words. Configure the microphone You can check that your microphone is working:
sam test microphone
Assuming you have a speaker, if you can clearly hear what you just said, you can move on without further microphone configuration.
Once you are satisfied that your hardware setup is working, you are ready to move on to the next step, where you will deploy your first assistant.
Importing AI Model From the Console

Once you have created your assistant from the previous steps, log in to the console from the terminal window by running:
sam login
You will be asked to enter your Snips Console credentials.
Next, install the assistant:
sam install assistant
If you have created several assistants in the Console, you will be asked to choose which one to install from a list.
Handler & Action Code
In order for the Raspberry Pi to respond, we will have to write some handler code. This is a code which is executed when a certain event happens on the Snips platform, such as when intent has been detected.
You have various methods to create Handler depending on the functioning.
Create a folder on your computer on which you want to store your handler code. From the terminal window, change to that directory, and enter:
npm init
This will create a file named package.json which contains your project's description, dependencies and more. Next, add the mqtt package dependency:
npm install mqtt --save
Now, create a file called index.js, and paste the following code, replacing the hostname variable with the hostname of your Raspberry Pi (if it differs from the default raspberrypi):
var mqtt = require('mqtt');
var hostname = "mqtt://raspberrypi.local";
var client  = mqtt.connect(hostname);
client.on('connect', function () {
   console.log("[Snips Log] Connected to MQTT broker " + hostname);
   client.subscribe('hermes/#');
});
client.on('message', function (topic, message) {
if (topic === "hermes/asr/startListening") {
onListeningStateChanged(true);
} else if (topic === "hermes/asr/stopListening") {
onListeningStateChanged(false);
} else if (topic.match(/hermes\/hotword\/.+\/detected/g) !== null) {
onHotwordDetected()
} else if (topic.match(/hermes\/intent\/.+/g) !== null) {
onIntentDetected(JSON.parse(message));
}
});
function onIntentDetected(intent) {
   console.log("[Snips Log] Intent detected: " + JSON.stringify(intent));
}
function onHotwordDetected() {
   console.log("[Snips Log] Hotword detected");
}
function onListeningStateChanged(listening) {
   console.log("[Snips Log] " + (listening ? "Start" : "Stop") + " listening");
}
Run this code using Node:
node index.js
You should see a message of a successful connection to the Snips MQTT broker. As before, perform a voice interaction with your Raspberry Pi:
Hey Snips, what is the weather in Chennai
You should see the logs updating:
[Snips Log] Connected to MQTT broker mqtt://raspberrypi.local
[Snips Log] Hotword detected
[Snips Log] Start listening
[Snips Log] Stop listening
[Snips Log] Intent detected: {"sessionId":"c84b5aa5-3f14-4218-975e-8872b9217933",
 "customData":null,"siteId": "default",
 "input":"what is the weather in chennai",
 "intent":{"intentName":"searchWeatherForecast","probability":0.73845243},
 "slots":[{"rawValue":"chennai","value":{"kind":"Custom","value":"Chennai"},"range":{"start":44,"end":53},"entity":"locality","slotName":"forecast_locality"}]}
Troubleshooting
- Delete the previous assistant if there is one.
$ sudo rm -rf /usr/share/snips/assistant/
- To Change the directory to the Assistant
cd /var/lib/snips/skills/
- To Clone the content of the repo to local
git clone <git_link>
- To run setup.sh script
./setup.sh
- Activate virtual environment
source venv/bin/activate
- Run the action code
./action-<filename>.py
- To give permission to the Python Script
chmod +x action-.py
Enclosure
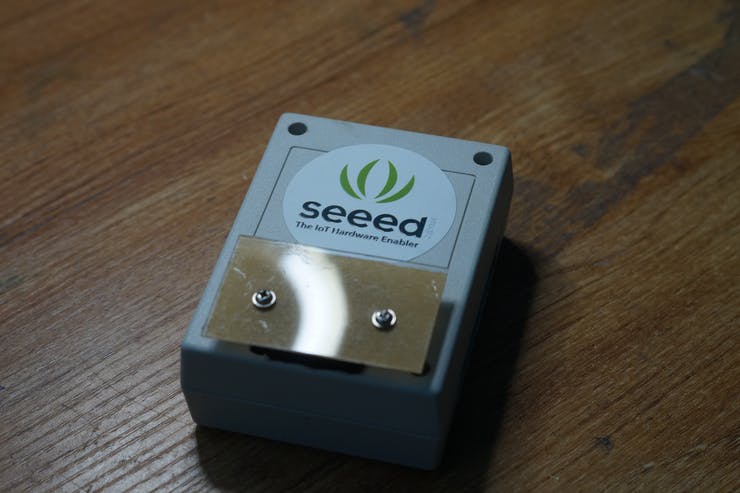
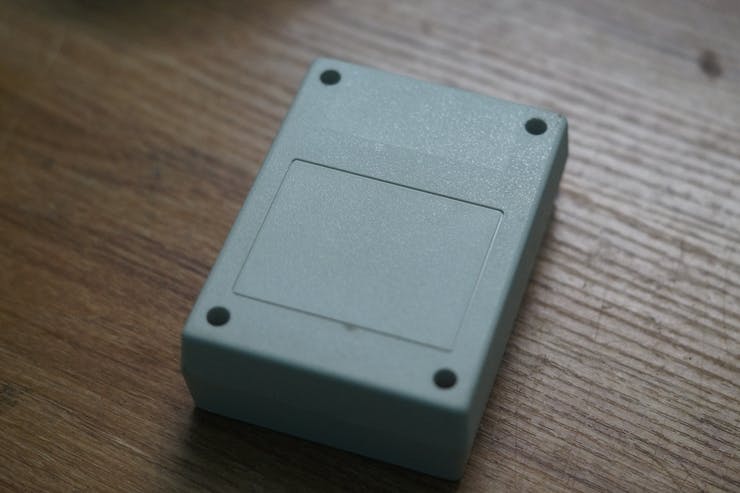
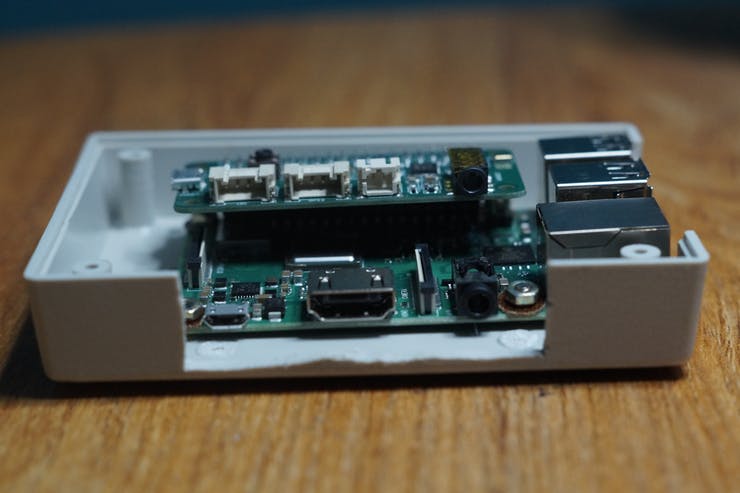


- I had used an IP rated enclosure for this project
- First, I made necessary holes to mount the circuitry & slots for Power cord and HDMI cable.
- Then I placed all the Raspberry Pi inside the enclosure and screw it firmly.
- I made a small opening for the Speaker and the Microphone and covered it using a small piece of acrylic sheet.
- Connect the speaker to the ReSpeaker hat firmly.
- Finally, all the screw are firmly mounted and the power cable is inserted via a slot.
- This is how the AI looks finally :D
Working of the AI


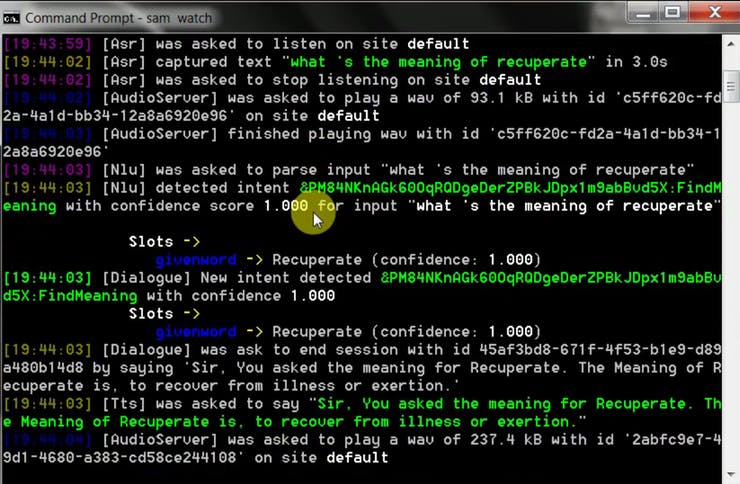
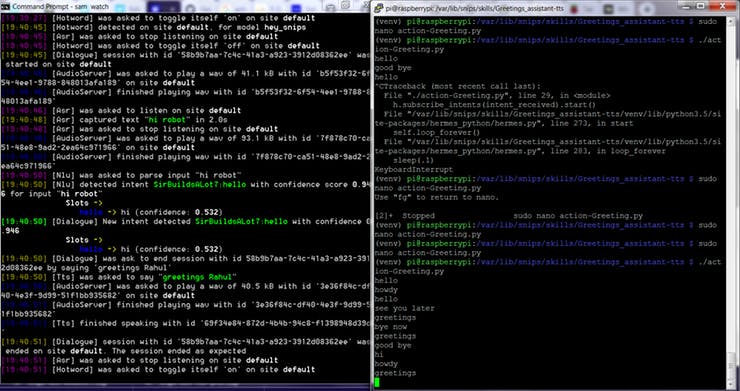
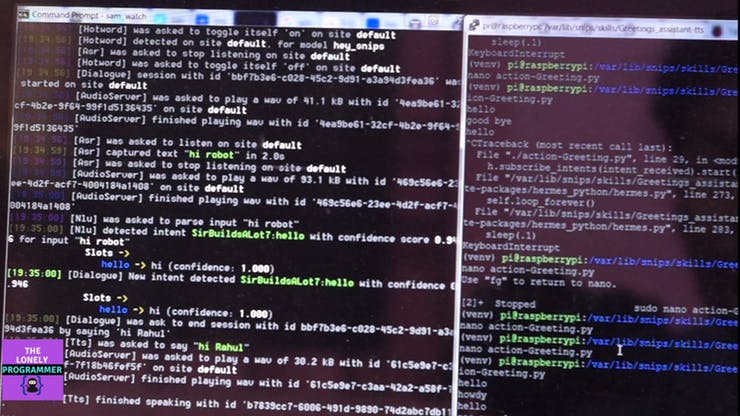
You can find the data which is monitored using Snips-watch
Now it's showtime. I started making with Simple greetings AI. Have a look at it's Functioning.
The Trainer AI has been programmed for limited words. This is extendable with little modifications. This helps the Students to memorize the meaning faster than the traditional method.
Kind Attention:
This project is trained for 25 words approximately. It can be further expanded by making minor tweaks in the action code.
You can find the Action scripts on my Github Repository attached.
Project Repo for Greetings AI - https://github.com/Rahul24-06/Greetings_Assistant-TTS
Project Repo for Trainer AI - https://github.com/Rahul24-06/Personal-English-Trainer---TTS
Link to My application: https://console.snips.ai/store/en/skill_xBKlxnE5KZy
The entire setup costs about $115 which can be purchased from SNIPS and this solution is very cheap and effective when compared to the traditional methods. Roughly more than 100, 000 tests were taken in India and This product will be the best supplement for GRE takers.
Give a thumbs up if it really helped you and do follow my channel for interesting projects. :) Share this video if you like. Happy to have you subscribed: https://console.snips.ai/store/en/skill_xBKlxnE5K... Thanks for reading!