Pie With Frozen Berries — a Taste of Summer Memories. Homemade Yeast Dough!
by littleChef in Cooking > Cake
112 Views, 1 Favorites, 0 Comments
Pie With Frozen Berries — a Taste of Summer Memories. Homemade Yeast Dough!
This pie turns out incredibly juicy! 🥧
The filling has a sweet and tangy flavor, but you can easily adjust the sweetness by adding more or less sugar. The berry taste is rich and fresh.
We use frozen berries, but you can absolutely use fresh ones when they’re in season.
The dough is yeast-based, and we make it from scratch — though you can, of course, use store-bought dough if you prefer.
If you’re using frozen berries, they should be thawed beforehand and allowed to drain.
You can watch the full video recipe in English here 👉https://youtu.be/8J9V_EbQ4C0
Supplies
For the dough:
250 ml milk
3 eggs
500 g flour (plus extra for dusting)
16 g fresh yeast
45 g sugar
80 g butter
Filling:
500 g frozen cherries and300 g frozen black currants (The berries should be thawed beforehand and let them drain!)
120 g sugar for a sweet-and-tangy flavor (if you want a sweeter pie, add 200–250 g of sugar)
+ a little sunflower oil for greasing
Making the dough. (If you’re using pre-made dough, skip these steps and go straight to the Step 6).
First, we make the starter. This helps activate the yeast.
For this, we warm the milk (I do it in the microwave) to body temperature. You can check it by dipping your finger in — just make sure your hands are clean! Your finger shouldn’t feel hot or cold; if it feels just right, the temperature is correct.
If the milk is too hot, the yeast will die. If it’s too cold, the yeast may not activate properly.
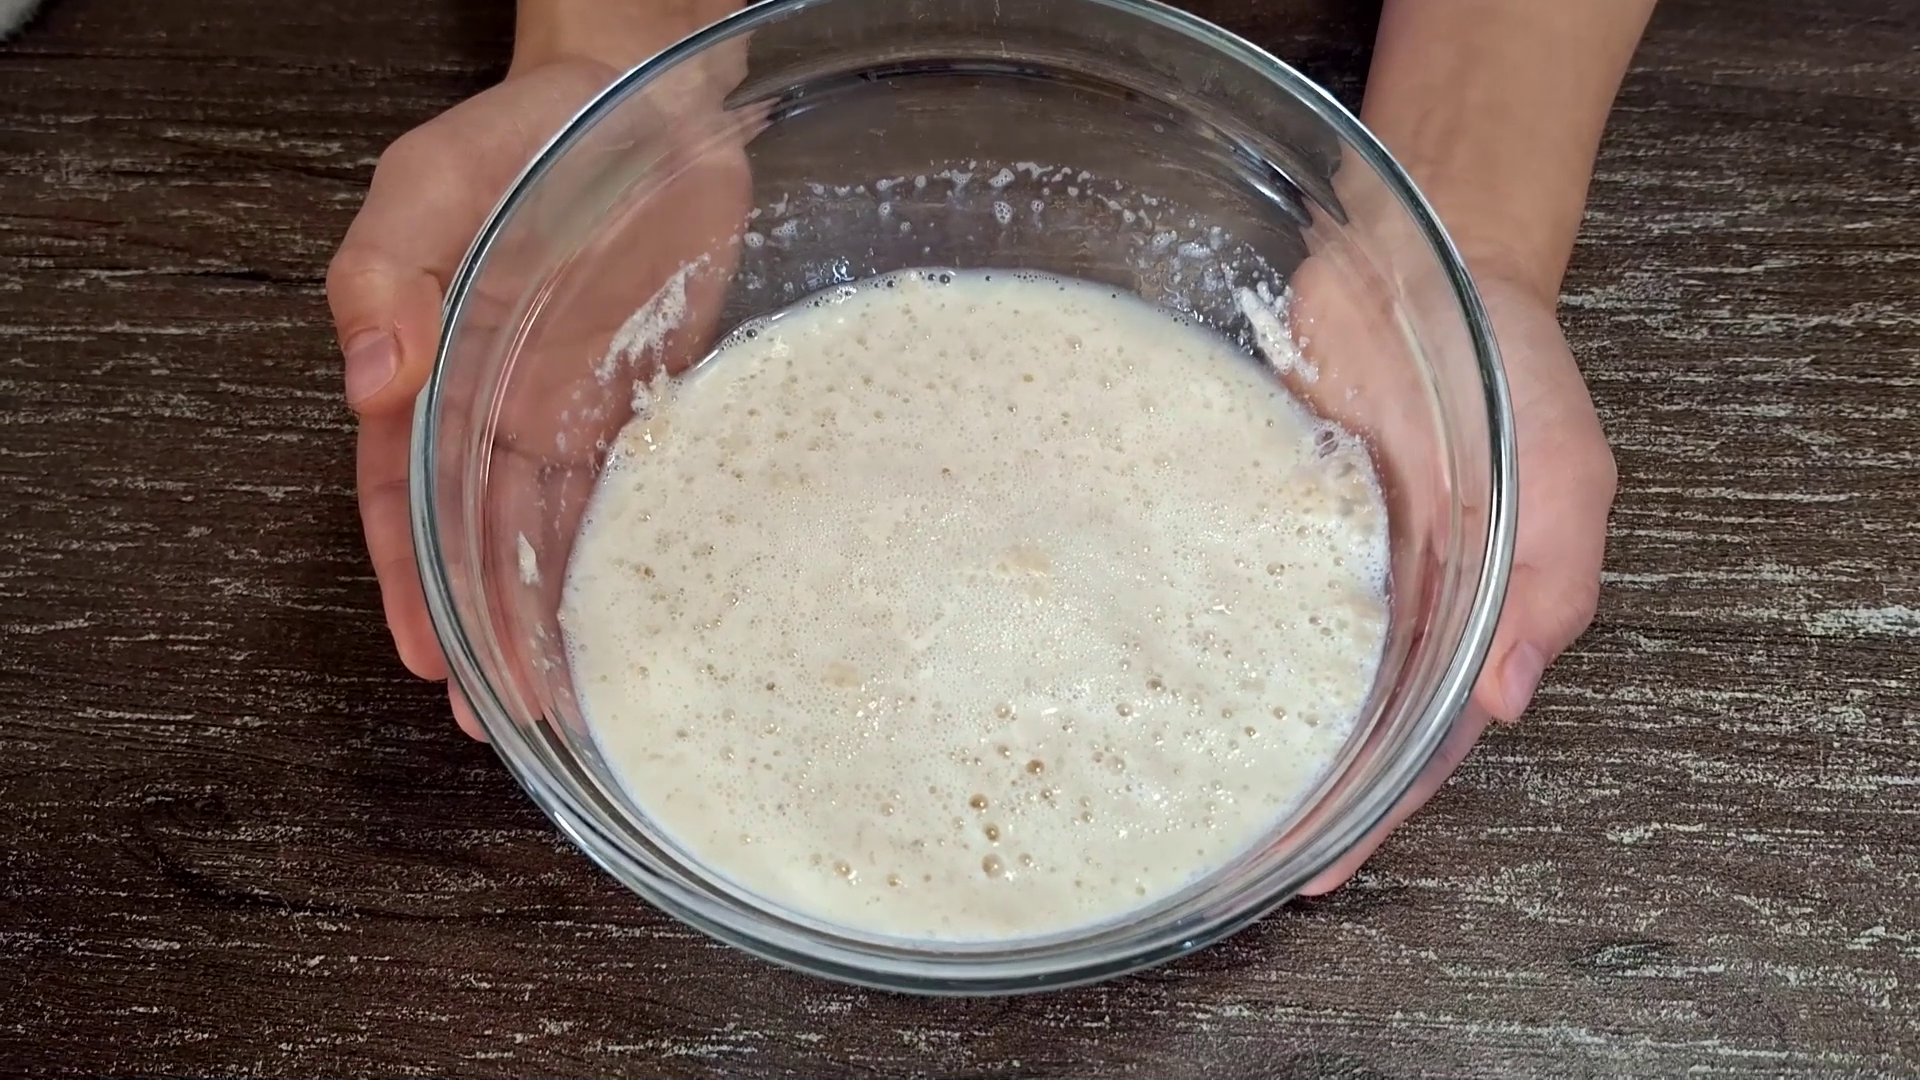
Next, we add sugar (45 g) and fresh yeast (16 g) to the milk. Rub the yeast into small pieces with your fingers and dissolve it in the milk along with the sugar.
Place the starter in a warm spot. I use the oven for this — I set it to 40°C (about 105°F) and put the starter inside.
Wait for the yeast to activate — the starter will look like the photo, with lots of bubbles appearing.
This usually takes 10 minutes to 2 hours, depending on the yeast, the milk temperature, where you placed the starter to rise, and a bit of luck 🙂.
If the yeast hasn’t activated after 2 hours, something went wrong and it’s best to start over. Maybe the yeast was old, maybe the milk wasn’t the right temperature, or the rising spot wasn’t ideal (using the oven usually prevents this problem).
Take 3 eggs and separate the yolks. We’ll use only the yolks for the dough.

Knead the dough. To do this, combine the prepared starter, the 3 egg yolks, flour (500 g), and butter (80 g). You can knead the dough by hand or use a dough hook/mixer if you have one.
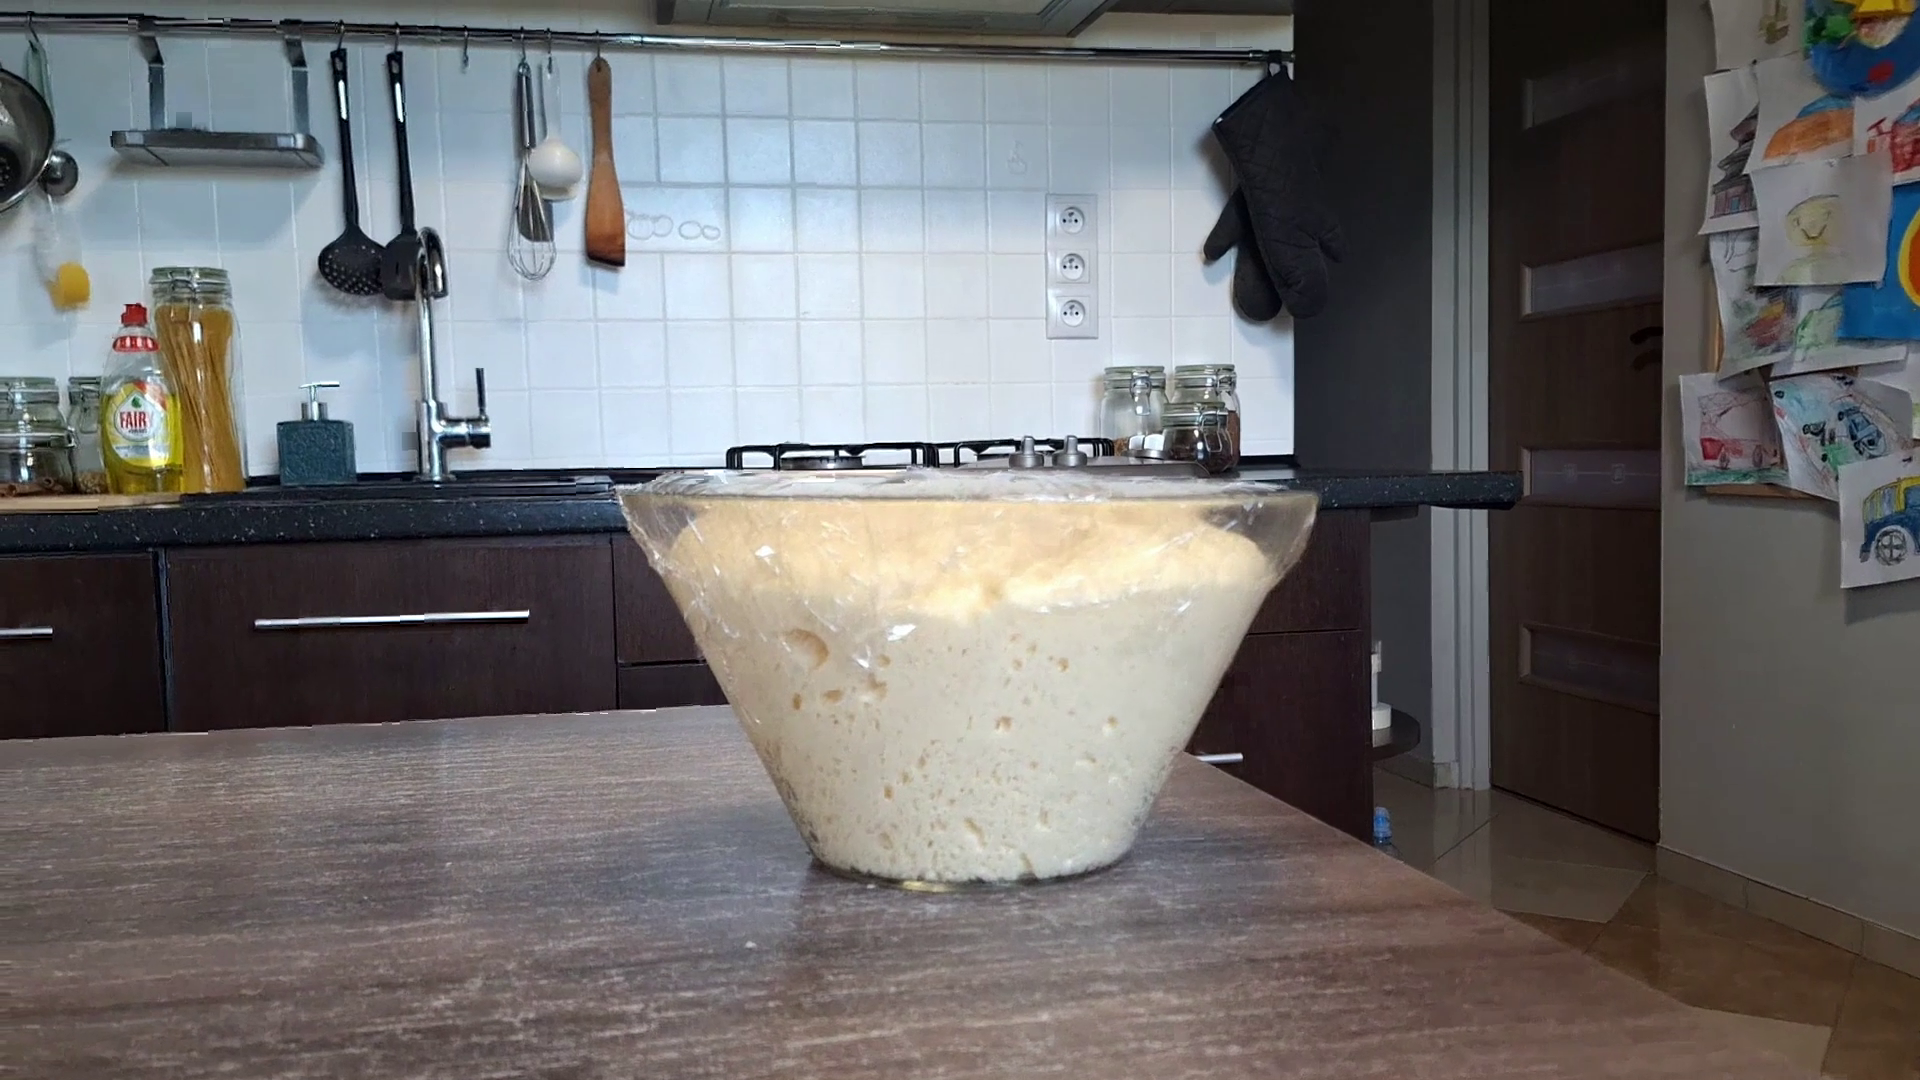
Place the kneaded dough back to rise. Take a large bowl (glass or ceramic) and lightly grease it with sunflower oil so the dough doesn’t stick. Put the dough in the bowl and cover it with plastic wrap or a cotton towel to prevent it from drying out.
Then, put it in the same warm spot where your starter successfully rose — we use the oven set to 40°C (about 105°F). Let the dough rise for about 2 hours.
If everything goes well, the dough should double in size and become light and airy (just like in the photo).
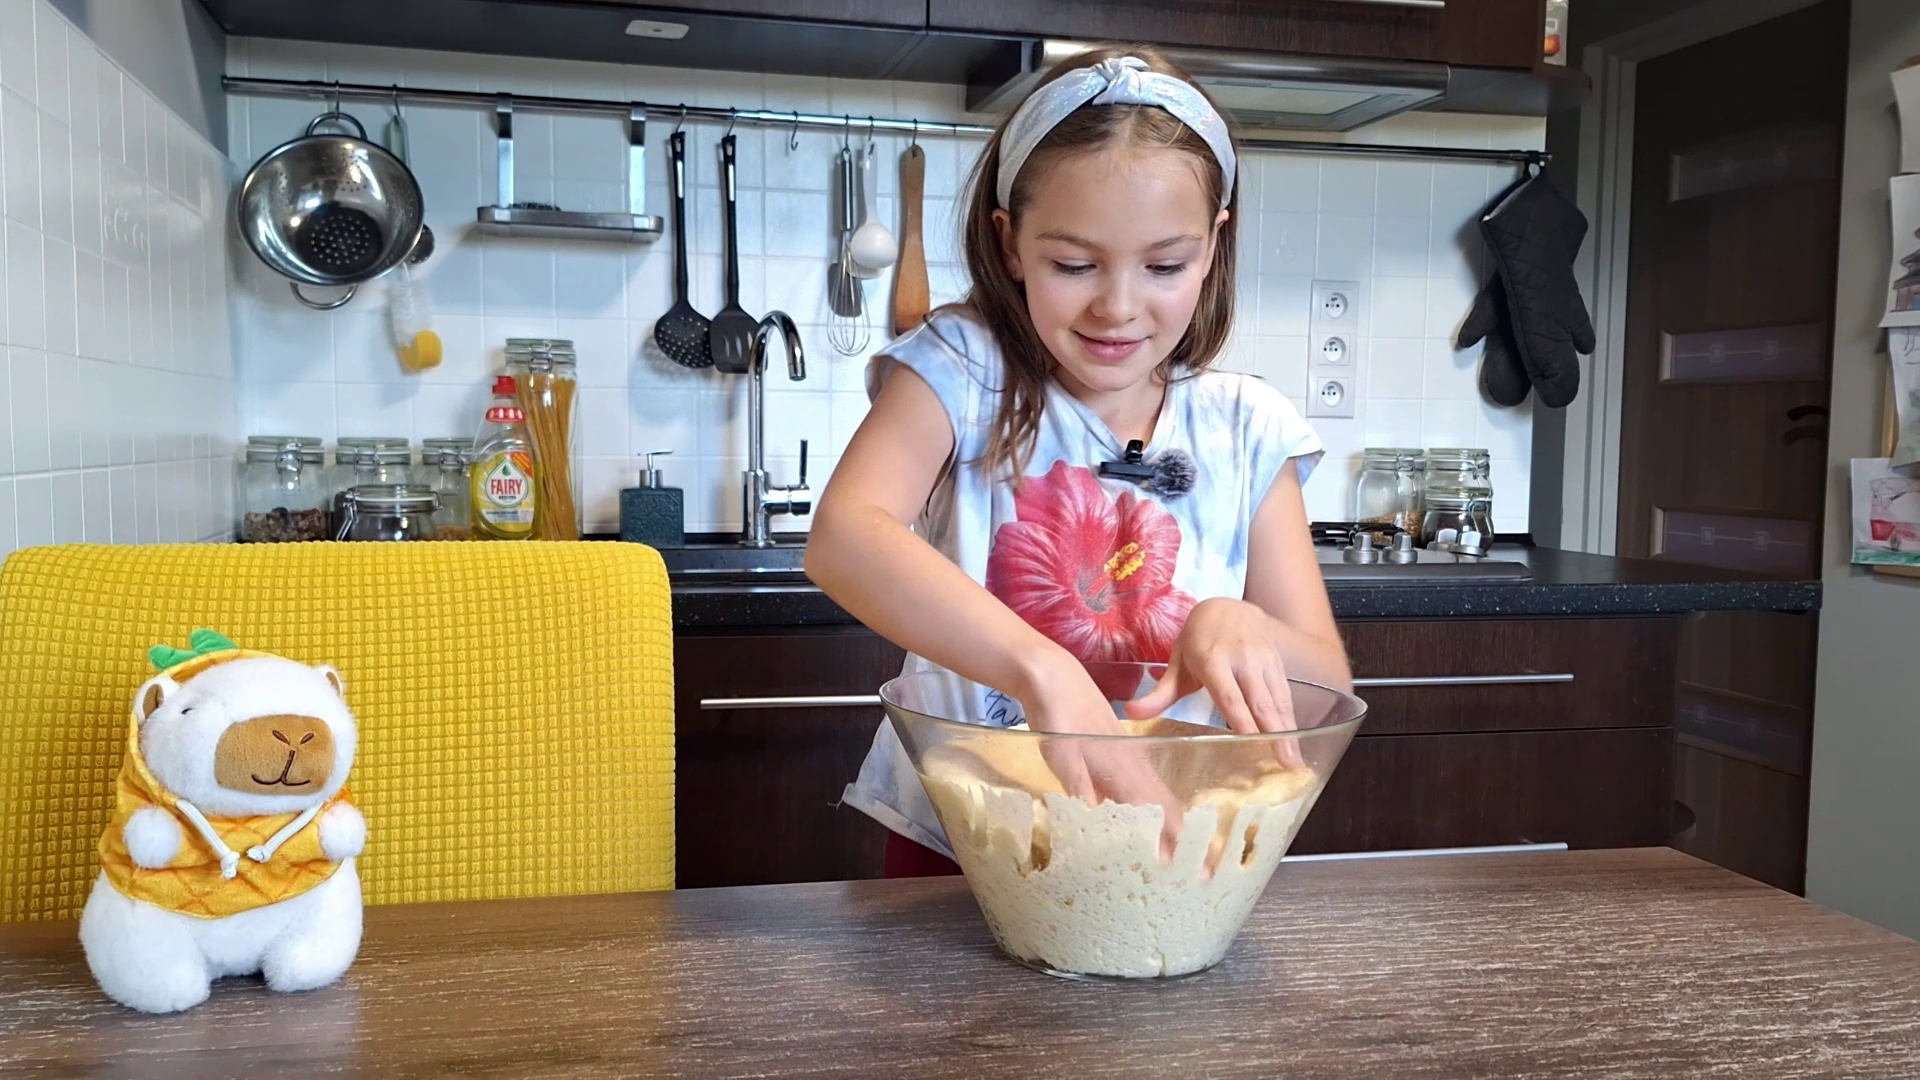
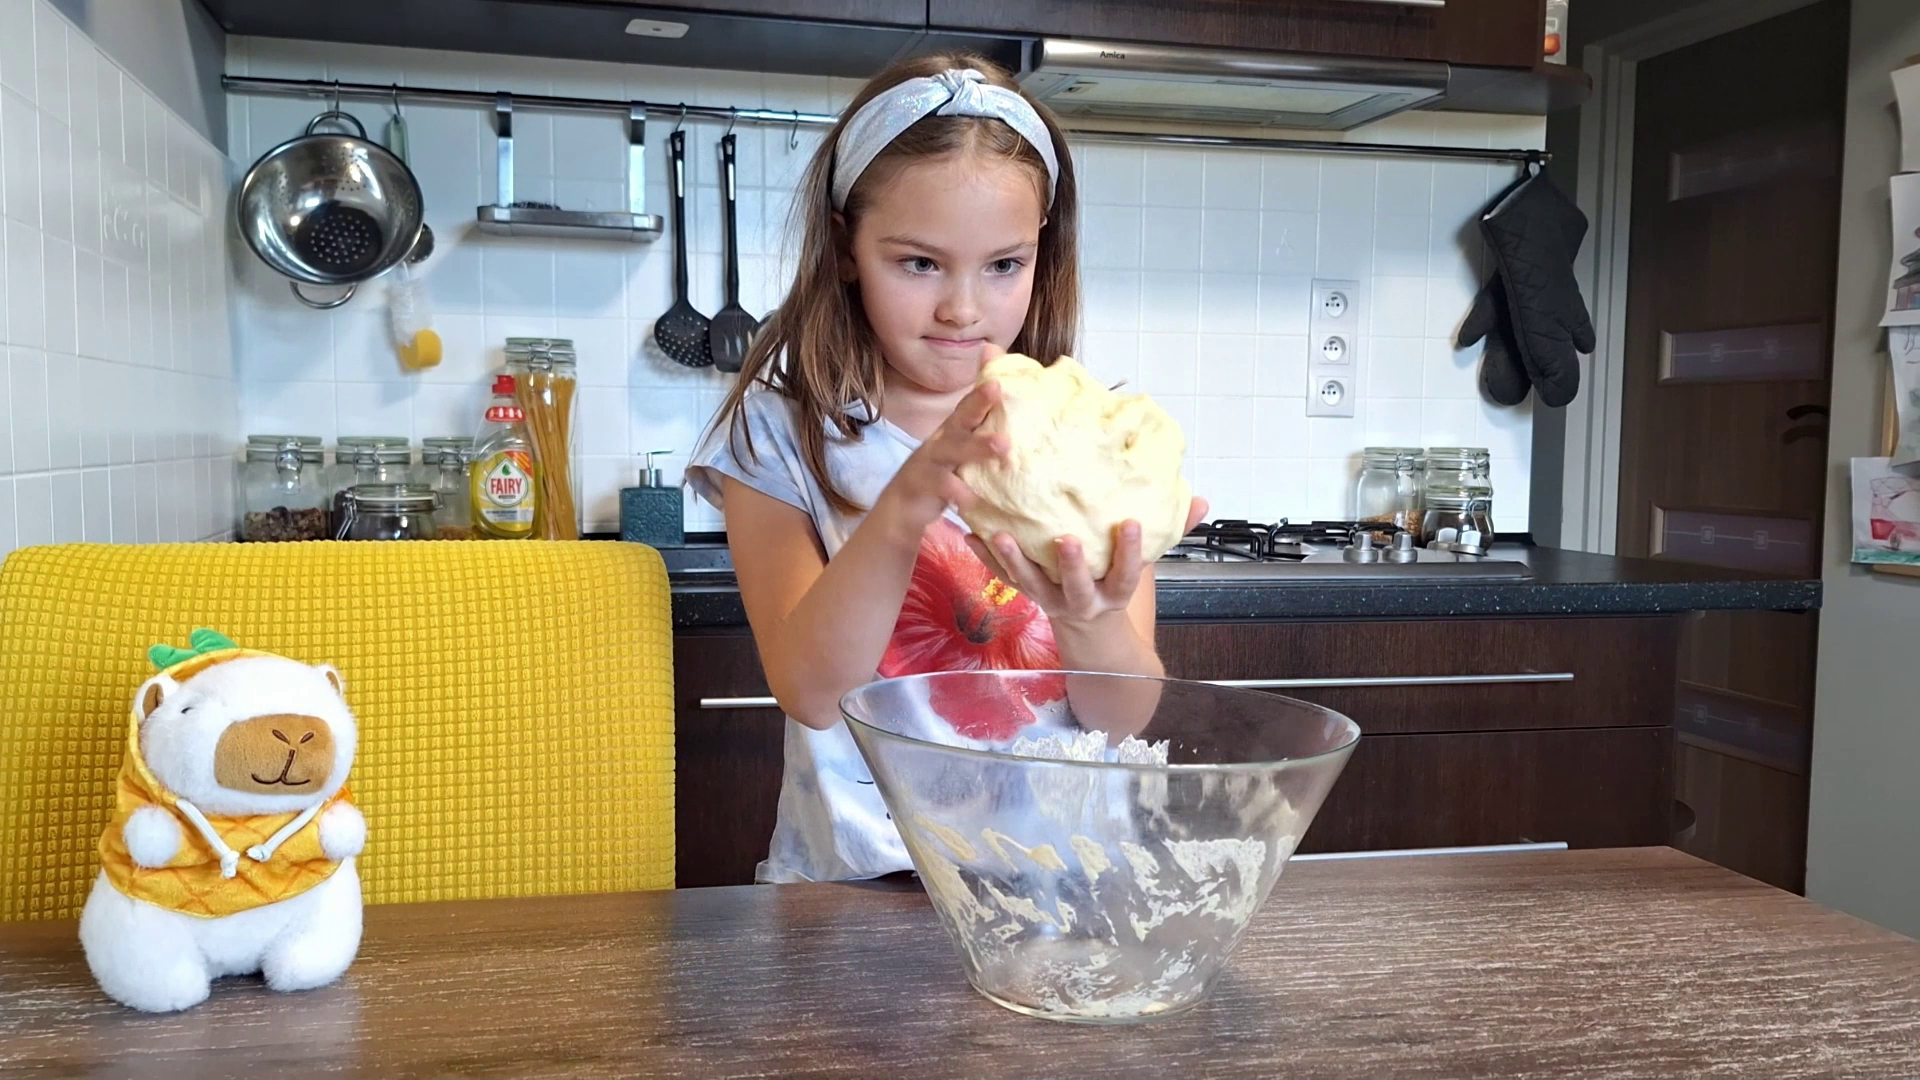
Now we need to punch down the dough and shape it into a compact ball — like in the photo, where my daughter is happily doing it :).
Then, place the dough back in the same bowl and cover it again with plastic wrap or a towel to prevent it from drying out. Put it in the refrigerator for 2 hours. After this, the dough will be fully ready to use!
Life hack: The dough can stay in the refrigerator for up to 10 hours, so you can make it in the evening and bake the pie in the morning.
You can also freeze the dough — it will keep for up to 1 month. To thaw, place it in the refrigerator for about 10 hours.
This way, you can prepare the dough in advance and use it whenever you need.
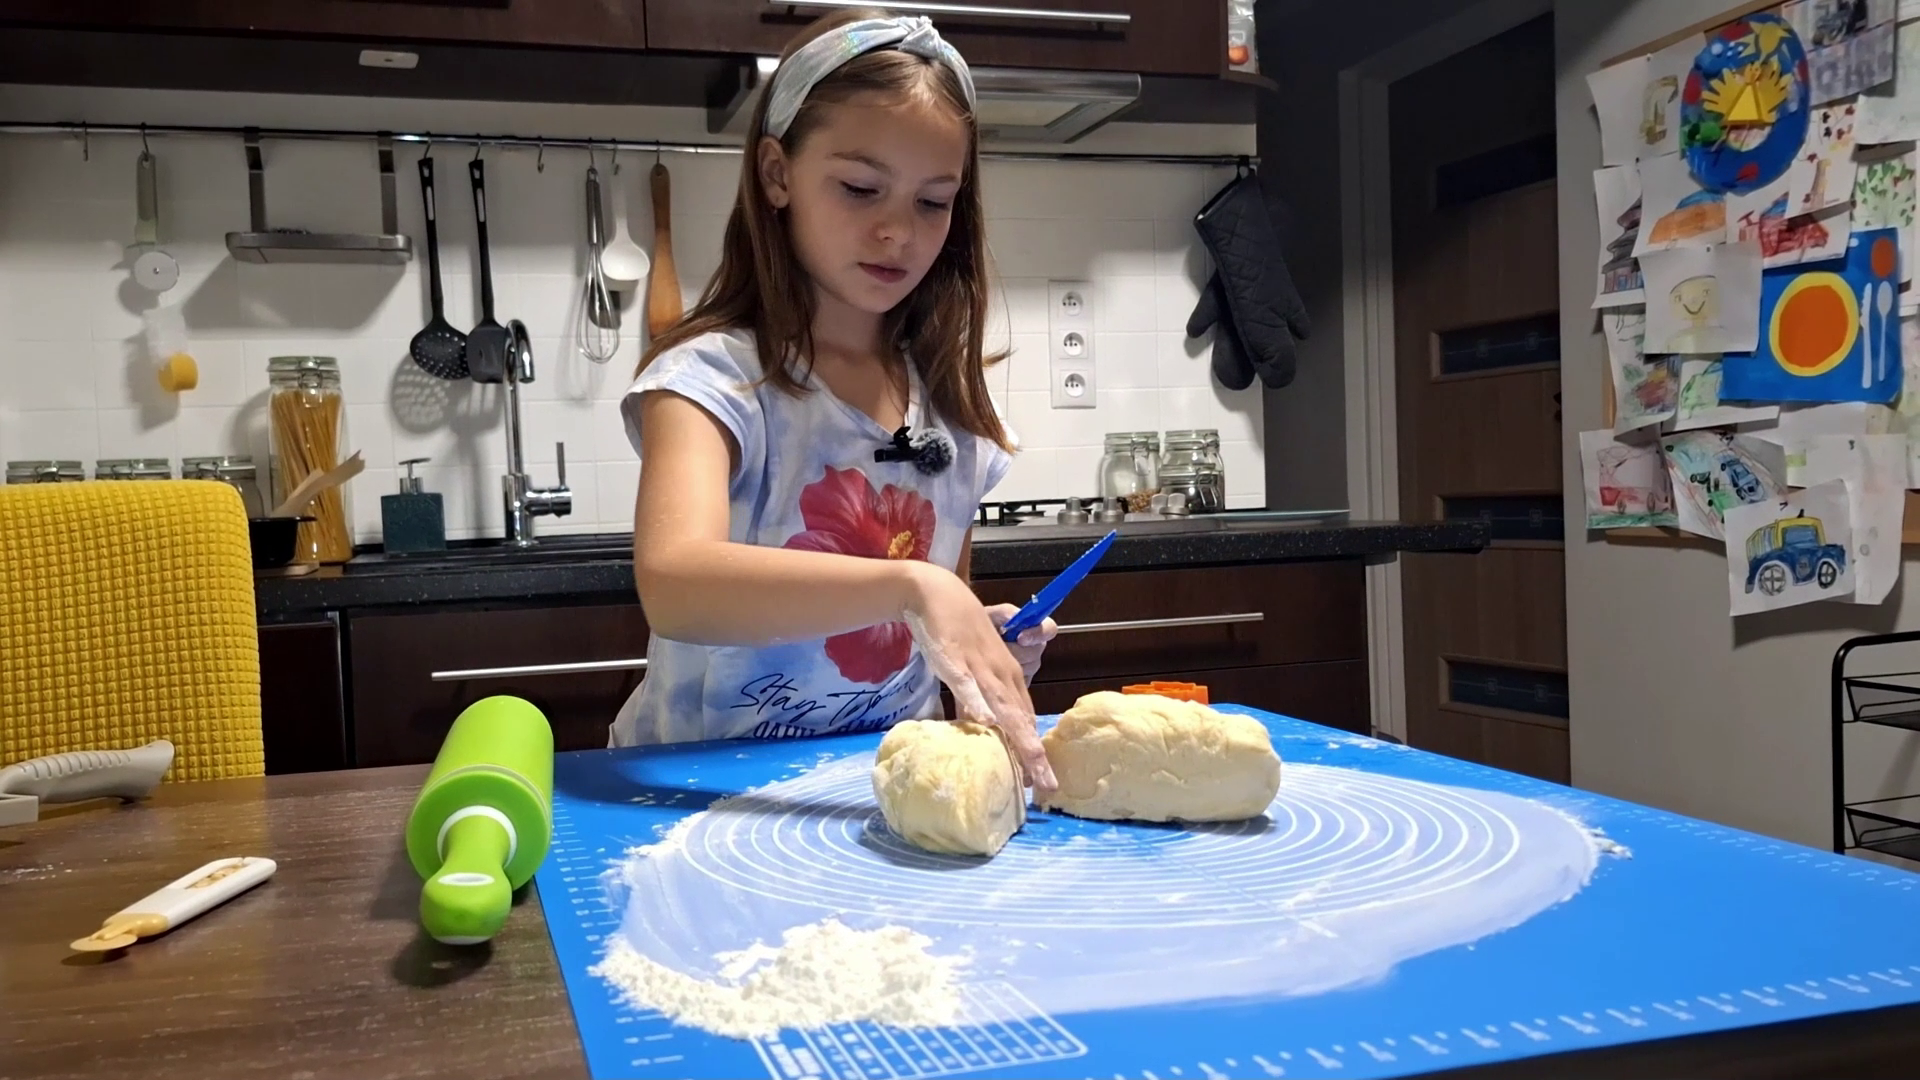
Take the prepared dough and divide it into 2 equal parts
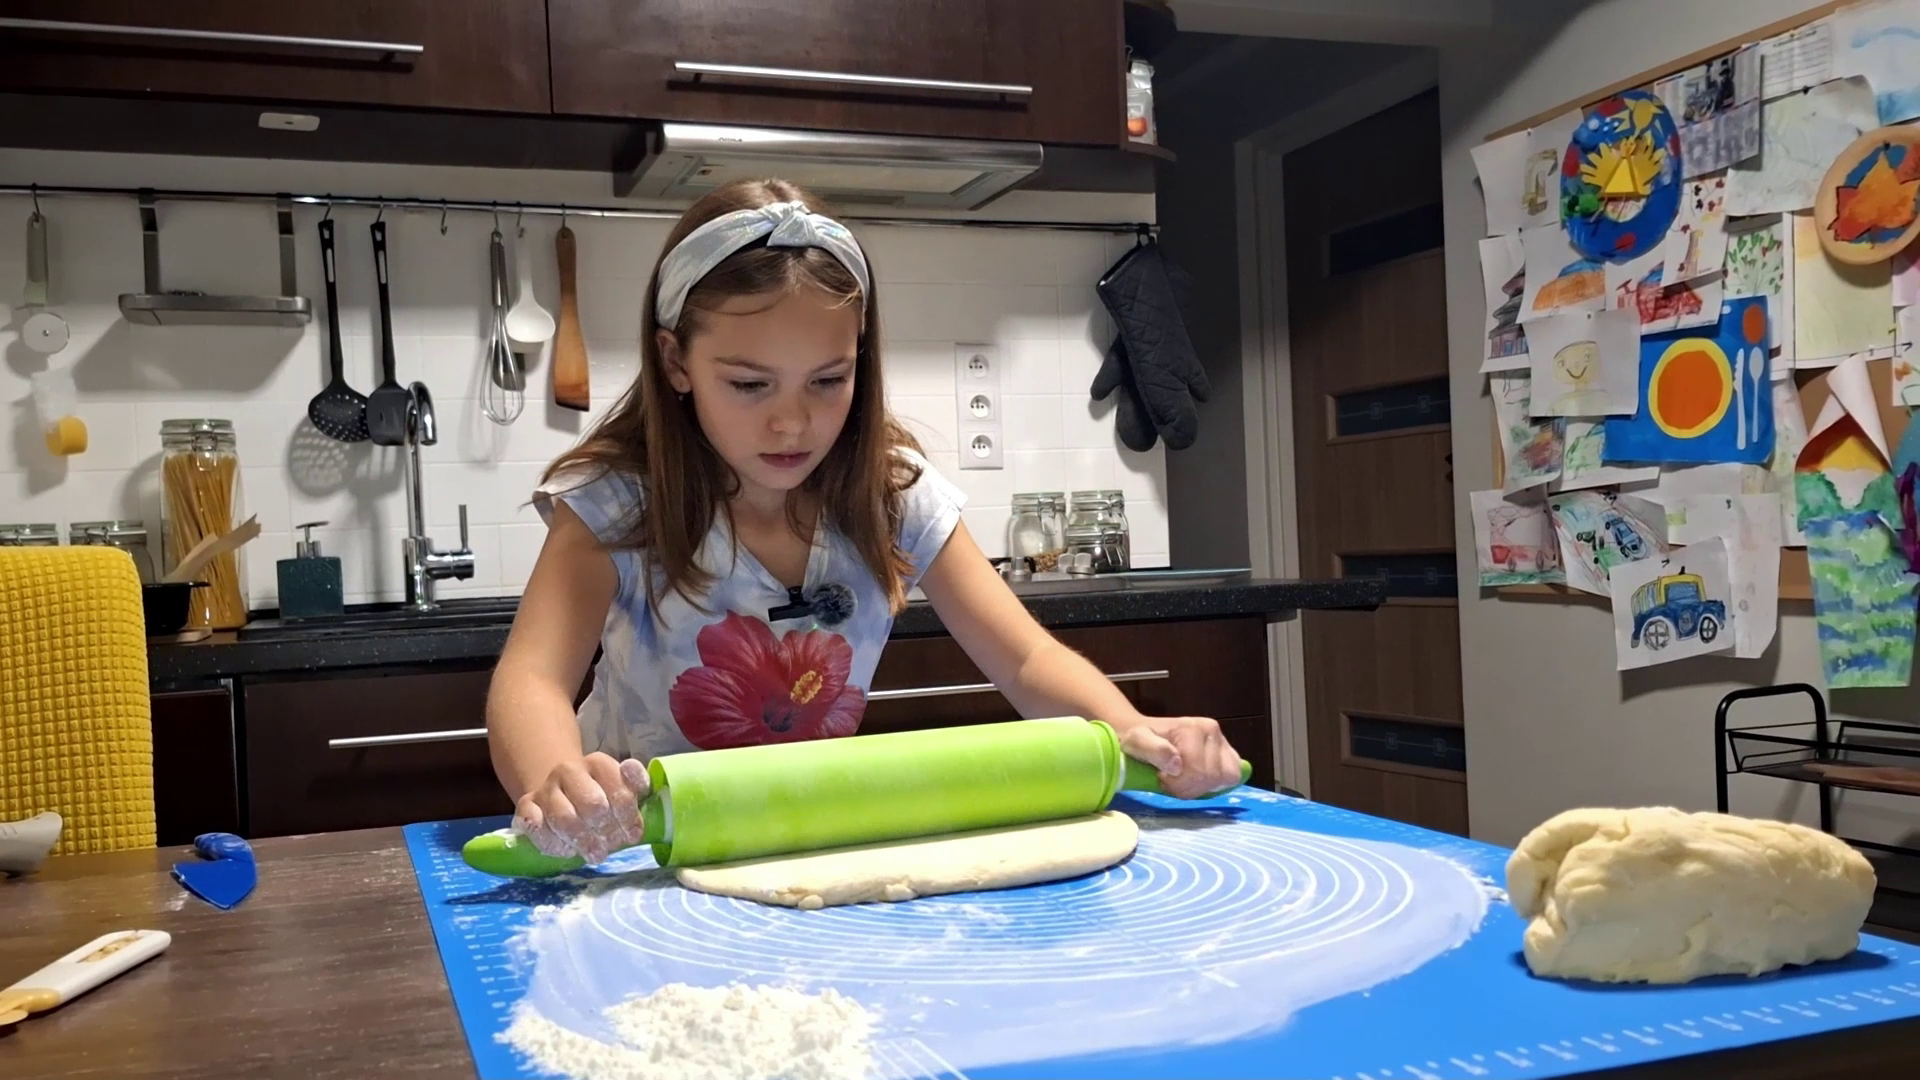
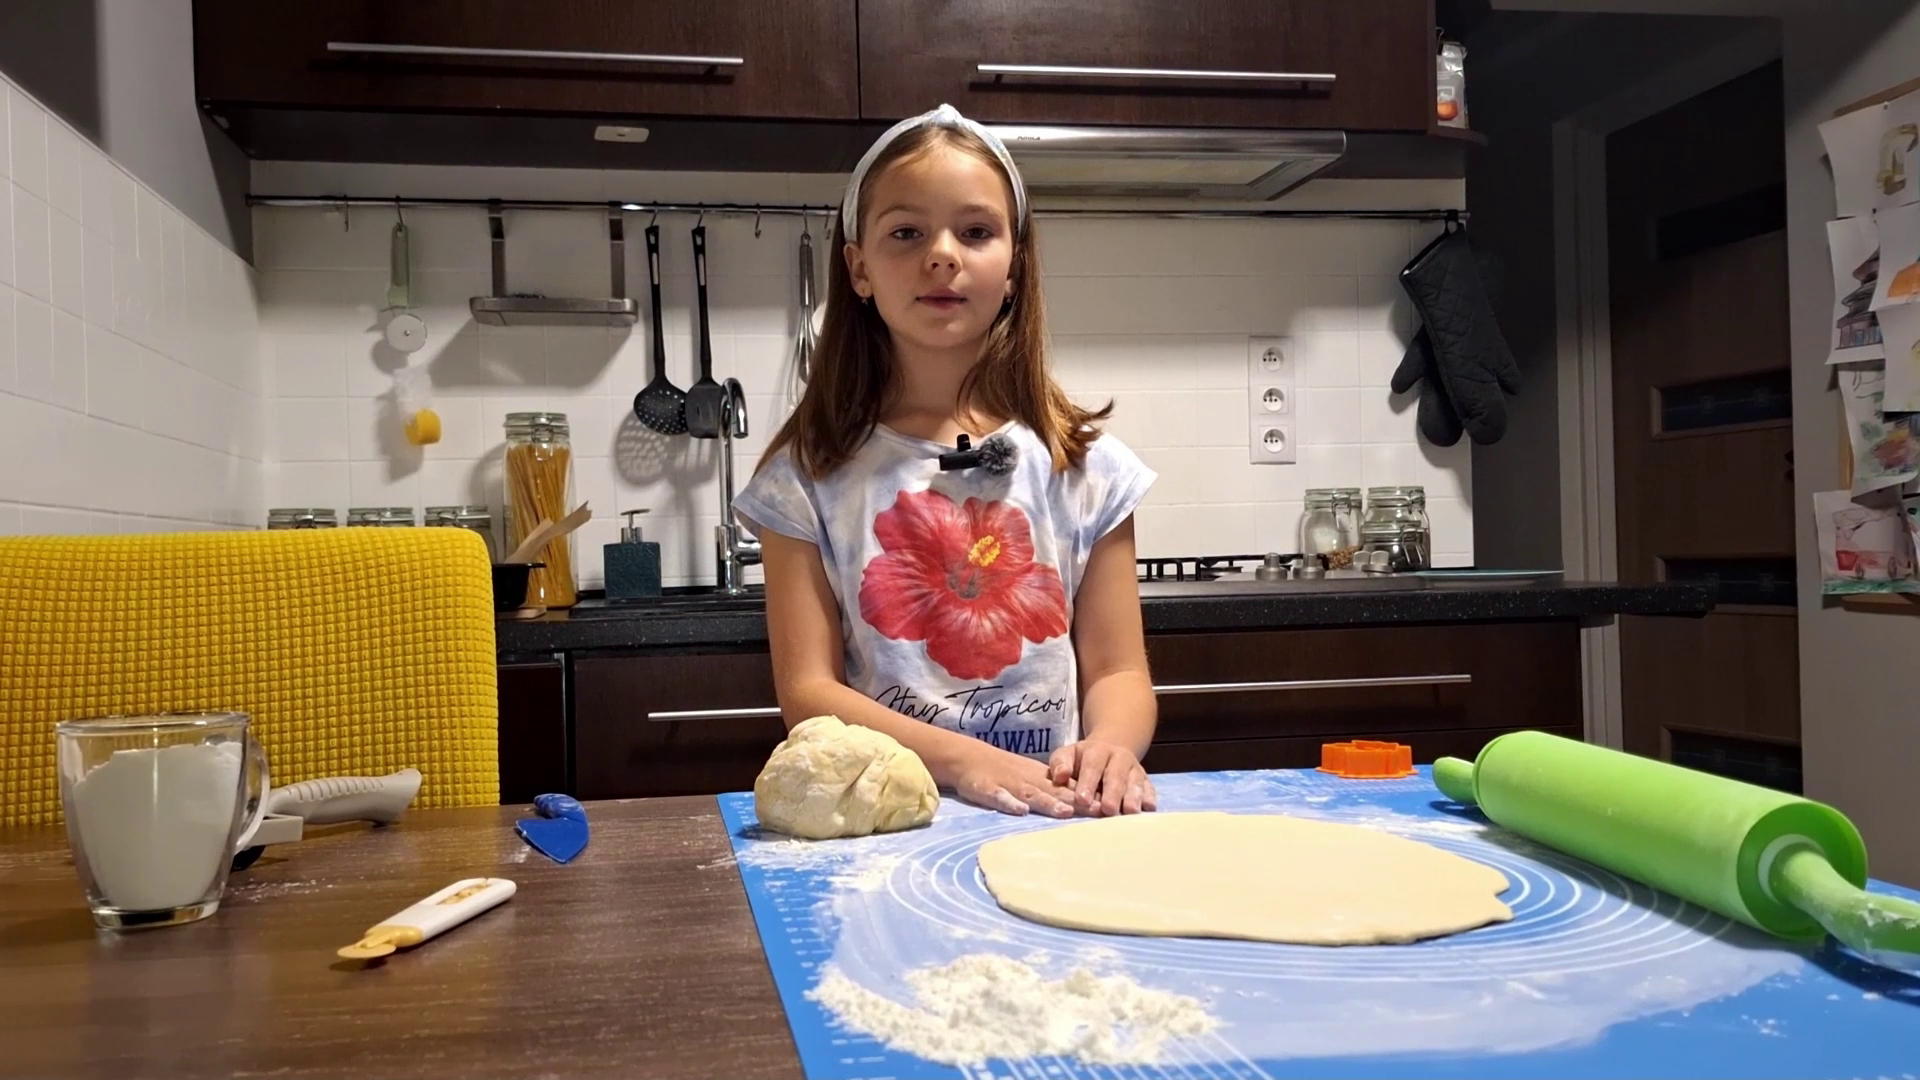
Take one part and roll it out with a rolling pin into a thin layer about 4 mm thick ( 1/6 inch). This will be the pie base.
Take a baking tray, preferably with high sides, since the filling might spill a little. Line it with parchment paper and lightly grease it with sunflower oil.
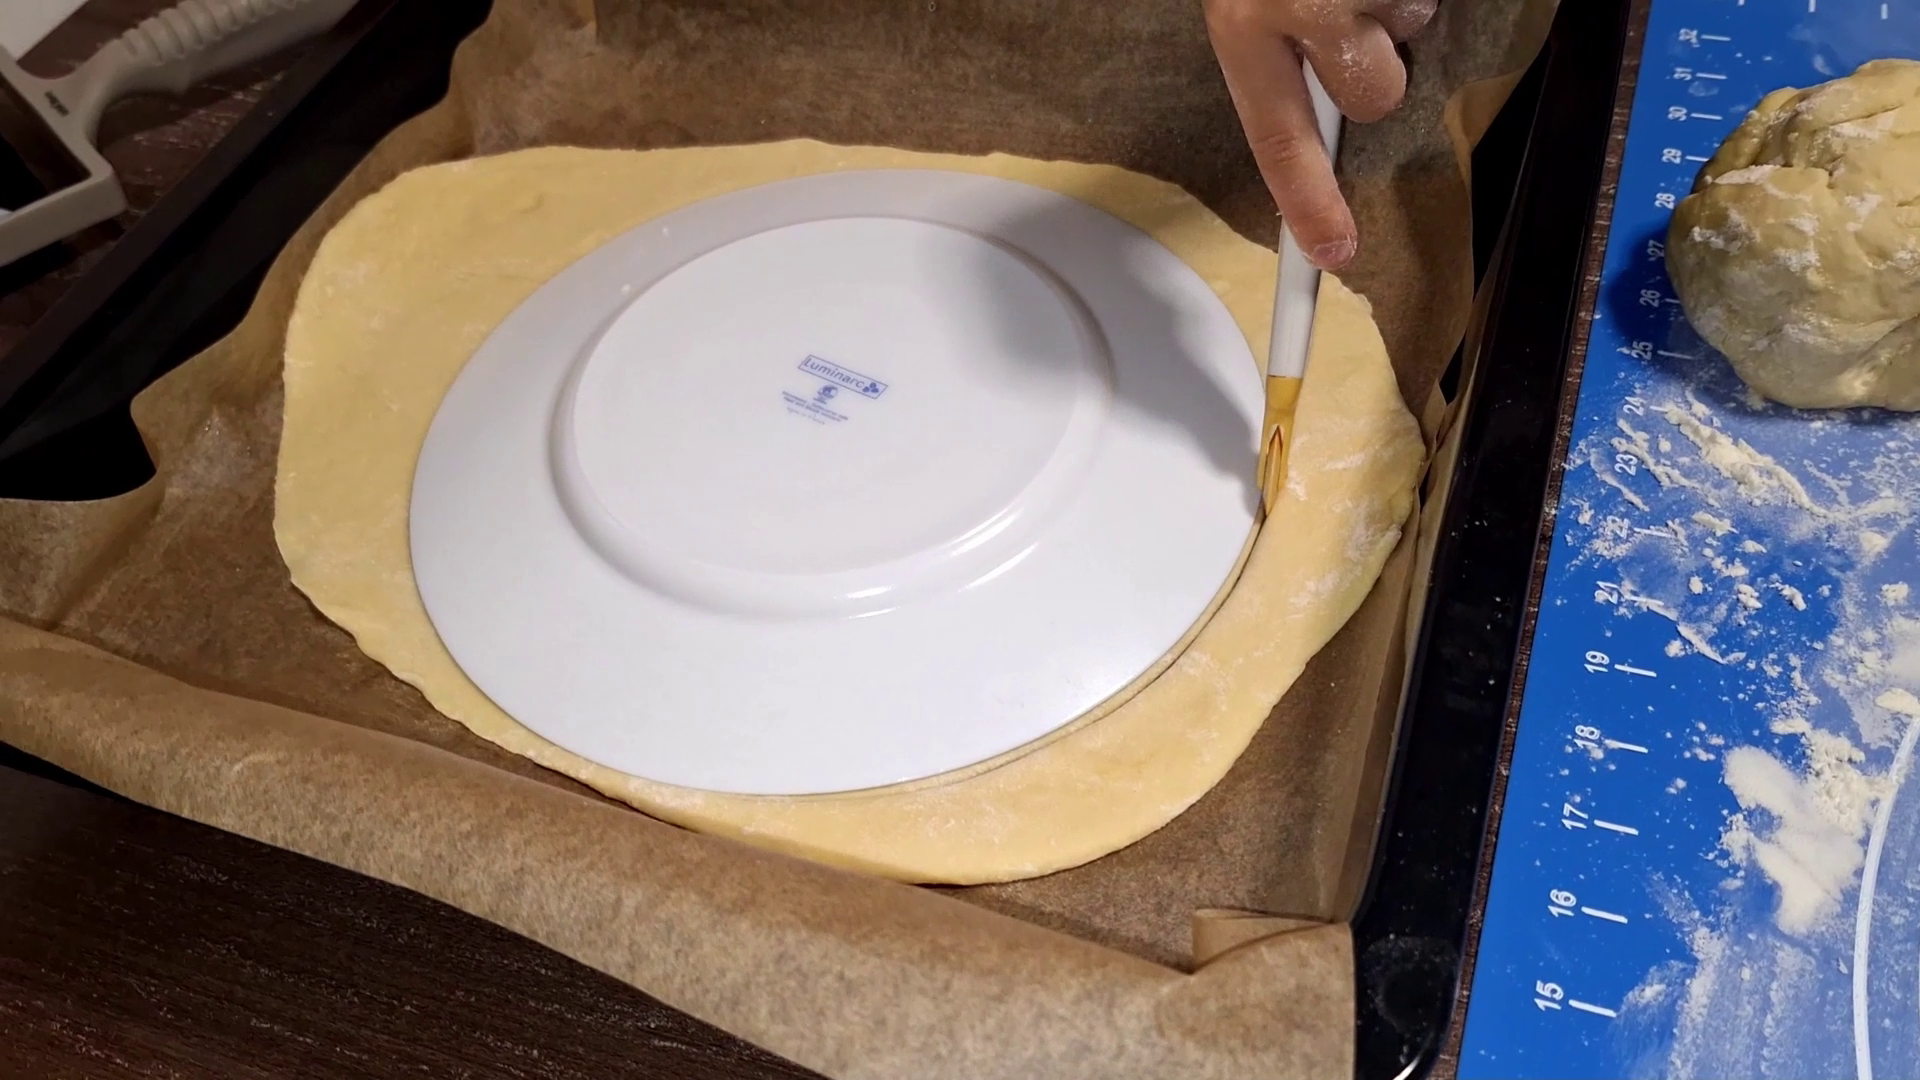
Transfer the rolled-out dough onto the tray. Take a large plate — its size and shape will determine the size and shape of your pie — and use a plastic knife to cut out the pie base.
Tip: If you cut the circle from the dough first and then try to transfer it to the tray, it may deform and lose its nice shape.
Also, if you use a regular sharp knife to cut the dough on the tray, you might scratch the tray — be careful!
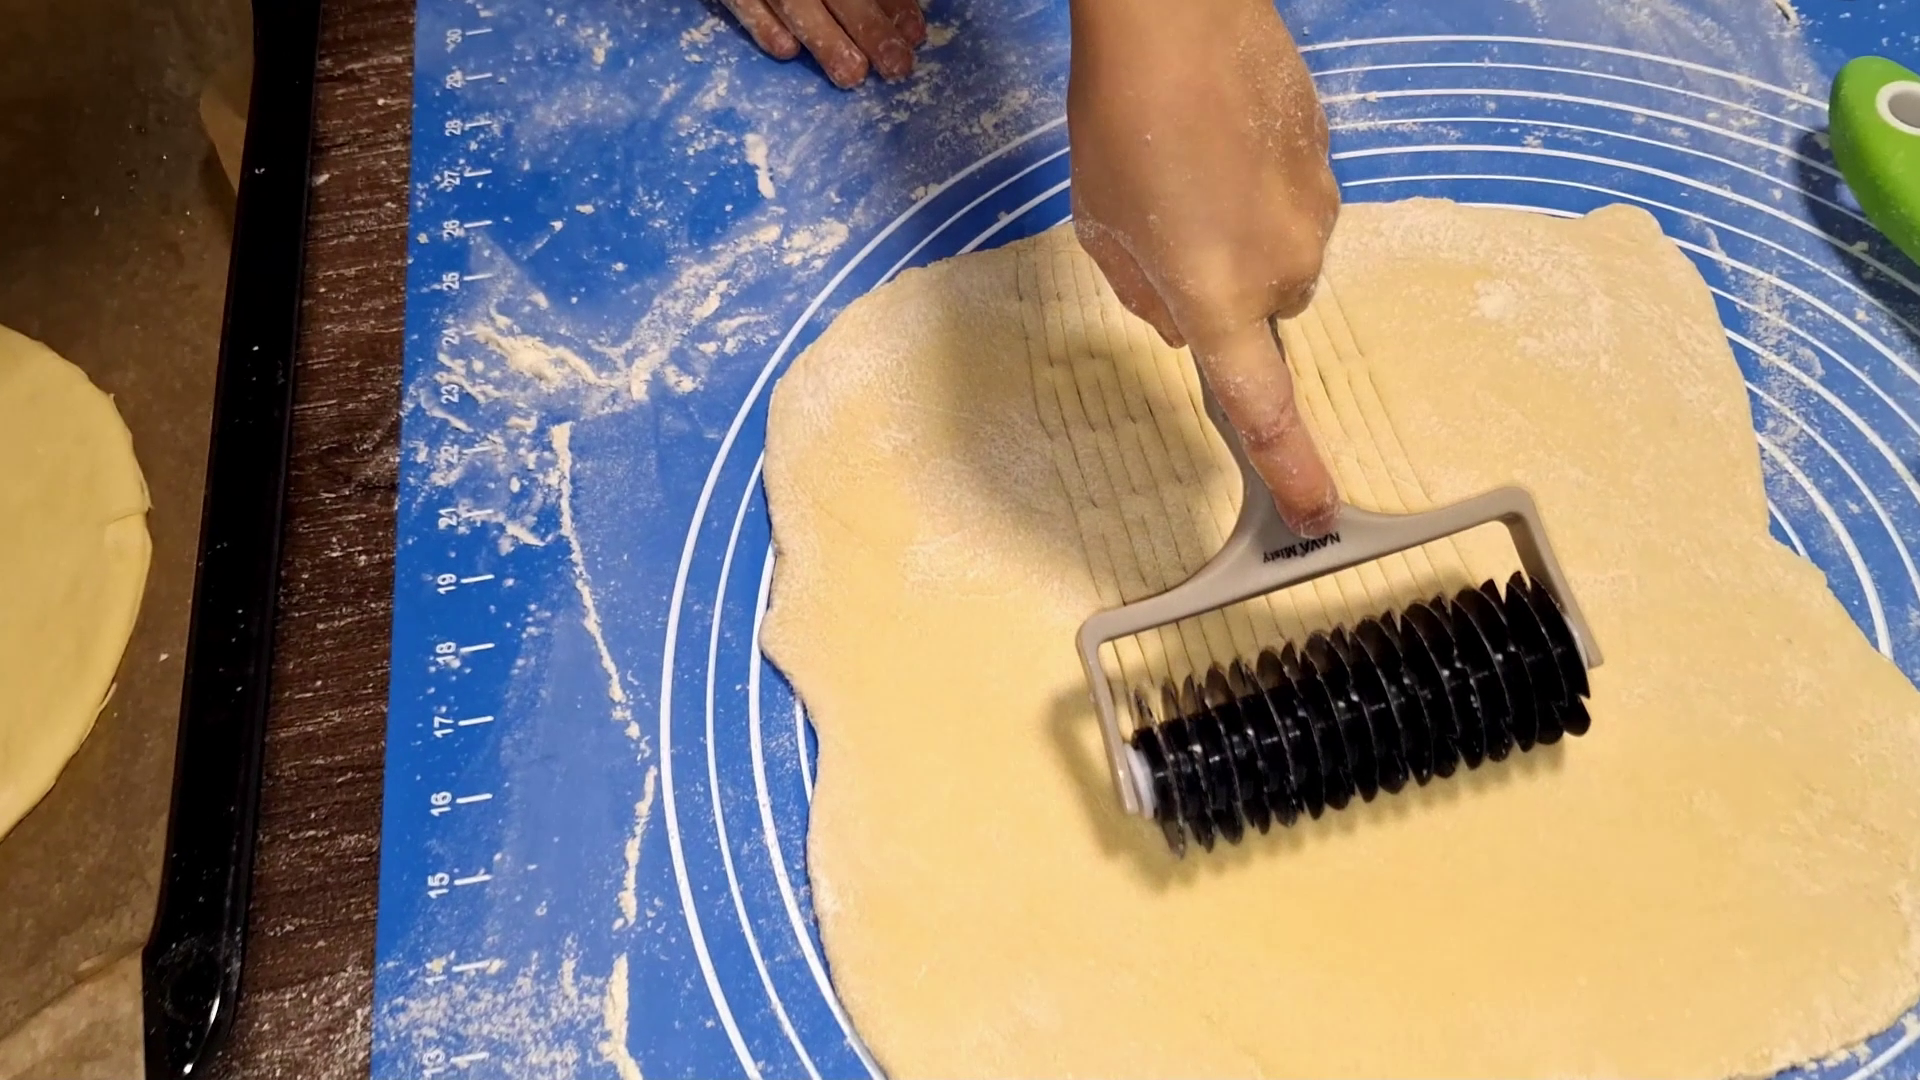
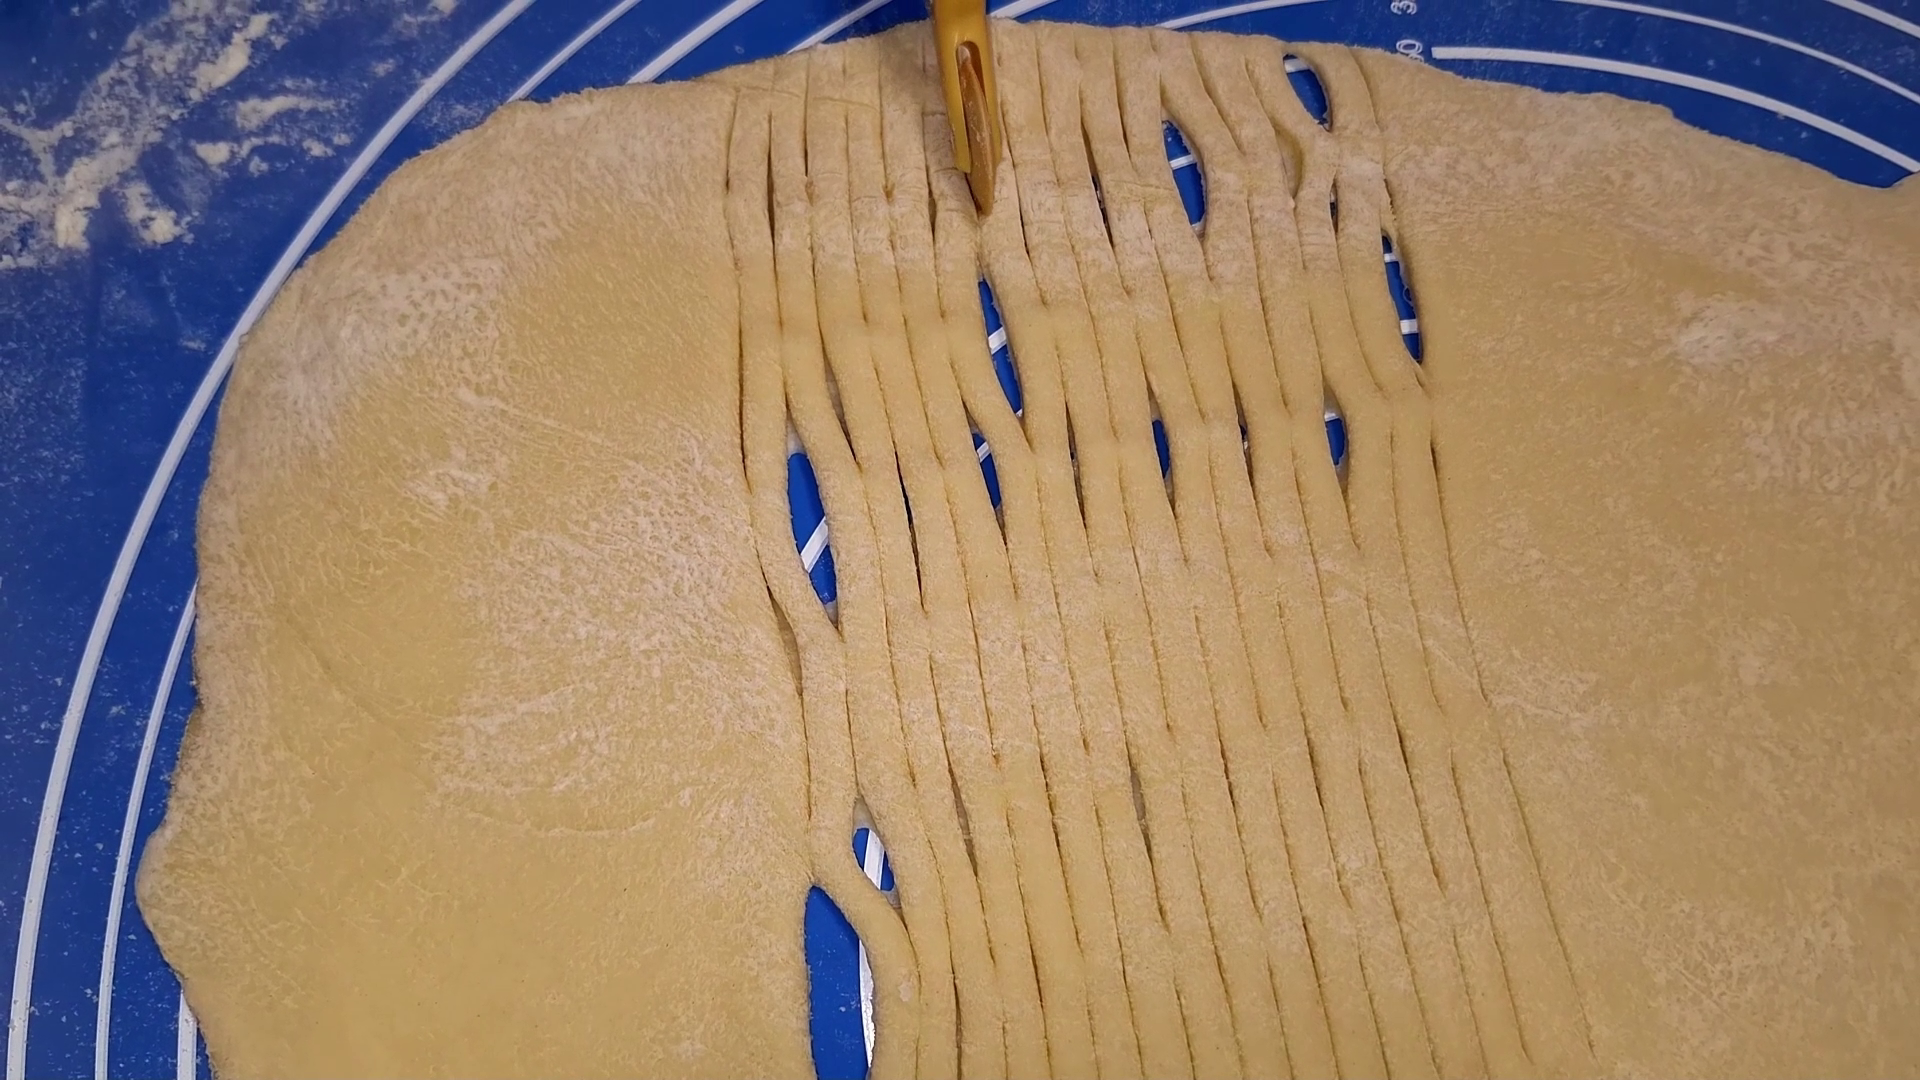
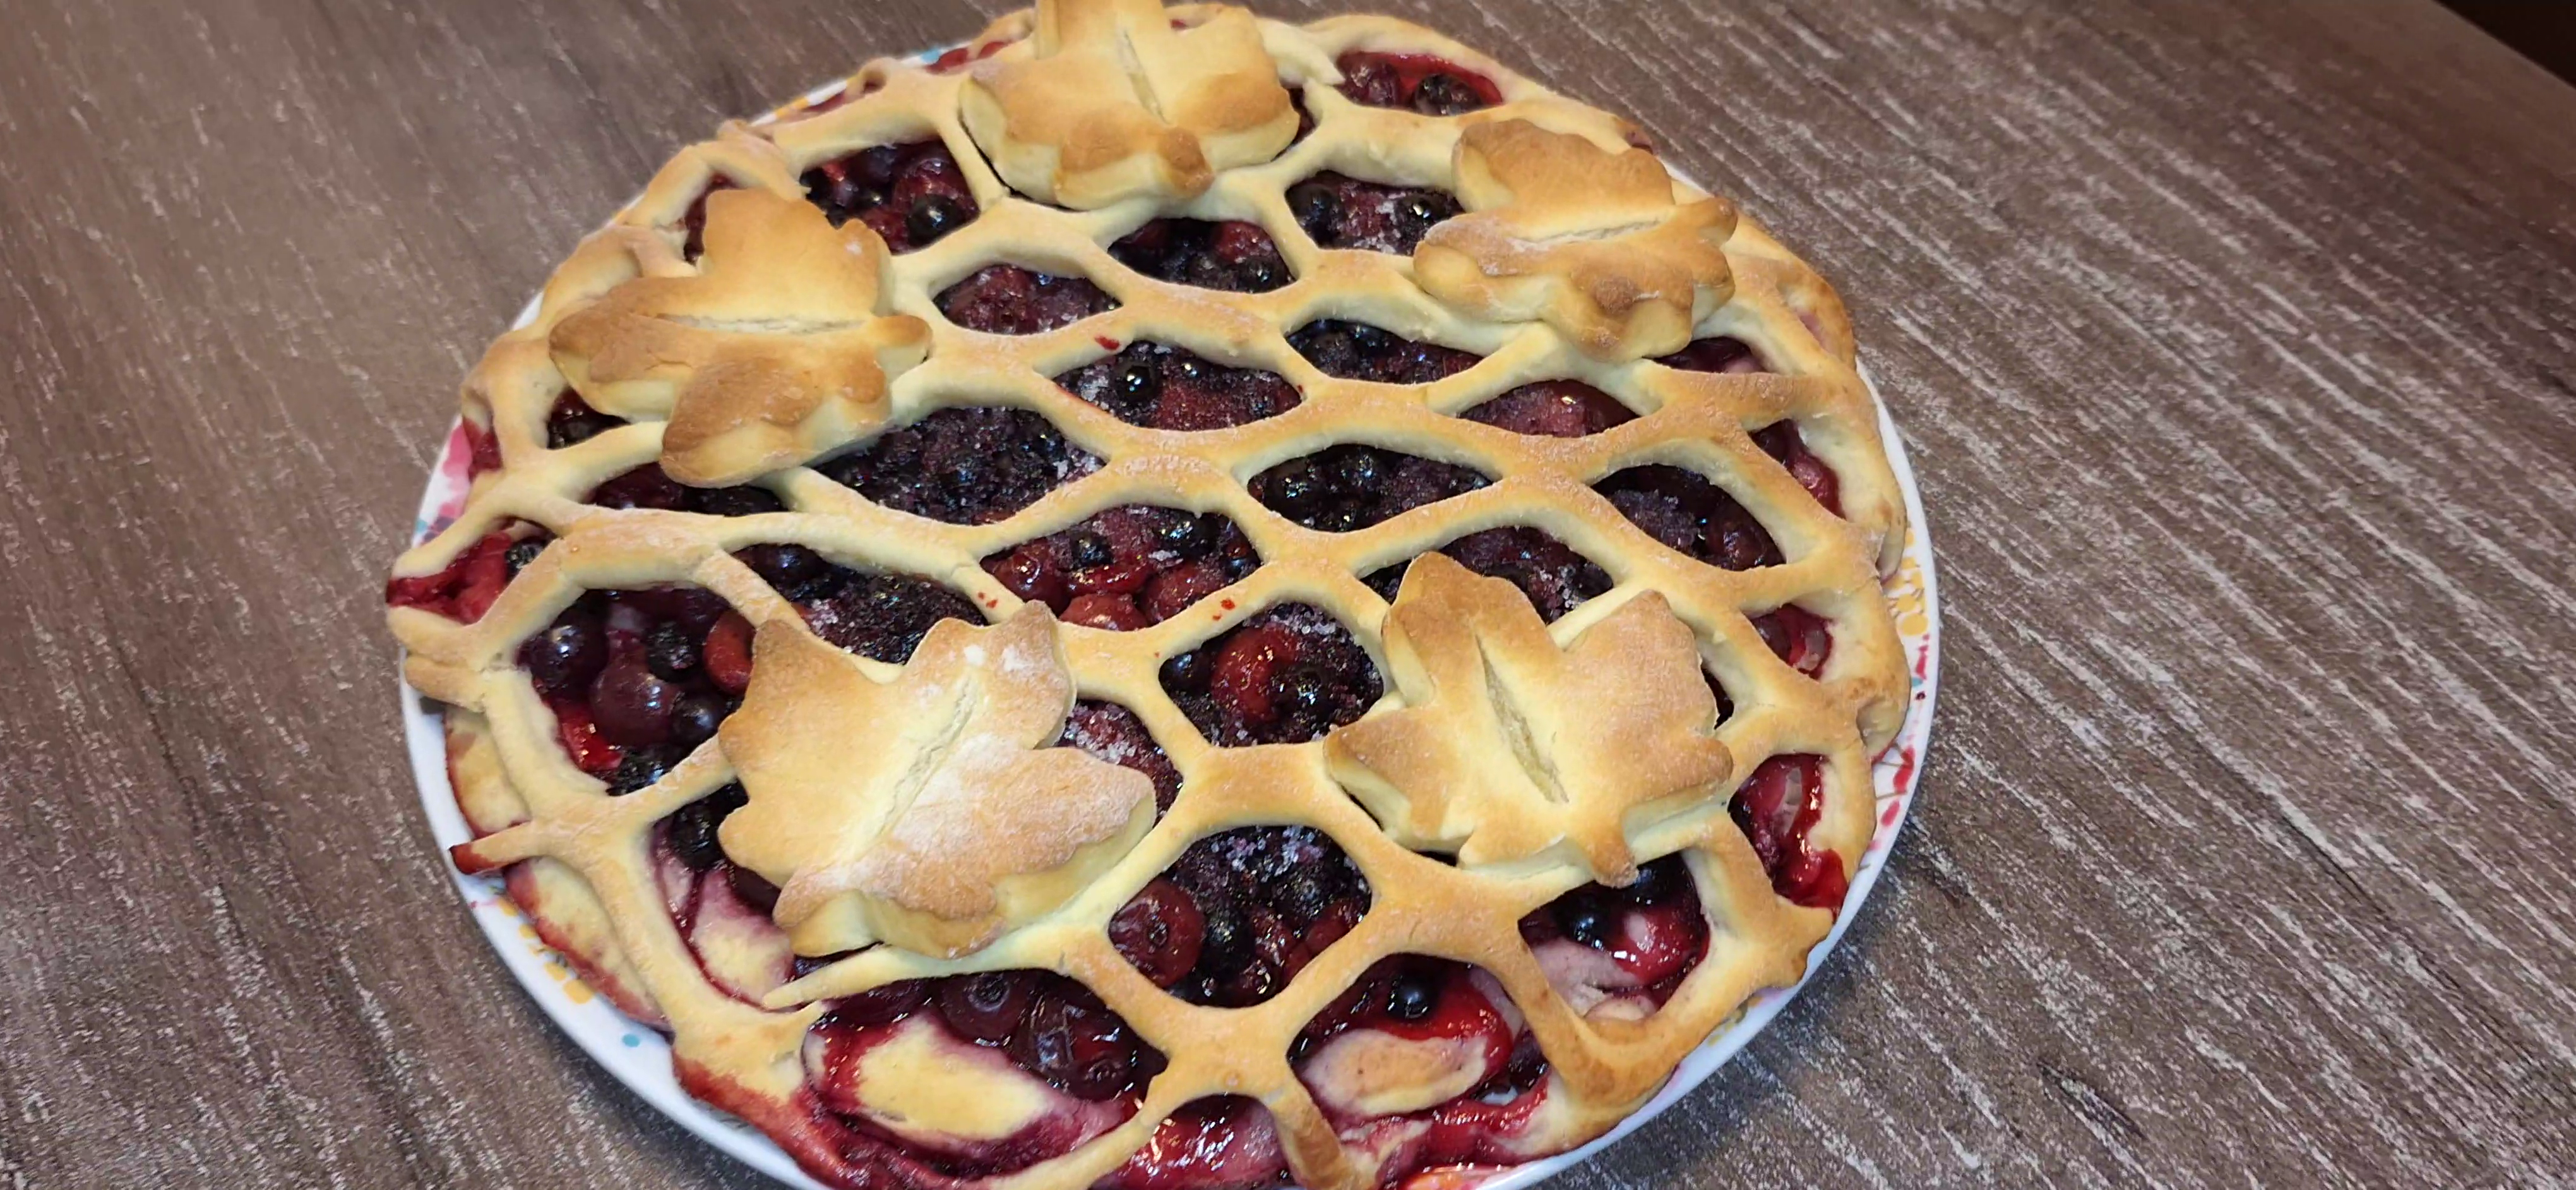
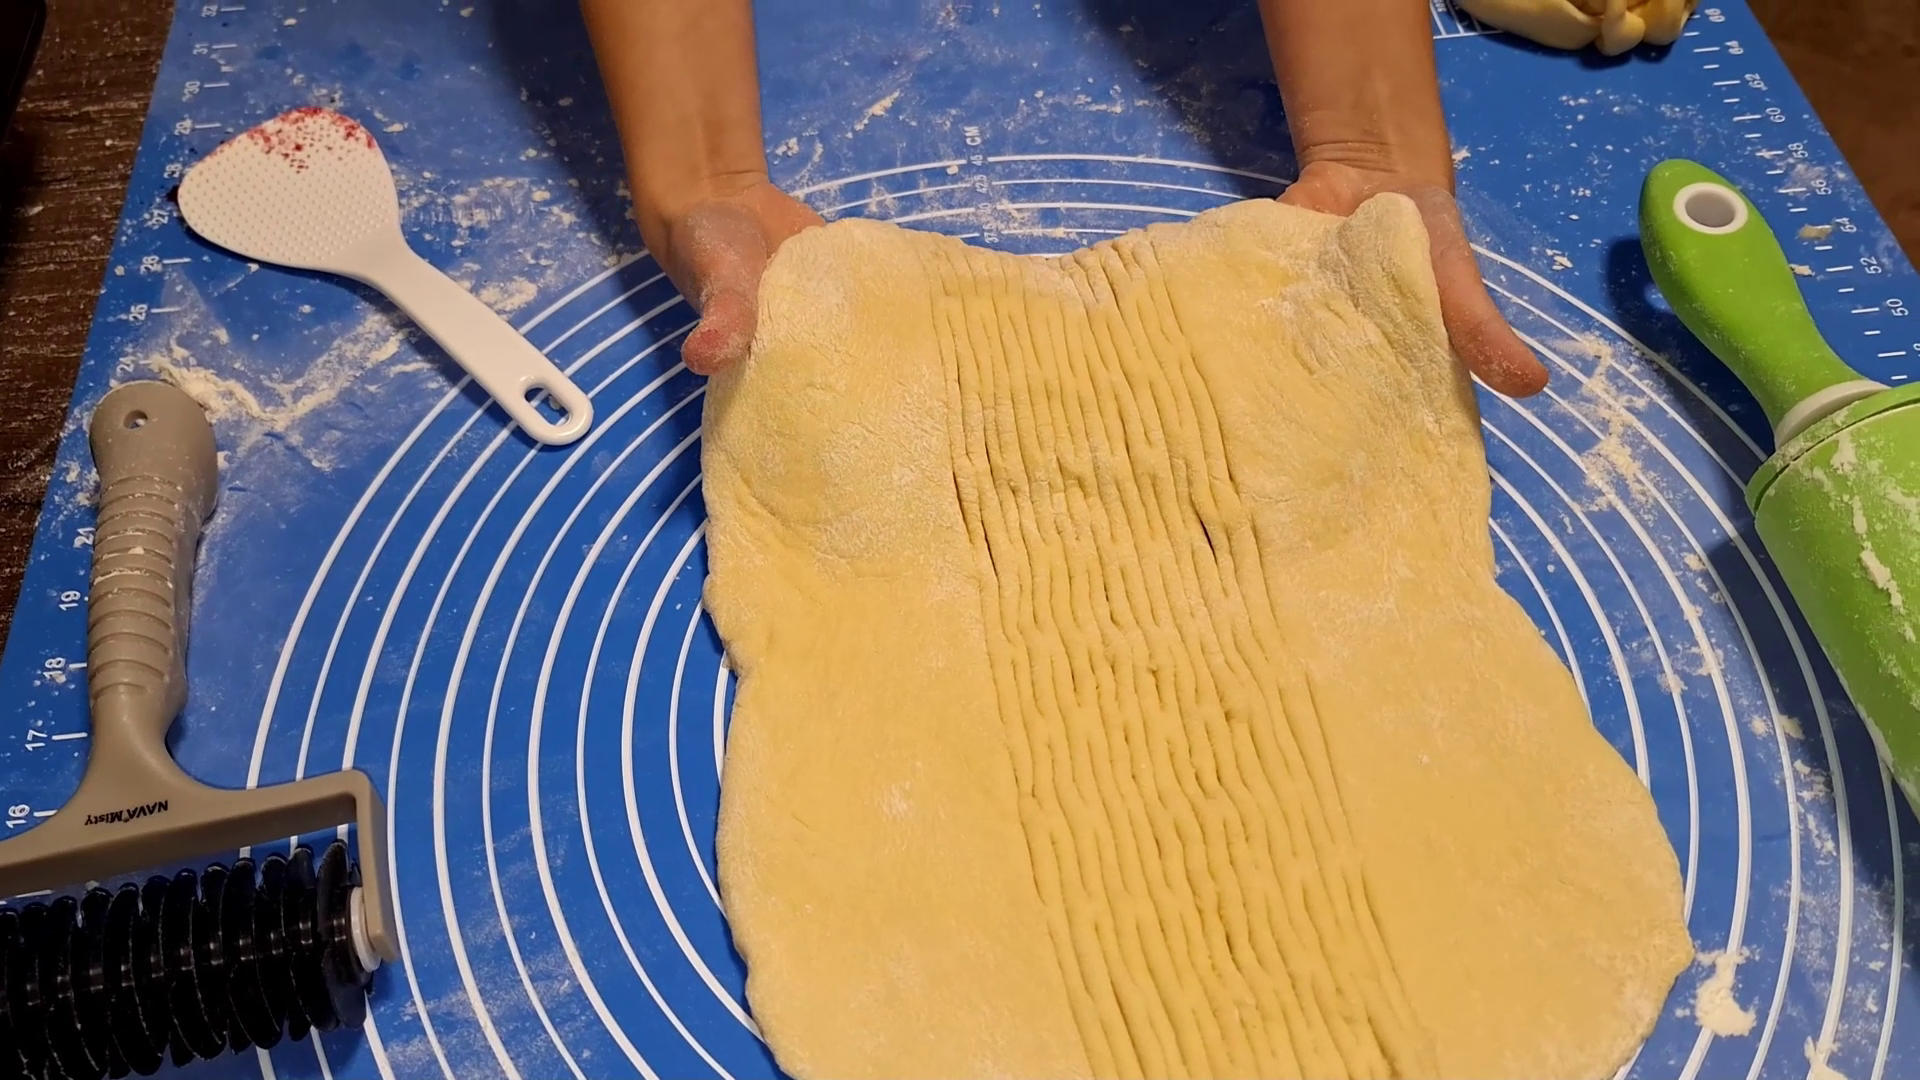
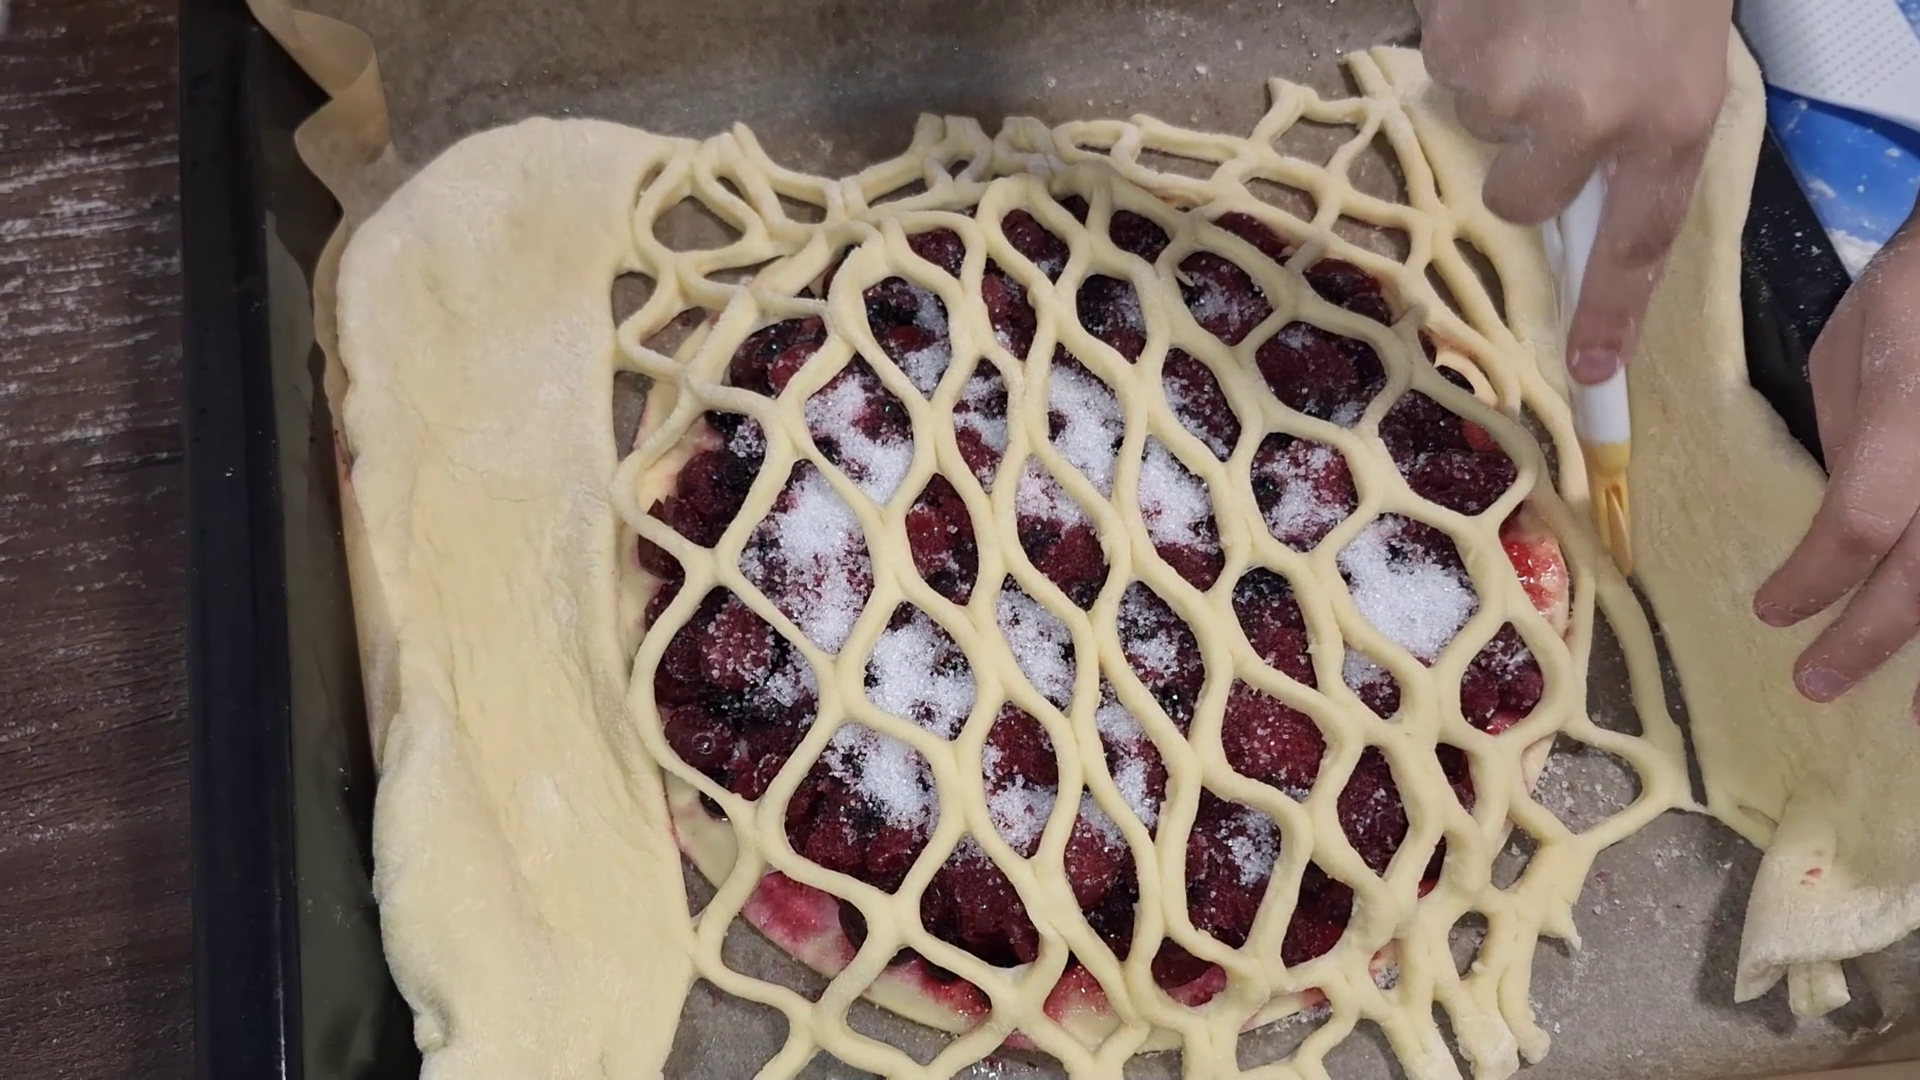
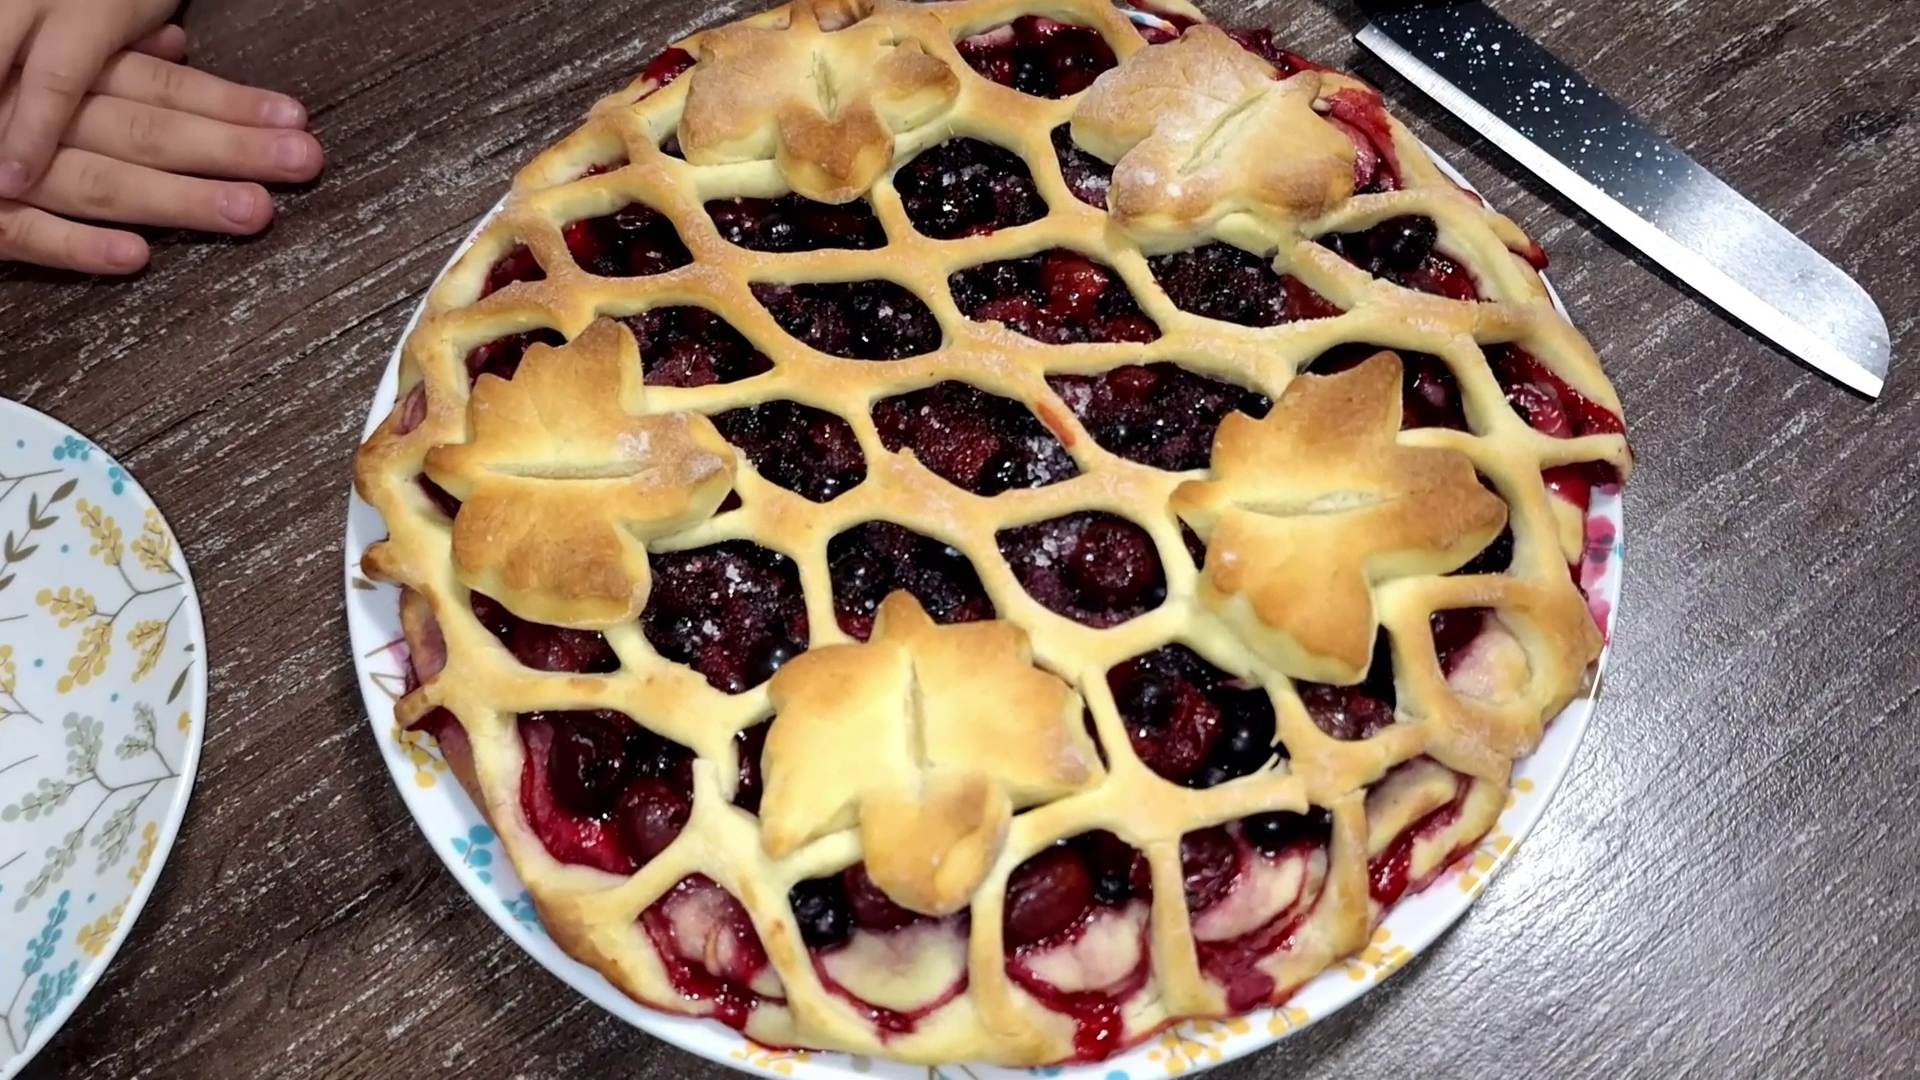
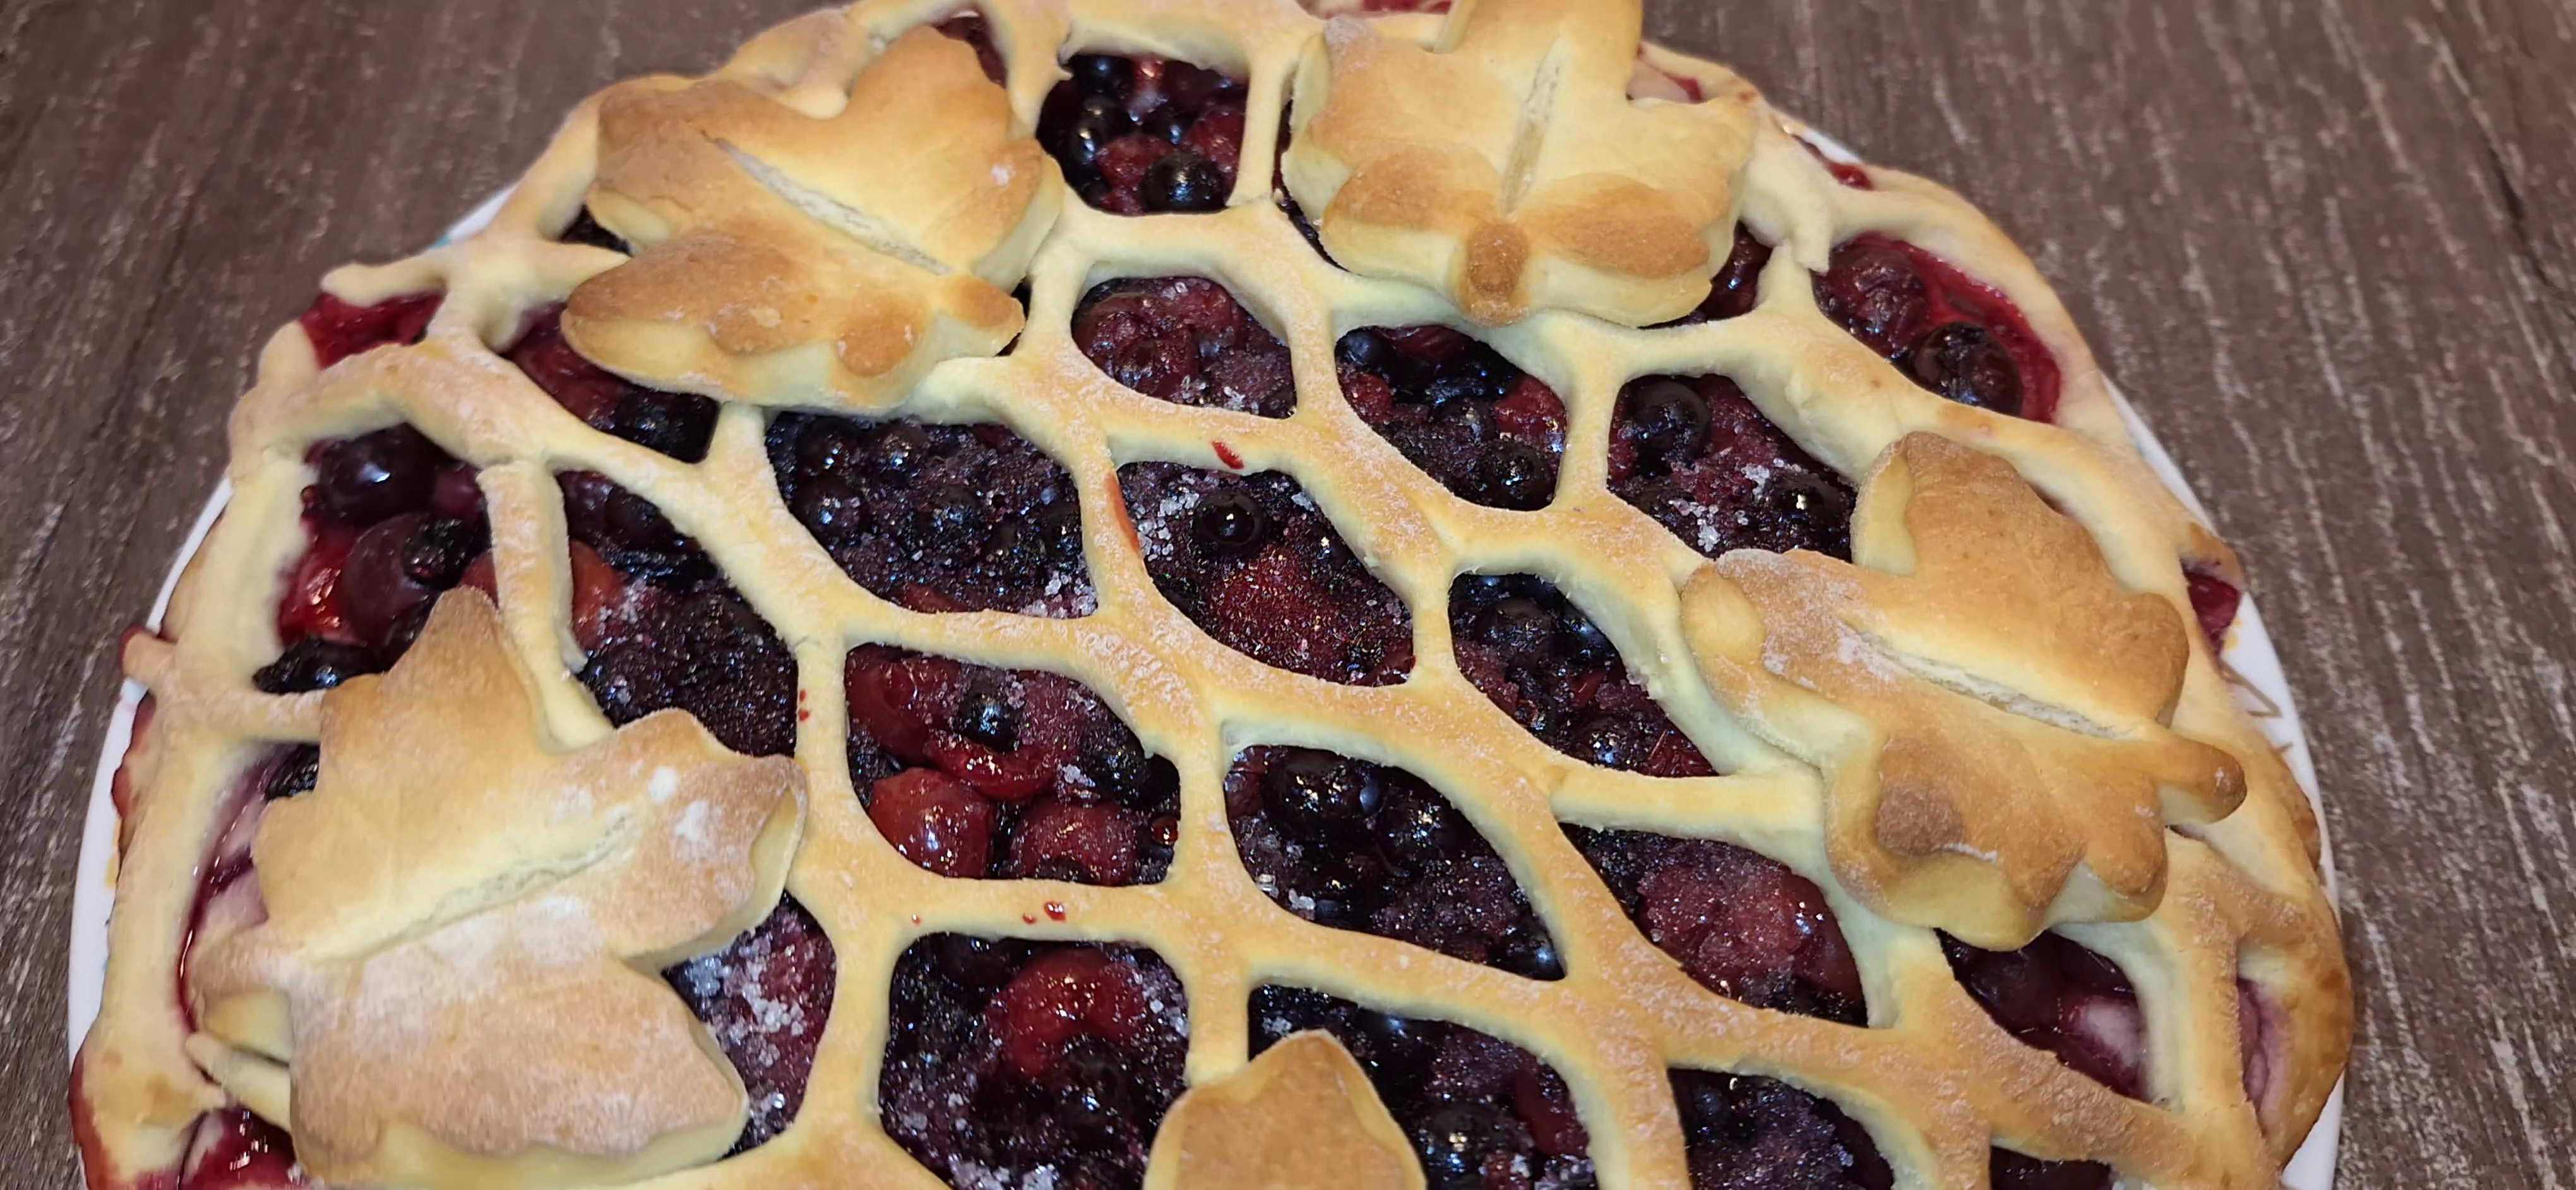
Next, it’s best to prepare the top of the pie. Roll out the second piece of dough just like the first. For this pie, I like to make a lattice using a special cutter (as shown in the photo).
If you don’t have one, you can cut strips of dough about 1–1.5 cm wide — that’s roughly the width of a finger, or about ½ inch — and lay them across the pie in a crisscross pattern.
For this pie, the top should be as open as possible, because extra moisture will either spill onto the tray or evaporate during baking.
If you’re using a cutter like mine, I recommend trimming any uncut spots with a regular knife, as shown in the photo.
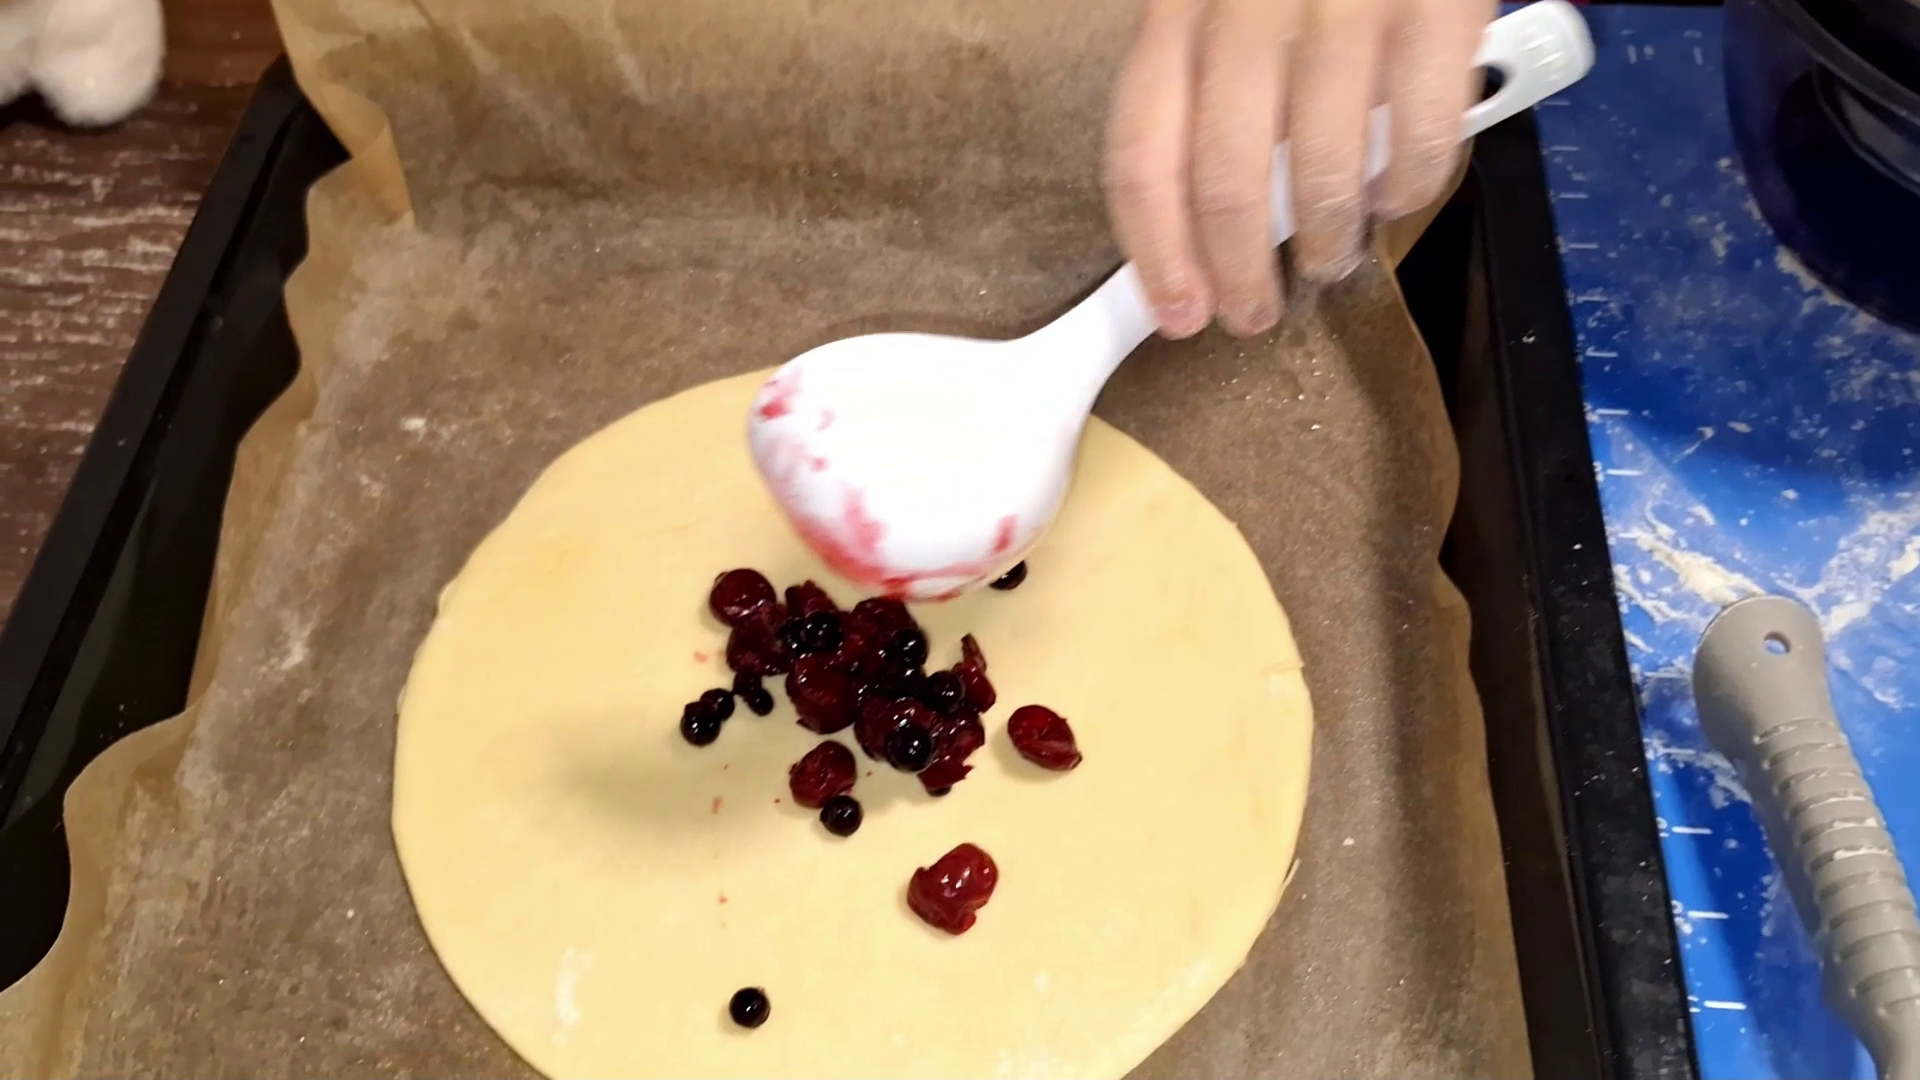
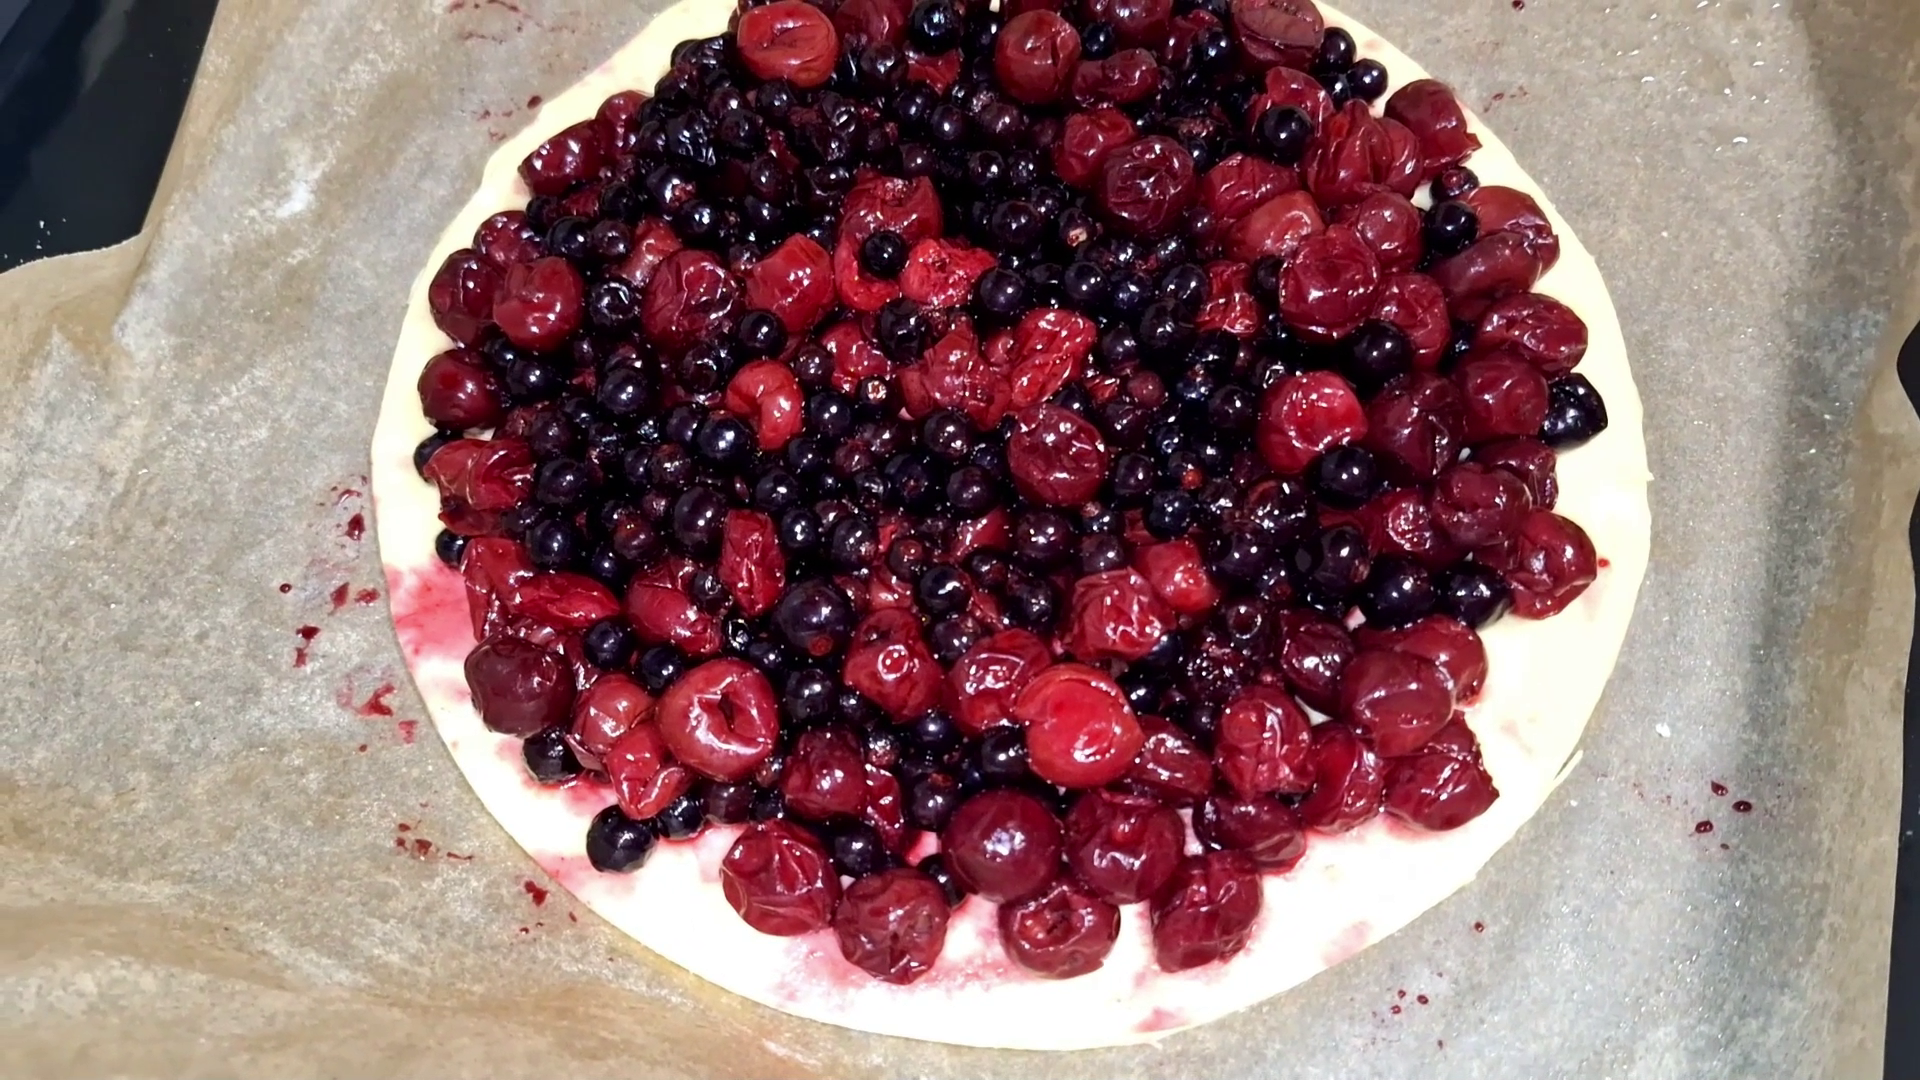
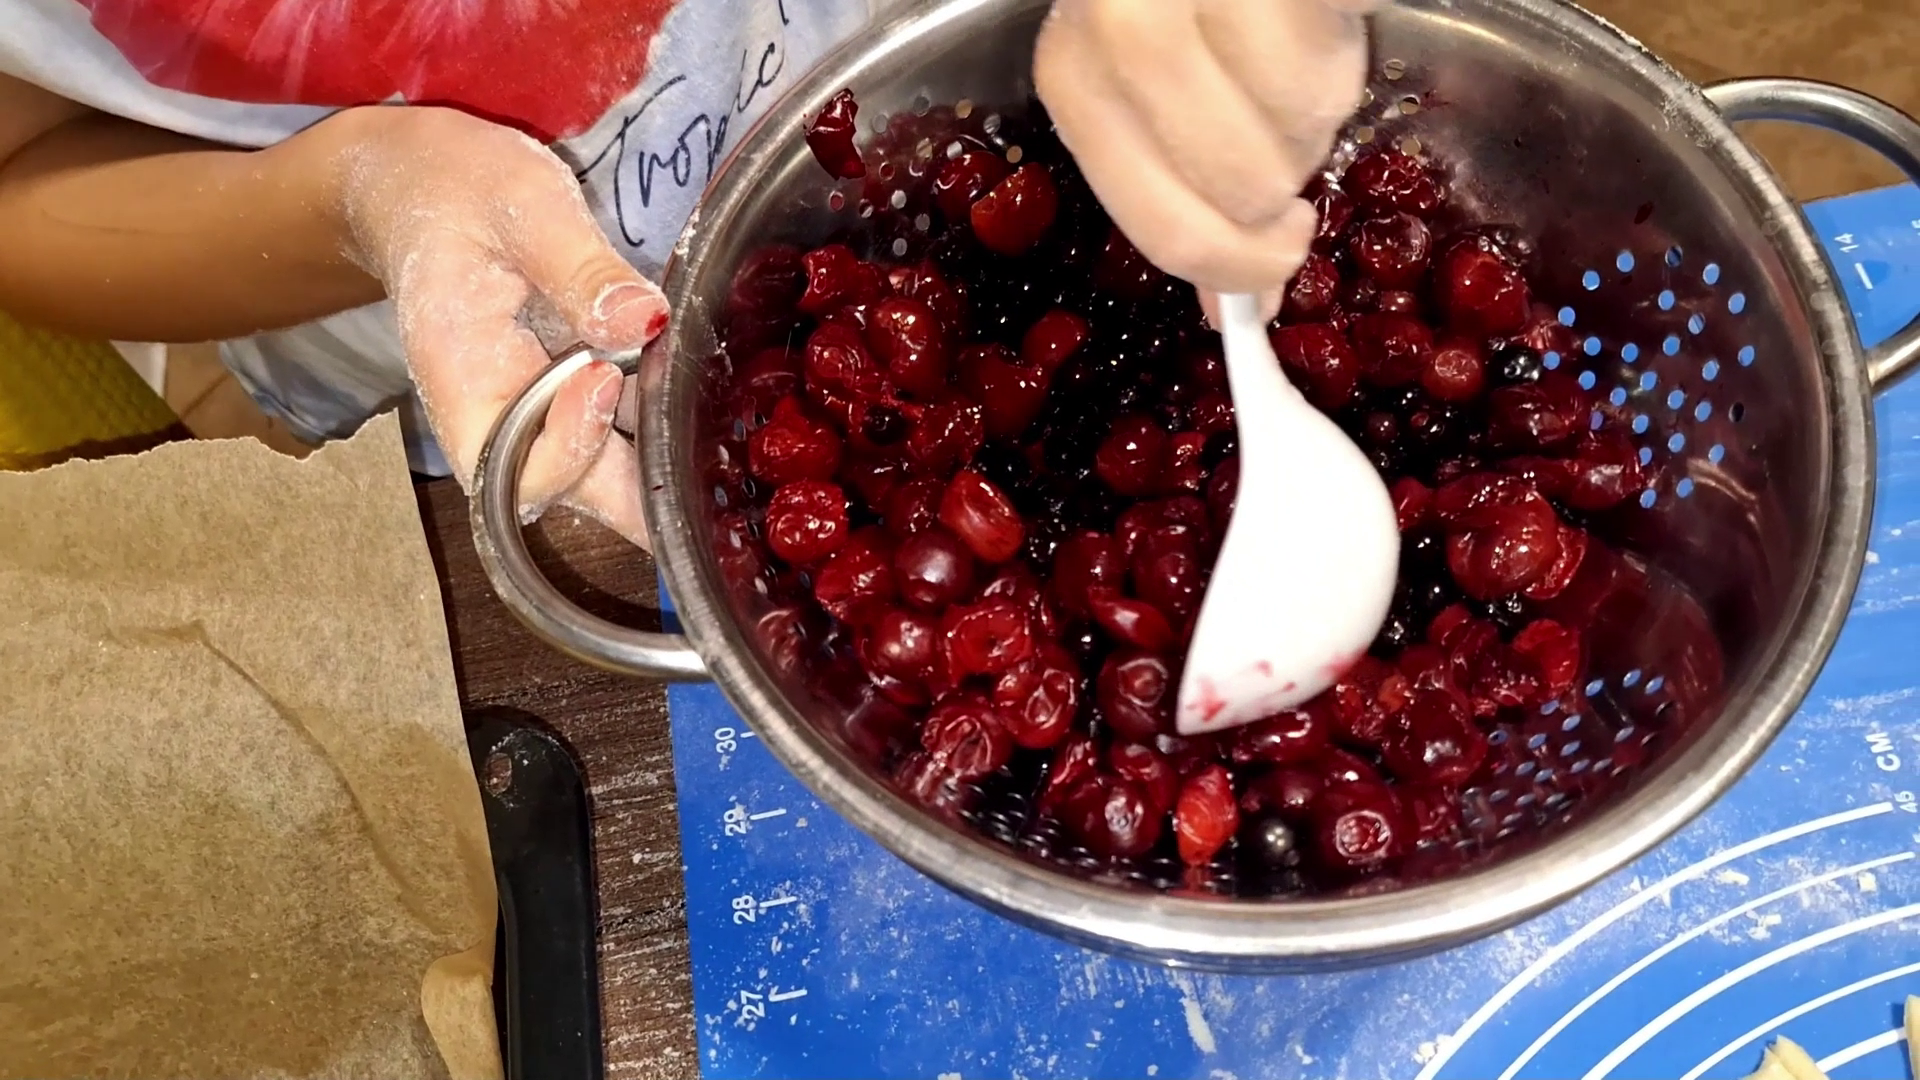
Take the fully thawed berries. You can mix them with sugar first — this is better for those who don’t like tartness in their pies — and then place the berries on the pie base.
Or, you can place the berries on the base first and sprinkle sugar on top. This creates a fun effect: tart berries on the bottom, sweet berries on top. I like to do it this way.
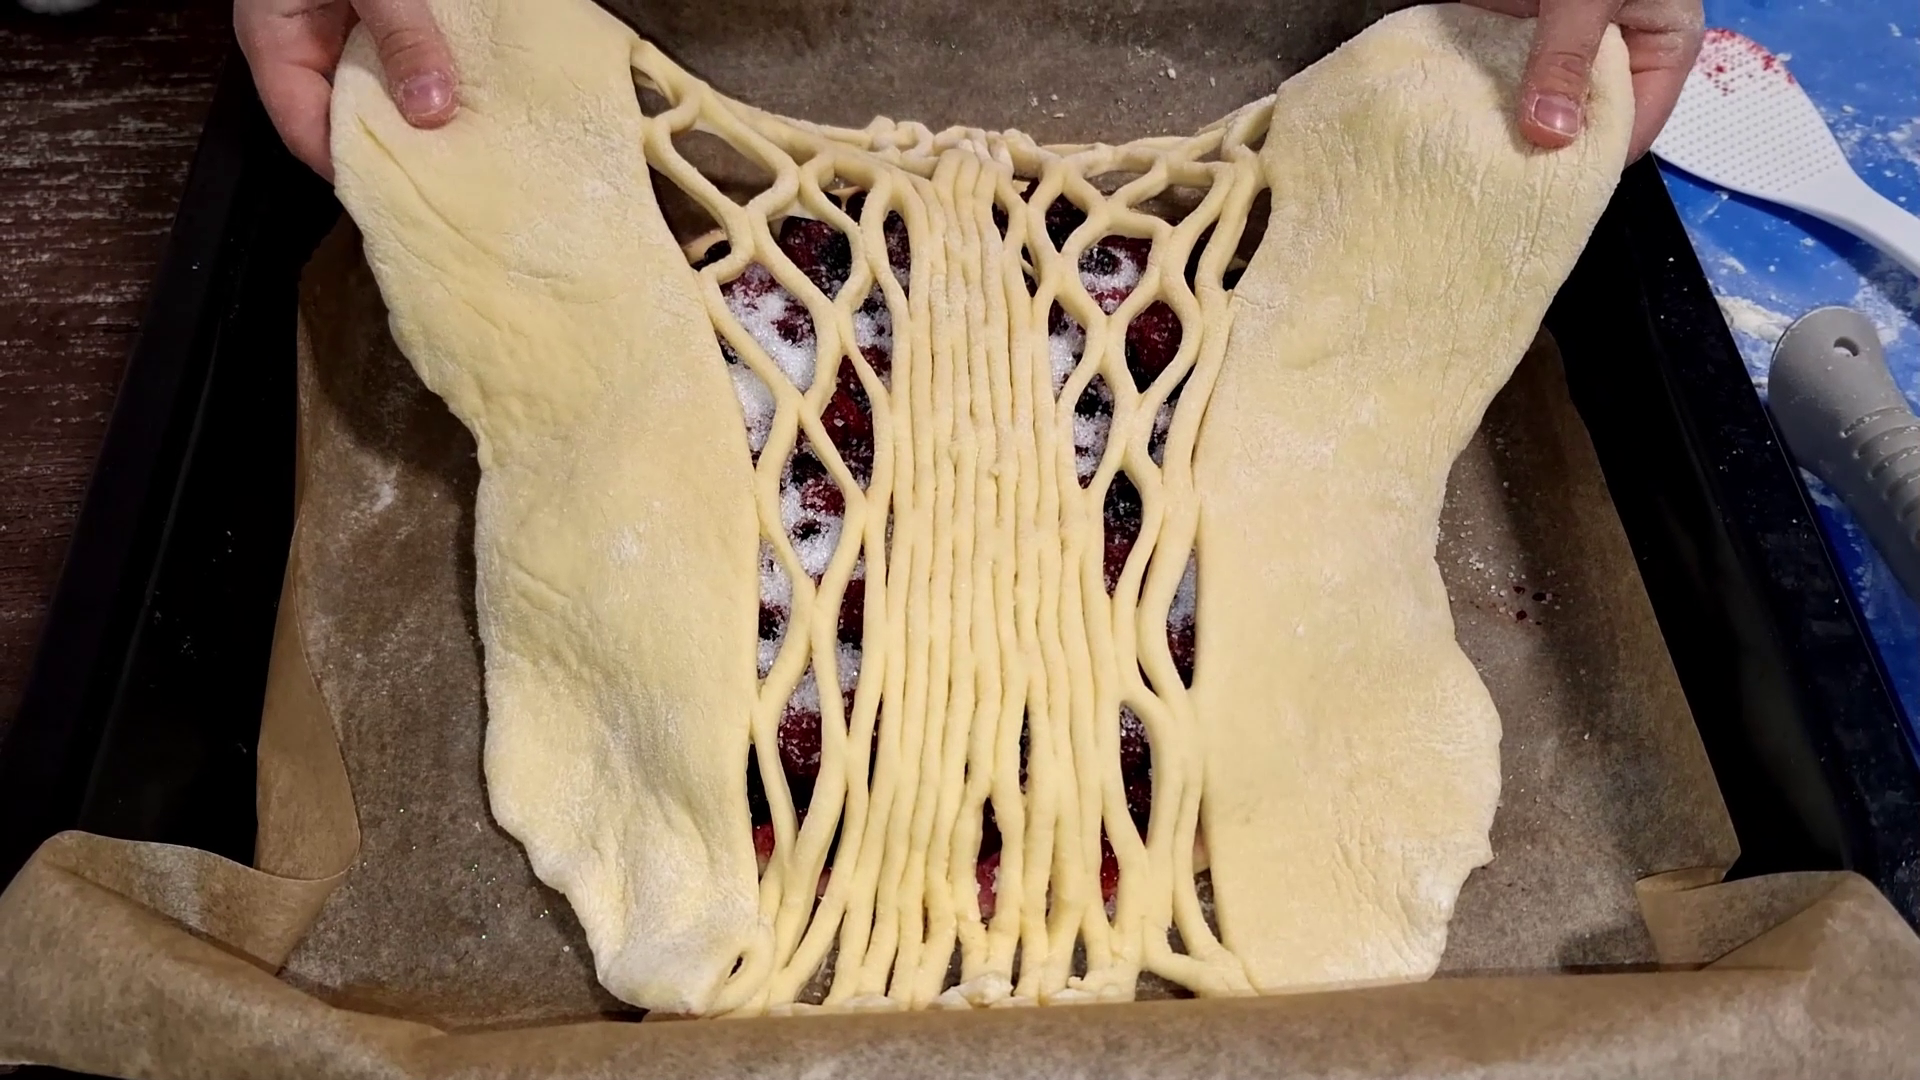
Cover the filling with the dough. If you’re using strips, lay them in a crisscross pattern. If you’re using a lattice, carefully place it on top and gently spread it out. Adjust as needed.
Trim off any excess dough
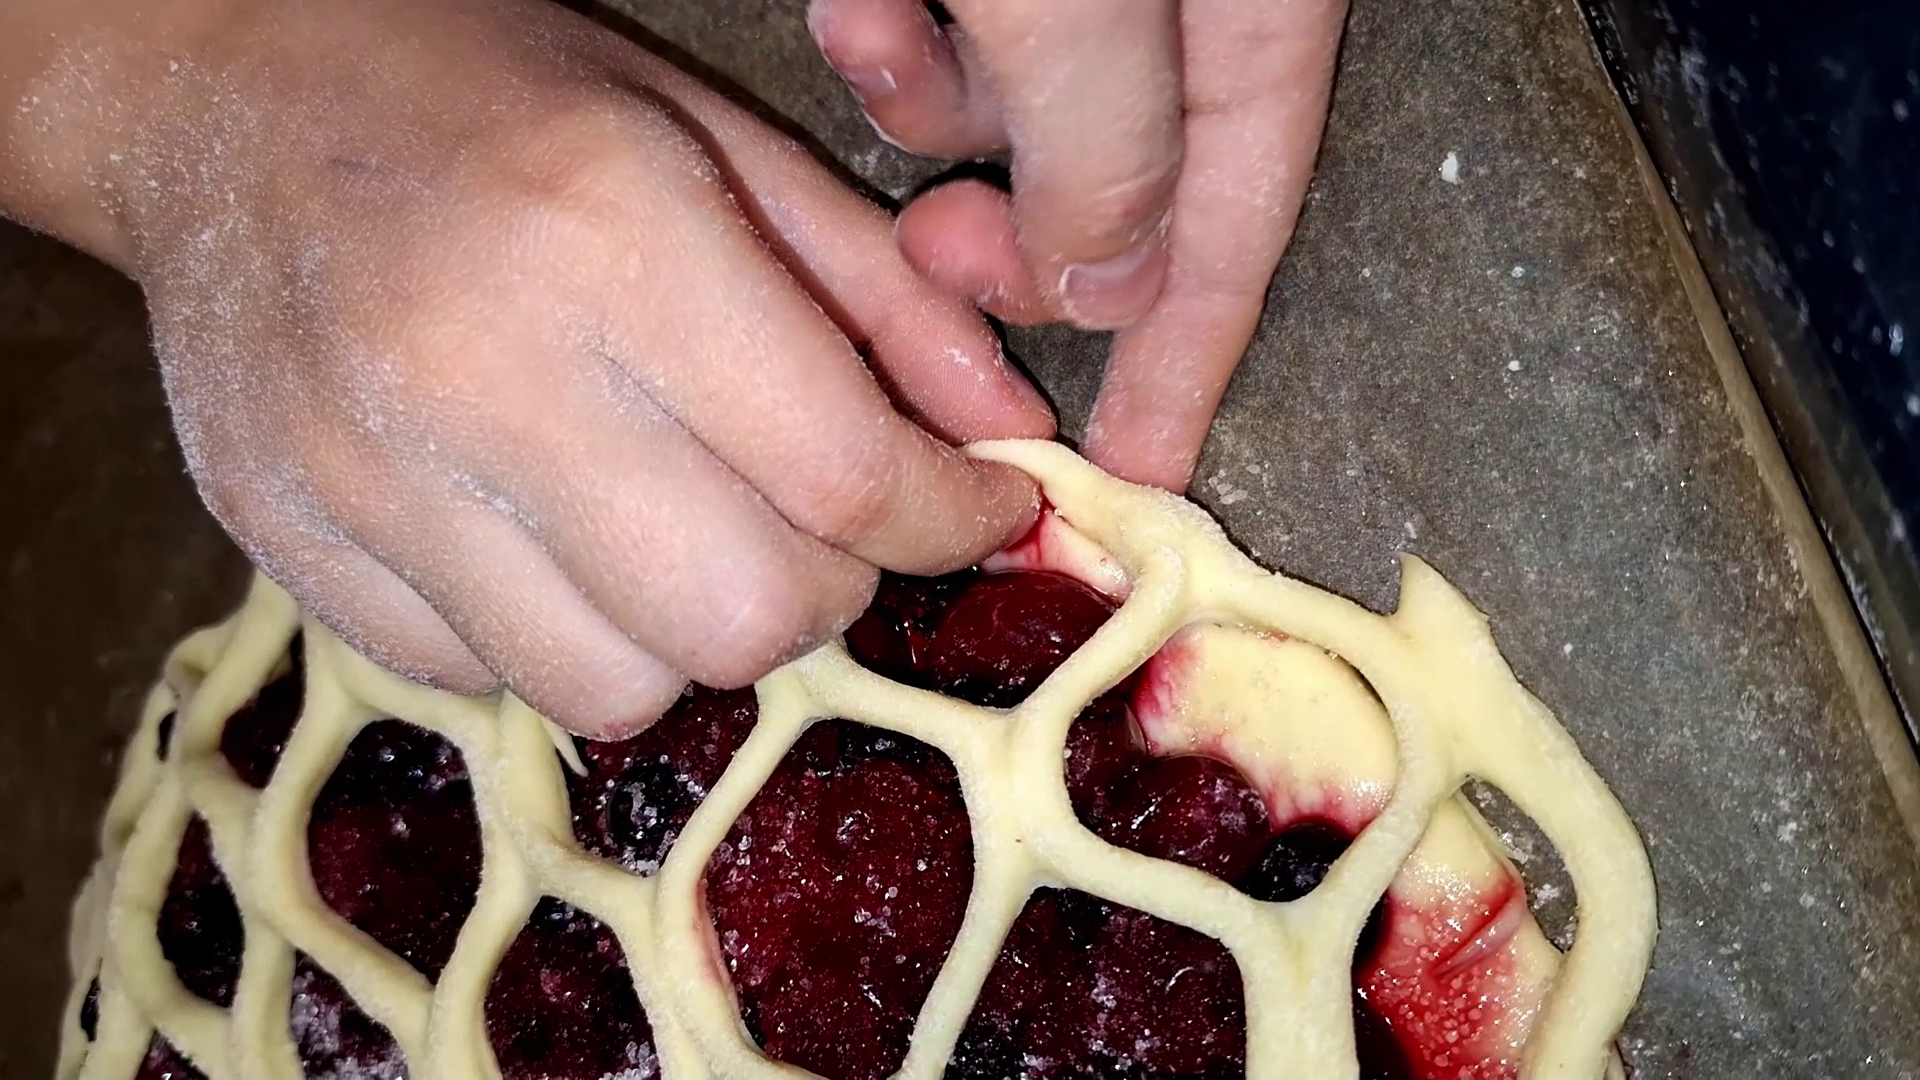
You need to attach the top of the pie to the base. To do this, tuck the edges of the top dough under the base and press gently with your fingers.

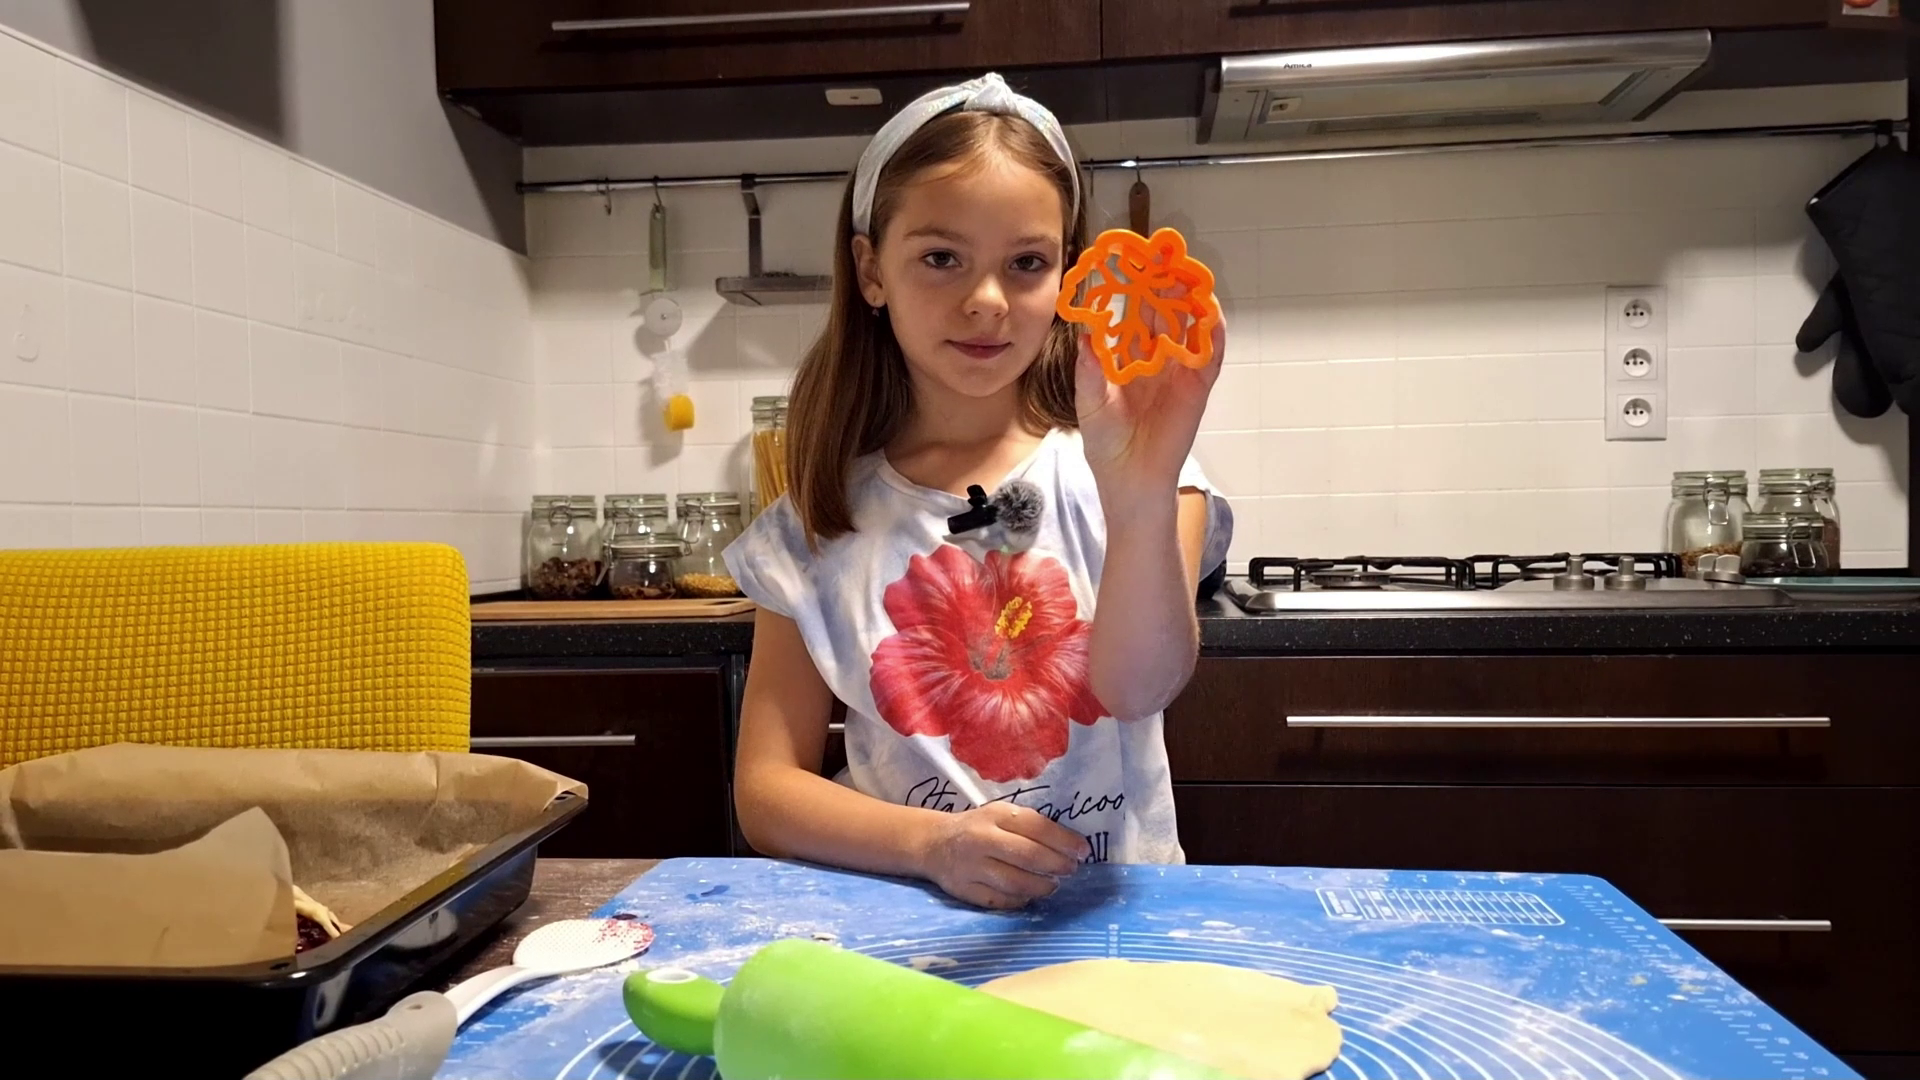
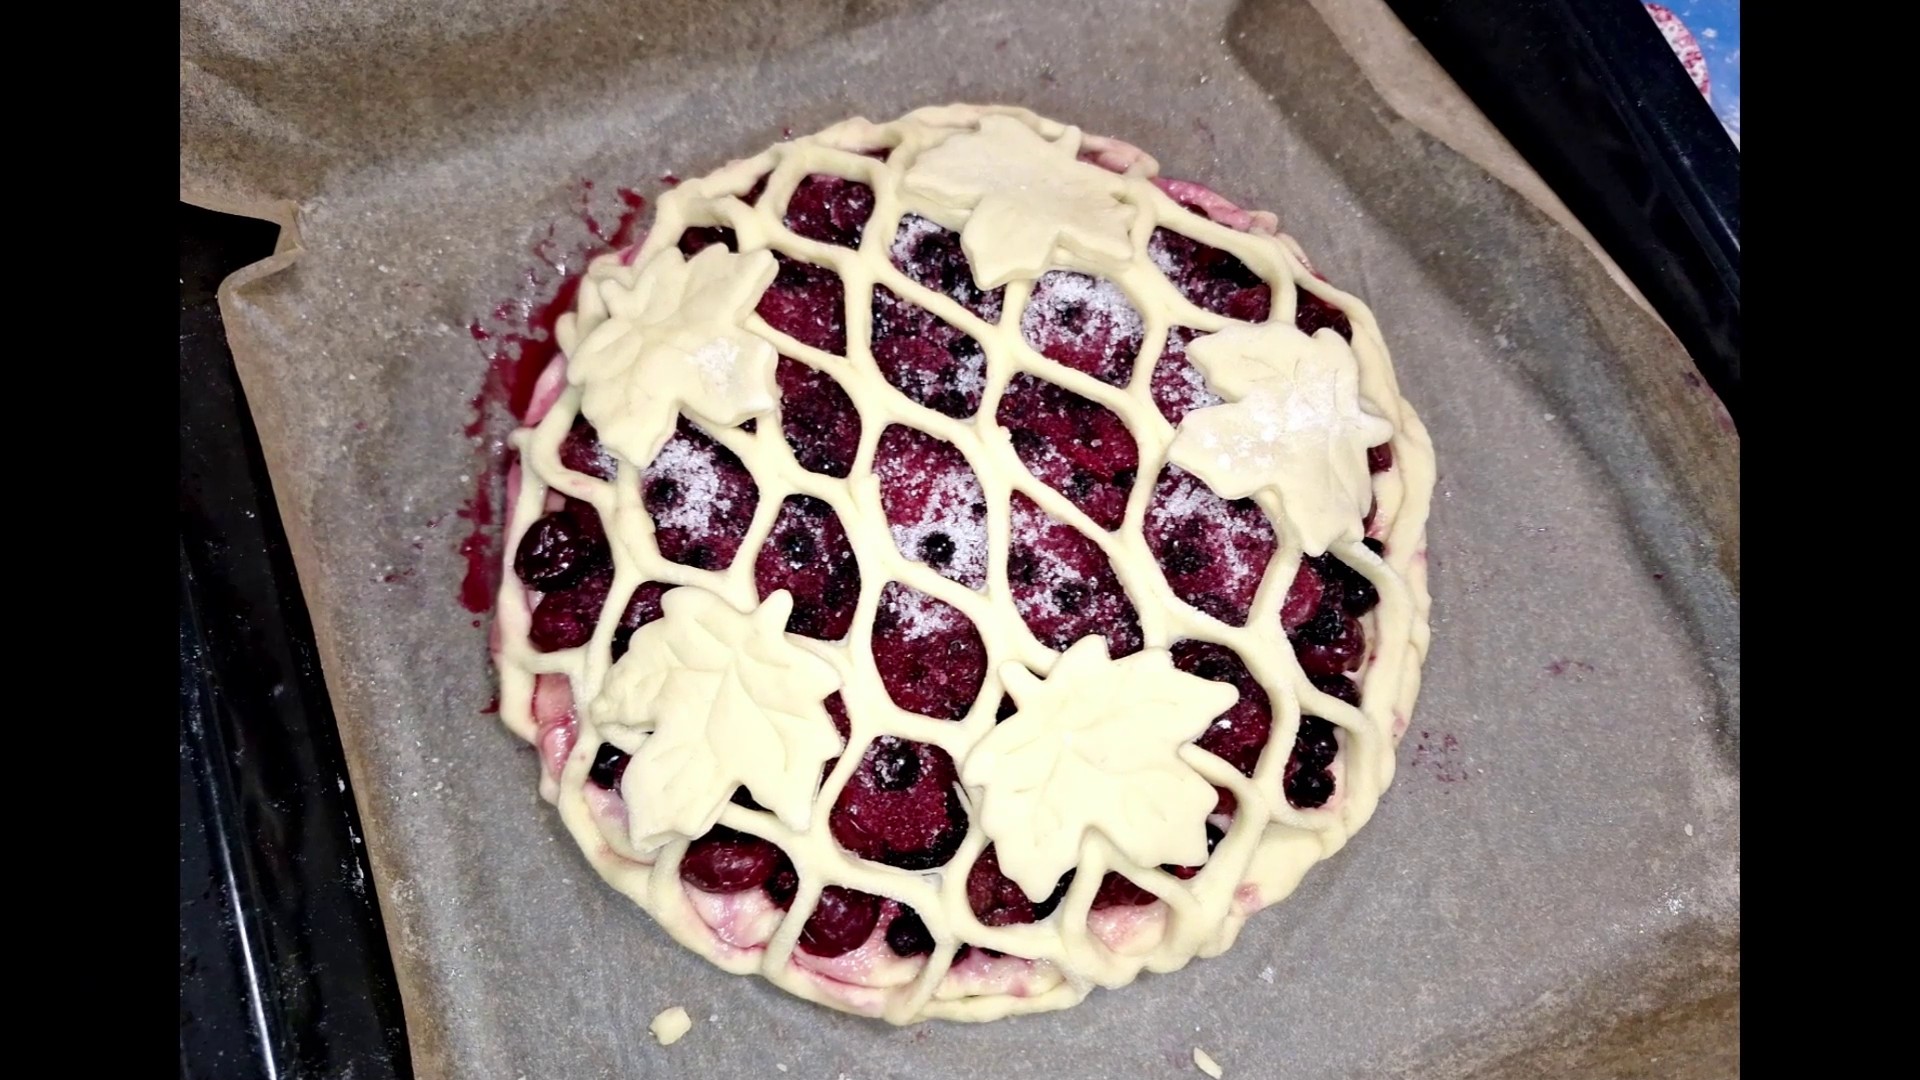
Roll out the remaining dough and use it to make decorations for the pie. Since it’s autumn, we chose a leaf shape :)
Tip: If you want the baked pie dough to have a more golden color, brush it with an egg yolk. This is optional.
Place the pie in the oven. Use the conventional bake setting (heat from both top and bottom). Set the temperature to 180°C (about 355°F) and bake for 20–30 minutes.
Baking time may vary depending on your oven, so it’s best to check the dough for doneness.

The filling of this pie doesn’t contain flour or any other thickener. This makes the pie juicy and gives it a more natural, fruity berry flavor.
The downside is that the pie releases a lot of juice while baking — don’t worry, that’s normal. This is what the baking tray looks like during baking.
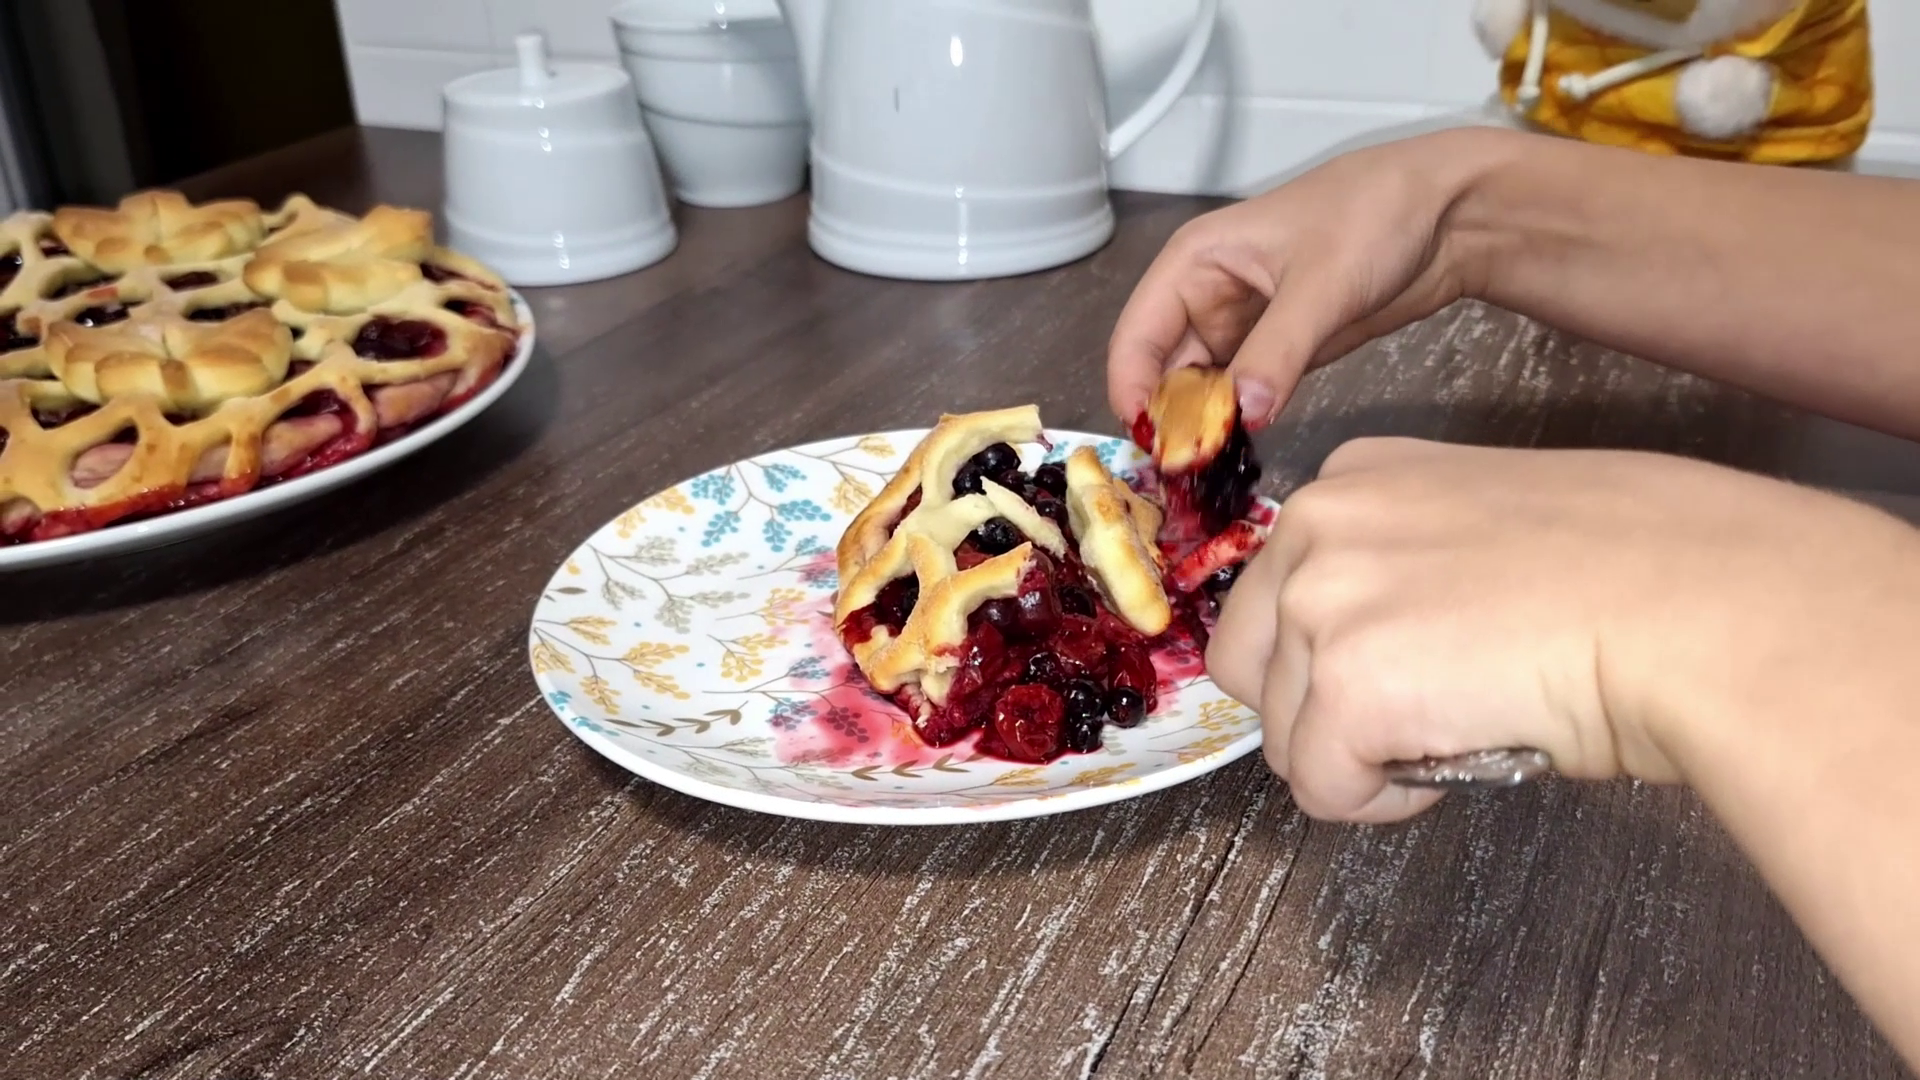
We usually transfer a pie like this from the baking tray to a plate together, me and my daughter, using three wide spatulas.
And finally: i wish you good luck with the dough — if you dared to make it yourself, wow, my respect! 😄 I hope you enjoy the result — the pie is very juicy and delicious.
Enjoy your meal! 🍴
Don’t forget to check out our family YouTube channel, where my 9-year-old daughter cooks these recipes. She works really hard and will be thrilled to see new subscribers — it means a lot to us 👉https://www.youtube.com/channel/UCwXeQhRyzyn-2XJRxB355Hw
I’m also looking forward to reading your comments on Instructables.com!