I Pimped My Steel Wheels

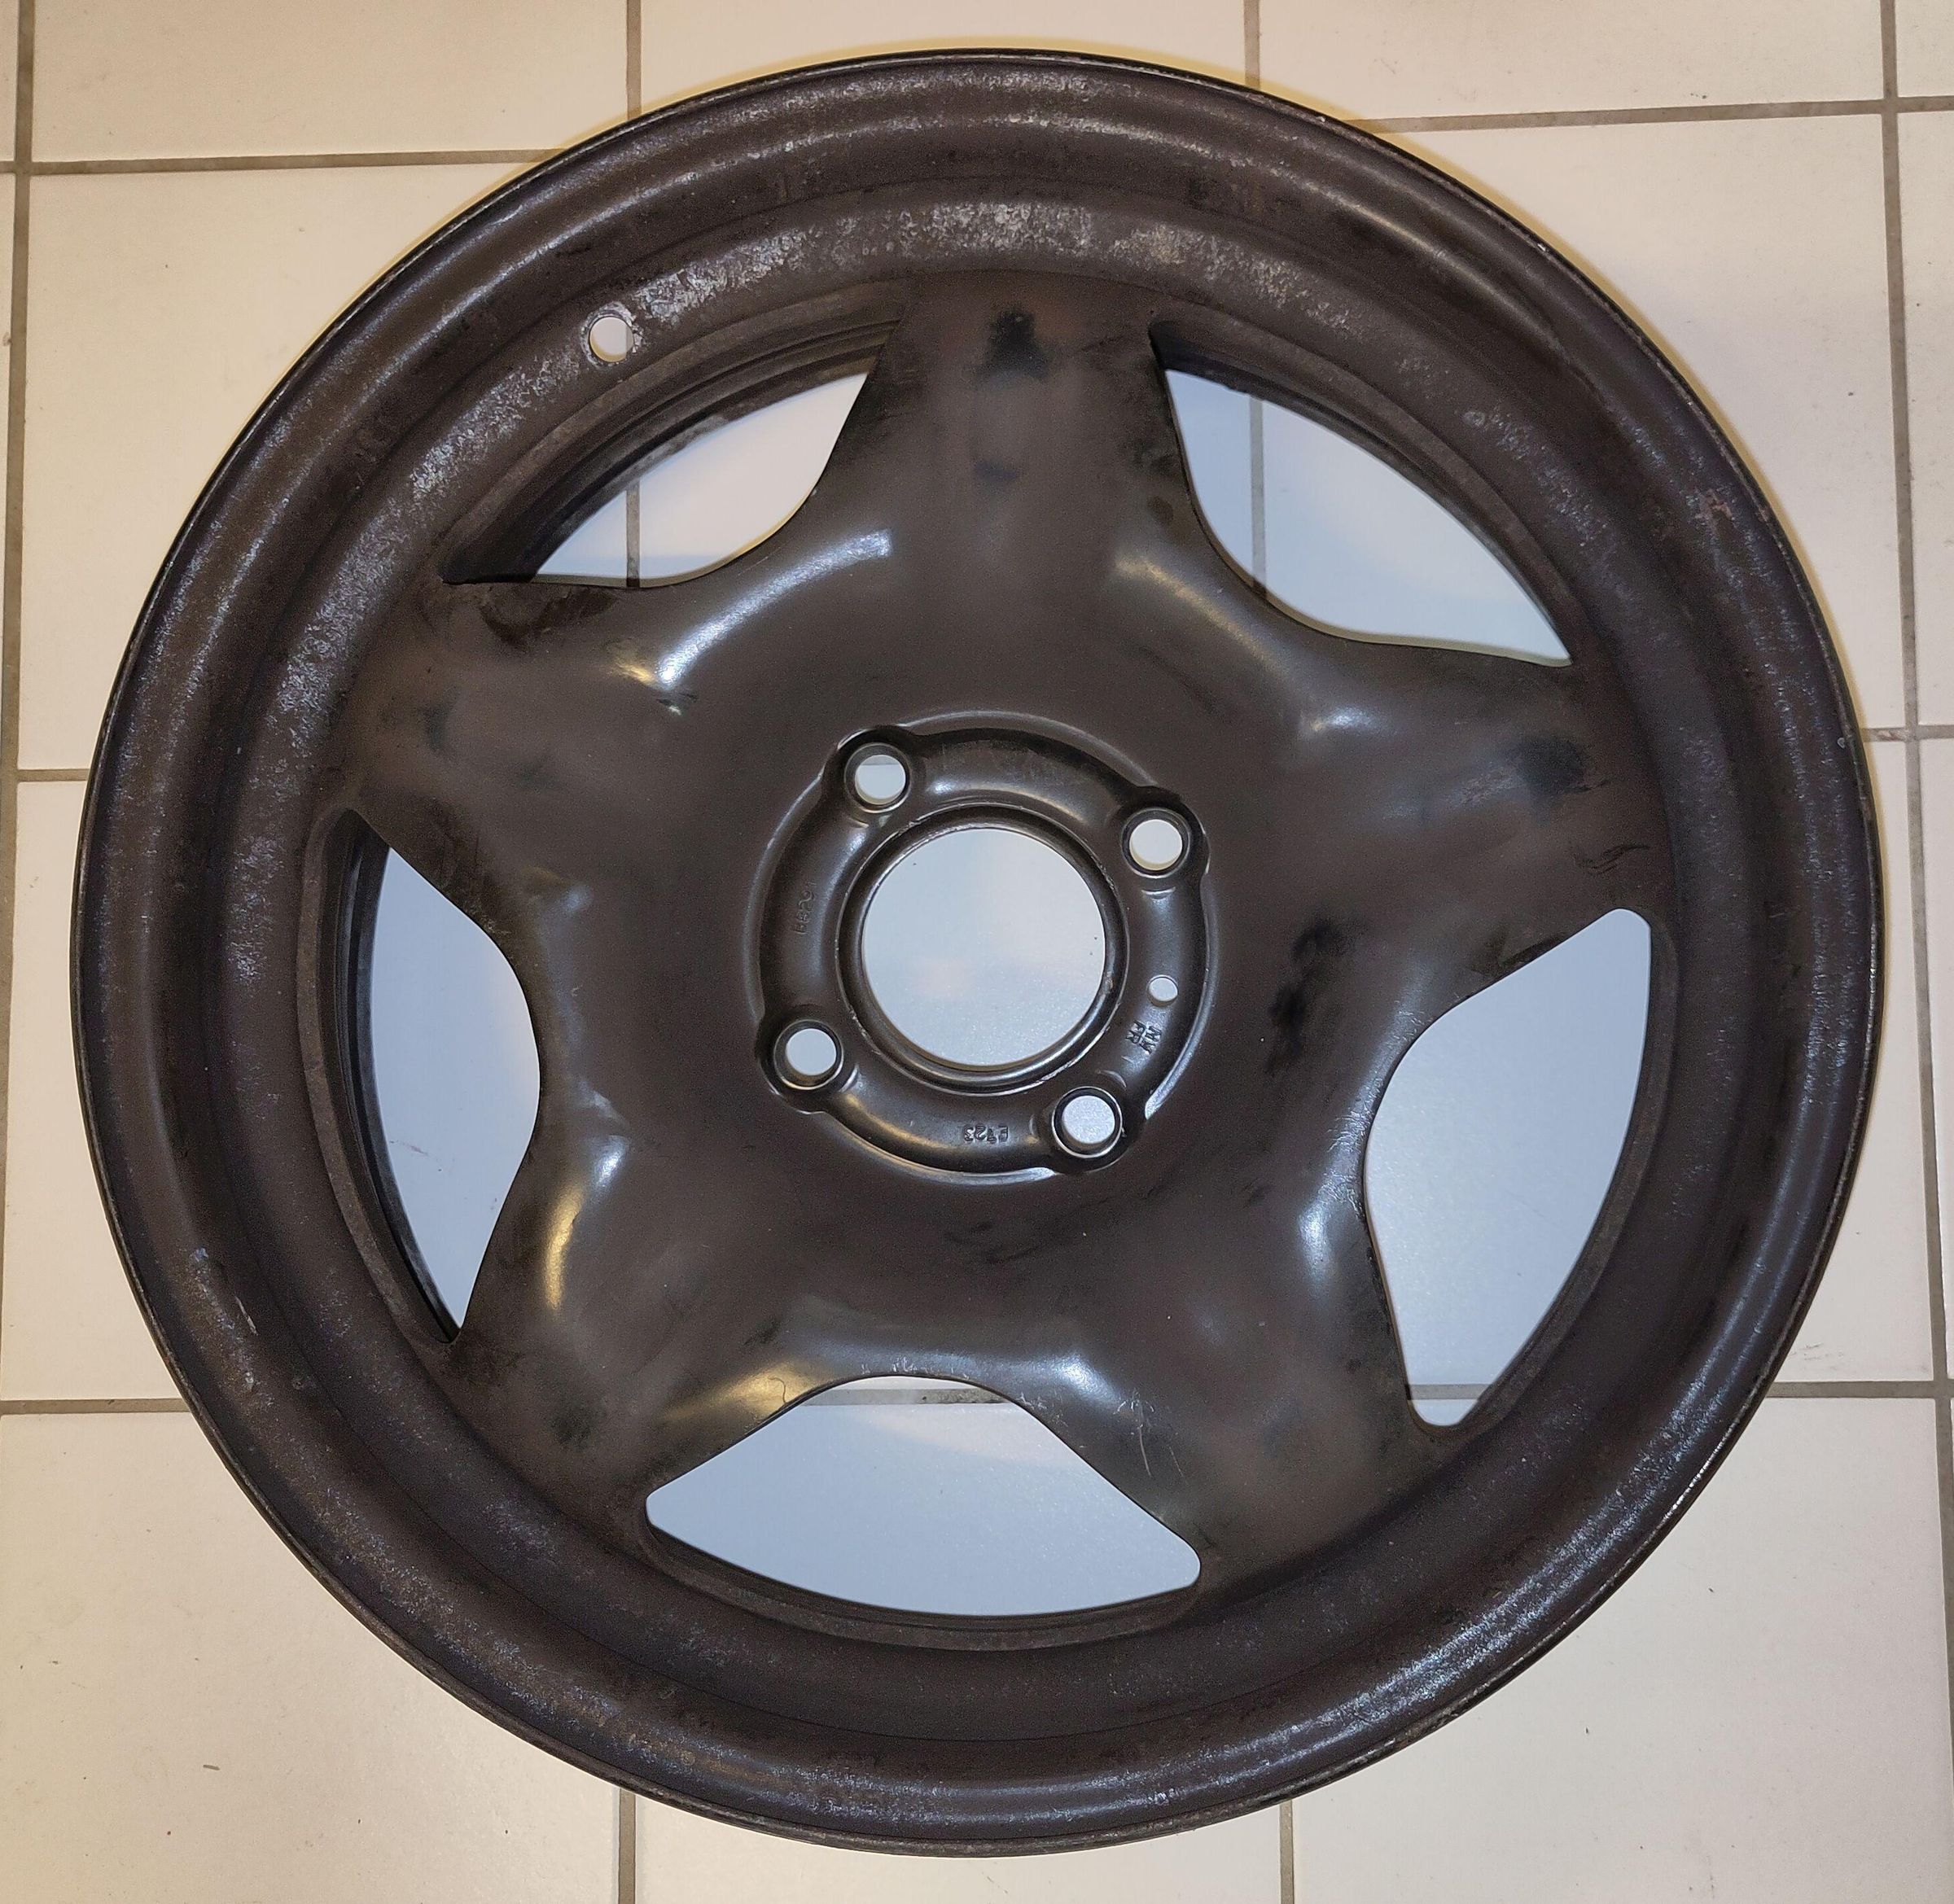
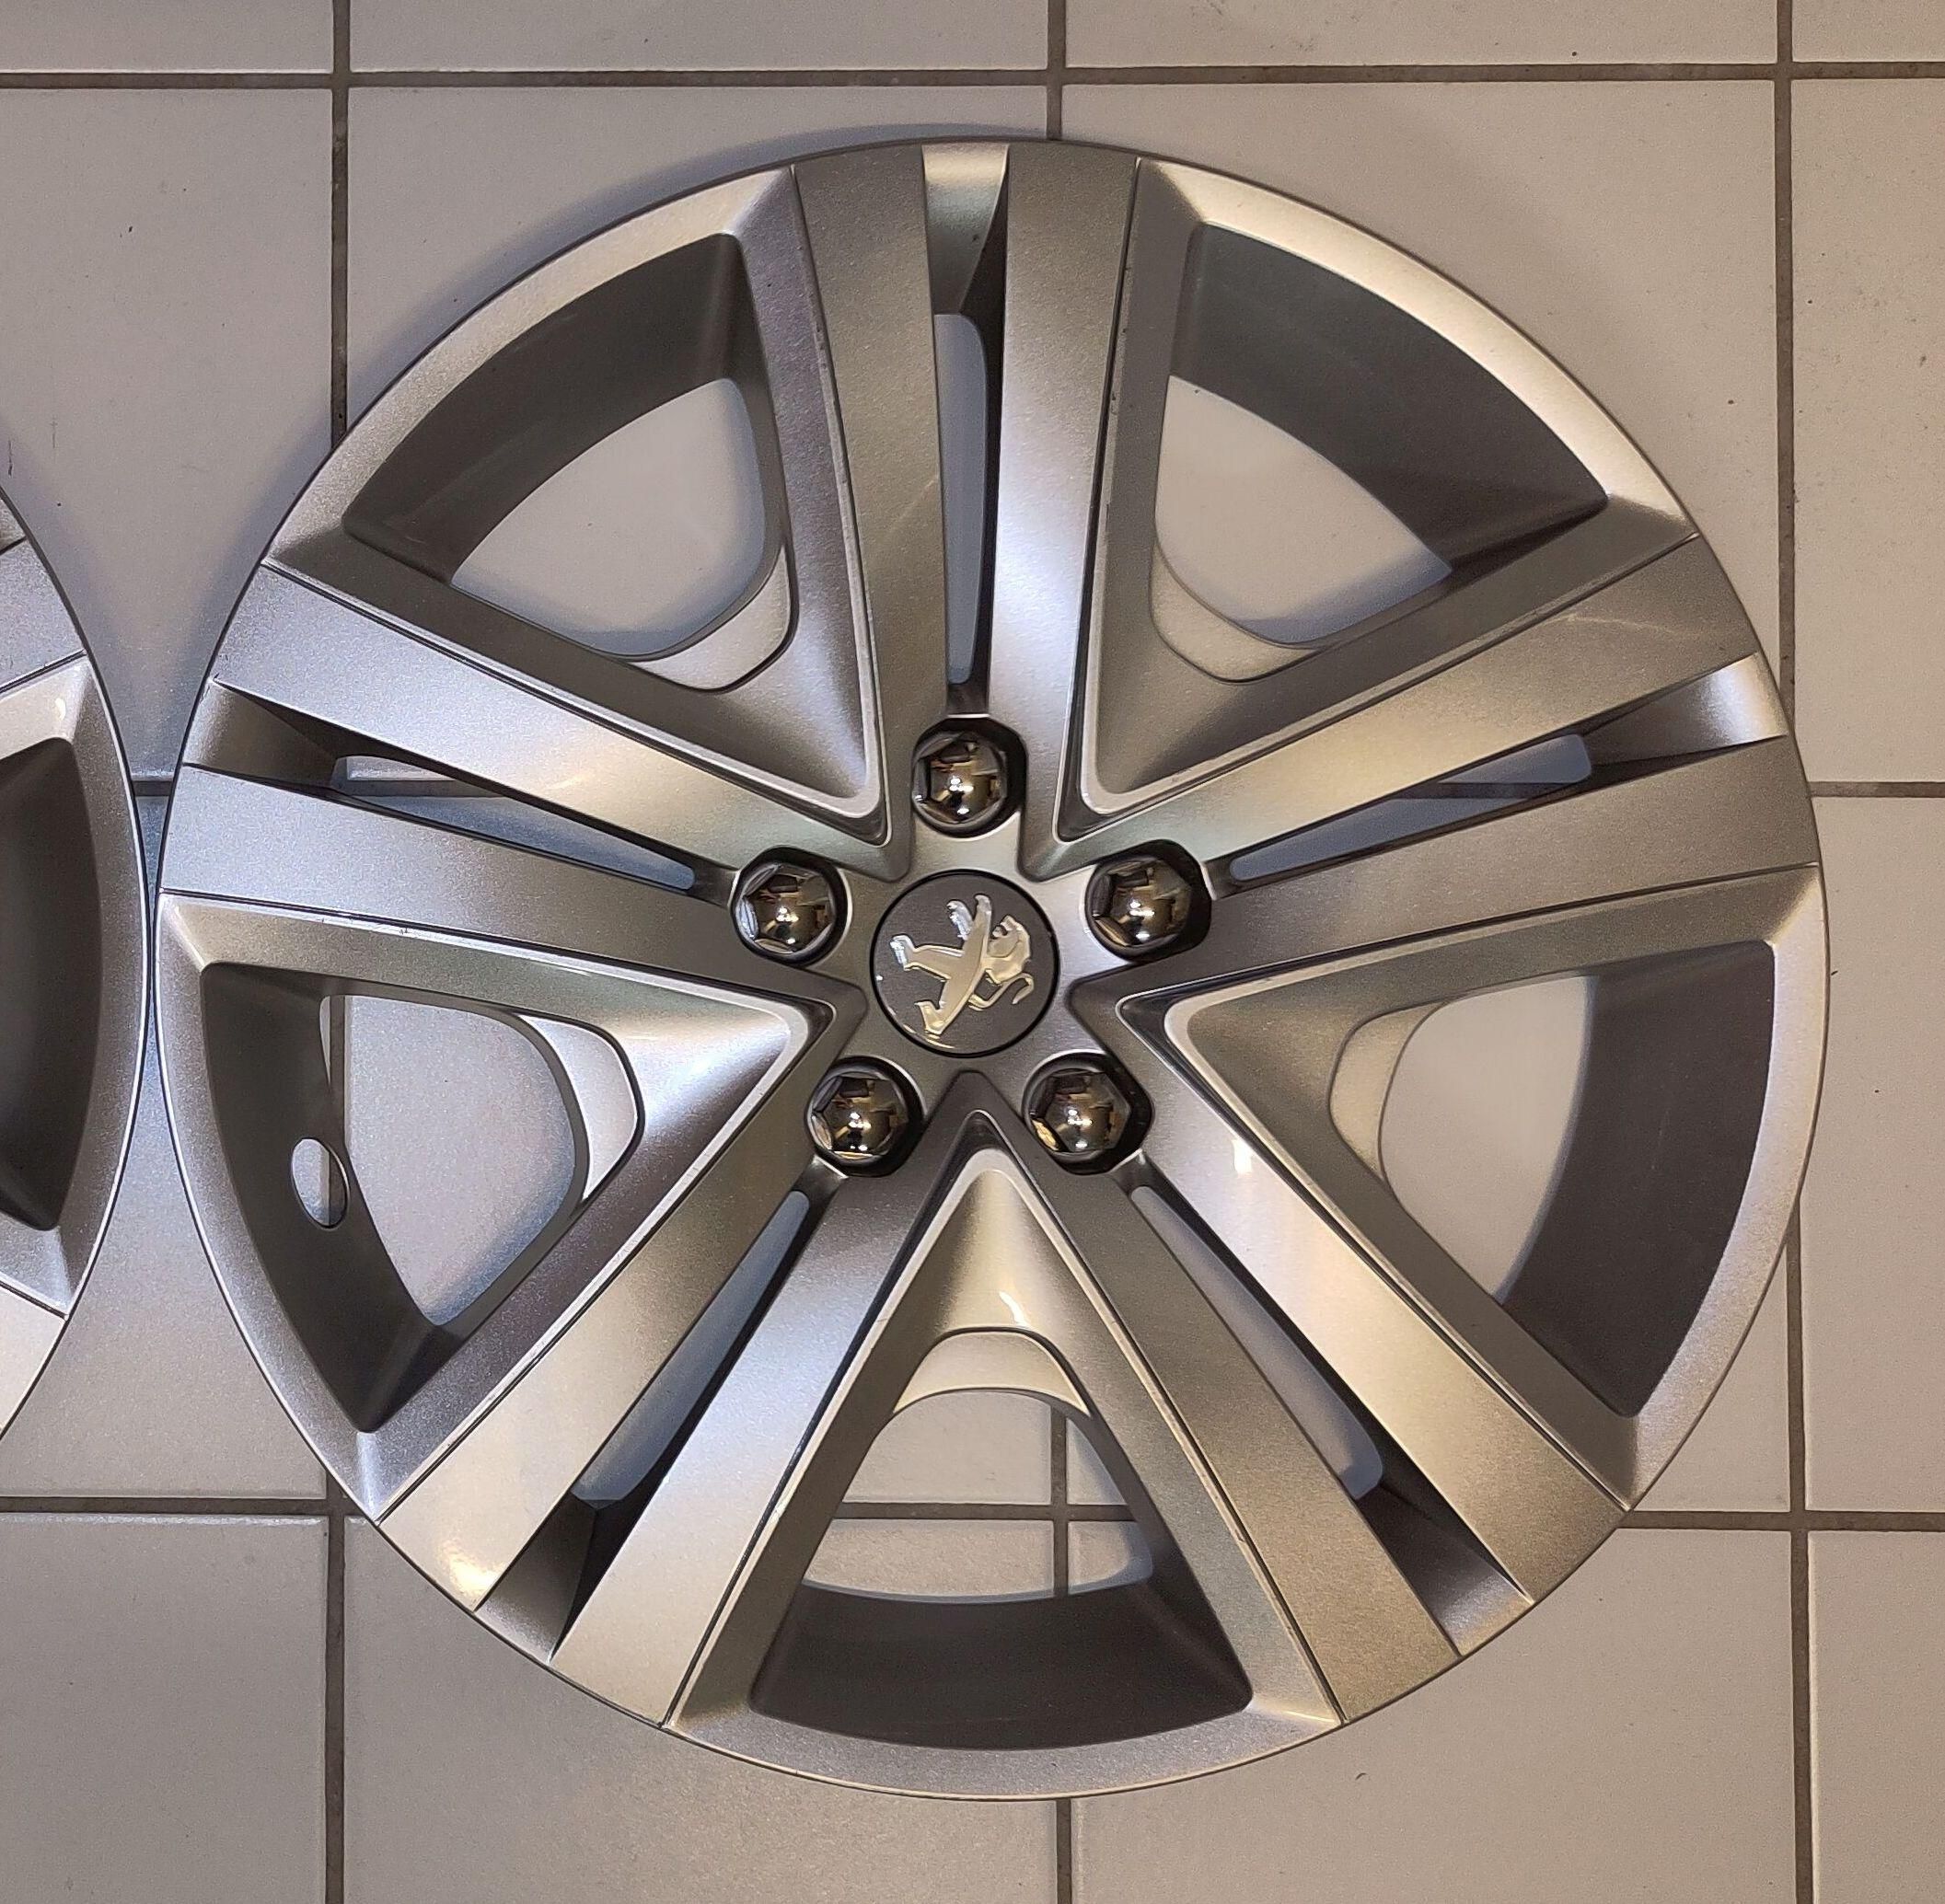
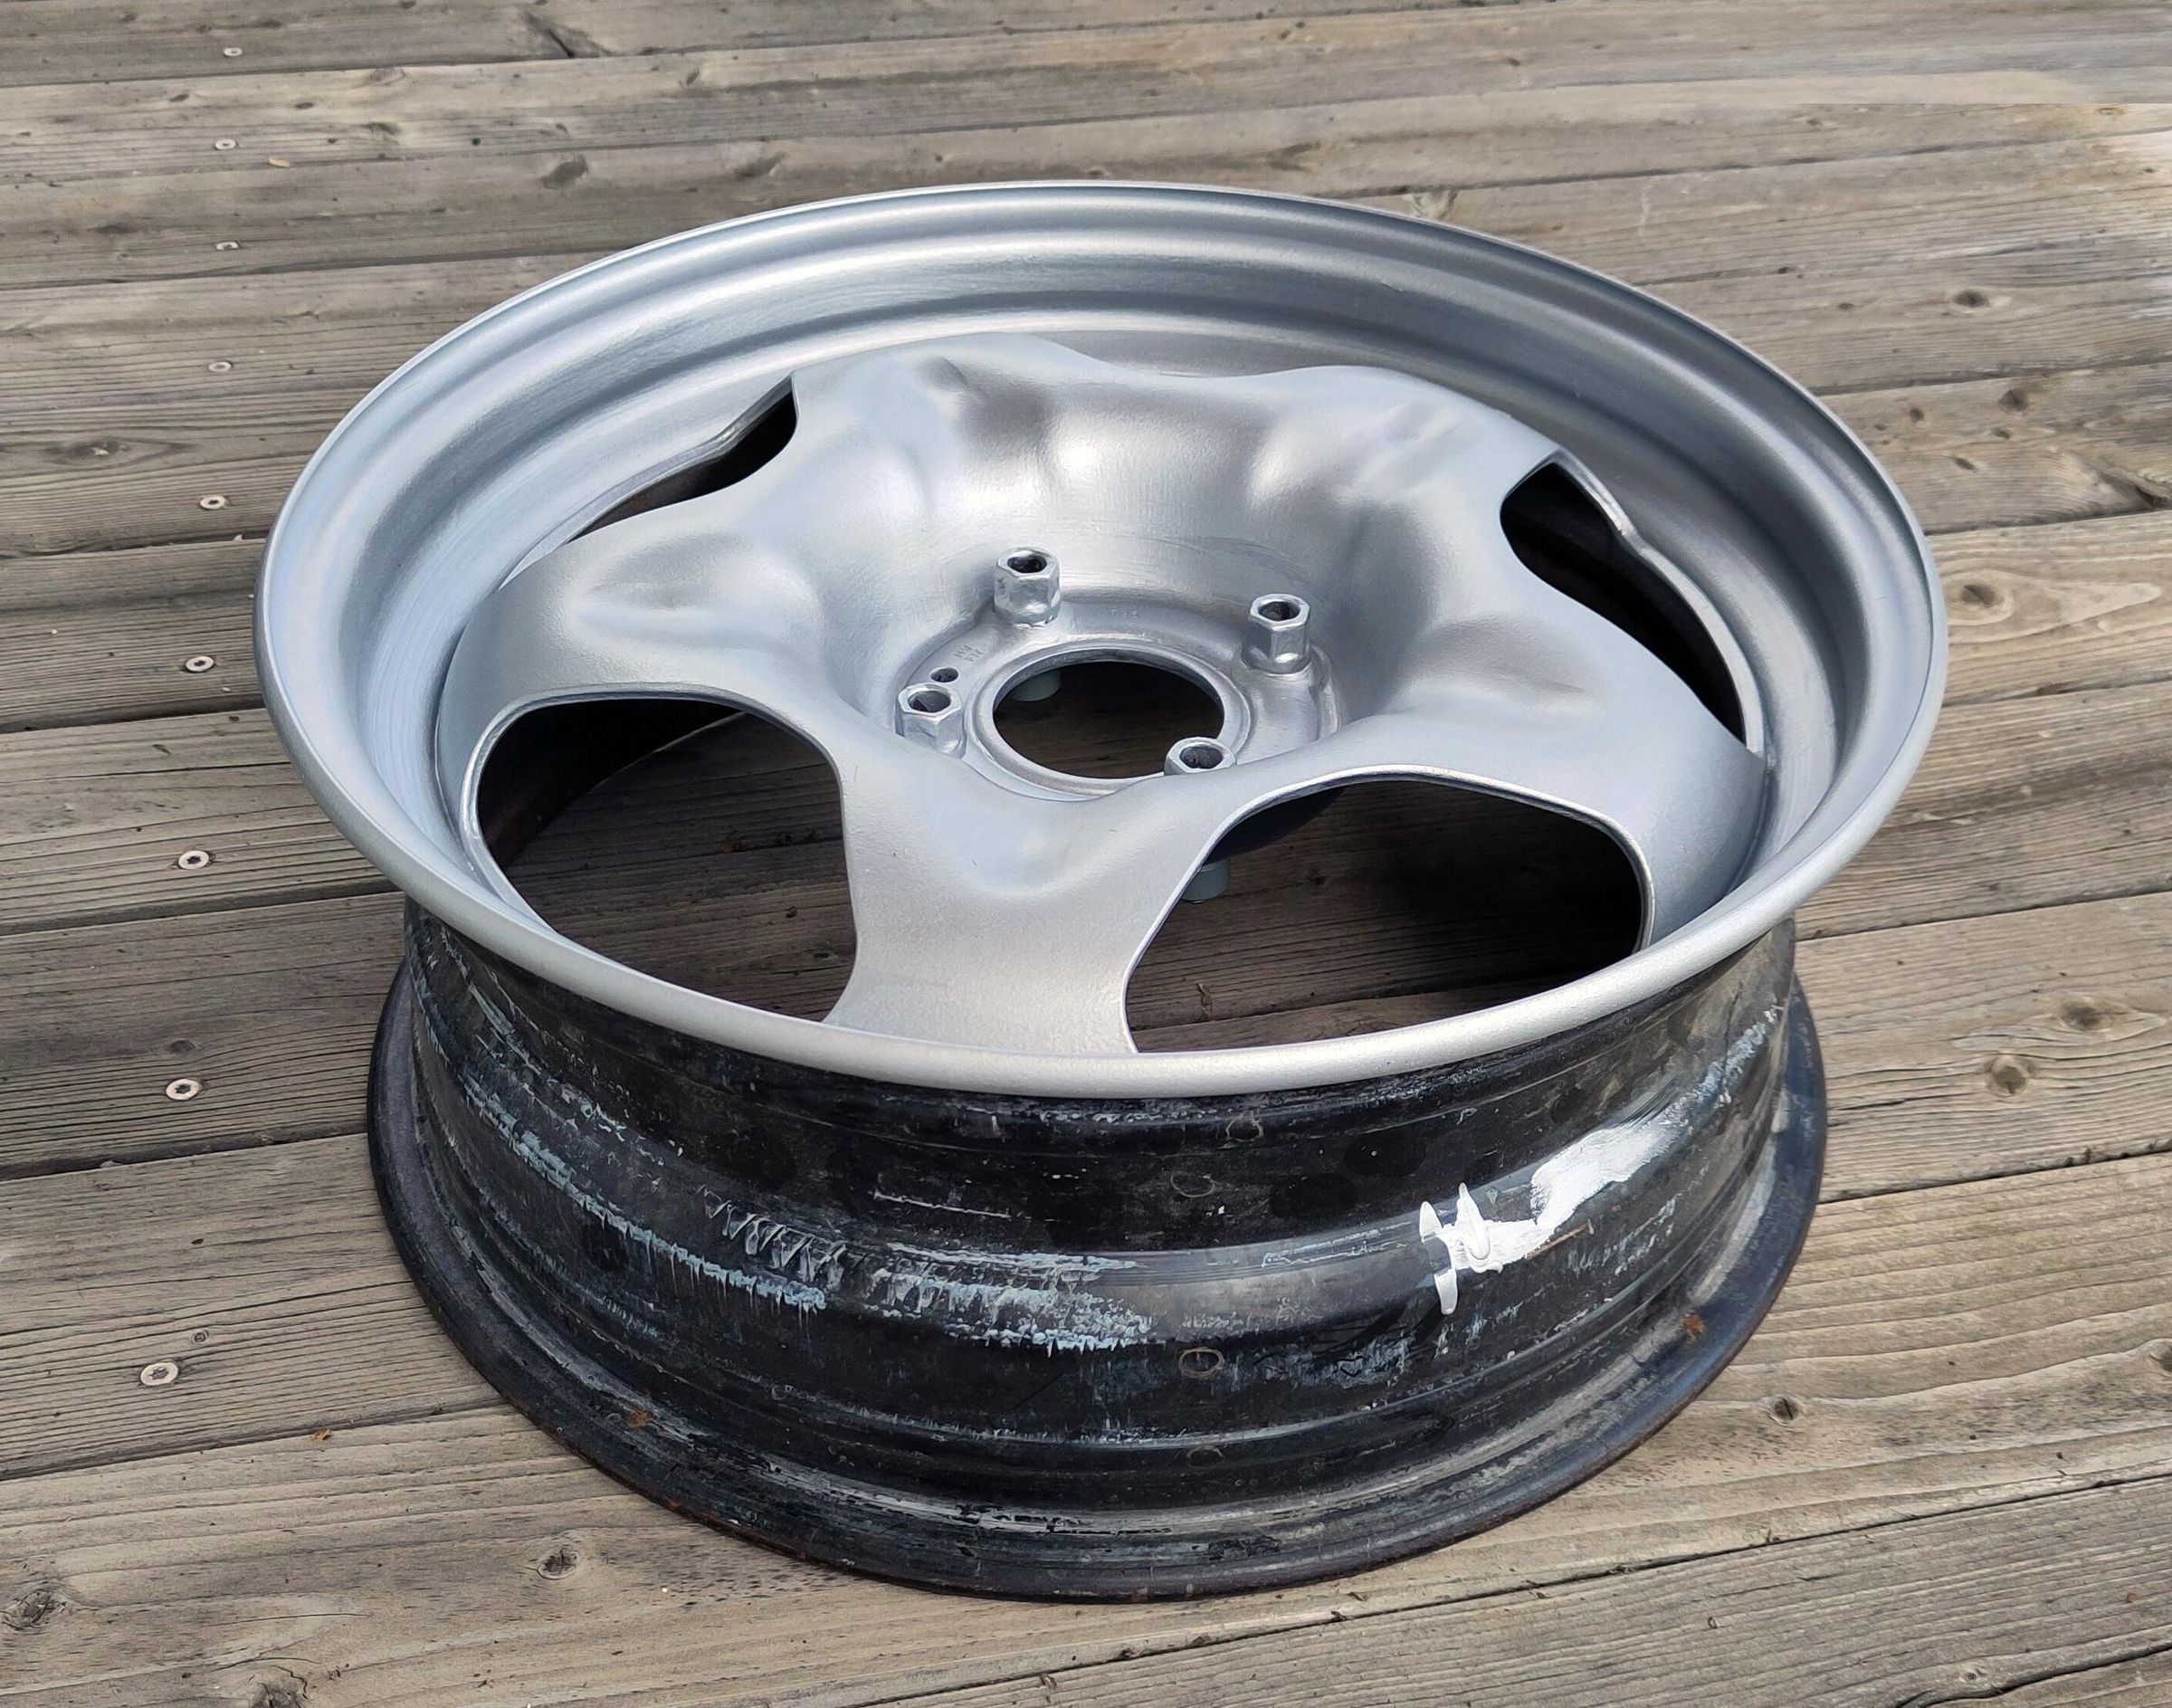
My little Peugeot 208 (purchased second-hand a little more than a year ago) is eight years old now. Last fall it needed new winter tyres. I only had four wheels with worn-out summer tyres on steel rims, hidden under plastic covers (hub caps?) that almost looked like alloy wheels. The covers on the front wheels were damaged and heavily worn. After removing them I realised that the steel rims covered by them have an interesting design but were cringeworthy dirty from brake dust as well as rusty, see the second picture above.
I decided to buy four complete winter wheels, that is, four snow tyres on steel rims, in a first step.
Why steel rims? They are a bit cheaper, and I doubt that my car would run much better with alloy rims. And since my car is, for me, a utility vehicle rather than an object for image promotion, I'm satisfied when it transports me from A to B. And back. No alloys needed for that.
At the same time I had the worn summer tyres removed. I took the old rims home with me to remove the rust, and to coat them with aluminium-look silver paint in a second step.
Needless to say that this procedure also might be applied to steel rims with the standard design (several holes around the circumference, or no holes at all).
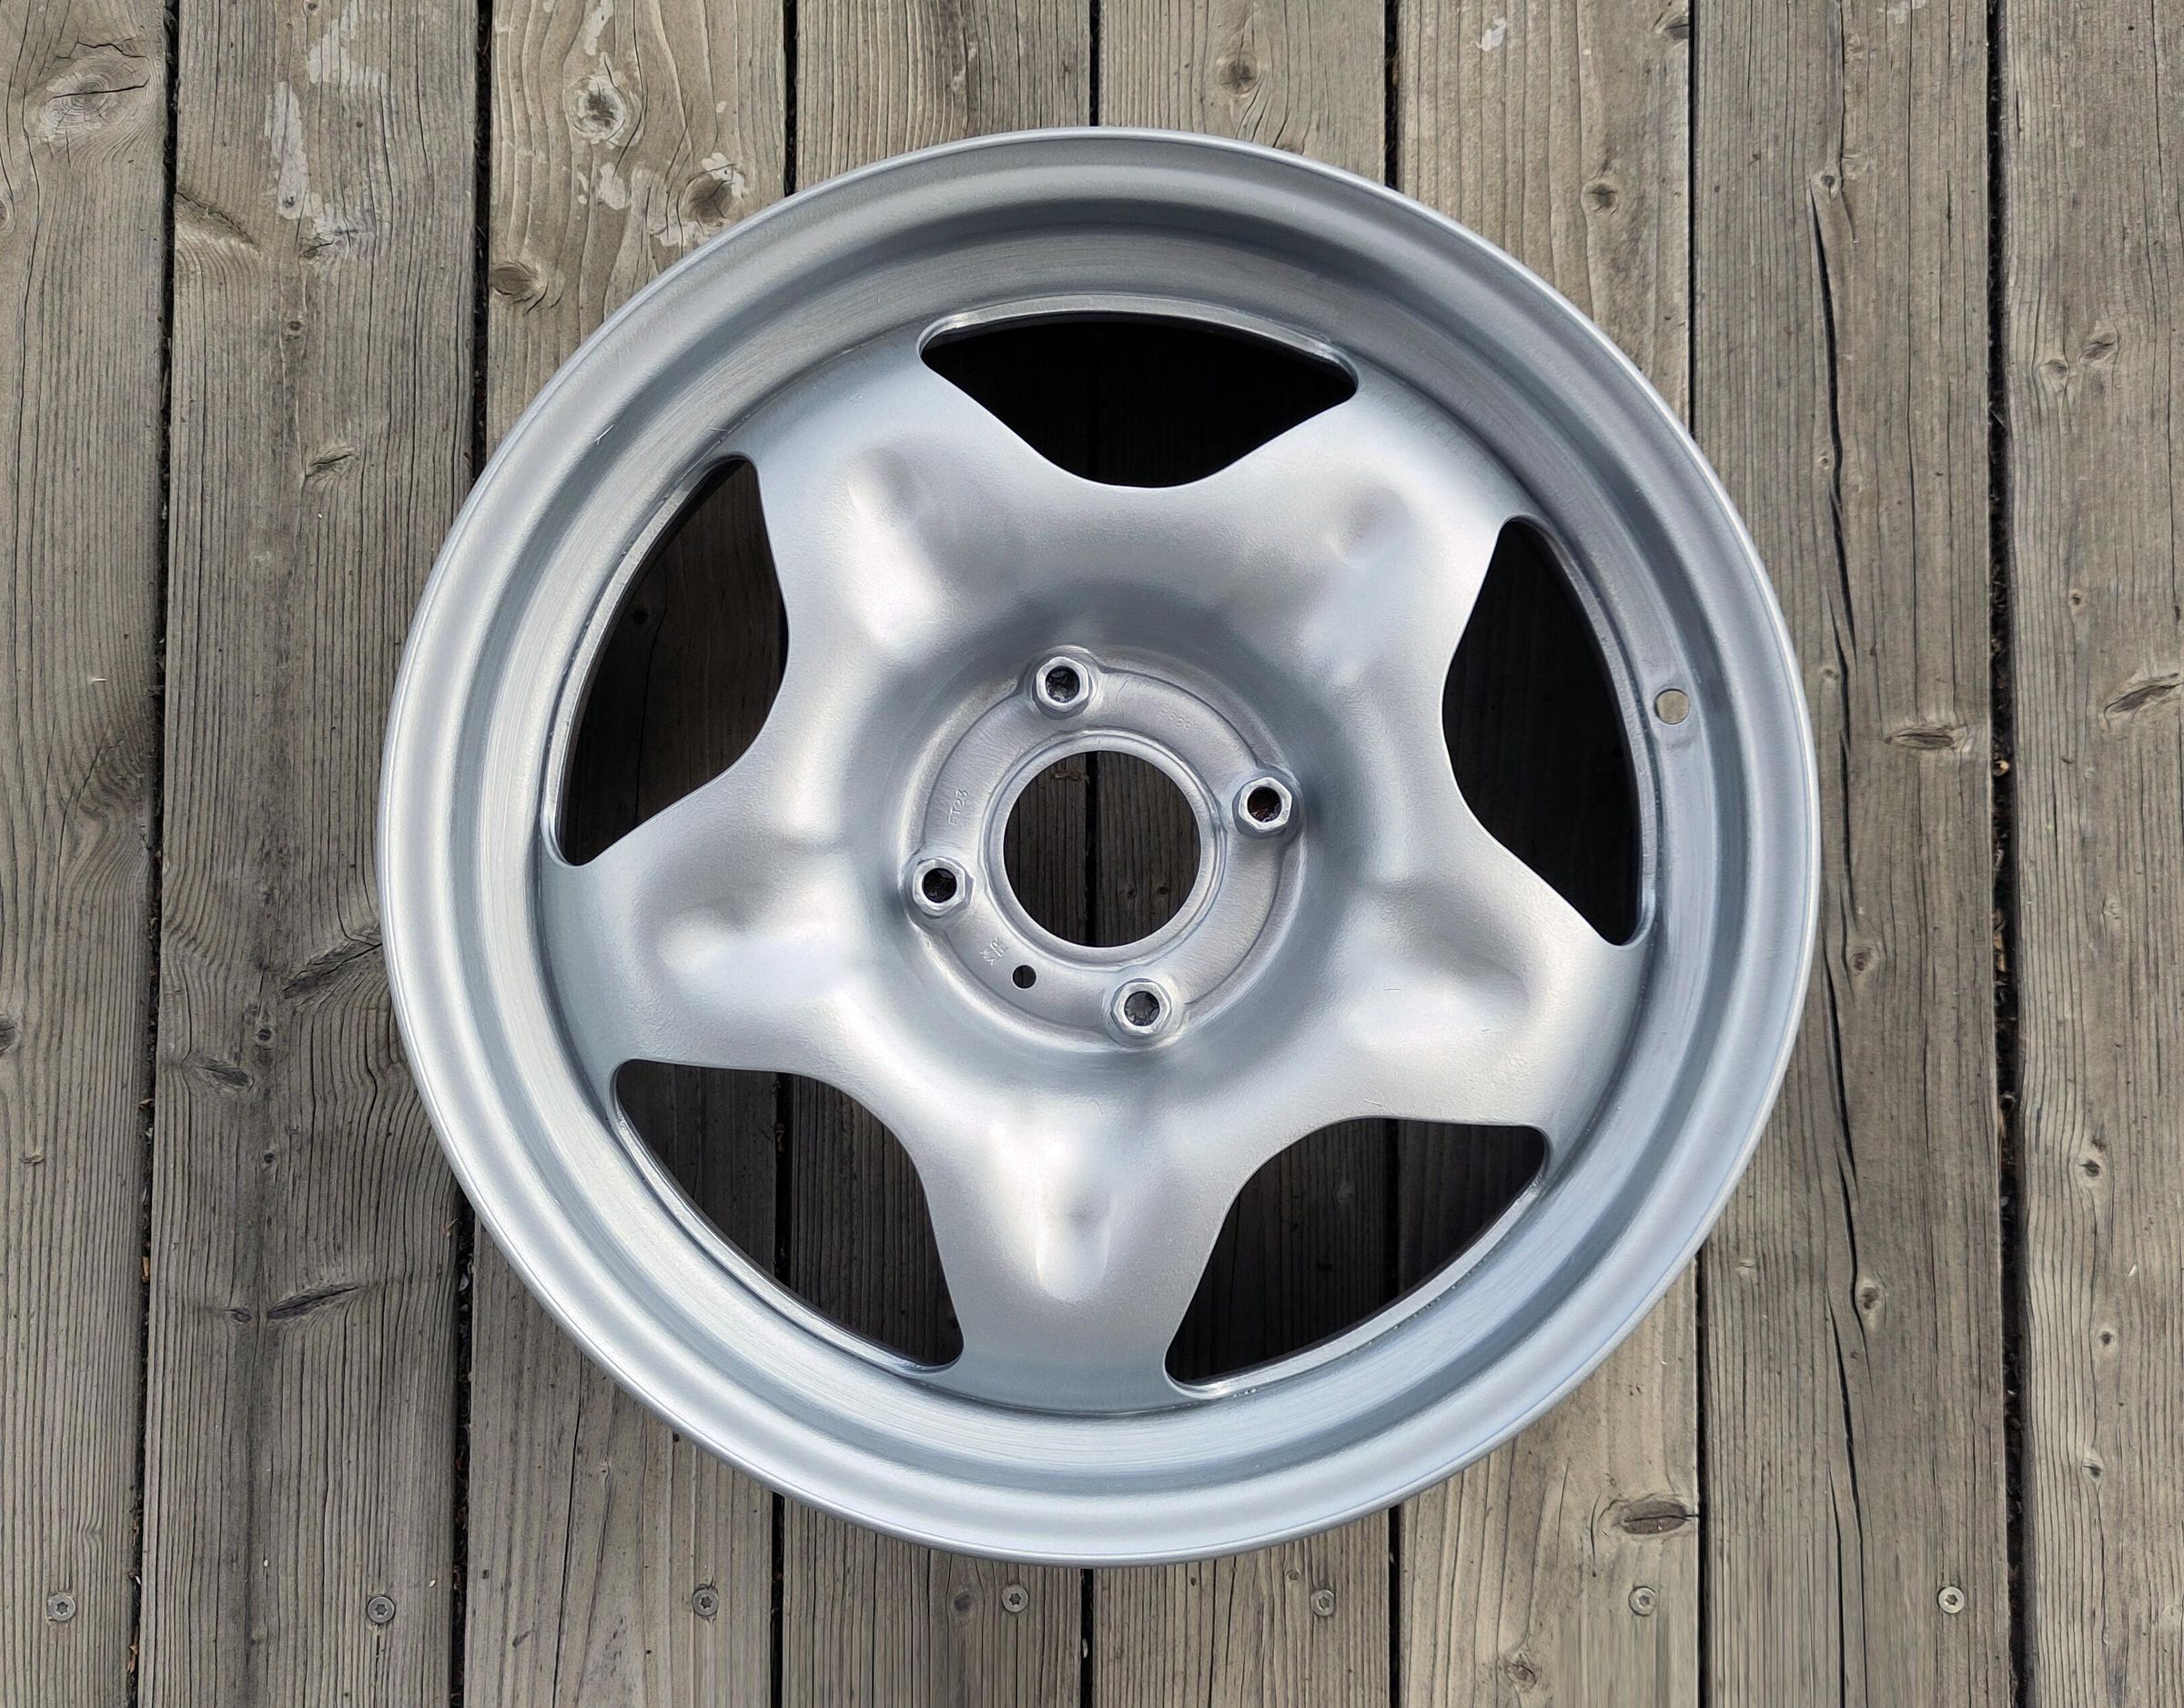
With winter and spring quickly passing, it became somewhat urgent to have summer wheels, too. To prepare the steel rims for their new tyres, several different steps and some trial-and-error were necessary. The result of this process is shown in the first picture above. The third picture shows one of the retired, plastic wheel covers from the rear wheels in almost pristine condition.
Supplies
- Work gloves for protecting your hands from dirt and brake dust on the rims
- Thin (latex) gloves for protecting your hands from paint while painting
- A sandblasting cabin large enough for the rims
- A vacuum cleaner for removing any dust or sand before painting
- A rotating platform such as a lazy susan, for instance 'Snudda' from Ikea, or similar. (Or, if you should have an old turntable ready to go to the recyclers, why not allow it a last assignment?)
- 46 cm dia. round piece of scrap wood (particleboard, MDF, OSD, plywood – or whatever you have lying around)
- Double-sided mounting tape for fixing this wood piece on your lazy susan
- Floor protection (such as a large piece of cardboard)
- Paint for metal (I used potted 'Hammerite' brand silver); perhaps some primer might be used for the first coat, too. If desired, you could also use some specialised wheel rim paint in spray cans
- A tool for stirring the paint before painting (large screwdriver, wood stick etc.). I used the 'VibroShaker' described here: https://www.instructables.com/Paint-Pots-Shaken-Not-Stirred
- A paint tray; cleaning it after each paint coat will be much easier when wrapping it in a thin plastic bag that can be disposed of after use
- A medium-sized paintbrush
- A bit of aluminium foil (for sealing the paintbrush in order to keep it ready for the next coat without having to clean it each time)
- A small (5 cm wide) neoprene paint roller
- Four matching wheel screws with nuts
- Paper towels and paint thinner for cleaning the stirring tool and your hands after painting (believe me, you will get some paint onto your fingers)
- Time and sufficient room for storing the rims while the paint is drying
Cleaning Attempts (Not Really Successful, But...)
.jpg)
I took the rims to a self-service car wash where I treated them with a high-pressure power washer, both inside and out. I was somewhat taken aback because, after such a thorough cleaning, my hands still got black when lugging the rims around after they had dried.
So a next attempt followed. I covered the bottom of my bathtub with a sturdy, plastic desk mat in order to avoid damaging the enamel coating, then soaked the rims – one at a time – in hot water with some dish detergent. Once the water had cooled down a bit, I treated them with a stiff dish-washing brush; I was surprised how much dirt still could be removed. After letting them dry completely, you guessed it, I got black hands again when handling them. Brake dust obviously is quite tenacious.
But as I only want to paint the rim's outside, this cleaning procedure was welcome for its inner side, at least.
Next Try With the Heavy Equipment
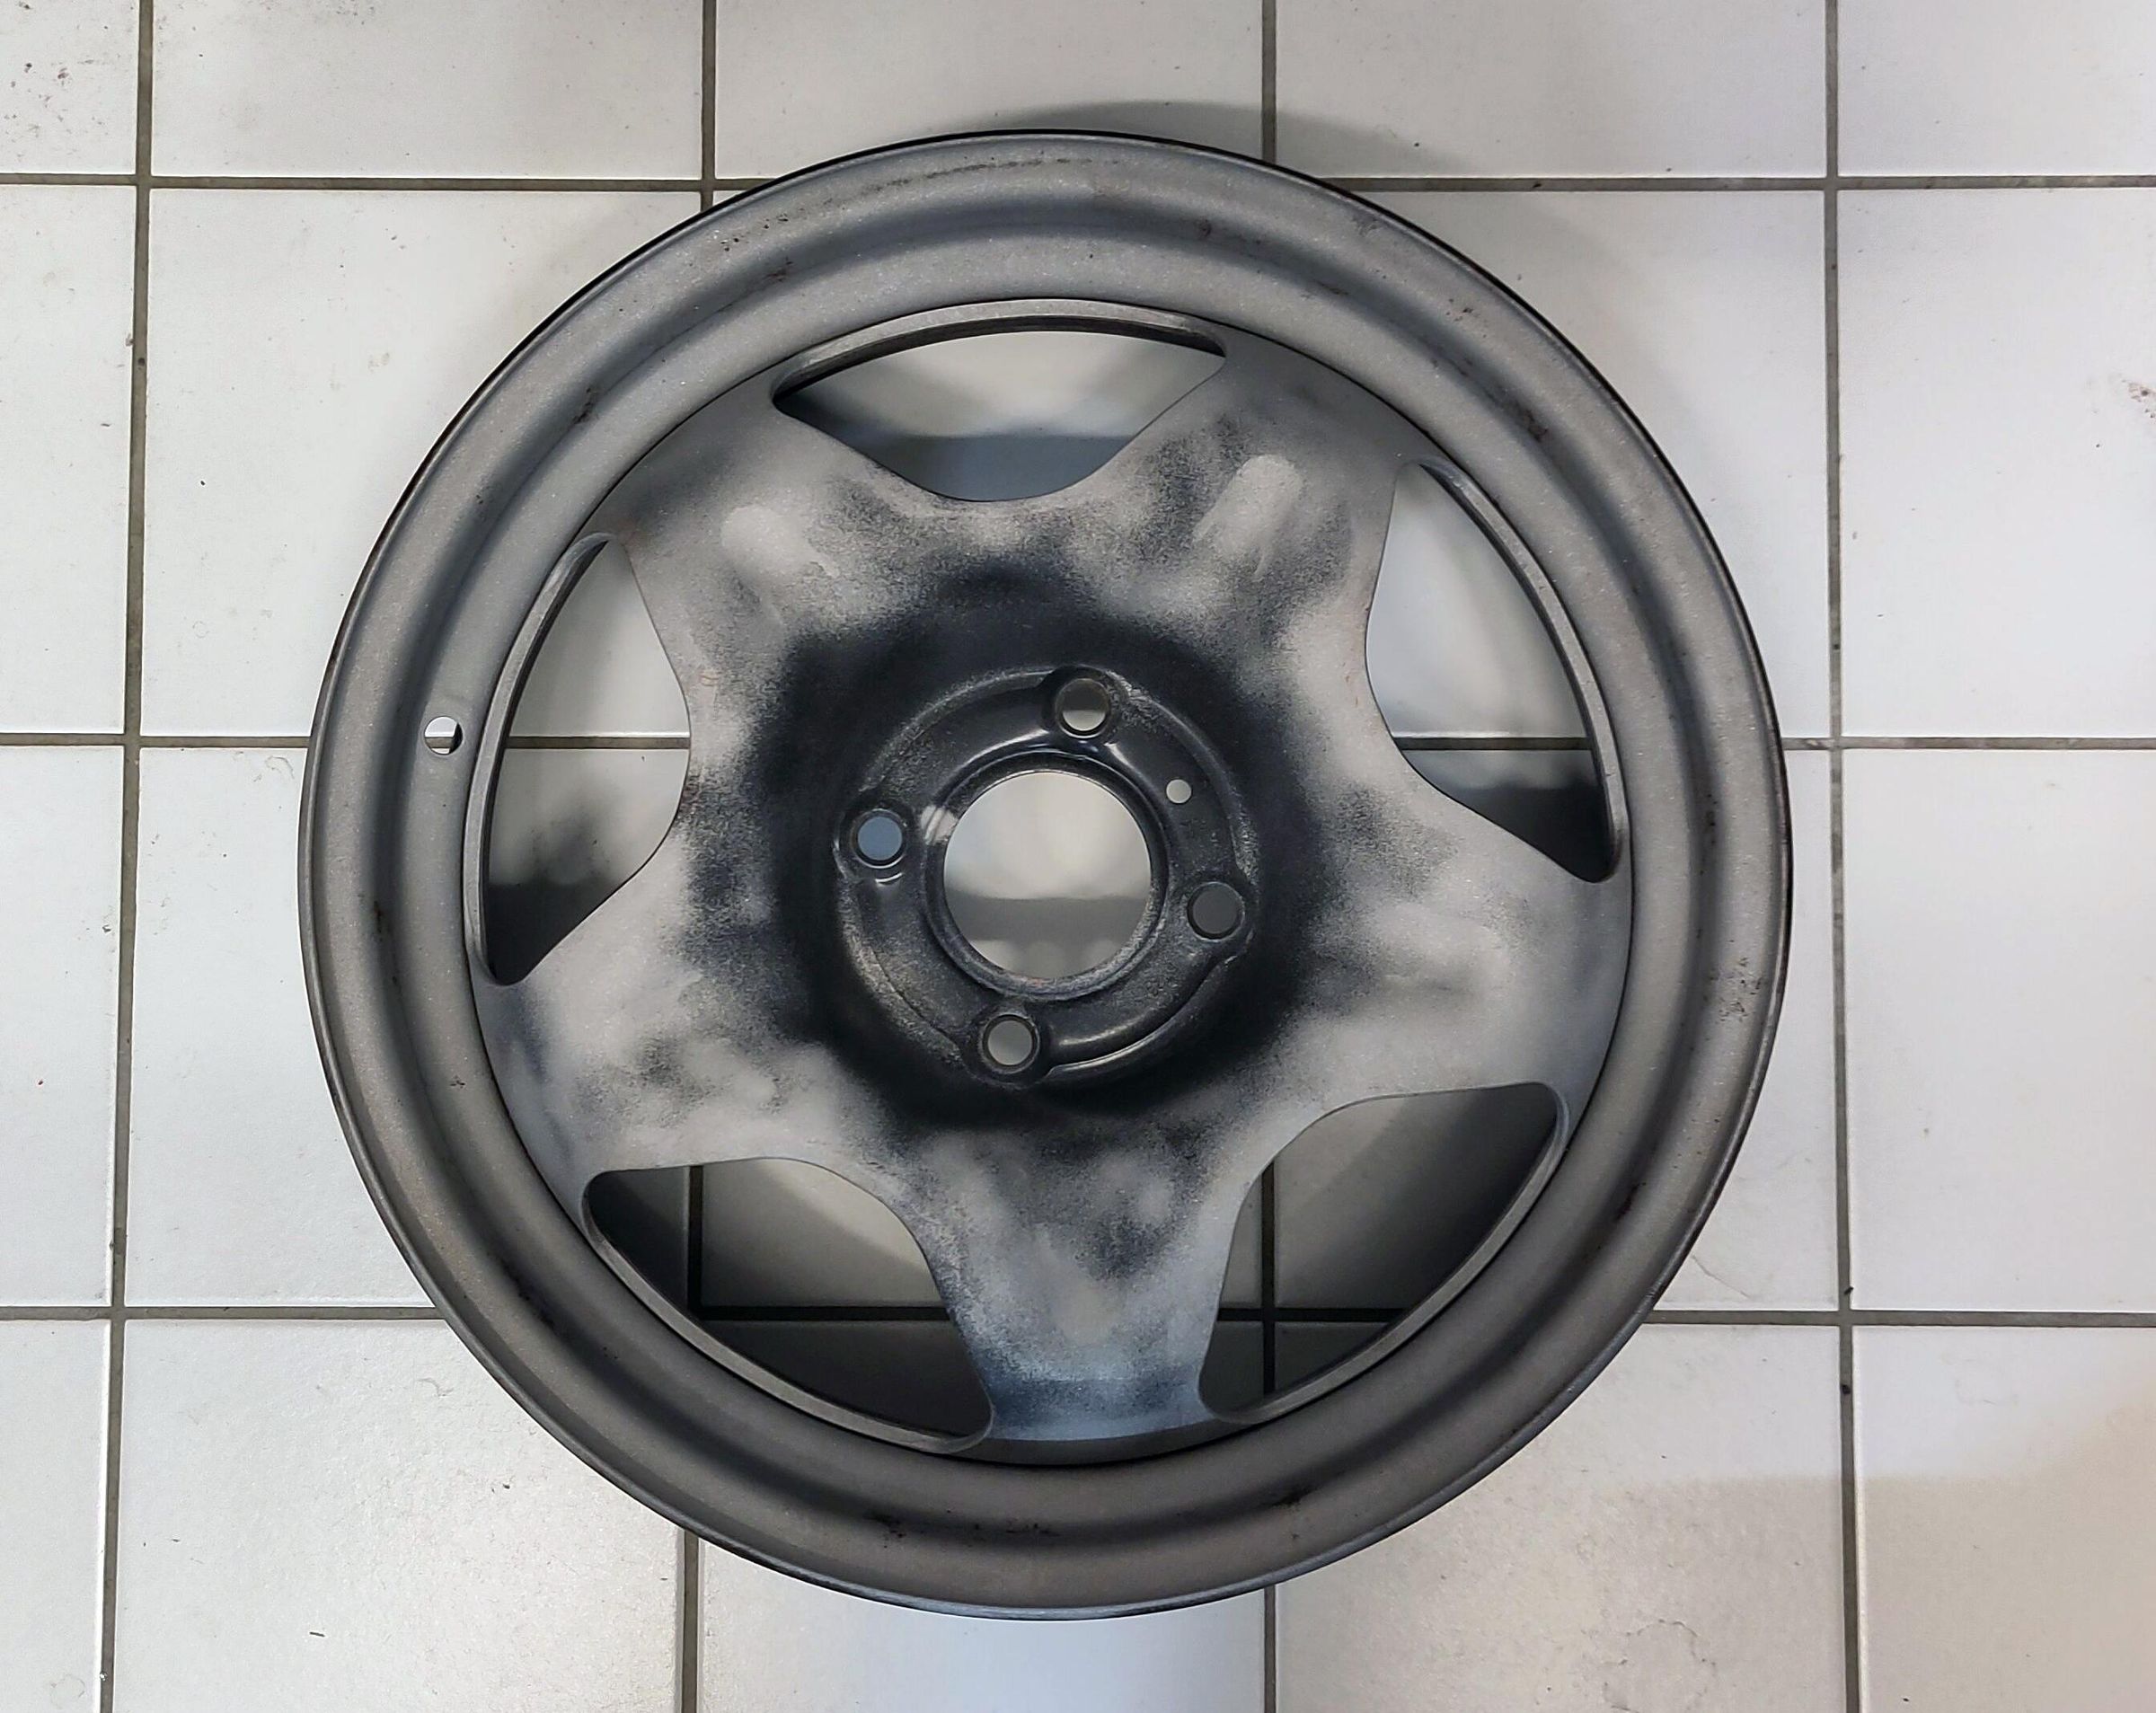
I went outside with a pro-grade cordless drill equipped with a rotating steel brush and tried my luck this way. Most of the black paint, rust, dirt etc. really went away, but this took quite a long time, and I had to recharge the drill two times before more or less finishing only the first one of my rims. I aborted the exercise and thought about a better solution.
Fortunately, I found a community centre with a well-appointed metal workshop ('Dynamo' in Zürich). They indeed have a sandblasting cabin large enough for my 16” rims. Sandblasting is quite efficient for removing old paint and rust; blasting the outer side of the four rims took me a little bit more than one hour, and the fee they charge for using their infrastructure is very reasonable. As you can see in the picture above, totally removing the black paint in places without rust didn't seem necessary. And, as already mentioned above, blasting and painting the rims' inner side is less important to me. A little rust at the inner side isn't too bad, considering the ample material thickness.
An advantage of sandblasting is that it roughens the surface, causing the paint to adhere better; this also is the reason why the bare metal in the picture looks dull rather than shiny. And some time ago I was told that sandblasting has the additional, positive effect of slightly hardening the blasted surface, which might provide some additional protection against future rust.
After that I removed any remaining sand and other residues with my workshop vacuum cleaner and a stiff brush, and then was almost ready for painting.
Covering the Mounting Holes
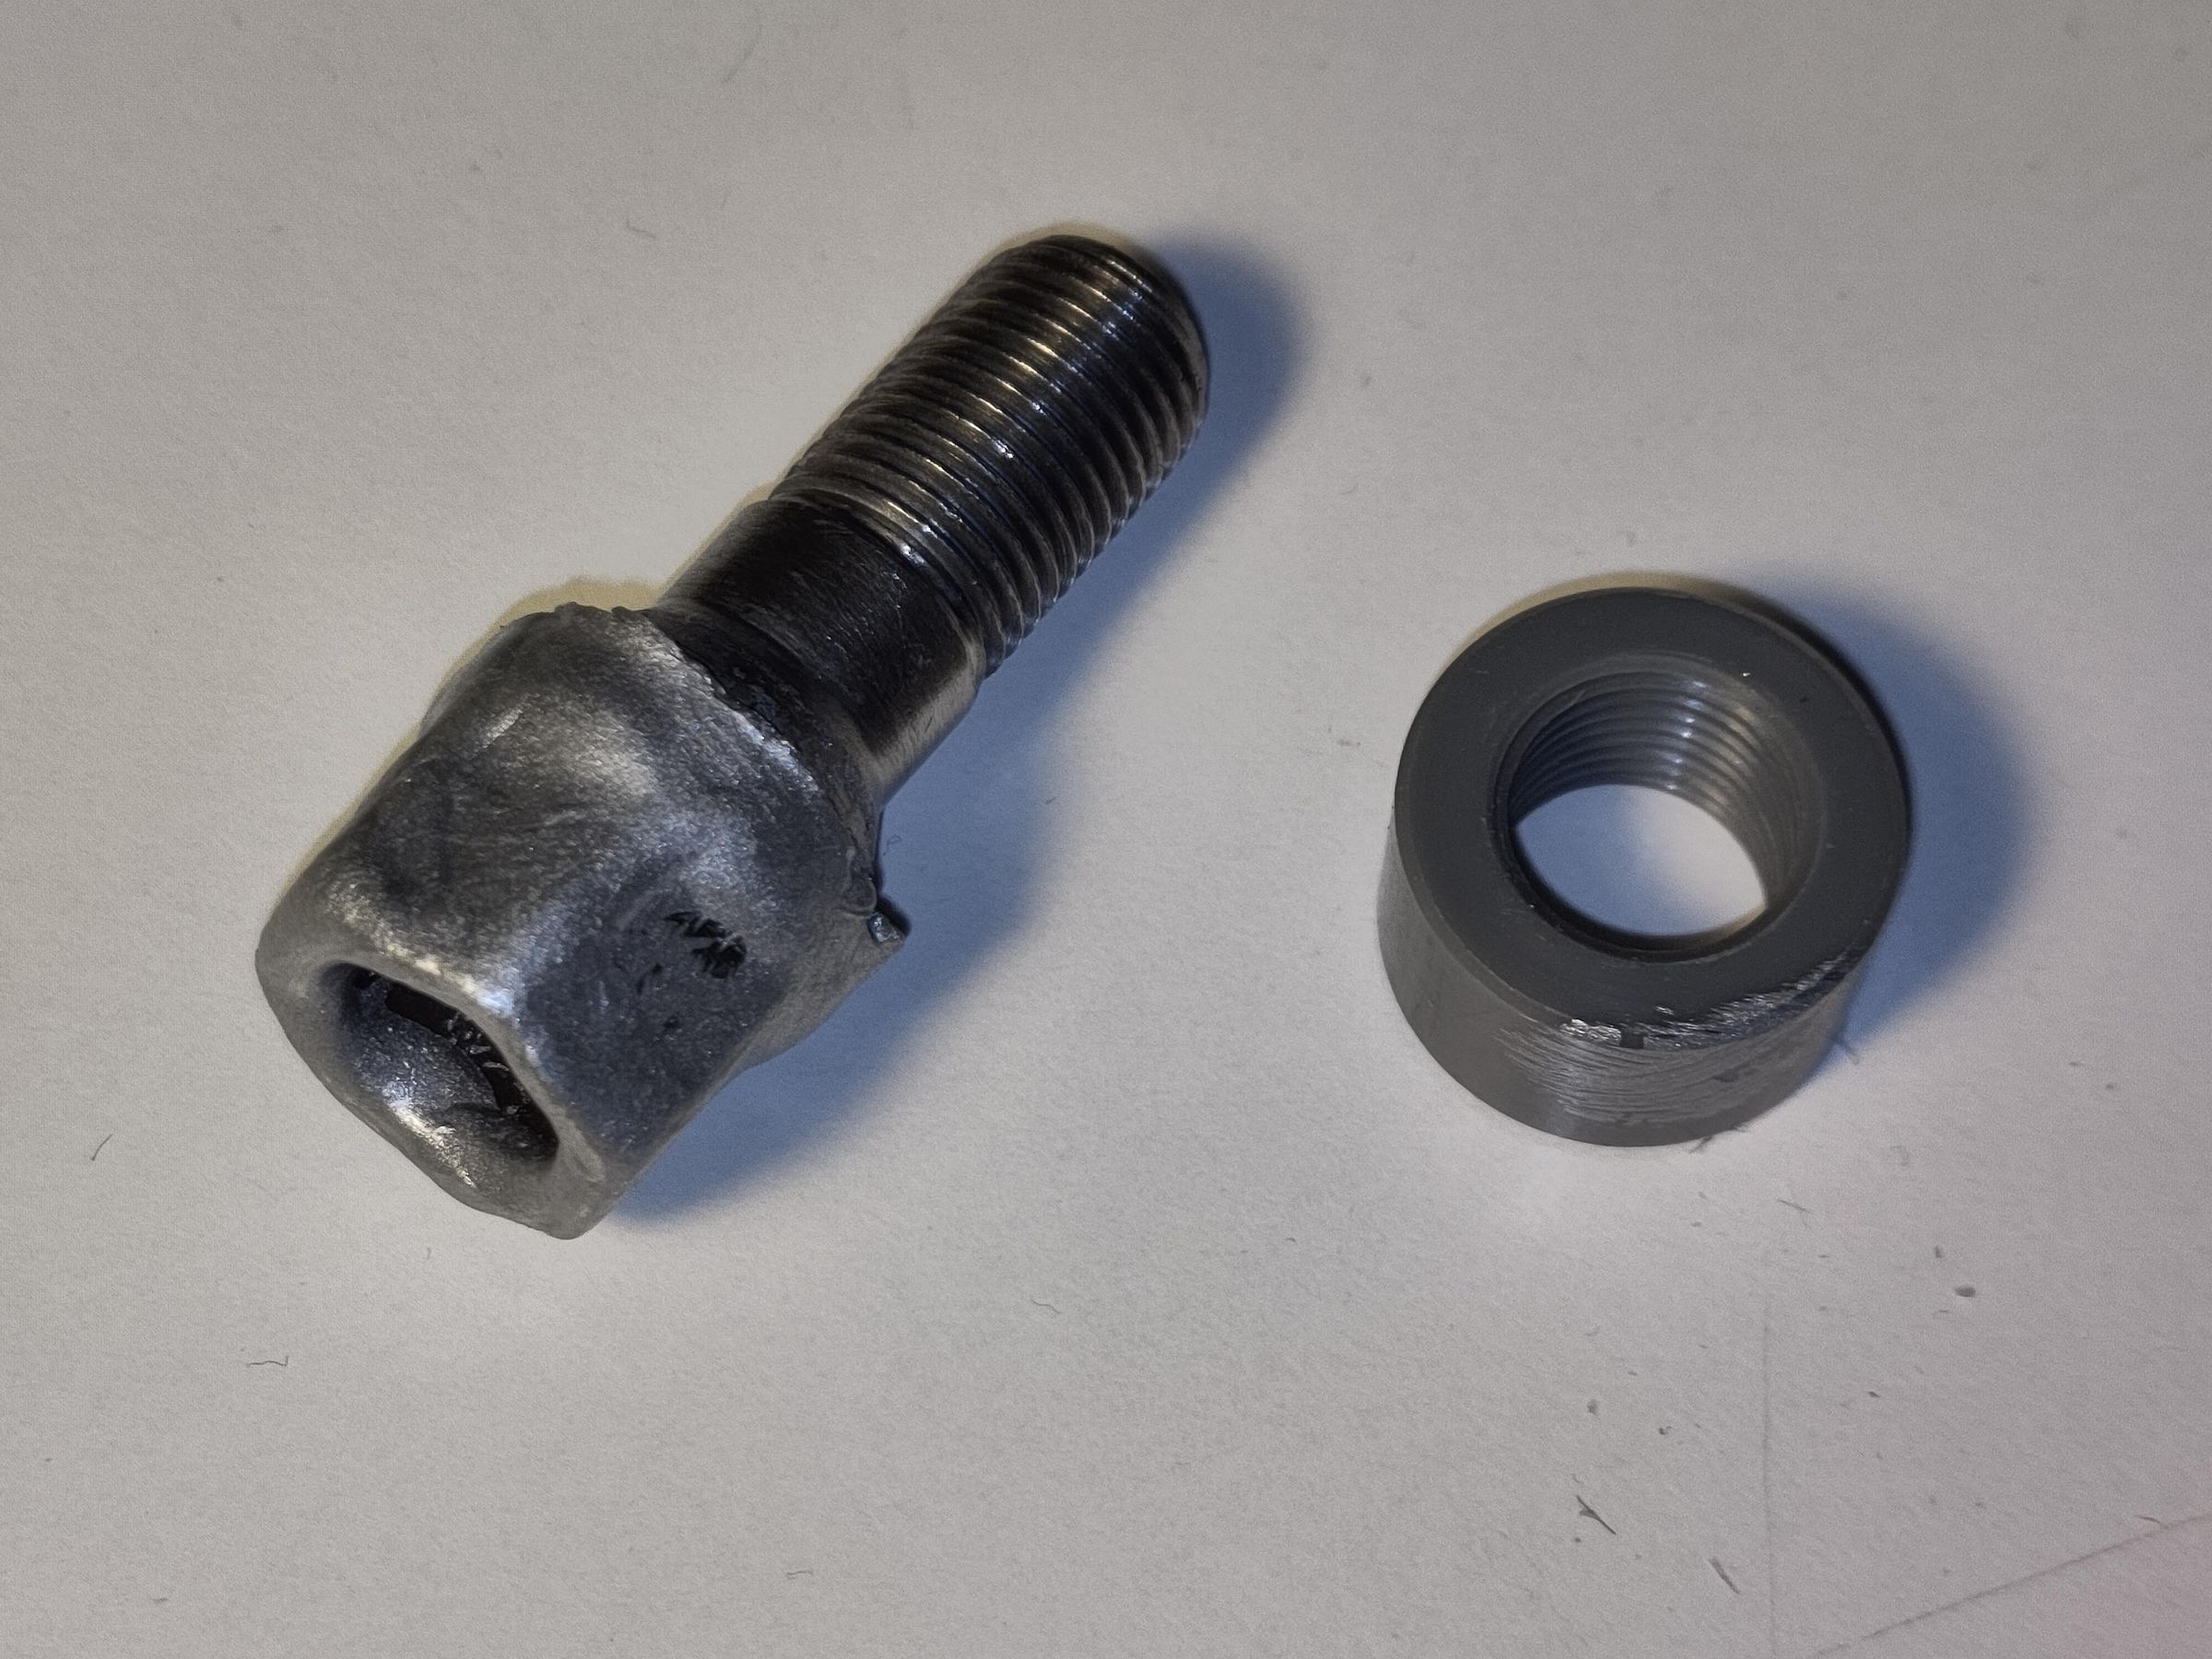
I got four used wheel mounting bolts from my dealer for free, for preventing the countersunk, conical mounting holes being covered by paint while painting the rims. I cleaned them with a steel brush; then I discovered that they have a 12 mm fine-pitch thread, and I could not fit standard M12 nuts on them. Fortunately a friend of mine having a precision lathe in his large, well-equipped workshop managed to provide four plastic nuts with matching thread, allowing me to temporarily fix the bolts in the mounting holes – by hand only, no tools required. The picture above shows one of the bolts after having been used for painting the four rims, so its head is covered by eight coats of paint.
Painting
In retrospect it might have been easier to spray the rims with specialised wheel rim paint, but I wanted to avoid the mess produced when spraying paint. Therefor I decided to use potted, 'Hammerite' brand, silver paint. They claim that their paint protects metal from rust and that it can be used on the bare metal, so painting my steel rims with their product seems a good idea to me.
For painting, I placed the rims on a rotary platform ('lazy susan') by Ikea called 'Snudda'. Its diameter (39 cm) was a bit small for my 44 cm diameter rims (16”), so I fixed a 46 cm dia. circular piece of particleboard on it with a few short pieces of double-sided tape. This allowed me to have the rims in a horizontal position and rotating them easily while painting them.
My experience of painting with neoprene foam rollers so far has been excellent. However, steel rims are somewhat craggy. I had to use a soft brush first for applying the paint to the most recessed parts, and used the foam rollers afterwards to paint the flatter parts. A second coat followed after allowing the first coat to dry for some 24 hours. Once that was dried, too, I placed the rims for some days on my balcony in the sun for some extended curing.
The Result

The picture above shows one of them in place with a brand new summer tyre installed. I like it!
BTW, the white residue on the new rubber isn't spilled paint but some lubricant used in the workshop during tyre fitting.
Now, time and experience will show how successful I really was and how durable the silver coating will be.