CNC Skateboard With X-carve Router
by Perezzz_ in Workshop > Woodworking
2029 Views, 34 Favorites, 0 Comments
CNC Skateboard With X-carve Router

Throughout this Instructable we will see how you can create your own skateboard design from scratch! Here is step by step to fabricate your own skateboard using Plywood and the Easel software with the X-Carve CNC router by Inventables.
Let's talk about how to engrave your digital design into the wood, how to cut the outline of the board and the assembly of the wheels.
Supplies

- Pine Plywood 19 mm or similar thickness
- CNC Router (X-carve by Inventables) with a double flute straight cut bit of ⅛ inch.
- Bandsaw or any other saw
- Orbital sander
- Sand paper (rough, medium and fine grain)
- Drill and bits
- Countersink drill bit (45 degrees)
- Paint and paintbrushes
- Kit of Skateboard wheels and Nuts / bolts.
Design the Artwork

First of all, you will need to make your design digital, but why digital? The fabrication equipment CNC Router we will be using for this Instructable is based on CNC (computer numerical control) processes so it requires reading a CAD drawing (computer aided design) to work properly.
This time I used Adobe Illustrator software to draw my design using the pen tool, which generates vector designs that a computer can interpret as sequences of coordinates.
However, you can use any other vector design software you want (a good free alternative is to use Inkscape) As long as you follow the same steps:
- Choose the silhouette that you will use for your skateboard and draw its shape with the pen tool (no fill, just black outline).
- Draw the pattern you will use to engrave on the wood (gray filling, don't use outline). Make sure it doesn't go outside the outline of your skateboard.
- Measure and accurately draw the wheel holes (black fill, no outline).
Like any manufacturing technology, we must follow certain rules and constraints to guarantee the feasibility of the design (making sure that the design can be manufactured correctly). In this case the five most important restrictions are:
- Avoid creating our design with intersecting lines or curves. Lines that cross over each other can cause irregularities in the cuts.
- Use Boolean operations (addition, subtraction and intersection) to create complex 2D shapes.
- On Adobe Illustrator we can use the Path Finder command.
- For Inkscape we usually use the Object menu.
- Design to 1:1 scale. Make sure the Canvas (or drawing area) corresponds to the size of your actual material, also the drawing should be drawn using the actual measurements of your skateboard.
- Usually a conventional CNC router cannot produce details smaller than 1/8 inch (3 mm). Therefore every detail, line, circle or corner of your drawing must be larger than that.
- Draw in grayscale (In the next step we will discuss this topic in more depth.)
Once you are satisfied with your design, export it into a format compatible with your CAM software (Computer Aided Manufacturing), the most common extensions are .dxf or .svg. *To be used with EASEL software you will require the drawing in .svg format.
Understanding the Grayscale for CNC Machining

Using a grayscale when drawing your digital design will help the CAM software to define the depth of cut (or engraving) on each of the elements of your design.
The rules are simple:
- White represents 0 mm (or the space where the router will not touch the material).
- Black represents the maximum thickness of your material (space where the router will pass through your entire sheet).
- Any shade of gray that remains between white and black will calculate its depth in a stepwise order as it gets closer to black.
Therefore the logic for using this grayscale is: use black only in the drill holes (where the wheel bolts will go) and cut paths (the perimeter of the skateboard silhouette).
And use gray for the general pattern or design that you want to engrave over the wood surface (try not to be too deep, 2 mm will be enough). The deeper the engravings, the more you are weakening the strength of your skateboard. Be careful with that!
Setting Up a New Document in Easel Inventables
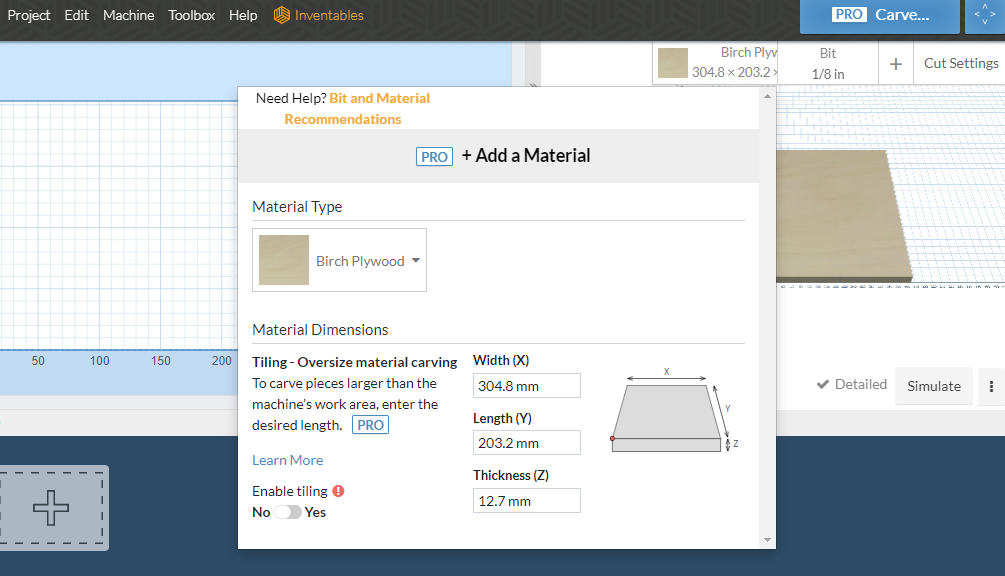
Easel by Inventables is a free online (cloud based) CAD and CAM software for designing and manufacturing prototypes using the CNC router X-Carve or similar.
When you open a new document you will find on your left the CAD drawing area (where you can draw your own designs) and on your right the CAM previewer (where you can check the paths that the router will follow in real time, before starting with the cuts).
But first of all, you must make sure that you set up your document correctly:
- Go to the "material" menu in the right-hand window
- Choose from the gallery of materials the type of wood that most closely matches the real one. *I used Birch Plywood which is the closest to pine plywood. It is extremely important to choose a material with the same characteristics as yours, because the software uses this information to program the cutting speed (and other technical aspects).
- Measure the piece of wood you will use and write down its exact width (x).
- Measure the piece of wood you will use and write exactly its length (y).
- Measure the piece of wood you will use and write down exactly its thickness (z). *Be careful with the size of your drill bit, conventional routers do not usually cut wood thicker than 2 cm.
- Click outside the window to save the changes automatically. You will see on your both windows that the wood preview has been updated.
Import .svg Into Easel Inventables

As we have drawn our design externally (using other software) it is not necessary to re-draw it inside the program, we only need to import it in .svg format.
- Access the import menu (last icon in the left option bar).
- Select the file you want to import.
- You will notice how your design appears in both windows.
- To center it on the wood, select the entire design and go to the Edit menu > Center to material. *Remember to leave a tolerance perimeter around each side of the wood (2 cm will be enough) to place the clamps.
Now it is time to double check the grayscale values. If you need to change a value you only have to select the figure and a bar (Shape Tab / Cut Tab) will appear where you can specify the depth of each cut inside the Cut Tab *be sure to select the "Clear Out a Pocket" option.
Finally, select all the shapes that will be cut (such as the skateboard outline) and access the Cut Tab, *make sure to select the "Cut Outside Shape Path" option and enable the "use tabs" checkbox.
Cutting Settings in Easel Inventables
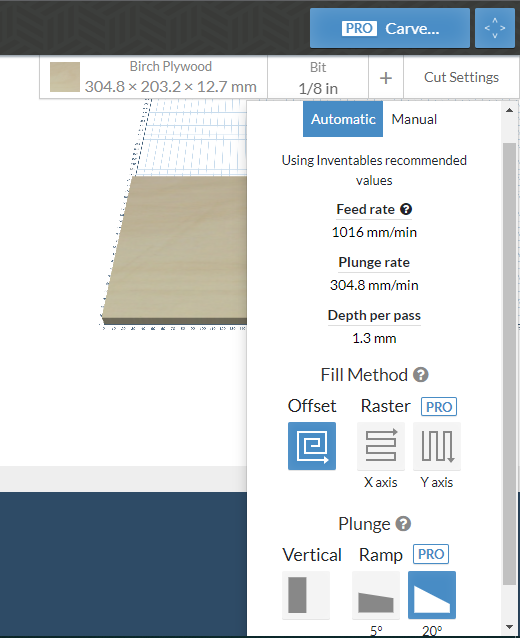
Fortunately for us Easel has very standardized cutting settings, we only have to verify that the software bit and the material corresponds to the one we are using in real life. *In this case 1/8 in double flute straight end mill with birch (or pine) plywood.
Clamping the Material to the Wasteboard

Clamping the wood to the cutting bed is a very important step in maintaining quality and control over the cut. It is crucial to lay as flat as possible (avoid bending the wood), secure it tight on all the four sides and make sure it is perfectly aligned to the X and Y axes.
If the wood is warped or in poor condition it is probable that it will produce irregular cuts or in the worst case it can break the drilling bit! If the wood is not tight enough, it could move out of place in the middle of the cutting or engraving process damaging the mechanism.
X-Carve It!
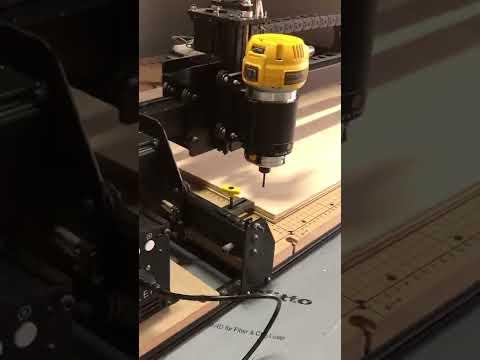
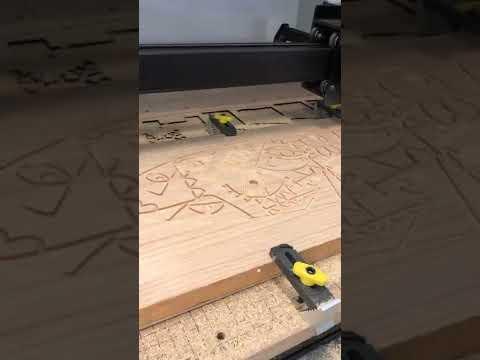
Before starting any cutting, Easel will ask us to perform a small routine check where we make sure:
- The measurements and type of material correspond to the real one.
- Our drill bit corresponds to the real one.
- We have correctly secured the material to the cutting bed.
- We take the spindle to the 0 origin point of our material *lower left corner of the wood, just barely touching the flat surface of the wood.
- Automatically lift the spindle.
- Make sure the spindle is turned on before starting the carving.
With all that in place, it's time to wish it the best and start the cutting. Let the mesmerizing process of routing begin!
Clean the Waste Board and Release the Clamps

At the end of the cut the spindle will return to its starting point and we must turn it off manually.
The oddly satisfying process of vacuuming all dust from the cutting bed begins. Look at the visuals!
After all is clean, it's the moment to release the clamps and start working on the wood finishes.
Remove Tabs

A tab is a piece of wood that the CAM software automatically generates to hold the design in place to the rest of the wood sheet, so it does not fly away when the drill touches the last layer of the cut.
After the cutting process, I used a bandsaw to release the tabs, but any other type of saw can work too (jigsaw, handsaw or even a sharp cutter).
Sand Down
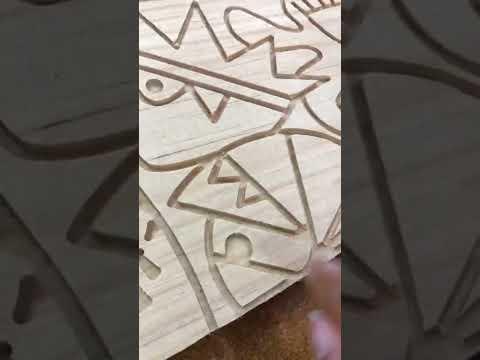
Like any sanding job, I used rough, medium and fine grade sandpaper (in that order) until I got the smooth texture I was looking for.
Fortunately I had an orbital sander, which allowed me to speed up the process, but you can always do it the traditional way with sandpaper and a wood block.
Color It!

I opted for neon acrylic paint to achieve a greater contrast between the wood and the engraved design. With the help of a thin paintbrush (and a lot of patience) I carefully painted inside each rail of the design.
But you can do it the way you want! It's your design!
Smooth the Edges
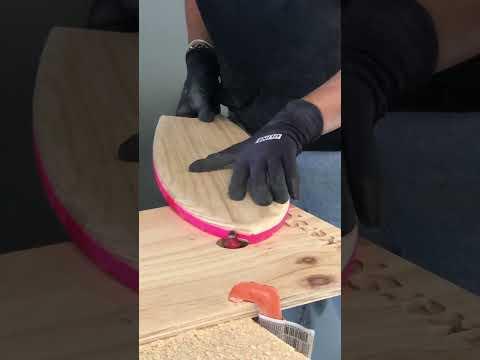
No one wants to hit their ankle on the sharp edge of a piece of wood. To prevent this, I decided to round the entire perimeter of the skateboard.
I disassembled the spindle from our X-Carve and later installed it on a small router table (that allows me to have more natural control of what I was doing). Using a rounding mill I went over the entire edge until I got a smooth border.
If you do not have a rounding bit, you can do it by hand with sandpaper.
Measure and Drill the Holes

With the wheels marked down and perfectly aligned, I drilled the holes where the screws will pass. In order to attach the wheels.
Varnish It!

At the end of the day our skateboard will be constantly outdoors, so it is essential to protect it from the sun's rays, humidity and scratches.
For this I chose to seal it with polyurethane varnish with semi-matte finish. The mixture I used was 1 part of polyurethane, 1/2 part of polyurethane catalyst and 1/3 of polyurethane thinner. *Be sure to read the supplier's specifications before mixing any compound.
Wait for the coating to dry completely before assembling the wheels.
Screw the Wheels

When the holes are ready, and the fit is just right, I use a socket wrench to tighten up the nuts and bolts.
Try It by Yourself and Let's Roll!

Enjoy your skateboard and be safe!