Pontoon Boat on a Bike: the Dogmaran 2.0
by mrstapleton in Outside > Fishing
267 Views, 0 Favorites, 0 Comments
Pontoon Boat on a Bike: the Dogmaran 2.0

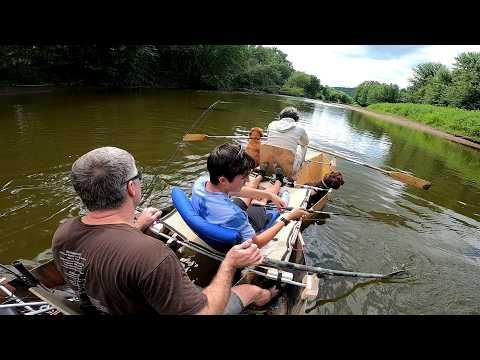
Beat the heat by getting out on the water with your friends!
Four years ago I posted the Dogmaran Instructable about an ultralight boat that accommodates a human and two dogs, and that you can carry as a backpack. This reboot includes several improvements on the original, but the really important goals that motivated my work were: 1) to be able to ride up a river with my boat on my bike and then float back down with my bike on my boat— no shuttle needed, and 2) to make the Dogmaran experience a more social event, involving people friends in addition to dog friends.
New Features of the Dogmaran 2.0:
- It goes ON Your Bike: A simple bike attachment lets you carry your boat full of gear on your bike. Since there is no trailer, the bike will then fit easily on the back of the boat. Ride upstream with the boat on your bike; float downstream with the bike on your boat. Or ride to a lake, bike across, and ride home. You don’t need a bridge or a ferry when you have a dogmaran; it’s now part of an amphibious system.
- Party Barge Mode: A single dogmaran can be a little lonely -- even with two dogs. Now, you can connect two dogmarans to make one 13 foot vessel with a fabric deck in between. There are just two simple connectors, and they easily fit inside the boats during travel. We stress tested the system yesterday by taking it down a river overloaded with 3 people, 2 dogs, and 3 bikes -- and it passed with my wife's approval!
- Easier Assembly: The crossmembers insert and lock with a twist (no retainer pins to lose, like the old system)
- Improved Seat Design: The new seat is more secure, more comfortable, and simpler than the one in the original Instructable.
- Increased Oar Handle Clearance: I made some oarlock risers to keep the oars from hitting my knees. It also mostly keeps them above the dogs' heads.
Supplies
Materials:
- Two 4'x8' sheets of 0.2" Revolution Ply from Lowes (or other 1/4"-ish thickness plywood)
- Two 10' lengths of 1/2" EMT galvanized conduit
- 5' of 3/4" PVC
- Approximately 1'x1' of 3/4" plywood
- Approximately 2'x4' of 1/2" plywood
- 2"x4" stud scraps
- 2" wood screws
- 3" wood screws
- 1 1/4" drywall screws
- Strong, weather resistant fabric
- 1" wide Polypropylene webbing
- 3/8" Grommets
- S hooks
- 4mm paracord
- 1/4" rope
Tools:
- Jigsaw
- Oscillating flush cut tool
- Bandsaw (you could use the jigsaw)
- Table or Circular Saw
- Drill
- Impact Driver
- Angle grinder with metal cutting disks and low grit flap disks
- Welder (optional)
- Sewing machine
- Grommet tool
- Grinder with wire brush wheel
- Benchtop belt sander
- 3-D printer (and PLA filament)
Check Out the Original Dogmaran Plans
The steps below are just the Dogmaran updates. If you want to build a Dogmaran, you should check out both the steps below and the basic instructions in the original Dogmaran Instructable.
Bike Rack
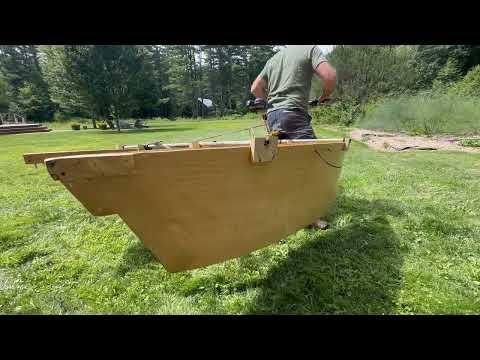
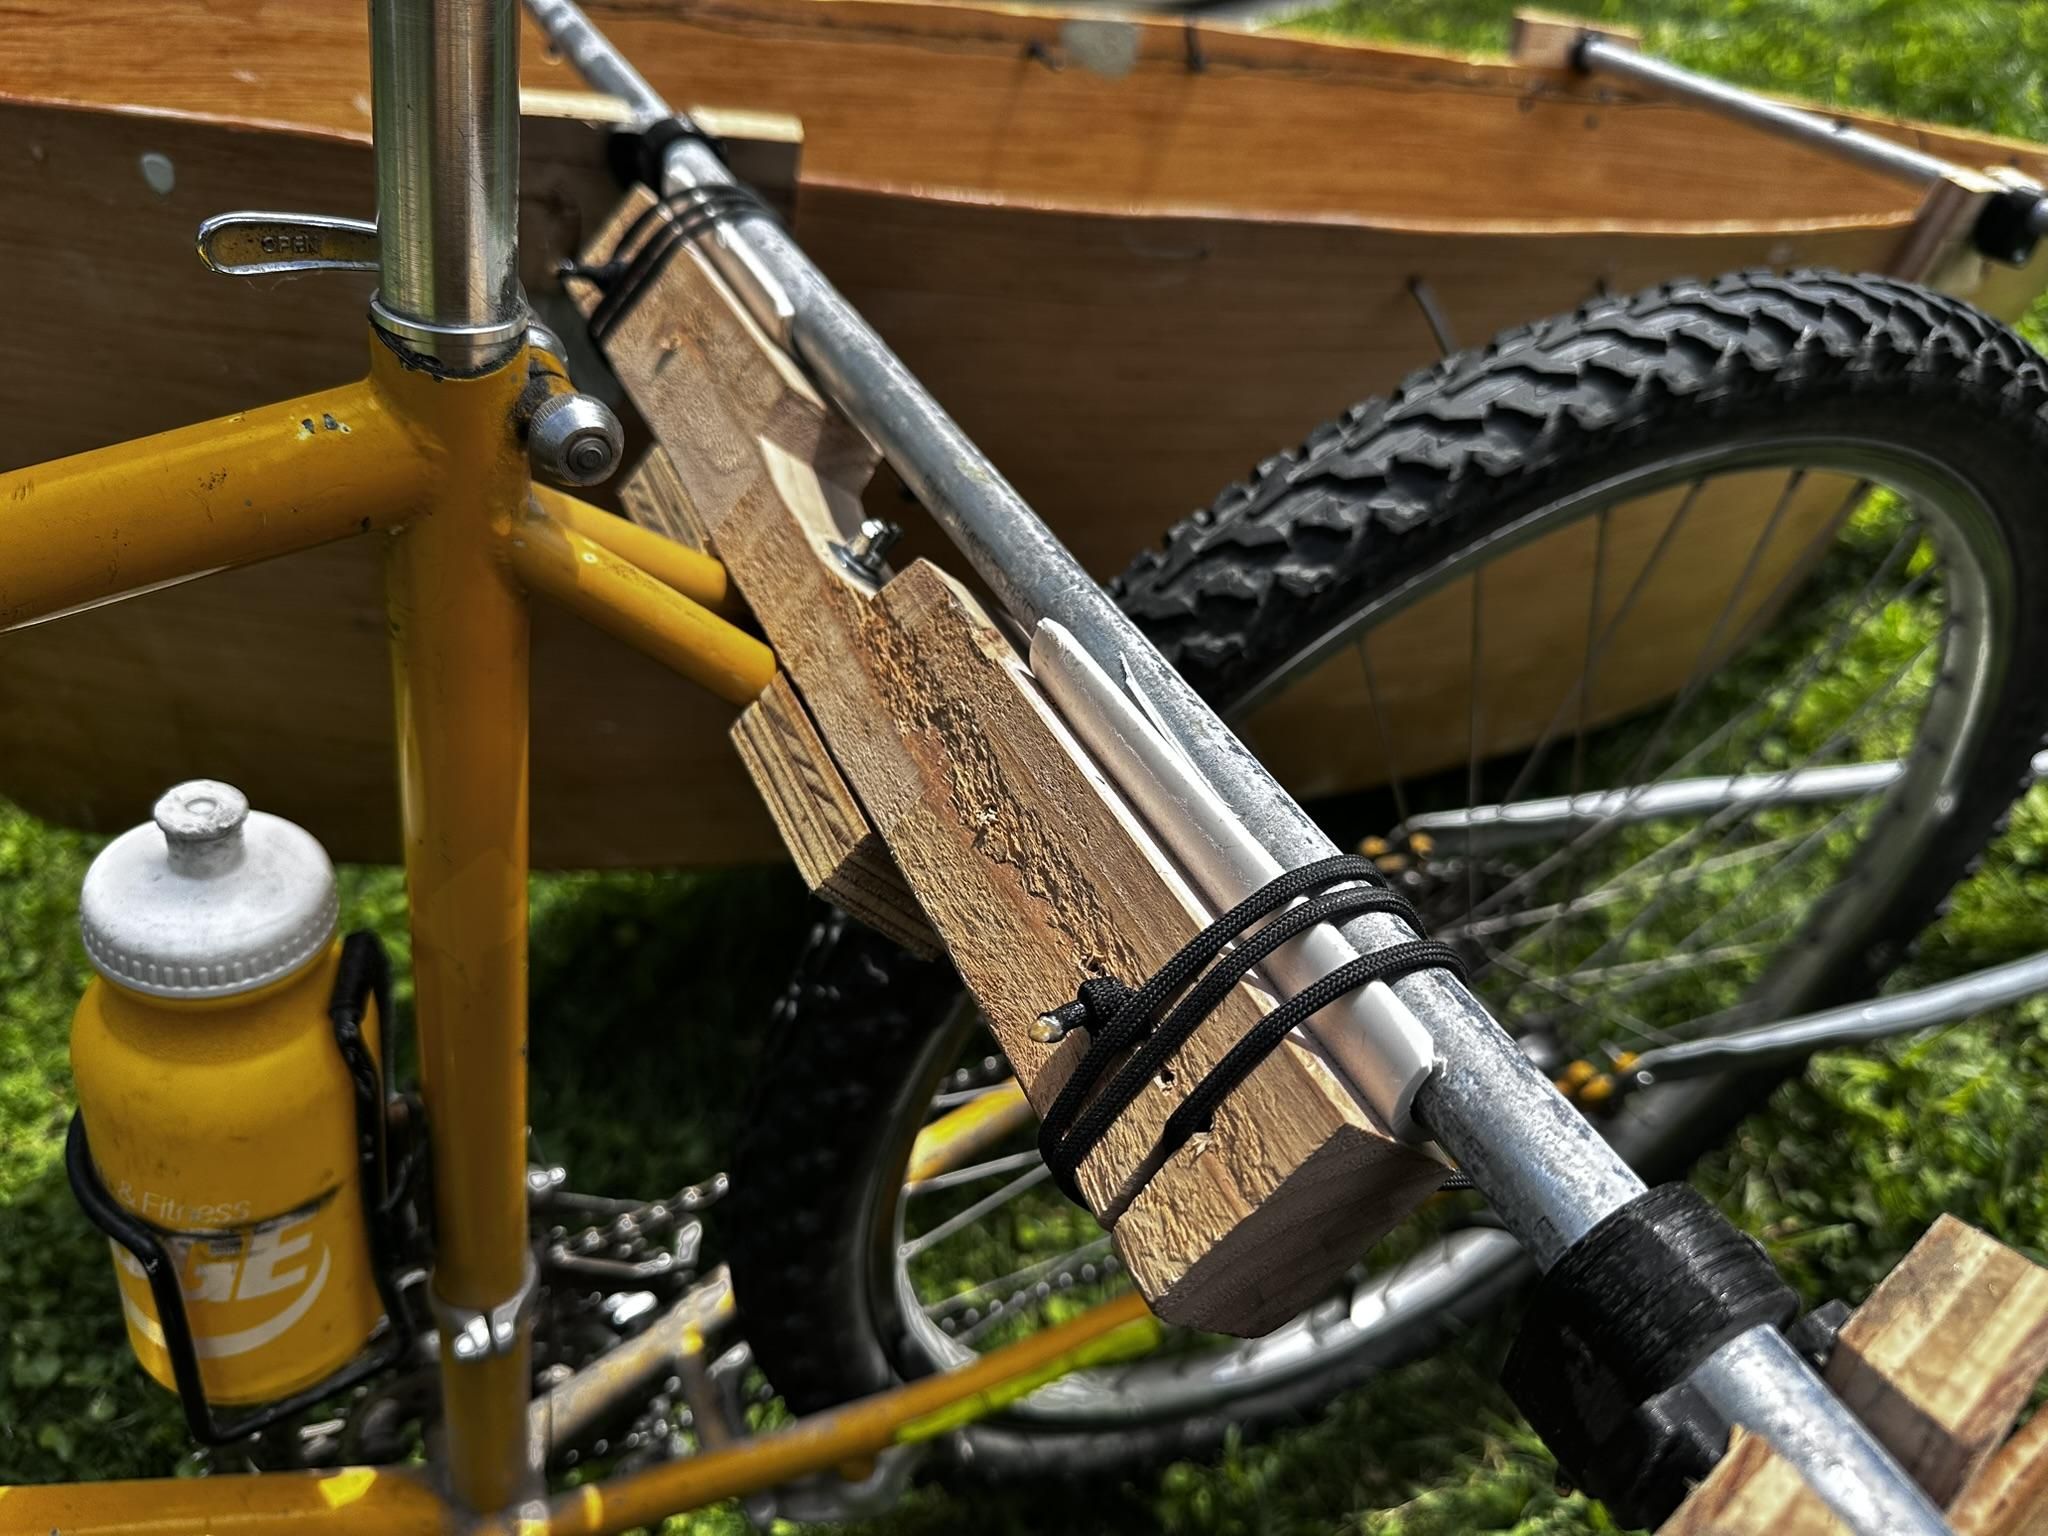
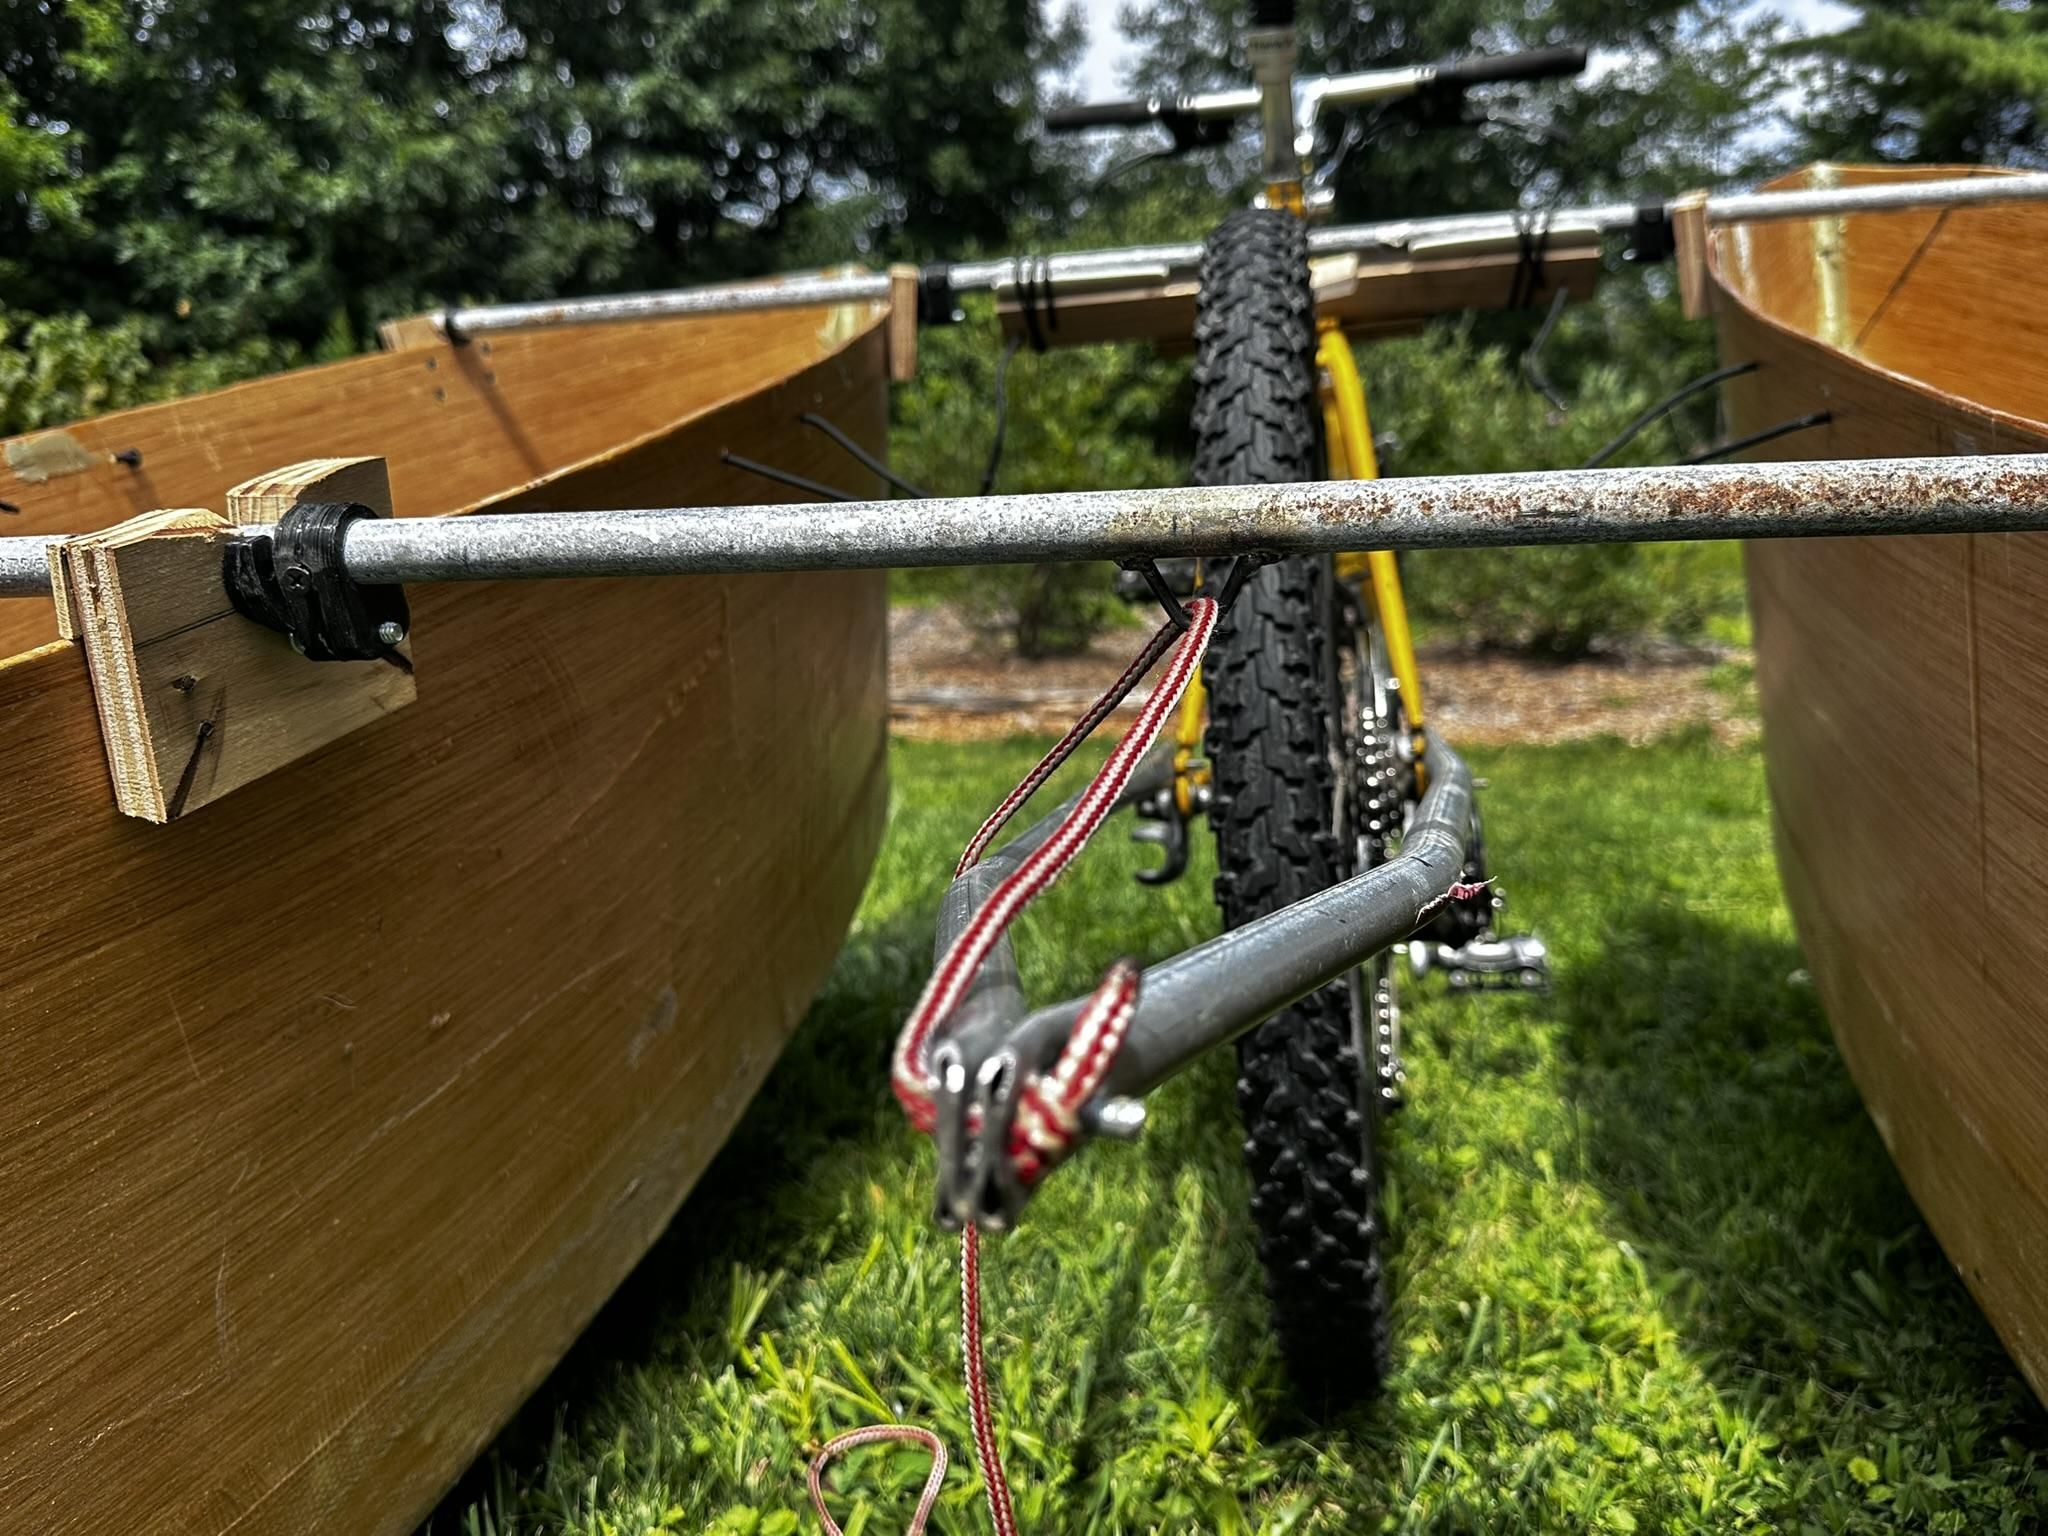
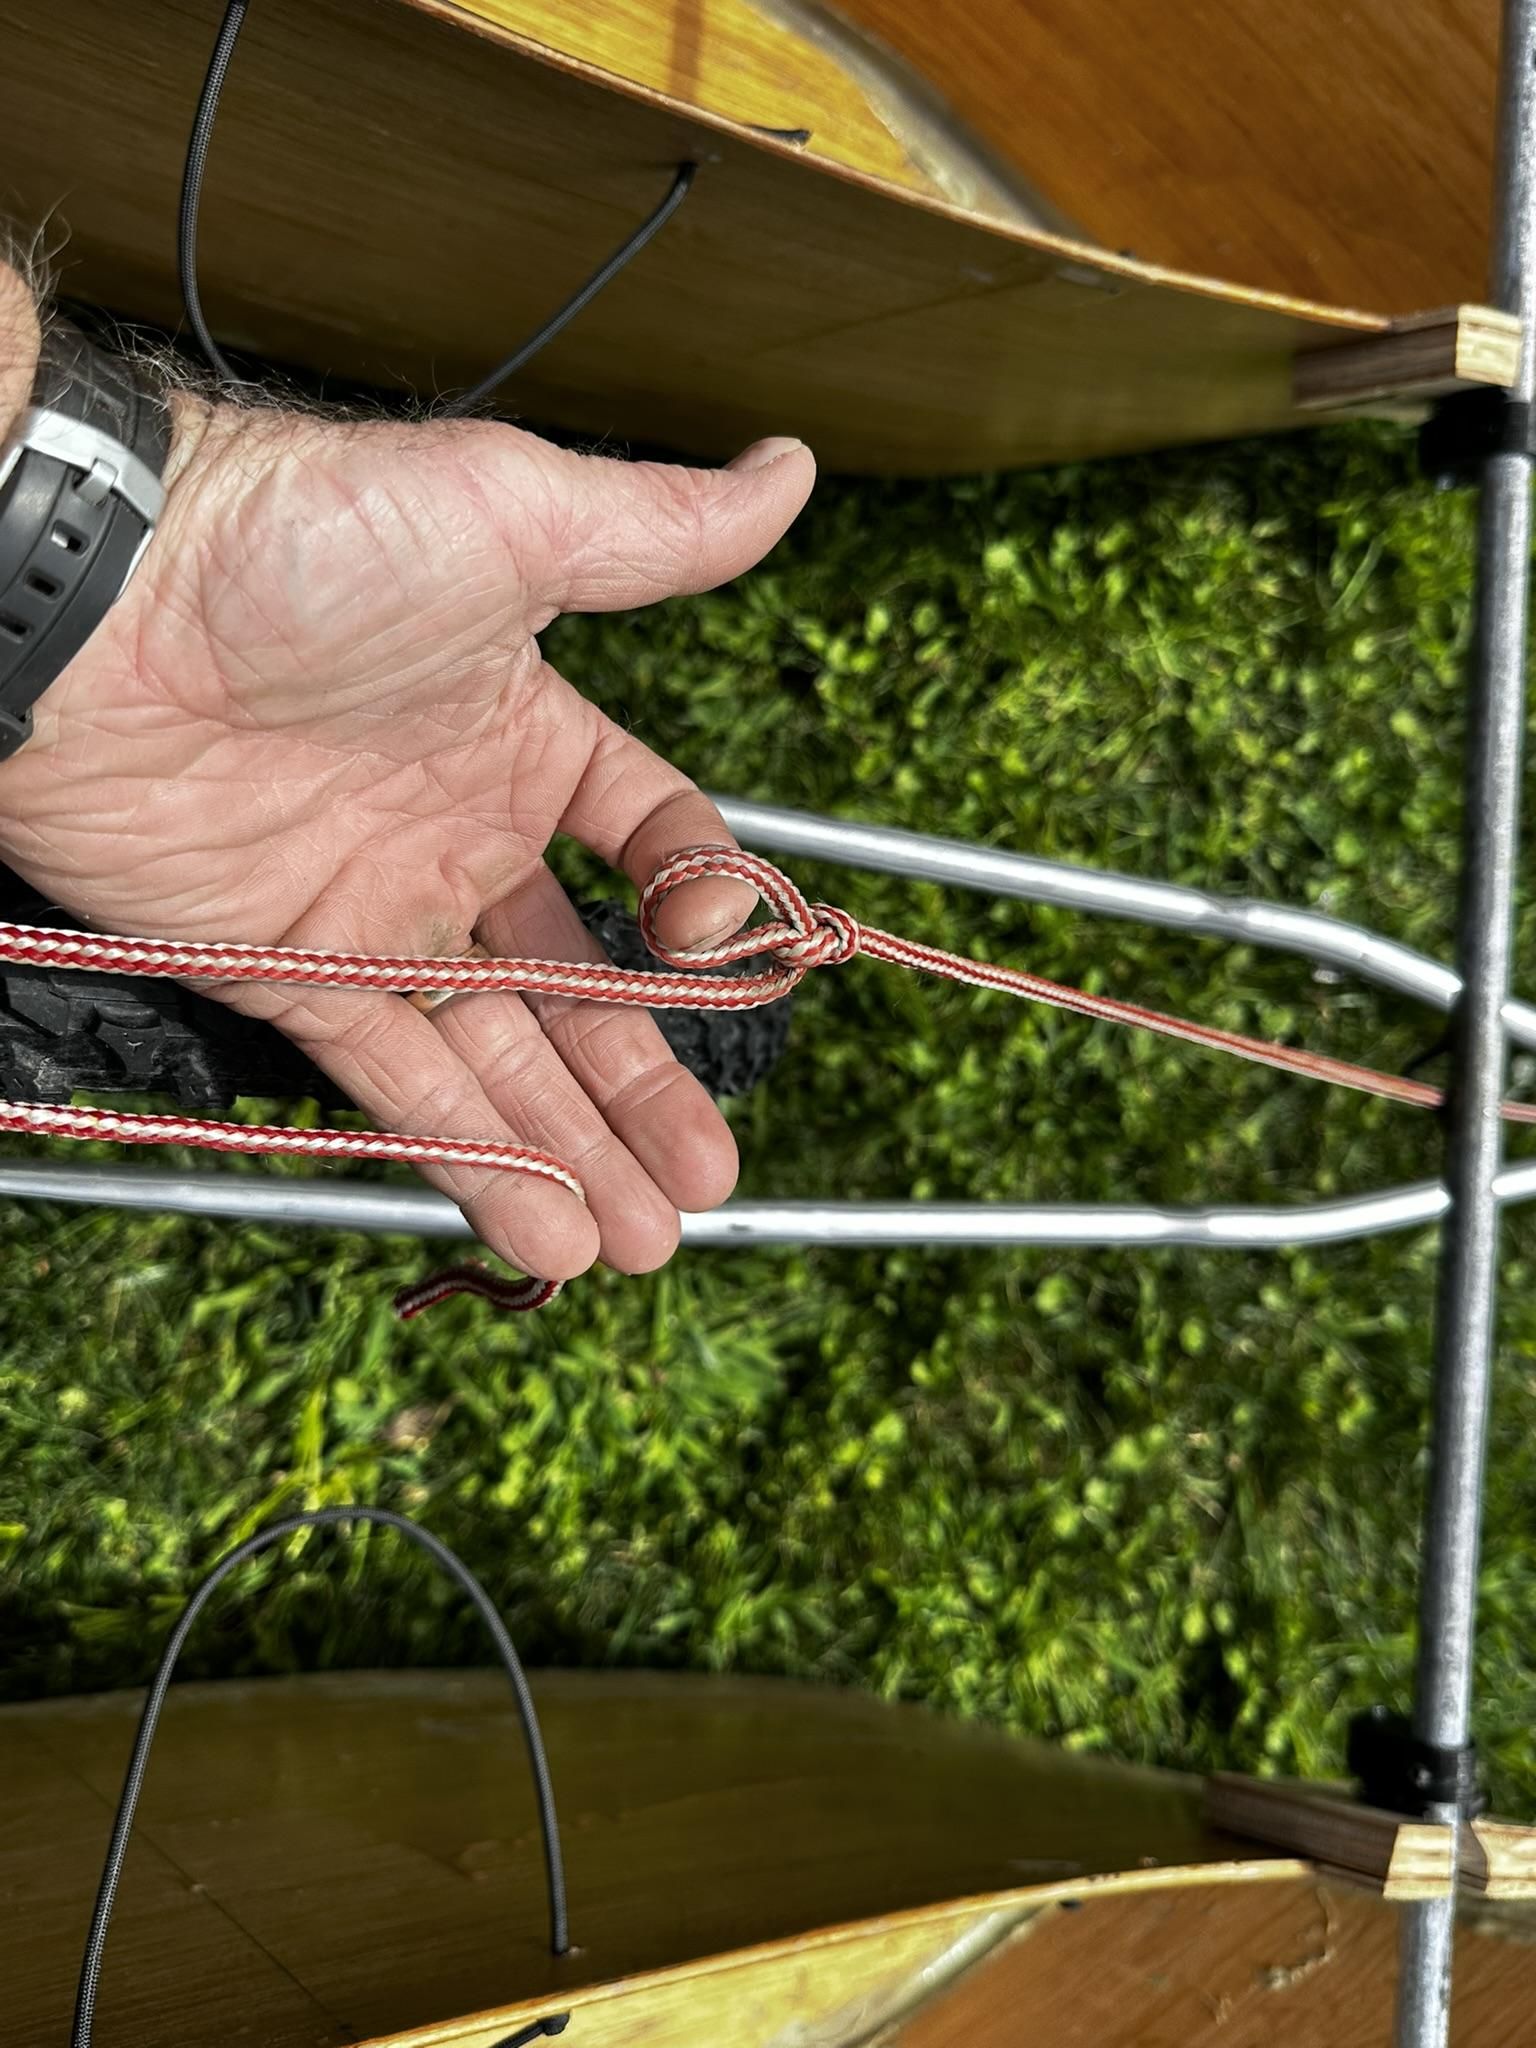
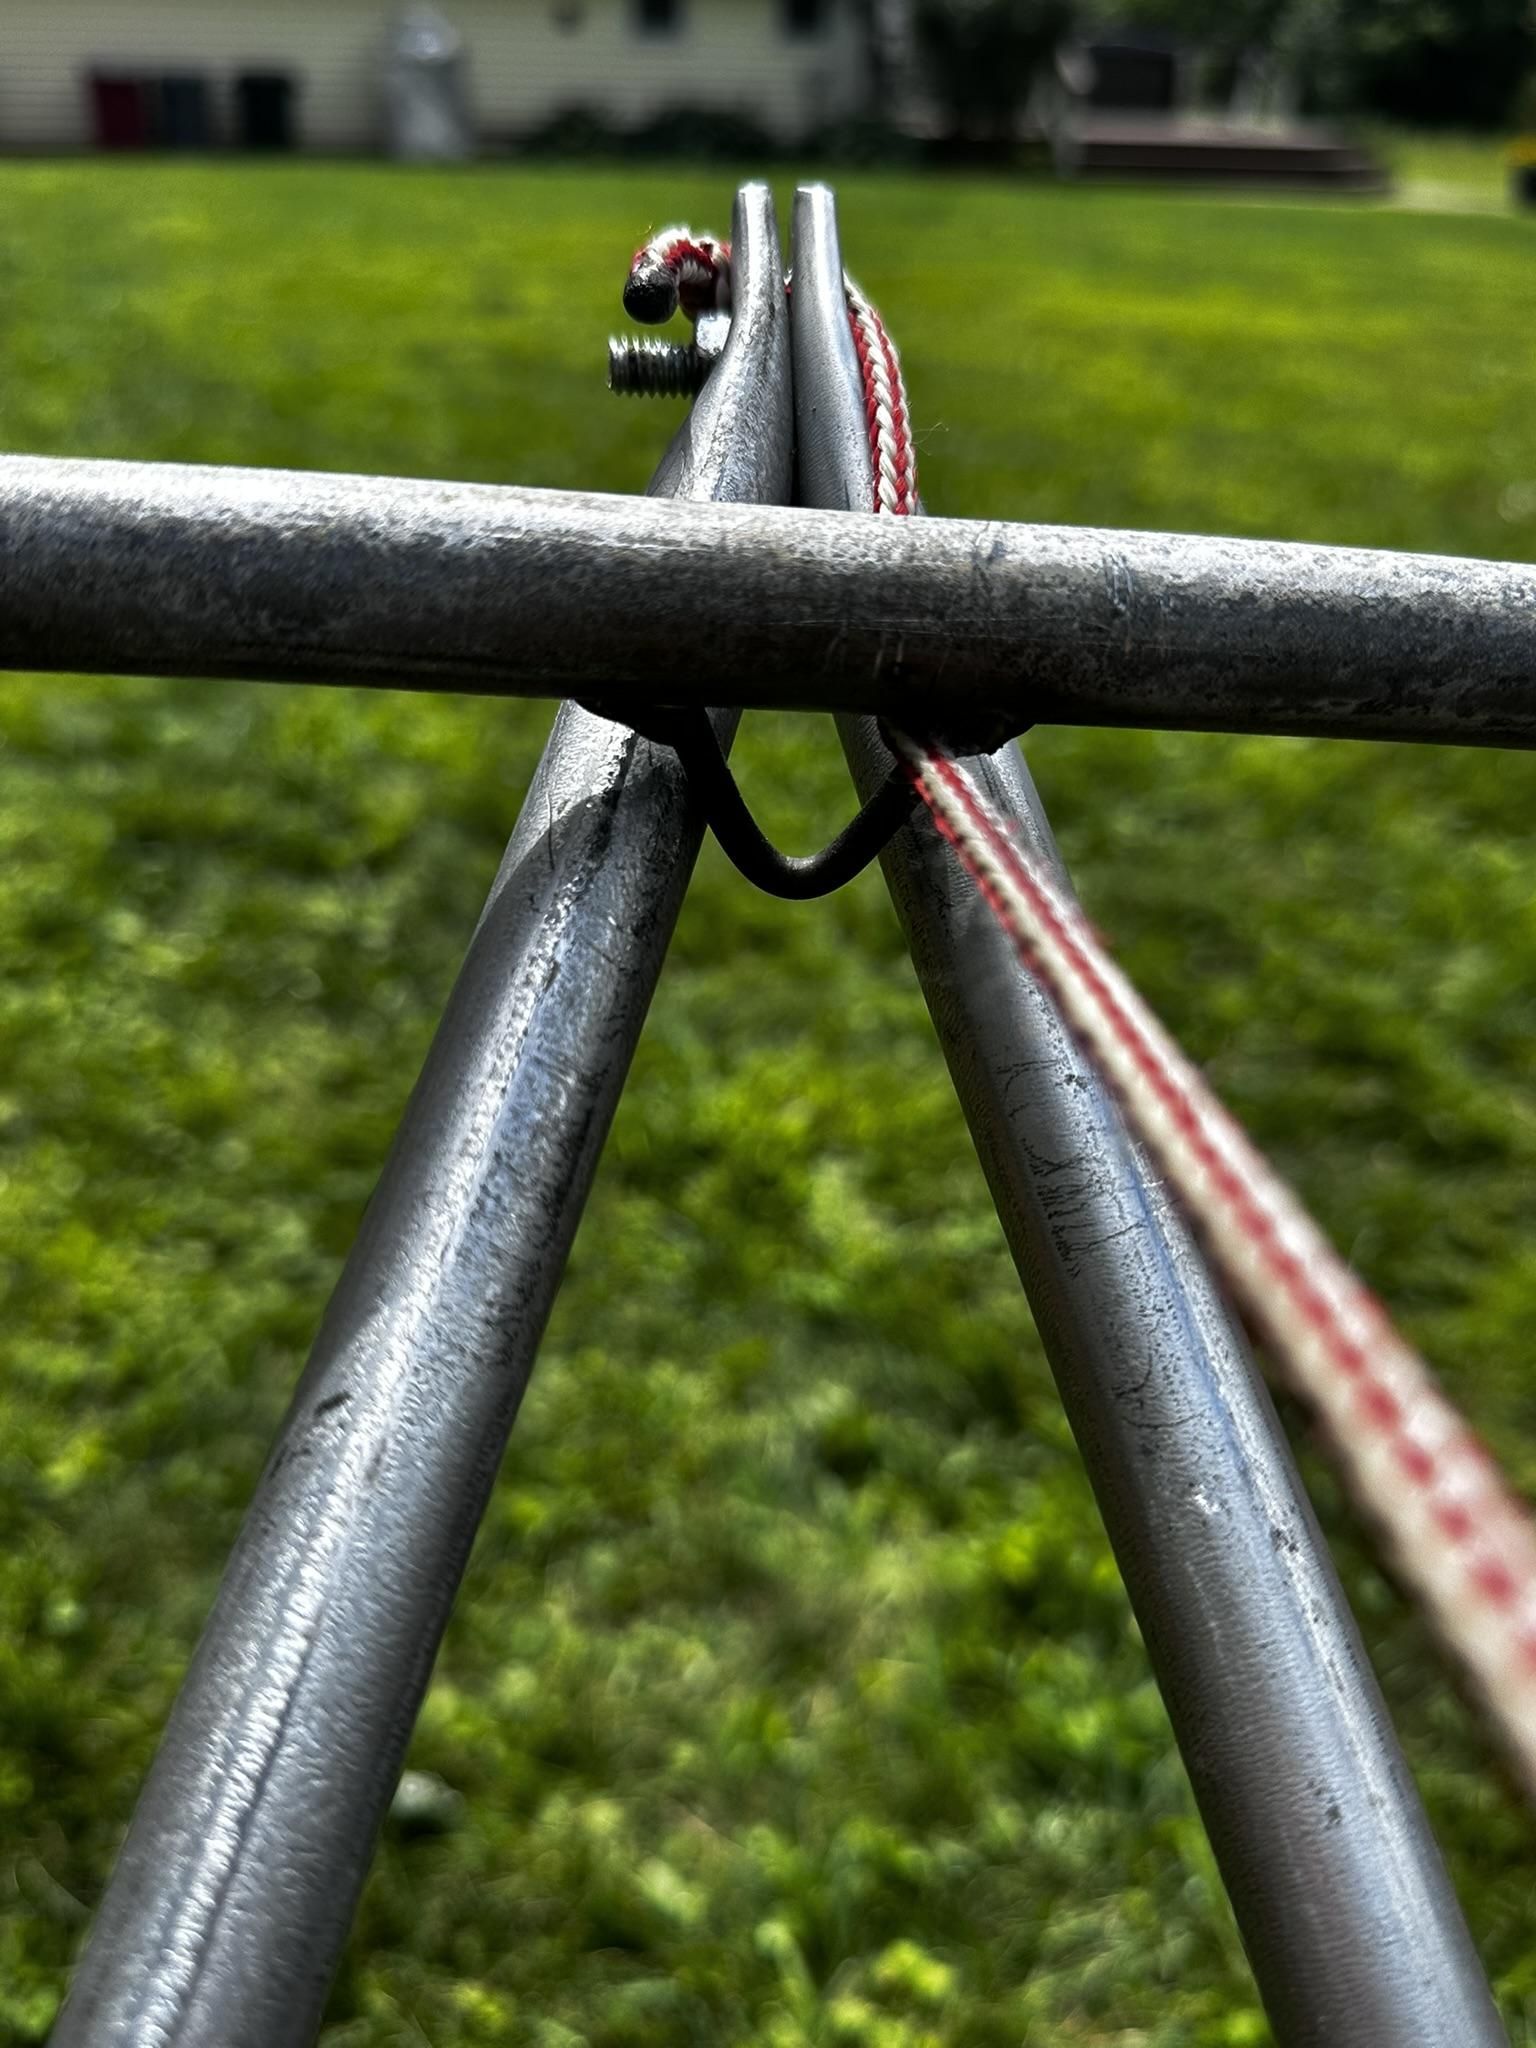
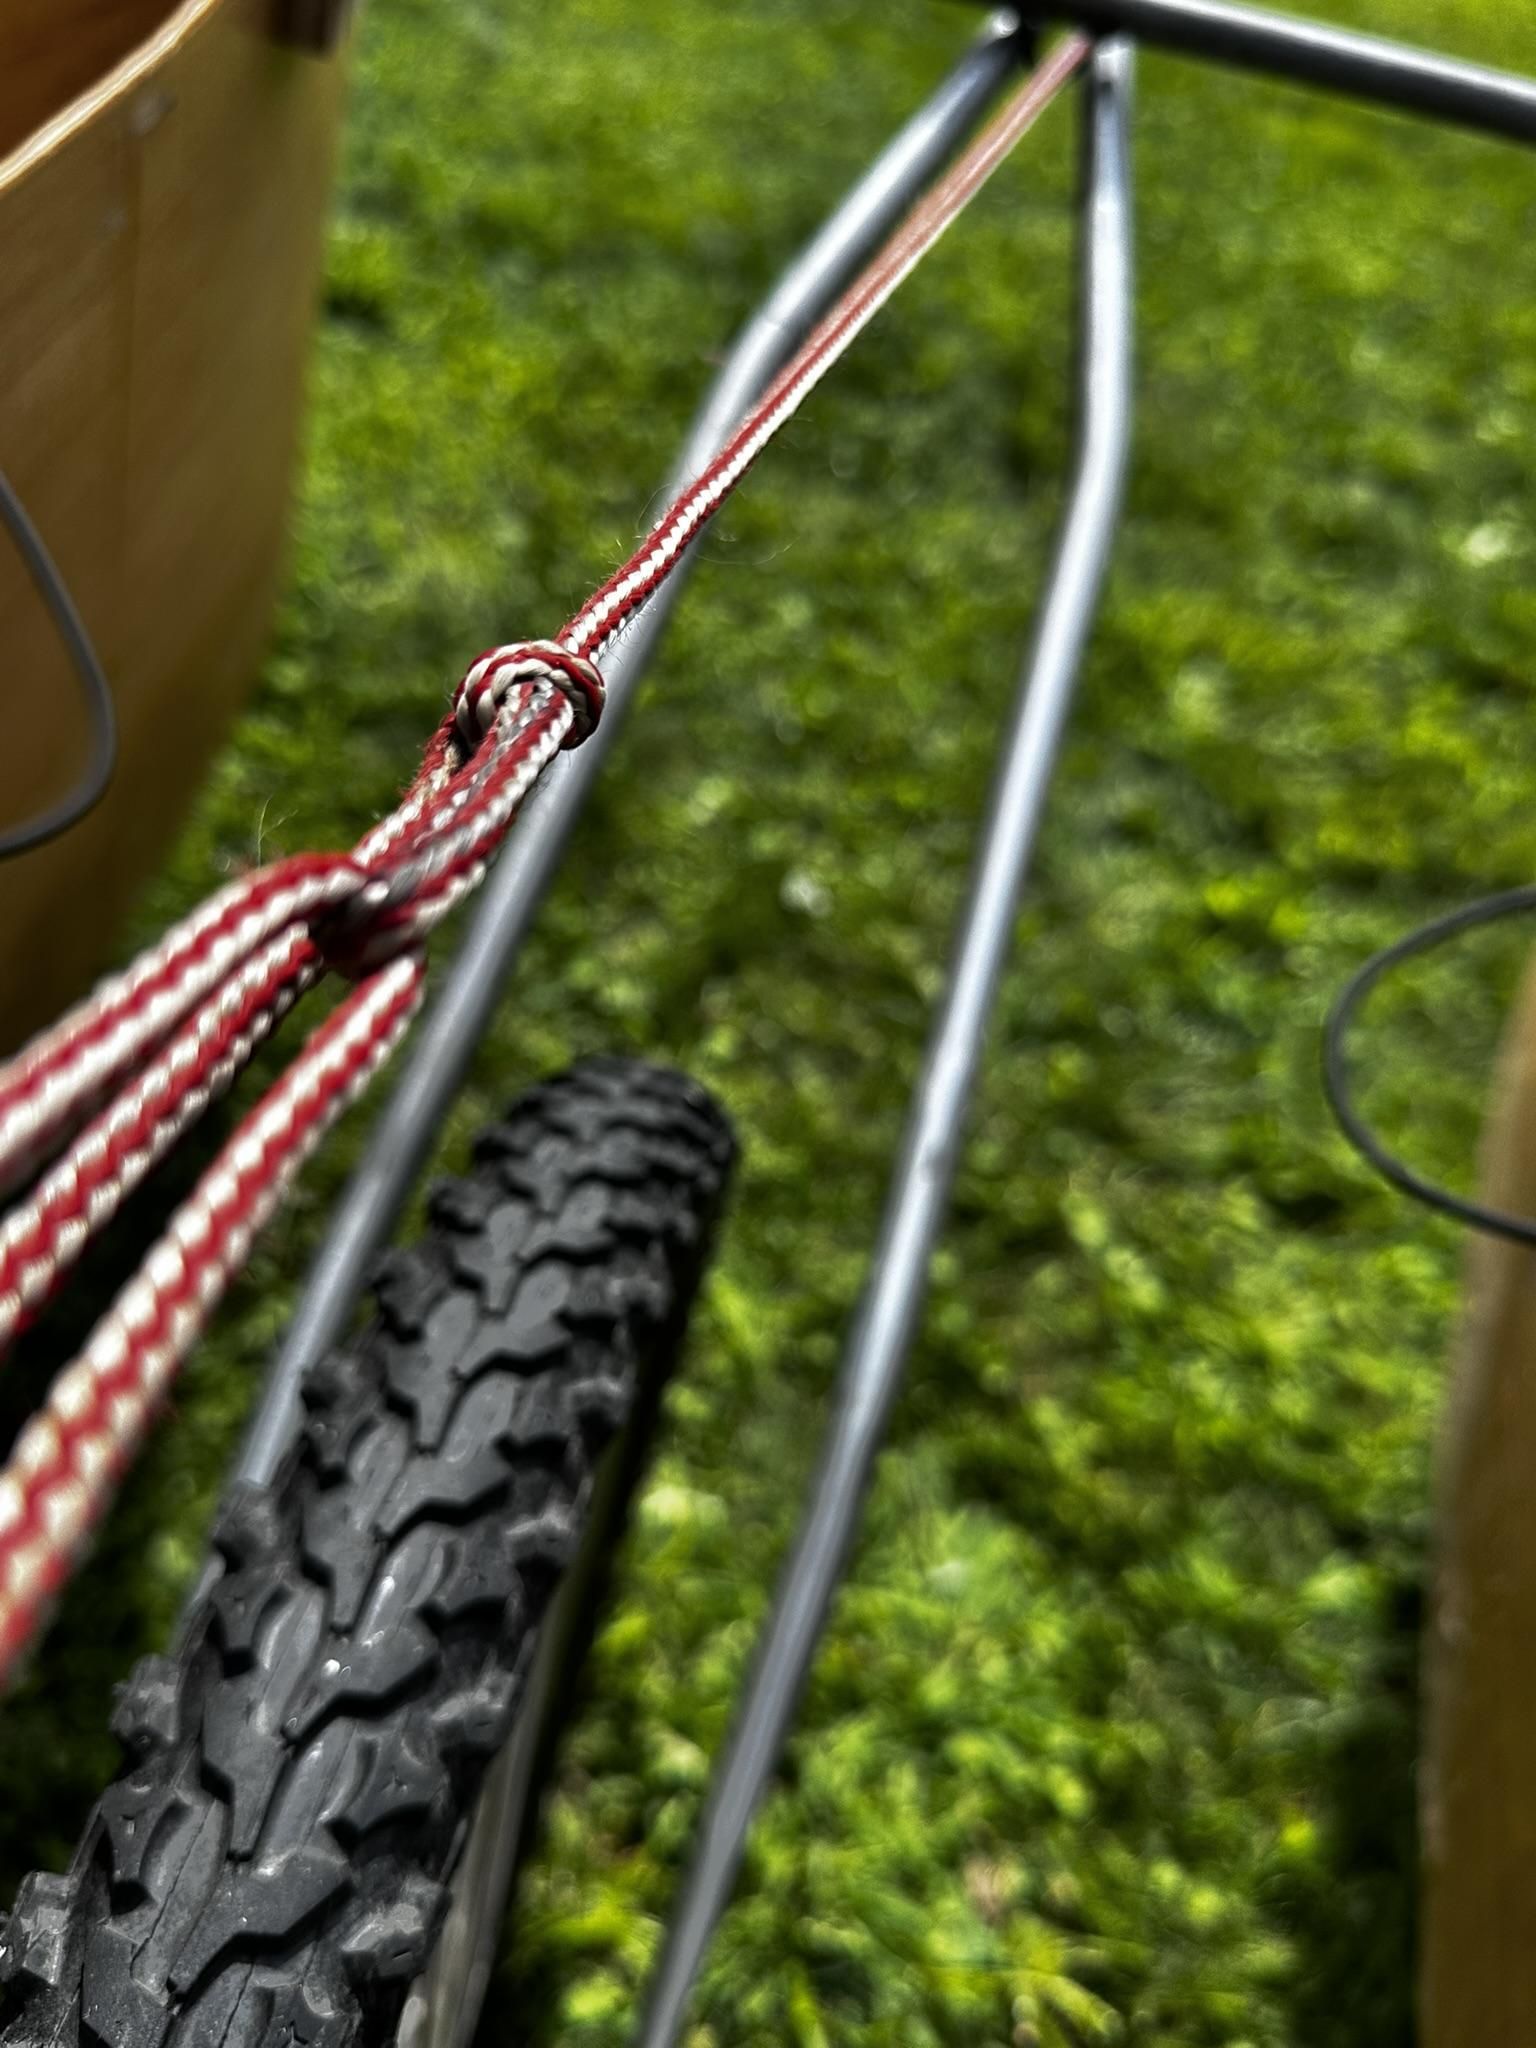
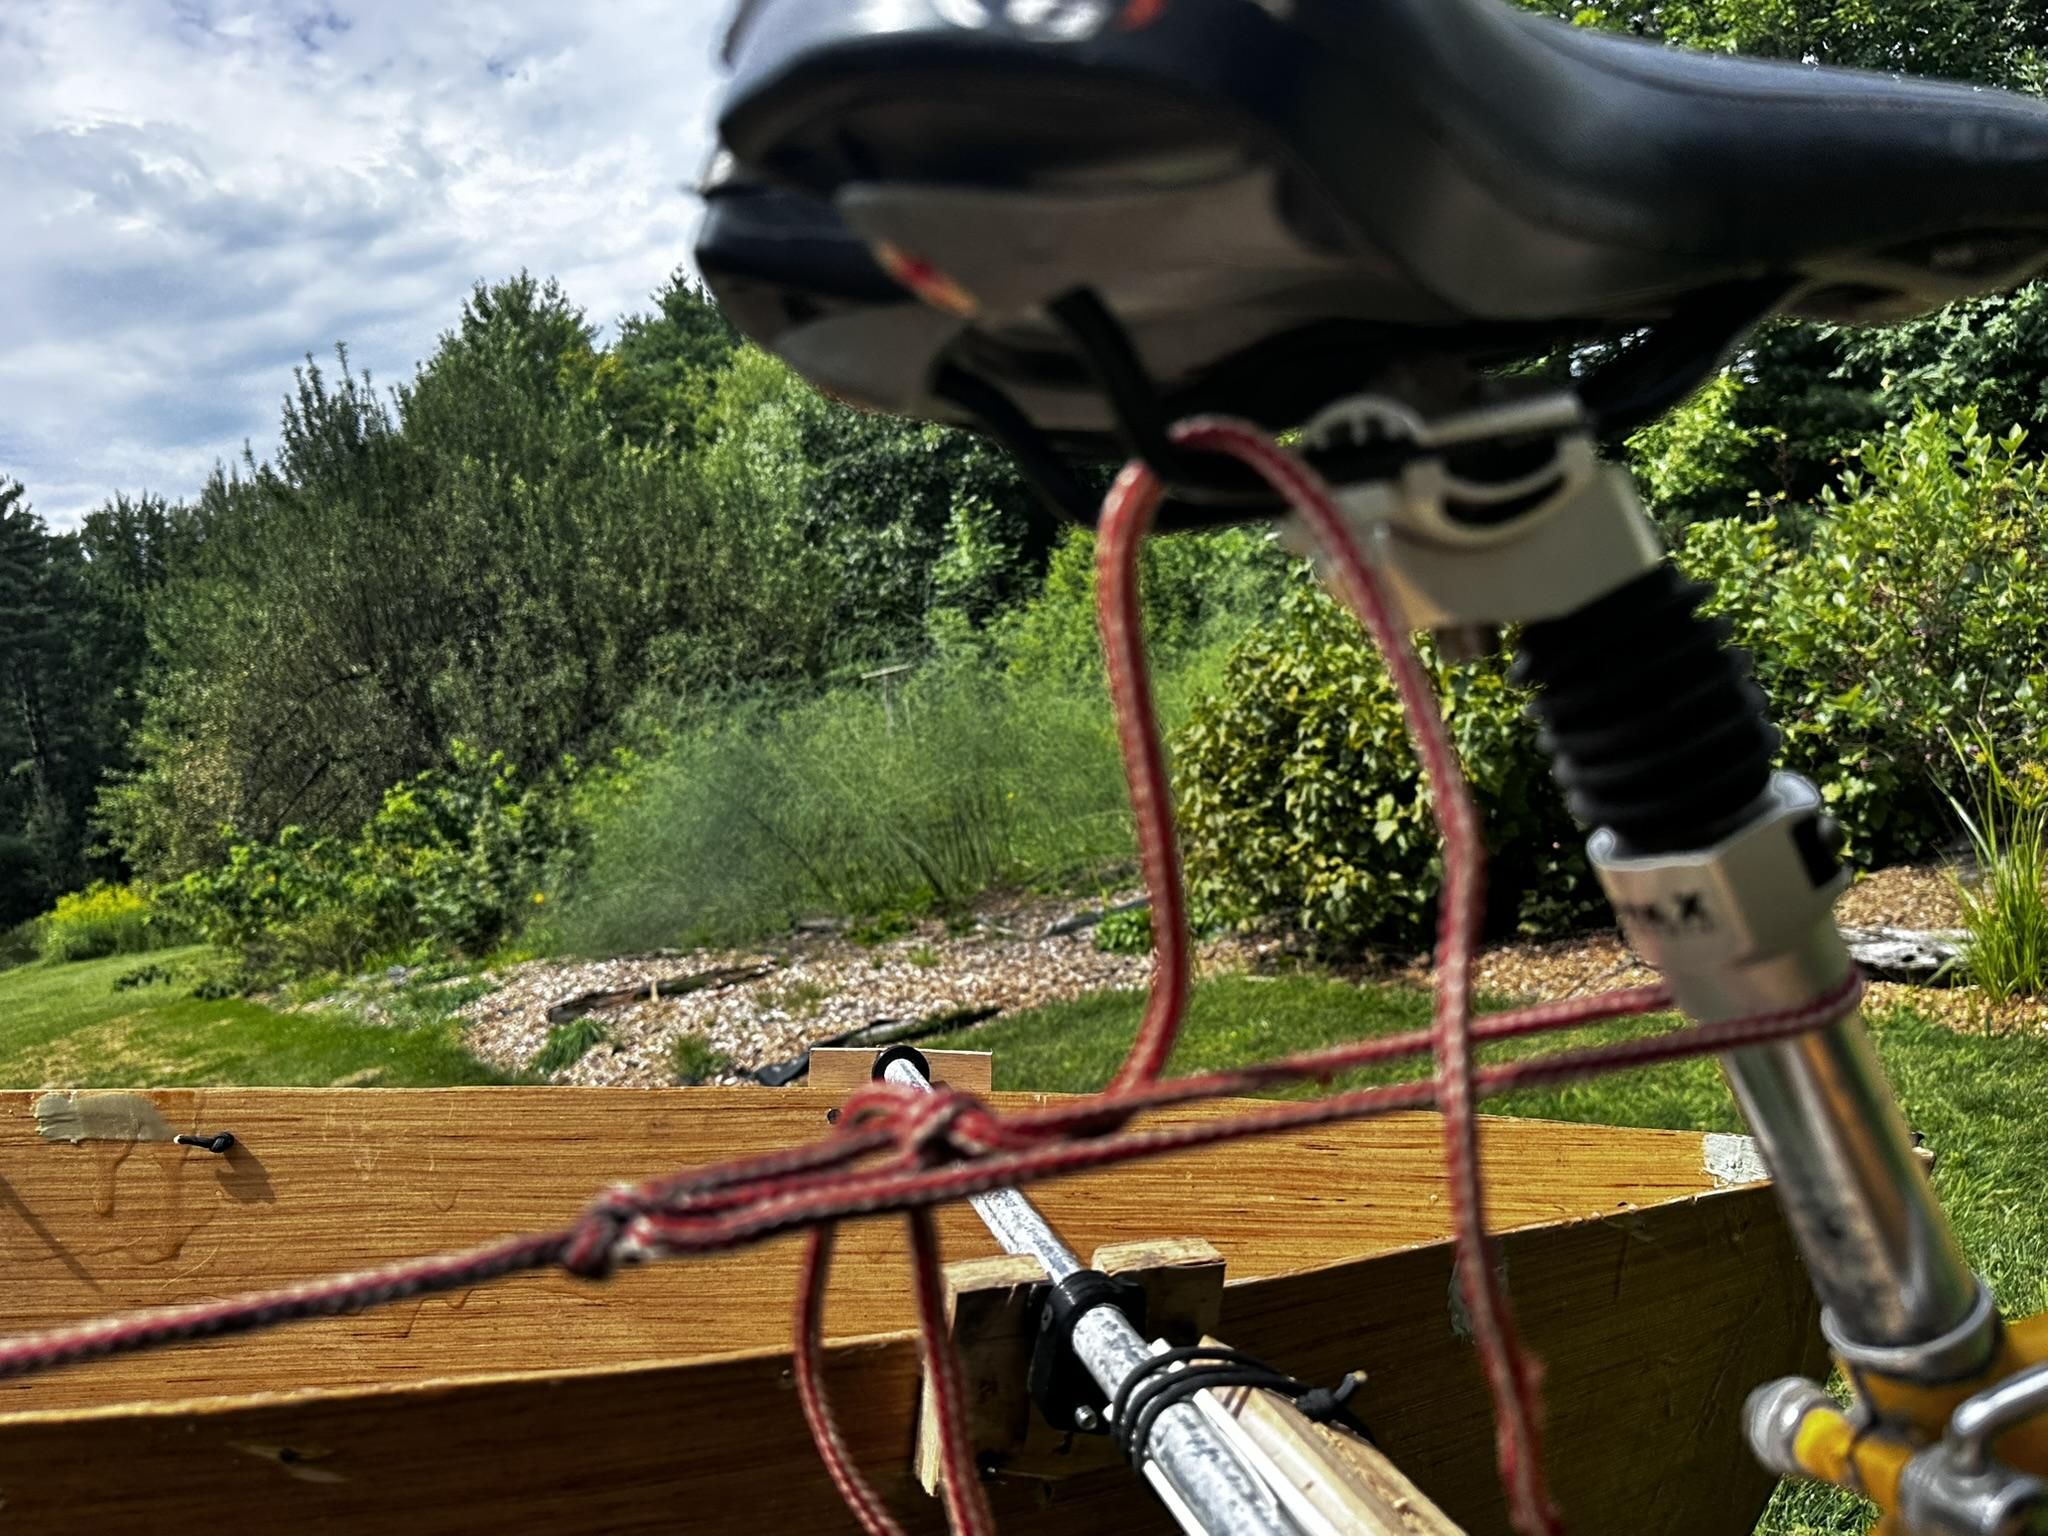
This is the part I'm happiest about. I thought about it all the way to Prince Edward Island and back, and when I got home, it mostly worked. When I did my first float last summer, I lifted the whole contraption over my head while sitting on the bike. This is much, much better.
The system uses the mechanical advantage of a lever and a trucker's hitch so that any adult (possibly with a little practice) can easily load and secure the boat. Regarding the "practice," tying a trucker's hitch and securing it with a slip knot is a skill you'll be glad you learned.
The exact design will need to vary, depending on your bike frame. I haven't come up with a universal system. Treat the instructions below as a basic guide rather than precise directions. The example I have shared here attaches to a bike that has screw holes in its axle for adding racks or other attachments. One end of the rack attaches to the bike frame with M5 screws near the rear axle. On a bike with no screw holes, some type of clamping system would be needed.
Part 1: The Lifting Arm
- Cut two lengths of 1/2" EMT galvanized metal conduit.
- Use a hammer to flatten the two ends of each pipe, so that their flat faces are in the same plane.
- Bend the pipes so that they will extend straight out from the frame holes near the bike's rear axle and then meet one another at their other end.
- Drill 1/4" holes about 1/2" from the end of each pipe, where the pipe will connects to the bike frame.
- Use appropriate screws (for me they were all M5 metric screws) to screw the pipes to the frame.
- Match up the other ends of the pipes. Clamp them together and drill another hole through both of them, about 1" from their ends. Make this hole bigger -- about 5/16".
- At the hole you just drilled, secure the two pipes together with a short 1/4 diameter bolt, lock washer, and nut.
- Drill another 1/4" hole between this bolt and the end of the bars. This hole will be for the rope.
Part 2: The Front Attachment Bar
- Cut a piece of strong wood (at least 1.5" x 1.5" in cross section) approximately 18" long. This length should be just a little shorter than the distance between the stopper knobs on the Dogmaran's crossmembers.
- Find a way to clamp this piece of wood to the bike's frame (or seat post), just above and in front of the rear tire. Create the clamp by using a second piece of wood bolted to the wood from the last step, as shown.
- Cut two short lengths of 3/4" PVC and slit them lengthwise to remove a longitudinal section. I did this by clamping the PVC and cutting it with an oscillating flush cut tool. Adjust the gap so that the metal tubing of the boat frame can be easily snapped into place and snapped back out. The fit is up to you. At first I relied only on this snap fit to hold the boat in place, but after family members tested it, I decided it was better to give the PVC a looser fit while adding an additional means of locking the boat tubing into place.
- Optional: devise an additional means of securing the attachment between boat bar to the frame. On each side of the connector, I added paracord and thin slot in the wood. To secure things I wrap the paracord tightly around the boat tubing several times and secure it in place by pulling the end snugly into the slot.
Part 3: The Guide Hole -- Attach some type of ring to the "bottom" of the Dogmaran's "rear" crossmember
- I created a triangular guide hole for the rope by bending a nail and welding it to the center of the Dogmaran's crossmember, as shown. You could contrive something that doesn't require welding, like an eye bolt, but it was easy for me to weld the guide hole. [**If you're welding galvanized material, make sure that you are not breathing the exhaust!]
- It would make sense to put one of these guide holes on both of the Dogmaran's crossmembers, so that you don't have to pay attention to which way you've loaded it on the bike.
- Make sure that the guide hole is attached to the cross member so that it will be on the bottom of the crossmember when the boat is loaded.
Part 4: Operation -- and the rope
- Tie a 7' length of 1/4" diameter rope to the hole at the far end of the lifting arm. If you use thinner paracord, it can be hard on the hands.
- Place the boat on on grass, so you won't damage the hull.
- Place the bike in front of the boat. Lower the lifting arm to the ground, pointing between the boat's two pontoons.
- Lift up the close end of the boat by its crossmember and secure the crossmember to the front attachment point. Once it's in place, the boat will stabilize the bike.
- Walk around the boat and lift up the end of the lifting arm until it hits the boat's back crossmember.
- Thread the rope through the guide hole on the crossmember.
- Run the rope around the bike's seat post.
- Use a trucker's hitch to raise the back end of the boat until it is at least as high as the front end. Here's a trucker's hitch video that I made for my students. The video also shows how to tie a bowline, but all you need here is the slippery half hitch and the slip knot.
- Tie off the trucker's hitch with a slip knot and do something with the excess rope to prevent it from tangling in moving parts.
- To remove the boat, lower it by releasing the slip knot. The friction in the trucker's hitch makes it easy to drop the boat slowly.
Connecting Hook for Party Barge Connectors
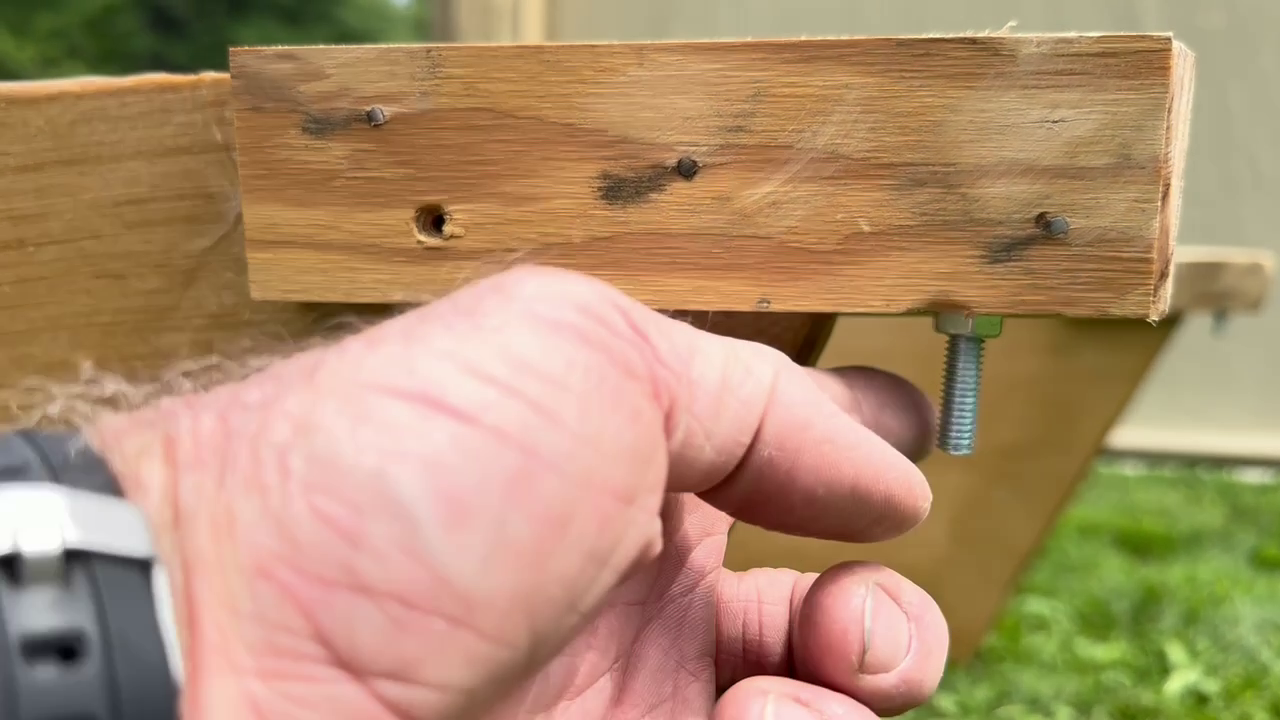
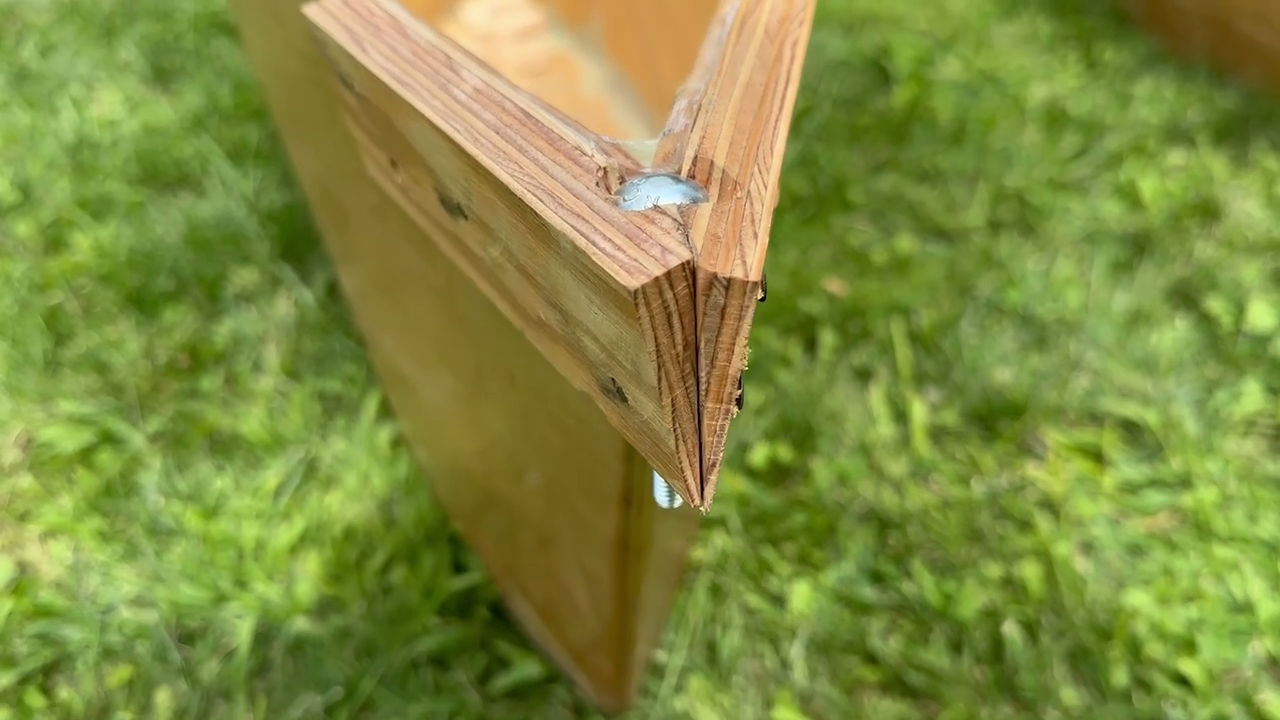
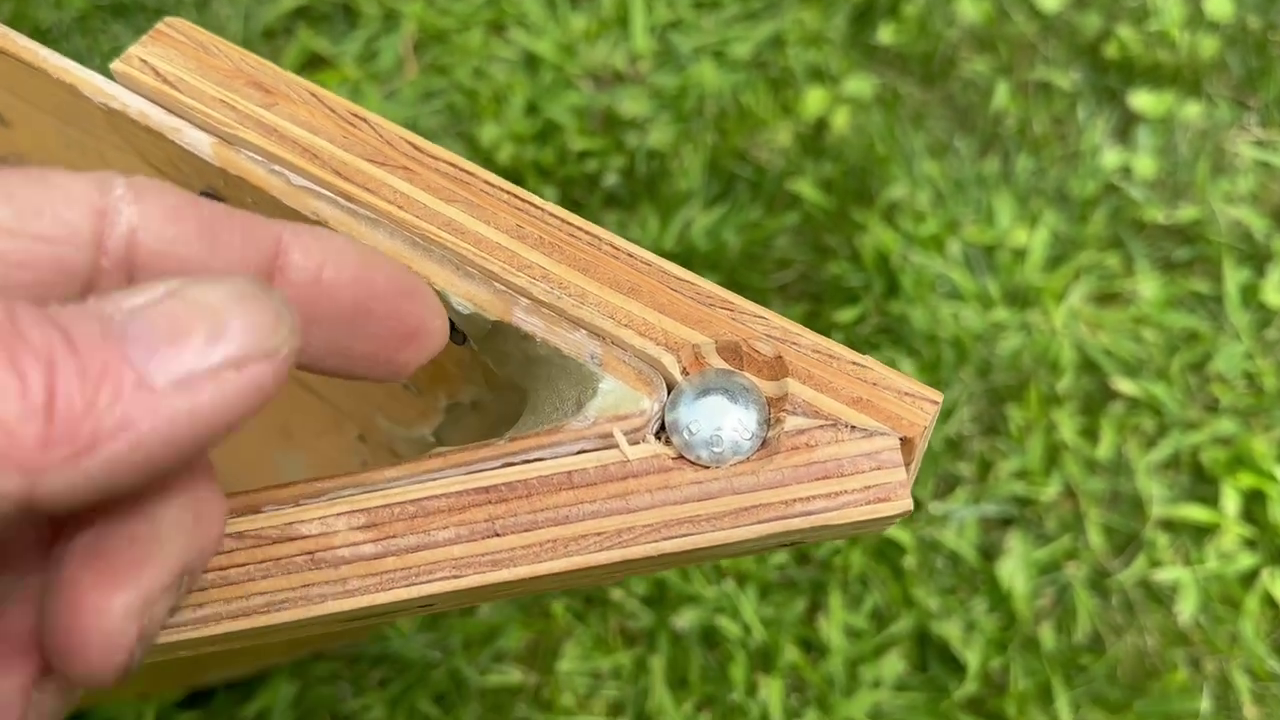
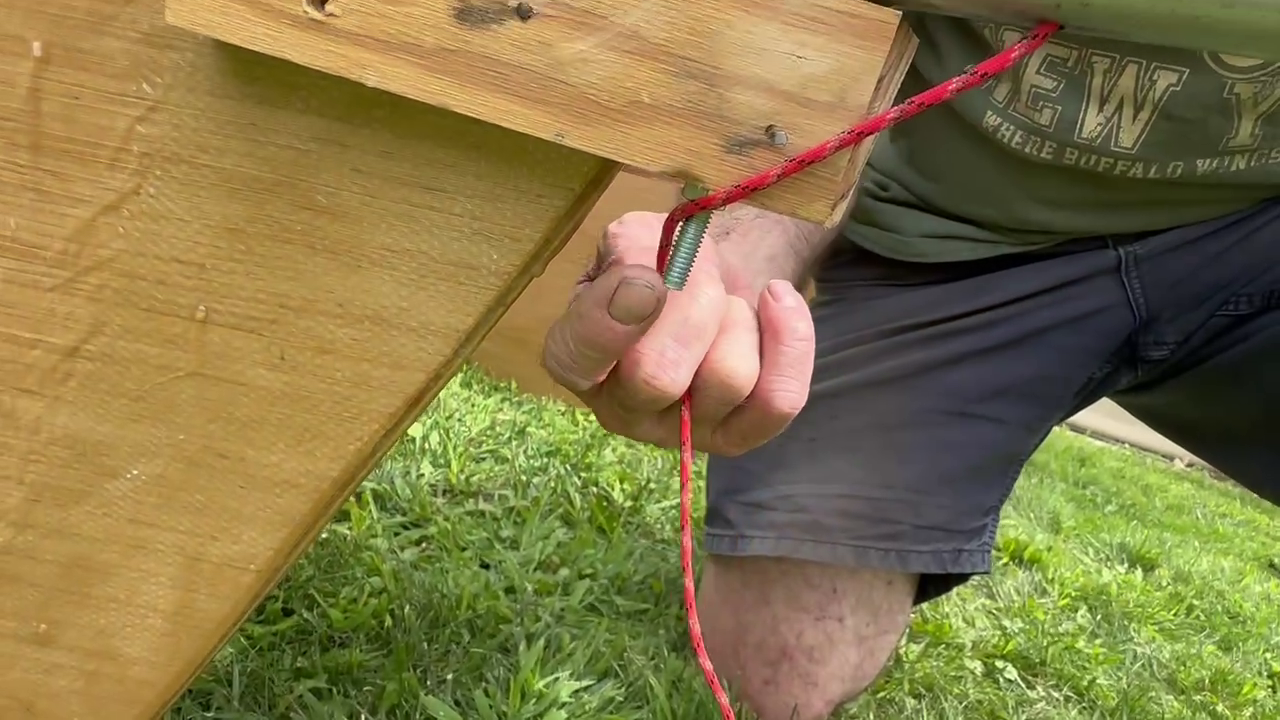
In my design, this "hook" is actually just a bolt. When two boats are connected together, a rope will wrap around this bolt to make the connection secure.
- Reinforce the tip of the boat with 3/4" plywood sized to match the other plywood reinforcements around the
- Cut the plywood so that it fits together as shown
- Screw the plywood together and to the boat.
- Cut away any screw ends that stick out.
- Drill a vertical hole to accept a large diameter carriage bolt (I used 3/8"). Choose a bolt that will protrude downward beyond the plywood to
- Insert the bolt downward and snug into place very tightly with a nut. Tighten the nut and/or pound on the bolt head until the head of the bolt is sunken into the plywood below the top of the gunwales.
- Make sure that 1" of bolt is extending downward to form the "hook," but cut off any excess. An excess will interfere when multiple hulls are nested for storage.
Party Barge Connectors
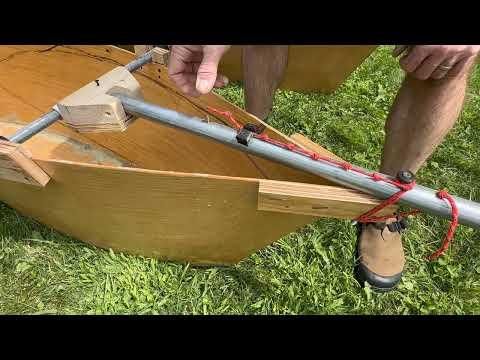
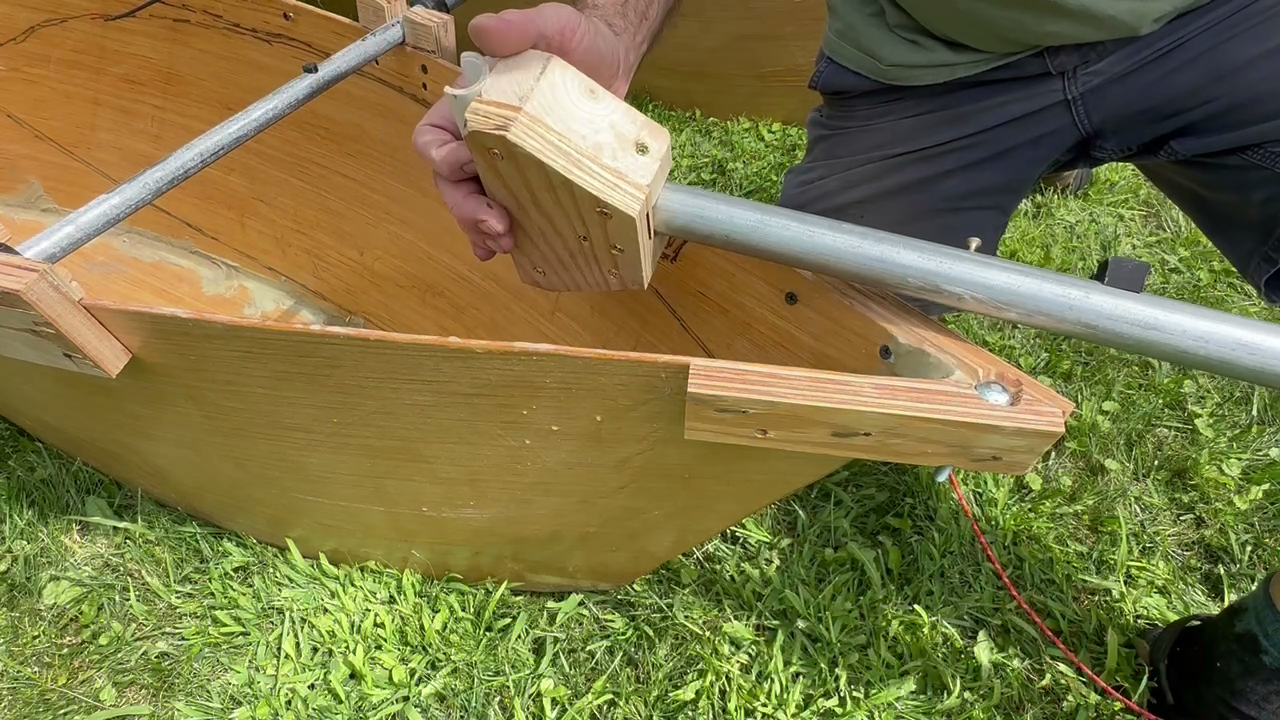
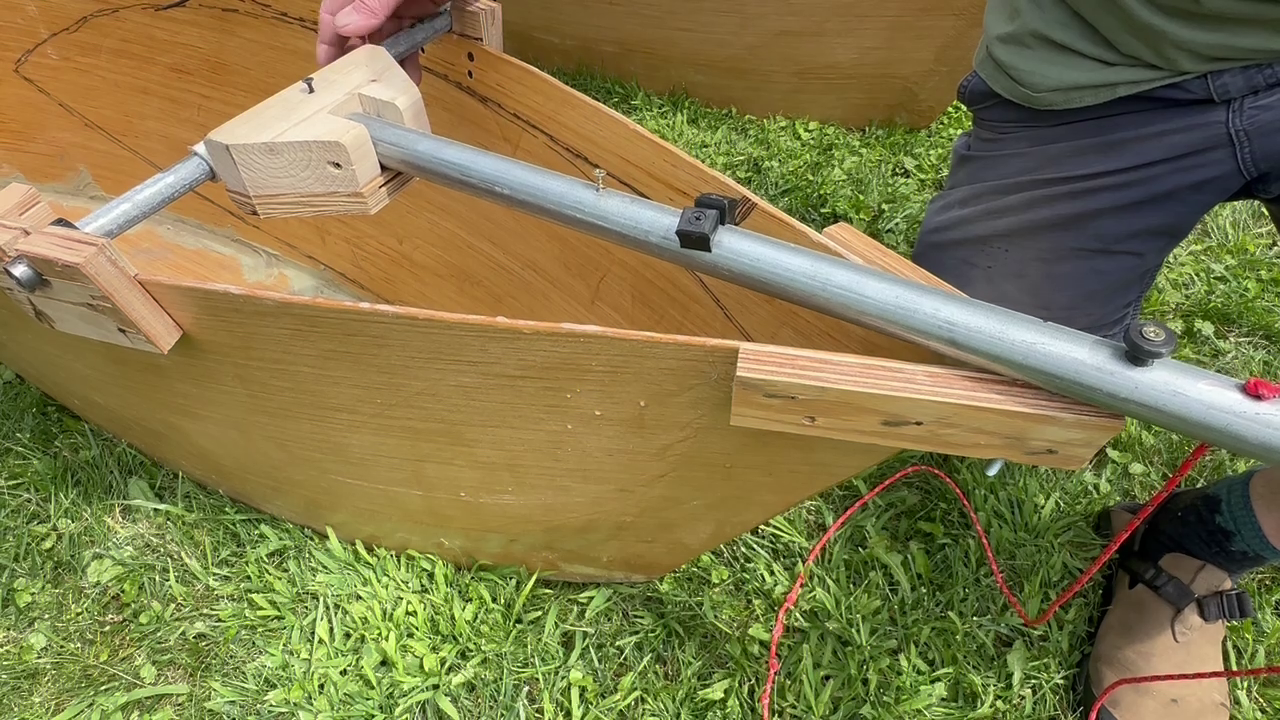
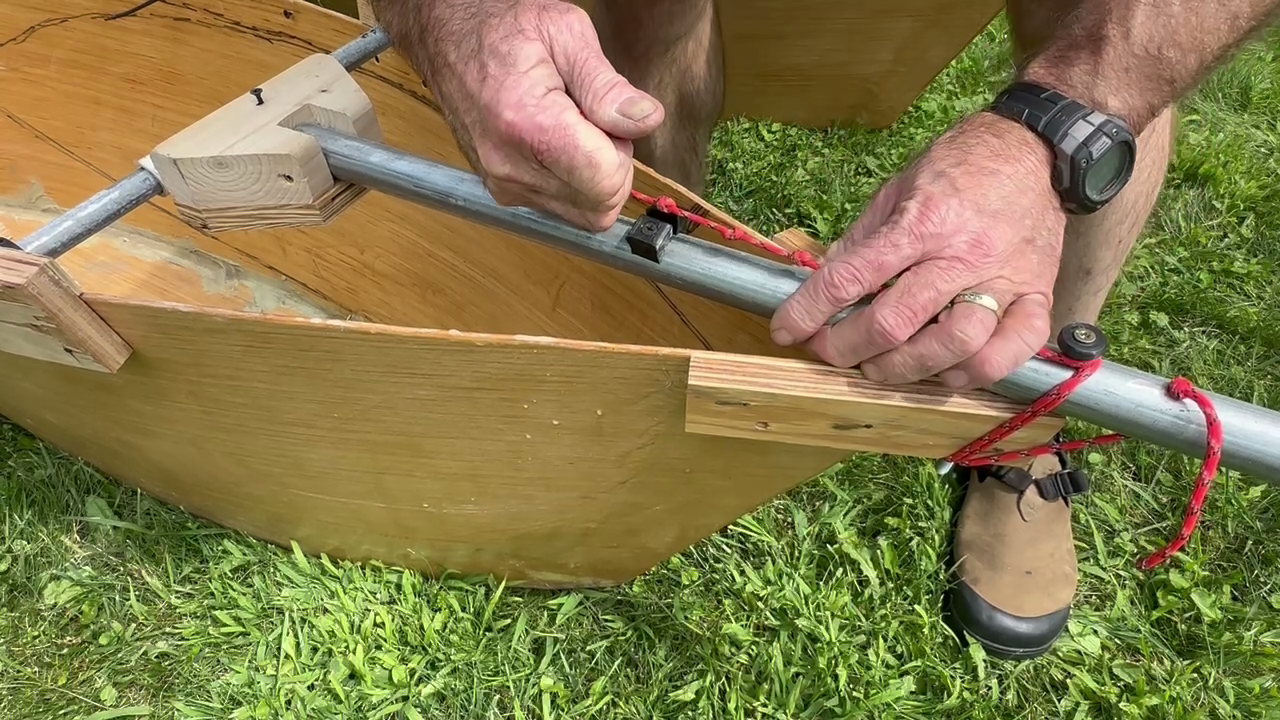
These are made from 1 1/4" EMT metal conduit, Wood, and 3/4" PVC.
For this step, the most helpful information is in the diagrams and video. The instructions below are just supplementary.
Instructions Outine:
- Cut the EMT tubing to length.
- Cut the 2x4 segments and 3/4" plywood.
- Drill the tubing hole through the 2x4
- Cut a segment of 3/4" PVC and remove a slit (possibly with an oscillating flush cut tool).
- Assemble the wood pieces and PVC with screws.
- Make sure that you assemble the pieces so that the bar will sit on top of the Dogmaran's gunwales when it engages with the crossmembers of two adjacent boats.
- Use screws to add the 3-D printed mounting hardware to the top of the connector pipe.
Operation: See Video
Downloads
Fabric Lounging Deck
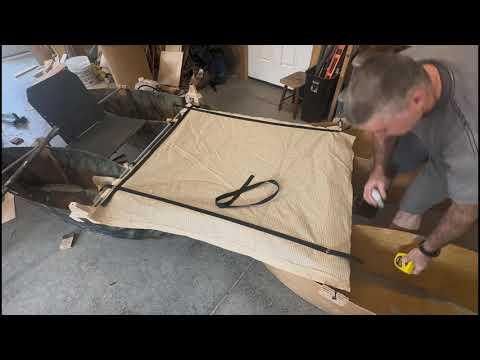
I made this deck out of polypropylene webbing and some Coolaroo fabric that I bought for porch shades. The webbing was necessary for reinforcement. It attaches to the connector bars with gromets hooked onto screw heads, and it attaches to the Dogmarans' crossmembers with hooks.
I started by making a webbing frame, hooked with grommets to screws. Then, instead of using pins, I used superglue and accelerant to tack the webbing to fabric to prepare for sewing. Then I added more grommets around the border.
Crossmember Locking System
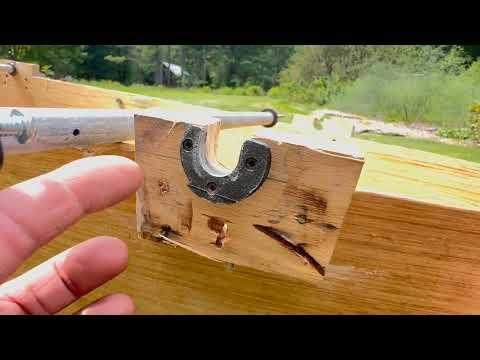
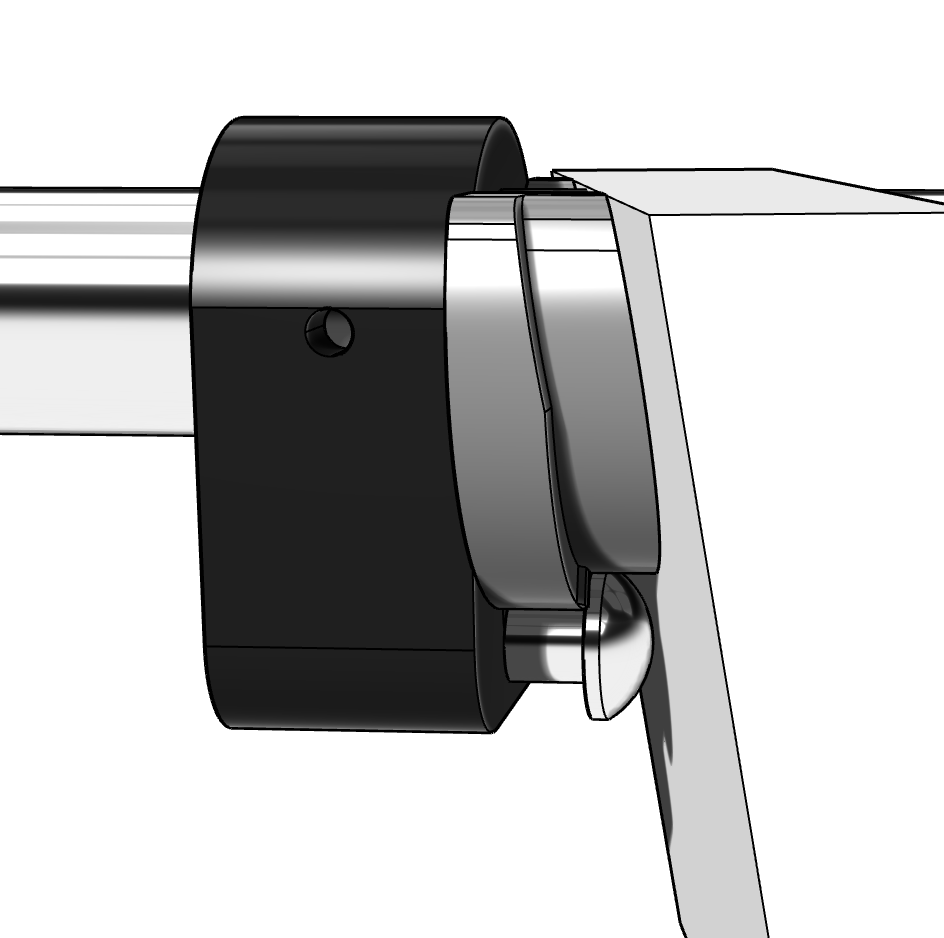
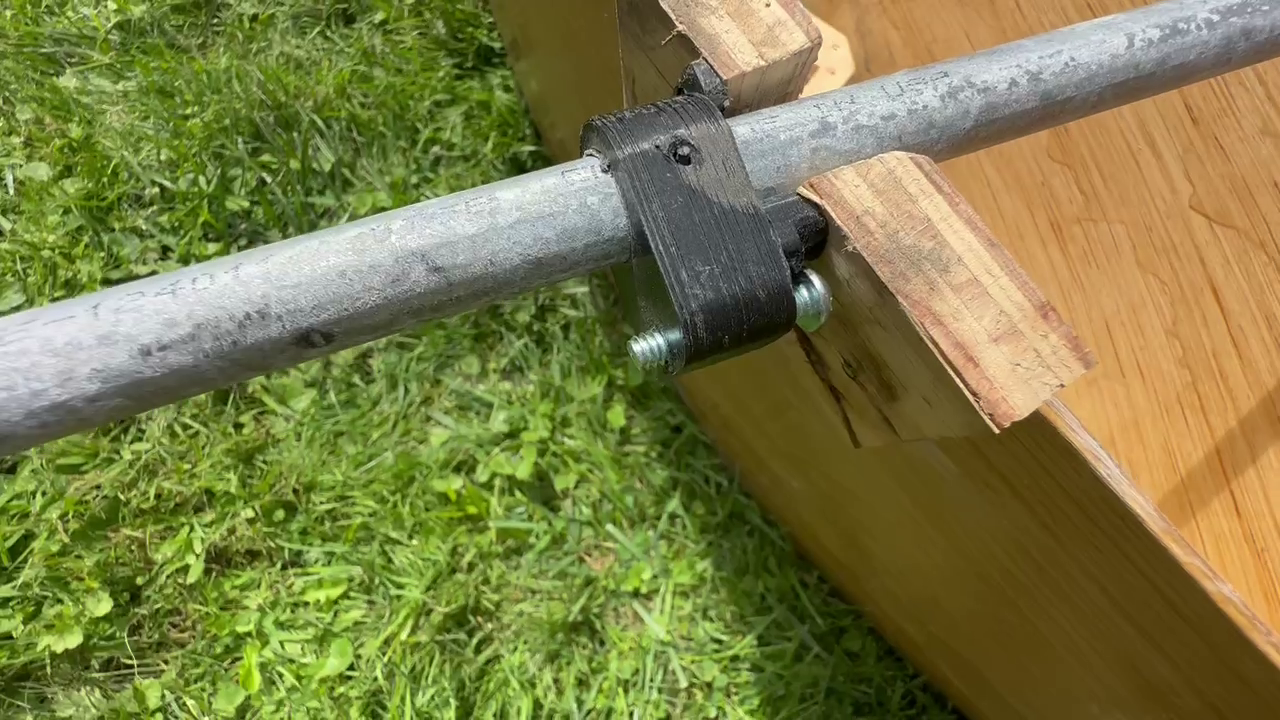
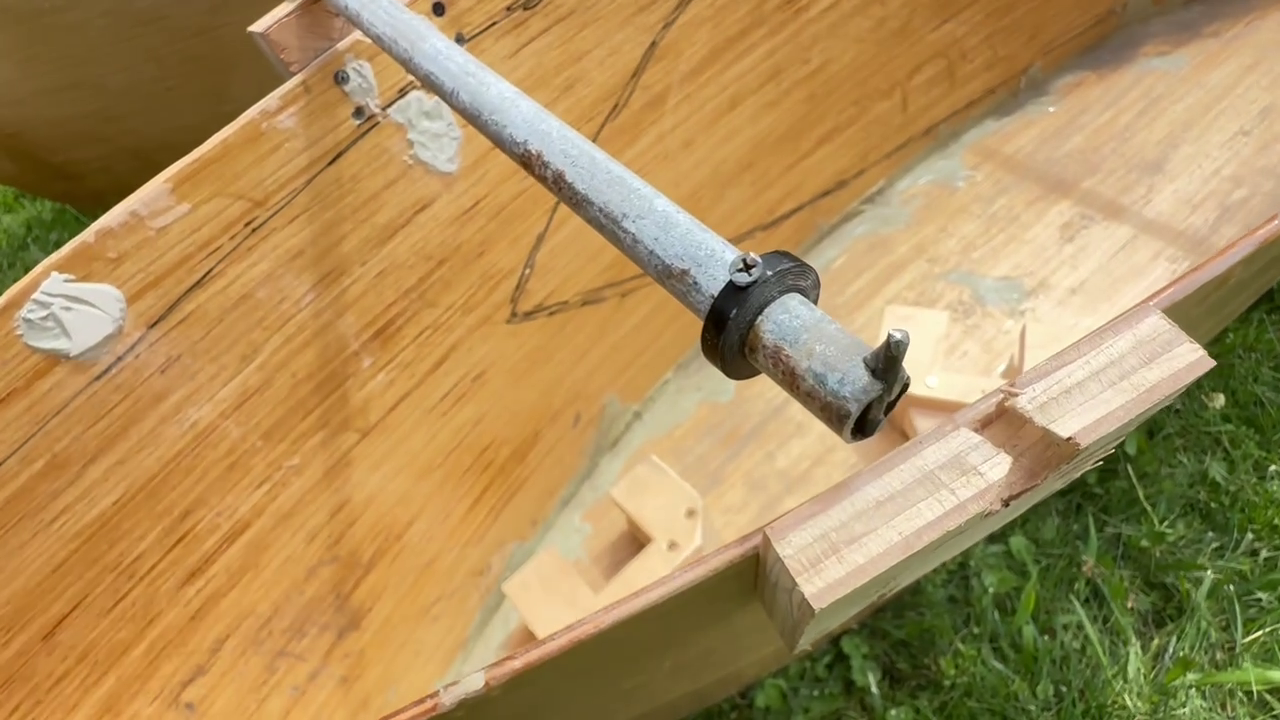
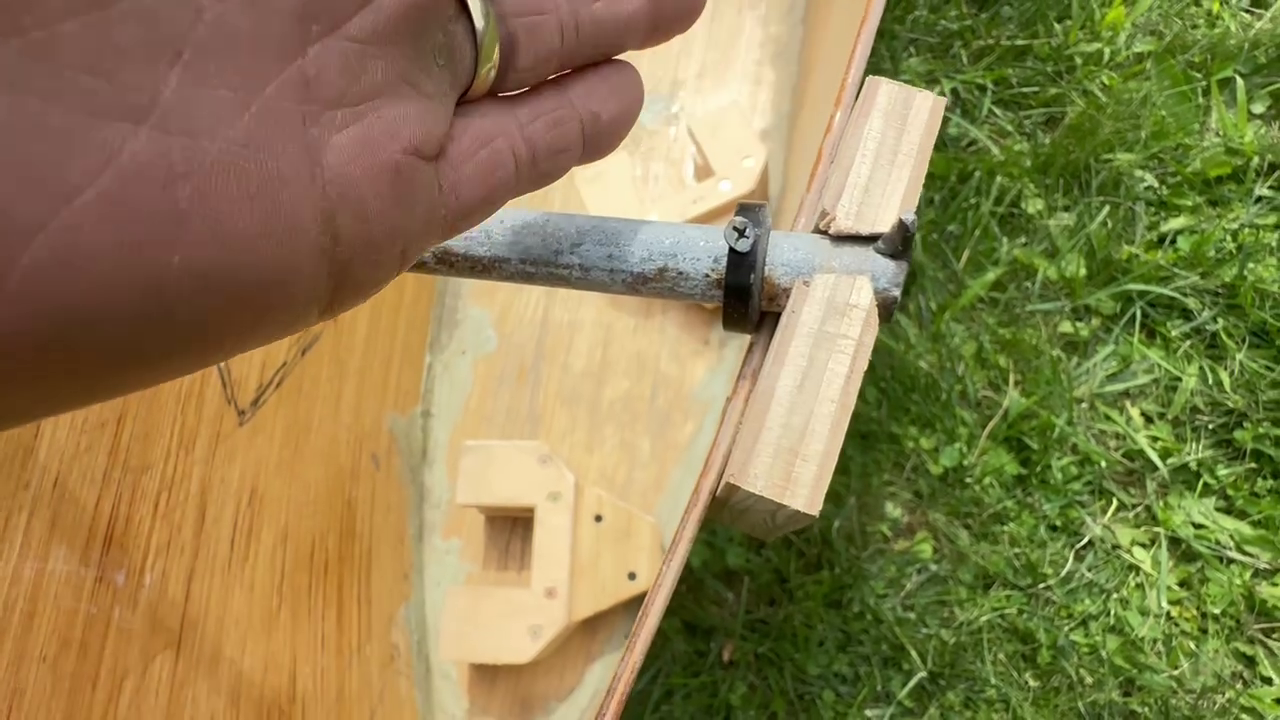
The crossmember locking system has the following components:
- Stopper knobs (clamped onto the crossmember with screws and a shim of Gorilla tape)
- End Pins (welded onto the ends of the crossmember -- but you could drill a hole and insert a screw instead)
- Brackets (plywood screwed onto gunwales)
- Male (screwed to crossmember) and Female (screwed to bracket) Components of Lock Mechanism
Assembly: As shown in the diagrams and video
Operation:
- Insert a crossmember through all of the bracket holes, with end pins facing up. The stopper knobs prevent them from protruding too far through the outside brackets.
- Align the machine screw head of the male lock mechanism with the groove of the female lock mechanism.
- While applying downward pressure to the crossmember, rotate the top of the male lock mechanism 180 degrees in a direction toward near end of the Dogmaran.
Updated Seat
- I used 1/16" stainless steel cable straps to support the back. Ferrules crimped at each end prevent them from pulling through holes drilled in the plywood. My wife reported that the cables were fraying and catching on her pants, so they need to be coated with something. I will probably cover them with duct tape, but coated cable would be better.
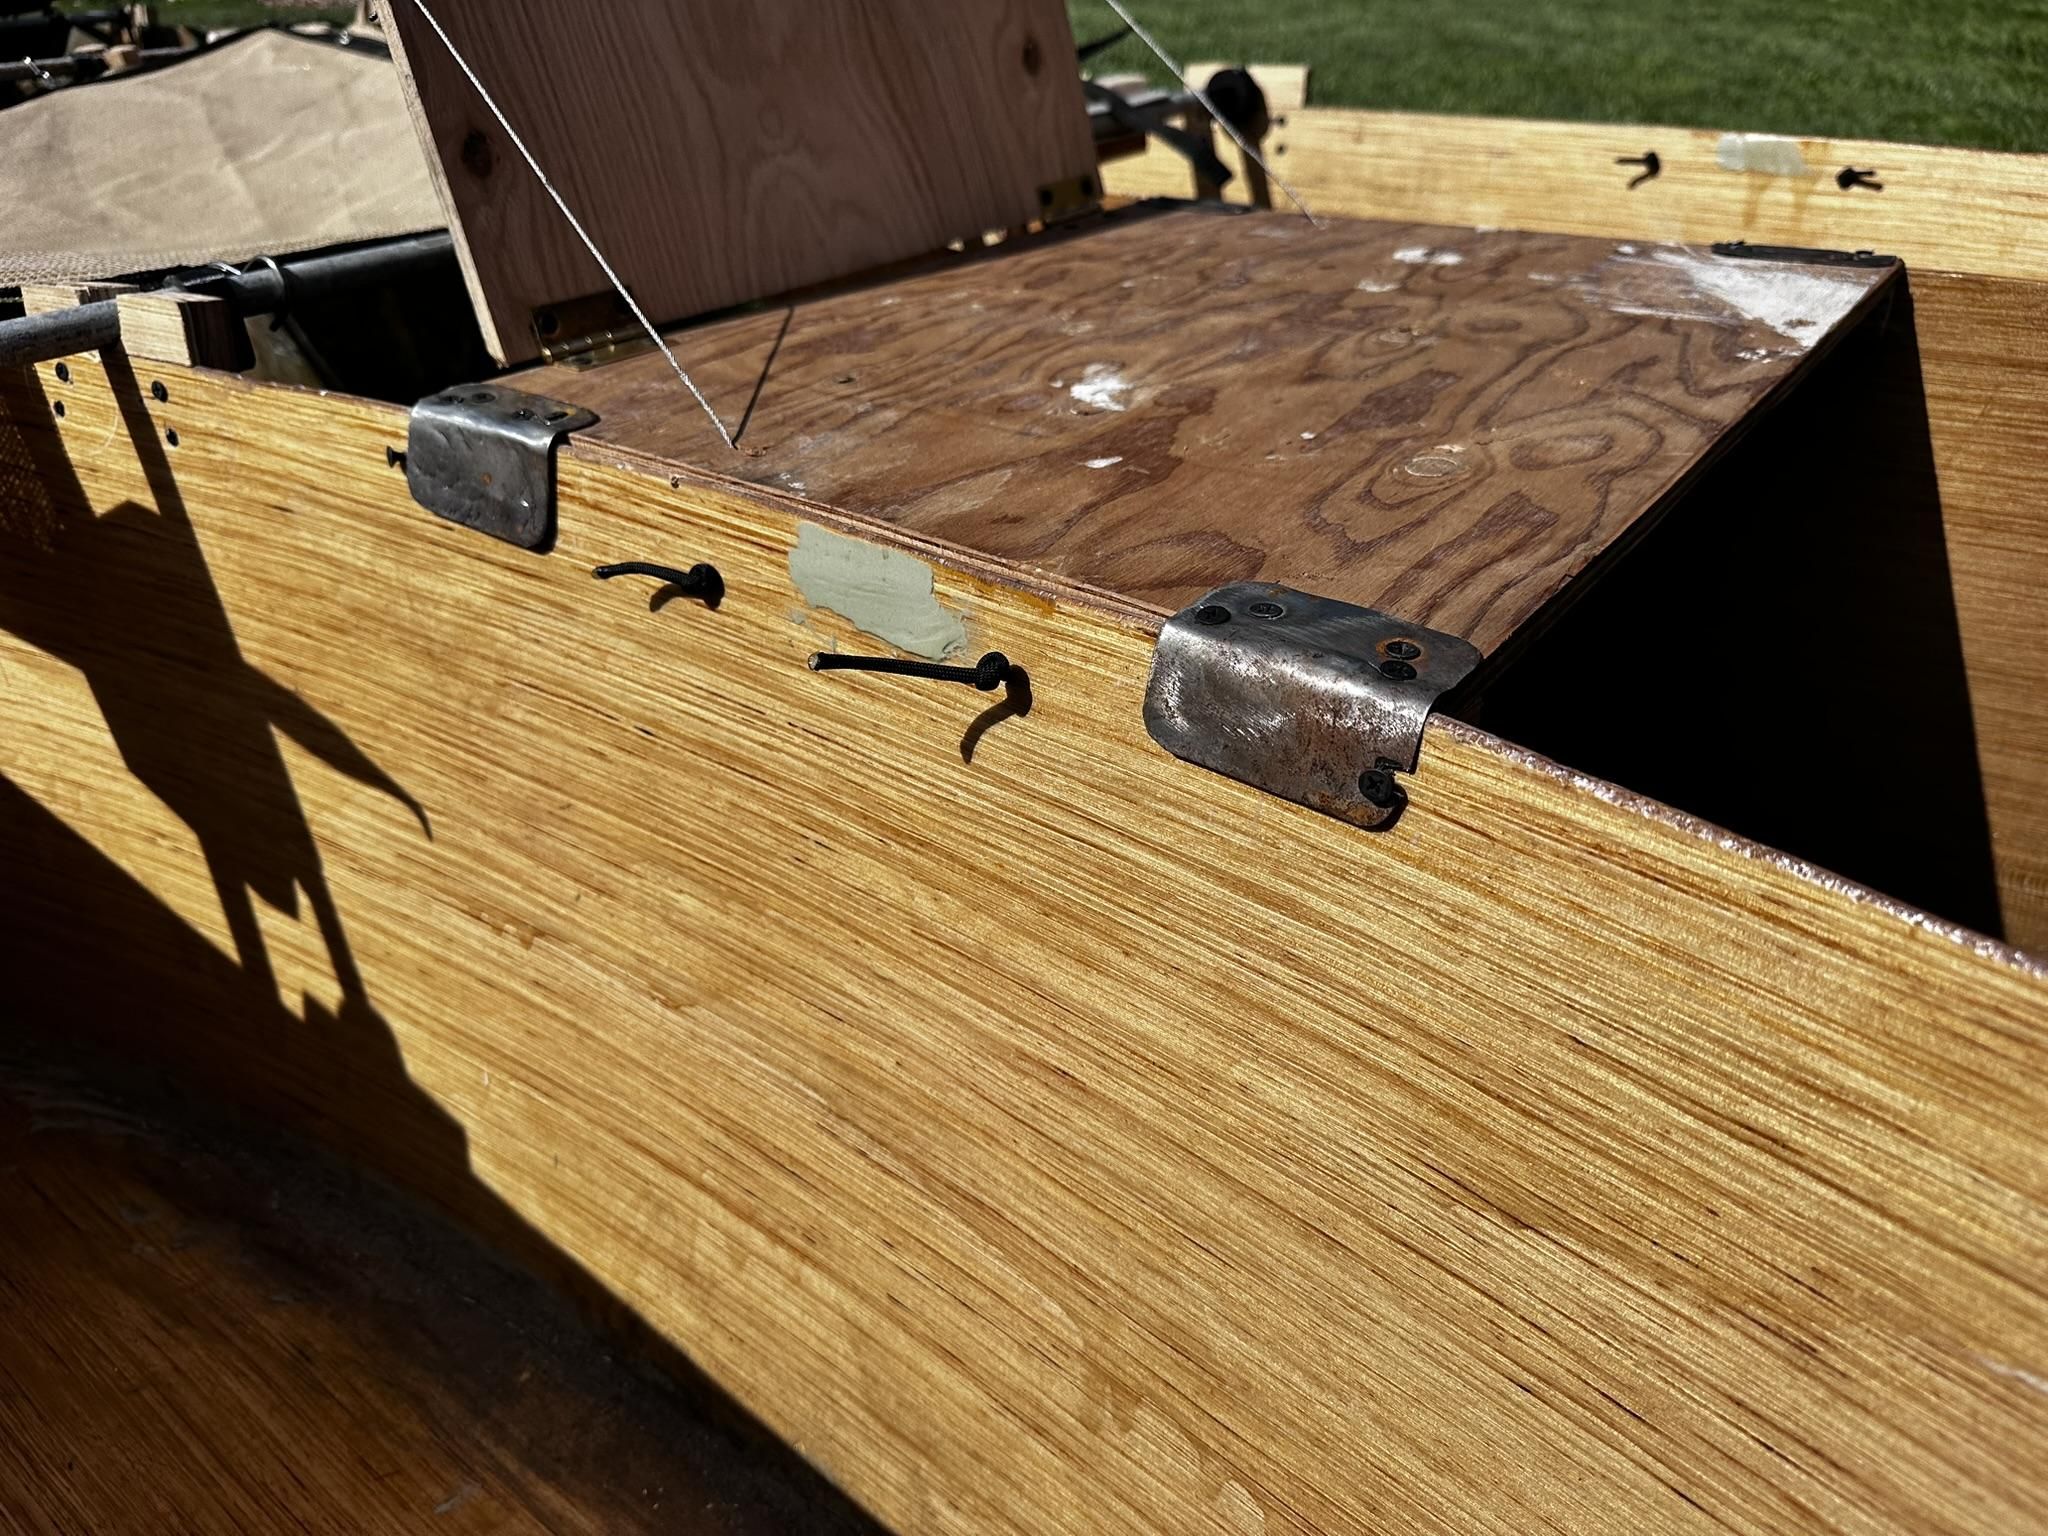
- The connection between the seat and the two hulls is very secure. At each corner of the seat base, a connector is formed by bent sheet metal and an extra plywood cleat. On each side of the seat, the gunwale of the hull is sandwiched between the sheet metal and the plywood cleat. To make this connection as strong as possible, some of the screws that hold the sheet metal to the seat should be placed as close as possible to the edge of the cleat.
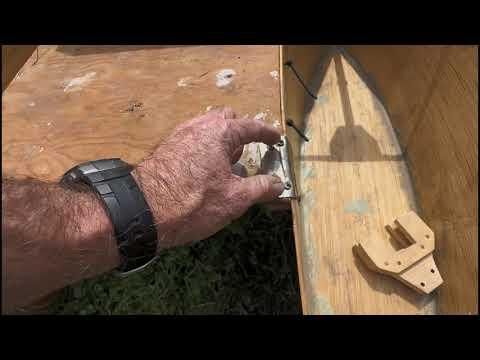
- In early testing, the seat tipped back, so now notches in the sheet metal fit together with screw heads in the hull to hold the seat in place. See photo.
Oarlocks (with Risers)
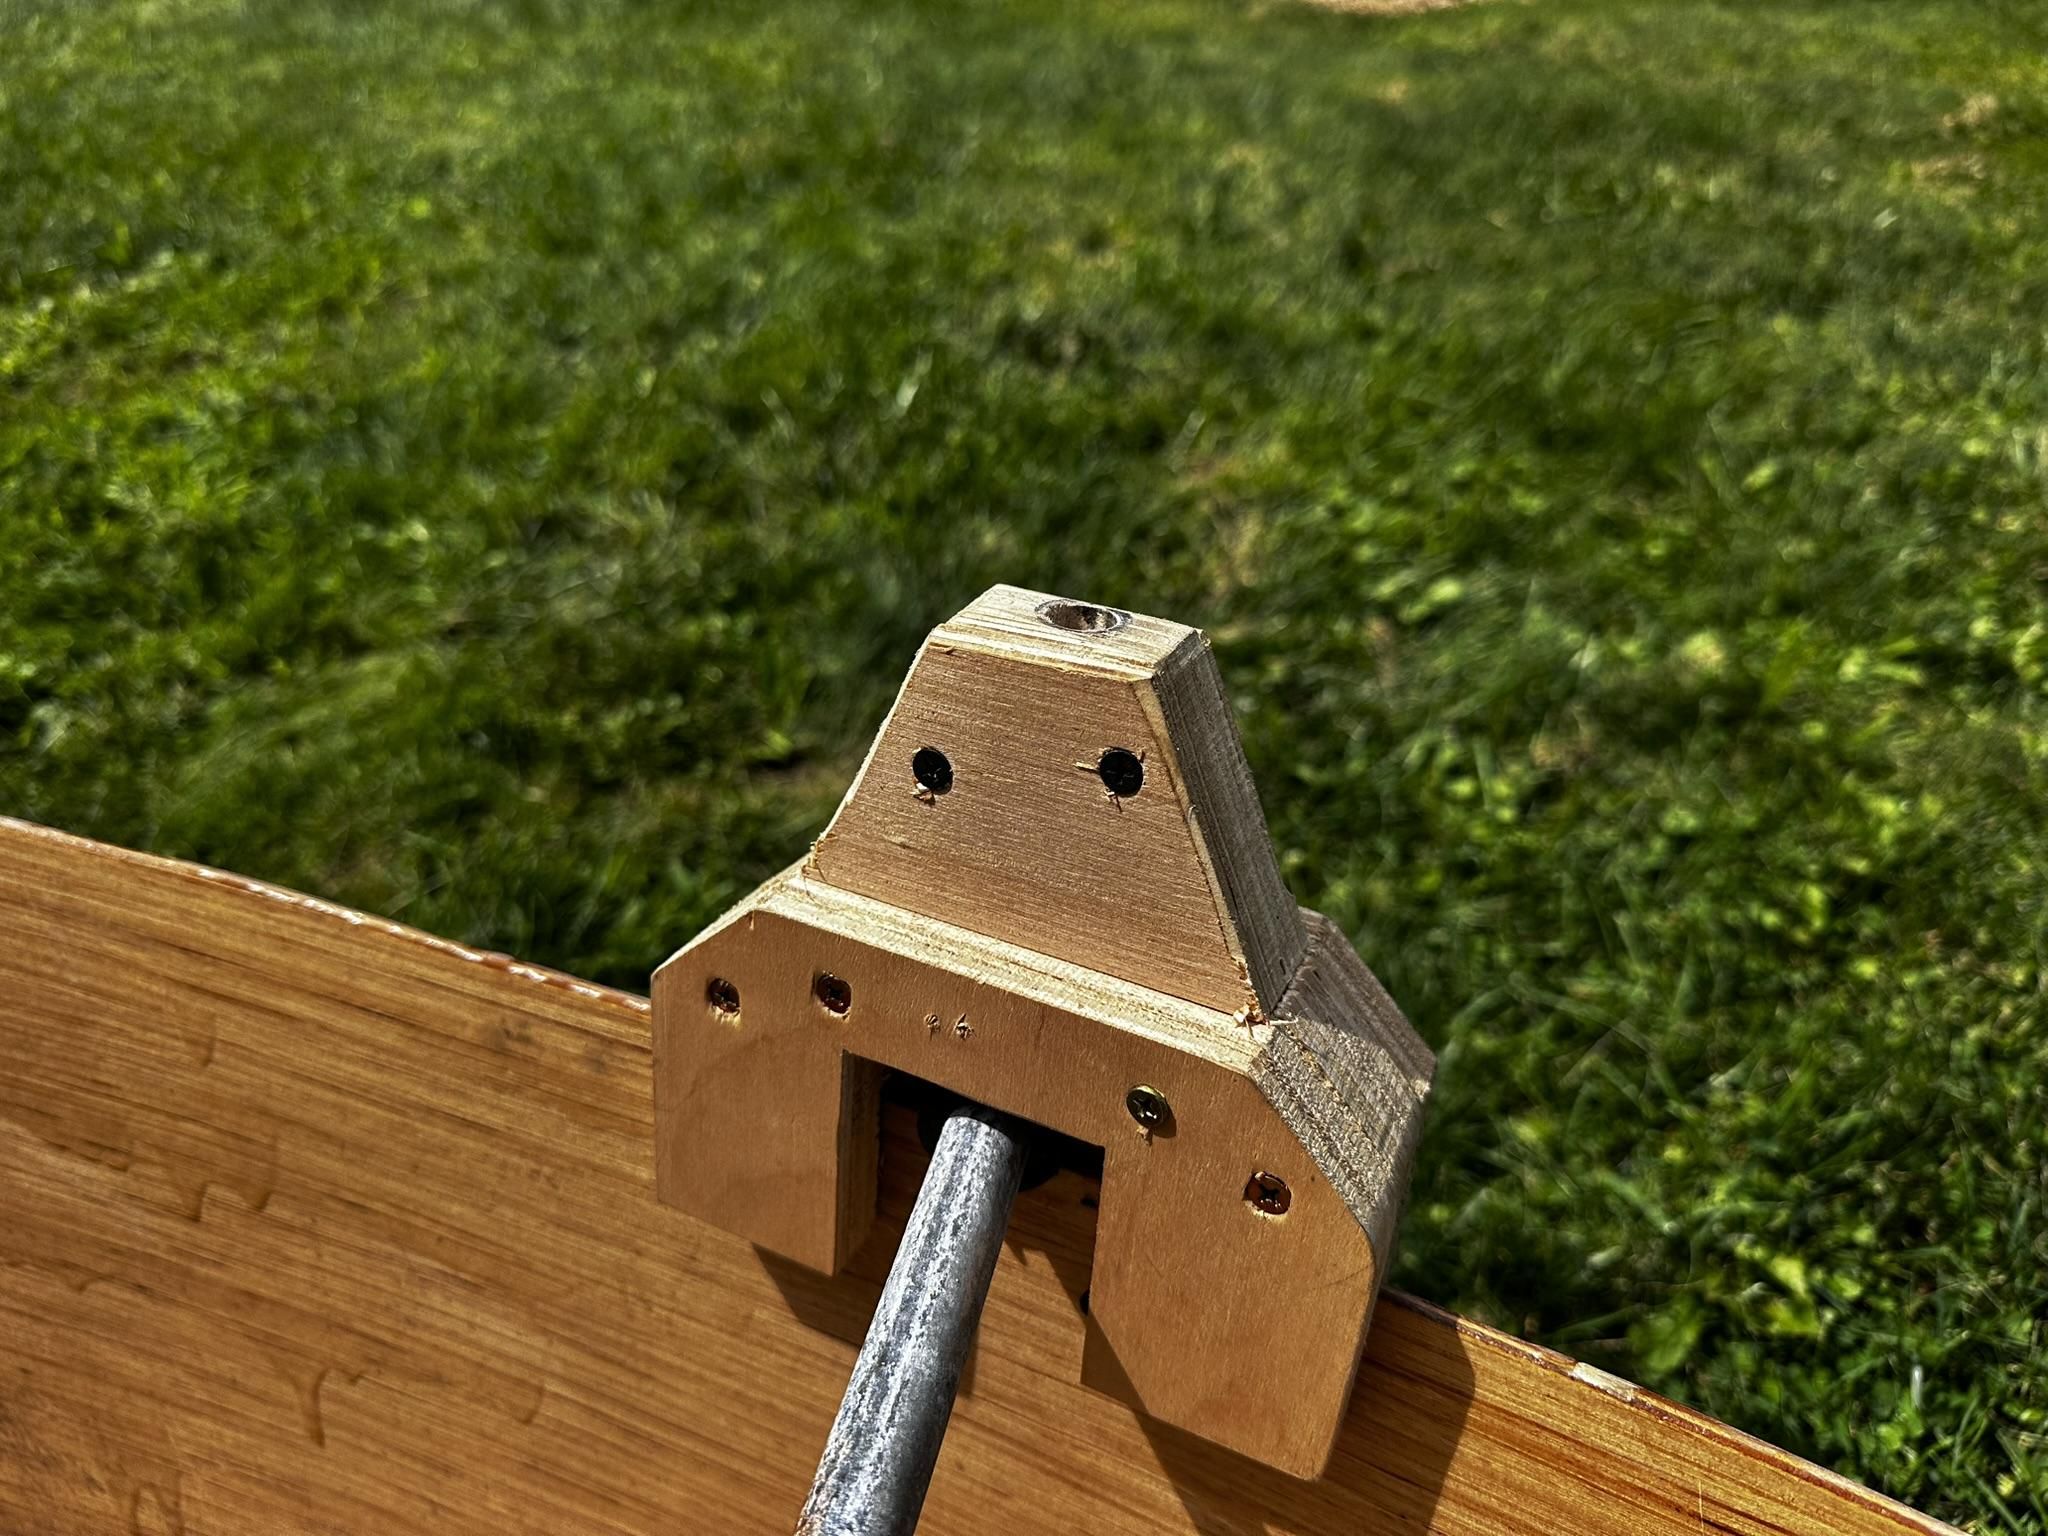
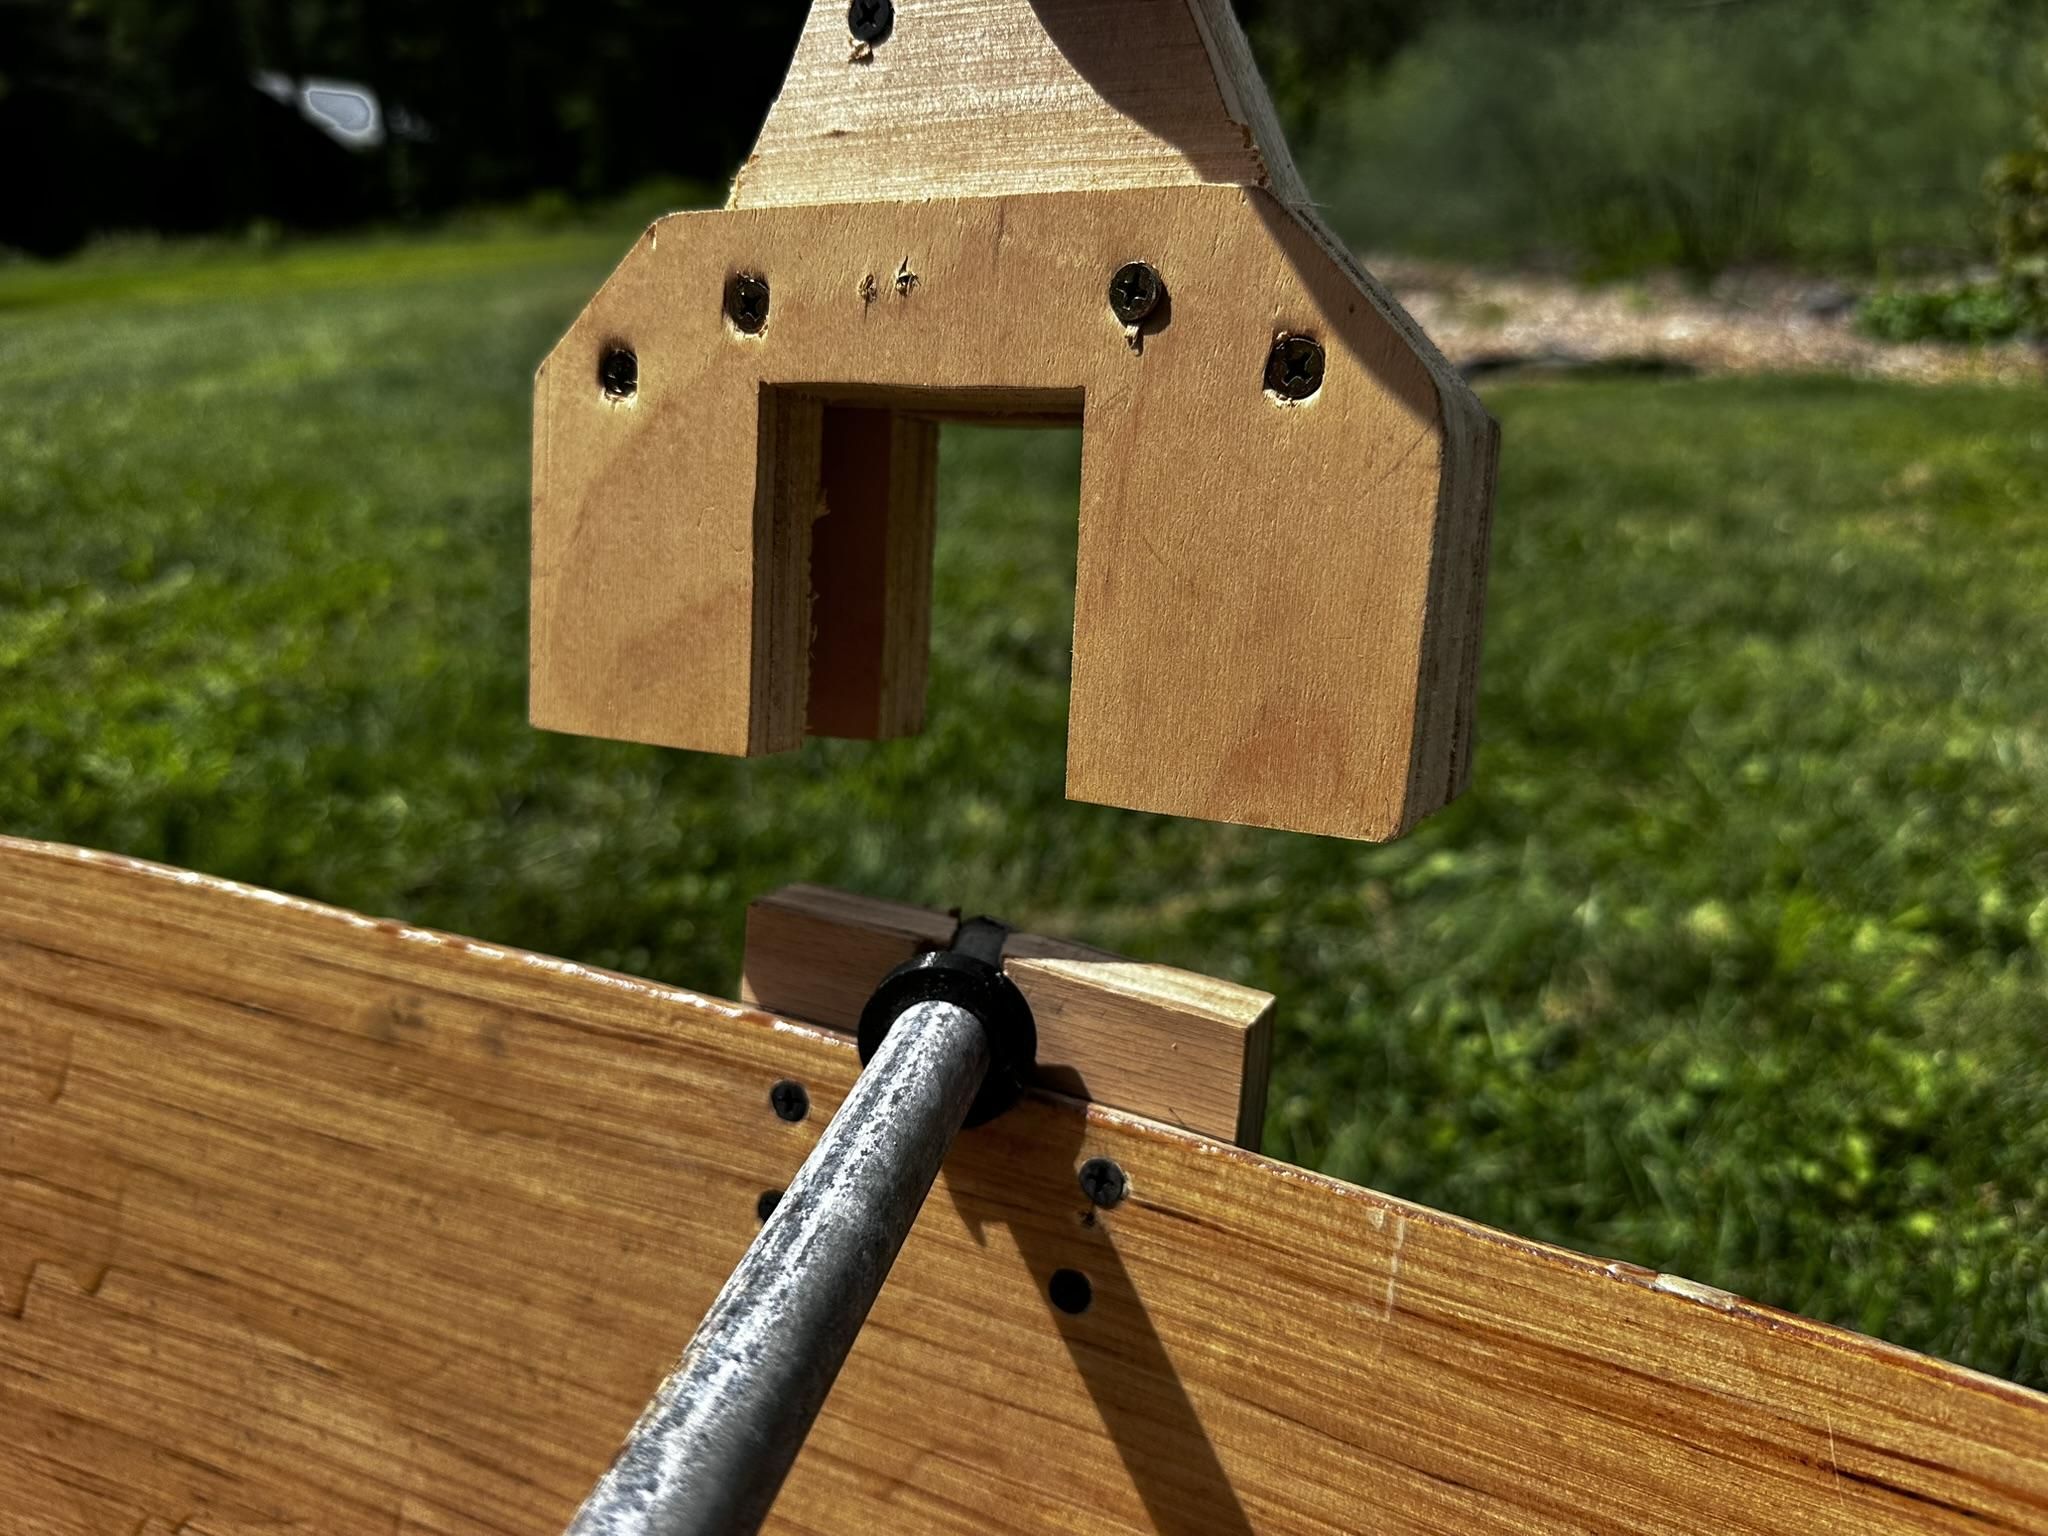
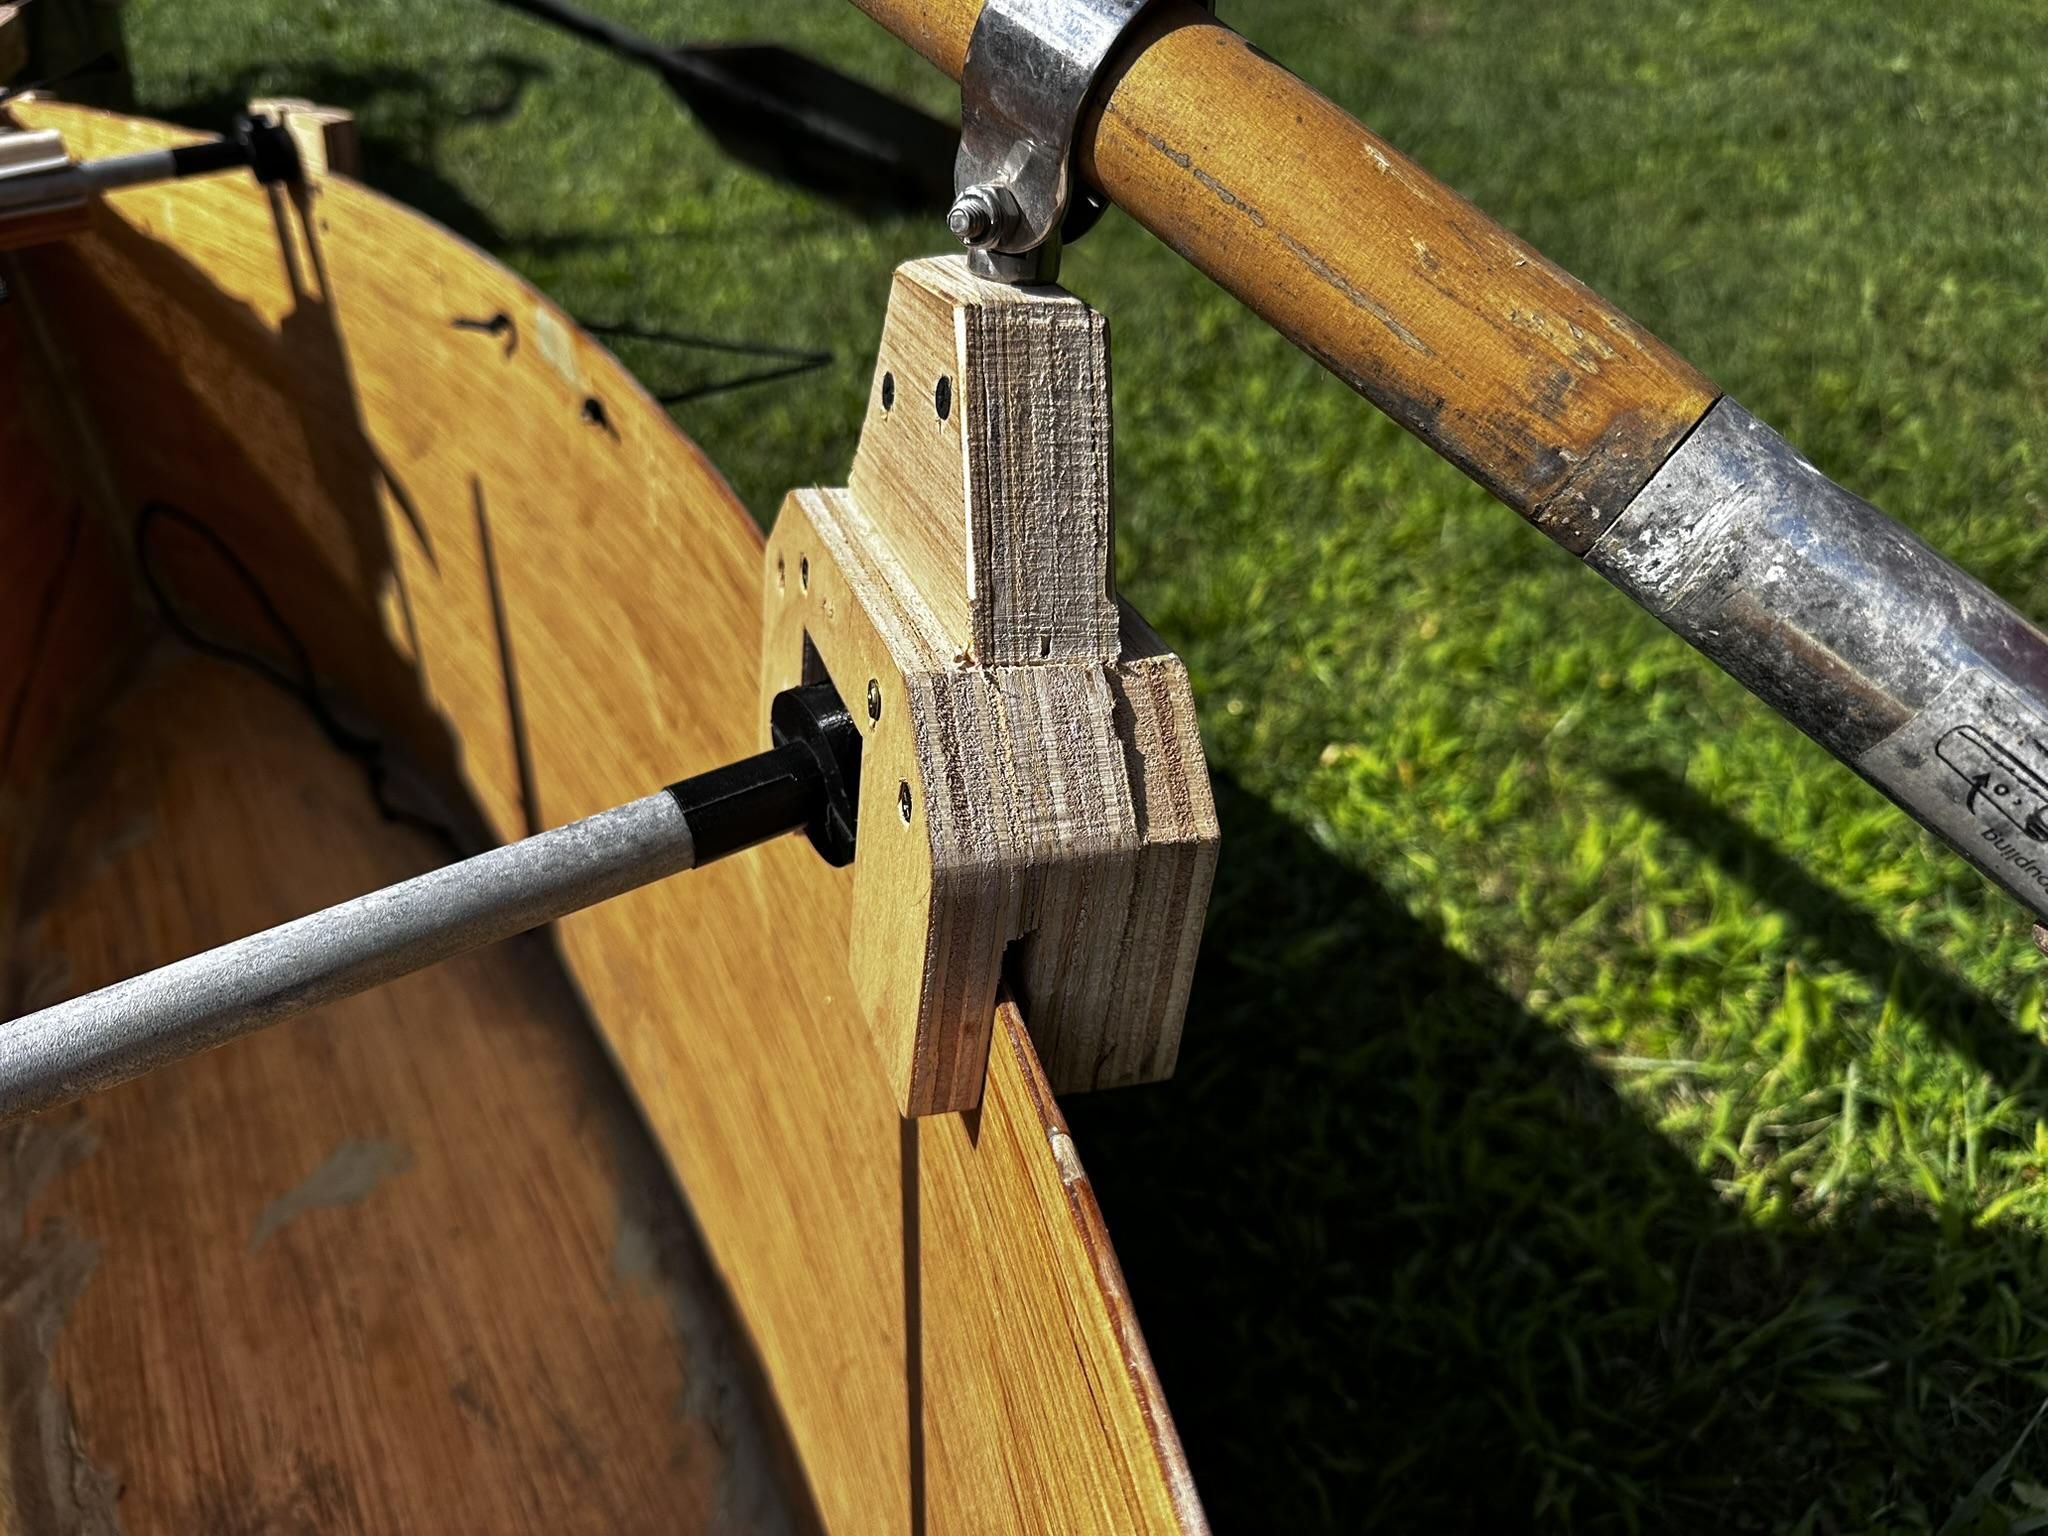
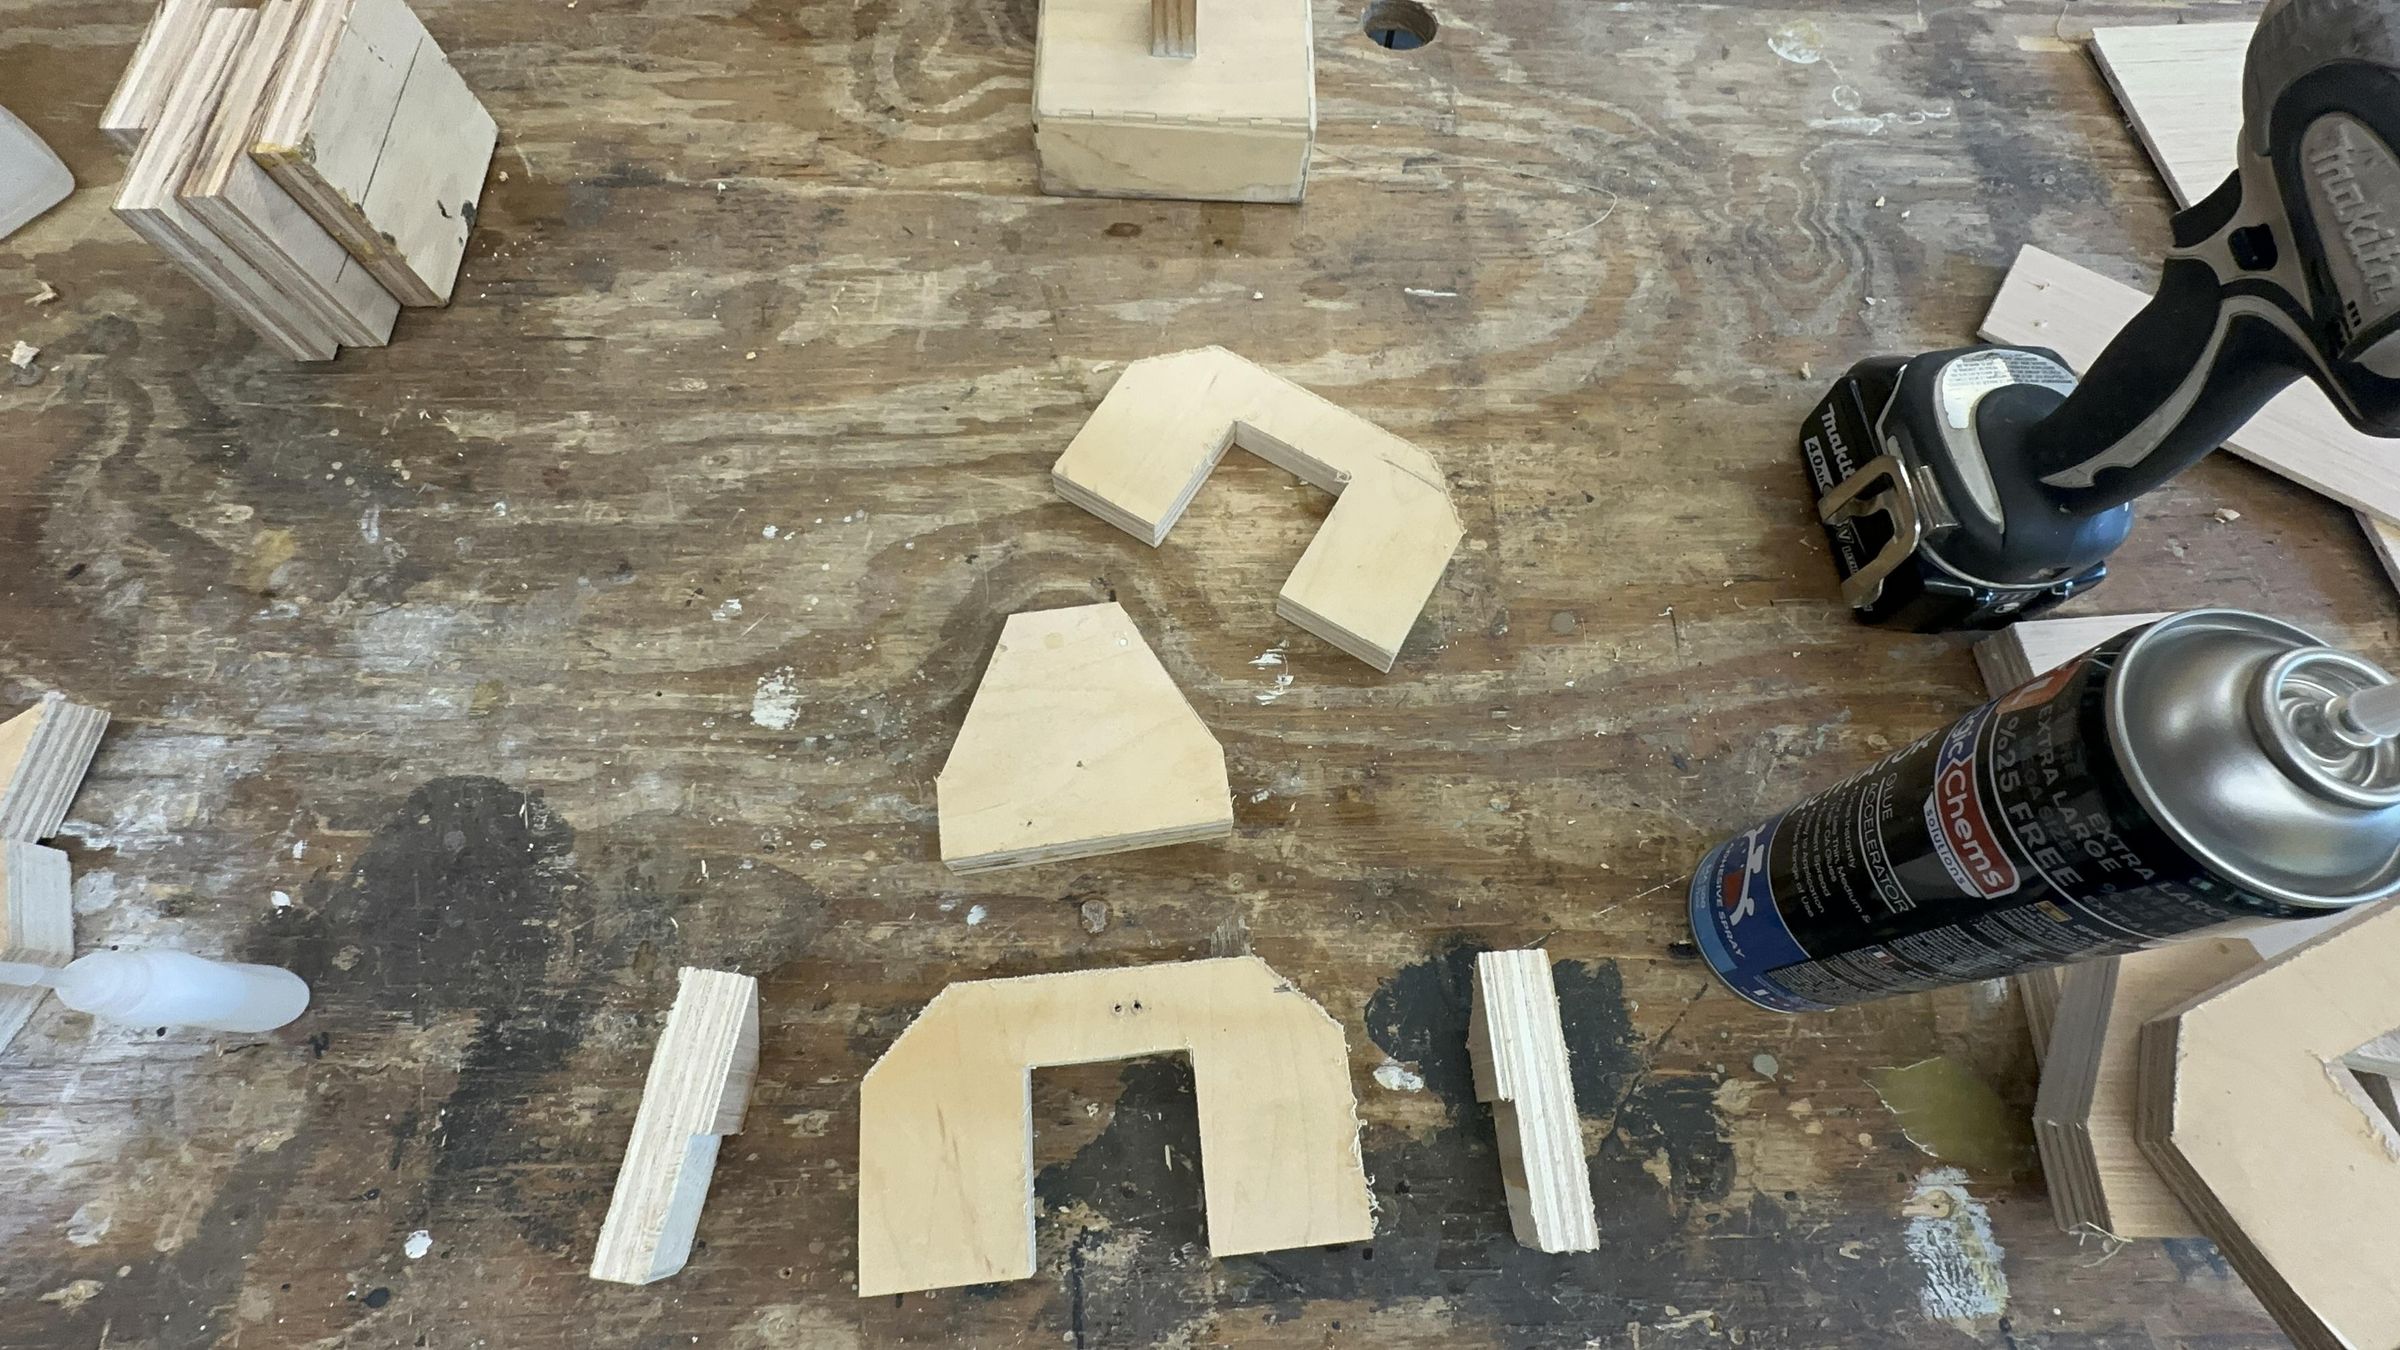
The oarlocks over the corner brackets and raise the oar insertion point. In the first dogmaran, the oarlocks were low, and it was hard to keep the oar handles from hitting my knees. There's nothing special about this oarlock design, except that it's important for it to be in this location. The bracket is the strongest, least wiggly part of the Dogmaran's gunwales. It can handle the rowing force, and it is in a nice spot, ergonomically.
Updated Hull Construction Methods
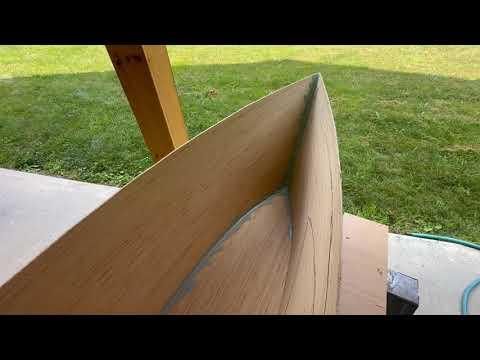
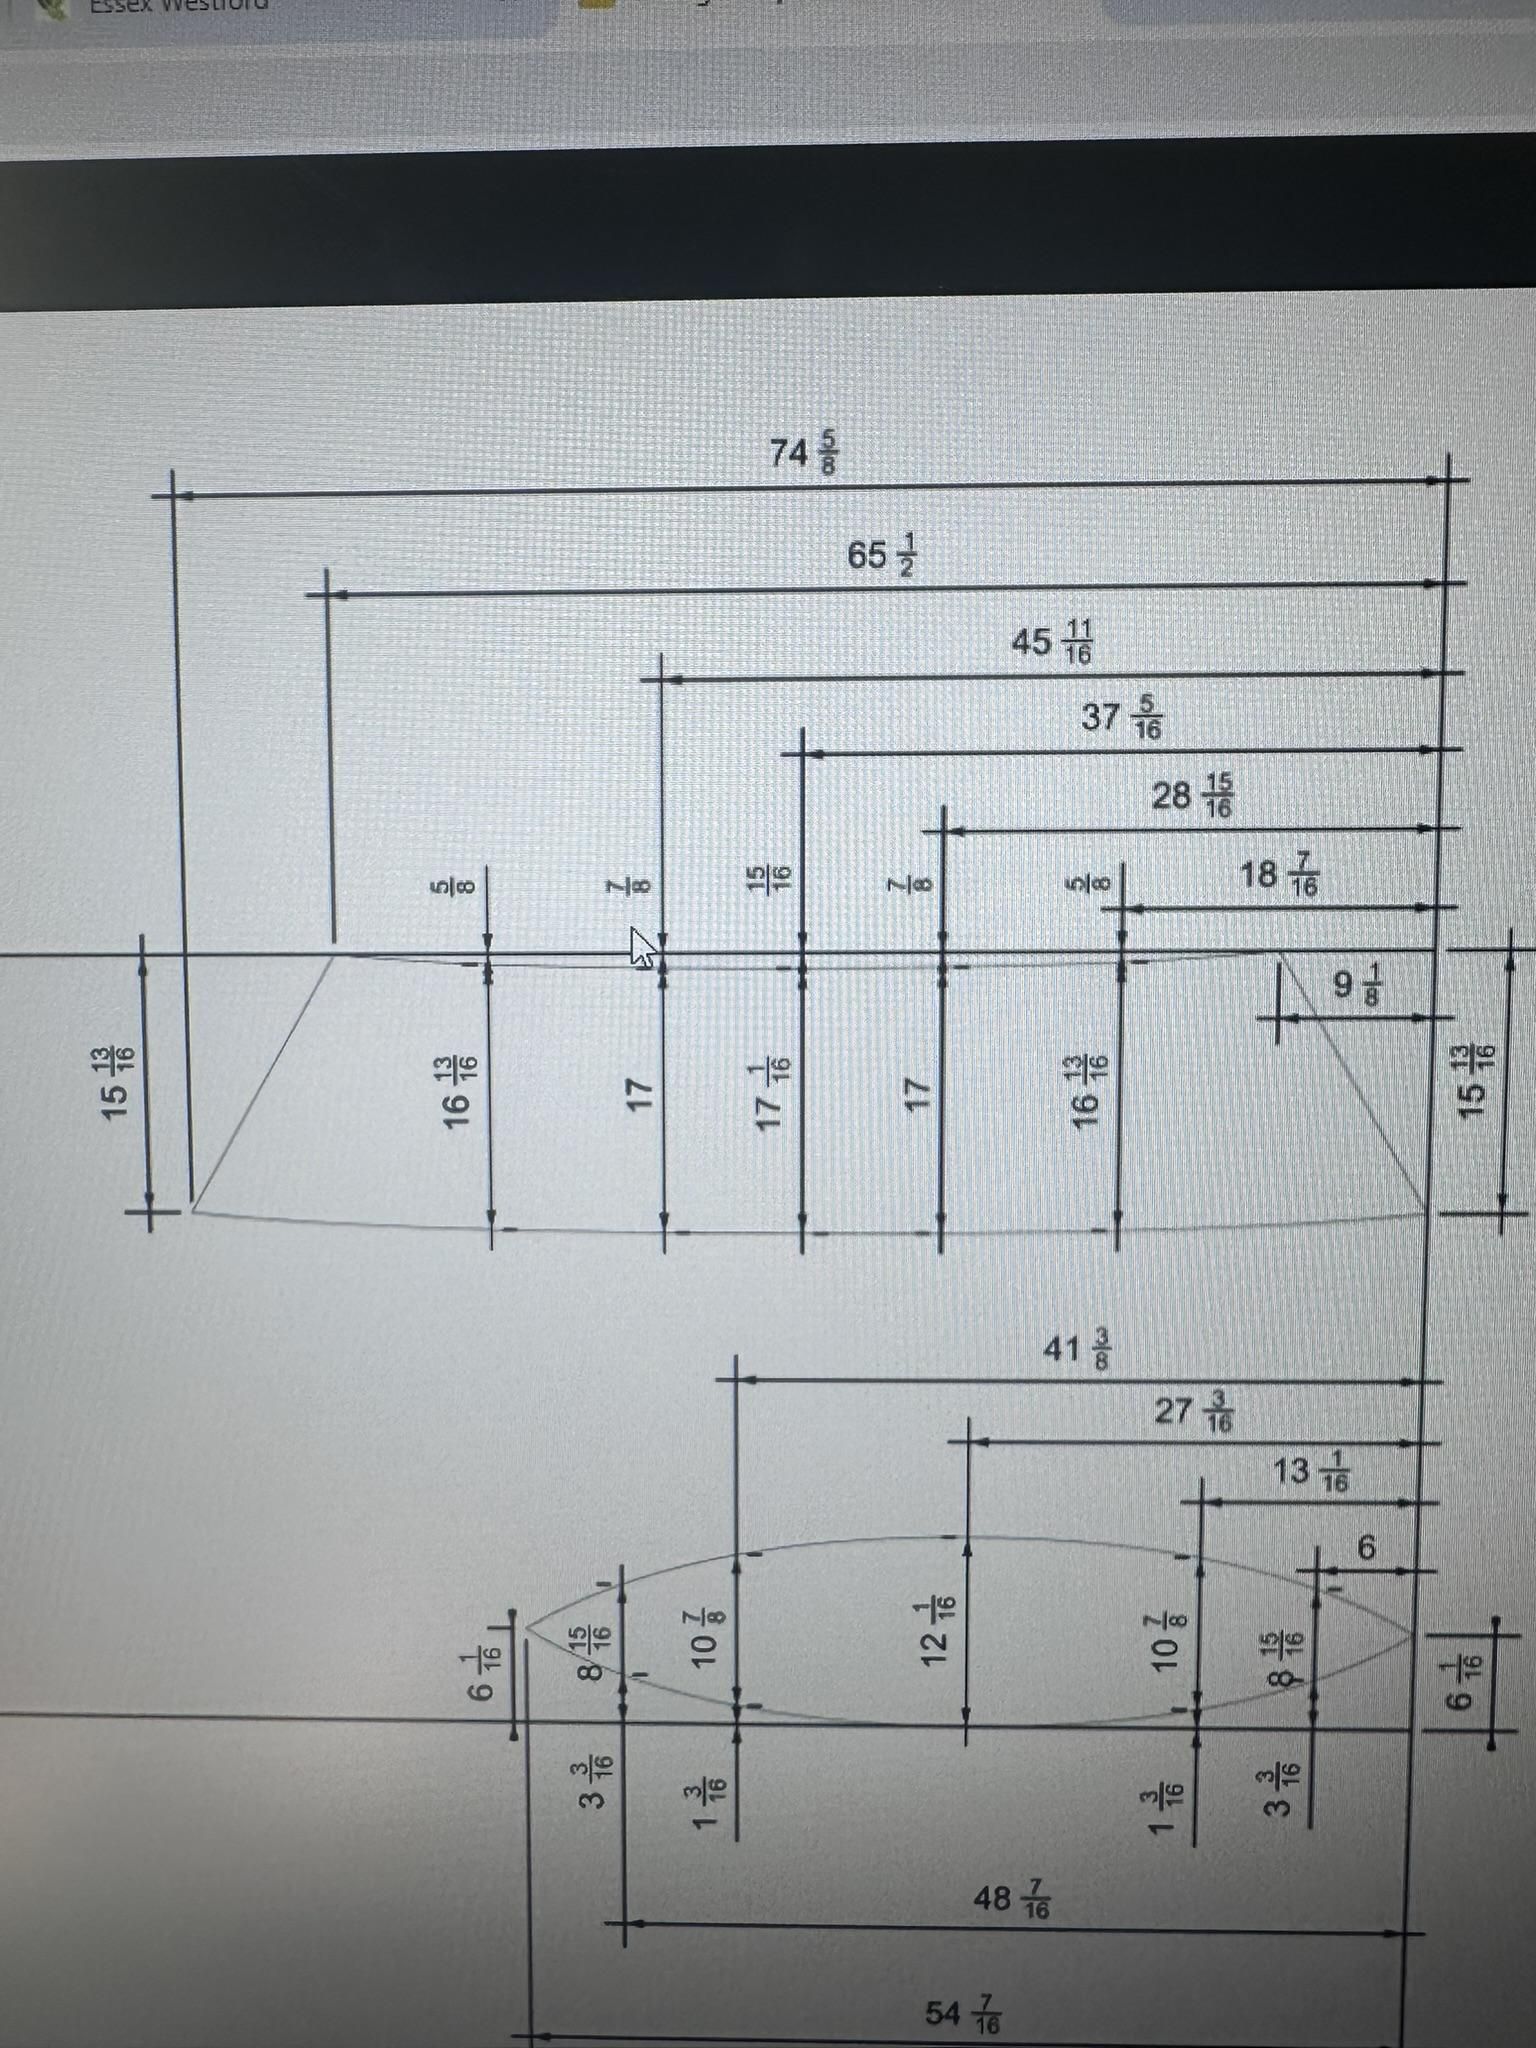
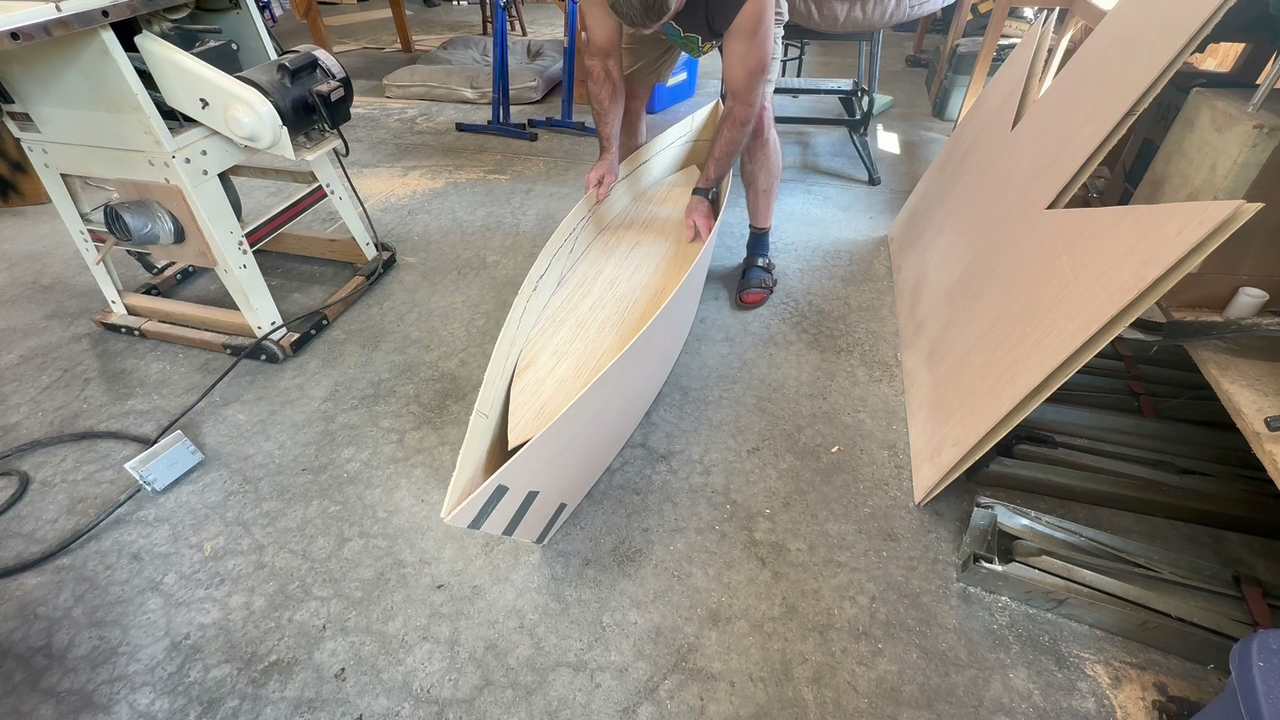
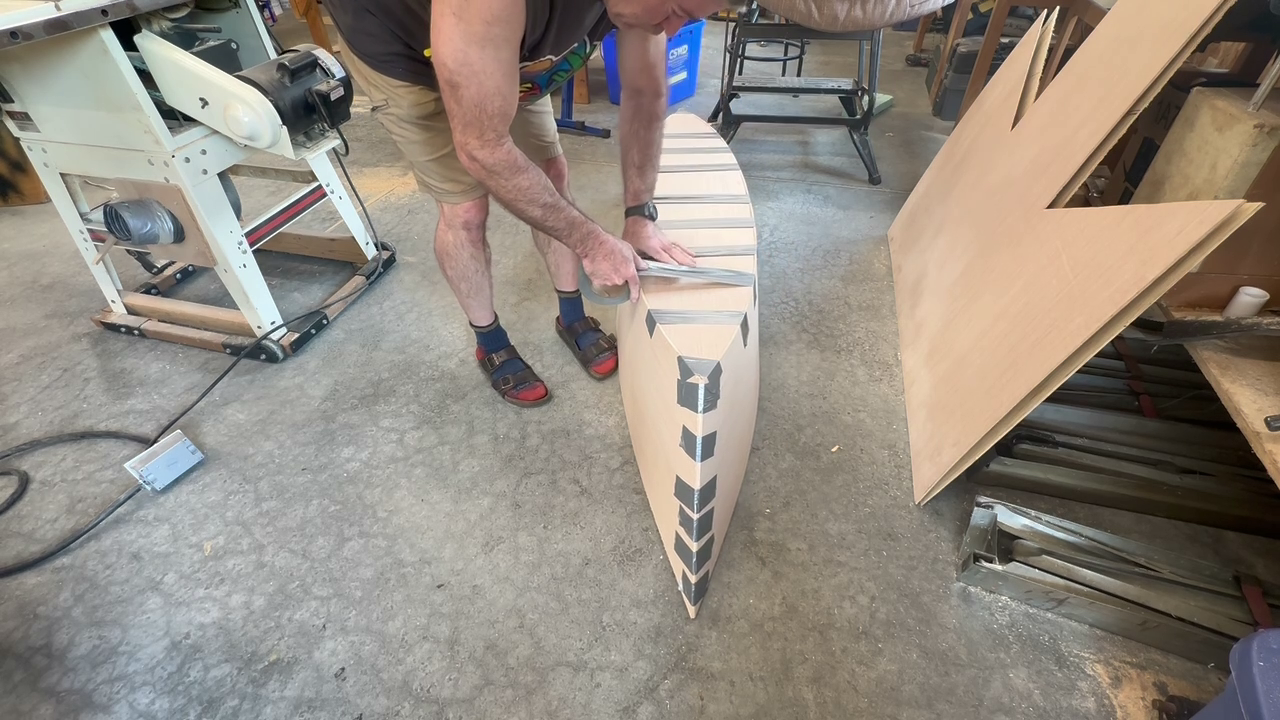
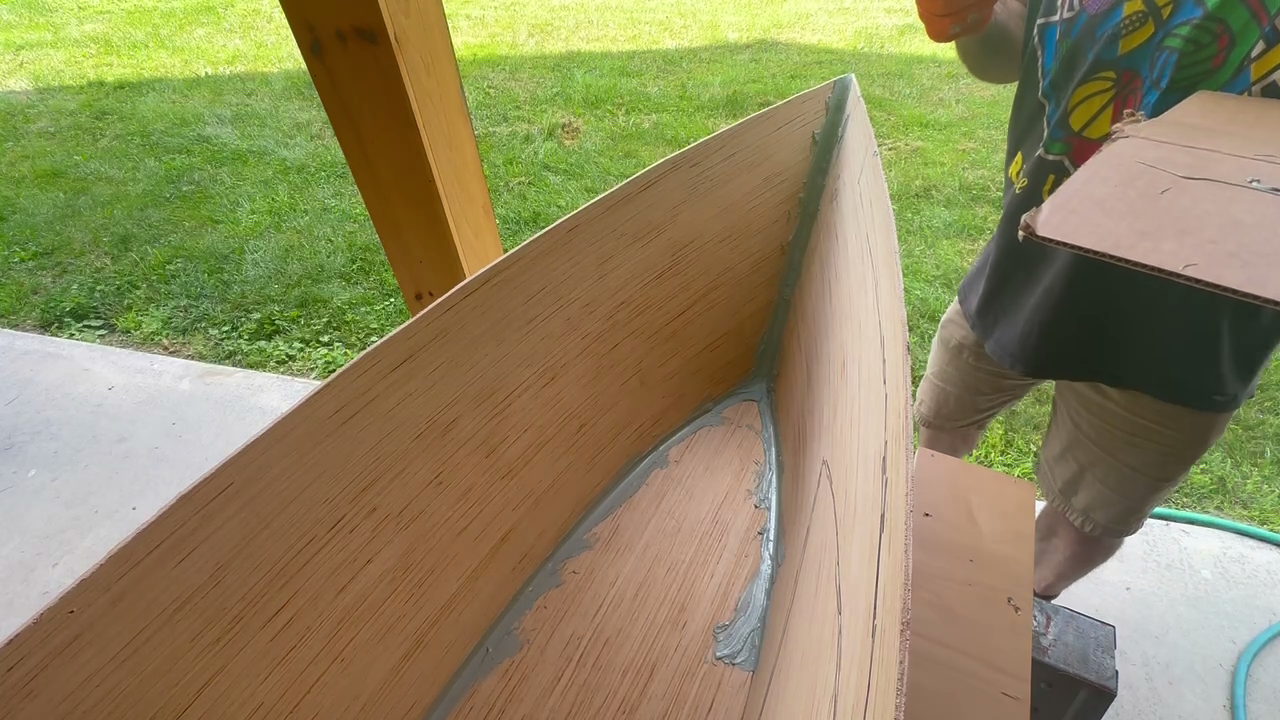
I made the second Dogmaran with the same measurements as the first, but I did a few things differently this time, and here are a few changes that I think were for the better.
- To create the hull pieces, I used the measurement sheet to cut a template, rather than projecting the design on the wall. I think this turned out to be more precise.
- "Stitch and glue" process changes:
- This time I used duct tape to hold the panels together before the "glue."
- Instead of initially gluing the panels with Gorilla Glue, I used fiberglass putty. This was much quicker, allowing me to get the whole thing done in one day.
- Instead of applying the fiberglass resin with cardboard and "finger painting," I used a throwaway brush, but I only used one of them, cleaning the brush with acetone before each batch of resin.