Porta Hooty Candy Bag / the Owl House Cosplay
by dadwithtowel in Craft > Costumes & Cosplay
890 Views, 8 Favorites, 0 Comments
Porta Hooty Candy Bag / the Owl House Cosplay


For our costume, Luz from The Owl House, we knew a plain candy bag just wouldn’t fly. So we set out to make Porta Hooty, the backpack that’s equal parts storage, sidekick, and unsolicited advice owl.
- Built from EVA foam for the house shape.
- Reinforced with a pressboard frame to handle Halloween candy weight.
- Featuring a working roof hatch with a fabric hinge and magnet latch.
- Glowing with LEDs behind a hand-drawn Light Glyph on a yellow Post-it note.
- Topped with a 3D printed Hooty face.
The final result glows, opens for candy, and stays wearable all night or all Con depending where you bring him.
Supplies
Materials
- EVA foam sheets
- 3D printed Hooty head
- u/omfoltz Model on thingiverse https://www.thingiverse.com/thing:4744918
- Spray paint
- white, red, (house) beige, (Hooty)
- Acrylic paint
- green, brown, orange, black, white
- Acrylic paints & brushes
- Dollar store LED lights
- Yellow Post-it note
- Pressboard (Recycled dresser drawer bottom) for the internal frame
- Nylon backpack straps (recycled from Backpack)
- Plastic backpack clips/adjusters (recycled from Backpack)
- Magnets
- Screws
- Gaffer/Fabric tape
- Hot glue sticks
- Superglue / Gorilla Glue
- Masking/painter’s tape
- Pencil & ruler
- Sandpaper / file
Tools
- 3D printer
- X-Acto knife / hobby knife
- Heat gun (or stovetop burner alternative)
- Drill / Dremel
- Screwdriver
- Cutting mat
- Spray booth / well-ventilated area
Budget Friendly Substitutions
- No 3D printer? Sculpt Hooty from foam clay or carve EVA.
- No pressboard? Use hot glue layered cardboard or thick foam board.
- No backpack straps? Old belts, fabric strips, or thrifted tote handles.
- No magnets? Velcro strips.
- No heat gun? Use stovetop burner or hair dryer on high.
- No spray paint? Brush on acrylics with sponge/brush.
Paper Templates and Foam Walls
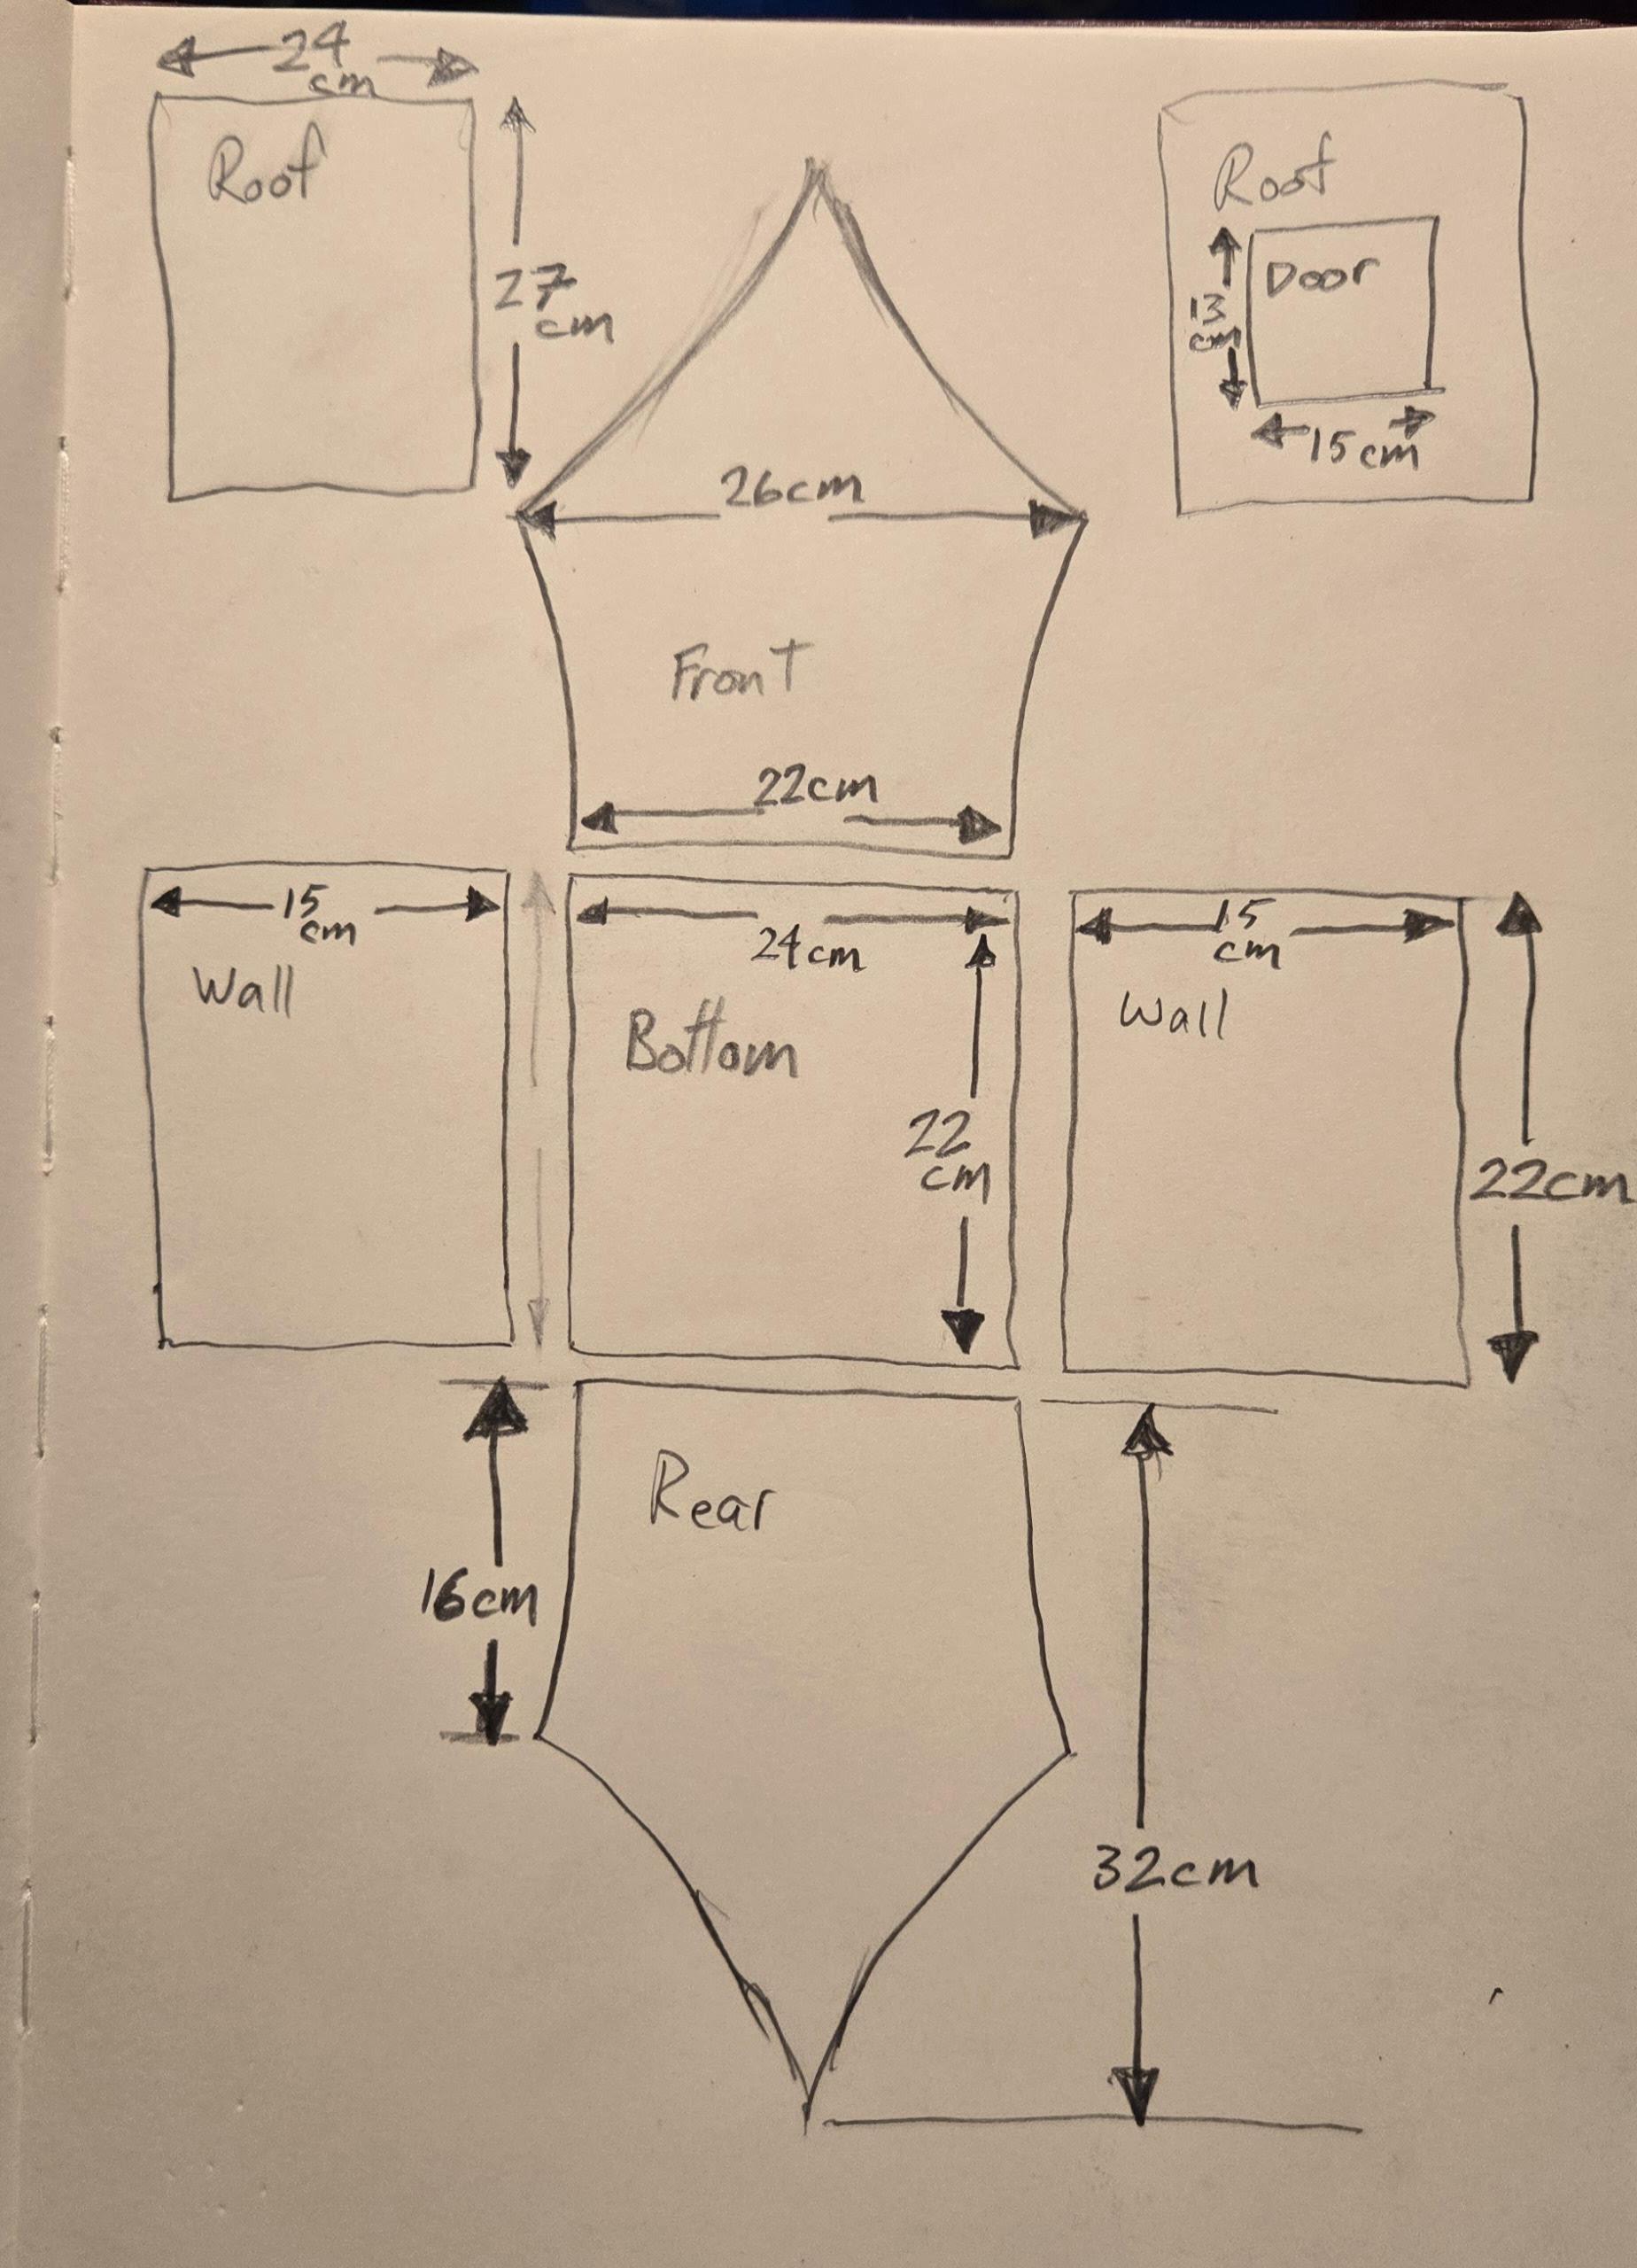
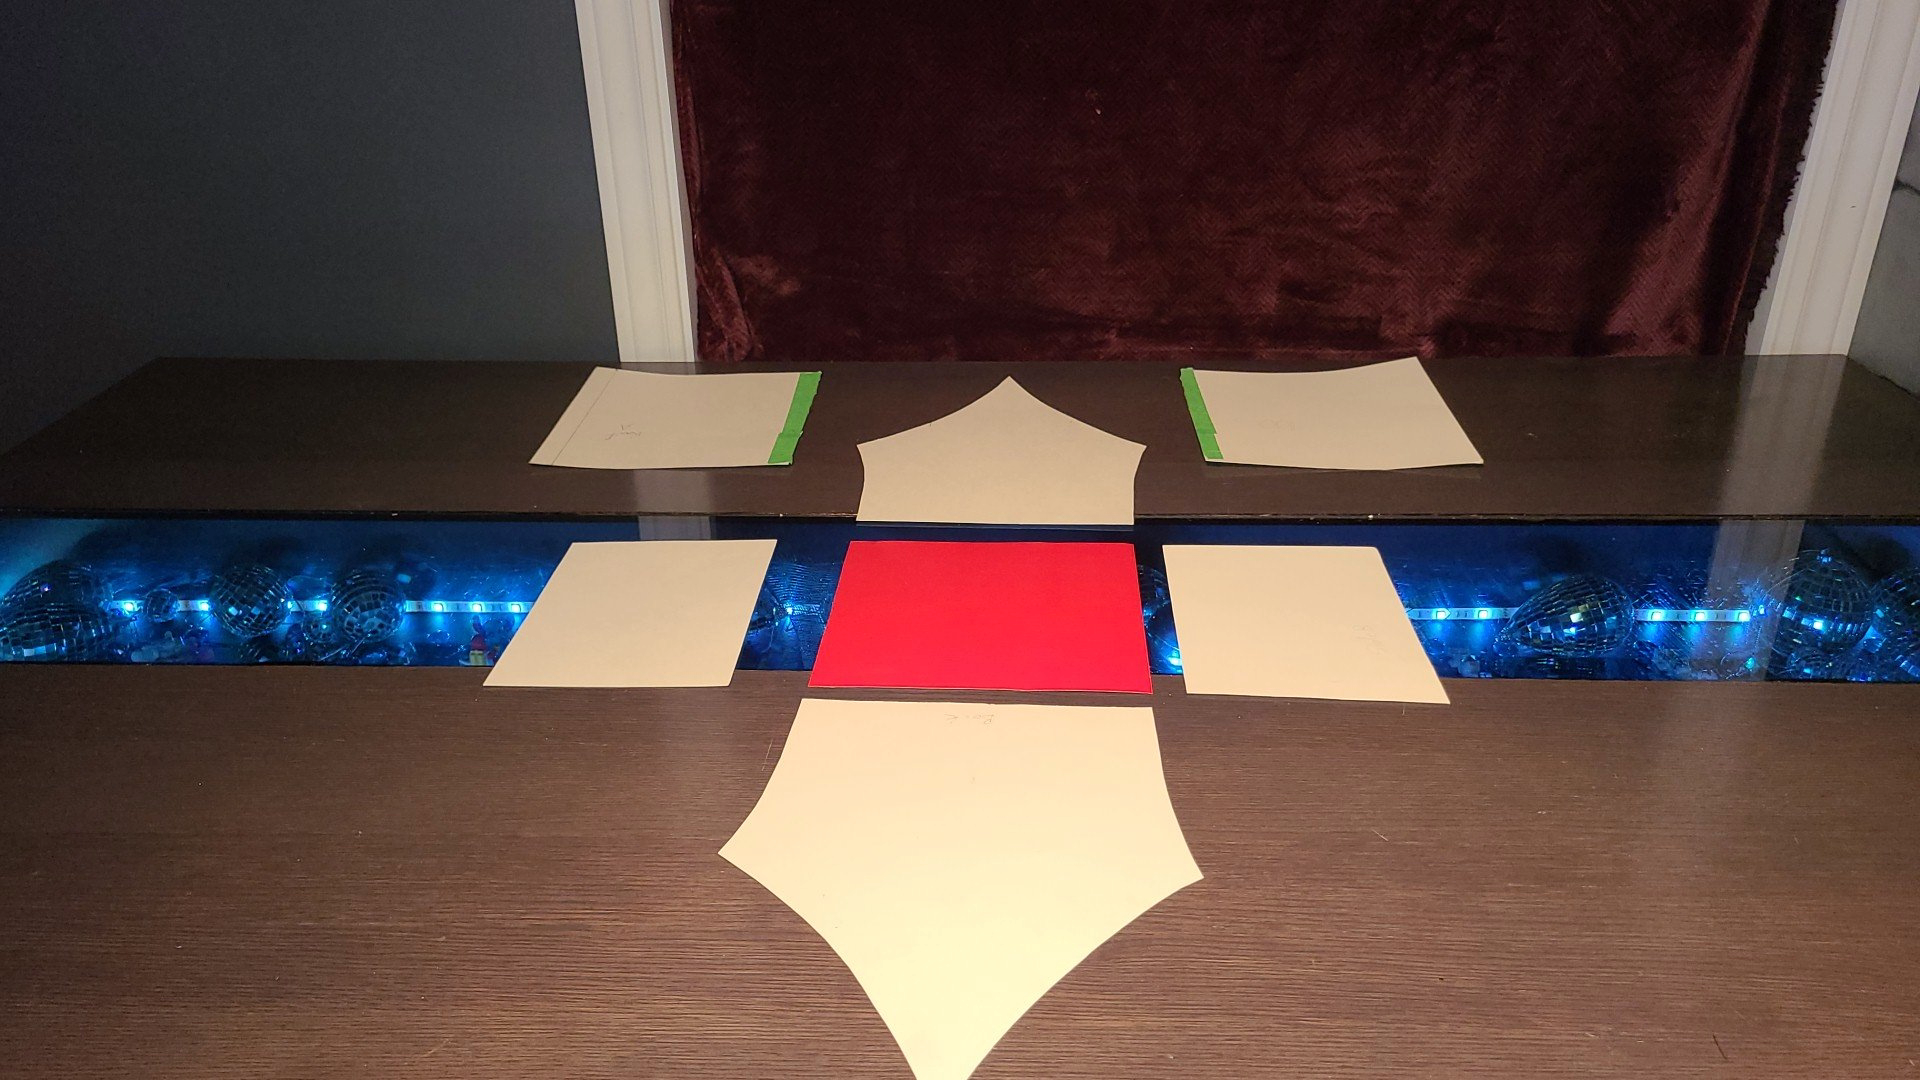
- Start with paper templates for the base, back wall, sides, front and roof.
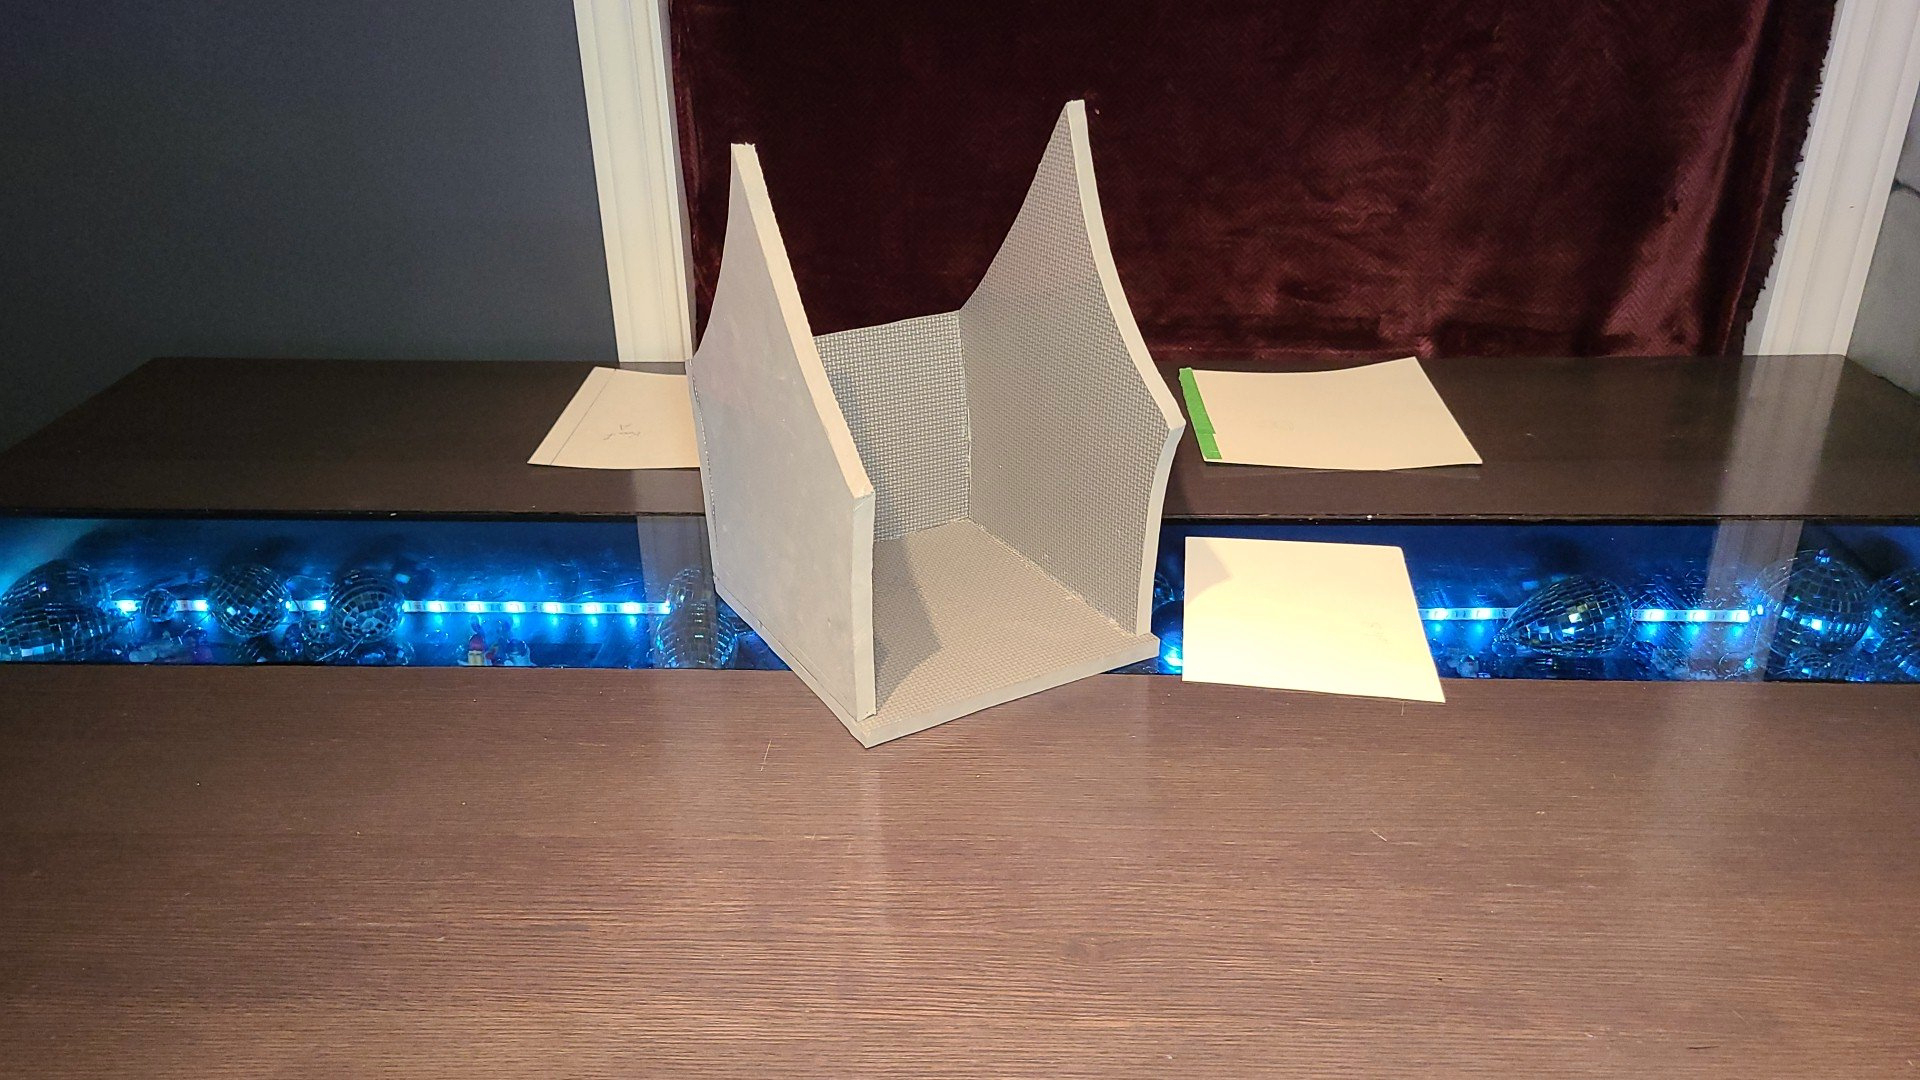
- Transfer to EVA foam, cut, and glue into shape.
- leave one side open, and the roof off, so you can insert the frame.
Pressboard Interior Frame

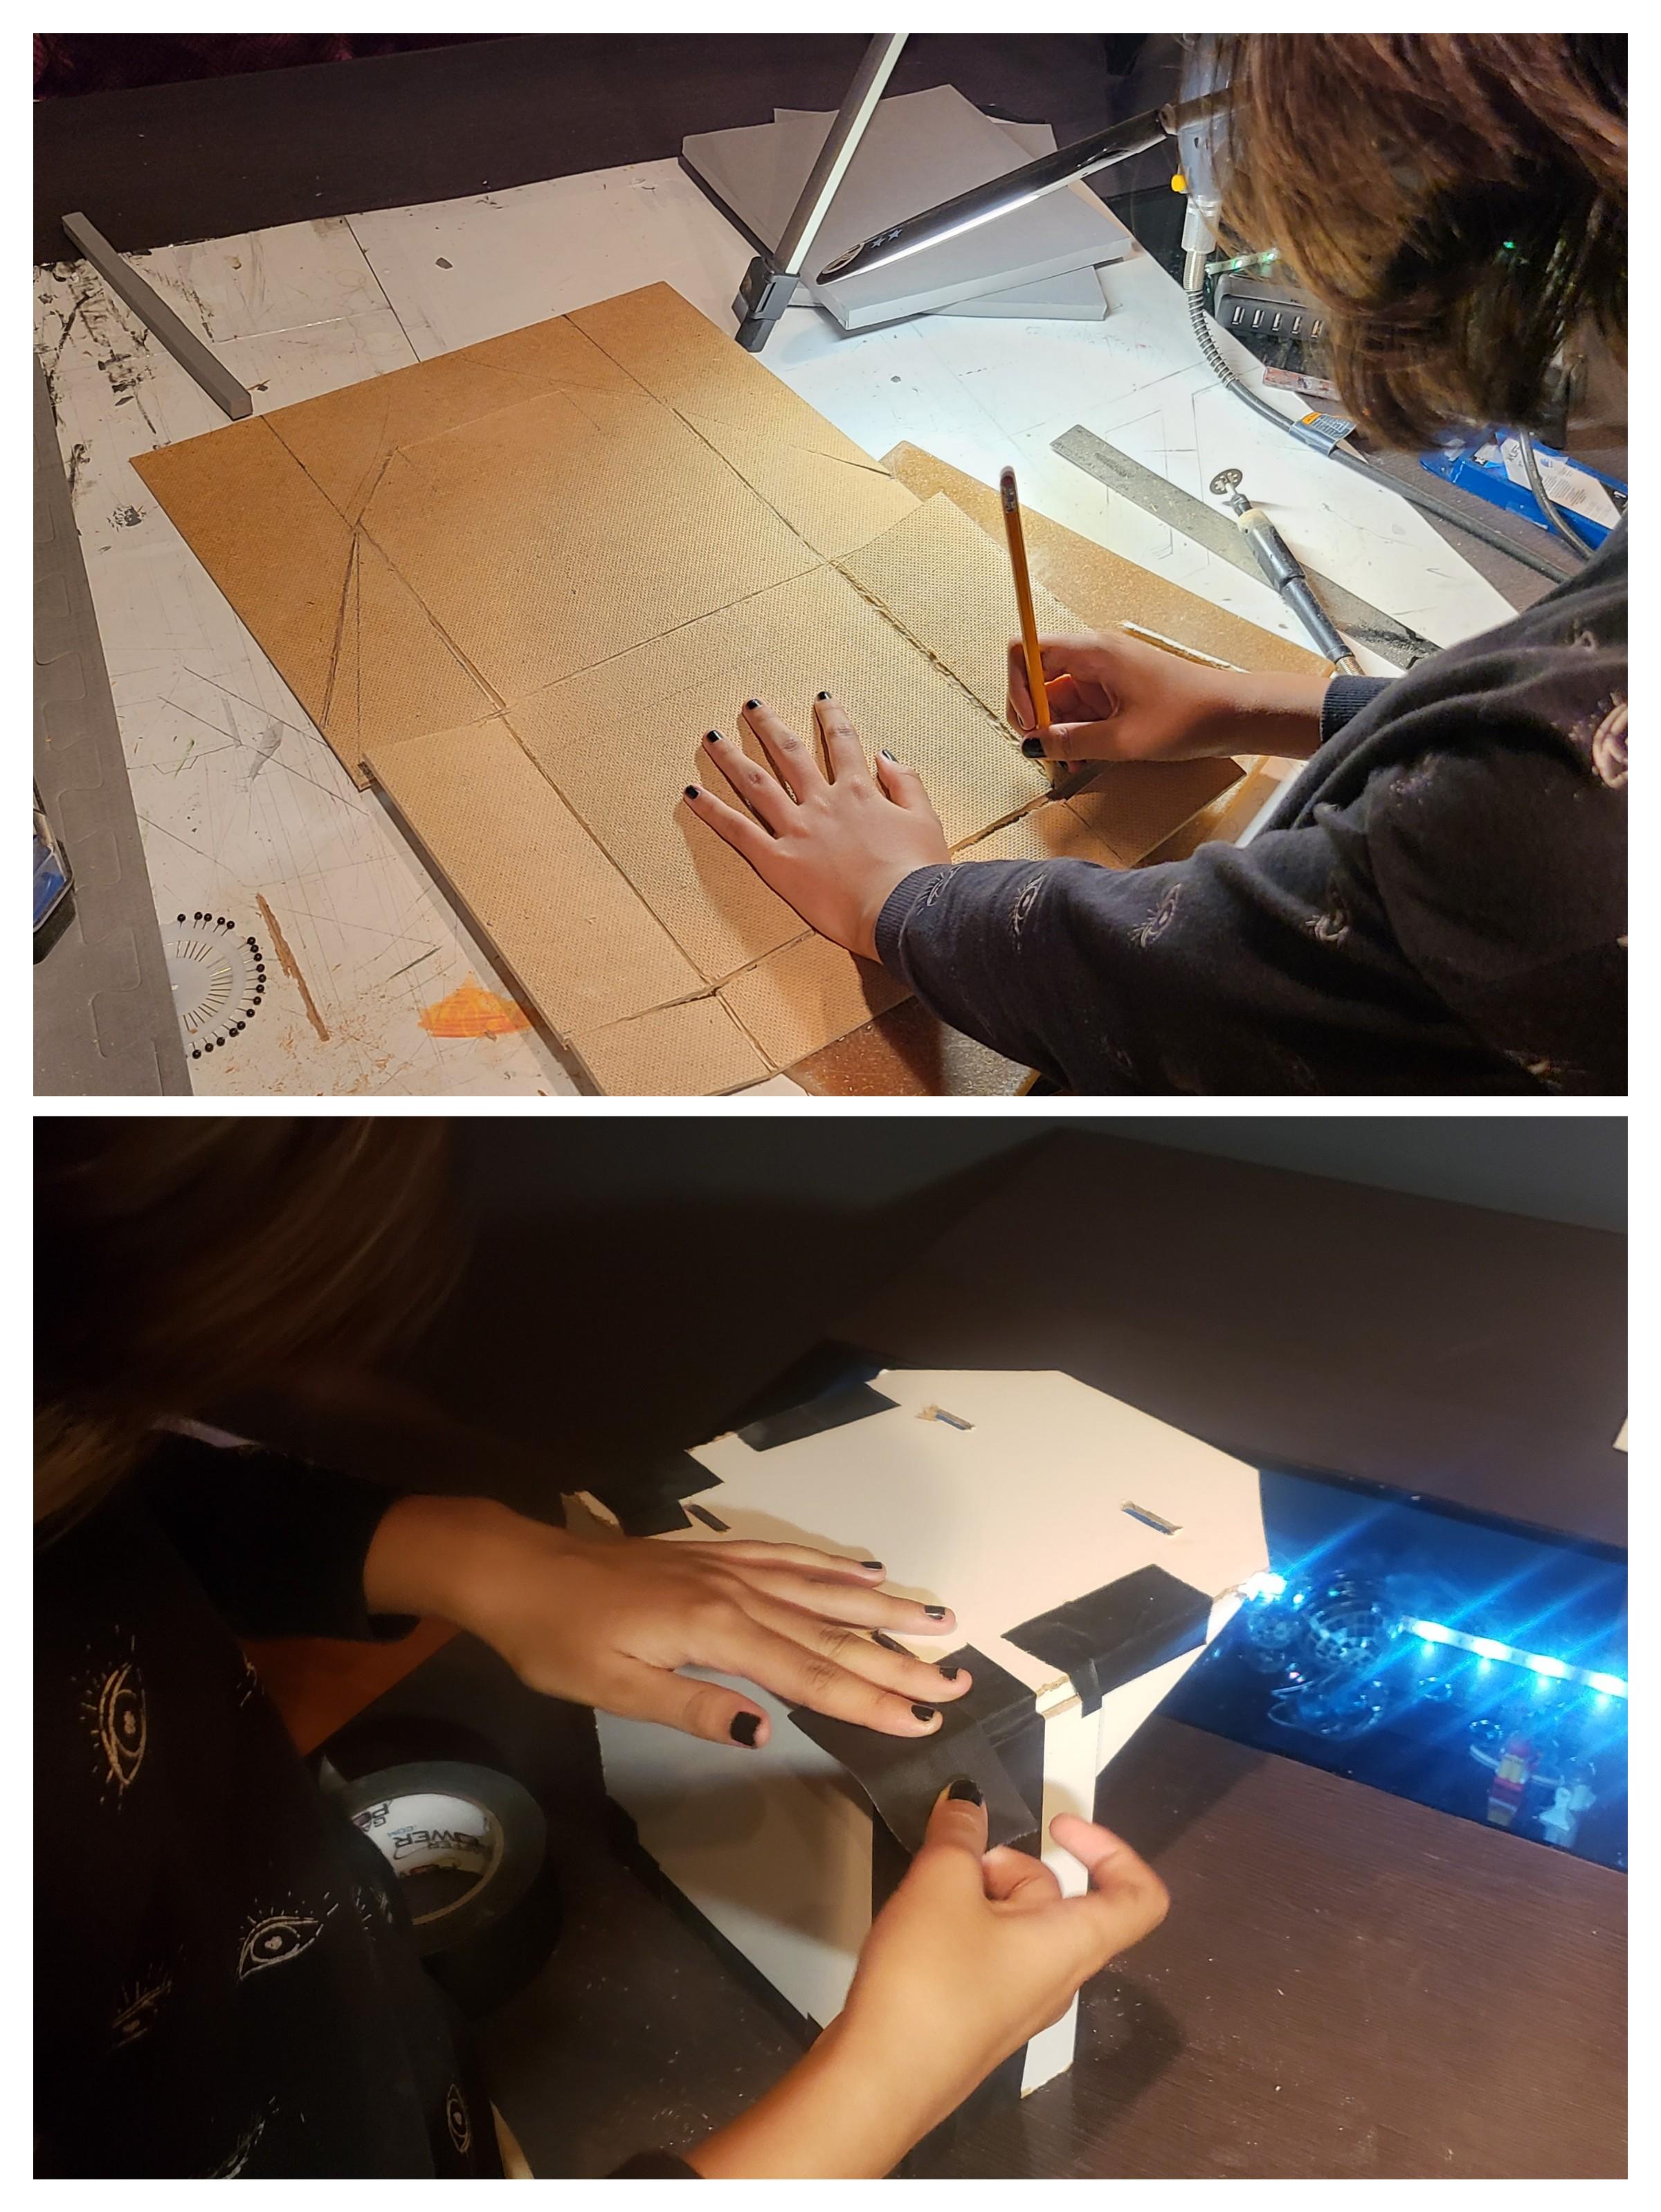


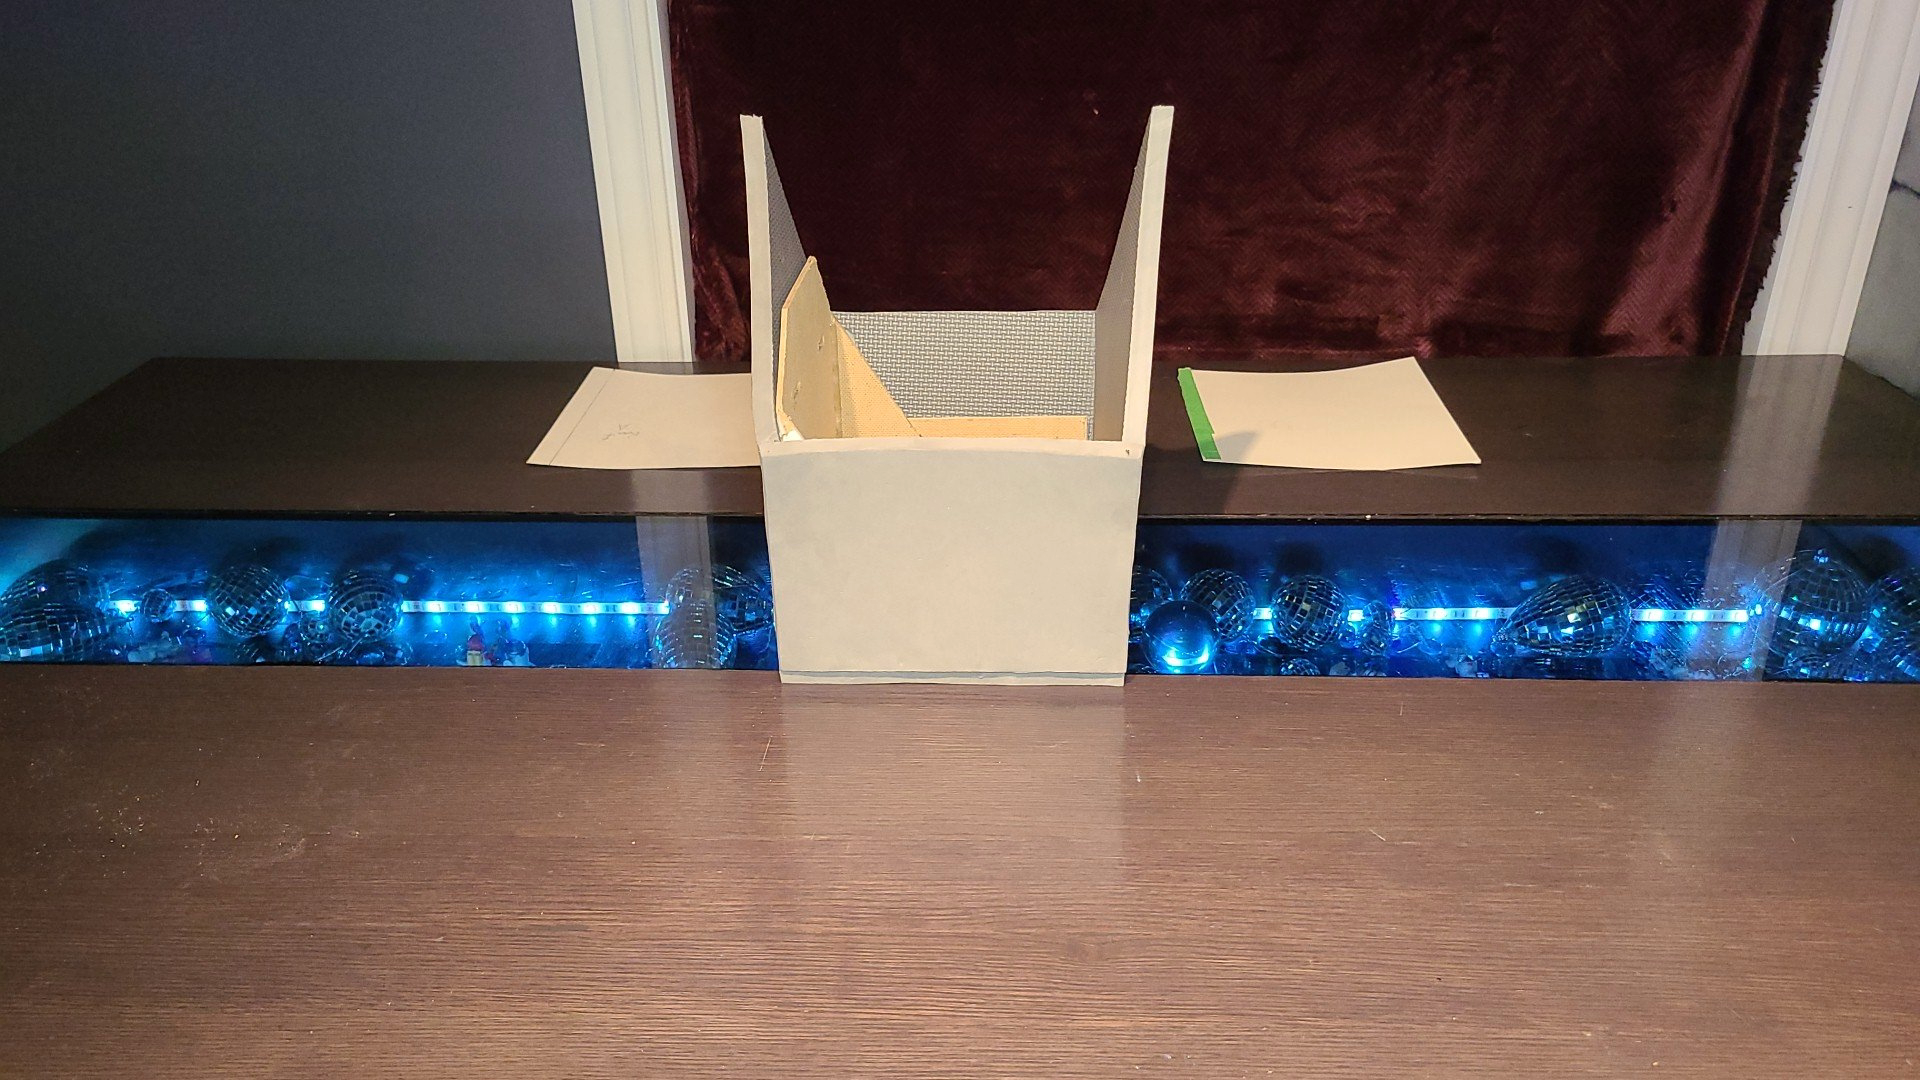
- Cut pressboard to size.
- Score with Dremel, fold, glue into shape.
- Slide frame into EVA shell to support weight.
- Add the final wall
Backpack Straps

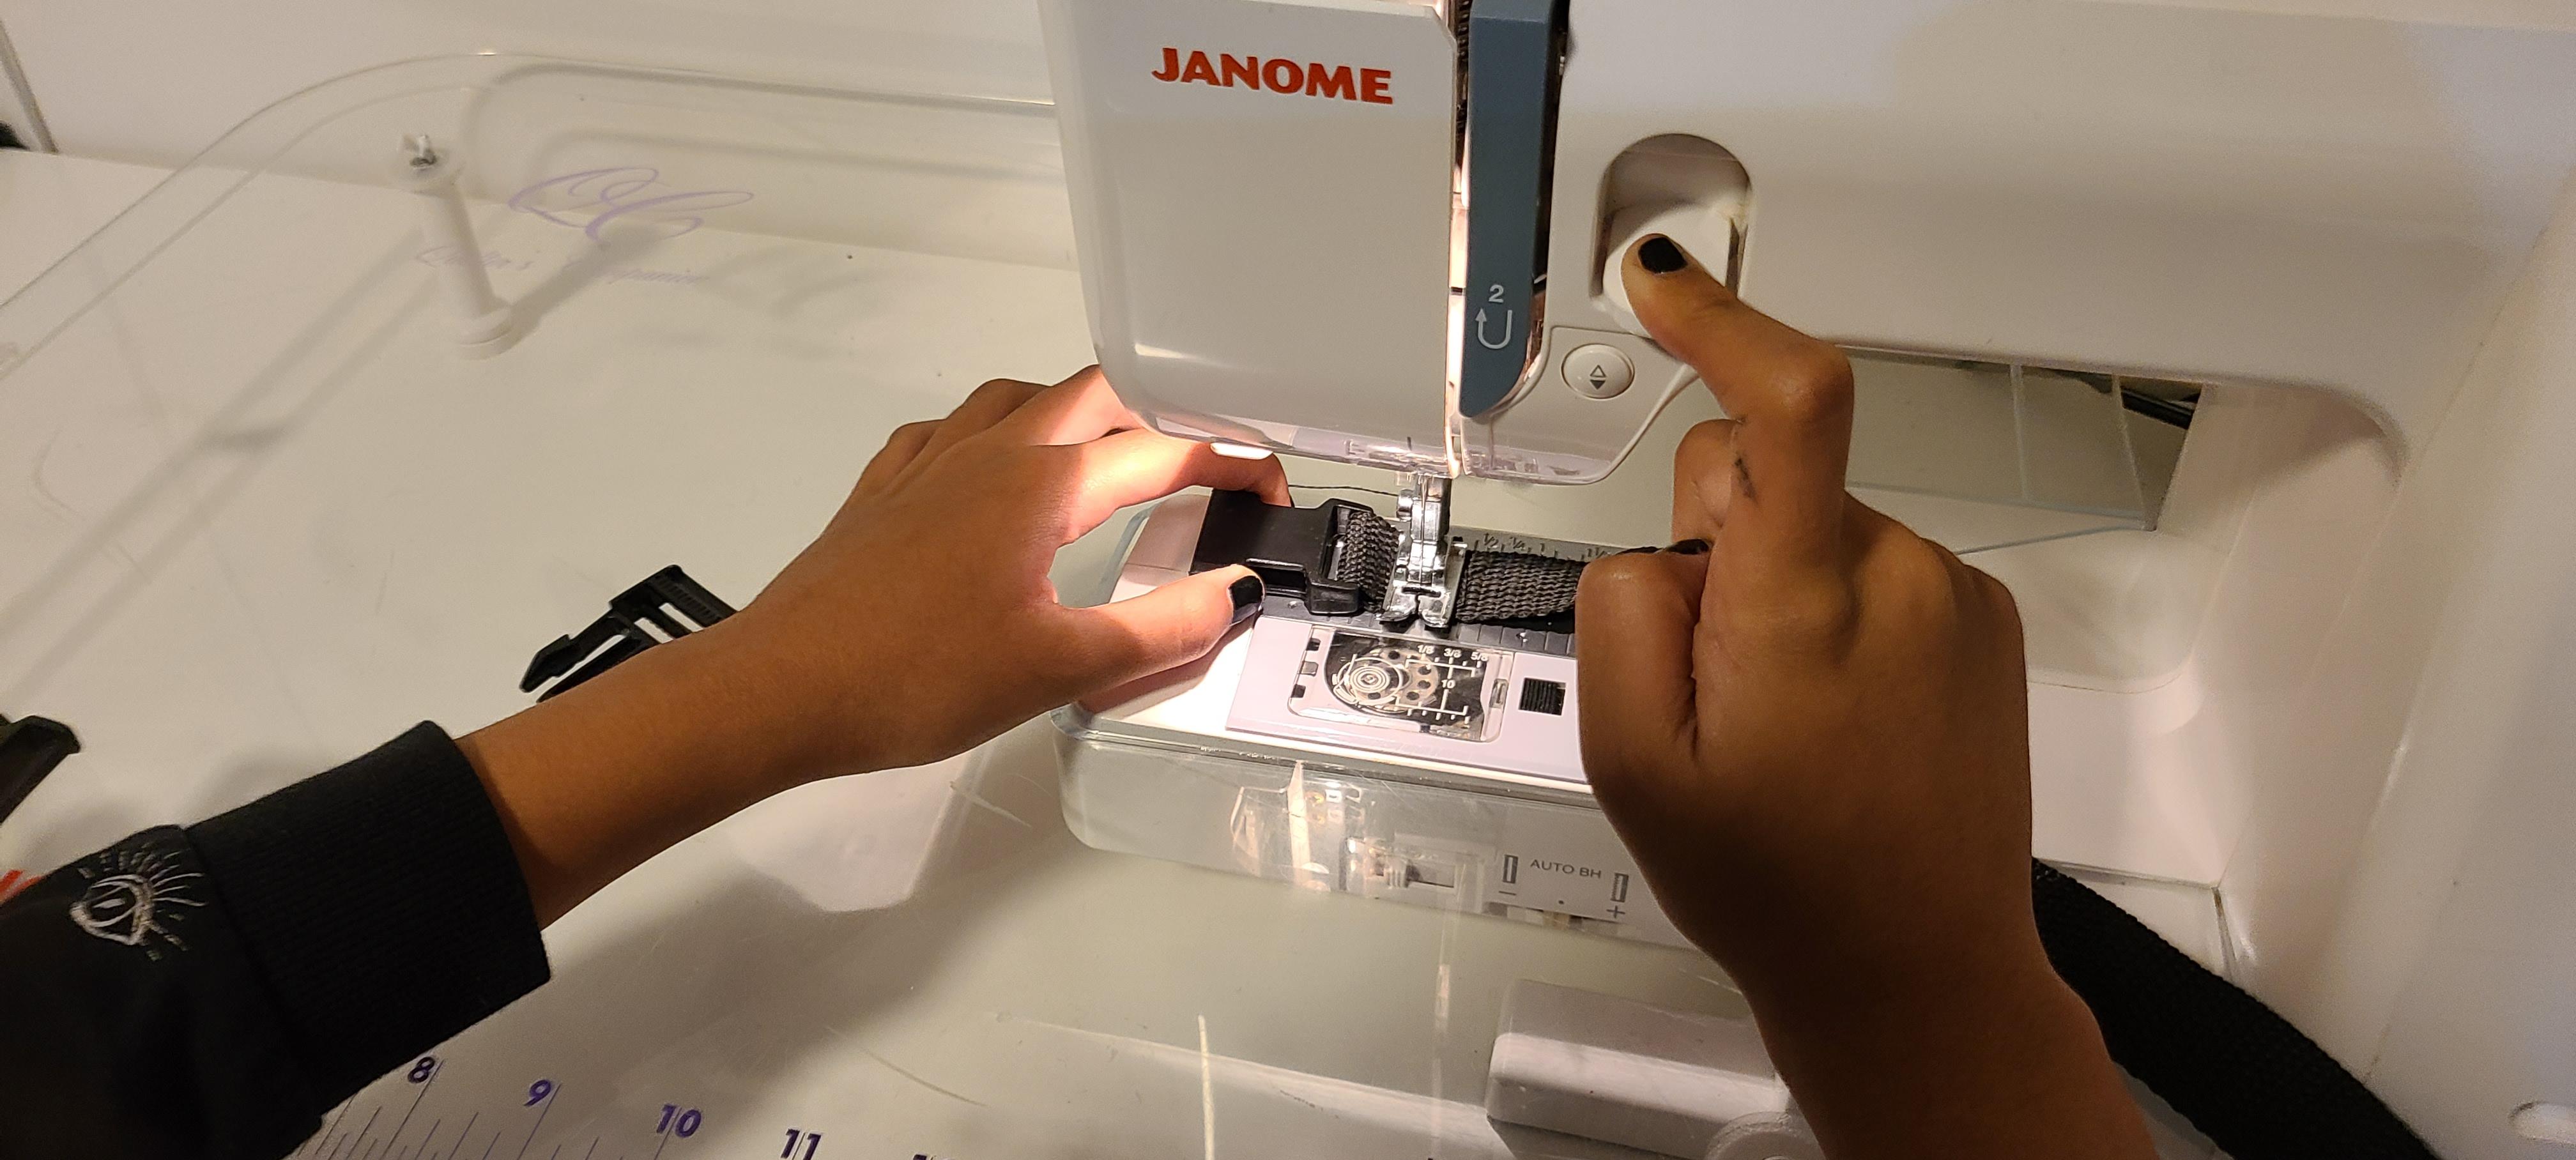
- Sew recycled straps and buckles.
- cut small holes in the EVA foam
- Attach securely to pressboard inside the house.
- Reinforcement through the pressboard prevents foam tearing.
Roof Hatch and Candy Door


- Cut roof access door.
- Hinge with gaffer tape and superglue for extra hold.
- Secure an extra piece of tape (1cm by 2.5cm) at the oposite side of the hinge to act as a pull point.
- Add magnet latch (screw and inset magnet which we glued and covered with tape).
- Test opening and closing.
Adding Foam Details


- Score 1mm deep lines on the front of house with an sharp knife (drawer door outine lines, decorative details).
- Make one continuous line, the heat will show every mistake.
- Use the heat gun to expand the scored lines into nice grooves for a sharper look.
- (hovering the foam over a stovetop burner will do the same as alternative to a heatgun)
Painting the House

- Spray white base coat.
- Mask off painted walls, then spray the roof red.
- Paint drawer handle yellow, add green leaf accents.
Painting and Mounting Hooty


- Print or model Hooty's head https://www.thingiverse.com/thing:4744918
- Sand the print before painting.
- Spray paint the base the base beige coat, brush details (brown, orange beak, black/white eyes).
- Hot glue and mount to screws, secure Hooty head to front.
Light Glyph / LEDs


- Draw Light Glyph on a yellow Post-it note.
- Place Dollar store fairy lights inside the house.
- When the candy door opens, the glow fills the interior storage area.
Final Assembly


From Candy runs to Comicons, Porta Hooty is ready to take in some experiences.