Powerbank

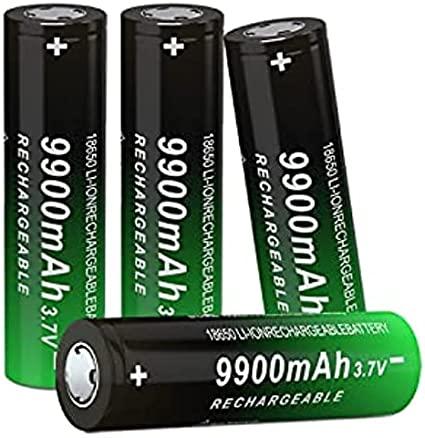
Being a Freshman in High School this is my very first Instructable. I had always taken an interest in technology and wanted to pursue it by entering into this competition. I hope you like it! I initially made this power bank because I wanted to get more into soldering and learn more about the topic, but I never knew that I would be successful. This specific power bank that I made includes two 9900mAh batteries. mAh: I realized stands for milliampere-hour. Each one of these batteries provides 3.7 volts of power, and the PCB gives out 5 volts of power which are perfect for charging a phone.
Supplies


Tools:
- 2 Lithium Ion Batteries
- Kapton Tape (used for connecting batteries together)
- Hook Up Wire Kit (used for soldering batteries together)
- PCB for recharging the batteries, and giving materials power
Other required tools:
- Soldering Iron
- Soldering wire
Optional Tools
- 3D printer for printing the case (this part is optional)
- Multimeter (To Check Battery Voltages)
Notice: These Files are stl files, and you will need to slice them when you download them, then place them onto your 3D Printer.
These files were made on Fusion 360.
Take Out Everything From It's Packaging
This step may seem crazy, but it is a moment for us because we are learning how to DIY, and the first time I did it I was scared too, and all the packaging created a mess. After This make sure to create a clean workspace in a well-ventilated area as soldering fumes are dangerous.
Tape the Batteries Together

Using Kapton tape you secure both batteries together; Kapton tape is not required however, you can use your own tape or you can hot glue the batteries together. When you are securing them together make sure to have both sides aligned positive with positive, and negative with negative, etc. Then you will be ready for the next step.
Solder the Batteries Together


As soon as you have the batteries secured, you can finally do what you have been waiting for which is: SOLDERING!! As soon as you get started find two colors of wire in the hook-up kit. I used black and red, as these are the most common colors of wires. Red was for the positive side and the back was for the negative side. Since these are Flat Top batteries there is only one way to tell which side the battery is positive or negative, and this is by looking at the writing on the battery. If it doesn't show it, NEVER FEAR: because the slightly raised side is positive and the flat one is the negative side. Then as you realize which side is which you can start soldering, first wait until your soldering iron is hot, and be careful, solder a slight bit of metal onto the battery. Then as soon as it cools heat up the solder, and place the wire onto the solder. Then repeat the step on both sides. (I did a not-so-well job because it was my first time too :))
Soldering Onto the PCB


When you are soldering the batteries to the PCB using wire, you must exercise caution as the soldering Iron will become extremely close to your finger. There are two spots in this area on B- and B+. The negative side will go to the B-, and the positive side (red wire) will go to the B+. Make sure to put both sides correctly; if you do it incorrectly, it will create a discharge, and either ruin the battery or the device you are charging. As stated, NEVER FEAR, because the PCB and these batteries have overcharge and discharge protection, but you want to keep in fact to put these the right way because this could cause the batteries to malfunction.
Check If the Power Bank Works


Lastly after all this work, (this took me three hours to do for some reason), you will be proud to say that I have built a power bank, something that Charges my phone wirelessly, and effortlessly. Also if the power bank's LCD screen lights up that means you did it correctly! Congratulations.
Enjoy!

I hope you had a great time listening to my instructable, and I hope you guys like it! Now charge your phone anytime and anywhere with the feeling that you have created something special. Bye! :)